Professional Csharp 7 and .NET Core 2.0
This document was submitted by our user and they confirm that they have the consent to share it. Assuming that you are writer or own the copyright of this document, report to us by using this DMCA report button.
WORKING WITH VARIABLES USING PREDEFINED DATA TYPES CONTROLLING PROGRAM FLOW GETTING ORGANIZED WITH NAMESPACES UNDERSTANDING THE MAIN METHOD USING COMMENTS UNDERSTANDING C# PREPROCESSOR DIRECTIVES C# PROGRAMMING GUIDELINES SUMMARY 3 Objects and Types CREATING AND USING CLASSES CLASSES AND STRUCTS CLASSES STRUCTS PASSING PARAMETERS BY VALUE AND BY REFERENCE NULLABLE TYPES ENUM TYPES PARTIAL CLASSES EXTENSION METHODS THE OBJECT CLASS SUMMARY 4 Object-Oriented Programming with C# OBJECT ORIENTATION TYPES OF INHERITANCE IMPLEMENTATION INHERITANCE MODIFIERS INTERFACES IS AND AS OPERATORS SUMMARY 3
5 Generics GENERICS OVERVIEW CREATING GENERIC CLASSES GENERICS FEATURES GENERIC INTERFACES GENERIC STRUCTS GENERIC METHODS SUMMARY 6 Operators and Casts OPERATORS AND CASTS OPERATORS USING BINARY OPERATORS TYPE SAFETY COMPARING OBJECTS FOR EQUALITY OPERATOR OVERLOADING IMPLEMENTING CUSTOM INDEX OPERATORS USER-DEFINED CASTS SUMMARY 7 Arrays MULTIPLE OBJECTS OF THE SAME TYPE SIMPLE ARRAYS MULTIDIMENSIONAL ARRAYS JAGGED ARRAYS ARRAY CLASS ARRAYS AS PARAMETERS ARRAY COVARIANCE ENUMERATORS STRUCTURAL COMPARISON SPANS 4
ARRAY POOLS SUMMARY 8 Delegates, Lambdas, and Events REFERENCING METHODS DELEGATES LAMBDA EXPRESSIONS EVENTS SUMMARY 9 Strings and Regular Expressions EXAMINING SYSTEM.STRING STRING FORMATS REGULAR EXPRESSIONS STRINGS AND SPANS SUMMARY 10 Collections OVERVIEW COLLECTION INTERFACES AND TYPES LISTS QUEUES STACKS LINKED LISTS SORTED LIST DICTIONARIES SETS PERFORMANCE SUMMARY 11 Special Collections OVERVIEW WORKING WITH BITS 5
OBSERVABLE COLLECTIONS IMMUTABLE COLLECTIONS CONCURRENT COLLECTIONS SUMMARY 12 Language Integrated Query LINQ OVERVIEW STANDARD QUERY OPERATORS PARALLEL LINQ EXPRESSION TREES LINQ PROVIDERS SUMMARY 13 Functional Programming with C# WHAT IS FUNCTIONAL PROGRAMMING? EXPRESSION-BODIED MEMBERS EXTENSION METHODS USING STATIC LOCAL FUNCTIONS TUPLES PATTERN MATCHING SUMMARY 14 Errors and Exceptions INTRODUCTION EXCEPTION CLASSES CATCHING EXCEPTIONS USER-DEFINED EXCEPTION CLASSES CALLER INFORMATION SUMMARY 15 Asynchronous Programming WHY ASYNCHRONOUS PROGRAMMING IS IMPORTANT 6
.NET HISTORY OF ASYNCHRONOUS PROGRAMMING FOUNDATION OF ASYNCHRONOUS PROGRAMMING ERROR HANDLING ASYNC WITH WINDOWS APPS SUMMARY 16 Reflection, Metadata, and Dynamic Programming INSPECTING CODE AT RUNTIME AND DYNAMIC PROGRAMMING CUSTOM ATTRIBUTES USING REFLECTION USING DYNAMIC LANGUAGE EXTENSIONS FOR REFLECTION THE DYNAMIC TYPE DYNAMICOBJECT AND EXPANDOOBJECT SUMMARY 17 Managed and Unmanaged Memory MEMORY MEMORY MANAGEMENT UNDER THE HOOD STRONG AND WEAK REFERENCES WORKING WITH UNMANAGED RESOURCES UNSAFE CODE REFERENCE SEMANTICS SPAN PLATFORM INVOKE SUMMARY 18 Visual Studio 2017 WORKING WITH VISUAL STUDIO 2017 CREATING A PROJECT EXPLORING AND CODING A PROJECT BUILDING A PROJECT 7
DEBUGGING YOUR CODE REFACTORING TOOLS DIAGNOSTIC TOOLS CREATING AND USING CONTAINERS WITH DOCKER SUMMARY PART II: .NET Core and the Windows Runtime 19 Libraries, Assemblies, Packages, and NuGet THE HELL OF LIBRARIES ASSEMBLIES CREATING LIBRARIES USING SHARED PROJECTS CREATING NUGET PACKAGES SUMMARY 20 Dependency Injection WHAT IS DEPENDENCY INJECTION? USING THE .NET CORE DI CONTAINER LIFETIME OF SERVICES INITIALIZATION OF SERVICES USING OPTIONS USING CONFIGURATION FILES CREATING PLATFORM INDEPENDENCE USING OTHER DI CONTAINERS SUMMARY 21 Tasks and Parallel Programming OVERVIEW PARALLEL CLASS TASKS CANCELLATION FRAMEWORK DATA FLOW TIMERS 8
THREADING ISSUES THE LOCK STATEMENT AND THREAD SAFETY INTERLOCKED MONITOR SPINLOCK WAITHANDLE MUTEX SEMAPHORE EVENTS BARRIER READERWRITERLOCKSLIM LOCKS WITH AWAIT SUMMARY 22 Files and Streams INTRODUCTION MANAGING THE FILE SYSTEM ENUMERATING FILES WORKING WITH STREAMS USING READERS AND WRITERS COMPRESSING FILES WATCHING FILE CHANGES WORKING WITH MEMORY MAPPED FILES COMMUNICATING WITH PIPES USING FILES AND STREAMS WITH THE WINDOWS RUNTIME SUMMARY 23 Networking NETWORKING THE HTTPCLIENT CLASS
9
WORKING WITH THE WEBLISTENER CLASS WORKING WITH UTILITY CLASSES USING TCP USING UDP USING SOCKETS SUMMARY 24 Security INTRODUCTION VERIFYING USER INFORMATION ENCRYPTING DATA PROTECTING DATA ACCESS CONTROL TO RESOURCES WEB SECURITY SUMMARY 25 ADO.NET and Transactions ADO.NET OVERVIEW USING DATABASE CONNECTIONS COMMANDS ASYNCHRONOUS DATA ACCESS TRANSACTIONS WITH ADO.NET TRANSACTIONS WITH SYSTEM.TRANSACTIONS SUMMARY 26 Entity Framework Core HISTORY OF ENTITY FRAMEWORK INTRODUCING EF CORE USING DEPENDENCY INJECTION CREATING A MODEL QUERIES RELATIONSHIPS 10
SAVING DATA CONFLICT HANDLING CONTEXT POOLING USING TRANSACTIONS MIGRATIONS SUMMARY 27 Localization GLOBAL MARKETS NAMESPACE SYSTEM.GLOBALIZATION RESOURCES LOCALIZATION WITH ASP.NET CORE LOCALIZATION WITH THE UNIVERSAL WINDOWS PLATFORM SUMMARY 28 Testing OVERVIEW UNIT TESTING WITH MSTEST UNIT TESTING WITH XUNIT LIVE UNIT TESTING UNIT TESTING WITH EF CORE UI TESTING WITH WINDOWS APPS WEB INTEGRATION, LOAD, AND PERFORMANCE TESTING SUMMARY 29 Tracing, Logging, and Analytics DIAGNOSTICS OVERVIEW TRACING WITH EVENTSOURCE CREATING CUSTOM LISTENERS WRITING LOGS WITH THE ILOGGER INTERFACE ANALYTICS WITH VISUAL STUDIO APP CENTER 11
SUMMARY PART III: Web Applications and Services 30 ASP.NET Core ASP.NET CORE WEB TECHNOLOGIES ASP.NET WEB PROJECT ADDING CLIENT-SIDE CONTENT REQUEST AND RESPONSE DEPENDENCY INJECTION SIMPLE ROUTING CREATING CUSTOM MIDDLEWARE SESSION STATE CONFIGURING WITH ASP.NET CORE SUMMARY 31 ASP.NET Core MVC SETTING UP SERVICES FOR ASP.NET CORE MVC DEFINING ROUTES CREATING CONTROLLERS CREATING VIEWS RECEIVING DATA FROM THE CLIENT WORKING WITH HTML HELPERS GETTING TO KNOW TAG HELPERS IMPLEMENTING ACTION FILTERS CREATING A DATA-DRIVEN APPLICATION IMPLEMENTING AUTHENTICATION AND AUTHORIZATION RAZOR PAGES SUMMARY 32 Web API
12
OVERVIEW CREATING SERVICES CREATING AN ASYNC SERVICE CREATING A .NET CLIENT WRITING TO THE DATABASE CREATING METADATA WITH THE OPENAPI OR SWAGGER CREATING AND USING ODATA SERVICES USING AZURE FUNCTIONS SUMMARY PART IV: Apps 33 Windows Apps INTRODUCING WINDOWS APPS INTRO TO XAML CONTROLS DATA BINDING NAVIGATION LAYOUT PANELS SUMMARY 34 Patterns with XAML Apps WHY MVVM? DEFINING THE MVVM PATTERN SHARING CODE SAMPLE SOLUTION MODELS SERVICES VIEW MODELS VIEWS MESSAGING USING EVENTS
13
USING A FRAMEWORK SUMMARY 35 Styling Windows Apps STYLING SHAPES GEOMETRY TRANSFORMATION BRUSHES STYLES AND RESOURCES TEMPLATES ANIMATIONS VISUAL STATE MANAGER SUMMARY 36 Advanced Windows Apps OVERVIEW APP LIFETIME NAVIGATION STATE SHARING DATA APP SERVICES ADVANCED COMPILED BINDING USING TEXT INKING AUTOSUGGEST SUMMARY 37 Xamarin.Forms STARTING WITH XAMARIN DEVELOPMENT TOOLS FOR XAMARIN DEVELOPMENT ANDROID FOUNDATION IOS FOUNDATION 14
XAMARIN.FORMS APPLICATION USING THE COMMON LIBRARIES CONTROL HIERARCHY PAGES NAVIGATION LAYOUT VIEWS DATA BINDING COMMANDS LISTVIEW AND VIEWCELL SUMMARY INDEX END USER LICENSE AGREEMENT
List of Illustrations Introduction FIGURE 1 Chapter 1 FIGURE 1-1 FIGURE 1-2 FIGURE 1-3 FIGURE 1-4 FIGURE 1-5 FIGURE 1-6 FIGURE 1-7 FIGURE 1-8 FIGURE 1-9 FIGURE 1-10 15
FIGURE 1-11 FIGURE 1-12 FIGURE 1-13 FIGURE 1-14 FIGURE 1-15 FIGURE 1-16 Chapter 2 FIGURE 2-1 Chapter 6 FIGURE 6-1 Chapter 7 FIGURE 7-1 FIGURE 7-2 FIGURE 7-3 FIGURE 7-4 FIGURE 7-5 FIGURE 7-6 FIGURE 7-7 Chapter 10 FIGURE 10-1 FIGURE 10-2 FIGURE 10-3 FIGURE 10-4 FIGURE 10-5 Chapter 11 FIGURE 11-1 16
FIGURE 11-2 Chapter 12 FIGURE 12-1 FIGURE 12-2 Chapter 14 FIGURE 14-1 Chapter 17 FIGURE 17-1 FIGURE 17-2 FIGURE 17-3 FIGURE 17-4 FIGURE 17-5 FIGURE 17-6 Chapter 18 FIGURE 18-1 FIGURE 18-2 FIGURE 18-3 FIGURE 18-4 FIGURE 18-5 FIGURE 18-6 FIGURE 18-7 FIGURE 18-8 FIGURE 18-9 FIGURE 18-10 FIGURE 18-11 FIGURE 18-12 17
FIGURE 18-13 FIGURE 18-14 FIGURE 18-15 FIGURE 18-16 FIGURE 18-17 FIGURE 18-18 FIGURE 18-19 FIGURE 18-20 FIGURE 18-21 FIGURE 18-22 FIGURE 18-23 FIGURE 18-24 FIGURE 18-25 FIGURE 18-26 FIGURE 18-27 FIGURE 18-28 FIGURE 18-29 FIGURE 18-30 FIGURE 18-31 FIGURE 18-32 FIGURE 18-33 FIGURE 18-34 FIGURE 18-35 FIGURE 18-36 FIGURE 18-37 FIGURE 18-38 18
FIGURE 18-39 FIGURE 18-40 FIGURE 18-41 FIGURE 18-42 FIGURE 18-43 FIGURE 18-44 FIGURE 18-45 FIGURE 18-46 FIGURE 18-47 FIGURE 18-48 FIGURE 18-49 FIGURE 18-50 FIGURE 18-51 FIGURE 18-52 FIGURE 18-53 FIGURE 18-54 FIGURE 18-55 FIGURE 18-56 FIGURE 18-57 FIGURE 18-58 Chapter 19 FIGURE 19-1 FIGURE 19-2 FIGURE 19-3 FIGURE 19-4 FIGURE 19-5 19
FIGURE 19-6 FIGURE 19-7 FIGURE 19-8 FIGURE 19-9 FIGURE 19-10 Chapter 20 FIGURE 20-1 FIGURE 20-2 FIGURE 20-3 Chapter 21 FIGURE 21-1 Chapter 22 FIGURE 22-1 FIGURE 22-2 Chapter 23 FIGURE 23-1 FIGURE 23-2 FIGURE 23-3 FIGURE 23-4 FIGURE 23-5 Chapter 24 FIGURE 24-1 FIGURE 24-2 Chapter 25 FIGURE 25-1 FIGURE 25-2 20
Chapter 26 FIGURE 26-1 FIGURE 26-2 FIGURE 26-3 FIGURE 26-4 FIGURE 26-5 Chapter 27 FIGURE 27-1 FIGURE 27-2 FIGURE 27-3 FIGURE 27-4 FIGURE 27-5 FIGURE 27-6 FIGURE 27-7 FIGURE 27-8 FIGURE 27-9 FIGURE 27-10 FIGURE 27-11 FIGURE 27-12 FIGURE 27-13 FIGURE 27-14 FIGURE 27-15 Chapter 28 FIGURE 28-1 FIGURE 28-2 FIGURE 28-3 21
FIGURE 28-4 FIGURE 28-5 FIGURE 28-6 FIGURE 28-7 FIGURE 28-8 FIGURE 28-9 FIGURE 28-10 FIGURE 28-11 FIGURE 28-12 FIGURE 28-13 FIGURE 28-14 FIGURE 28-15 FIGURE 28-16 Chapter 29 FIGURE 29-1 FIGURE 29-2 FIGURE 29-3 FIGURE 29-4 FIGURE 29-5 FIGURE 29-6 FIGURE 29-7 Chapter 30 FIGURE 30-1 FIGURE 30-2 FIGURE 30-3 FIGURE 30-4 22
FIGURE 30-5 FIGURE 30-6 FIGURE 30-7 FIGURE 30-8 FIGURE 30-9 FIGURE 30-10 FIGURE 30-11 FIGURE 30-12 FIGURE 30-13 FIGURE 30-14 FIGURE 30-15 Chapter 31 FIGURE 31-1 FIGURE 31-2 FIGURE 31-3 FIGURE 31-4 FIGURE 31-5 FIGURE 31-6 FIGURE 31-7 FIGURE 31-8 FIGURE 31-9 FIGURE 31-10 FIGURE 31-11 FIGURE 31-12 FIGURE 31-13 FIGURE 31-14 23
FIGURE 31-15 FIGURE 31-16 FIGURE 31-17 FIGURE 31-18 FIGURE 31-19 FIGURE 31-20 FIGURE 31-21 FIGURE 31-22 FIGURE 31-23 FIGURE 31-24 FIGURE 31-25 FIGURE 31-26 FIGURE 31-27 FIGURE 31-28 Chapter 32 FIGURE 32-1 FIGURE 32-2 FIGURE 32-3 FIGURE 32-4 FIGURE 32-5 FIGURE 32-6 FIGURE 32-7 Chapter 33 FIGURE 33-1 FIGURE 33-2 FIGURE 33-3 24
FIGURE 33-4 FIGURE 33-5 FIGURE 33-6 FIGURE 33-7 FIGURE 33-8 FIGURE 33-9 FIGURE 33-10 FIGURE 33-11 FIGURE 33-12 FIGURE 33-13 FIGURE 33-14 FIGURE 33-15 FIGURE 33-16 FIGURE 33-17 FIGURE 33-18 FIGURE 33-19 FIGURE 33-20 FIGURE 33-21 FIGURE 33-22 FIGURE 33-23 FIGURE 33-24 FIGURE 33-25 FIGURE 33-26 FIGURE 33-27 FIGURE 33-28 FIGURE 33-29 25
FIGURE 33-30 FIGURE 33-31 FIGURE 33-32 FIGURE 33-33 FIGURE 33-34 FIGURE 33-35 FIGURE 33-36 FIGURE 33-37 FIGURE 33-38 FIGURE 33-39 FIGURE 33-40 FIGURE 33-41 FIGURE 33-42 FIGURE 33-43 FIGURE 33-44 FIGURE 33-45 Chapter 34 FIGURE 34-1 FIGURE 34-2 FIGURE 34-3 FIGURE 34-4 FIGURE 34-5 FIGURE 34-6 FIGURE 34-7 FIGURE 34-8 FIGURE 34-9 26
FIGURE 34-10 FIGURE 34-11 FIGURE 34-12 FIGURE 34-13 FIGURE 34-14 Chapter 35 FIGURE 35-1 FIGURE 35-2 FIGURE 35-3 FIGURE 35-4 FIGURE 35-5 FIGURE 35-6 FIGURE 35-7 FIGURE 35-8 FIGURE 35-9 FIGURE 35-10 FIGURE 35-11 FIGURE 35-12 FIGURE 35-13 FIGURE 35-14 FIGURE 35-15 FIGURE 35-16 FIGURE 35-17 FIGURE 35-18 FIGURE 35-19 FIGURE 35-20 27
FIGURE 35-21 FIGURE 35-22 FIGURE 35-23 FIGURE 35-24 FIGURE 35-25 FIGURE 35-26 FIGURE 35-27 FIGURE 35-28 FIGURE 35-29 FIGURE 35-30 FIGURE 35-31 Chapter 36 FIGURE 36-1 FIGURE 36-2 FIGURE 36-3 FIGURE 36-4 FIGURE 36-5 FIGURE 36-6 FIGURE 36-7 FIGURE 36-8 FIGURE 36-9 FIGURE 36-10 FIGURE 36-11 FIGURE 36-12 FIGURE 36-13 FIGURE 36-14 28
FIGURE 36-15 FIGURE 36-16 FIGURE 36-17 FIGURE 36-18 FIGURE 36-19 FIGURE 36-20 FIGURE 36-21 FIGURE 36-22 FIGURE 36-23 Chapter 37 FIGURE 37-1 FIGURE 37-2 FIGURE 37-3 FIGURE 37-4 FIGURE 37-5 FIGURE 37-6 FIGURE 37-7 FIGURE 37-8 FIGURE 37-9 FIGURE 37-10 FIGURE 37-11 FIGURE 37-12 FIGURE 37-13 FIGURE 37-14 FIGURE 37-15
29
PROFESSIONAL C# 7 and .NET Core 2.0
Christian Nagel
30
INTRODUCTION AFTER SO MANY YEARS, .NET has a new momentum. The .NET Framework has a young sibling: .NET Core! The .NET Framework was closed source and available on Windows systems only. Now, .NET Core is open source, is available on Linux, and uses modern patterns. We can see many great improvements in the .NET ecosystem.
NOTE Because of the recent changes, C# is within the top 10 of the most loved programming languages, and .NET Core is holds position 3 of the most loved frameworks. Among web and desktop developers, C# holds rank 3 among the most popular languages. You can see the details at https://insights.stackoverflow.com/survey/2017. By using C# and ASP.NET Core, you can create web applications and services that run on Windows, Linux, and Mac. You can use the Windows Runtime to create native Windows apps (also known as the Universal Windows Platform, UWP) using C# and XAML, as well as .NET Core. With Xamarin, you can use C# and XAML to create apps that run on Android and iOS devices. With the help of the .NET Standard, you can create libraries that you can share between ASP.NET Core, Windows apps, Xamarin; you also can create traditional Windows Forms and WPF applications. All this is covered in the book. Most of the samples of the book are built on a Windows system with Visual Studio. Many of the samples are also tested on Linux and run on Linux and the Mac. Except for the Windows apps samples, you can also use Visual Studio Code or Visual Studio for the Mac as the developer environment.
31
THE WORLD OF .NET CORE .NET has a long history, but .NET Core is very young. .NET Core 2.0 got many new APIs coming from the .NET Framework to make it easier to move existing .NET Framework applications to the new world of .NET Core. As an easy move, you can create libraries that use .NET Standard 2.0, which can be used from .NET Framework applications starting with .NET Framework 4.6.1, .NET Core 2.0 applications, and Windows apps starting with Build 16299. Nowadays, there are not many reasons to not use ASP.NET Core from the backend. With the easy move to the .NET Standard, more and more libraries can be used from .NET Core. From a high-level view, ASP.NET Core MVC looks very similar to its older brother ASP.NET MVC. However, ASP.NET Core MVC is a lot more flexible, easier to work with when using the .NET Core patterns, and easier to extend. For creating new web applications, using the new technology Razor Pages might be all you need. If the application grows, Razor Pages can be easily extended to the Model-View-Controller pattern using ASP.NET Core MVC. At the time of writing, a .NET Core version for SignalR, a technology for real-time communication, is near to being released. ASP.NET Core works great in combination with JavaScript technologies like Angular and React/Redux. There are even templates to create projects with these technologies in combination with ASP.NET Core for the backend services.
NOTE You can access the source code of .NET Core at https://github.com/dotnet/corefx. The .NET Core command line is available at https://github.com/dotnet/cli. At https://github.com/aspnet you can find many repositories for ASP.NET Core. Among them are ASP.NET Core MVC, Razor, 32
SignalR, EntityFrameworkCore, and many others. Here’s a summary of some of the features of .NET Core: .NET Core is open source. .NET Core uses modern patterns. .NET Core supports development on multiple platforms. ASP.NET Core can run on Windows and Linux. As you work with .NET Core, you’ll see that this technology is the biggest change for .NET since the first version. .NET Core is a new start. From here we can continue our journey on new developments in a fast pace.
THE WORLD OF C# When C# was released in the year 2002, it was a language developed for the .NET Framework. C# was designed with ideas from C++, Java, and Pascal. Anders Hejlsberg had come to Microsoft from Borland and brought experience with language development of Delphi. At Microsoft, Hejlsberg worked on Microsoft’s version of Java, named J++, before creating C#.
NOTE Today, Anders Hejlsberg has moved to TypeScript (while he still influences C#) and Mads Torgersen is the project lead for C#. C# improvements are discussed openly at https://github.com/dotnet/csharplang. Here you can read C# language proposals and event meeting notes. You can also submit your own proposals for C#. C# started not only as an object-oriented general-purpose programming language but was a component-based programming language that supported properties, events, attributes (annotations), 33
and building assemblies (binaries including metadata). Over time, C# was enhanced with generics, Language Integrated Query (LINQ), lambda expressions, dynamic features, and easier asynchronous programming. C# is not an easy programming language because of the many features it offers, but it’s continuously evolving with features that are practical to use. With this, C# is more than an object-oriented or component-based language; it also includes ideas of functional programming—things that are of practical use for a generalpurpose language developing all kind of applications. With C# 6, the source code of the compiler was completely rewritten. It’s more than that the new compiler pipeline can be used from custom programs; Microsoft also got new sources where changes do not break other parts of the program. Thus, it was becoming a lot easier to enhance the compiler. C# 7 again adds many new features that come from a functional programming background, such as local functions, tuples, and pattern matching.
WHAT’S NEW IN C# 7 The C# 6 extensions included static using, expression-bodied methods and properties, auto-implemented property initializers, readonly auto properties, the nameof operator, the null conditional operator, string interpolation, dictionary initializers, exception filters, and await in catch. What are the changes of C# 7?
Digit Separators The digit separators make the code more readable. You can add _ to separate numbers when declaring variables. The compiler just removes the _. The following code snippet looks a lot more readable with C# 7: In C# 6 long n1 = 0x1234567890ABCDEF;
34
In C# 7 long n2 = 0x1234_5678_90AB_CDEF;
With C# 7.2, you can also put the _ at the beginning. In C# 7.2 long n2 = 0x_1234_5678_90AB_CDEF;
Digit separators are covered in Chapter 2, “Core C#.”
Binary Literals C# 7 offers a new literal for binaries. Binaries can have only the values 0 and 1. Now the digit separator becomes especially important: In C# 7 uint binary1 = 0b1111_0000_1010_0101_1111_0000_1010_0101;
Binary literals are covered in Chapter 2.
Expression-Bodied Members C# 6 allows expression-bodied methods and properties. With C# 7, expression bodies can be used with constructors, destructors, local functions, property accessors, and more. Here you can see the difference with property accessors between C# 6 and C# 7: In C# 6 private string _firstName; public string FirstName { get { return _firstName; } set { Set(ref _firstName, value); } } In C# 7 private string _firstName; public string FirstName { get => _firstName;
35
set => Set(ref _firstName, value); }
Expression-bodied members are covered in Chapter 3, “Objects and Types.”
Out Var Before C# 7, out variables had to be declared before its use. With C# 7, the code is reduced by one line because the variable can be declared on use: In C# 6 string n = "42"; int result; if (string.TryParse(n, out result) { Console.WriteLine($"Converting to a number was successful: {result}"); } In C# 7 string n = "42"; if (string.TryParse(n, out var result) { Console.WriteLine($"Converting to a number was successful: {result}"); }
This feature is covered in Chapter 3.
Non-Trailing Named Arguments C# supports named arguments that are required with optional arguments but can support readability in any cases. With C# 7.2, nontrailing named arguments are supported. Argument names can be added to any argument with C# 7.2: In C# 7.0 if (Enum.TryParse(weekdayRecommendation.Entity, ignoreCase: true,
36
result: out DayOfWeek weekday)) { reservation.Weekday = weekday; } In C# 7.2 if (Enum.TryParse(weekdayRecommendation.Entity, ignoreCase: true, out DayOfWeek weekday)) { reservation.Weekday = weekday; }
Named arguments are covered in Chapter 3.
Readonly Struct Structures should be read-only (with some exceptions). Using C# 7.2 it’s possible to declare the struct with the readonly modifier, so the compiler verifies that the struct is not changed. This guarantee can also be used by the compiler to not copy a struct that passes it as a parameter but instead passes it as a reference: In C# 7.2 public readonly struct Dimensions { public double Length { get; } public double Width { get; } public Dimensions(double length, double width) { Length = length; Width = width; } public double Diagonal => Math.Sqrt(Length * Length + Width * Width); }
The readonly
struct
is covered in Chapter 3.
In Parameters 37
C# 7.2 also allows the in modifier with parameters. This guarantees that a passed value type is not changed, and it can be passed by reference to avoid a copy: In C# 7.2 static void CantChange(in AStruct s) { // s can't change } ref, in,
and out modifiers are covered in Chapter 3.
Private Protected C# 7.2 adds a new access modifier: private protected. The access modifier protected internal allows access to the member if it’s used from a type in the same assembly, or from a type from another assembly that derives from the class. With private protected, it’s an AND instead of an OR—access is only allowed if the class derives from the base class and is in the same assembly. Access modifiers are covered in Chapter 4, “Object-Oriented Programming with C#.”
Target-Typed Default With C# 7.1, a default literal is defined that allows a shorter syntax compared to the default operator. The default operator always requires the repetition of the type, which is now not needed anymore. This is practical with complex types: In C# 7.0 int x = default(int); ImmutableArray arr = default(ImmutableArray); In C# 7.1 int x = default; ImmutableArray arr = default;
The default literal is covered in Chapter 5, “Generics.” 38
Local Functions Before C# 7, it was not possible to declare a function within a method. You could create a lambda expression and invoke it as shown here in the C# 6 code snippet: In C# 6 public void SomeFunStuff() { Func add = (x, y) => x + y; int result = add(38, 4); Console.WriteLine(result); }
With C# 7, a local function can be declared within a method. The local function is only accessible within the scope of the method: In C# 7 public void SomeFunStuff() { int add(int x, int y) => x + y; int result = add(38, 4); Console.WriteLine(result); }
Local functions are explained in Chapter 13, “Functional Programming.” You see it in different uses in several chapters of the book.
Tuples Tuples allow combining objects of different types. Before C# 7, tuples have been part of the .NET Framework with the Tuple class. The members of the tuple can be accessed with Item1, Item2, Item3, and so on. In C# 7, tuples are part of the language, and you can define the names of the members: In C# 6 var t1 = Tuple.Create(42, "astring");
39
int i1 = t1.Item1; string s1 = t1.Item2; In C# 7 var t1 = (n: 42, s: "magic"); int i1 = t1.n; string s1 = t1.s;
Other than that, the new tuples are value types (ValueTuple) whereas the Tuple type is a reference type. All the changes with tuples are covered in Chapter 13.
Inferred Tuple Names C# 7.1 extends tuples by automatically inferring tuple names, similar to anonymous types. With C# 7.0, the members of the tuple always need to be named. In case the tuple member should have the same name as the property or field you assign to it, with C# 7.1, if the name is not supplied, it has the same name as the assigned member: In C# 7.0 var t1 = (FirstName: racer.FirstName, Wins: racer.Wins); int wins = t1.Wins; In C# 7.1 var t1 = (racer.FirstName, racer.Wins); int wins = t1.Wins;
Deconstructors No, this is not a typo. Deconstructors are not destructors. A tuple can be deconstructed to separate variables, such as the following: In C# 7 (int n, string s) = (42, "magic");
It’s also possible to deconstruct a Person object, if a Deconstruct method is defined: In C# 7
40
var p1 = new Person("Tom", "Turbo"); (string firstName, string lastName) = p1;
Deconstruction is covered in Chapter 13.
Pattern Matching With pattern matching, the is operator and the switch statement have been enhanced with three kinds of patterns: the const pattern, the type pattern, and the var pattern. The following code snippet shows patterns with the is operator. The first check for a match matches the constant 42, the second match checks for a Person object, and the third match checks every object with the var pattern. Using the type and the var pattern, a variable can be declared for strongly typed access: In C# 7 public void PatternMatchingWithIsOperator(object o) { if (o is 42) { } if (o is Person p) { } if (o is var v1) { } }
Using the switch statement, you can use the same patterns with the case clause. You can also declare a variable to be strongly typed in case the pattern matches. You can also use when to filter the pattern on a condition: In C# 7 public void PatternMatchingWithSwitchStatement(object o) { swtich (o) { case 42: break;
41
case Person p when p.FirstName == "Katharina": break; case Person p: break; case var v: break; } }
Pattern matching is covered in Chapter 13.
Throw Expressions Throwing exceptions was only possible with a statement; it wasn’t possible in an expression. Thus, when receiving a parameter with a constructor, extra checks for null were necessary to throw an ArgumentNullException. With C# 7, exceptions can be thrown in expressions, thus it is possible to throw the ArgumentNullException when the left side is null—using the coalescing operator. In C# 6 private readonly IBooksService _booksService; public BookController(BooksService booksService) { if (booksService == null) { throw new ArgumentNullException(nameof(b)); } _booksService = booksService; } In C# 7 private readonly IBooksService _booksService; public BookController(BooksService booksService) { _booksService = booksService ?? throw new ArgumentNullException(nameof(b)); }
Throwing expressions is covered in Chapter 14, “Errors and Exceptions.”
42
Async Main Before C# 7.1, the Main method always needed to be declared of type void. With C# 7.1, the Main method can also be of type Task and use the async and await keywords: In C# 7.0 static void Main() { SomeMethodAsync().Wait(); } In C# 7.1 async static Task Main() { await SomeMethodAsync(); }
Asynchronous programming is covered in Chapter 15, “Asynchronous Programming.”
Reference Semantics .NET Core has a big focus on enhancing the performance. Additions to C# features for reference semantics help increase the performance. Before C# 7, the ref keyword could be used with parameters to pass value types by reference. Now it’s also possible to use the ref keyword with the return type and with local variables. The following code snippet declares the method GetNumber to return a reference to an int. This way, the caller has direct access to the element in the array and can change its content: In C# 7.0 int[] _numbers = { 3, 7, 11, 15, 21 }; public ref int GetNumber(int index) { return ref _numbers[index]; }
With C# 7.2, the readonly modifier can be added to ref returns. This 43
way the caller can’t change the content of the returned value, but still reference semantics is used, and a copy of the value type when returning the result can be avoided. The caller receives a reference but isn’t allowed to change it: In C# 7.2 int[] _numbers = { 3, 7, 11, 15, 21 }; public ref readonly int GetNumber(int index) { return ref _numbers[index]; }
Before C# 7.2, C# could create reference types (a class) and value types (a struct). However, the struct could also be stored on the heap when boxing took place. With C# 7.2, a type can be declared that is only allowed on the stack: ref struct: In C# 7.2 ref struct OnlyOnTheStack { }
The new features for references are covered in Chapter 17, “Managed and Unmanaged Memory.”
WHAT’S NEW IN ASP.NET CORE With .NET Core and Visual Studio 2017, we have a new project file. The .NET Core tools that were in preview with Visual Studio 2015 are released with Visual Studio 2017. The tools switched to the MSBuild environment with csproj files, so now we have csproj files both with .NET Framework as well as .NET Core applications. However, it’s not the csproj you know from previous generations. csproj files are a lot shorter and simplified, and you can also modify them by using a simple text editor. .NET Core 2.0 is enhanced with classes and methods defined in the .NET Standard 2.0, which makes it easier to bring existing .NET Framework applications to .NET Core. 44
Creating an ASP.NET Core project, not only the csproj file gets simplified, but also the C# source code. When you use the default WebHostBuilder, a lot more is predefined. Configuration and logging providers are added without you needing to add them yourself. With ASP.NET Core MVC, small improvements have been made—for example, view components can now be used from a tag helper. There’s also a new technology—Razor Pages—which is easier to learn than ASP.NET Core MVC. Some apps don’t need the abstraction from the Model-View-Controller pattern; this is where Razor Pages has its place.
WHAT’S NEW WITH THE UNIVERSAL WINDOWS PLATFORM Two times a year we get updates with Windows 10. (If you are in the Windows Insiders program, you get the updates more often, but that’s not the norm for most users.) Every update of Windows releases a new SDK. The latest two updates have been the Creators Update (build 15063, March 2017) and the Fall Creators Update (build 16299, October 2017). Microsoft continues to offer new design features that are integrated in the Windows controls. The new design is named Fluent Design, which is incorporated in standard controls and is also directly accessible—for example, with the acrylic and reveal brushes. The ParallaxView has been added for a parallax effect in your apps. Features are also added to enhance productivity. You can use the Windows Template Studio—an extension in Visual Studio—to have a template editor to create many pages and use services pre-generated. XAML has been enhanced with conditional XAML to make it easier to support multiple Windows 10 versions but use new features not available in older Windows 10 editions. The InkCanvas control offers new rulers that can be easily incorporated in your apps. The NavigationView makes it easy to create adaptive menus with a hamburger button and a SplitView. You can read about all these new features and many more in the fourth part of the book. 45
WHAT YOU NEED TO WRITE AND RUN C# CODE .NET Core runs on Windows, Linux, and Mac operating systems. You can create and build your programs on any of these operating systems using Visual Studio Code (https://code.visualstudio.com). The best developer tool to use, and the tool used with this book, is Visual Studio 2017. You can use Visual Studio Community 2017 edition (https://www.visualstudio.com), but some features shown are available only with the Enterprise edition of Visual Studio. It will be mentioned where the Enterprise edition is needed. Visual Studio 2017 requires the Windows 10 build 1507 or higher, Windows 8.1, Windows Server 2012 R2, or Windows 7 SP1. To build and run the Windows apps (Universal Windows Platform) shown in this book, you need Windows 10. For creating and building Xamarin apps for iOS, you also need a Mac for the build system. Without the Mac, you can still create Xamarin apps for Windows and Android. For developing apps on the Mac, you can use Visual Studio for Mac: https://www.visualstudio.com/vs/visual-studio-mac/. You can use this tool to create ASP.NET Core and Xamarin apps, but you can’t create and test Windows apps.
46
WHAT THIS BOOK COVERS This book starts by reviewing the overall architecture of .NET in Chapter 1 to give you the background you need to write managed code. You’ll get an overview about the different application types and learn how to compile with the new development environment CLI, as well as see the most important parts for a start in Visual Studio. After that, the book is divided into sections that cover both the C# language and its application in a variety of areas.
Part I: The C# Language This section gives a good grounding in the C# language. This section doesn’t presume knowledge of any particular language, although it does assume you are an experienced programmer. You start by looking at C#’s basic syntax and data types and then explore the objectoriented programming before you look at more advanced C# programming topics like delegates, lambda expressions, and Language Integrated Query (LINQ). As C# contains many features that come from functional programming, you learn the foundation of functional programming among tuples and pattern matching. Asynchronous programming and the new language features for the reference semantics are covered. This section concludes with a tour through many Visual Studio 2017 features. You also learn foundations of Docker as well as how Visual Studio 2017 supports Docker out of the box.
Part II: .NET Core and the Windows Runtime Chapters 19 to 29 cover topics from .NET Core and the Windows Runtime that are independent of application types. This section starts with creating libraries and NuGet packages in Chapter 19, “Libraries, Assemblies, Packages, and NuGet.” You learn how to use the .NET Standard in the best way. Dependency injection (DI) is used with .NET Core no matter where you look: services are injected with Entity Framework Core and 47
ASP.NET Core. ASP.NET Core MVC uses hundreds of services. DI makes it easy to use the same code across WPF, UWP, and Xamarin. Chapter 20, “Dependency Injection,” is dedicated to the foundations of DI, and you also learn advanced features from the Microsoft.Extensions.DependencyInjection DI container, including adapting non-Microsoft containers. Many of the other chapters use DI as well. Chapter 21, “Tasks and Parallel Programming,” covers parallel programming using the Task Parallel Library (TPL) as well as various objects for synchronization. In Chapter 22, “Files and Streams,” you read about accessing the file system and reading files and directories. You learn about using both streams from the System.IO namespace and streams from the Windows Runtime for programming Windows apps. Chapter 23, “Networking,” covers the core foundation of networking using sockets, as well as using higher-level abstractions like the HttpClient. Chapter 24, “Security,” makes use of streams when you learn about security and how to encrypt data and allow for secure conversion. This chapter also covers some topics you need to know when creating web applications, such as issues with SQL injection and Cross-Site Request Forgery attacks. Chapters 25 and 26 show you how to access the database. Chapter 25 uses ADO.NET directly, explains transactions, and covers using ambient transactions with .NET Core. Chapter 26 goes through all the new features offered by Entity Framework Core 2.0. EF Core 2.0 has many features that were not available with the older Entity Framework 6.x technology. In Chapter 27, “Localization,” you learn to localize applications using techniques that are important both for Windows and web applications. When you’re creating functionality with C# code, don’t skip the step of creating unit tests. It takes more time in the beginning, but over time you’ll see advantages when you add functionality and maintain code. Chapter 28, “Testing,” covers creating unit tests, including Live Unit 48
Testing with Visual Studio 2017, web tests, and coded UI tests. Finally, Chapter 29, “Tracing, Logging, and Analytics,” covers the logging facility from .NET Core as well as using Visual Studio AppCenter for analytic information.
Part III: Web Applications and Services In this section you look at web applications and services. You should start this section with Chapter 30, “ASP.NET Core,” to give you the foundation of ASP.NET Core. Creating web applications with the MVC pattern, including the new technology Razor Pages, is covered in Chapter 31, “ASP.NET Core MVC.” Chapter 32 covers the REST service features of ASP.NET Core: Web API.
Part IV: Apps This section is about building apps with XAML—both Universal Windows apps and Xamarin. You learn about the foundation of Windows Apps including the foundation of XAML in Chapter 33, “Windows Apps,” with the XAML syntax, dependency properties, and markup extensions where you can create your own XAML syntax. The chapter covers the different categories of Windows controls and the foundation of data binding with XAML. A big focus on the MVVM (model-view-view model) pattern is in Chapter 34, “Patterns with XAML Apps.” Here you learn to take advantage of the data-binding features of XAML-based applications, which allow sharing a lot of code between Windows apps, WPF, and Xamarin. You also can share a lot of code developing for the iOS and Android platforms. Creating WPF applications is not covered in the book itself—this technology didn’t get many improvements in the recent years, and you should think about a switch to the Universal Windows Platform, which can be done easier if you use the knowledge you learn in Chapter 34. WPF applications still need to be maintained. For a deeper coverage of WPF, you should read the previous edition of this book, Professional C# 6 and .NET Core 1.0. In Chapter 35, “Styling Windows Apps,” you learn about styling your 49
XAML-based apps. Chapter 36, “Advanced Windows Apps,” goes into advanced features of creating Windows apps with the Universal Windows Platform. You learn about App Services, inking, the AutoSuggest control, advanced compiled binding features, and more. Chapter 37, “Xamarin.Forms,” helps you start Xamarin development for Windows, Android, and iPhone, and shows what happens behind the scenes. You learn the differences between Xamarin.Android, Xamarin.iOS, and what’s covered with Xamarin.Forms. You’ll see the how the Xamarin.Forms controls differ from the Windows controls for making a faster move from Windows development to Xamarin. A larger sample from this chapter uses the same MVVM libraries done for the Windows apps from Chapter 34.
Bonus Chapters Five bonus chapters are available for download at www.wrox.com. Search for the book's ISBN (978-1-119-44927-0) to find the PDFs. Bonus Chapter 1, “Composition,” covers Microsoft Composition that allows creating independence between containers and parts. In Bonus Chapter 2, “XML and JSON,” you learn about serializing objects into XML and JSON, as well as different techniques for reading and writing XML. Publish and subscribe technologies for web applications, in the form of using the ASP.NET Core technologies technologies WebHooks and SignalR, are covered in Bonus Chapter 3. Bonus Chapter 4 gives you a new look into creating apps using Bot Services and Azure Cognitive Services. Bonus Chapter 5, "More Windows Apps Features", covers some extra topics related to Windows apps: using the camera, geolocation to access your current location information, the MapControl to display maps in various formats, and several sensors (such as those that give information about the light and measure g-forces).
CONVENTIONS To help you get the most from the text and keep track of what’s 50
happening, I use some conventions throughout the book.
WARNING Warnings hold important, not-to-be-forgotten information that is directly relevant to the surrounding text.
NOTE Notes indicate notes, tips, hints, tricks, and/or asides to the current discussion. As for styles in the text: We highlight new terms and important words when we introduce them. We show keyboard strokes like this: Ctrl+A. We show filenames, URLs, and code within the text like so: persistence.properties. We present code in two different ways: We use a monofont type with no highlighting for most code examples. We use bold to emphasize code that's particularly important in the present context or to show changes from a previous code snippet.
SOURCE CODE As you work through the examples in this book, you may choose either to type in all the code manually or to use the source code files that accompany the book. All the source code used in this book is available for download at www.wrox.com. When at the site, simply locate the book’s title (either by using the Search box or by using one of the title 51
lists) and click the Download Code link on the book’s detail page to obtain all the source code for the book.
NOTE Because many books have similar titles, you may find it easiest to search by ISBN; this book’s ISBN is 978-1-119-44927-0. After you download the code, just decompress it with your favorite compression tool. Alternatively, you can go to the main Wrox code download page at http://www.wrox.com/dynamic/books/download.aspx to see the code available for this book and all other Wrox books.
GITHUB The source code is also available on GitHub at https://www.github.com/ProfessionalCSharp/ProfessionalCSharp7.
With GitHub, you can also open each source code file with a web browser. When you use the website, you can download the complete source code in a zip file. You can also clone the source code to a local directory on your system. Just install the git tools, which you can do with Visual Studio or by downloading the git tools from https://gitscm.com/downloads for Windows, Linux, and Mac. To clone the source code to a local directory, use git clone: > git clone https://www.github.com/ProfessionalCSharp/ProfessionalCSharp7
With this command, the complete source code is copied to the subdirectory ProfessionalCSharp7. From there, you can start working with the source files. As updates of Visual Studio become available, and libraries such as SignalR will be released, the source code will be updated on GitHub. If the source code changes after you cloned it, you can pull the latest changes after changing your current directory to the directory of the source code: 52
> git pull
In case you’ve made some changes on the source code, git pull might result in an error. If this happens, you can stash away your changes, and pull again: > git stash > git pull
The complete list of git commands is available at https://gitscm.com/docs. In case you have problems with the source code, you can report an issue in the repository. Just open https://github.com/ProfessionalCSharp/ProfessionalCSharp7 in the browser, click the Issues tab, and click the New Issue button. This opens an editor as shown in Figure 1. Just be as descriptive as possible to describe your issue.
FIGURE 1 53
For reporting issues, you need a GitHub account. If you have a GitHub account, you can also fork the source code repository to your account. For more information on using GitHub, check https://guides.github.com/activities/hello-world.
NOTE You can read the source code and issues and clone the repository locally without joining GitHub. For posting issues and creating your own repositories on GitHub, you need your own GitHub account.
ERRATA We make every effort to ensure that there are no errors in the text or in the code. However, no one is perfect, and mistakes do occur. If you find an error in one of our books, like a spelling mistake or faulty piece of code, we would be grateful for your feedback. By sending in errata you may save another reader hours of frustration, and at the same time you can help provide even higher-quality information. To find the errata page for this book, go to http://www.wrox.com and locate the title using the Search box or one of the title lists. Then, on the book details page, click the Book Errata link. On this page you can view all errata that have been submitted for this book and posted by Wrox editors. A complete book list including links to each book’s errata is also available at www.wrox.com/misc-pages/booklist.shtml. If you don’t spot “your” error on the Book Errata page, go to www.wrox.com/contact/techsupport.shtml and complete the form there to send us the error you have found. We’ll check the information and, if appropriate, post a message to the book’s errata page and fix the problem in subsequent editions of the book.
54
PART I The C# Language Chapter 1: .NET Applications and Tools Chapter 2: Core C# Chapter 3: Objects and Types Chapter 4: Object-Oriented Programming with C# Chapter 5: Generics Chapter 6: Operators and Casts Chapter 7: Arrays Chapter 8: Delegates, Lambdas, and Events Chapter 9: Strings and Regular Expressions Chapter 10: Collections Chapter 11: Special Collections Chapter 12: Language Integrated Query Chapter 13: Functional Programming with C# Chapter 14: Errors and Exceptions Chapter 15: Asynchronous Programming Chapter 16: Reflection, Metadata, and Dynamic Programming Chapter 17: Managed and Unmanaged Memory Chapter 18: Visual Studio 2017
55
1 .NET Applications and Tools WHAT’S IN THIS CHAPTER? Reviewing the history of .NET Understanding differences between .NET Framework and .NET Core NuGet packages The Common Language Runtime Features of the Windows Runtime Programming Hello World! .NET Core Command-Line Interface Visual Studio 2017 Universal Windows Platform Technologies for creating Windows apps Technologies for creating Web apps
WROX.COM CODE DOWNLOADS FOR THIS CHAPTER The wrox.com code downloads for this chapter are found at www.wrox.com on the Download Code tab. The source code is also available at https://github.com/ProfessionalCSharp/ProfessionalCSharp7 in 56
the directory HelloWorld. The code for this chapter is divided into the following major examples: HelloWorld WebApp SelfContained HelloWorld
CHOOSING YOUR TECHNOLOGIES .NET has been a great technology for creating applications on the Windows platform. Now .NET is a great technology for creating applications on Windows, Linux, and the Mac. The creation of .NET Core has been the biggest change for .NET since its invention. Now .NET code is open-source code, you can create apps for other platforms, and .NET uses modern patterns. .NET Core and NuGet packages allow Microsoft to provide faster update cycles for delivering new features. It’s not easy to decide what technology should be used for creating applications. This chapter helps you with that. It gives you information about the different technologies available for creating Windows and web apps and services, offers guidance on what to choose for database access, and highlights the differences between the .NET Framework and .NET Core.
REVIEWING .NET HISTORY To better understand what is available with .NET and C#, it is best to know something about its history. The following table shows the version of the .NET Framework in relation to the Common Language Runtime (CLR), the version of C#, and the Visual Studio edition that gives some idea about the year when the corresponding versions have been released. Besides knowing what technology to use, it’s also good to know what technology is not recommended because there’s a replacement. .NET FRAMEWORK CLR C# VISUAL STUDIO 57
1.0
1.0
1.0 2002
1.1
1.1
1.2 2003
2.0
2.0
2.0 2005
3.0 3.5
2.0 2.0
2.0 2005 + Extensions 3.0 2008
4.0
4.0
4.0 2010
4.5
4.0
5.0 2012
4.5.1 4.6
4.0 4.0
5.0 2013 6 2015
4.7
4.0
7
2017
When you create applications with .NET Core, it’s important to know the timeframe for the support level. LTS (Long Time Support) has a longer support length than Current, but Current gets new features faster. LTS is supported for three years after the release or 12 months after the next LTS version, whichever is shorter. So, .NET Core 1.0 is supported until June 27, 2019 if the next LTS version is not released before June 27, 2018. In case the next LTS version is released earlier, .NET Core 1.0 is supported one year after the release of the next LTS. .NET Core 1.1 originally was a Current release, but it changed to LTS with the same support length as .NET Core 1.0. .NET Core 2.0 is a release with the support level Current. This means it is supported for 3 years, 12 months after the next LTS, or 3 months after the next Current release—whichever is shorter. It can be assumed that the last option will be the case, and .NET Core 2.0 will be supported 3 months after .NET Core 2.1 is available. The next table lists .NET Core versions, their release dates, and the support level. .NET CORE VERSION 1.0 1.1 2.0
RELEASE DATE June 27, 2016 Nov 16, 2016 Aug 14, 2017 58
SUPPORT LEVEL LTS LTS* Current
The following sections cover the details of these tables and the progress of C# and .NET.
C# 1.0—A New Language C# 1.0 was a completely new programming language designed for the .NET Framework. At the time it was developed, the .NET Framework consisted of about 3,000 classes and the CLR. After Microsoft was not allowed by a court order (filed by Sun, the company that created Java) to make changes to the Java code, Anders Hejlsberg designed C#. Before working for Microsoft, Hejlsberg had his roots at Borland where he designed the Delphi programming language (an Object Pascal dialect). At Microsoft he was responsible for J++ (Microsoft’s version of the Java programming language). Given Hejlsberg’s background, the C# programming language was mainly influenced by C++, Java, and Pascal. Because C# was created later than Java and C++, Microsoft analyzed typical programming errors that happened with the other languages and did some things differently to avoid these errors. Some differences include the following: With if statements, Boolean expressions are required (C++ allows an integer value here as well). It’s permissible to create value and reference types using the struct and class keywords (Java only allows creating custom reference types; with C++ the distinction between struct and class is only the default for the access modifier). Virtual and non-virtual methods are allowed (this is like C++; Java always creates virtual methods). Of course, there are a lot more changes as you’ll see reading this book. At this time, C# was not only a pure object-oriented programming language with features for inheritance, encapsulation, and polymorphism. Instead, C# also offered component-based programming enhancements such as delegates and events. Before .NET and the CLR, every programming language had its own 59
runtime. With C++, the C++ Runtime is linked with every C++ program. Visual Basic 6 had its own runtime with VBRun. The runtime of Java is the Java Virtual Machine—which can be compared to the CLR. The CLR is a runtime that is used by every .NET programming language. At the time the CLR appeared on the scene, Microsoft offered JScript.NET, Visual Basic .NET, and Managed C++ in addition to C#. JScript.NET was Microsoft’s JavaScript compiler that was to be used with the CLR and .NET classes. Visual Basic.NET was the name for Visual Basic that offered .NET support. Nowadays it’s just called Visual Basic again. Managed C++ was the name for a language that mixed native C++ code with Managed .NET Code. The newer C++ language used today with .NET is C++/CLR. A compiler for a .NET programming language generates Intermediate Language (IL) code. The IL code looks like object-oriented machine code and can be checked by using the tool ildasm.exe to open DLL or EXE files that contain .NET code. The CLR contains a just-in-time (JIT) compiler that generates native code out of the IL code when the program starts to run.
NOTE IL code is also known as managed code. Other parts of the CLR are a garbage collector (GC), which is responsible for cleaning up managed memory that is no longer referenced; a security mechanism that uses code access security to verify what code is allowed to do; an extension for the debugger to allow a debug session between different programming languages (for example, starting a debug session with Visual Basic and continuing to debug within a C# library); and a threading facility that is responsible for creating threads on the underlying platform. The .NET Framework was already huge with version 1. The classes are organized within namespaces to help facilitate navigating the 3,000 available classes. Namespaces are used to group classes and to solve conflicts by allowing the same class name in different namespaces. 60
Version 1 of the .NET Framework allowed creating Windows desktop applications using Windows Forms (namespace System.Windows.Forms), creating web applications with ASP.NET Web Forms (System.Web), communicating with applications and web services using ASP.NET Web Services, communicating more quickly between .NET applications using .NET Remoting, and creating COM+ components for running in an application server using Enterprise Services. ASP.NET Web Forms was the technology for creating web applications with the goal for the developer to not need to know something about HTML and JavaScript. Server-side controls that worked similarly to Windows Forms itself created HTML and JavaScript. C# 1.2 and .NET 1.1 were mainly a bug fix release with minor enhancements.
NOTE Inheritance is discussed in Chapter 4, “Object-Oriented Programming with C#”; delegates and events are covered in Chapter 8, “Delegates, Lambdas, and Events.”
NOTE Every new release of .NET has been accompanied by a new version of the book Professional C#. With .NET 1.0, the book was already in the second edition as the first edition had been published with Beta 2 of .NET 1.0. You’re holding the 11th edition of this book in your hands.
C# 2 and .NET 2 with Generics C# 2 and .NET 2 were a huge update. With this version, a change to 61
both the C# programming language and the IL code had been made; that’s why a new CLR was needed to support the IL code additions. One big change was generics. Generics make it possible to create types without needing to know what inner types are used. The inner types used are defined at instantiation time, when an instance is created. This advance in the C# programming language also resulted in many new types in the Framework—for example, new generic collection classes found in the namespace System.Collections.Generic. With this, the older collection classes defined with 1.0 are rarely used with newer applications. Of course, the older classes still work nowadays, even with .NET Core.
NOTE Generics are used all through the book, but they’re explained in detail in Chapter 5, “Generics.” Chapter 10, “Collections,” covers generic collection classes.
.NET 3—Windows Presentation Foundation With the release of .NET 3.0 no new version of C# was needed. 3.0 was only a release offering new libraries, but it was a huge release with many new types and namespaces. Windows Presentation Foundation (WPF) was probably the biggest part of the new Framework for creating Windows desktop applications. Windows Forms wrapped the native Windows controls and was based on pixels, whereas WPF was based on DirectX to draw every control on its own. The vector graphics in WPF allow seamless resizing of every form. The templates in WPF also allow for complete custom looks. For example, an application for the Zurich airport can include a button that looks like a plane. As a result, applications can look very different from the traditional Windows applications that had been developed up to that time. Everything below the namespace System.Windows belongs to WPF, except for System.Windows.Forms. With WPF the user interface can be designed using an XML syntax: XML for Applications Markup 62
Language (XAML). Before .NET 3, ASP.NET Web Services and .NET Remoting were used for communicating between applications. Message Queuing was another option for communicating. The various technologies had different advantages and disadvantages, and all had different APIs for programming. A typical enterprise application had to use more than one communication API, and thus it was necessary to learn several of them. This was solved with Windows Communication Foundation (WCF). WCF combined all the options of the other APIs into the one API. However, to support all the features WCF has to offer, you need to configure WCF. The third big part of the .NET 3.0 release was Windows Workflow Foundation (WF) with the namespace System.Workflow. Instead of creating custom workflow engines for several different applications (and Microsoft itself created several workflow engines for different products), a workflow engine was available as part of .NET. With .NET 3.0, the class count of the Framework increased from 8,000 types in .NET 2.0 to about 12,000 types.
NOTE To read about WPF and WCF, you need the previous edition of the book, Professional C# 6 and .NET Core 1.0.
C# 3 and .NET 3.5—LINQ .NET 3.5 came together with a new release of C# 3. The major enhancement was a query syntax defined with C# that allows using the same syntax to filter and sort object lists, XML files, and the database. The language enhancements didn’t require any change to the IL code as the C# features used here are just syntax sugar. All the enhancements could have been done with the older syntax as well; just a lot more code would be necessary. The C# language makes it easy to do these queries. With LINQ and lambda expressions, it’s possible to 63
use the same query syntax and access object collections, databases, and XML files. For accessing the database and creating LINQ queries, LINQ to SQL was released as part of .NET 3.5. With the first update to .NET 3.5, the first version of Entity Framework was released. Both LINQ to SQL and Entity Framework offered mapping of hierarchies to the relations of a database and a LINQ provider. Entity Framework was more powerful, but LINQ to SQL was simpler. Over time, features of LINQ to SQL have been implemented in Entity Framework, and now this one is here to stay. The new version of Entity Framework, Entity Framework Core (EF Core) looks very different from the first version released. Another technology introduced as part of .NET 3.5 was the System.AddIn namespace, which offers an add-in model. This model offers powerful features that run add-ins even out of process, but it is also complex to use.
NOTE LINQ is covered in detail in Chapter 12, “Language Integrated Query.” The newest version of the Entity Framework is very different from the .NET 3.5.1 release; it’s described in Chapter 26, “Entity Framework Core.”
C# 4 and .NET 4—Dynamic and TPL The theme of C# 4 was dynamic—integrating scripting languages and making it easier to use COM integration. C# syntax has been extended with the dynamic keyword, named and optional parameters, and enhancements to co- and contra-variance with generics. Other enhancements have been made within the .NET Framework. With multi-core CPUs, parallel programming had become more and more important. The Task Parallel Library (TPL), with abstractions of threads using Task and Parallel classes, make it easier to create parallel running code. 64
Because the workflow engine created with .NET 3.0 didn’t fulfill its promises, a completely new Windows Workflow Foundation was part of .NET 4.0. To avoid conflicts with the older workflow engine, the newer one is defined in the System.Activity namespace. The enhancements of C# 4 also required a new version of the runtime. The runtime version skipped from 2 to 4. With the release of Visual Studio 2010, a new technology shipped for creating web applications: ASP.NET MVC 2.0. Unlike ASP.NET Web Forms, this technology has a focus on the Model-View-Controller (MVC) pattern, which is enforced by the project structure. This technology also has a focus on programming HTML and JavaScript. HTML and JavaScript gained a great push in the developer community with the release of HTML 5. As this technology was very new as well as being out of band (OOB) to Visual Studio and .NET, ASP.NET MVC was updated regularly.
NOTE The dynamic keyword of C# 4 is covered in Chapter 16, “Reflection, Metadata, and Dynamic Programming.” The Task Parallel Library is covered in Chapter 21, “Tasks and Parallel Programming.” The next generation of ASP.NET, ASP.NET Core is covered in Chapter 30, “ASP.NET Core.” Chapter 31, “ASP.NET Core MVC,” covers the ASP.NET Core version of ASP.NET Core MVC.
C# 5 and Asynchronous Programming C# 5 had only two new keywords: async and await. However, they made programming of asynchronous methods a lot easier. As touch became more significant with Windows 8, it also became a lot more important to not block the UI thread. Using the mouse, users are accustomed to scrolling taking some time. However, using fingers on a touch interface that is not responsive is really annoying. 65
Windows 8 also introduced a new programming interface for Windows Store apps (also known as Modern apps, Metro apps, Universal Windows apps, and, more recently, Windows apps): the Windows Runtime. This is a native runtime that looks like .NET by using language projections. Many of the WPF controls have been redone for the new runtime, and a subset of the .NET Framework can be used with such apps. As the System.AddIn framework was much too complex and slow, a new composition framework was created with .NET 4.5: Managed Extensibility Framework with the namespace System.Composition. A new version of platform-independent communication is offered by the ASP.NET Web API. Unlike WCF, which offers stateful and stateless services as well as many different network protocols, the ASP.NET Web API is a lot simpler and based on the Representational State Transfer (REST) software architecture style.
NOTE The async and await keywords of C# 5 are discussed in detail in Chapter 15, “Asynchronous Programming.” This chapter also shows the different asynchronous patterns that have been used over time with .NET. Managed Extensibility Framework (MEF) is covered in Bonus Chapter 1, “Composition.” Windows apps are covered in Chapters 33 to 36, and the Web API with ASP.NET Core MVC is covered in Chapter 32, “Web API.”
C# 6 and .NET Core 1.0 C# 6 doesn’t involve the huge improvements that were made by generics, LINQ, and async, but there are a lot of small and practical enhancements in the language that can reduce the code length in several places. The many improvements have been made possible by a new compiler engine code named Roslyn or the .NET Compiler 66
Platform. The full .NET Framework is not the only .NET version that was in use in recent years. Some scenarios required smaller frameworks. In 2007, the first version of Microsoft Silverlight was released (code named WPF/E, WPF Everywhere). Silverlight was a web browser plug-in that allowed dynamic content. The first version of Silverlight supported programming only via JavaScript. The second version included a subset of the .NET Framework. Of course, server-side libraries were not needed because Silverlight was always running on the client, but the Framework shipped with Silverlight also removed classes and methods from the core features to make it lightweight and portable to other platforms. The last version of Silverlight for the desktop (version 5) was released in December 2011. Silverlight had also been used for programming for the Windows Phone. Silverlight 8.1 made it into Windows Phone 8.1, but this version of Silverlight is also different from the version on the desktop. On the Windows desktop, where there is such a huge framework with .NET and the need for faster and faster development cadences, big changes were also required. In a world of DevOps where developers and operations work together or are even the same people to bring applications and new features continuously to the user, there’s a need to have new features available in a fast way. Creating new features or making bug fixes is a not-so-easy task with a huge framework and many dependencies. With several smaller .NET versions available (e.g. Silverlight, Silverlight for the Windows Phone), it became important to share code between the desktop version of .NET and a smaller version. A technology to share code between different .NET versions was the portable library. Over time, with many different .NET Frameworks and versions, the management of the portable library has become a nightmare. With all these issues, a new version of .NET is a necessity. (Yes, it’s really a requirement to solve these issues.) The new version of the Framework is invented with the name .NET Core. .NET Core is smaller with modular NuGet packages, has a runtime that’s 67
distributed with every application, is open source, and is available not only for the desktop version of Windows but also for many different Windows devices, as well as for Linux and OS X. For creating web applications, ASP.NET Core 1.0 was a complete rewrite of ASP.NET. This release is not completely backward compatible with older versions and requires some changes to existing ASP.NET MVC code (with ASP.NET Core MVC). However, it also has a lot of advantages when compared with the older versions, such as a lower overhead with every network request—which results in better performance—and it can also run on Linux. ASP.NET Web Forms is not part of this release because ASP.NET Web Forms was not designed for best performance; it was designed for developer friendliness based on patterns known by Windows Forms application developers. Of course, not all applications can be changed easily to make use of .NET Core. That’s why the huge framework received improvements as well—even if those improvements are not completed at as fast a pace as .NET Core. The new version of the full .NET Framework is 4.6. Small updates for ASP.NET Web Forms are available on the full .NET stack.
NOTE The changes to the C# language are covered in all the language chapters in Part I—for example, read-only properties are in Chapter 3, “Objects and Types”; the nameof operator and null propagation are in Chapter 6, “Operators and Casts”; string interpolation is in Chapter 9, “Strings and Regular Expressions”; and exception filters are in Chapter 14, “Errors and Exceptions.”
C# 7 and .NET Core 2.0 C# has been updated to have a faster pace. Major version 7.0 was released in March 2017, and the minor versions 7.1 and 7.2 soon after in August 2017 and December 2017. With a project setting, you can 68
select the compiler version to use. C# 7 introduces many new features (these are outlined in the Introduction.) The most significant of these features come from functional programming: pattern matching and tuples.
NOTE Pattern matching and tuples are covered in Chapter 13, “Functional Programming with C#.” .NET Core 2.0 is focused on making it easier to bring existing applications written with the .NET Framework to .NET Core. Types that haven’t been available with .NET Core but are still in use with many .NET Framework applications and libraries are now available with .NET Core. More than 20,000 APIs have been added to .NET Core 2.0. For example, binary serialization, and the DataSet are back, and you can use these features also on Linux. Another feature that helps bring legacy applications to .NET Core is the Windows Compatibility Pack (Microsoft.Windows.Compatibility). This NuGet package defines APIs for WCF, registry access, cryptography, directory services, drawing, and more. See https://github.com/dotnet/designs/blob/master/accepted/compatpack/compat-pack.md for a current state.
The .NET Standard is a spec that defines which APIs should be available on any platform that supports the standard. The higher the standard version, the more APIs are available. .NET Standard 2.0 extended the standard by more than 20,000 APIs and is supported by .NET Framework 4.6.1, .NET Core 2.0, and the Universal Windows Platform (Windows Apps) starting with build 16299 (the Fall Creators Update of Windows 10).
NOTE 69
The .NET Standard is covered in detail in Chapter 19, “Libraries, Assemblies, Packages, and NuGet.” To check whether your application can easily be ported to .NET Core, you can use the .NET Portability Analyzer. You can install this tool as an extension to Visual Studio. It analyzes your binaries. You can configure the portability information for what versions and frameworks you would like to get, and you can select portability information for .NET Core, .NET Framework, .NET Standard, Mono, Silverlight, Windows, Xamarin, and more. The result can be JSON, HTML, and Excel. Figure 1-1 shows the summary report after selecting a .NET Framework binary that is 100% compatible with the .NET Framework, 96.67% with .NET Core, and just 69.7% with Windows Apps. Figure 12 shows detail information about the problematic APIs.
FIGURE 1-1
FIGURE 1-2 70
Choosing Technologies and Going Forward When you know the reason for competing technologies within the Framework, it’s easier to select a technology to use for programming applications. For example, if you’re creating new Windows applications it’s not a good idea to bet on Windows Forms. Instead, you should use a XAML-based technology, such as the Universal Windows Platform (UWP). Of course, there are still good reasons to use other technologies. Do you need to support Windows 7 clients? In that case, UWP is not an option, but WPF is. You still can create your WPF applications in a way that make it easy to switch to other technologies, such as UWP and Xamarin.
NOTE Read Chapter 34, “Patterns with XAML Apps,” for information about how to design your app to share as much code as possible between WPF, UWP, and Xamarin. If you’re creating web applications, a safe bet is to use ASP.NET Core with ASP.NET Core MVC. Making this choice rules out using ASP.NET Web Forms. If you’re accessing a database, you should use Entity Framework Core, and you should opt for the Managed Extensibility Framework instead of System.AddIn. Legacy applications still use Windows Forms and ASP.NET Web Forms and some other older technologies. It doesn’t make sense to change existing applications just to use new technologies. There must be a huge advantage to making the change—for example, when maintenance of the code is already a nightmare and a lot of refactoring is needed to change to faster release cycles that are being demanded by customers, or when using a new technology allows for reducing the coding time for updates. Depending on the type of legacy application, it might not be worthwhile to switch to a new technology. You can allow the application to still be based on older technologies because Windows Forms and ASP.NET Web Forms will still be supported for 71
many years to come. The content of this book is based on the newer technologies to show what’s best for creating new applications. In case you still need to maintain legacy applications, you can refer to older editions of this book, which cover ASP.NET Web Forms, WCF, Windows Forms, System.AddIn, Workflow Foundation, and other legacy technologies that are still part of and available with the .NET Framework.
.NET TERMS What are the current .NET technologies? Figure 1-3 gives an overall picture of how the .NET Framework, .NET Core, and Mono relate to each other. All .NET Framework apps, .NET Core apps, and Xamarin apps can use the same libraries if they are built with the .NET Standard. These technologies share the same compiler platform, programming languages, and runtime components. They do not share the same runtime, but they do share components within their runtime. For example, the just-in-time (JIT) compiler RyuJIT is used by the .NET Framework and .NET Core.
72
FIGURE 1-3 With the .NET Framework, you can create Windows Forms, WPF, and legacy ASP.NET applications that run on Windows. Using .NET Core, you can create ASP.NET Core and console apps that run on different platforms. .NET Core is also used by the Universal Windows Platform (UWP), but this doesn’t make UWP available on Linux. UWP also makes use of the Windows Runtime, which is available only on Windows. Xamarin offers Xamarin.IoS and Xamarin.Android, libraries that enable you to develop C# apps for the iPhone and for Android. With Xamarin.Forms, you have a library to share the user interface between the two mobile platforms. Xamarin is currently still based on the Mono framework, a .NET variant developed by Xamarin. At some point, this might change to .NET Core. However, what’s important is that all these technologies can use the same libraries created for the .NET Standard. In the lower part of Figure 1-3, you can see there’s also some sharing going on between .NET Framework, .NET Core, and Mono. Runtime components, such as the code for the garbage collector and the RyuJIT (this is a new JIT compiler to compile IL code to native code) are shared. The garbage collector is used by CLR, CoreCLR, and .NET Native. The RyuJIT just-in-time compiler is used by CLR and CoreCLR. The .NET Compiler Platform (also known as Roslyn) and the programming languages are used by all these platforms.
.NET Framework NET Framework 4.7 is the .NET Framework that has been continuously enhanced in the past 15 years. Many of the technologies that have been discussed in the history section are based on this framework. This framework is used for creating Windows Forms and WPF applications. .NET Framework 4.7 still offers enhancements for Windows Forms, such as support for High DPI. If you want to continue working with ASP.NET Web Forms, ASP.NET 4.7 with .NET Framework 4.7 is the way to go. Otherwise, you need to 73
rewrite some code to move to .NET Core. Depending on the quality of the source code and the need to add new features, rewriting the code might be worthwhile.
.NET Core .NET Core is the new .NET that is used by all new technologies and has a big focus in this book. This framework is open source—you can find it at http://www.github.com/dotnet. The runtime is the CoreCLR repository; the framework containing collection classes, file system access, console, XML, and a lot more is in the CoreFX repository. Unlike the .NET Framework, where the specific version you needed for the application had to be installed on the system, with .NET Core 1.0 the framework, including the runtime, is delivered with the application. Previously there were times when you might have had problems deploying an ASP.NET web application to a shared server because the provider had older versions of .NET installed; those times are gone. Now you can deliver the runtime with the application and are not dependent on the version installed on the server. .NET Core is designed in a modular approach. The framework splits up into a large list of NuGet packages. So that you don’t have to deal with all the packages, metapackages are used that reference the smaller packages that work together. Metapackages even improved with .NET Core 2.0 and ASP.NET Core 2.0. With ASP.NET Core 2.0, you just need to reference Microsoft.AspNetCore.All to get all the packages you typically need with ASP.NET Core web applications. .NET Core can be updated at a fast pace. Even updating the runtime doesn’t influence existing applications because the runtime can be installed with the applications. Now Microsoft can improve .NET Core, including the runtime, with faster release cycles.
NOTE For developing apps using .NET Core, Microsoft created new command-line utilities named .NET Core Command line (CLI). 74
These tools are introduced later in this chapter through a “Hello World!” application in the section “Using the .NET Core CLI.”
.NET Standard The .NET Standard is not an implementation; it’s a contract. This contract specifies what APIs need to be implemented. .NET Framework, .NET Core, and Xamarin implement this standard. The standard is versioned. With every version additional APIs are added. Depending on the APIs you need, you can choose the standard version for a library. You need to check whether your platform of choice supports the standard of the needed version. You can find a detailed table for the platform support for the .NET Standard at https://docs.microsoft.com/en-us/dotnet/standard/netstandard. The following are the most important parts you need to know: .NET Core 1.1 supports .NET Standard 1.6; .NET Core 2.0 supports .NET Standard 2.0. .NET Framework 4.6.1 supports .NET Standard 2.0. UWP build 16299 and later supports .NET Standard 2.0; older versions support only .NET Standard 1.4. With Xamarin to use .NET Standard 2.0 you need Xamarin.iOS 10.14 and Xamarin.Android 8.0.
NOTE Read detailed information on the .NET Standard in Chapter 19.
NuGet Packages In the early days, assemblies were reusable units with applications. That use is still possible (and necessary with some assemblies) when 75
you’re adding a reference to an assembly for using the public types and methods from your own code. However, using libraries can mean a lot more than just adding a reference and using it. Using libraries can also mean some configuration changes, or scripts that can be used to take advantage of some features. This is one of the reasons to package assemblies within NuGet packages. A NuGet package is a zip file that contains the assembly (or multiple assemblies) as well as configuration information and PowerShell scripts. Another reason for using NuGet packages is that they can be found easily; they’re available not only from Microsoft but also from third parties. NuGet packages are easily accessible on the NuGet server at http://www.nuget.org. From the references within a Visual Studio project, you can open the NuGet Package Manager (see Figure 1-4). There you can search for packages and add them to the application. This tool enables you to search for packages that are not yet released (include prerelease option) and define the NuGet server where the packages should be searched. One place to search for packages is your own shared directory where your internal used packages are placed.
NOTE When you use third-party packages from the NuGet server, you’re always at risk if a package is available later. You also need to check about the support availability of the package. Always check for project links with information about the package before using it. With the package source, you can select Microsoft and .NET to only get packages supported by Microsoft. Third-party packages are also included in the Microsoft and .NET section, but they are third-party packages that are supported by Microsoft.
76
FIGURE 1-4
NOTE More information about the NuGet Package Manager is covered in Chapter 17, “Visual Studio 2015.”
Namespaces The classes available with .NET are organized in namespaces whose names start with the System. To give you an idea about the hierarchy, the following table describes a few of the namespaces. NAMESPACE System.Collections
DESCRIPTION This is the root namespace for collections. Collections are also found within subnamespaces, such as System.Collections.Concurrent and 77
System.Collections.Generic. System.Data
This is the namespace for accessing databases. System.Data.SqlClient contains classes to access the SQL Server.
System.Diagnostics
This is the root namespace for diagnostics information, such as event logging and tracing (in the namespace System.Diagnostics.Tracing). This is the namespace that contains classes for globalization and localization of applications.
System.Globalization
System.IO
This is the namespace for File IO, which are classes to access files and directories. Readers, writers, and streams are here.
System.Net
This is the namespace for core networking, such as accessing DNS servers and creating sockets with System.Net.Sockets.
System.Threading
This is the root namespace for threads and tasks. Tasks are defined within System.Threading.Tasks.
NOTE Many of the new .NET classes use namespaces that start with the name Microsoft instead of System, like Microsoft.EntityFrameworkCore for the Entity Framework Core and Microsoft.Extensions.DependencyInjection for the new dependency injection framework.
Common Language Runtime The Universal Windows Platform makes use of Native .NET to compile IL to native code with an AOT Compiler. This is like Xamarin.iOS. With all other scenarios, with both applications using the .NET 78
Framework and applications using .NET Core 1.0, a Common Language Runtime (CLR) is needed. .NET Core uses the CoreCLR whereas the .NET Framework uses the CLR. So, what’s done by a CLR? Before an application can be executed by the CLR, any source code that you develop (in C# or some other language) needs to be compiled. Compilation occurs in two steps in .NET: 1. Compilation of source code to Microsoft Intermediate Language (IL) 2. Compilation of IL to platform-specific native code by the CLR The IL code is available within a .NET assembly. During runtime, a Just-In-Time (JIT) compiler compiles IL code and creates the platform-specific native code. The new CLR and the CoreCLR include the JIT compiler named RyuJIT. The new JIT compiler is not only faster than the previous one; it also has better support for the Edit & Continue feature while debugging with Visual Studio. The Edit & Continue feature enables you to edit the code while debugging, and you can continue the debug session without the need to stop and restart the process. The runtime also includes a type system with a type loader that is responsible for loading types from assemblies. Security infrastructure with the type system verifies whether certain type system structures are permitted—for example, with inheritance. After creating instances of types, the instances also need to be destroyed and memory needs to be recycled. Another feature of the runtime is the garbage collector. The garbage collector cleans up memory from the managed heap that isn’t referenced anymore. The runtime is also responsible for threading. Creating a managed thread from C# is not necessarily a thread from the underlying operating system. Threads are virtualized and managed by the runtime.
79
NOTE How threads can be created and managed from C# is covered in Chapter 21, “Tasks and Parallel Programming,” and in Chapter 22, “Task Synchronization.” Chapter 17, “Managed and Unmanaged Memory,” gives information about the garbage collector and how to clean up memory.
Windows Runtime Starting with Windows 8, the Windows operating system offers another framework: the Windows Runtime. This runtime is used by the Windows Universal Platform and was version 1 with Windows 8, version 2 with Windows 8.1, and version 3 with Windows 10. Unlike the .NET Framework, this framework was created using native code. When it’s used with .NET apps, the types and methods contained just look like .NET. With the help of language projection, the Windows Runtime can be used with the JavaScript, C++, and .NET languages, and it looks like it’s native to the programming environment. Methods are not only behaving differently regarding case sensitivity; the methods and types can also have different names depending on where they are used. The Windows Runtime offers an object hierarchy organized in namespaces that start with Windows. Looking at these classes, there’s not a lot with duplicate functionality to the .NET types; instead, extra functionality is offered that is available for apps running on the Universal Windows Platform. NAMESPACE Windows.ApplicationModel
DESCRIPTION This namespace and its subnamespaces, such as Windows.ApplicationModel.Contracts, define classes to manage the app lifecycle and communication with other apps. 80
Windows.Data
Windows.Devices
Windows.Data defines
subnamespaces to work with Text, JSON, PDF, and XML data. Geolocation, smartcards, point of service devices, printers, scanners, and other devices can be accessed with subnamespaces of Windows.Devices.
Windows.Foundation
defines core functionality. Interfaces for collections are defined with the namespace Windows.Foundation.Collections. You will not find concrete collection classes here. Instead, interfaces of .NET collection types map to the Windows Runtime types.
Windows.Media
Windows.Media
Windows.Networking
Windows.Security
Windows.Foundation
is the root namespace for playing and capturing video and audio, accessing playlists, and doing speech output. This is the root namespace for socket programming, background transfer of data, and push notifications. Classes from Windows.Security.Credentials
offer a safe
store for passwords; offers a picker to get credentials from the user. This namespace contains classes for location services and routing. With Windows.Storage and its subnamespaces, it is possible to access files and directories as well as use streams and compression. The Windows.System namespace and its subnamespaces give information about the system and the user, but they also offer a Windows.Security.Credentials.UI
Windows.Services.Maps
Windows.Storage
Windows.System
81
Launcher Windows.UI.Xaml
to launch other apps.
In this namespace, you can find a ton of types for the user interface.
USING THE .NET CORE CLI For many chapters in this book you don’t need Visual Studio; you can use any editor and a command line. For creating and compiling your applications, you can use the .NET Core Command Line Interface (CLI). Let’s have a look how to set up your system and how you can use this tool.
Setting Up the Environment In case you have Visual Studio 2017 with the latest updates installed, you can immediately start with the CLI tools. As previously mentioned, you can set up a system without Visual Studio 2017. You also can use most of the samples on Linux and OS X. To download the applications for your environment, just go to https://dot.net and click the Get Started button. From there, you can download the .NET SDK for Windows, Linux, and macOS. For Windows, you can download an executable that installs the SDK. With Linux, you need to select the Linux distribution to get the corresponding command: With Red Hat and CentOS, install the .NET SDK using yum. With Ubuntu and Debian, use apt-get. With Fedora, use dnf
install.
With SLES/openSUSE, use zipper
install.
To install the .NET SDK on the Mac, you can download a .pkg file. With Windows, different versions of .NET Core runtimes as well as NuGet packages are installed in the user profile. As you work with .NET, this folder increases in size. Over time as you create multiple projects, NuGet packages are no longer stored in the project itself; they’re stored in this user-specific folder. This has the advantage that 82
you do not need to download NuGet packages for every different project. After you have this NuGet package downloaded, it’s on your system. Just as different versions of the NuGet packages as well as the runtime are available, all the different versions are stored in this folder. From time to time it might be interesting to check this folder and delete old versions you no longer need. Installing .NET Core CLI tools, you have the dotnet tools as an entry point to start all these tools. Just start > dotnet --help
to see all the different options of the dotnet tools available. Many of the options have a shorthand notation. For help, you can type > dotnet -h
Creating the Application The dotnet tools offer an easy way to create a “Hello World!” application. Just enter this command: > dotnet new console --output HelloWorld
This command creates a new HelloWorld directory and adds the source code file Program.cs and the project file HelloWorld.csproj. Starting with .NET Core 2.0, this command also includes a dotnet restore where all NuGet packages are downloaded. To see a list of dependencies and versions of libraries used by the application, you can check the file project.assets.json in the obj subdirectory. Without using the option --output (or -o as shorthand), the files would be generated in the current directory. The generated source code looks like the following code snippet (code file HelloWorld/Program.cs): using System; namespace HelloWorld { class Program {
83
static void Main(string[] args) { Console.WriteLine("Hello World!"); } } }
Since the 1970s, when Brian Kernighan and Dennis Ritchie wrote the book The C Programming Language, it’s been a tradition to start learning programming languages using a “Hello World!” application. With the .NET Core CLI, this program is automatically generated. Let’s get into the syntax of this program. The Main method is the entry point for a .NET application. The CLR invokes a static Main method on startup. The Main method needs to be put into a class. Here, the class is named Program, but you could call it by any name. Console.WriteLine invokes the WriteLine method of the Console class. You can find the Console class in the System namespace. You don’t need to write System.Console.WriteLine to invoke this method; the System namespace is opened with the using declaration on top of the
source file. After writing the source code, you need to compile the code to run it. The created project configuration file is named HelloWorld.csproj. Compared to older csproj files, the new project file is reduced to a few lines with several defaults: Exe netcoreapp2.0
With the project file, the OutputType defines the type of the output. With a console application, this is Exe. The TargetFramework specifies the framework and the version that is used to build the application. With the sample project, the application is built using .NET Core 2.0. You can change this element to TargetFrameworks and specify multiple frameworks, such as netcoreapp2.0;net47 to build applications both for .NET Framework 4.7 and .NET Core 2.0 (project file 84
HelloWorld/HelloWorld.csproj): Exe netcoreapp2.0;net47
The Sdk attribute specifies the SDK that is used by the project. Microsoft ships two main SDKs: Microsoft.NET.Sdk for console applications, and Microsoft.NET.Sdk.Web for ASP.NET Core web applications. You don’t need to add source files to the project. Files with the .cs extension in the same directory and subdirectories are automatically added for compilation. Resource files with the .resx extension are automatically added for embedding the resource. You can change the default behavior and exclude/include files explicitly. You also don’t need to add the .NET Core package. By specifying the target framework netcoreapp2.0, the metapackage Microsoft.NetCore.App that references many other packages is automatically included.
Building the Application To build the application, you need to change the current directory to the directory of the application and start dotnet build. When you compile for .NET Core 2.0 and .NET Framework 4.7, you see output like the following: > dotnet build Microsoft (R) Build Engine version 15.5.179.9764 for .NET Core Copyright (C) Microsoft Corporation. All rights reserved. Restore completed in 19.8 ms for C:\procsharp\Intro\HelloWorld\HelloWorld.csproj. HelloWorld -> C:\procsharp\Intro\HelloWorld\bin\Debug\net47\HelloWorld.exe HelloWorld ->
85
C:\procsharp\Intro\HelloWorld\bin\Debug\netcoreapp2.0\HelloWorld.dll
Build succeeded. 0 Warning(s) 0 Error(s) Time Elapsed 00:00:01.58
NOTE The commands dotnet new and dotnet build now include restoring NuGet packages. You can also explicitly restore NuGet packages with dotnet restore. Because of the compilation process, you find the assembly containing the IL code of the Program class within the bin/debug/[netcoreapp2.0|net47] folders. If you compare the build of .NET Core with .NET 4.7, you will find a DLL containing the IL code with .NET Core, and an EXE containing the IL code with .NET 4.7. The assembly generated for .NET Core has a dependency to the System.Console assembly, whereas the .NET 4.6 assembly finds the Console class in the mscorlib assembly. To build release code, you need to specify the option --Configuration Release (shorthand -c Release): > dotnet build --configuration Release
Some of the code samples in the following chapters make use of features offered by C# 7.1 or C# 7.2. By default, the latest major version of the compiler is used, which is C# 7.0. To enable newer versions of C#, you need to specify this in the project file as shown with the following project file section. Here, the latest version of the C# compiler is configured. latest
86
Running the Application To run the application, you can use the dotnet
run command
> dotnet run
In case the project file targets multiple frameworks, you need to tell the dotnet run command which framework to use to run the app by using the option --framework. This framework must be configured with the csproj file. With the sample application, you can see output like the following after the restore information: > dotnet run ––framework netcooreapp2.0 Microsoft (R) Build Engine version 15.5.179.9764 for .NET Core Copyright (C) Microsoft Corporation. All rights reserved. Restore completed in 20.65 ms for C:\procsharp\Intro\HelloWorld\HelloWorld.csproj. Hello World!
On a production system, you don’t use dotnet run to run the application. Instead, you use dotnet with the name of the library: > dotnet bin/debug/netcoreapp2.0/HelloWorld.dll
You can also create an executable, but executables are platform specific. How this is done is shown later in this chapter in the section “Packaging and Publishing the Application.”
NOTE As you’ve seen building and running the “Hello World!” app on Windows, the dotnet tools work the same on Linux and OS X. You can use the same dotnet commands on either platform. The focus of this book is on Windows, as Visual Studio 2017 offers a more powerful development platform than is available on the other platforms, but many code samples from this book are based on .NET Core, and you will be able to run them on other platforms 87
as well. You can also use Visual Studio Code, a free development environment, to develop applications directly on Linux and OS X. See the section “Developer Tools” later in this chapter for more information about different editions of Visual Studio.
Creating a Web Application You also can use the .NET Core CLI to create a web application. When you start dotnet new, you can see a list of templates available (see Figure 1-5).
FIGURE 1-5 The command > dotnet new mvc -o WebApp
creates a new ASP.NET Core web application using ASP.NET Core MVC. After changing to the WebApp folder, build and run the program using > dotnet build > dotnet run
starts the Kestrel server of ASP.NET Core to listen on port 5000. You can open a browser to access the pages returned from this server, as 88
shown in Figure 1-6.
FIGURE 1-6
Publishing the Application With the dotnet tool you can create a NuGet package and publish the application for deployment. Let’s first create a framework-dependent deployment of the application. This reduces the files needed with publishing. Using the previously created console application, you just need the following command to create the files needed for publishing. The framework is selected by using -f, and the release configuration is selected by using -c: > dotnet publish -f netcoreapp2.0 -c Release
The files needed for publishing are put into the bin/Release/netcoreapp2.0/publish directory. 89
Using these files for publishing on the target system, the runtime is needed as well. You can find the runtime downloads and installation instructions at https://www.microsoft.com/net/download/. Contrary to the .NET Framework where the same installed runtime can be used by different .NET Framework versions (for example, the .NET Framework 4.0 runtime with updates can be used from .NET Framework 4.7, 4.6, 4.5, 4.0… applications), with .NET Core, to run the application, you need the same runtime version.
NOTE In case your application uses additional NuGet packages, these need to be referenced in the csproj file, and the libraries need to be delivered with the application. Read Chapter 19 for more information.
Self-Contained Deployments Instead of needing to have the runtime installed on the target system, the application can deliver the runtime with it. This is known as selfcontained deployment. Depending on the platform, the runtime differs. Thus, with selfcontained deployment you need to specify the platforms supported by specifying RuntimeIdentifiers in the project file, as shown in the following project file. Here, the runtime identifiers for Windows 10, MacOS, and Ubuntu Linux are specified (project file SelfContainedHelloWorld/SelfContainedHelloWorld.csproj): Exe netcoreapp2.0 win10-x64;ubuntu-x64;osx.10.11-x64;
90
NOTE Get all the runtime identifiers for different platforms and versions from the .NET Core Runtime Identifier (RID) catalog at https://docs.microsoft.com/en-us/dotnet/core/rid-catalog. Now you can create publish files for all the different platforms: > dotnet publish -c Release -r win10-x64 > dotnet publish -c Release -r osx.10.11-x64 > dotnet publish -c Release -r ubuntu-x64
After running these commands, you can find the files needed for publishing in the Release/[win10-x64|osx.10.11-x64|ubuntux64]/publish directories. As .NET Core 2.0 is a lot larger, the size needed for publishing was growing. In these directories, you can find platform-specific executables that you can start directly without using the dotnet command.
NOTE Chapter 19 gives more details on working with the .NET Core CLI and adding NuGet packages, adding projects, creating libraries, working with solution files, and more.
USING VISUAL STUDIO 2017 Next, let’s get into using Visual Studio 2017 instead of the command line. In this section, the most important parts of Visual Studio are covered to get you started. More features of Visual Studio are covered in Chapter 18, “Visual Studio 2017.”
91
Installing Visual Studio 2017 Visual Studio 2017 offers a new installer that should make it easier to install the products you need. With the installer, you can select the Workloads you need for developing applications (see Figure 1-7). To cover all the chapters of the book, install these workloads:
FIGURE 1-7 Universal Windows Platform development .NET Desktop development ASP.NET and web development Azure development Mobile development with .NET .NET Core cross-platform development
Creating a Project You might be overwhelmed by the huge number of menu items and the many options in Visual Studio. To create simple apps in the first 92
chapters of this book, you need only a small subset of the features of Visual Studio. Also, this complete book covers only a part of all the things you can do with Visual Studio. Many features within Visual Studio are offered for legacy applications, as well as for other programming languages. The first thing you do after starting Visual Studio is create a new project. Select the menu File ➪ New ➪ Project. The dialog shown in Figure 1-8 opens. You see a list of project items that you can use to create new projects.
FIGURE 1-8 For this book, you’re interested in a subset of the Visual C# project items. With the first chapters of this book, you select the .NET Core category and the project template Console App (.NET Core). On top of the dialog shown in Figure 1-8 you can see where .NET Framework version is selected. Don’t be confused, this selection does not apply to .NET Core projects. 93
In the lower part of this dialog, you can enter the name of the application, chose the folder where to store the project, and enter a name for the solution. Solutions can contain multiple projects. Clicking the OK button creates a “Hello World!” application.
Working with Solution Explorer In the Solution Explorer (see Figure 1-9), you can see the solution, the projects belonging to the solution, and the files in the project. You can select a source code file you can get into the classes and class members.
FIGURE 1-9 When you select an item in the Solution Explorer and click the right mouse key or press the application key on the keyboard, you open the context menu for the item, as shown in Figure 1-10. The available menus depend on the item you selected and on the features installed with Visual Studio.
94
FIGURE 1-10 When you open the context menu for the project, one menu item is to edit the project file. This option opens the project file VSHelloWorld.csproj with the same content you’ve already seen earlier when using the .NET Core CLI.
Configuring Project Properties You can configure the project properties by selecting the context menu of the project in the Solution Explorer and clicking Properties, or by 95
selecting Project ➪ VSHelloWorld Properties. This opens the view shown in Figure 1-11. Here, you can configure different settings of the project, such as the .NET Core version to use (if you have multiple frameworks installed), build settings, commands that should be invoked during the build process, package configuration, and arguments and environmental variables used while debugging the application. As previously mentioned, with some code samples, C# 7.0 is not enough. You can configure a different version of the C# compiler with the Build category. Clicking the Advanced button opens the Advanced Build Settings dialog (see Figure 1-12). Here, you can configure the version of the C# compiler. This selection goes into the csproj project configuration file.
FIGURE 1-11
96
FIGURE 1-12
NOTE When making a change with the project properties, you need to make sure to select the correct Configuration at the top of the dialog. If you change the version of the C# compiler only with the Debug configuration, building release code will fail when you use newer C# language features. For settings you would like to have with all configurations, select the configuration All Configurations.
Getting to Know the Editor The Visual Studio editor is extremely powerful. It offers IntelliSense to offer you available options to invoke methods and properties and completes your typing as you press the Tab button. Compilation takes place while you type, so you can immediately see syntax errors with underlined code. Hovering the mouse pointer over the underlined text brings up a small box that contains the description of the error. One great productivity feature from the code editor is code snippets. They reduce how much you need to type. Just by typing cw and pressing Tab twice in the editor, the editor creates 97
Console.WriteLine();. Visual
Studio comes with many code snippets that you can see when you select Tools ➪ Code Snippets Manager to open the Code Snippets Manager (see Figure 1-13), where you can select CSharp in the Language field for the code snippets defined with the C# language; select the group Visual C# to see all predefined code snippets for C#.
FIGURE 1-13
Building a Project You compile the project from the menu Build ➪ Build Solution. In case of errors, the Error List window shows errors and warnings. However, the Output window (see Figure 1-14) is more reliable than the Error List. Sometimes the Error List contains older cached information, or it is not that easy to find the error when the list is large. The Output window usually gives great information for many 98
different tools. You open the Output window by selecting View ➪ Output.
FIGURE 1-14
Running an Application To run the application, select Debug ➪ Start Without Debugging. This starts the application and keeps the console window opened until you close it. Remember, you can configure application arguments in the Project Properties selecting the Debug category.
Debugging To debug an application, you can click the left gray area in the editor to create breakpoints (see Figure 1-15). With breakpoints in place, you can start the debugger by selecting Debug ➪ Start Debugging. When you hit a breakpoint, you can use the Debug toolbar (see Figure 1-16) to step into, over, or out of methods, or you can show the next statement. Hover over variables to see the current values. You also can check the Locals and Watch windows for variables set, and you can change values while the application runs.
99
FIGURE 1-15 Now you’ve seen the parts of Visual Studio that are most important for helping you to survive the first chapters in this book. Chapter 18 takes a deeper look at Visual Studio 2017.
FIGURE 1-16
APPLICATION TYPES AND TECHNOLOGIES You can use C# to create console applications; with most samples in the first chapters of this book you’ll do that exact thing. For many programs, console applications are not used that often. You can use C# to create applications that use many of the technologies associated with .NET. This section gives you an overview of the different types of applications that you can write in C#.
Data Access 100
Download from finelybook www.finelybook.com
Before having a look at the application types, let’s look at technologies that are used by all application types: access to data. Files and directories can be accessed by using simple API calls; however, the simple API calls are not flexible enough for some scenarios. With the stream API you have a lot of flexibility, and the streams offer many more features such as encryption or compression. Readers and writers make using streams easier. All the different options available here are covered in Chapter 22, “Files and Streams.” It’s also possible to serialize complete objects in XML or JSON format. Bonus Chapter 2, “XML and JSON,” (which you can find online) discusses these options. To read and write to databases, you can use ADO.NET directly (see Chapter 25, “ADO.NET and Transactions”), or you can use an abstraction layer, Entity Framework Core (Chapter 26, “Entity Framework Core”). Entity Framework Core offers a mapping of object hierarchies to the relations of a database. Entity Framework Core 1.0 is a complete redesign of Entity Framework, as is reflected with the new name. Code needs to be changed to migrate applications from older versions of Entity Framework to the new version. Older mapping variants, such as Database First and Model First, have been dropped, as Code First is a better alternative. The complete redesign was also done to support not only relational databases but also NoSQL. Entity Framework Core 2.0 has a long list of new features, which are covered in this book.
Windows Apps For creating Windows apps, the technology of choice should be the Universal Windows Platform. Of course, there are restrictions when this option is not available—for example, if you still need to support older O/S versions like Windows 7. In this case you can use Windows Presentation Foundation (WPF). WPF is not covered in this book, but you can read the previous edition, Professional C# 6 and .NET Core 1.0, which has five chapters dedicated to WPF, plus some additional WPF coverage in other chapters. This book has one focus: developing apps with the Universal Windows 101
Download from finelybook www.finelybook.com
Platform (UWP). Compared to WPF, UWP offers a more modern XAML to create the user interface. For example, data binding offers a compiled binding variant where you get errors at compile time instead of not showing the bound data. The application is compiled to native code before it’s run on the client systems. And it offers a modern design, which is now called Fluent Design from Microsoft.
NOTE Creating UWP apps is covered in Chapter 33, “Windows Apps,” along with an introduction to XAML, the different XAML controls, and the lifetime of apps. You can create apps with WPF, UWP, and Xamarin by using as much common code as possible by supporting the MVVM pattern. This pattern is covered in Chapter 34, “Patterns with XAML Apps.” To create cool looks and style the app, be sure to read Chapter 35, “Styling Windows Apps.” Chapter 36, “Advanced Windows Apps,” dives into some advanced features of UWP.
Xamarin It would have been great if Windows had been a bigger player in the mobile phone market. Then Universal Windows Apps would run on the mobile phones as well. Reality turned out differently, and Windows on the phone is (currently) a thing of the past. However, with Xamarin you can use C# and XAML to create apps on the iPhone and Android. Xamarin offers APIs to create apps on Android and libraries to create apps on iPhone—using the C# code you are used to. With Android, a mapping layer using Android Callable Wrappers (ACW) and Managed Callable Wrappers (MCW) are used to interop between .NET code and Android’s Java runtime. With iOS, an Ahead of Time (AOT) compiler compiles the managed code to native code. Xamarin.Forms offers XAML code to create the user interface and share as much of the user interface as possible between Android, iOS, 102
Download from finelybook www.finelybook.com
Windows, and Linux. XAML only offers UI controls that can be mapped to all platforms. For using specific controls from a platform, you can create platform-specific renderers.
NOTE Developing with Xamarin and Xamarin.Forms is covered in Chapter 37, “Xamarin.Forms.”
Web Applications The original introduction of ASP.NET fundamentally changed the web programming model. ASP.NET Core changed it again. ASP.NET Core allows the use of .NET Core for high performance and scalability, and it not only runs on Windows but also on Linux systems. With ASP.NET Core, ASP.NET Web Forms is no longer covered (ASP.NET Web Forms can still be used and is updated with .NET 4.7). ASP.NET Core MVC is based on the well-known Model-ViewController (MVC) pattern for easier unit testing. It also allows a clear separation for writing user interface code with HTML, CSS, and JavaScript, and it uses C# on the backend.
NOTE Chapter 30 covers the foundation of ASP.NET Core. Chapter 31 continues building on the foundation and adds using the ASP.NET Core MVC framework.
Web API SOAP and WCF fulfilled their duty in the past, and they’re not needed anymore. Modern apps make use of REST (Representational State 103
Download from finelybook www.finelybook.com
Transfer) and the Web API. Using ASP.NET Core to create a Web API is an option that is a lot easier for communication and fulfills more than 90 percent of requirements by distributed applications. This technology is based on REST, which defines guidelines and best practices for stateless and scalable web services. The client can receive JSON or XML data. JSON and XML can also be formatted in a way to make use of the Open Data specification (OData). The features of this new API make it easy to consume from web clients using JavaScript, the Universal Windows Platform, and Xamarin. Creating a Web API is a good approach for creating microservices. The approach to build microservices defines smaller services that can run and be deployed independently, having their own control of a data store. To describe the services, a new standard was defined: the OpenAPI (https://www.openapis.org). This standard has its roots with Swagger (https://swagger.io/).
NOTE The ASP.NET Core Web API, Swagger, and more information on microservices are covered in Chapter 32.
WebHooks and SignalR For real-time web functionality and bidirectional communication between the client and the server, WebHooks and SignalR are ASP.NET Core technologies available with .NET Core 2.1. SignalR allows pushing information to connected clients as soon as information is available. SignalR makes use of the WebSocket technology to push information. WebHooks allows you to integrate with public services, and these services can call into your public ASP.NET Core created Web API 104
Download from finelybook www.finelybook.com
service. WebHooks is a technology to receive push notification from services such as GitHub or Dropbox and many other services.
NOTE The foundation of SignalR connection management, grouping of connections, and authorization and integration of WebHooks are discussed in Bonus Chapter 3, “WebHooks and SignalR,” which you can find online.
Microsoft Azure Nowadays you can’t ignore the cloud when considering the development picture. Although there’s not a dedicated chapter on cloud technologies, Microsoft Azure is referenced in several chapters in this book. Microsoft Azure offers Software as a Service (SaaS), Infrastructure as a Service (IaaS), Platform as a Service (PaaS), and Functions as a Service (FaaS), and sometimes offerings are in between these categories. Let’s have a look at some Microsoft Azure offerings. Software as a Service SaaS offers complete software; you don’t have to deal with management of servers, updates, and so on. Office 365 is one of the SaaS offerings for using e-mail and other services via a cloud offering. A SaaS offering that’s relevant for developers is Visual Studio Team Services. Visual Studio Team Services is the Team Foundation Server in the cloud that can be used as a private code repository, for tracking bugs and work items, and for build and testing services. Chapter 18 explains DevOps features that can be used from Visual Studio. Infrastructure as a Service Another service offering is IaaS. Virtual machines are offered by this service offering. You are responsible for managing the operating 105
Download from finelybook www.finelybook.com
system and maintaining updates. When you create virtual machines, you can decide between different hardware offerings starting with shared Cores up to 128 cores (at the time of this writing, but things change quickly). 128 cores, 2 TB RAM, and 4 TB local SSD belong to the “M-Series” of machines. With preinstalled operating systems you can decide between Windows, Windows Server, Linux, and operating systems that come preinstalled with SQL Server, BizTalk Server, SharePoint, and Oracle, and many other products. I use virtual machines often for environments that I need only for several hours a week, as the virtual machines are paid on an hourly basis. In case you want to try compiling and running .NET Core programs on Linux but don’t have a Linux machine, installing such an environment on Microsoft Azure is an easy task. Platform as a Service For developers, the most relevant part of Microsoft Azure is PaaS. You can access services for storing and reading data, use computing and networking capabilities of app services, and integrate developer services within the application. For storing data in the cloud, you can use a relational data store SQL Database. SQL Database is nearly the same as the on-premise version of SQL Server. There are also some NoSQL solutions such as Cosmos DB with different store options like JSON data, relationships, or table storage, and Azure Storage that stores blobs (for example, for images or videos). App Services can be used to host your web apps and API apps that you are creating with ASP.NET Core. Microsoft also offers Developer Services in Microsoft Azure. Part of the Developer Services is Visual Studio Team Services. Visual Studio Team Services allows you to manage the source code, automatic builds, tests, and deployments—continuous integration (CI). Part of the Developer Services is Application Insights. With faster release cycles, it’s becoming more and more important to get 106
Download from finelybook www.finelybook.com
information about how the user uses the app. What menus are never used because the users probably don’t find them? What paths in the app is the user taking to fulfill his or her tasks? With Application Insights, you can get good anonymous user information to find out the issues users have with the application, and with DevOps in place you can do quick fixes. You also can use Cognitive Services that offer functionality to process images, use Bing Search APIs, understand what users say with language services, and more. Functions as a Service FaaS is a new concept for cloud service, also known as a serverless computing technology. Of course, behind the scenes there’s always a server. You just don’t pay for reserved CPU and memory as you do with App Services that are used from web apps. Instead the amount you pay is based on consumption—on the number of calls done with some limitations on the memory and time needed for the activity. Azure Functions is one technology that can be deployed using FaaS.
NOTE In Chapter 29, “Tracing, Logging, and Analytics,” you can read about tracing features and learn how to use the Application Insights offering of Microsoft Azure. Chapter 32, “Web API,” not only covers creating Web APIs with ASP.NET Core MVC but also shows how the same service functionality can be used from an Azure Function. The Microsoft Bot service as well as Cognitive Services are explained in Bonus Chapter 4, “Bot Framework and Cognitive Services,” which you can find online.
DEVELOPER TOOLS This final part of the chapter, before we switch to a lot of C# code in the next chapter, covers developer tools and editions of Visual Studio 107
Download from finelybook www.finelybook.com
2017.
Visual Studio Community This edition of Visual Studio is a free edition with features that the Professional edition previously had. There’s a license restriction for when it can be used. It’s free for open-source projects and training and to academic and small professional teams. Unlike the Express editions of Visual Studio that previously have been the free editions, this product allows using extensions with Visual Studio.
Visual Studio Professional This edition includes more features than the Community edition, such as the CodeLens and Team Foundation Server for source code management and team collaboration. With this edition, you also get an MSDN subscription that includes several server products from Microsoft for development and testing.
Visual Studio Enterprise Unlike the Professional edition, this edition contains a lot of tools for testing, such as Web Load & Performance Testing, Unit Test Isolation with Microsoft Fakes, and Coded UI Testing. (Unit testing is part of all Visual Studio editions.) With Code Clone you can find code clones in your solution. Visual Studio Enterprise also contains architecture and modeling tools to analyze and validate the solution architecture.
NOTE Be aware that with a Visual Studio subscription you’re entitled to free use of Microsoft Azure up to a specific monthly amount that is contingent on the type of Visual Studio subscription you have.
108
Download from finelybook www.finelybook.com
NOTE Chapter 18 includes details on using several features of Visual Studio 2017. Chapter 28, “Testing,” gets into details of unit testing, web testing, and creating Coded UI tests.
NOTE For some of the features in the book—for example, the Coded UI Tests —you need Visual Studio Enterprise. You can work through most parts of the book with the Visual Studio Community edition.
Visual Studio for Mac Visual Studio for Mac originates in the Xamarin Studio, but now it offers a lot more than the earlier product. For example, the editor shares code with Visual Studio, so you’re soon familiar with it. With Visual Studio for Mac you can not only create Xamarin apps, but you also can create ASP.NET Core apps that run on Windows, Linux, and the Mac. With many chapters of this book, you can use Visual Studio for Mac. Exceptions are the chapters covering the Universal Windows Platform, which requires Windows to run the app and also to develop the app.
Visual Studio Code Visual Studio Code is a completely different development tool compared to the other Visual Studio editions. While Visual Studio 2017 offers project-based features with a rich set of templates and tools, Visual Studio is a code editor with little project management support. However, Visual Studio Code runs not only on Windows, but also on Linux and OS X.
109
Download from finelybook www.finelybook.com
With many chapters of this book, you can use Visual Studio Code as your development editor. What you can’t do is create UWP and Xamarin applications, and you also don’t have access to the features covered in Chapter 18, “Visual Studio 2017.” You can use Visual Studio Code for .NET Core console applications, and ASP.NET Core 1.0 web applications using .NET Core. You can download Visual Studio Code from http://code.visualstudio.com.
SUMMARY This chapter covered a lot of ground to review important technologies and changes with technologies. Knowing about the history of some technologies helps you decide which technology should be used with new applications and what you should do with existing applications. You read about the differences between .NET Framework and .NET Core, and you saw how to create and run a Hello World application with all these environments with and without using Visual Studio. You’ve seen the functions of the Common Language Runtime (CLR) and looked at technologies for accessing the database and creating Windows apps. You also reviewed the advantages of ASP.NET Core. Chapter 2 dives fast into the syntax of C#. You learn variables, implement program flows, organize your code into namespaces, and more.
110
Download from finelybook www.finelybook.com
2 Core C# WHAT’S IN THIS CHAPTER? Declaring variables Initialization and scope of variables Working with redefined C# data types Dictating execution flow within a C# program Organizing classes and types with namespaces Getting to know the Main method Using internal comments and documentation features Using preprocessor directives Understanding guidelines and conventions for good programming in C#
WROX.COM CODE DOWNLOADS FOR THIS CHAPTER The Wrox.com code downloads for this chapter are found at www.wrox.com on the Download Code tab. The source code is also available at https://github.com/ProfessionalCSharp/ProfessionalCSharp7 in the directory CoreCSharp. The code for this chapter is divided into the following major examples: 111
Download from finelybook www.finelybook.com
HelloWorldApp VariablesSample VariableScopeSample IfStatement ForLoop NamespacesSample ArgumentsSample StringSample
FUNDAMENTALS OF C# Now that you understand more about what C# can do, you need to know how to use it. This chapter gives you a good start in that direction by providing a basic understanding of the fundamentals of C# programming, which is built on in subsequent chapters. By the end of this chapter, you will know enough C# to write simple programs (though without using inheritance or other object-oriented features, which are covered in later chapters).
Hello, World! Chapter 1, “.NET Application Architectures and Tools,” shows how to create a Hello, World! application using the .NET Core CLI tools, Visual Studio, Visual Studio for Mac, and Visual Studio Code. Now let’s concentrate on the C# source code. First, I have a few general comments about C# syntax. In C#, as in other C-style languages, statements end in a semicolon (;) and can continue over multiple lines without needing a continuation character. Statements can be joined into blocks using curly braces ({}). Single-line comments begin with two forward slash characters (//), and multiline comments begin with a slash and an asterisk (/*) and end with the same combination reversed (*/). In these aspects, C# is identical to C++ and Java but different from Visual Basic. It is the semicolons and curly braces that give C# code such a different visual appearance from Visual Basic 112
Download from finelybook www.finelybook.com
code. If your background is predominantly Visual Basic, take extra care to remember the semicolon at the end of every statement. Omitting this is usually the biggest single cause of compilation errors among developers who are new to C-style languages. Another thing to remember is that C# is case sensitive. That means the variables named myVar and MyVar are two different variables. The first few lines in the previous code example are related to namespaces (mentioned later in this chapter), which is a way to group associated classes. The namespace keyword declares the namespace with which your class should be associated. All code within the braces that follow it is regarded as being within that namespace. The using declaration specifies a namespace that the compiler should look at to find any classes that are referenced in your code but aren’t defined in the current namespace. This serves the same purpose as the import statement in Java and the using namespace statement in C++ (code file HelloWorldApp/Program.cs): using System; namespace Wrox.HelloWorldApp {
The reason for the presence of the using System; declaration in the Program.cs file is that you are going to use the class Console from the namespace System: System.Console. The using System; declaration enables you to refer to this class without adding the namespace. You can invoke the WriteLine method using the following class: using System; // ... Console.WriteLine("Hello World!");
NOTE Namespaces are explained in detail later in this chapter in the section “Getting Organized with Namespaces.” With the using static declaration you can open not only a namespace, 113
Download from finelybook www.finelybook.com
but all static members of a class. Declaring using static System.Console, you can invoke the WriteLine method of the Console class without the class name: using static System.Console; // ... WriteLine("Hello World!");
Omitting the complete using declaration, you need to add the namespace name invoking the WriteLine method: System.Console.WriteLine("Hello World!");
The standard System namespace is where the most commonly used .NET types reside. It is important to realize that everything you do in C# depends on .NET base classes. In this case, you are using the Console class within the System namespace to write to the console window. C# has no built-in keywords of its own for input or output; it is completely reliant on the .NET classes. Within the source code, a class called Program is declared. However, because it has been placed in a namespace called Wrox.HelloWorldApp, the fully qualified name of this class is Wrox.HelloWorldApp.Program (code file HelloWorldApp/Program.cs): namespace Wrox.HelloWorldApp { class Program {
All C# code must be contained within a class. The class declaration consists of the class keyword, followed by the class name and a pair of curly braces. All code associated with the class should be placed between these braces. The class Program contains a method called Main. Every C# executable (such as console applications, Windows applications, Windows services, and web applications) must have an entry point—the Main method (note the capital M). static void Main() {
114
Download from finelybook www.finelybook.com
The method is called when the program is started. This method must return either nothing (void) or an integer (int). Note the format of method definitions in C#: [modifiers] return_type MethodName([parameters]) { // Method body. NB. This code block is pseudo-code. }
Here, the first square brackets represent certain optional keywords. Modifiers are used to specify certain features of the method you are defining, such as from where the method can be called. In this case the Main method doesn’t have a public access modifier applied. You can do this in case you need a unit test for the Main method. The runtime doesn’t need the public access modifier applied, and it still can invoke the method. The static modifier is required as the runtime invokes the method without creating an instance of the class. The return type is set to void, and in the example parameters are not included. Finally, we come to the code statement themselves: Console.WriteLine("Hello World!");
In this case, you simply call the WriteLine method of the System.Console class to write a line of text to the console window. WriteLine is a static method, so you don’t need to instantiate a Console object before calling it. Now that you have had a taste of basic C# syntax, you are ready for more detail. Because it is virtually impossible to write any nontrivial program without variables, we start by looking at variables in C#.
WORKING WITH VARIABLES You declare variables in C# using the following syntax: datatype identifier;
For example: int i;
115
Download from finelybook www.finelybook.com
This statement declares an int named i. The compiler won’t actually let you use this variable in an expression until you have initialized it with a value. After it has been declared, you can assign a value to the variable using the assignment operator, =: i = 10;
You can also declare the variable and initialize its value at the same time: int i = 10;
If you declare and initialize more than one variable in a single statement, all the variables will be of the same data type: int x = 10, y =20; // x and y are both ints
To declare variables of different types, you need to use separate statements. You cannot assign different data types within a multiplevariable declaration: int x = 10; bool y = true; // Creates a variable that stores true or false int x = 10, bool y = true; // This won't compile!
Notice the // and the text after it in the preceding examples. These are comments. The // character sequence tells the compiler to ignore the text that follows on this line because it is included for a human to better understand the program; it’s not part of the program itself. Comments are explained further later in this chapter in the “Using Comments” section.
Initializing Variables Variable initialization demonstrates an example of C#’s emphasis on safety. Briefly, the C# compiler requires that any variable be initialized with some starting value before you refer to that variable in an operation. Most modern compilers will flag violations of this as a warning, but the ever-vigilant C# compiler treats such violations as 116
Download from finelybook www.finelybook.com
errors. C# has two methods for ensuring that variables are initialized before use: Variables that are fields in a class or struct, if not initialized explicitly, are by default zeroed out when they are created (classes and structs are discussed later). Variables that are local to a method must be explicitly initialized in your code prior to any statements in which their values are used. In this case, the initialization doesn’t have to happen when the variable is declared, but the compiler checks all possible paths through the method and flags an error if it detects any possibility of the value of a local variable being used before it is initialized. For example, you can’t do the following in C#: static int Main() { int d; Console.WriteLine(d); // Can't do this! Need to initialize d before use return 0; }
Notice that this code snippet demonstrates defining Main so that it returns an int instead of void. If you attempt to compile the preceding lines, you receive this error message: Use of unassigned local variable 'd'
Consider the following statement: Something objSomething;
In C#, this line of code would create only a reference for a Something object, but this reference would not yet actually refer to any object. Any attempt to call a method or property against this variable would result in an error. To instantiate a reference object in C#, you must use the new keyword. 117
Download from finelybook www.finelybook.com
You create a reference as shown in the previous example and then point the reference at an object allocated on the heap using the new keyword: objSomething = new Something(); // This creates a Something object on the heap
Using Type Inference Type inference makes use of the var keyword. The syntax for declaring the variable changes by using the var keyword instead of the real type. The compiler “infers” what the type of the variable is by what the variable is initialized to. For example: var someNumber = 0;
becomes: int someNumber = 0;
Even though someNumber is never declared as being an int, the compiler figures this out and someNumber is an int for as long as it is in scope. Once compiled, the two preceding statements are equal. Here is a short program to demonstrate (code file VariablesSample/Program.cs): using System; namespace Wrox { class Program { static void Main() { var name = "Bugs Bunny"; var age = 25; var isRabbit = true; Type nameType = name.GetType(); Type ageType = age.GetType(); Type isRabbitType = isRabbit.GetType(); Console.WriteLine($"name is of type {nameType}"); Console.WriteLine($"age is of type {ageType}"); Console.WriteLine($"isRabbit is of type {isRabbitType}"); } }
118
Download from finelybook www.finelybook.com
}
The output from this program is as follows: name is of type System.String age is of type System.Int32 isRabbit is of type System.Boolean
There are a few rules that you need to follow: The variable must be initialized. Otherwise, the compiler doesn’t have anything from which to infer the type. The initializer cannot be null. The initializer must be an expression. You can’t set the initializer to an object unless you create a new object in the initializer. Chapter 3, “Objects and Types,” examines these rules more closely in the discussion of anonymous types. After the variable has been declared and the type inferred, the variable’s type cannot be changed. When established, the variable’s type strong typing rules that any assignment to this variable must follow the inferred type.
Understanding Variable Scope The scope of a variable is the region of code from which the variable can be accessed. In general, the scope is determined by the following rules: A field (also known as a member variable) of a class is in scope for as long as a local variable of this type is in scope. A local variable is in scope until a closing brace indicates the end of the block statement or method in which it was declared. A local variable that is declared in a for, while, or similar statement is in scope in the body of that loop. Scope Clashes for Local Variables 119
Download from finelybook www.finelybook.com
It’s common in a large program to use the same variable name for different variables in different parts of the program. This is fine as long as the variables are scoped to completely different parts of the program so that there is no possibility for ambiguity. However, bear in mind that local variables with the same name can’t be declared twice in the same scope. For example, you can’t do this: int x = 20; // some more code int x = 30;
Consider the following code sample (code file VariableScopeSample/Program.cs): using System; namespace VariableScopeSample { class Program { static int Main() { for (int i = 0; i < 10; i++) { Console.WriteLine(i); } // i goes out of scope here // We can declare a variable named i again, because // there's no other variable with that name in scope for (int i = 9; i >= 0; i –) { Console.WriteLine(i); } // i goes out of scope here. return 0; } } }
This code simply prints out the numbers from 0 to 9, and then back again from 9 to 0, using two for loops. The important thing to note is that you declare the variable i twice in this code, within the same method. You can do this because i is declared in two separate loops, so each i variable is local to its own loop. Here’s another example (code file VariableScopeSample2/Program.cs): 120
Download from finelybook www.finelybook.com
static int Main() { int j = 20; for (int i = 0; i < 10; i++) { int j = 30; // Can't do this — j is still in scope Console.WriteLine(j + i); } return 0; }
If you try to compile this, you’ll get an error like the following: error CS0136: A local variable named 'j' cannot be declared in this scope because that name is used in an enclosing local scope to define a local or parameter
This occurs because the variable j, which is defined before the start of the for loop, is still in scope within the for loop and won’t go out of scope until the Main method has finished executing. Although the second j (the illegal one) is in the loop’s scope, that scope is nested within the Main method’s scope. The compiler has no way to distinguish between these two variables, so it won’t allow the second one to be declared. Scope Clashes for Fields and Local Variables In certain circumstances, however, you can distinguish between two identifiers with the same name (although not the same fully qualified name) and the same scope, and in this case the compiler allows you to declare the second variable. That’s because C# makes a fundamental distinction between variables that are declared at the type level (fields) and variables that are declared within methods (local variables). Consider the following code snippet (code file VariableScopeSample3/Program.cs): using System; namespace Wrox { class Program
121
Download from finelybook www.finelybook.com
{ static int j = 20; static void Main() { int j = 30; Console.WriteLine(j); return; } } }
This code will compile even though you have two variables named j in scope within the Main method: the j that was defined at the class level and doesn’t go out of scope until the class Program is destroyed (when the Main method terminates and the program ends), and the j defined within Main. In this case, the new variable named j that you declare in the Main method hides the class-level variable with the same name, so when you run this code, the number 30 is displayed. What if you want to refer to the class-level variable? You can actually refer to fields of a class or struct from outside the object, using the syntax object.fieldname. In the previous example, you are accessing a static field (you find out what this means in the next section) from a static method, so you can’t use an instance of the class; you just use the name of the class itself: // ... static void Main() { int j = 30; Console.WriteLine(j); Console.WriteLine(Program.j); } // ...
If you are accessing an instance field (a field that belongs to a specific instance of the class), you need to use the this keyword instead.
Working with Constants As the name implies, a constant is a variable whose value cannot be changed throughout its lifetime. Prefixing a variable with the const keyword when it is declared and initialized designates that variable as 122
Download from finelybook www.finelybook.com
a constant: const int a = 100; // This value cannot be changed.
Constants have the following characteristics: They must be initialized when they are declared. After a value has been assigned, it can never be overwritten. The value of a constant must be computable at compile time. Therefore, you can’t initialize a constant with a value taken from a variable. If you need to do this, you must use a read-only field (this is explained in Chapter 3). Constants are always implicitly static. However, notice that you don’t have to (and, in fact, are not permitted to) include the static modifier in the constant declaration. At least three advantages exist for using constants in your programs: Constants make your programs easier to read by replacing magic numbers and strings with readable names whose values are easy to understand. Constants make your programs easier to modify. For example, assume that you have a SalesTax constant in one of your C# programs, and that constant is assigned a value of 6 percent. If the sales tax rate changes later, you can modify the behavior of all tax calculations simply by assigning a new value to the constant; you don’t have to hunt through your code for the value .06 and change each one, hoping you will find all of them. Constants help prevent mistakes in your programs. If you attempt to assign another value to a constant somewhere in your program other than at the point where the constant is declared, the compiler flags the error.
USING PREDEFINED DATA TYPES Now that you have seen how to declare variables and constants, let’s take a closer look at the data types available in C#. As you will see, C# is much stricter about the types available and their definitions than 123
Download from finelybook www.finelybook.com
some other languages.
Value Types and Reference Types Before examining the data types in C#, it is important to understand that C# distinguishes between two categories of data type: Value types Reference types The next few sections look in detail at the syntax for value and reference types. Conceptually, the difference is that a value type stores its value directly, whereas a reference type stores a reference to the value. These types are stored in different places in memory; value types are stored in an area known as the stack, and reference types are stored in an area known as the managed heap. It is important to be aware of whether a type is a value type or a reference type because of the different effect each assignment has. For example, int is a value type, which means that the following statement results in two locations in memory storing the value 20: // i and j are both of type int i = 20; j = i;
However, consider the following example. For this code, assume you have defined a class called Vector and that Vector is a reference type and has an int member variable called Value: Vector x, y; x = new Vector(); x.Value = 30; // Value is a field defined in Vector class y = x; Console.WriteLine(y.Value); y.Value = 50; Console.WriteLine(x.Value);
The crucial point to understand is that after executing this code, there is only one Vector object: x and y both point to the memory location that contains this object. Because x and y are variables of a reference 124
Download from finelybook www.finelybook.com
type, declaring each variable simply reserves a reference—it doesn’t instantiate an object of the given type. In neither case is an object actually created. To create an object, you have to use the new keyword, as shown. Because x and y refer to the same object, changes made to x will affect y and vice versa. Hence, the code will display 30 and then 50. If a variable is a reference, it is possible to indicate that it does not refer to any object by setting its value to null: y = null;
If a reference is set to null, then it is not possible to call any nonstatic member functions or fields against it; doing so would cause an exception to be thrown at runtime.
NOTE Non-nullable reference types are planned for C# 8. Variables of these types require initialization with non-null. Reference types that allow null explicitly require declaration as a nullable reference type. In C#, basic data types such as bool and long are value types. This means that if you declare a bool variable and assign it the value of another bool variable, you will have two separate bool values in memory. Later, if you change the value of the original bool variable, the value of the second bool variable does not change. These types are copied by value. In contrast, most of the more complex C# data types, including classes that you yourself declare, are reference types. They are allocated upon the heap, have lifetimes that can span multiple function calls, and can be accessed through one or several aliases. The CLR implements an elaborate algorithm to track which reference variables are still reachable and which have been orphaned. Periodically, the CLR destroys orphaned objects and returns the memory that they once occupied back to the operating system. This is done by the garbage 125
Download from finelybook www.finelybook.com
collector. C# has been designed this way because high performance is best served by keeping primitive types (such as int and bool) as value types, and larger types that contain many fields (as is usually the case with classes) as reference types. If you want to define your own type as a value type, you should declare it as a struct.
NOTE The layout of primitive data types typically aligns with native layouts. This makes it possible to share the same memory between managed and native code.
.NET Types The C# keywords for data types—such as int, short, and string—are mapped from the compiler to .NET data types. For example, when you declare an int in C#, you are actually declaring an instance of a .NET struct: System.Int32. This might sound like a small point, but it has a profound significance: It means that you can treat all the primitive data types syntactically, as if they are classes that support certain methods. For example, to convert an int i to a string, you can write the following: string s = i.ToString();
It should be emphasized that behind this syntactical convenience, the types really are stored as primitive types, so absolutely no performance cost is associated with the idea that the primitive types are notionally represented by C# structs. The following sections review the types that are recognized as built-in types in C#. Each type is listed, along with its definition and the name of the corresponding .NET type. C# has 15 predefined types, 13 value types, and 2 (string and object) reference types.
126
Download from finelybook www.finelybook.com
Predefined Value Types The built-in .NET value types represent primitives, such as integer and floating-point numbers, character, and Boolean types. Integer Types C# supports eight predefined integer types, shown in the following table. NAME .NET TYPE DESCRIPTION RANGE (MIN:MAX) sbyte
System.SByte
short
System.Int16
int
8-bit signed integer
16-bit signed integer System.Int32 32-bit signed integer
–128:127 (–27:27–1) –32,768:32,767 (–215:215–1) – 2,147,483,648:2,147,483,647 (–231:231–1) –9,223,372,036,854,775,808: 9,223,372,036,854,775,807 (–263:263–1)
long
System.Int64
64-bit signed integer
byte
System.Byte
8-bit unsigned integer
0:255 (0:28–1)
ushort
System.UInt16
16-bit unsigned integer
0:65,535 (0:216–1)
uint
System.UInt32
ulong
32-bit unsigned integer System.UInt64 64-bit unsigned integer
0:4,294,967,295 (0:232–1) 0:18,446,744,073,709,551,615 (0:264–1)
Some C# types have the same names as C++ and Java types but have different definitions. For example, in C# an int is always a 32-bit signed integer. In C++ an int is a signed integer, but the number of bits is platform-dependent (32 bits on Windows). In C#, all data types have been defined in a platform-independent manner to allow for the 127
Download from finelybook www.finelybook.com
possible future porting of C# and .NET to other platforms. A byte is the standard 8-bit type for values in the range 0 to 255 inclusive. Be aware that, in keeping with its emphasis on type safety, C# regards the byte type and the char type as completely distinct types, and any programmatic conversions between the two must be explicitly requested. Also, be aware that unlike the other types in the integer family, a byte type is by default unsigned. Its signed version bears the special name sbyte. With .NET, a short is no longer quite so short; it is 16 bits long. The int type is 32 bits long. The long type reserves 64 bits for values. All integer-type variables can be assigned values in decimal, hex, or binary notation. Binary notation requires the 0b prefix; hex notation requires the 0x prefix: long x = 0x12ab;
Binary notation is discussed later in the section “Working with Binary Values.” If there is any ambiguity about whether an integer is int, uint, long, or ulong, it defaults to an int. To specify which of the other integer types the value should take, you can append one of the following characters to the number: uint ui = 1234U; long l = 1234L; ulong ul = 1234UL;
You can also use lowercase u and l, although the latter could be confused with the integer 1 (one). Digit Separators C# 7 offers digit separators. These separators help with readability and don’t add any functionality. For example, you can add underscores to numbers, as shown in the following code snippet (code file UsingNumbers/Program.cs): long l1 = 0x123_4567_89ab_cedf;
128
Download from finelybook www.finelybook.com
The underscores used as separators are ignored by the compiler. With the preceding sample, reading from the right every 16 bits (or four hexadecimal characters) a digit separator is added. The result is a lot more readable than the alternative: long l2 = 0x123456789abcedf;
Because the compiler just ignores the underscores, you are responsible for ensuring readability. You can put the underscores at any position, you need to make sure it helps readability, not as shown in this example: long l3 = 0x12345_6789_abc_ed_f;
It’s useful to have it allowed on any position as this allows for different use cases—for example, to work with hexadecimal or octal values, or to separate different bits needed for a protocol (as shown in the next section).
NOTE Digit separators are new with C# 7. C# 7.0 doesn’t allow leading digit separators, having the separator before the value (and after the prefix). Leading digit separators can be used with C# 7.2. Working with Binary Values Besides offering digit separators, C# 7 also makes it easier to assign binary values to integer types. If you prefix the variable value with the 0b literal, it’s only allowed to use 0 and 1. Only binary values are allowed to assign to the variable, as you can see in the following code snippet (code file UsingNumbers/Program.cs): uint binary1 = 0b1111_1110_1101_1100_1011_1010_1001_1000;
This preceding code snippet uses an unsigned int with 32 bits available. Digit separators help a lot with readability in binary values. This snippet makes a separation every four bits. Remember, you can 129
Download from finelybook www.finelybook.com
write this in the hex notation as well: uint hex1 = 0xfedcba98;
Using the separator every three bits helps when you’re working with the octal notation, where characters are used between 0 (000 binary) and 7 (111 binary). uint binary2 = 0b111_110_101_100_011_010_001_000;
The following example shows how to define values that could be used in a binary protocol where two bits define the rightmost part, six bits are in the next section, and the last two sections have four bits to complete 16 bits: ushort binary3 = 0b1111_0000_101010_11;
Remember to use the correct integer type for the number of bits needed: ushort for 16, uint for 32, and ulong for 64 bits.
NOTE Read Chapter 6, “Operators and Casts,” and Chapter 11, “Special Collections,” for additional information on working with binary data.
NOTE Binary literals are new with C# 7. Floating-Point Types Although C# provides a plethora of integer data types, it supports floating-point types as well. NAME .NET TYPE DESCRIPTION SIGNIFICANT RANGE FIGURES (APPROXIMATE) 130
Download from finelybook www.finelybook.com
float
System.Single
32-bit, singleprecision floating point
7
±1.5 × 10245 × 1038
double
System.Double
64-bit, doubleprecision floating point
15/16
±5.0 × 102324 ±1.7 × 10308
The float data type is for smaller floating-point values, for which less precision is required. The double data type is bulkier than the float data type but offers twice the precision (15 digits). If you hard-code a non-integer number (such as 12.3), the compiler will normally assume that you want the number interpreted as a double. To specify that the value is a float, append the character F (or f) to it: float f = 12.3F;
The Decimal Type The decimal type represents higher-precision floating-point numbers, as shown in the following table. NAME .NET TYPE
DESCRIPTION SIGNIFICANT RANGE FIGURES (APPROXIMATE)
decimal System.Decimal
128-bit, high28 precision decimal notation
±1.0 × 10228 × 1028
One of the great things about the .NET and C# data types is the provision of a dedicated decimal type for financial calculations. How you use the 28 digits that the decimal type provides is up to you. In other words, you can track smaller dollar amounts with greater accuracy for cents or larger dollar amounts with more rounding in the fractional portion. Bear in mind, however, that decimal is not implemented under the hood as a primitive type, so using decimal has a performance effect on your calculations. To specify that your number is a decimal type rather than a double, a 131
Download from finelybook www.finelybook.com
float,
or an integer, you can append the M (or m) character to the value, as shown here: decimal d = 12.30M;
The Boolean Type The C# bool type is used to contain Boolean values of either true or false. NAME .NET TYPE bool
DESCRIPTION SIGNIFICANT RANGE FIGURES System.Boolean Represents true NA true or or false false
You cannot implicitly convert bool values to and from integer values. If a variable (or a function return type) is declared as a bool, you can only use values of true and false. You get an error if you try to use zero for false and a nonzero value for true. The Character Type For storing the value of a single character, C# supports the char data type. NAME .NET TYPE VALUES char System.Char Represents a single 16-bit (Unicode) character Literals of type char are signified by being enclosed in single quotation marks—for example, 'A'. If you try to enclose a character in double quotation marks, the compiler treats the character as a string and throws an error. As well as representing chars as character literals, you can represent them with four-digit hex Unicode values (for example, '\u0041'), as integer values with a cast (for example, (char)65), or as hexadecimal values (for example,'\x0041'). You can also represent them with an escape sequence, as shown in the following table. ESCAPE SEQUENCE CHARACTER \' Single quotation mark 132
Download from finelybook www.finelybook.com
\" \\ \0 \a \b \f \n \r \t \v
Double quotation mark Backslash Null Alert Backspace Form feed Newline Carriage return Tab character Vertical tab
Literals for Numbers The following table summarizes the literals that can be used for numbers. The table repeats the literals from the preceding sections so they’re all collected in one place. LITERAL POSITION U Postfix L Postfix UL Postfix F Postfix M Postfix 0x Prefix 0b true False
Prefix NA NA
DESCRIPTION unsigned int long unsigned long float decimal (money) Hexadecimal number; values from 0 to F are allowed Binary number; only 0 and 1 are allowed Boolean value Boolean value
Predefined Reference Types C# supports two predefined reference types, object and string, 133
Download from finelybook www.finelybook.com
described in the following table. NAME .NET TYPE DESCRIPTION object System.Object The root type. All other types (including value types) are derived from object. string System.String Unicode character string The object Type Many programming languages and class hierarchies provide a root type, from which all other objects in the hierarchy are derived. C# and .NET are no exception. In C#, the object type is the ultimate parent type from which all other intrinsic and user-defined types are derived. This means that you can use the object type for two purposes: You can use an object reference to bind to an object of any particular subtype. For example, in Chapter 6, “Operators and Casts,” you see how you can use the object type to box a value object on the stack to move it to the heap; object references are also useful in reflection, when code must manipulate objects whose specific types are unknown. The object type implements a number of basic, general-purpose methods, which include Equals, GetHashCode, GetType, and ToString. Responsible user-defined classes might need to provide replacement implementations of some of these methods using an object-oriented technique known as overriding, which is discussed in Chapter 4, “Object Oriented Programming with C#.” When you override ToString, for example, you equip your class with a method for intelligently providing a string representation of itself. If you don’t provide your own implementations for these methods in your classes, the compiler picks up the implementations in object, which might or might not be correct or sensible in the context of your classes. You examine the object type in more detail in subsequent chapters. The string Type C# recognizes the string keyword, which under the hood is translated 134
Download from finelybook www.finelybook.com
to the .NET class, System.String. With it, operations like string concatenation and string copying are a snap: string str1 = "Hello "; string str2 = "World"; string str3 = str1 + str2; // string concatenation
Despite this style of assignment, string is a reference type. Behind the scenes, a string object is allocated on the heap, not the stack; and when you assign one string variable to another string, you get two references to the same string in memory. However, string differs from the usual behavior for reference types. For example, strings are immutable. Making changes to one of these strings creates an entirely new string object, leaving the other string unchanged. Consider the following code (code file StringSample/Program.cs): using System; class Program { static void Main() { string s1 = "a string"; string s2 = s1; Console.WriteLine("s1 is Console.WriteLine("s2 is s1 = "another string"; Console.WriteLine("s1 is Console.WriteLine("s2 is } }
" + s1); " + s2); now " + s1); now " + s2);
The output from this is as follows: s1 s2 s1 s2
is is is is
a string a string now another string now a string
Changing the value of s1 has no effect on s2, contrary to what you’d expect with a reference type! What’s happening here is that when s1 is initialized with the value a string, a new string object is allocated on the heap. When s2 is initialized, the reference points to this same object, so s2 also has the value a string. However, when you now 135
Download from finelybook www.finelybook.com
change the value of s1, instead of replacing the original value, a new object is allocated on the heap for the new value. The s2 variable still points to the original object, so its value is unchanged. Under the hood, this happens as a result of operator overloading, a topic that is explored in Chapter 6. In general, the string class has been implemented so that its semantics follow what you would normally intuitively expect for a string. String literals are enclosed in double quotation marks ("."); if you attempt to enclose a string in single quotation marks, the compiler takes the value as a char and throws an error. C# strings can contain the same Unicode and hexadecimal escape sequences as chars. Because these escape sequences start with a backslash, you can’t use this character unescaped in a string. Instead, you need to escape it with two backslashes (\\): string filepath = "C:\\ProCSharp\\First.cs";
WARNING Be aware that using backslash (\) for directories and using C: restricts the application to the Windows operating system. Both Windows and Linux can use the forward slash (/) to separate directories. Chapter 22, “Files and Streams,” gives you details about how to work with files and directories both on Windows and Linux. Even if you are confident that you can remember to do this all the time, typing all those double backslashes can prove annoying. Fortunately, C# gives you an alternative. You can prefix a string literal with the at character (@) and all the characters after it are treated at face value; they aren’t interpreted as escape sequences: string filepath = @"C:\ProCSharp\First.cs";
This even enables you to include line breaks in your string literals: string jabberwocky = @"'Twas brillig and the slithy toves
136
Download from finelybook www.finelybook.com
Did gyre and gimble in the wabe.";
In this case, the value of jabberwocky would be this: 'Twas brillig and the slithy toves Did gyre and gimble in the wabe.
C# defines a string interpolation format that is marked by using the $ prefix. You’ve previously seen this prefix in the section “Working with Variables.” You can change the earlier code snippet that demonstrated string concatenation to use the string interpolation format. Prefixing a string with $ enables you to put curly braces into the string that contains a variable—or even a code expression. The result of the variable or code expression is put into the string at the position of the curly braces: public static void Main() { string s1 = "a string"; string s2 = s1; Console.WriteLine($"s1 is Console.WriteLine($"s2 is s1 = "another string"; Console.WriteLine($"s1 is Console.WriteLine($"s2 is }
{s1}"); {s2}"); now {s1}"); now {s2}");
NOTE Note Strings and the features of string interpolation are covered in detail in Chapter 9, “Strings and Regular Expressions.”
CONTROLLING PROGRAM FLOW This section looks at the real nuts and bolts of the language: the statements that allow you to control the flow of your program rather than execute every line of code in the order it appears in the program.
137
Download from finelybook www.finelybook.com
Conditional Statements Conditional statements enable you to branch your code depending on whether certain conditions are met or what the value of an expression is. C# has two constructs for branching code: the if statement, which tests whether a specific condition is met, and the switch statement, which compares an expression with several different values. The if Statement For conditional branching, C# inherits the C and C++ if.else construct. The syntax should be fairly intuitive for anyone who has done any programming with a procedural language: if (condition) statement(s) else statement(s)
If more than one statement is to be executed as part of either condition, these statements need to be joined into a block using curly braces ({.}). (This also applies to other C# constructs where statements can be joined into a block, such as the for and while loops): bool isZero; if (i == 0) { isZero = true; Console.WriteLine("i is Zero"); } else { isZero = false; Console.WriteLine("i is Non-zero"); }
If you want to, you can use an if statement without a final else statement. You can also combine else if clauses to test for multiple conditions (code file IfStatement/Program.cs): using System; namespace Wrox { class Program
138
Download from finelybook www.finelybook.com
{ static void Main() { Console.WriteLine("Type in a string"); string input; input = Console.ReadLine(); if (input == "") { Console.WriteLine("You typed in an empty string."); } else if (input.Length < 5) { Console.WriteLine("The string had less than 5 characters."); } else if (input.Length < 10) { Console.WriteLine( "The string had at least 5 but less than 10 Characters."); } Console.WriteLine("The string was " + input); } } }
There is no limit to how many else ifs you can add to an if clause. Note that the previous example declares a string variable called input, gets the user to enter text at the command line, feeds this into input, and then tests the length of this string variable. The code also shows how easy string manipulation can be in C#. To find the length of input, for example, use input.Length. Another point to note about the if statement is that you don’t need to use the braces when there’s only one statement in the conditional branch: if (i == 0) Console.WriteLine("i is Zero"); // This will only execute if i == 0 Console.WriteLine("i can be anything"); // Will execute whatever the // value of i
However, for consistency, many programmers prefer to use curly 139
Download from finelybook www.finelybook.com
braces whenever they use an if statement.
TIP Not using curly braces with if statements can lead to errors in maintaining the code. It happens too often that a second statement is added to the if statement that runs no matter whether the if returns true or false. Using curly braces every time avoids this coding error. A good guideline in regard to the if statement is to allow programmers to not use curly braces only when the statement is written in the same line as the if statement. With this guideline, programmers are less likely to add a second statement without adding curly braces. The if statements presented also illustrate some of the C# operators that compare values. Note in particular that C# uses == to compare variables for equality. Do not use = for this purpose. A single = is used to assign values. In C#, the expression in the if clause must evaluate to a Boolean. It is not possible to test an integer directly (returned from a function, for example). You have to convert the integer that is returned to a Boolean true or false, for example, by comparing the value with zero or null: if (DoSomething() != 0) { // Non-zero value returned } else { // Returned zero }
The switch Statement The switch / case statement is good for selecting one branch of execution from a set of mutually exclusive ones. It takes the form of a 140
Download from finelybook www.finelybook.com
argument followed by a series of case clauses. When the expression in the switch argument evaluates to one of the values beside a case clause, the code immediately following the case clause executes. This is one example for which you don’t need to use curly braces to join statements into blocks; instead, you mark the end of the code for each case using the break statement. You can also include a default case in the switch statement, which executes if the expression doesn’t evaluate to any of the other cases. The following switch statement tests the value of the integerA variable: switch
switch (integerA) { case 1: Console.WriteLine("integerA break; case 2: Console.WriteLine("integerA break; case 3: Console.WriteLine("integerA break; default: Console.WriteLine("integerA break; }
= 1");
= 2");
= 3");
is not 1, 2, or 3");
Note that the case values must be constant expressions; variables are not permitted. Though the switch.case statement should be familiar to C and C++ programmers, C#’s switch.case is a bit safer than its C++ equivalent. Specifically, it prohibits fall-through conditions in almost all cases. This means that if a case clause is fired early on in the block, later clauses cannot be fired unless you use a goto statement to indicate that you want them fired, too. The compiler enforces this restriction by flagging every case clause that is not equipped with a break statement as an error: Control cannot fall through from one case label ('case 2:') to another
Although it is true that fall-through behavior is desirable in a limited number of situations, in the vast majority of cases it is unintended and 141
Download from finelybook www.finelybook.com
results in a logical error that’s hard to spot. Isn’t it better to code for the norm rather than for the exception? By getting creative with goto statements, you can duplicate fallthrough functionality in your switch.cases. However, if you find yourself really wanting to, you probably should reconsider your approach. The following code illustrates both how to use goto to simulate fall-through, and how messy the resultant code can be: // assume country and language are of type string switch(country) { case "America": CallAmericanOnlyMethod(); goto case "Britain"; case "France": language = "French"; break; case "Britain": language = "English"; break; }
There is one exception to the no-fall-through rule, however, in that you can fall through from one case to the next if that case is empty. This allows you to treat two or more cases in an identical way (without the need for goto statements): switch(country) { case "au": case "uk": case "us": language = "English"; break; case "at": case "de": language = "German"; break; }
One intriguing point about the switch statement in C# is that the order of the cases doesn’t matter—you can even put the default case first! As a result, no two cases can be the same. This includes different 142
Download from finelybook www.finelybook.com
constants that have the same value, so you can’t, for example, do this: // assume country is of type string const string england = "uk"; const string britain = "uk"; switch(country) { case england: case britain: // This will cause a compilation error. language = "English"; break; }
The previous code also shows another way in which the switch statement is different in C# compared to C++: In C#, you are allowed to use a string as the variable being tested.
NOTE With C# 7, the switch statement has been enhanced with pattern matching. Using pattern matching, the ordering of the cases becomes important. Read Chapter 13, “Functional Programming with C#,” for more information about the switch statement using pattern matching.
Loops C# provides four different loops (for, while, do…while, and foreach) that enable you to execute a block of code repeatedly until a certain condition is met. The for Loop C# for loops provide a mechanism for iterating through a loop whereby you test whether a particular condition holds true before you perform another iteration. The syntax is where: The initializer is the expression evaluated before the first loop is 143
Download from finelybook www.finelybook.com
executed (usually initializing a local variable as a loop counter). The condition is the expression checked before each new iteration of the loop (this must evaluate to true for another iteration to be performed). The iterator is an expression evaluated after each iteration (usually incrementing the loop counter). The iterations end when the condition evaluates to false. The for loop is a so-called pretest loop because the loop condition is evaluated before the loop statements are executed; therefore, the contents of the loop won’t be executed at all if the loop condition is false. The for loop is excellent for repeating a statement or a block of statements for a predetermined number of times. The following example demonstrates typical usage of a for loop. It writes out all the integers from 0 to 99: for (int i = 0; i < 100; i = i + 1) { Console.WriteLine(i); }
Here, you declare an int called i and initialize it to zero. This is used as the loop counter. You then immediately test whether it is less than 100. Because this condition evaluates to true, you execute the code in the loop, displaying the value 0. You then increment the counter by one, and walk through the process again. Looping ends when i reaches 100. Actually, the way the preceding loop is written isn’t quite how you would normally write it. C# has a shorthand for adding 1 to a variable, so instead of i = i + 1, you can simply write i++: for (int i = 0; i < 100; i++) { // ... }
You can also make use of type inference for the iteration variable i in 144
Download from finelybook www.finelybook.com
the preceding example. Using type inference, the loop construct would be as follows: for (var i = 0; i < 100; i++) { // ... }
It’s not unusual to nest for loops so that an inner loop executes once completely for each iteration of an outer loop. This approach is typically employed to loop through every element in a rectangular multidimensional array. The outermost loop loops through every row, and the inner loop loops through every column in a particular row. The following code displays rows of numbers. It also uses another Console method, Console.Write, which does the same thing as Console.WriteLine but doesn’t send a carriage return to the output (code file ForLoop/Program.cs): using System; namespace Wrox { class Program { static void Main() { // This loop iterates through rows for (int i = 0; i < 100; i+=10) { // This loop iterates through columns for (int j = i; j < i + 10; j++) { Console.Write($" {j}"); } Console.WriteLine(); } } } }
Although j is an integer, it is automatically converted to a string so that the concatenation can take place. The preceding sample results in this output: 145
Download from finelybook www.finelybook.com
0 1 2 10 11 20 21 30 31 40 41 50 51 60 61 70 71 80 81 90 91
3 4 5 12 13 22 23 32 33 42 43 52 53 62 63 72 73 82 83 92 93
6 7 8 14 15 24 25 34 35 44 45 54 55 64 65 74 75 84 85 94 95
9 16 26 36 46 56 66 76 86 96
17 27 37 47 57 67 77 87 97
18 28 38 48 58 68 78 88 98
19 29 39 49 59 69 79 89 99
It is technically possible to evaluate something other than a counter variable in a for loop’s test condition, but it is certainly not typical. It is also possible to omit one (or even all) of the expressions in the for loop. In such situations, however, you should consider using the while loop. The while Loop Like the for loop, while is a pretest loop. The syntax is similar, but while loops take only one expression: while(condition) statement(s);
Unlike the for loop, the while loop is most often used to repeat a statement or a block of statements for a number of times that is not known before the loop begins. Usually, a statement inside the while loop’s body will set a Boolean flag to false on a certain iteration, triggering the end of the loop, as in the following example: bool condition = false; while (!condition) { // This loop spins until the condition is true. DoSomeWork(); condition = CheckCondition(); // assume CheckCondition() returns a bool }
The do…while Loop The do…while loop is the post-test version of the while loop. This means that the loop’s test condition is evaluated after the body of the 146
Download from finelybook www.finelybook.com
loop has been executed. Consequently, do…while loops are useful for situations in which a block of statements must be executed at least one time, as in this example: bool condition; do { // This loop will at least execute once, even if Condition is false. MustBeCalledAtLeastOnce(); condition = CheckCondition(); } while (condition);
The foreach Loop The foreach loop enables you to iterate through each item in a collection. For now, don’t worry about exactly what a collection is (it is explained fully in Chapter 10, “Collections”); just understand that it is an object that represents a list of objects. Technically, for an object to count as a collection, it must support an interface called IEnumerable. Examples of collections include C# arrays, the collection classes in the System.Collections namespaces, and user-defined collection classes. You can get an idea of the syntax of foreach from the following code, if you assume that arrayOfInts is (unsurprisingly) an array of ints: foreach (int temp in arrayOfInts) { Console.WriteLine(temp); }
Here, foreach steps through the array one element at a time. With each element, it places the value of the element in the int variable called temp and then performs an iteration of the loop. Here is another situation where you can use type inference. The foreach loop would become the following: foreach (var temp in arrayOfInts) { // ... } temp
would be inferred to int because that is what the collection item 147
Download from finelybook www.finelybook.com
type is. An important point to note with foreach is that you can’t change the value of the item in the collection (temp in the preceding code), so code such as the following will not compile: foreach (int temp in arrayOfInts) { temp++; Console.WriteLine(temp); }
If you need to iterate through the items in a collection and change their values, you must use a for loop instead.
Jump Statements C# provides a number of statements that enable you to jump immediately to another line in the program. The first of these is, of course, the notorious goto statement. The goto Statement The goto statement enables you to jump directly to another specified line in the program, indicated by a label (this is just an identifier followed by a colon): goto Label1; Console.WriteLine("This won't be executed"); Label1: Console.WriteLine("Continuing execution from here");
A couple of restrictions are involved with goto. You can’t jump into a block of code such as a for loop, you can’t jump out of a class, and you can’t exit a finally block after try…catch blocks (Chapter 14, “Errors and Exceptions,” looks at exception handling with try.catch.finally). The reputation of the goto statement probably precedes it, and in most circumstances, its use is sternly frowned upon. In general, it certainly doesn’t conform to good object-oriented programming practices. The break Statement 148
Download from finelybook www.finelybook.com
You have already met the break statement briefly—when you used it to exit from a case in a switch statement. In fact, break can also be used to exit from for, foreach, while, or do…while loops. Control switches to the statement immediately after the end of the loop. If the statement occurs in a nested loop, control switches to the end of the innermost loop. If the break occurs outside a switch statement or a loop, a compile-time error occurs. The continue Statement The continue statement is similar to break, and you must use it within a for, foreach, while, or do…while loop. However, it exits only from the current iteration of the loop, meaning that execution restarts at the beginning of the next iteration of the loop rather than restarting outside the loop altogether. The return Statement The return statement is used to exit a method of a class, returning control to the caller of the method. If the method has a return type, return must return a value of this type; otherwise, if the method returns void, you should use return without an expression.
GETTING ORGANIZED WITH NAMESPACES As discussed earlier in this chapter, namespaces provide a way to organize related classes and other types. Unlike a file or a component, a namespace is a logical, rather than a physical, grouping. When you define a class in a C# file, you can include it within a namespace definition. Later, when you define another class that performs related work in another file, you can include it within the same namespace, creating a logical grouping that indicates to other developers using the classes how they are related and used: using System; namespace CustomerPhoneBookApp { public struct Subscriber { // Code for struct here..
149
Download from finelybook www.finelybook.com
} }
Placing a type in a namespace effectively gives that type a long name, consisting of the type’s namespace as a series of names separated with periods (.), terminating with the name of the class. In the preceding example, the full name of the Subscriber struct is CustomerPhoneBookApp.Subscriber. This enables distinct classes with the same short name to be used within the same program without ambiguity. This full name is often called the fully qualified name. You can also nest namespaces within other namespaces, creating a hierarchical structure for your types: namespace Wrox { namespace ProCSharp { namespace Basics { class NamespaceExample { // Code for the class here.. } } } }
Each namespace name is composed of the names of the namespaces it resides within, separated with periods, starting with the outermost namespace and ending with its own short name. Therefore, the full name for the ProCSharp namespace is Wrox.ProCSharp, and the full name of the NamespaceExample class is Wrox.ProCSharp.Basics.NamespaceExample. You can use this syntax to organize the namespaces in your namespace definitions too, so the previous code could also be written as follows: namespace Wrox.ProCSharp.Basics { class NamespaceExample { // Code for the class here.. }
150
Download from finelybook www.finelybook.com
}
Note that you are not permitted to declare a multipart namespace nested within another namespace. Namespaces are not related to assemblies. It is perfectly acceptable to have different namespaces in the same assembly or to define types in the same namespace in different assemblies. You should define the namespace hierarchy prior to starting a project. Generally the accepted format is CompanyName.ProjectName.SystemSection. In the previous example, Wrox is the company name, ProCSharp is the project, and in the case of this chapter, Basics is the section.
The using Directive Obviously, namespaces can grow rather long and tiresome to type, and the capability to indicate a particular class with such specificity may not always be necessary. Fortunately, as noted earlier in this chapter, C# allows you to abbreviate a class’s full name. To do this, list the class’s namespace at the top of the file, prefixed with the using keyword. Throughout the rest of the file, you can refer to the types in the namespace simply by their type names: using System; using Wrox.ProCSharp;
As mentioned earlier, many C# files have the statement using System; simply because so many useful classes supplied by Microsoft are contained in the System namespace. If two namespaces referenced by using statements contain a type of the same name, you need to use the full (or at least a longer) form of the name to ensure that the compiler knows which type to access. For example, suppose classes called NamespaceExample exist in both the Wrox.ProCSharp.Basics and Wrox.ProCSharp.OOP namespaces. If you then create a class called Test in the Wrox.ProCSharp namespace, and instantiate one of the NamespaceExample classes in this class, you need to specify which of these two classes you’re talking about: 151
Download from finelybook www.finelybook.com
using Wrox.ProCSharp.OOP; using Wrox.ProCSharp.Basics; namespace Wrox.ProCSharp { class Test { static void Main() { Basics.NamespaceExample nSEx = new Basics.NamespaceExample(); // do something with the nSEx variable. } } }
Your organization will probably want to spend some time developing a namespace convention so that its developers can quickly locate functionality that they need and so that the names of the organization’s homegrown classes won’t conflict with those in off-theshelf class libraries. Guidelines on establishing your own namespace convention, along with other naming recommendations, are discussed later in this chapter.
Namespace Aliases Another use of the using keyword is to assign aliases to classes and namespaces. If you need to refer to a very long namespace name several times in your code but don’t want to include it in a simple using statement (for example, to avoid type name conflicts), you can assign an alias to the namespace. The syntax for this is as follows: using alias = NamespaceName;
The following example (a modified version of the previous example) assigns the alias Introduction to the Wrox.ProCSharp.Basics namespace and uses this to instantiate a NamespaceExample object, which is defined in this namespace. Notice the use of the namespace alias qualifier (::). This forces the search to start with the Introduction namespace alias. If a class called Introduction had been introduced in the same scope, a conflict would occur. The :: operator enables the alias to be referenced even if the conflict exists. The NamespaceExample class has one method, GetNamespace, which uses the 152
Download from finelybook www.finelybook.com
method exposed by every class to access a Type object representing the class’s type. You use this object to return a name of the class’s namespace (code file NamespaceSample/Program.cs): GetType
using System; using Introduction = Wrox.ProCSharp.Basics; class Program { static void Main() { Introduction::NamespaceExample NSEx = new Introduction::NamespaceExample(); Console.WriteLine(NSEx.GetNamespace()); } } namespace Wrox.ProCSharp.Basics { class NamespaceExample { public string GetNamespace() { return this.GetType().Namespace; } } }
UNDERSTANDING THE MAIN METHOD As described at the beginning of this chapter, C# programs start execution at a method named Main. Depending on the execution environment there are different requirements. Have a static modifier applied Be in a class with any name Return a type of int or void Although it is common to specify the public modifier explicitly— because by definition the method must be called from outside the program—it doesn’t actually matter what accessibility level you assign to the entry-point method; it will run even if you mark the method as private. 153
Download from finelybook www.finelybook.com
The examples so far have shown only the Main method without any parameters. However, when the program is invoked, you can get the CLR to pass any command-line arguments to the program by including a parameter. This parameter is a string array, traditionally called args (although C# accepts any name). The program can use this array to access any options passed through the command line when the program is started. The following example loops through the string array passed in to the Main method and writes the value of each option to the console window (code file ArgumentsSample/Program.cs): using System; namespace Wrox { class Program { static void Main(string[] args) { for (int i = 0; i < args.Length; i++) { Console.WriteLine(args[i]); } } } }
For passing arguments to the program when running the application from Visual Studio 2017, you can define the arguments in the Debug section of the project properties as shown in Figure 2-1. Running the application reveals the result to show all argument values to the console.
154
Download from finelybook www.finelybook.com
FIGURE 2-1 When you run the application from the command line using the .NET Core CLI tools, you just need to supply the arguments following the dotnet run command: dotnet run arg1 arg2 arg3
In case you want to supply arguments that are in conflict with the arguments of the dotnet run command, you can add two dashes (--) before supplying the arguments of the program: dotnet run -- arg1 arg2 arg3
USING COMMENTS The next topic—adding comments to your code—looks very simple on the surface, but it can be complex. Comments can be beneficial to other developers who may look at your code. Also, as you will see, you can use comments to generate documentation of your code for other developers to use.
155
Download from finelybook www.finelybook.com
Internal Comments Within the Source Files As noted earlier in this chapter, C# uses the traditional C-type singleline (//..) and multiline (/* .. */) comments: // This is a single-line comment /* This comment spans multiple lines. */
Everything in a single-line comment, from the // to the end of the line, is ignored by the compiler, and everything from an opening /* to the next */ in a multiline comment combination is ignored. Obviously, you can’t include the combination */ in any multiline comments, because this will be treated as the end of the comment. It is possible to put multiline comments within a line of code: Console.WriteLine(/* Here's a comment! */ "This will compile.");
Use inline comments with care because they can make code hard to read. However, they can be useful when debugging if, for example, you temporarily want to try running the code with a different value somewhere: DoSomething(Width, /*Height*/ 100);
Comment characters included in string literals are, of course, treated like normal characters: string s = "/* This is just a normal string .*/";
XML Documentation In addition to the C-type comments, illustrated in the preceding section, C# has a very neat feature: the capability to produce documentation in XML format automatically from special comments. These comments are single-line comments, but they begin with three slashes (///) instead of the usual two. Within these comments, you can place XML tags containing documentation of the types and type members in your code.
156
Download from finelybook www.finelybook.com
The tags in the following table are recognized by the compiler. TAG
DESCRIPTION Marks up text within a line as code—for example, int i = 10;. Marks multiple lines as code. Marks up a code example. Documents an exception class. (Syntax is verified by the compiler.) Includes comments from another documentation file. (Syntax is verified by the compiler.) Inserts a list into the documentation. Gives structure to text. Marks up a method parameter. (Syntax is verified by the compiler.) Indicates that a word is a method parameter. (Syntax is verified by the compiler.) Documents access to a member. (Syntax is verified by the compiler.) Adds a description for a member. Documents the return value for a method. Provides a cross-reference to another parameter. (Syntax is verified by the compiler.) Provides a “see also” section in a description. (Syntax is verified by the compiler.) Provides a short summary of a type or member. Describes a type parameter in the comment of a generic type. Provides the name of the type parameter. Describes a property. Add some XML comments to the Calculator.cs file from the previous 157
Download from finelybook www.finelybook.com
section. You add a element for the class and for its Add method, and a element and two elements for the Add method: // MathLib.cs namespace Wrox.MathLib { /// /// Wrox.MathLib.Calculator class. /// Provides a method to add two doublies. /// public class Calculator { /// /// The Add method allows us to add two doubles. /// ///Result of the addition (double) ///First number to add ///Second number to add public static double Add(double x, double y) => x + y; } }
UNDERSTANDING C# PREPROCESSOR DIRECTIVES Besides the usual keywords, most of which you have now encountered, C# also includes a number of commands that are known as preprocessor directives. These commands are never actually translated to any commands in your executable code, but they affect aspects of the compilation process. For example, you can use preprocessor directives to prevent the compiler from compiling certain portions of your code. You might do this if you are planning to release two versions of it—a basic version and an enterprise version that will have more features. You could use preprocessor directives to prevent the compiler from compiling code related to the additional features when you are compiling the basic version of the software. In another scenario, you might have written bits of code that are intended to provide you with debugging information. You probably don’t want those portions of code compiled when you actually ship the software. The preprocessor directives are all distinguished by beginning with the 158
Download from finelybook www.finelybook.com
#
symbol.
NOTE C++ developers will recognize the preprocessor directives as something that plays an important part in C and C++. However, there aren’t as many preprocessor directives in C#, and they are not used as often. C# provides other mechanisms, such as custom attributes, that achieve some of the same effects as C++ directives. Also, note that C# doesn’t actually have a separate preprocessor in the way that C++ does. The so-called preprocessor directives are actually handled by the compiler. Nevertheless, C# retains the name preprocessor directive because these commands give the impression of a preprocessor. The following sections briefly cover the purposes of the preprocessor directives.
#define and #undef #define
is used like this:
#define DEBUG
This tells the compiler that a symbol with the given name (in this case DEBUG) exists. It is a little bit like declaring a variable, except that this variable doesn’t really have a value—it just exists. Also, this symbol isn’t part of your actual code; it exists only for the benefit of the compiler, while the compiler is compiling the code, and has no meaning within the C# code itself. #undef
does the opposite, and removes the definition of a symbol:
#undef DEBUG
If the symbol doesn’t exist in the first place, then #undef has no effect. Similarly, #define has no effect if a symbol already exists.
159
Download from finelybook www.finelybook.com
You need to place any #define and #undef directives at the beginning of the C# source file, before any code that declares any objects to be compiled. isn’t much use on its own, but when combined with other preprocessor directives, especially #if, it becomes very powerful. #define
NOTE Incidentally, you might notice some changes from the usual C# syntax. Preprocessor directives are not terminated by semicolons and they normally constitute the only command on a line. That’s because for the preprocessor directives, C# abandons its usual practice of requiring commands to be separated by semicolons. If the compiler sees a preprocessor directive, it assumes that the next command is on the next line.
#if, #elif, #else, and #endif These directives inform the compiler whether to compile a block of code. Consider this method: int DoSomeWork(double x) { // do something #if DEBUG Console.WriteLine($"x is {x}"); #endif }
This code compiles as normal except for the Console.WriteLine method call contained inside the #if clause. This line is executed only if the symbol DEBUG has been defined by a previous #define directive. When the compiler finds the #if directive, it checks to see whether the symbol concerned exists, and compiles the code inside the #if clause only if the symbol does exist. Otherwise, the compiler simply ignores all the code until it reaches the matching #endif directive. Typical practice is to define the symbol DEBUG while you are debugging and 160
Download from finelybook www.finelybook.com
have various bits of debugging-related code inside #if clauses. Then, when you are close to shipping, you simply comment out the #define directive, and all the debugging code miraculously disappears, the size of the executable file gets smaller, and your end users don’t get confused by seeing debugging information. (Obviously, you would do more testing to ensure that your code still works without DEBUG defined.) This technique is very common in C and C++ programming and is known as conditional compilation. The #elif (=else if) and #else directives can be used in #if blocks and have intuitively obvious meanings. It is also possible to nest #if blocks: #define ENTERPRISE #define W10 // further on in the file #if ENTERPRISE // do something #if W10 // some code that is only relevant to enterprise // edition running on W10 #endif #elif PROFESSIONAL // do something else #else // code for the leaner version #endif
and #elif support a limited range of logical operators too, using the operators !, ==, !=, and ||. A symbol is considered to be true if it exists and false if it doesn’t. For example: #if
#if W10 && (ENTERPRISE==false) // if W10 is defined but ENTERPRISE isn't
#warning and #error Two other very useful preprocessor directives are #warning and #error. These will respectively cause a warning or an error to be raised when the compiler encounters them. If the compiler sees a #warning directive, it displays whatever text appears after the #warning to the user, after which compilation continues. If it encounters an #error 161
Download from finelybook www.finelybook.com
directive, it displays the subsequent text to the user as if it is a compilation error message and then immediately abandons the compilation, so no IL code is generated. You can use these directives as checks that you haven’t done anything silly with your #define statements; you can also use the #warning statements to remind yourself to do something: #if DEBUG && RELEASE #error "You've defined DEBUG and RELEASE simultaneously!" #endif #warning "Don't forget to remove this line before the boss tests the code!" Console.WriteLine("*I love this job.*");
#region and #endregion The #region and #endregion directives are used to indicate that a certain block of code is to be treated as a single block with a given name, like this: #region Member Field Declarations int x; double d; Currency balance; #endregion
This doesn’t look that useful by itself; it doesn’t affect the compilation process in any way. However, the real advantage is that these directives are recognized by some editors, including the Visual Studio editor. These editors can use the directives to lay out your code better on the screen. You find out how this works in Chapter 18, “Visual Studio 2017.”
#line The #line directive can be used to alter the filename and line number information that is output by the compiler in warnings and error messages. You probably won’t want to use this directive very often. It’s most useful when you are coding in conjunction with another package that alters the code you are typing before sending it to the compiler. In 162
Download from finelybook www.finelybook.com
this situation, line numbers, or perhaps the filenames reported by the compiler, don’t match up to the line numbers in the files or the filenames you are editing. The #line directive can be used to restore the match. You can also use the syntax #line default to restore the line to the default line numbering: #line 164 "Core.cs" // We happen to know this is line 164 in the file // Core.cs, before the intermediate // package mangles it. // later on #line default // restores default line numbering
#pragma The #pragma directive can either suppress or restore specific compiler warnings. Unlike command-line options, the #pragma directive can be implemented on the class or method level, enabling fine-grained control over what warnings are suppressed and when. The following example disables the “field not used” warning and then restores it after the MyClass class compiles: #pragma warning disable 169 public class MyClass { int neverUsedField; } #pragma warning restore 169
C# PROGRAMMING GUIDELINES This final section of the chapter supplies the guidelines you need to bear in mind when writing C# programs. These are guidelines that most C# developers use. When you use these guidelines, other developers will feel comfortable working with your code.
Rules for Identifiers This section examines the rules governing what names you can use for variables, classes, methods, and so on. Note that the rules presented in this section are not merely guidelines: they are enforced by the C# 163
Download from finelybook www.finelybook.com
compiler. Identifiers are the names you give to variables, to user-defined types such as classes and structs, and to members of these types. Identifiers are case sensitive, so, for example, variables named interestRate and InterestRate would be recognized as different variables. Following are a few rules determining what identifiers you can use in C#: They must begin with a letter or underscore, although they can contain numeric characters. You can’t use C# keywords as identifiers. The following table lists reserved C# keywords. abstract
as
base
bool
break
byte
case
catch
char
checked
class
const
continue
decimal
default
delegate
do
double
else
enum
event
explicit
extern
false
finally
fixed
float
for
foreach
goto
if
implicit
in
int
interface internal
is
lock
long
namespace
new
null
object
operator
out
override
params
private
protected public
readonly
ref
return
sbyte
sealed
short
sizeof
stackalloc static
string
struct
switch
this
throw
true
try
typeof
uint
ulong
unchecked
unsafe
ushort
using
virtual
void
volatile
while
If you need to use one of these words as an identifier (for example, if you are accessing a class written in a different language), you can 164
Download from finelybook www.finelybook.com
prefix the identifier with the @ symbol to indicate to the compiler that what follows should be treated as an identifier, not as a C# keyword (so abstract is not a valid identifier, but @abstract is). Finally, identifiers can also contain Unicode characters, specified using the syntax \uXXXX, where XXXX is the four-digit hex code for the Unicode character. The following are some examples of valid identifiers: Name Überfluß _Identifier \u005fIdentifier
The last two items in this list are identical and interchangeable (because 005f is the Unicode code for the underscore character), so obviously these identifiers couldn’t both be declared in the same scope. Note that although syntactically you are allowed to use the underscore character in identifiers, this isn’t recommended in most situations. That’s because it doesn’t follow the guidelines for naming variables that Microsoft has written to ensure that developers use the same conventions, making it easier to read one another’s code.
NOTE You might wonder why some newer keywords added with the recent versions of C# are not in the list of reserved keywords. The reason is that if they had been added to the list of reserved keywords, it would have broken existing code that already made use of the new C# keywords. The solution was to enhance the syntax by defining these keywords as contextual keywords; they can be used only in some specific code places. For example, the async keyword can be used only with a method declaration, and it is okay to use it as a variable name. The compiler doesn’t have a conflict with that.
165
Download from finelybook www.finelybook.com
Usage Conventions In any development language, certain traditional programming styles usually arise. The styles are not part of the language itself but rather are conventions—for example, how variables are named or how certain classes, methods, or functions are used. If most developers using that language follow the same conventions, it makes it easier for different developers to understand each other’s code—which in turn generally helps program maintainability. Conventions do, however, depend on the language and the environment. For example, C++ developers programming on the Windows platform have traditionally used the prefixes psz or lpsz to indicate strings—char *pszResult; char *lpszMessage;—but on Unix machines it’s more common not to use any such prefixes: char *Result; char *Message;. Notice from the sample code in this book that the convention in C# is to name local variables without prefixes: string result; string message;.
NOTE The convention by which variable names are prefixed with letters that represent the data type is known as Hungarian notation. It means that other developers reading the code can immediately tell from the variable name what data type the variable represents. Hungarian notation is widely regarded as redundant in these days of smart editors and IntelliSense. Whereas many languages’ usage conventions simply evolved as the language was used, for C# and the whole of the .NET Framework, Microsoft has written very comprehensive usage guidelines, which are detailed in the .NET/C# documentation. This means that, right from the start, .NET programs have a high degree of interoperability in terms of developers being able to understand code. The guidelines have also been developed with the benefit of some 20 years’ hindsight in object-oriented programming. Judging by the relevant newsgroups, 166
Download from finelybook www.finelybook.com
the guidelines have been carefully thought out and are well received in the developer community. Hence, the guidelines are well worth following. Note, however, that the guidelines are not the same as language specifications. You should try to follow the guidelines when you can. Nevertheless, you won’t run into problems if you have a good reason for not doing so—for example, you won’t get a compilation error because you don’t follow these guidelines. The general rule is that if you don’t follow the usage guidelines, you must have a convincing reason. When you depart from the guidelines you should be making a conscious decision rather than simply not bothering. Also, if you compare the guidelines with the samples in the remainder of this book, you’ll notice that in numerous examples I have chosen not to follow the conventions. That’s usually because the conventions are designed for much larger programs than the samples; although the guidelines are great if you are writing a complete software package, they are not really suitable for small 20-line standalone programs. In many cases, following the conventions would have made the samples harder, rather than easier, to follow. The full guidelines for good programming style are quite extensive. This section is confined to describing some of the more important guidelines, as well as those most likely to surprise you. To be absolutely certain that your code follows the usage guidelines completely, you need to refer to the Microsoft documentation.
Naming Conventions One important aspect of making your programs understandable is how you choose to name your items—and that includes naming variables, methods, classes, enumerations, and namespaces. It is intuitively obvious that your names should reflect the purpose of the item and should not clash with other names. The general philosophy in the .NET Framework is also that the name of a variable should reflect the purpose of that variable instance and not the data type. For example, height is a good name for a variable, whereas integerValue isn’t. However, you are likely to find that principle is an 167
Download from finelybook www.finelybook.com
ideal that is hard to achieve. Particularly when you are dealing with controls, in most cases you’ll probably be happier sticking with variable names such as confirmationDialog and chooseEmployeeListBox, which do indicate the data type in the name. The following sections look at some of the things you need to think about when choosing names. Casing of Names In many cases you should use Pascal casing for names. With Pascal casing, the first letter of each word in a name is capitalized: EmployeeSalary, ConfirmationDialog, PlainTextEncoding. Notice that nearly all the names of namespaces, classes, and members in the base classes follow Pascal casing. In particular, the convention of joining words using the underscore character is discouraged. Therefore, try not to use names such as employee_salary. It has also been common in other languages to use all capitals for names of constants. This is not advised in C# because such names are harder to read—the convention is to use Pascal casing throughout: const int MaximumLength;
The only other casing convention that you are advised to use is camel casing. Camel casing is similar to Pascal casing, except that the first letter of the first word in the name is not capitalized: employeeSalary, confirmationDialog, plainTextEncoding. Following are three situations in which you are advised to use camel casing: For names of all private member fields in types: Note, however, that often it is conventional to prefix names of member fields with an underscore: For names of all parameters passed to methods To distinguish items that would otherwise have the same name. A common example is when a property wraps around a field: private string employeeName; public string EmployeeName { get
168
Download from finelybook www.finelybook.com
{ return employeeName; } }
If you are wrapping a property around a field, you should always use camel casing for the private member and Pascal casing for the public or protected member, so that other classes that use your code see only names in Pascal case (except for parameter names). You should also be wary about case sensitivity. C# is case sensitive, so it is syntactically correct for names in C# to differ only by the case, as in the previous examples. However, bear in mind that your assemblies might at some point be called from Visual Basic applications—and Visual Basic is not case sensitive. Hence, if you do use names that differ only by case, it is important to do so only in situations in which both names will never be seen outside your assembly. (The previous example qualifies as okay because camel case is used with the name that is attached to a private variable.) Otherwise, you may prevent other code written in Visual Basic from being able to use your assembly correctly. Name Styles Be consistent about your style of names. For example, if one of the methods in a class is called ShowConfirmationDialog, then you should not give another method a name such as ShowDialogWarning or WarningDialogShow. The other method should be called ShowWarningDialog. Namespace Names It is particularly important to choose Namespace names carefully to avoid the risk of ending up with the same name for one of your namespaces as someone else uses. Remember, namespace names are the only way that .NET distinguishes names of objects in shared assemblies. Therefore, if you use the same namespace name for your software package as another package, and both packages are used by the same program, problems will occur. Because of this, it’s almost always a good idea to create a top-level namespace with the name of 169
Download from finelybook www.finelybook.com
your company and then nest successive namespaces that narrow down the technology, group, or department you are working in or the name of the package for which your classes are intended. Microsoft recommends namespace names that begin with . , as in these two examples: WeaponsOfDestructionCorp.RayGunControllers WeaponsOfDestructionCorp.Viruses
Names and Keywords It is important that the names do not clash with any keywords. In fact, if you attempt to name an item in your code with a word that happens to be a C# keyword, you’ll almost certainly get a syntax error because the compiler will assume that the name refers to a statement. However, because of the possibility that your classes will be accessed by code written in other languages, it is also important that you don’t use names that are keywords in other .NET languages. Generally speaking, C++ keywords are similar to C# keywords, so confusion with C++ is unlikely, and those commonly encountered keywords that are unique to Visual C++ tend to start with two underscore characters. As with C#, C++ keywords are spelled in lowercase, so if you hold to the convention of naming your public classes and members with Pascalstyle names, they will always have at least one uppercase letter in their names, and there will be no risk of clashes with C++ keywords. However, you are more likely to have problems with Visual Basic, which has many more keywords than C# does, and being non-casesensitive means that you cannot rely on Pascal-style names for your classes and methods. Check the Microsoft documentation at https://docs.microsoft.com/dotnet/csharp/languagereference/keywords. Here, you find a long list of C# keywords
that you
shouldn’t use with classes and members.
Use of Properties and Methods One area that can cause confusion regarding a class is whether a particular quantity should be represented by a property or a method. The rules are not hard and strict, but in general you should use a 170
Download from finelybook www.finelybook.com
property if something should look and behave like a variable. (If you’re not sure what a property is, see Chapter 3.) This means, among other things, that Client code should be able to read its value. Write-only properties are not recommended, so, for example, use a SetPassword method, not a write-only Password property. Reading the value should not take too long. The fact that something is a property usually suggests that reading it will be relatively quick. Reading the value should not have any observable and unexpected side effect. Furthermore, setting the value of a property should not have any side effect that is not directly related to the property. Setting the width of a dialog has the obvious effect of changing the appearance of the dialog on the screen. That’s fine, because that’s obviously related to the property in question. It should be possible to set properties in any order. In particular, it is not good practice when setting a property to throw an exception because another related property has not yet been set. For example, to use a class that accesses a database, you need to set ConnectionString, UserName, and Password, and then the author of the class should ensure that the class is implemented such that users can set them in any order. Successive reads of a property should give the same result. If the value of a property is likely to change unpredictably, you should code it as a method instead. Speed, in a class that monitors the motion of an automobile, is not a good candidate for a property. Use a GetSpeed method here; but Weight and EngineSize are good candidates for properties because they will not change for a given object. If the item you are coding satisfies all the preceding criteria, it is probably a good candidate for a property. Otherwise, you should use a method.
Use of Fields 171
Download from finelybook www.finelybook.com
The guidelines are pretty simple here. Fields should almost always be private, although in some cases it may be acceptable for constant or read-only fields to be public. Making a field public may hinder your ability to extend or modify the class in the future. The previous guidelines should give you a foundation of good practices, and you should use them in conjunction with a good objectoriented programming style. A final helpful note to keep in mind is that Microsoft has been relatively careful about being consistent and has followed its own guidelines when writing the .NET base classes, so a very good way to get an intuitive feel for the conventions to follow when writing .NET code is to simply look at the base classes—see how classes, members, and namespaces are named, and how the class hierarchy works. Consistency between the base classes and your classes will facilitate readability and maintainability.
NOTE The new ValueTuple type contains public fields, whereas the old Tuple type instead used properties. Microsoft broke one of its own guidelines that’s been defined for fields. Because variables of a tuple can be as simple as a variable of an int, and performance is paramount, it was decided to have public fields for value tuples. It just goes to show that there are no rules without exceptions. Read Chapter 13 for more information on tuples.
SUMMARY This chapter examined some of the basic syntax of C#, covering the areas needed to write simple C# programs. We covered a lot of ground, but much of it will be instantly recognizable to developers who are familiar with any C-style language (or even JavaScript). You have seen that although C# syntax is similar to C++ and Java syntax, there are many minor differences. You have also seen that in 172
Download from finelybook www.finelybook.com
many areas this syntax is combined with facilities to write code very quickly—for example, high-quality string handling facilities. C# also has a strongly defined type system, based on a distinction between value and reference types. Chapters 3 and 4 cover the C# objectoriented programming features.
173
Download from finelybook www.finelybook.com
3 Objects and Types WHAT’S IN THIS CHAPTER? The differences between classes and structs Class members Expression-bodied members Passing values by value and by reference Method overloading Constructors and static constructors Read-only fields Enumerations Partial classes Static classes The Object class, from which all other types are derived
WROX.COM CODE DOWNLOADS FOR THIS CHAPTER The wrox.com code downloads for this chapter are found at www.wrox.com on the Download Code tab. The source code is also available at https://github.com/ProfessionalCSharp/ProfessionalCSharp7 in the directory ObjectsAndTypes. 174
Download from finelybook www.finelybook.com
The code for this chapter is divided into the following major examples: MathSample MethodSample StaticConstructorSample StructsSample PassingByValueAndByReference OutKeywordSample EnumSample ExtensionMethods
CREATING AND USING CLASSES So far, you’ve been introduced to some of the building blocks of the C# language, including variables, data types, and program flow statements, and you have seen a few very short complete programs containing little more than the Main method. What you haven’t seen yet is how to put all these elements together to form a longer, complete program. The key to this lies in working with classes—the subject of this chapter. Chapter 4, “Object-Oriented Programming with C#,” covers inheritance and features related to inheritance.
NOTE This chapter introduces the basic syntax associated with classes. However, we assume that you are already familiar with the underlying principles of using classes—for example, that you know what a constructor or a property is. This chapter is largely confined to applying those principles in C# code.
CLASSES AND STRUCTS 175
Download from finelybook www.finelybook.com
Classes and structs are essentially templates from which you can create objects. Each object contains data and has methods to manipulate and access that data. The class defines what data and behavior each particular object (called an instance) of that class can contain. For example, if you have a class that represents a customer, it might define fields such as CustomerID, FirstName, LastName, and Address, which are used to hold information about a particular customer. It might also define functionality that acts upon the data stored in these fields. You can then instantiate an object of this class to represent one specific customer, set the field values for that instance, and use its functionality: class PhoneCustomer { public const string DayOfSendingBill = "Monday"; public int CustomerID; public string FirstName; public string LastName; }
Structs differ from classes because they do not need to be allocated on the heap (classes are reference types and are always allocated on the heap). Structs are value types and are usually stored on the stack. Also, structs cannot derive from a base struct. You typically use structs for smaller data types for performance reasons. Storing value types on the stack avoids garbage collection. Another use case of structs are interop with native code; the layout of the struct can look the same as native data types. In terms of syntax, however, structs look very similar to classes; the main difference is that you use the keyword struct instead of class to declare them. For example, if you wanted all PhoneCustomer instances to be allocated on the stack instead of the managed heap, you could write the following: struct PhoneCustomerStruct { public const string DayOfSendingBill = "Monday"; public int CustomerID; public string FirstName; public string LastName;
176
Download from finelybook www.finelybook.com
}
For both classes and structs, you use the keyword new to declare an instance. This keyword creates the object and initializes it; in the following example, the default behavior is to zero out its fields: var myCustomer = new PhoneCustomer(); // works for a class var myCustomer2 = new PhoneCustomerStruct();// works for a struct
In most cases, you use classes much more often than structs. Therefore, this chapter covers classes first and then the differences between classes and structs and the specific reasons why you might choose to use a struct instead of a class. Unless otherwise stated, however, you can assume that code presented for a class works equally well for a struct.
NOTE An important difference between classes and structs is that objects of type of class are passed by reference, and objects of type of a struct are passed by value. This is explained later in this chapter in the section “Passing Parameters by Value and by Reference.”
CLASSES A class contains members, which can be static or instance members. A static member belongs to the class; an instance member belongs to the object. With static fields, the value of the field is the same for every object. With instance fields, every object can have a different value. Static members have the static modifier attached. The kind of members are explained in the following table. MEMBER Fields
DESCRIPTION A field is a data member of a class. It is a variable of a 177
Download from finelybook www.finelybook.com
type that is a member of a class. Constants
Constants are associated with the class (although they do not have the static modifier). The compiler replaces constants everywhere they are used with the real value. Methods Methods are functions associated with a particular class. Properties Properties are sets of functions that can be accessed from the client in a similar way to the public fields of the class. C# provides a specific syntax for implementing read and write properties on your classes, so you don’t have to use method names that are prefixed with the words Get or Set. Because there’s a dedicated syntax for properties that is distinct from that for normal functions, the illusion of objects as actual things is strengthened for client code. Constructors Constructors are special functions that are called automatically when an object is instantiated. They must have the same name as the class to which they belong and cannot have a return type. Constructors are useful for initialization. Indexers Indexers allow your object to be accessed the same way as arrays. Indexers are explained in 6, “Operators and Casts.” Operators Operators, at their simplest, are actions such as + or –. When you add two integers, you are, strictly speaking, using the + operator for integers. C# also allows you to specify how existing operators will work with your own classes (operator overloading). Chapter 6 looks at operators in detail. Events Events are class members that allow an object to notify a subscriber whenever something noteworthy happens, such as a field or property of the class changing, or some form of user interaction occurring. The client can have code, known as an event handler, that reacts to the event. Chapter 8, “Delegates, Lambdas, and Events,” 178
Download from finelybook www.finelybook.com
looks at events in detail. Destructors The syntax of destructors or finalizers is similar to the syntax for constructors, but they are called when the CLR detects that an object is no longer needed. They have the same name as the class, preceded by a tilde (~). It is impossible to predict precisely when a finalizer will be called. Finalizers are discussed in Chapter 17, “Managed and Unmanaged Memory.” Types Classes can contain inner classes. This is interesting if the inner type is only used in conjunction with the outer type. Let’s get into the details of class members.
Fields Fields are any variables associated with the class. You have already seen fields in use in the PhoneCustomer class in the previous example. After you have instantiated a PhoneCustomer object, you can then access these fields using the object.FieldName syntax, as shown in this example: var customer1 = new PhoneCustomer(); customer1.FirstName = "Simon";
Constants can be associated with classes in the same way as variables. You declare a constant using the const keyword. If it is declared as public, then it is accessible from outside the class: class PhoneCustomer { public const string DayOfSendingBill = "Monday"; public int CustomerID; public string FirstName; public string LastName; }
Readonly Fields To guarantee that fields of an object cannot be changed, you can 179
Download from finelybook www.finelybook.com
declare fields with the readonly modifier. Fields with the readonly modifier can be assigned only values from constructors, which is different from the const modifier. With the const modifier, the compiler replaces the variable with its value everywhere it is used. The compiler already knows the value of the constant. Read-only fields are assigned during runtime from a constructor. Unlike const fields, readonly fields can be instance members. For using a read-only field as a class member, the static modifier needs to be assigned to the field. Suppose that you have a program that edits documents, and for licensing reasons you want to restrict the number of documents that can be opened simultaneously. Assume also that you are selling different versions of the software, and it’s possible for customers to upgrade their licenses to open more documents simultaneously. Clearly, this means you can’t hard-code the maximum number in the source code. You would probably need a field to represent this maximum number. This field has to be read in—perhaps from some file storage—each time the program is launched. Therefore, your code might look something like this: public class DocumentEditor { private static readonly uint s_maxDocuments; static DocumentEditor() { s_maxDocuments = DoSomethingToFindOutMaxNumber(); } }
In this case, the field is static because the maximum number of documents needs to be stored only once per running instance of the program. This is why the field is initialized in the static constructor. If you had an instance readonly field, you would initialize it in the instance constructor(s). For example, presumably each document you edit has a creation date, which you wouldn’t want to allow the user to change (because that would be rewriting the past!). As noted earlier, the date is represented by the class System.DateTime. The following code initializes the _creationTime field in the constructor using the DateTime struct. After initialization of the Document class, the creation time cannot be changed anymore: 180
Download from finelybook www.finelybook.com
public class Document { private readonly DateTime _creationTime; public Document() { _creationTime = DateTime.Now; } }
and s_maxDocuments in the previous code snippets are treated like any other fields, except that they are read-only, which means they can’t be assigned outside the constructors: _creationDate
void SomeMethod() { s_maxDocuments = 10; // compilation error here. MaxDocuments is readonly }
It’s also worth noting that you don’t have to assign a value to a readonly field in a constructor. If you don’t assign a value, the field is left with the default value for its particular data type or whatever value you initialized it to at its declaration. That applies to both static and instance readonly fields. It’s a good idea not to declare fields public. If you change a public member of a class, every caller that’s using this public member needs to be changed as well. For example, in case you want to introduce a check for the maximum string length with the next version, the public field needs to be changed to a property. Existing code that makes use of the public field must be recompiled for using this property (although the syntax from the caller side looks the same with properties). If you instead change the check within an existing property, the caller doesn’t need to be recompiled for using the new version. It’s good practice to declare fields private and use properties to access the field, as described in the next section.
Properties The idea of a property is that it is a method or a pair of methods 181
Download from finelybook www.finelybook.com
dressed to look like a field. Let’s change the field for the first name from the previous example to a private field with the variable name _firstName. The property named FirstName contains a get and set accessor to retrieve and set the value of the backing field: class PhoneCustomer { private string _firstName; public string FirstName { get { return _firstName; } set { _firstName = value; } } //... }
The get accessor takes no parameters and must return the same type as the declared property. You should not specify any explicit parameters for the set accessor either, but the compiler assumes it takes one parameter, which is of the same type again, and which is referred to as value. Let’s get into another example with a different naming convention. The following code contains a property called Age, which sets a field called age. In this example, age is referred to as the backing variable for the property Age: private int age; public int Age { get { return age; } set { age = value; } }
182
Download from finelybook www.finelybook.com
Note the naming convention used here. You take advantage of C#’s case sensitivity by using the same name—Pascal-case for the public property, and camel-case for the equivalent private field if there is one. In earlier .NET versions, this naming convention was preferred by Microsoft’s C# team. Recently they switched the naming convention to prefix field names by an underscore. This provides an extremely convenient way to identify fields in contrast to local variables.
NOTE Microsoft teams use either one or the other naming convention. For using private members of types, .NET doesn’t have strict naming conventions. However, within a team the same convention should be used. The .NET Core team switched to using an underscore to prefix fields, which is the convention used in this book in most places (see https://github.com/dotnet/corefx/blob/master/Documentation/codingguidelines/coding-style.md).
Expression-Bodied Property Accessors With C# 7, you can also write property accessors as expression-bodied members. For example, the previously shown property FirstName can be written using =>. This new feature reduces the need to write curly brackets, and the return keyword is omitted with the get accessor. private string _firstName; public string FirstName { get => _firstName; set => _firstName = value; }
When you use expression-bodied members, the implementation of the property accessor can be made up of only a single statement. Auto-Implemented Properties
183
Download from finelybook www.finelybook.com
If there isn’t going to be any logic in the properties set and get, then auto-implemented properties can be used. Auto-implemented properties implement the backing member variable automatically. The code for the earlier Age example would look like this: public int Age { get; set; }
The declaration of a private field is not needed. The compiler creates this automatically. With auto-implemented properties, you cannot access the field directly as you don’t know the name the compiler generates. If all you need to do with a property is read and write a field, the syntax for the property when you use auto-implemented properties is shorter than when you use expression-bodied property accessors. By using auto-implemented properties, validation of the property cannot be done at the property set. Therefore, with the Age property you could not have checked to see if an invalid age is set. Auto-implemented properties can be initialized using a property initializer: public int Age { get; set; } = 42;
Access Modifiers for Properties C# allows the set and get accessors to have differing access modifiers. This would allow a property to have a public get and a private or protected set. This can help control how or when a property can be set. In the following code example, notice that the set has a private access modifier but the get does not. In this case, the get takes the access level of the property. One of the accessors must follow the access level of the property. A compile error is generated if the get accessor has the protected access level associated with it because that would make both accessors have a different access level from the property. public string Name { get => _name; private set => _name = value; }
184
Download from finelybook www.finelybook.com
Different access levels can also be set with auto-implemented properties: public int Age { get; private set; }
NOTE Some developers may be concerned that the previous sections have presented a number of situations in which standard C# coding practices have led to very small functions—for example, accessing a field via a property instead of directly. Will this hurt performance because of the overhead of the extra function call? The answer is no. There’s no need to worry about performance loss from these kinds of programming methodologies in C#. Recall that C# code is compiled to IL, then JIT compiled at runtime to native executable code. The JIT compiler is designed to generate highly optimized code and will ruthlessly inline code as appropriate (in other words, it replaces function calls with inline code). A method or property whose implementation simply calls another method or returns a field will almost certainly be inlined. Usually you do not need to change the inlining behavior, but you have some control to inform the compiler about inlining. Using the attribute MethodImpl, you can define that a method should not be inlined (MethodImplOptions.NoInlining), or inlining should be done aggressively by the compiler (MethodImplOptions.AggressiveInlining). With properties, you need to apply this attribute directly to the get and set accessors. Attributes are explained in detail in Chapter 16, “Reflection, Metadata, and Dynamic Programming.” Read-Only Properties It is possible to create a read-only property by simply omitting the set accessor from the property definition. Thus, to make Name a read-only property, you would do the following: 185
Download from finelybook www.finelybook.com
private readonly string _name; public string Name { get => _name; }
Declaring the field with the readonly modifier only allows initializing the value of the property in the constructor.
WARNING Similar to creating read-only properties it is also possible to create a write-only property. Write-only properties can be created by omitting the get accessor. However, this is regarded as poor programming practice because it could be confusing to authors of client code. In general, it is recommended that if you are tempted to do this, you should use a method instead. Auto-Implemented Read-Only Properties C# offers a simple syntax with auto-implemented properties to create read-only properties that access read-only fields. These properties can be initialized using property initializers. public string Id { get; } = Guid.NewGuid().ToString();
Behind the scenes, the compiler creates a read-only field and also a property with a get accessor to this field. The code from the initializer moves to the implementation of the constructor and is invoked before the constructor body is called. Read-only properties can also explicitly be initialized from the constructor as shown with this code snippet: public class Person { public Person(string name) => Name = name; public string Name { get; } }
186
Download from finelybook www.finelybook.com
Expression-Bodied Properties Since C# 6, properties with just a get accessor also can be implemented using expression-bodied properties. Similar to expression-bodied methods, expression-bodied properties don’t need curly brackets and return statements. Expression-bodied properties are properties with the get accessor, but you don’t need to write the get keyword. Instead of writing the get keyword, the code you previously implemented in the get accessor can now follow the lambda operator. With the Person class, the FullName property is implemented using an expression-bodied property and returns with this property the values of the FirstName and LastName properties combined (code file ClassesSample/Program.cs): public class Person { public Person(string firstName, string lastName) { FirstName = firstName; LastName = lastName; } public string FirstName { get; } public string LastName { get; } public string FullName => $"{FirstName} {LastName}"; }
Immutable Types If a type contains members that can be changed, it is a mutable type. With the readonly modifier, the compiler complains if the state is changed. The state can be initialized only in the constructor. If an object doesn’t have any members that can be changed—it has only readonly members—it is an immutable type. The content can be set only at initialization time. This is extremely useful with multithreading, as multiple threads can access the same object with the information and it can never change. Because the content can’t change, synchronization is not necessary. An example of an immutable type is the String class. This class does not define any member that is allowed to change its content. Methods such as ToUpper (which changes the string to uppercase) always return a new string, but the original string passed to the constructor remains 187
Download from finelybook www.finelybook.com
unchanged.
NOTE .NET also offers immutable collections. These collection classes are covered in Chapter 11, “Special Collections.”
Anonymous Types Chapter 2, “Core C#,” discusses the var keyword in reference to implicitly typed variables. When you use var with the new keyword, you can create anonymous types. An anonymous type is simply a nameless class that inherits from object. The definition of the class is inferred from the initializer, just as with implicitly typed variables. For example, if you need an object containing a person’s first, middle, and last name, the declaration would look like this: var captain = new { FirstName = "James", MiddleName = "T", LastName = "Kirk" };
This would produce an object with FirstName, MiddleName, and LastName properties. If you were to create another object that looked like this: var doctor = new { FirstName = "Leonard", MiddleName = string.Empty, LastName = "McCoy" };
then the types of captain and doctor are the same. You could set captain = doctor, for example. This is only possible if all the properties match. 188
Download from finelybook www.finelybook.com
The names for the members of anonymous types can be inferred—if the values that are being set come from another object. This way, the initializer can be abbreviated. If you already have a class that contains the properties FirstName, MiddleName, and LastName and you have an instance of that class with the instance name person, then the captain object could be initialized like this: var captain = new { person.FirstName, person.MiddleName, person.LastName };
The property names from the person object are inferred in the new object named captain, so the object named captain has FirstName, MiddleName, and LastName properties. The actual type name of anonymous types is unknown; that’s where the name comes from. The compiler “makes up” a name for the type, but only the compiler is ever able to make use of it. Therefore, you can’t and shouldn’t plan on using any type reflection on the new objects because you won’t get consistent results.
Methods Note that official C# terminology makes a distinction between functions and methods. In C# terminology, the term “function member” includes not only methods, but also other nondata members of a class or struct. This includes indexers, operators, constructors, destructors, and—perhaps somewhat surprisingly—properties. These are contrasted with data members: fields, constants, and events. Declaring Methods In C#, the definition of a method consists of any method modifiers (such as the method’s accessibility), followed by the type of the return value, followed by the name of the method, followed by a list of input arguments enclosed in parentheses, followed by the body of the method enclosed in curly braces: 189
Download from finelybook www.finelybook.com
[modifiers] return_type MethodName([parameters]) { // Method body }
Each parameter consists of the name of the type of the parameter, and the name by which it can be referenced in the body of the method. Also, if the method returns a value, a return statement must be used with the return value to indicate each exit point, as shown in this example: public bool IsSquare(Rectangle rect) { return (rect.Height == rect.Width); }
If the method doesn’t return anything, specify a return type of void because you can’t omit the return type altogether; and if it takes no arguments, you still need to include an empty set of parentheses after the method name. In this case, including a return statement is optional—the method returns automatically when the closing curly brace is reached. Expression-Bodied Methods If the implementation of a method consists just of one statement, C# gives a simplified syntax to method definitions: expression-bodied methods. You don’t need to write curly brackets and the return keyword with the new syntax. The operator => is used to distinguish the declaration of the left side of this operator to the implementation that is on the right side. The following example is the same method as before, IsSquare, implemented using the expression-bodied method syntax. The right side of the lambda operator defines the implementation of the method. Curly brackets and a return statement are not needed. What’s returned is the result of the statement, and the result needs to be of the same type as the method declared on the left side, which is a bool in this code snippet: public bool IsSquare(Rectangle rect) => rect.Height == rect.Width;
190
Download from finelybook www.finelybook.com
Invoking Methods The following example illustrates the syntax for definition and instantiation of classes, and definition and invocation of methods. The class Math defines instance and static members (code file MathSample/Math.cs): public class Math { public int Value { get; set; } public int GetSquare() => Value * Value; public static int GetSquareOf(int x) => x * x; public static double GetPi() => 3.14159; }
The Program class makes use of the Math class, calls static methods, and instantiates an object to invoke instance members (code file MathSample/Program.cs); using System; namespace MathSample { class Program { static void Main() { // Try calling some static functions. Console.WriteLine($"Pi is {Math.GetPi()}"); int x = Math.GetSquareOf(5); Console.WriteLine($"Square of 5 is {x}"); // Instantiate a Math object var math = new Math(); // instantiate a reference type // Call instance members math.Value = 30; Console.WriteLine($"Value field of math variable contains {math.Value}"); Console.WriteLine($"Square of 30 is {math.GetSquare()}"); } } }
Running the MathSample example produces the following results: Pi is 3.14159 Square of 5 is 25
191
Download from finelybook www.finelybook.com
Value field of math variable contains 30 Square of 30 is 900
As you can see from the code, the Math class contains a property that contains a number, as well as a method to find the square of this number. It also contains two static methods: one to return the value of pi and one to find the square of the number passed in as a parameter. Some features of this class are not really good examples of C# program design. For example, GetPi would usually be implemented as a const field, but following good design would mean using some concepts that have not yet been introduced. Method Overloading C# supports method overloading—several versions of the method that have different signatures (that is, the same name but a different number of parameters and/or different parameter data types). To overload methods, simply declare the methods with the same name but different numbers of parameter types: class ResultDisplayer { public void DisplayResult(string result) { // implementation } public void DisplayResult(int result) { // implementation } }
It’s not just the parameter types that can differ; the number of parameters can differ too, as shown in the next example. One overloaded method can invoke another: class MyClass { public int DoSomething(int x) { return DoSomething(x, 10); // invoke DoSomething with two parameters
192
Download from finelybook www.finelybook.com
} public int DoSomething(int x, int y) { // implementation } }
NOTE With method overloading, it is not sufficient to only differ overloads by the return type. It’s also not sufficient to differ by parameter names. The number of parameters and/or types needs to differ. Named Arguments Invoking methods, the variable name need not be added to the invocation. However, if you have a method signature like the following to move a rectangle public void MoveAndResize(int x, int y, int width, int height)
and you invoke it with the following code snippet, it’s not clear from the invocation what numbers are used for what: r.MoveAndResize(30, 40, 20, 40);
You can change the invocation to make it immediately clear what the numbers mean: r.MoveAndResize(x: 30, y: 40, width: 20, height: 40);
Any method can be invoked using named arguments. You just need to write the name of the variable followed by a colon and the value passed. The compiler gets rid of the name and creates an invocation of the method just like the variable name would not be there—so there’s no difference within the compiled code. C# 7.2 allows for non-trailing named arguments. When you use earlier C# versions, you need to 193
Download from finelybook www.finelybook.com
supply names for all arguments after using the first named argument. You can also change the order of variables this way, and the compiler rearranges it to the correct order. A big advantage you get with named arguments is shown in the next section with optional arguments. Optional Arguments Parameters can also be optional. You must supply a default value for optional parameters, which must be the last ones defined: public void TestMethod(int notOptionalNumber, int optionalNumber = 42) { Console.WriteLine(optionalNumber + notOptionalNumber); }
This method can now be invoked using one or two parameters. Passing one parameter, the compiler changes the method call to pass 42 with the second parameter. TestMethod(11); TestMethod(11, 22);
NOTE Because the compiler changes methods with optional parameters to pass the default value, the default value should never change with newer versions of the assembly. With a change of the default value in a newer version, if the caller is in a different assembly that is not recompiled, it would have the older default value. That’s why you should have optional parameters only with values that never change. In case the calling method is always recompiled when the default value changes, this is not an issue. You can define multiple optional parameters, as shown here: public void TestMethod(int n, int opt1 = 11, int opt2 = 22, int opt3 = 33) {
194
Download from finelybook www.finelybook.com
Console.WriteLine(n + opt1 + opt2 + opt3); }
This way, the method can be called using 1, 2, 3, or 4 parameters. The first line of the following code leaves the optional parameters with the values 11, 22, and 33. The second line passes the first three parameters, and the last one has a value of 33: TestMethod(1); TestMethod(1, 2, 3);
With multiple optional parameters, the feature of named arguments shines. Using named arguments, you can pass any of the optional parameters—for example, this example passes just the last one: TestMethod(1, opt3: 4); opt3: 4
WARNING Pay attention to versioning issues when using optional arguments. One issue is to change default values in newer versions; another issue is to change the number of arguments. It might look tempting to add another optional parameter as it is optional anyway. However, the compiler changes the calling code to fill in all the parameters, and that’s the reason earlier compiled callers fail if another parameter is added later on. Variable Number of Arguments Using optional arguments, you can define a variable number of arguments. However, there’s also a different syntax that allows passing a variable number of arguments—and this syntax doesn’t have versioning issues. Declaring the parameter of type array—the sample code uses an int array—and adding the params keyword, the method can be invoked using any number of int parameters. 195
Download from finelybook www.finelybook.com
public void AnyNumberOfArguments(params int[] data) { foreach (var x in data) { Console.WriteLine(x); } }
NOTE Arrays are explained in detail in Chapter 7, “Arrays.” As the parameter of the method AnyNumberOfArguments is of type int[], you can pass an int array, or because of the params keyword, you can pass one or any number of int values: AnyNumberOfArguments(1); AnyNumberOfArguments(1, 3, 5, 7, 11, 13);
If arguments of different types should be passed to methods, you can use an object array: public void AnyNumberOfArguments(params object[] data) { // ...
Now it is possible to use any type calling this method: AnyNumberOfArguments("text", 42);
If the params keyword is used with multiple parameters that are defined with the method signature, params can be used only once, and it must be the last parameter: Console.WriteLine(string format, params object[] arg);
Now that you’ve looked at the many aspects of methods, let’s get into constructors, which are a special kind of methods.
Constructors 196
Download from finelybook www.finelybook.com
The syntax for declaring basic constructors is a method that has the same name as the containing class and that does not have any return type: public class MyClass { public MyClass() { } // rest of class definition }
It’s not necessary to provide a constructor for your class. We haven’t supplied one for any of the examples so far in this book. In general, if you don’t supply any constructor, the compiler generates a default one behind the scenes. It will be a very basic constructor that initializes all the member fields by zeroing them out (null reference for reference types, zero for numeric data types, and false for bools). Often, that is adequate; if not, you need to write your own constructor. Constructors follow the same rules for overloading as other methods— that is, you can provide as many overloads to the constructor as you want, provided they are clearly different in signature: public MyClass() // zeroparameter constructor { // construction code } public MyClass(int number) // another overload { // construction code }
However, if you supply any constructors that take parameters, the compiler does not automatically supply a default one. This is done only if you have not defined any constructors at all. In the following example, because a one-parameter constructor is defined, the compiler assumes that this is the only constructor you want to be available, so it does not implicitly supply any others: public class MyNumber
197
Download from finelybook www.finelybook.com
{ private int _number; public MyNumber(int number) { _number = number; } }
If you now try instantiating a MyNumber object using a no-parameter constructor, you get a compilation error: var numb = new MyNumber(); // causes compilation error
Note that it is possible to define constructors as private or protected, so that they are invisible to code in unrelated classes too: public class MyNumber { private int _number; private MyNumber(int number) // another overload { _number = number; } }
This example hasn’t actually defined any public, or even any protected, constructors for MyNumber. This would actually make it impossible for MyNumber to be instantiated by outside code using the new operator (though you might write a public static property or method in MyNumber that can instantiate the class). This is useful in two situations: If your class serves only as a container for some static members or properties, and therefore should never be instantiated. With this scenario, you can declare the class with the modifier static. With this modifier the class can contain only static members and cannot be instantiated. If you want the class to only ever be instantiated by calling a static member function (this is the so-called factory pattern approach to object instantiation). An implementation of the Singleton pattern is shown in the following code snippet. public class Singleton {
198
Download from finelybook www.finelybook.com
private static Singleton s_instance; private int _state; private Singleton(int state) { _state = state; } public static Singleton Instance { get => s_instance ?? (s_instance = new Singleton(42); } }
The Singleton class contains a private constructor, so you can instantiate it only within the class itself. To instantiate it, the static property Instance returns the field s_instance. If this field is not yet initialized (null), a new instance is created by calling the instance constructor. For the null check, the coalescing operator is used. If the left side of this operator is null, the right side of this operator is processed and the instance constructor invoked.
NOTE The coalescing operator is explained in detail in Chapter 6. Expression Bodies with Constructors If the implementation of a constructor consists of a single expression, the constructor can be implemented with an expression-bodied implementation: public class Singleton { private static Singleton s_instance; private int _state; private Singleton(int state) => _state = state; public static Singleton Instance => s_instance ?? (s_instance = new Singleton(42); }
Calling Constructors from Other Constructors 199
Download from finelybook www.finelybook.com
You might sometimes find yourself in the situation where you have several constructors in a class, perhaps to accommodate some optional parameters for which the constructors have some code in common. For example, consider the following: class Car { private string _description; private uint _nWheels; public Car(string description, uint nWheels) { _description = description; _nWheels = nWheels; } public Car(string description) { _description = description; _nWheels = 4; } // ... }
Both constructors initialize the same fields. It would clearly be neater to place all the code in one location. C# has a special syntax known as a constructor initializer to enable this: class Car { private string _description; private uint _nWheels; public Car(string description, uint nWheels) { _description = description; _nWheels = nWheels; } public Car(string description): this(description, 4) { } // ...
In this context, the this keyword simply causes the constructor with the nearest matching parameters to be called. Note that any constructor initializer is executed before the body of the constructor. 200
Download from finelybook www.finelybook.com
Suppose that the following code is run: var myCar = new Car("Proton Persona");
In this example, the two-parameter constructor executes before any code in the body of the one-parameter constructor (though in this particular case, because there is no code in the body of the oneparameter constructor, it makes no difference). A C# constructor initializer may contain either one call to another constructor in the same class (using the syntax just presented) or one call to a constructor in the immediate base class (using the same syntax, but using the keyword base instead of this). It is not possible to put more than one call in the initializer. Static Constructors One feature of C# is that it is also possible to write a static noparameter constructor for a class. Such a constructor is executed only once, unlike the constructors written so far, which are instance constructors that are executed whenever an object of that class is created: class MyClass { static MyClass() { // initialization code } // rest of class definition }
One reason for writing a static constructor is if your class has some static fields or properties that need to be initialized from an external source before the class is first used. The .NET runtime makes no guarantees about when a static constructor will be executed, so you should not place any code in it that relies on it being executed at a particular time (for example, when an assembly is loaded). Nor is it possible to predict in what order static constructors of different classes will execute. However, what is guaranteed is that the static constructor will run at most once, and 201
Download from finelybook www.finelybook.com
that it will be invoked before your code makes any reference to the class. In C#, the static constructor is usually executed immediately before the first call to any member of the class. Note that the static constructor does not have any access modifiers. It’s never called explicitly by any other C# code, but always by the .NET runtime when the class is loaded, so any access modifier such as public or private would be meaningless. For this same reason, the static constructor can never take any parameters, and there can be only one static constructor for a class. It should also be obvious that a static constructor can access only static members, not instance members, of the class. It is possible to have a static constructor and a zero-parameter instance constructor defined in the same class. Although the parameter lists are identical, there is no conflict because the static constructor is executed when the class is loaded, but the instance constructor is executed whenever an instance is created. Therefore, there is no confusion about which constructor is executed or when. If you have more than one class that has a static constructor, the static constructor that is executed first is undefined. Therefore, you should not put any code in a static constructor that depends on other static constructors having been or not having been executed. However, if any static fields have been given default values, these are allocated before the static constructor is called. The next example illustrates the use of a static constructor. It is based on the idea of a program that has user preferences (which are presumably stored in some configuration file). To keep things simple, assume just one user preference—a quantity called BackColor that might represent the background color to be used in an application. Because we don’t want to get into the details of writing code to read data from an external source here, assume also that the preference is to have a background color of red on weekdays and green on weekends. All the program does is display the preference in a console window, but that is enough to see a static constructor at work. The class UserPreferences is declared with the static modifier; thus, it cannot be instantiated and can only contain static members. The static 202
Download from finelybook www.finelybook.com
constructor initializes the BackColor property depending on the day of the week (code file StaticConstructorSample/UserPreferences.cs): public static class UserPreferences { public static Color BackColor { get; } static UserPreferences() { DateTime now = DateTime.Now; if (now.DayOfWeek == DayOfWeek.Saturday || now.DayOfWeek == DayOfWeek.Sunday) { BackColor = Color.Green; } else { BackColor = Color.Red; } } }
This code makes use of the System.DateTime struct that is supplied with the .NET Framework. DateTime implements a static property Now that returns the current time. DayOfWeek is an instance property of DateTime that returns an enum value of type DayOfWeek. is defined as an enum type and contains a few colors. The enum types are explained in detail later in the section Enums (code file StaticConstructorSample/Color.cs): Color
public enum Color { White, Red, Green, Blue, Black }
The Main method just invokes the Console.WriteLine method and writes the user preferences back color to the console (code file StaticConstructorSample/Program.cs): class Program {
203
Download from finelybook www.finelybook.com
static void Main() { Console.WriteLine( $"User-preferences: BackColor is: {UserPreferences.BackColor}"); } }
Compiling and running the preceding code results in the following output: User-preferences: BackColor is: Color Red
Of course, if the code is executed during the weekend, your color preference would be Green.
STRUCTS So far, you have seen how classes offer a great way to encapsulate objects in your program. You have also seen how they are stored on the heap in a way that gives you much more flexibility in data lifetime but with a slight cost in performance. This performance cost is small thanks to the optimizations of managed heaps. However, in some situations all you really need is a small data structure. In those cases, a class provides more functionality than you need, and for best performance you probably want to use a struct. Consider the following example using a reference type: public class Dimensions { public Dimensions(double length, double width) { Length = length; Width = width; } public double Length { get; } public double Width { get; } }
This code defines a class called Dimensions, which simply stores the length and width of an item. Suppose you’re writing a furniturearranging program that enables users to experiment with rearranging their furniture on the computer, and you want to store the dimensions 204
Download from finelybook www.finelybook.com
of each item of furniture. All you have is two numbers, which you’ll find convenient to treat as a pair rather than individually. There is no need for a lot of methods, or for you to be able to inherit from the class, and you certainly don’t want to have the .NET runtime go to the trouble of bringing in the heap, with all the performance implications, just to store two doubles. As mentioned earlier in this chapter, the only thing you need to change in the code to define a type as a struct instead of a class is to replace the keyword class with struct: public struct Dimensions { public Dimensions(double length, double width) { Length = length; Width = width; } public double Length { get; } public double Width { get; } }
Defining functions for structs is also exactly the same as defining them for classes. You’ve already seen a constructor with the Dimensions struct. The following code demonstrates adding the property Diagonal to invoke the Sqrt method of the Math class (code file StructsSample/Dimension.cs): public struct Dimensions { public double Length { get; } public double Width { get; } public Dimensions(double length, double width) { Length = length; Width = width; } public double Diagonal => Math.Sqrt(Length * Length + Width * Width); }
Structs are value types, not reference types. This means they are stored either in the stack or inline (if they are part of another object that is 205
Download from finelybook www.finelybook.com
stored on the heap) and have the same lifetime restrictions as the simple data types: Structs do not support inheritance. There are some differences in the way constructors work for structs. If you do not supply a default constructor, the compiler automatically creates one and initializes the members to its default values. With a struct, you can specify how the fields are to be laid out in memory (this is examined in Chapter 16, which covers attributes). Because structs are really intended to group data items together, you’ll sometimes find that most or all of their fields are declared as public. Strictly speaking, this is contrary to the guidelines for writing .NET code—according to Microsoft, fields (other than const fields) should always be private and wrapped by public properties. However, for simple structs, many developers consider public fields to be acceptable programming practice.
NOTE Behind the scenes, the int type (System.Int32) is a struct with a public field. The new type System.ValueType is a struct that contains one or more public fields. ValueTuple is discussed in detail in Chapter 13, “Functional Programming with C#.” The following sections look at some of these differences between structs and classes in more detail.
Structs Are Value Types Although structs are value types, you can often treat them syntactically in the same way as classes. For example, with the definition of the Dimensions class in the previous section, you could write this: var point = new Dimensions(); point.Length = 3;
206
Download from finelybook www.finelybook.com
point.Width = 6;
Note that because structs are value types, the new operator does not work in the same way as it does for classes and other reference types. Instead of allocating memory on the heap, the new operator simply calls the appropriate constructor, according to the parameters passed to it, initializing all fields. Indeed, for structs it is perfectly legal to write this: Dimensions point; point.Length = 3; point.Width = 6;
If Dimensions were a class, this would produce a compilation error, because point would contain an uninitialized reference—an address that points nowhere, so you could not start setting values to its fields. For a struct, however, the variable declaration actually allocates space on the stack for the entire struct, so it’s ready to assign values to. The following code, however, would cause a compilation error, with the compiler complaining that you are using an uninitialized variable: Dimensions point; double d = point.Length;
Structs follow the same rule as any other data type: Everything must be initialized before use. A struct is considered fully initialized either when the new operator has been called against it or when values have been individually assigned to all its fields. Also, of course, a struct defined as a member field of a class is initialized by being zeroed out automatically when the containing object is initialized. The fact that structs are value types affects performance, though depending on how you use your struct, this can be good or bad. On the positive side, allocating memory for structs is very fast because this takes place inline or on the stack. The same is true when they go out of scope. Structs are cleaned up quickly and don’t need to wait on garbage collection. On the negative side, whenever you pass a struct as a parameter or assign a struct to another struct (as in A = B, where A and B are structs), the full contents of the struct are copied, whereas for a class only the reference is copied. This results in a performance 207
Download from finelybook www.finelybook.com
loss that varies according to the size of the struct, emphasizing the fact that structs are really intended for small data structures. Note, however, that when passing a struct as a parameter to a method, you can avoid this performance loss by passing it as a ref parameter— in this case, only the address in memory of the struct will be passed in, which is just as fast as passing in a class. If you do this, though, be aware that it means the called method can, in principle, change the value of the struct. This is shown later in this chapter in the section “Passing Parameters by Value and by Reference.”
Readonly structs When you return a value type from a property, the caller receives a copy. Setting properties of this value type changes only the copy; the original value doesn’t change. This can be confusing to the developer who’s accessing the property. That’s why a guideline for structs defines that value types should be immutable. Of course, this guideline is not valid for all value types because int, short, double… are not immutable, and the ValueTuple is also not immutable. However, most struct types are implemented as immutable. When you use C# 7.2, the readonly modifier can be applied to a struct, and thus the compiler guarantees for immutability of the struct. The previously defined type Dimensions can be declared readonly when you use C# 7.2 because it contains only a constructor that changes its members. The properties only contain a get accessor, thus change is not possible (code file ReadOnlyStructSample/Dimensions.cs): public readonly struct Dimensions { public double Length { get; } public double Width { get; } public Dimensions(double length, double width) { Length = length; Width = width; } public double Diagonal => Math.Sqrt(Length * Length + Width * Width);
208
Download from finelybook www.finelybook.com
}
With the readonly modifier, the compiler complains in case the type contains changes to fields or properties that are applied after the object is created. With this modifier, the compiler can generate optimized code to not copy the contents of a struct when it is passed along; instead the compiler uses references because it can never change.
Structs and Inheritance Structs are not designed for inheritance. This means it is not possible to inherit from a struct. The only exception to this is that structs, in common with every other type in C#, derive ultimately from the class System.Object. Hence, structs also have access to the methods of System.Object, and it is even possible to override them in structs; an obvious example would be overriding the ToString method. The actual inheritance chain for structs is that each struct derives from the class, System.ValueType, which in turn derives from System.Object. ValueType does not add any new members to Object but provides override implementations of some members of the base class that are more suitable for structs. Note that you cannot supply a different base class for a struct: Every struct is derived from ValueType.
NOTE Inheritance from System.ValueType only happens with structs when they are used as objects. Structs that cannot be used as objects are ref structs. These types have been available since C# 7.2. This feature is explained later in this chapter in the section “ref structs.”
NOTE 209
Download from finelybook www.finelybook.com
To compare structural values, it’s a good practice to implement the interface IEquatable. This interface is discussed in Chapter 6.
Constructors for Structs You can define constructors for structs in a similar way as you do it for classes. That said, the default constructor, which initializes all fields to zero values, is always present implicitly, even if you supply other constructors that take parameters. You can’t create custom default constructors for structs. public Dimensions(double length, double width) { Length = length; Width = width; }
Incidentally, you can supply a Close or Dispose method for a struct in the same way you do for a class. The Dispose method is discussed in detail in Chapter 17.
ref structs Structs are not always put on the stack. They can also live on the heap. You can assign a struct to an object, which results in creating an object in the heap. Such a behavior can be a problem with some types. With .NET Core 2.1, the Span type allows access to memory on the stack. Copies of the Span type need to be atomic. This can only be guaranteed when the type stays on the stack. Also, the Span type can use managed pointers in its fields. Having such pointers on the heap can crash the application when the garbage collector runs. Thus, it needs to be guaranteed that the type stays on the stack. With a new C# 7.2 language construct, reference types are stored on the heap and value types are typically stored on the stack but also can be stored on the heap. There’s also a third type available—a value type that can only exist on the stack. 210
Download from finelybook www.finelybook.com
This type is created by applying the ref modifier to a struct as shown in the following code snippet. You can add properties, fields of value, reference types, and methods—just like other structs (code file RefStructSample/ValueTypeOnly.cs): ref struct ValueTypeOnly { //... }
What can’t be done with this type is to assign it to an object—for example, invoke methods of the Object base class such as ToString. This would incur boxing and create a reference type, which is not allowed with this type.
NOTE With most applications you’ll not have a need to create a custom ref struct type. However, for high-performance applications where garbage collection needs to be reduced, there’s need for this type. To get more information about ref struct and the reason for this type, along with ref return and ref locals, you should read Chapter 17 with details about the Span type and more information about ref.
PASSING PARAMETERS BY VALUE AND BY REFERENCE Let’s assume you have a type named A with a property of type int named X. The method ChangeA receives a parameter of type A and changes the value of X to 2 (code file PassingByValueAndReference/Program.cs): public static void ChangeA(A a) { a.X = 2; }
211
Download from finelybook www.finelybook.com
The Main method creates an instance of type A, initializes X to 1, and invokes the ChangeA method: static void Main() { A a1 = new A { X = 1 }; ChangeA(a1); Console.WriteLine($"a1.X: {a1.X}"); }
What would you guess is the output? 1 or 2? The answer is … it depends. You need to know if A is a class or a struct. Let’s start with A as a struct: public struct A { public int X { get; set; } }
Structs are passed by value; with that the variable a from the ChangeA method gets a copy from the variable a1 that is put on the stack. Only the copy is changed and destroyed at the end of the method ChangeA. The content of a1 never changes and stays 1. This is completely different with A as a class: public class A { public int X { get; set; } }
Classes are passed by reference. This way, a is a variable that references the same object on the heap as the variable a1. When ChangeA changes the value of the X property of a, the change makes it a1.X because it is the same object. Here, the result is 2.
NOTE To avoid this confusion on different behavior between classes and structs when members are changed, it’s a good practice to make structs immutable. If a struct only has members that don’t allow 212
Download from finelybook www.finelybook.com
changing the state, you can’t get into such a confusing situation. Of course, there’s always an exception to the rule to make struct types immutable. The ValueTuple that is new with C# 7 is implemented as a mutable struct. However, with ValueTuple the public members are fields instead of properties (which is another violation of a guideline offering public fields). Because of the significance of tuples, and using them in similar ways as int and float, that’s a good reason to violate some guidelines.
ref Parameters You can also pass structs by reference. Changing the declaration of the ChangeA method by adding the ref modifier, the variable is passed by reference—also if A is of type struct: public static void ChangeA(ref A a) { a.X = 2; }
It’s good to know this from the caller side as well, so with method parameters that have the ref modifier applied, this needs to be added on calling the method as well: static void Main() { A a1 = new A { X = 1 }; ChangeA(ref a1); Console.WriteLine($"a1.X: {a1.X}"); }
Now the struct is passed by reference, likewise the class type, so the result is 2. What about using the ref modifier with a class type? Let’s change the implementation of the ChangeA method to this: public static void ChangeA(A a) { a.X = 2; a = new A { X = 3 }; }
213
Download from finelybook www.finelybook.com
Using A of type class, what result can be expected now? Of course, the result from the Main method will not be 1 because a pass by reference is done by class types. Setting a.X to 2, the original object a1 gets changed. However, the next line a = new A { X = 3 } now creates a new object on the heap, and a references the new object. The variable a1 used within the Main method still references the old object with the value 2. After the end of the ChangeA method, the new object on the heap is not referenced and can be garbage collected. So here the result is 2. Using the ref modifier with A as a class type, a reference to a reference (or in C++ jargon, a pointer to a pointer) is passed, which allows allocating a new object, and the Main method shows the result 3: public static void ChangeA(ref A a) { a.X = 2; a = new A { X = 3 }; }
Finally, it is important to understand that C# continues to apply initialization requirements to parameters passed to methods. Any variable must be initialized before it is passed into a method, whether it is passed in by value or by reference.
NOTE With C# 7, you also can use the ref keyword with local variables and with the return type of a method. This new feature is discussed in Chapter 17.
out Parameters If a method returns one value, the method usually declares a return type and returns the result. What about returning multiple values from a method, maybe with different types? There are different options to do this. One option is to declare a class and struct and define all the 214
Download from finelybook www.finelybook.com
information that should be returned as members of this type. Another option is to use a tuple type. Tuples are explained in Chapter 13, “Functional Programming with C#.” The third option is to use the out keyword. Let’s get into an example by using the Parse method that is defined with the Int32 type. The ReadLine method gets a string from user input. Assuming the user enters a number, the int.Parse method converts the string and returns the number (code file OutKeywordSample/Program.cs): string input1 = Console.ReadLine(); int result1 = int.Parse(input1); Console.WriteLine($"result: {result1}");
However, users do not always enter the data you would like them to enter. In case the user does not enter a number, an exception is thrown. Of course, it is possible to catch the exception and work with the user accordingly, but this is not a good idea to do for a “normal” case. Maybe it can be assumed to be the “normal” case that the user enters wrong data. Dealing with exceptions is covered in Chapter 14, “Errors and Exceptions.” A better way to deal with the wrong type of data is to use a different method of the Int32 type: TryParse. TryParse is declared to return a bool type whether the parsing is successful or not. The result of the parsing (if it was successful) is returned with a parameter using the out modifier: public static bool TryParse(string s, out int result);
Invoking this method, the result variable doesn’t need to be initialized beforehand; the variable is initialized within the method. With C# 7, the variable can also be declared on method invocation. Similar to the ref keyword, the out keyword needs to be supplied on calling the method and not only with the method declaration: string input2 = ReadLine(); if (int.TryParse(input2, out int result2)) { Console.WriteLine($"result: {result2}"); }
215
Download from finelybook www.finelybook.com
else { Console.WriteLine("not a number"); }
NOTE is a new feature of C# 7. Before C# 7, an out variable needed to be declared before invoking the method. With C# 7, the declaration can happen calling the method. You can declare the variable using the var keyword (that’s why the feature is known by out var), if the type is unambiguously defined by the method signature. You can also define the concreate type, as was shown in the previous code snippet. The scope of the variable is valid after the method invocation. out var
in Parameters C# 7.2 adds the in modifier to parameters. The out modifier allows returning values specified with the arguments. The in modifier guarantees the data that is sent into the method does not change (when passing a value type). Let’s define a simple mutable struct with the name AValueType and a public mutable field (code file InParameterSample/AValueType.cs): struct AValueType { public int Data; }
Now when you define a method using the in modifier, the variable cannot be changed. Trying to change the mutable field Data, the compiler complains about not being able to assign a value to a member of the read-only variable because the variable is readonly. The in modifier makes the parameter a readonly variable (code file InParameterSample/Program.cs):
216
Download from finelybook www.finelybook.com
static void CantChange(in AValueType a) { // a.Data = 43; // does not compile - readonly variable Console.WriteLine(a.Data); }
When invoking the method CantChange, you can invoke the method with or without passing the in modifier. This doesn’t have an effect on the generated code. Using value types with the in modifier not only helps to ensure that the memory cannot be changed but the compiler also can create better optimized code. Instead of copying the value type with the method invocation, the compiler can use references instead, and thus reduces the memory needed and increases performance.
NOTE The in modifier is mainly used with value types. However, you can use it with reference types as well. When using the in modifier with reference types, you can change the content of the variable, but not the variable itself.
NULLABLE TYPES Variables of reference types (classes) can be null while variables of value types (structs) cannot. This can be a problem with some scenarios, such as mapping C# types to database or XML types. A database or XML number can be null, whereas an int or double cannot be null. One way to deal with this conflict is to use classes that map to database number types (which is done by Java). Using reference types that map to database numbers to allow the null value has an important disadvantage: It creates extra overhead. With reference types, the garbage collector is needed to clean up. Value types do not need to be cleaned up by the garbage collector; they are removed from memory 217
Download from finelybook www.finelybook.com
when the variable goes out of scope. C# has a solution for this: nullable types. A nullable type is a value type that can be null. You just have to put the ? after the type (which needs to be a struct). The only overhead a value type has compared to the underlying struct is a Boolean member that tells whether it is null. With the following code snippet, x1 is a normal int, and x2 is a nullable int. Because x2 is a nullable int, null can be assigned to x2: int x1 = 1; int? x2 = null;
Because an int cannot have a value that cannot be assigned to int?, passing a variable of int to int? always succeeds and is accepted from the compiler: int? x3 = x1;
The reverse is not true. int? cannot be directly assigned to int. This can fail, and thus a cast is required: int x4 = (int)x3;
Of course, the cast generates an exception in a case where x3 is null. A better way to deal with that is to use the HasValue and Value properties of nullable types. HasValue returns true or false, depending on whether the nullable type has a value, and Value returns the underlying value. Using the conditional operator, x5 gets filled without possible exceptions. In a case where x3 is null, HasValue returns false, and here −1 is supplied to the variable x5: int x5 = x3.HasValue ? x3.Value : -1;
Using the coalescing operator ??, there’s a shorter syntax possible with nullable types. In a case where x3 is null, −1 is set with the variable x6; otherwise you take the value of x3: int x6 = x3 ?? -1;
NOTE 218
Download from finelybook www.finelybook.com
With nullable types, you can use all operators that are available with the underlying types—for example, +, -, *, / and more with int?. You can use nullable types with every struct type, not only with predefined C# types. You can read more about nullable types and what’s behind the scenes in Chapter 5, “Generics.”
ENUM TYPES An enumeration is a value type that contains a list of named constants, such as the Color type shown here. The enumeration type is defined by using the enum keyword (code file EnumSample/Color.cs): public enum Color { Red, Green, Blue }
You can declare variables of enum types, such as the variable c1, and assign a value from the enumeration by setting one of the named constants prefixed with the name of the enum type (code file EnumSample/Program.cs): private static void ColorSamples() { Color c1 = Color.Red; Console.WriteLine(c1); //... }
Running the program, the console output shows Red, which is the constant value of the enumeration. By default, the type behind the enum type is an int. The underlying type can be changed to other integral types (byte, short, int, long with signed and unsigned variants). The values of the named constants are incremental values starting with 0, but they can be changed to other values:
219
Download from finelybook www.finelybook.com
public enum Color : short { Red = 1, Green = 2, Blue = 3 }
You can change a number to an enumeration value and back using casts. Color c2 = (Color)2; short number = (short)c2;
You can also use an enum type to assign multiple options to a variable and not just one of the enum constants. To do this, the values assigned to the constants must be different bits, and the Flags attribute needs to be set with the enum. The enum type DaysOfWeek defines different values for every day. Setting different bits can be done easily using hexadecimal values that are assigned using the 0x prefix. The Flags attribute is information for the compiler for creating a different string representation of the values —for example, setting the value 3 to a variable of DaysOfWeek results in Monday, Tuesday when the Flags attribute is used (code file EnumSample/DaysOfWeek.cs): [Flags] public enum DaysOfWeek { Monday = 0x1, Tuesday = 0x2, Wednesday = 0x4, Thursday = 0x8, Friday = 0x10, Saturday = 0x20, Sunday = 0x40 }
With such an enum declaration, you can assign a variable multiple values using the logical OR operator (code file EnumSample/Program.cs): DaysOfWeek mondayAndWednesday = DaysOfWeek.Monday | DaysOfWeek.Wednesday; Console.WriteLine(mondayAndWednesday);
220
Download from finelybook www.finelybook.com
Running the program, the output is a string representation of the days: Monday, Tuesday
Setting different bits, it is also possible to combine single bits to cover multiple values, such as Weekend with a value of 0x60 that combines Saturday and Sunday with the logical OR operator, Workday to combine all the days from Monday to Friday, and AllWeek to combine Workday and Weekend with the logical OR operator (code file EnumSample/DaysOfWeek.cs): [Flags] public enum DaysOfWeek { Monday = 0x1, Tuesday = 0x2, Wednesday = 0x4, Thursday = 0x8, Friday = 0x10, Saturday = 0x20, Sunday = 0x40, Weekend = Saturday | Sunday Workday = 0x1f, AllWeek = Workday | Weekend }
With this in place, it’s possible to assign DaysOfWeek.Weekend directly to a variable, but also assigning the separate values DaysOfWeek.Saturday and DaysOfWeek.Sunday combined with the logical OR operator results in the same. The output shown is the string representation of Weekend. DaysOfWeek weekend = DaysOfWeek.Saturday | DaysOfWeek.Sunday; Console.WriteLine(weekend);
Working with enumerations, the class Enum is sometimes a big help for dynamically getting some information about enum types. Enum offers methods to parse strings to get the corresponding enumeration constant, and to get all the names and values of an enum type. The following code snippet uses a string to get the corresponding Color value using Enum.TryParse (code file EnumSample/Program.cs): Color red;
221
Download from finelybook www.finelybook.com
if (Enum.TryParse("Red", out red)) { Console.WriteLine($"successfully parsed {red}"); }
NOTE is a generic method where T is a generic parameter type. This parameter type needs to be defined with the method invocation. Generic methods are explained in detail in Chapter 5. Enum.TryParse()
The Enum.GetNames method returns a string array of all the names of the enumeration: foreach (var day in Enum.GetNames(typeof(Color))) { Console.WriteLine(day); }
When you run the application, this is the output: Red Green Blue
To get all the values of the enumeration, you can use the method Enum.GetValues. Enum.GetValues returns an Array of the enum values. To get the integral value, it needs to be cast to the underlying type of the enumeration, which is done by the foreach statement: foreach (short val in Enum.GetValues(typeof(Color))) { Console.WriteLine(val); }
PARTIAL CLASSES The partial keyword allows the class, struct, method, or interface to span multiple files. Typically, a code generator of some type is 222
Download from finelybook www.finelybook.com
generating part of a class, and so having the class in multiple files can be beneficial. Let’s assume you want to make some additions to the class that is automatically generated from a tool. If the tool reruns then your changes are lost. The partial keyword is helpful for splitting the class in two files and making your changes to the file that is not defined by the code generator. To use the partial keyword, simply place partial before class, struct, or interface. In the following example, the class SampleClass resides in two separate source files, SampleClassAutogenerated.cs and SampleClass.cs: SampleClass.cs: //SampleClassAutogenerated.cs partial class SampleClass { public void MethodOne() { } } //SampleClass.cs partial class SampleClass { public void MethodTwo() { } }
When the project that these two source files are part of is compiled, a single type called SampleClass will be created with two methods: MethodOne and MethodTwo. If any of the following keywords are used in describing the class, the same must apply to all partials of the same type: public private protected internal abstract sealed new
223
Download from finelybook www.finelybook.com
generic constraints Nested partials are allowed as long as the partial keyword precedes the class keyword in the nested type. Attributes, XML comments, interfaces, generic-type parameter attributes, and members are combined when the partial types are compiled into the type. Given these two source files: // SampleClassAutogenerated.cs [CustomAttribute] partial class SampleClass: SampleBaseClass, ISampleClass { public void MethodOne() { } } // SampleClass.cs [AnotherAttribute] partial class SampleClass: IOtherSampleClass { public void MethodTwo() { } }
the equivalent source file would be as follows after the compile: [CustomAttribute] [AnotherAttribute] partial class SampleClass: SampleBaseClass, ISampleClass, IOtherSampleClass { public void MethodOne() { } public void MethodTwo() { } }
NOTE Although it may be tempting to create huge classes that span multiple files and possibly having different developers working on different files but the same class, the partial keyword was not designed for this use. With such a scenario, it would be better to split the big class into several smaller classes, having a class just for one purpose. 224
Download from finelybook www.finelybook.com
Partial classes can contain partial methods. This is extremely useful if generated code should invoke methods that might not exist at all. The programmer extending the partial class can decide to create a custom implementation of the partial method, or do nothing. The following code snippet contains a partial class with the method MethodOne that invokes the method APartialMethod. The method APartialMethod is declared with the partial keyword; thus, it does not need any implementation. If there’s not an implementation, the compiler removes the invocation of this method: //SampleClassAutogenerated.cs partial class SampleClass { public void MethodOne() { APartialMethod(); } public partial void APartialMethod(); }
An implementation of the partial method can be done within any other part of the partial class, as shown in the following code snippet. With this method in place, the compiler creates code within MethodOne to invoke this APartialMethod declared here: // SampleClass.cs partial class SampleClass: IOtherSampleClass { public void APartialMethod() { // implementation of APartialMethod } }
A partial method needs to be of type void. Otherwise the compiler cannot remove the invocation in case no implementation exists.
EXTENSION METHODS There are many ways to extend a class. Inheritance, which is covered in Chapter 4, is a great way to add functionality to your objects. Extension methods are another option that can also be used to add 225
Download from finelybook www.finelybook.com
functionality to classes. This option is also possible when inheritance cannot be used (for example, the class is sealed).
NOTE Extension methods can be used to extend interfaces. This way you can have common functionality for all the classes that implement this interface. Interfaces are explained in Chapter 4. Extension methods are static methods that can look like part of a class without actually being in the source code for the class. Let’s say you want the string type to be extended with a method to count the number of words within a string. The method GetWordCount makes use of the String.Split method to split up a string in a string array, and counts the number of elements within the array using the Length property (code file ExtensionMethods/Program.cs): ExtensionMethods/Program.cs): public static class StringExtension { public static int GetWordCount(this string s) => s.Split().Length; }
The string is extended by using the this keyword with the first parameter. This keyword defines the type that is extended. Even though the extension method is static, you use standard method syntax. Notice that you call GetWordCount using the fox variable and not using the type name: string fox = "the quick brown fox jumped over the lazy dogs down " + "9876543210 times"; int wordCount = fox.GetWordCount(); Console.WriteLine($"{wordCount} words");
Behind the scenes, the compiler changes this to invoke the static method instead: 226
Download from finelybook www.finelybook.com
int wordCount = StringExtension.GetWordCount(fox);
Using the instance method syntax instead of calling a static method from your code directly results in a much nicer syntax. This syntax also has the advantage that the implementation of this method can be replaced by a different class without the need to change the code—just a new compiler run is needed. How does the compiler find an extension method for a specific type? The this keyword is needed to match an extension method for a type, but also the namespace of the static class that defines the extension method needs to be opened. If you put the StringExtensions class within the namespace Wrox.Extensions, the compiler finds the GetWordCount method only if Wrox.Extensions is opened with the using directive. In case the type also defines an instance method with the same name, the extension method is never used. Any instance method already in the class takes precedence. When you have multiple extension methods with the same name to extend the same type, and when all the namespaces of these types are opened, the compiler results in an error that the call is ambiguous and it cannot decide between multiple implementations. If, however, the calling code is in one of these namespaces, this namespace takes precedence.
NOTE Language Integrated Query (LINQ) makes use of many extension methods. LINQ is discussed in Chapter 12, “Language Integrated Query.”
THE OBJECT CLASS As indicated earlier, all .NET classes are ultimately derived from System.Object. In fact, if you don’t specify a base class when you define a class, the compiler automatically assumes that it derives from Object. Because inheritance has not been used in this chapter, every class you have seen here is actually derived from System.Object. (As 227
Download from finelybook www.finelybook.com
noted earlier, for structs this derivation is indirect—a struct is always derived from System.ValueType, which in turn derives from System.Object.) The practical significance of this is that—besides the methods, properties, and so on that you define—you also have access to a number of public and protected member methods that have been defined for the Object class. These methods are available in all other classes that you define. For the time being, the following list summarizes the purpose of each method: ToString—A fairly
basic, quick-and-easy string representation. Use it when you want a quick idea of the contents of an object, perhaps for debugging purposes. It provides very little choice regarding how to format the data. For example, dates can, in principle, be expressed in a huge variety of formats, but DateTime.ToString does not offer you any choice in this regard. If you need a more sophisticated string representation—for example, one that takes into account your formatting preferences or the culture (the locale) —then you should implement the IFormattable interface (see Chapter 9, “Strings and Regular Expressions”). GetHashCode—If
objects are placed in a data structure known as a map (also known as a hash table or dictionary), it is used by classes that manipulate these structures to determine where to place an object in the structure. If you intend your class to be used as a key for a dictionary, you need to override GetHashCode. Some fairly strict requirements exist for how you implement your overload, which you learn about when you examine dictionaries in Chapter 10, “Collections.” (both versions) and ReferenceEquals—As you’ll note by the existence of three different methods aimed at comparing the equality of objects, the .NET Framework has quite a sophisticated scheme for measuring equality. Subtle differences exist between how these three methods, along with the comparison operator, ==, are intended to be used. In addition, restrictions exist on how you should override the virtual, one-parameter version of Equals if you Equals
228
Download from finelybook www.finelybook.com
choose to do so, because certain base classes in the System.Collections namespace call the method and expect it to behave in certain ways. You explore the use of these methods in Chapter 6 when you examine operators. Finalize—Covered
in Chapter 17, this method is intended as the nearest that C# has to C++-style destructors. It is called when a reference object is garbage collected to clean up resources. The Object implementation of Finalize doesn’t actually do anything and is ignored by the garbage collector. You normally override Finalize if an object owns references to unmanaged resources that need to be removed when the object is deleted. The garbage collector cannot do this directly because it only knows about managed resources, so it relies on any finalizers that you supply. GetType—This object returns an instance of a class derived from System.Type, so it can provide an extensive range of information
about the class of which your object is a member, including base type, methods, properties, and so on. System.Type also provides the entry point into .NET’s reflection technology. Chapter 16 examines this topic. MemberwiseClone—The
only member of System.Object that isn’t examined in detail anywhere in the book. That’s because it is fairly simple in concept. It just makes a copy of the object and returns a reference (or in the case of a value type, a boxed reference) to the copy. Note that the copy made is a shallow copy, meaning it copies all the value types in the class. If the class contains any embedded references, then only the references are copied, not the objects referred to. This method is protected and cannot be called to copy external objects. Nor is it virtual, so you cannot override its implementation.
SUMMARY This chapter examined C# syntax for declaring and manipulating objects. You have seen how to declare static and instance fields, properties, methods, and constructors. You have also seen new features that have been added with C# 7, such as expression-bodied 229
Download from finelybook www.finelybook.com
members with constructors, property accessors, and out vars. You have also seen how all types in C# derive ultimately from the type System.Object, which means that all types start with a basic set of useful methods, including ToString. Inheritance comes up a few times throughout this chapter, and you examine implementation, interface inheritance, and the other aspects of object-orientation with C# in Chapter 4.
230
Download from finelybook www.finelybook.com
4 Object-Oriented Programming with C# WHAT’S IN THIS CHAPTER? Types of inheritance Implementation inheritance Access modifiers Interfaces is
and as Operators
WROX.COM CODE DOWNLOADS FOR THIS CHAPTER The Wrox.com code downloads for this chapter are found at www.wrox.com on the Download Code tab. The source code is also available at https://github.com/ProfessionalCSharp/ProfessionalCSharp7 in the directory ObjectOrientation. The code for this chapter is divided into the following major examples: VirtualMethods InheritanceWithConstructors UsingInterfaces
231
Download from finelybook www.finelybook.com
OBJECT ORIENTATION C# is not a pure object-oriented programming language. C# offers multiple programming paradigms. However, object orientation is an important concept with C#, and it’s a core principle of all the libraries offered by .NET. The three most important concepts of object-orientation are inheritance, encapsulation, and polymorphism. Chapter 3, “Objects and Types,” talks about creating individual classes to arrange properties, methods, and fields. When members of a type are declared private, they cannot be accessed from the outside. They are encapsulated within the type. This chapter’s focus is on inheritance and polymorphism. The previous chapter also explains that all classes ultimately derive from the class System.Object. This chapter covers how to create a hierarchy of classes and how polymorphism works with C#. It also describes all the C# keywords related to inheritance.
TYPES OF INHERITANCE Let’s start by reviewing some object-oriented (OO) terms and look at what C# does and does not support as far as inheritance is concerned. Single inheritance—With single inheritance, one class can derive from one base class. This is a possible scenario with C#. Multiple inheritance—Multiple inheritance allows deriving from multiple base classes. C# does not support multiple inheritance with classes, but it allows multiple inheritance with interfaces. Multilevel inheritance—Multilevel inheritance allows inheritance across a bigger hierarchy. Class B derives from class A, and class C derives from class B. Here, class B is also known as intermediate base class. This is supported and often used with C#. Interface inheritance—Interface inheritance defines inheritance with interfaces. Here, multiple inheritance is possible. Interfaces and interface inheritance is explained later in this 232
Download from finelybook www.finelybook.com
chapter in the “Interfaces” section. Let’s discuss some specific issues with inheritance and C#.
Multiple Inheritance Some languages such as C++ support what is known as multiple inheritance, in which a class derives from more than one other class. With implementation inheritance, multiple inheritance adds complexity and also overhead to the generated code even in cases where multiple inheritance is not used. Because of this, the designers of C# decided not to support multiple inheritance with classes because support for multiple inheritance increases complexity and adds overhead even in cases when multiple inheritance is not used. C# does allow types to be derived from multiple interfaces. One type can implement multiple interfaces. This means that a C# class can be derived from one other class, and any number of interfaces. Indeed, we can be more precise: Thanks to the presence of System.Object as a common base type, every C# class (except for Object) has exactly one base class, and every C# class may additionally have any number of base interfaces.
Structs and Classes Chapter 3 distinguishes between structs (value types) and classes (reference types). One restriction of using structs is that they do not support inheritance, beyond the fact that every struct is automatically derived from System.ValueType. Although it’s true that you cannot code a type hierarchy of structs, it is possible for structs to implement interfaces. In other words, structs don’t really support implementation inheritance, but they do support interface inheritance. The following summarizes the situation for any types that you define: Structs are always derived from System.ValueType. They can also implement any number of interfaces. Classes are always derived from either System.Object or a class that you choose. They can also implement any number of interfaces.
233
Download from finelybook www.finelybook.com
IMPLEMENTATION INHERITANCE If you want to declare that a class derives from another class, use the following syntax: class MyDerivedClass: MyBaseClass { // members }
If a class (or a struct) also derives from interfaces, the list of base class and interfaces is separated by commas: public class MyDerivedClass: MyBaseClass, IInterface1, IInterface2 { // members }
NOTE In case a class and interfaces are used to derive from, the class always must come first—before interfaces. For a struct, the syntax is as follows (it can only use interface inheritance): public struct MyDerivedStruct: IInterface1, IInterface2 { // members }
If you do not specify a base class in a class definition, the C# compiler assumes that System.Object is the base class. Hence, deriving from the Object class (or using the object keyword) is the same as not defining a base class. class MyClass // implicitly derives from System.Object { // members }
234
Download from finelybook www.finelybook.com
Let’s get into an example to define a base class Shape. Something that’s common with shapes—no matter whether they are rectangles or ellipses—is that they have position and size. For position and size, corresponding classes are defined that are contained within the Shape class. The Shape class defines read-only properties Position and Shape that are initialized using auto property initializers (code file VirtualMethods/Shape.cs): public class Position { public int X { get; set; } public int Y { get; set; } } public class Size { public int Width { get; set; } public int Height { get; set; } } public class Shape { public Position Position { get; } = new Position(); public Size Size { get; } = new Size(); }
Virtual Methods By declaring a base class method as virtual, you allow the method to be overridden in any derived classes: public class Shape { public virtual void Draw() => Console.WriteLine($"Shape with {Position} and {Size}"); }
In case the implementation is a one-liner, expression bodied methods (using the lambda operator) can also be used with the virtual keyword. This syntax can be used independent of the modifiers applied: public class Shape { public virtual void Draw() =>
235
Download from finelybook www.finelybook.com
Console.WriteLine($"Shape with {Position} and {Size}"); }
It is also permitted to declare a property as virtual. For a virtual or overridden property, the syntax is the same as for a non-virtual property, with the exception of the keyword virtual, which is added to the definition. The syntax looks like this: public virtual Size Size { get; set; }
Of course, it is also possible to use the full property syntax for virtual properties. The following code snippet makes use of C# 7 expressionbodied property accessors: private Size _size; public virtual Size Size { get => _size; set => _size = value; }
For simplicity, the following discussion focuses mainly on methods, but it applies equally well to properties. The concepts behind virtual functions in C# are identical to standard OOP concepts. You can override a virtual function in a derived class; when the method is called, the appropriate method for the type of object is invoked. In C#, functions are not virtual by default but (aside from constructors) can be explicitly declared as virtual. This follows the C++ methodology: For performance reasons, functions are not virtual unless indicated. In Java, by contrast, all functions are virtual. C# differs from C++ syntax, though, because it requires you to declare when a derived class’s function overrides another function, using the override keyword (code file VirtualMethods/ConcreteShapes.cs): public class Rectangle : Shape { public override void Draw() => Console.WriteLine($"Rectangle with {Position} and {Size}"); }
This syntax for method overriding removes potential runtime bugs 236
Download from finelybook www.finelybook.com
that can easily occur in C++, when a method signature in a derived class unintentionally differs slightly from the base version, resulting in the method failing to override the base version. In C#, this is picked up as a compile-time error because the compiler would see a function marked as override but would not see a base method for it to override. The Size and Position types override the ToString method. This method is declared as virtual in the base class Object: public class Position { public int X { get; set; } public int Y { get; set; } public override string ToString() => $"X: {X}, Y: {Y}"; } public class Size { public int Width { get; set; } public int Height { get; set; } public override string ToString() => $"Width: {Width}, Height: {Height}"; }
NOTE The members of the base class Object are explained in Chapter 3.
NOTE When overriding methods of the base class, the signature (all parameter types and the method name) and the return type must match exactly. If this is not the case then you can create a new member that does not override the base member. Within the Main method, a rectangle named r is instantiated, its properties initialized, and the method Draw invoked (code file 237
Download from finelybook www.finelybook.com
VirtualMethods/Program.cs): var r = new Rectangle(); r.Position.X = 33; r.Position.Y = 22; r.Size.Width = 200; r.Size.Height = 100; r.Draw();
Run the program to see the output of the Draw method: Rectangle with X: 33, Y: 22 and Width: 200, Height: 100
Neither member fields nor static functions can be declared as virtual. The concept simply wouldn’t make sense for any class member other than an instance function member.
Polymorphism With polymorphism, the method that is invoked is defined dynamically and not during compile time. The compiler creates a virtual method table (vtable) that lists the methods that can be invoked during runtime, and it invokes the method based on the type at runtime. Let’s have a look at one example. The method DrawShape receives a Shape parameter and invokes the Draw method of the Shape class (code file VirtualMethods/Program.cs): public static void DrawShape(Shape shape) => shape.Draw();
Use the rectangle created before to invoke the method. Although the method is declared to receive a Shape object, any type that derives from Shape (including the Rectangle) can be passed to this method: Run the program to see the output of the Rectangle.Draw method instead of the Shape.Draw method. The output line starts with Rectangle. If the method of the base class wouldn’t be virtual or the method from the derived class not overridden, the Draw method of the type of the declared object (the Shape) would be used, and thus the output would start with Shape: Rectangle with X: 33, Y: 22 and Width: 200, Height: 100
238
Download from finelybook www.finelybook.com
Hiding Methods If a method with the same signature is declared in both base and derived classes but the methods are not declared with the modifiers virtual and override, respectively, then the derived class version is said to hide the base class version. In most cases, you would want to override methods rather than hide them. By hiding them you risk calling the wrong method for a given class instance. However, as shown in the following example, C# syntax is designed to ensure that the developer is warned at compile time about this potential problem, thus making it safer to hide methods if that is your intention. This also has versioning benefits for developers of class libraries. Suppose that you have a class called Shape in a class library: public class Shape { // various members }
At some point in the future, you write a derived class Ellipse that adds some functionality to the Shape base class. In particular, you add a method called MoveBy, which is not present in the base class: public class Ellipse: Shape { public void MoveBy(int x, int y) { Position.X += x; Position.Y += y; } }
At some later time, the developer of the base class decides to extend the functionality of the base class and, by coincidence, adds a method that is also called MoveBy and that has the same name and signature as yours; however, it probably doesn’t do the same thing. This new method might be declared virtual or not. If you recompile the derived class you get a compiler warning because of a potential method clash. However, it can also happen easily that 239
Download from finelybook www.finelybook.com
the new base class is used without compiling the derived class; it just replaces the base class assembly. The base class assembly could be installed in the global assembly cache (which is done by many Framework assemblies). Now let’s assume the MoveBy method of the base class is declared virtual and the base class itself invokes the MoveBy method. What method will be called? The method of the base class or the MoveBy method of the derived class that was defined earlier? Because the MoveBy method of the derived class is not defined with the override keyword (this was not possible because the base class MoveBy method didn’t exist earlier), the compiler assumes the MoveBy method from the derived class is a completely different method that doesn’t have any relation to the method of the base class; it just has the same name. This method is treated the same way as if it had a different name. Compiling the Ellipse class generates a compilation warning that reminds you to use the new keyword to hide a method. In practice, not using the new keyword has the same compilation result, but you avoid the compiler warning: public class Ellipse: Shape { new public void Move(Position newPosition) { Position.X = newPosition.X; Position.Y = newPosition.Y; } //... other members }
Instead of using the new keyword, you can also rename the method or override the method of the base class if it is declared virtual and serves the same purpose. However, in case other methods already invoke this method, a simple rename can lead to breaking other code.
NOTE The new method modifier shouldn’t be used deliberately to hide 240
Download from finelybook www.finelybook.com
members of the base class. The main purpose of this modifier is to deal with version conflicts and react to changes on base classes after the derived class was done.
Calling Base Versions of Methods C# has a special syntax for calling base versions of a method from a derived class: base.. For example, you have the Move method declared in the base class Shape and want to invoke it in the derived class Rectangle to use the implementation from the base class. To add functionality from the derived class, you can invoke it using base (code file VirtualMethods/Shape.cs): public class Shape { public virtual void Move(Position newPosition) { Position.X = newPosition.X; Position.Y = newPosition.Y; Console.WriteLine($"moves to {Position}"); } //...other members }
The Move method is overridden in the Rectangle class to add the term Rectangle to the console. After this text is written, the method of the base class is invoked using the base keyword (code file VirtualMethods/ConcreteShapes.cs): public class Rectangle: Shape { public override void Move(Position newPosition) { Console.Write("Rectangle "); base.Move(newPosition); } //...other members }
Now move the rectangle to a new position (code file VirtualMethods/Program.cs):
241
Download from finelybook www.finelybook.com
r.Move(new Position { X = 120, Y = 40 });
Run the application to see output that is a result of the Move method in the Rectangle and the Shape classes: Rectangle moves to X: 120, Y: 40
NOTE Using the base keyword, you can invoke any method of the base class—not just the method that is overridden.
Abstract Classes and Methods C# allows both classes and methods to be declared as abstract. An abstract class cannot be instantiated, whereas an abstract method does not have an implementation and must be overridden in any nonabstract derived class. Obviously, an abstract method is automatically virtual (although you don’t need to supply the virtual keyword, and doing so results in a syntax error). If any class contains any abstract methods, that class is also abstract and must be declared as such. Let’s change the Shape class to be abstract. With this it is necessary to derive from this class. The new method Resize is declared abstract, and thus it can’t have any implementation in the Shape class (code file VirtualMethods/Shape.cs): public abstract class Shape { public abstract void Resize(int width, int height); // abstract method }
When deriving a type from the abstract base class, it is necessary to implement all abstract members. Otherwise, the compiler complains: public class Ellipse : Shape {
242
Download from finelybook www.finelybook.com
public override void Resize(int width, int height) { Size.Width = width; Size.Height = height; } }
Of course, the implementation could also look like the following example. Throwing an exception of type NotImplementationException is also an implementation, just not the implementation that was meant to be and usually just a temporary implementation during development: public override void Resize(int width, int height) { throw new NotImplementedException(); }
NOTE Exceptions are explained in detail in Chapter 14, “Errors and Exceptions.” Using the abstract Shape class and the derived Ellipse class, you can declare a variable of a Shape. You cannot instantiate it, but you can instantiate an Ellipse and assign it to the Shape variable (code file VirtualMethods/Program.cs): Shape s1 = new Ellipse(); DrawShape(s1);
Sealed Classes and Methods In case it shouldn’t be allowed to create a class that derives from your class, your class should be sealed. Adding the sealed modifier to a class doesn’t allow you to create a subclass of it. Sealing a method means it’s not possible to override this method. sealed class FinalClass {
243
Download from finelybook www.finelybook.com
//... } class DerivedClass: FinalClass // wrong. Cannot derive from sealed class. { //... }
The most likely situation in which you’ll mark a class or method as sealed is if the class or method is internal to the operation of the library, class, or other classes that you are writing, to ensure that any attempt to override some of its functionality might lead to instability in the code. For example, maybe you haven’t tested inheritance and made the investment in design decisions for inheritance. If this is the case, it’s better to mark your class sealed. There’s another reason to seal classes. With a sealed class, the compiler knows that derived classes are not possible, and thus the virtual table used for virtual methods can be reduced or eliminated, which can increase performance. The string class is sealed. As I haven’t seen a single application not using strings, it’s best to have this type as performant as possible. Making the class sealed is a good hint for the compiler. Declaring a method as sealed serves a purpose similar to that for a class. The method can be an overridden method from a base class, but in the following example the compiler knows another class cannot extend the virtual table for this method; it ends here. class MyClass: MyBaseClass { public sealed override void FinalMethod() { // implementation } } class DerivedClass: MyClass { public override void FinalMethod() // wrong. Will give compilation error { }
244
Download from finelybook www.finelybook.com
}
In order to use the sealed keyword on a method or property, it must have first been overridden from a base class. If you do not want a method or property in a base class overridden, then don’t mark it as virtual.
Constructors of Derived Classes Chapter 3 discusses how constructors can be applied to individual classes. An interesting question arises as to what happens when you start defining your own constructors for classes that are part of a hierarchy, inherited from other classes that may also have custom constructors. Assume that you have not defined any explicit constructors for any of your classes. This means that the compiler supplies default zeroingout constructors for all your classes. There is actually quite a lot going on under the hood when that happens, but the compiler is able to arrange it so that things work out nicely throughout the class hierarchy, and every field in every class is initialized to whatever its default value is. When you add a constructor of your own, however, you are effectively taking control of construction. This has implications right down through the hierarchy of derived classes, so you have to ensure that you don’t inadvertently do anything to prevent construction through the hierarchy from taking place smoothly. You might be wondering why there is any special problem with derived classes. The reason is that when you create an instance of a derived class, more than one constructor is at work. The constructor of the class you instantiate isn’t by itself sufficient to initialize the class; the constructors of the base classes must also be called. That’s why we’ve been talking about construction through the hierarchy. With the earlier sample of the Shape type, properties have been initialized using the auto property initializer: public class Shape { public Position Position { get; } = new Position(); public Size Size { get; } = new Size();
245
Download from finelybook www.finelybook.com
}
Behind the scenes, the compiler creates a default constructor for the class and moves the property initializer within this constructor: public class Shape { public Shape() { Position = new Position(); Size = new Size(); } public Position Position { get; }; public Size Size { get; }; }
Of course, instantiating a Rectangle type that derives from the Shape class, the Rectangle needs Position and Size, and thus the constructor from the base class is invoked on constructing the derived object. In case you don’t initialize members within the default constructor, the compiler automatically initializes reference types to null and value types to 0. Boolean types are initialized to false. The Boolean type is a value type, and false is the same as 0, so it’s the same rule that applies to the Boolean type. With the Ellipse class, it’s not necessary to create a default constructor if the base class defines a default constructor and you’re okay with initializing all members to their defaults. Of course, you still can supply a constructor and call the base constructor using a constructor initializer: public class Ellipse : Shape { public Ellipse() : base() { } }
The constructors are always called in the order of the hierarchy. The constructor of the class System.Object is first, and then progress continues down the hierarchy until the compiler reaches the class 246
Download from finelybook www.finelybook.com
being instantiated. For instantiating the Ellipse type, the Shape constructor follows the Object constructor, and then the Ellipse constructor comes. Each of these constructors handles the initialization of the fields in its own class. Now, make a change to the constructor of the Shape class. Instead of doing a default initialization with Size and Position properties, assign values within the constructor (code file InheritanceWithConstructors/Shape.cs): public abstract class Shape { public Shape(int width, int height, int x, int y) { Size = new Size { Width = width, Height = height }; Position = new Position { X = x, Y = y }; } public Position Position { get; } public Size Size { get; } }
When removing the default constructor and recompiling the program, the Ellipse and Rectangle classes can’t compile because the compiler doesn’t know what values should be passed to the only nondefault constructor of the base class. Here you need to create a constructor in the derived class and initialize the base class constructor with the constructor initializer (code file InheritanceWithConstructors/ConcreteShapes.cs): public Rectangle(int width, int height, int x, int y) : base(width, height, x, y) { }
Putting the initialization inside the constructor block is too late because the constructor of the base class is invoked before the constructor of the derived class is called. That’s why there’s a constructor initializer that is declared before the constructor block. In case you want to allow creating Rectangle objects by using a default constructor, you can still do this. You can also do it if the constructor of the base class doesn’t have a default constructor. You just need to 247
Download from finelybook www.finelybook.com
assign the values for the base class constructor in the constructor initializer as shown. In the following snippet, named arguments are used because otherwise it would be hard to distinguish between width, height, x, and y values passed. public Rectangle() : base(width: 0, height: 0, x: 0, y: 0) { }
NOTE Named arguments are discussed in Chapter 3. As you can see, this is a very neat and well-designed process. Each constructor handles initialization of the variables that are obviously its responsibility; and, in the process, your class is correctly instantiated and prepared for use. If you follow the same principles when you write your own constructors for your classes, even the most complex classes should be initialized smoothly and without any problems.
MODIFIERS You have already encountered quite a number of so-called modifiers— keywords that can be applied to a type or a member. Modifiers can indicate the visibility of a method, such as public or private, or the nature of an item, such as whether a method is virtual or abstract. C# has a number of modifiers, and at this point it’s worth taking a minute to provide the complete list.
Access Modifiers Access modifiers indicate which other code items can view an item. MODIFIER APPLIES DESCRIPTION TO public Any types The item is visible to any other code. 248
Download from finelybook www.finelybook.com
protected
internal
private
protected internal
private protected
or members Any member of a type, and any nested type Any types or members Any member of a type, and any nested type Any member of a type, and any nested type Any member of a type, and any nested type
The item is visible only to any derived type.
The item is visible only within its containing assembly. The item is visible only inside the type to which it belongs.
The item is visible to any code within its containing assembly and to any code inside a derived type. Practically this means protected or internal, either protected (from any assembly) or internal (from within the assembly). Contrary to the access modifier protected internal which means either protected or internal, private protected combines protected internal with an and. Access is allowed only for derived types that are within the same assembly, but not from other assemblies. This access modifier is new with C# 7.2.
NOTE 249
Download from finelybook www.finelybook.com
public, protected, and private are logical access modifiers. internal is a physical access modifier whose boundary is an
assembly. Note that type definitions can be internal or public, depending on whether you want the type to be visible outside its containing assembly: public class MyClass { // ...
You cannot define types as protected, private, or protected internal because these visibility levels would be meaningless for a type contained in a namespace. Hence, these visibilities can be applied only to members. However, you can define nested types (that is, types contained within other types) with these visibilities because in this case the type also has the status of a member. Hence, the following code is correct: public class OuterClass { protected class InnerClass { // ... } // ... }
If you have a nested type, the inner type is always able to see all members of the outer type. Therefore, with the preceding code, any code inside InnerClass always has access to all members of OuterClass, even where those members are private.
Other Modifiers The modifiers in the following table can be applied to members of types and have various uses. A few of these modifiers also make sense when applied to types. MODIFIER APPLIES DESCRIPTION 250
Download from finelybook www.finelybook.com
new
static
virtual
abstract
override
sealed
extern
TO Function members All members Function members only Function members only Function members only Classes, methods, and properties
The member hides an inherited member with the same signature. The member does not operate on a specific instance of the class. This is also known as class member instead of instance member. The member can be overridden by a derived class. A virtual member that defines the signature of the member but doesn’t provide an implementation. The member overrides an inherited virtual or abstract member.
For classes, the class cannot be inherited from. For properties and methods, the member overrides an inherited virtual member but cannot be overridden by any members in any derived classes. Must be used in conjunction with override. Static The member is implemented externally, in [DllImport] a different language. The use of this methods keyword is explained in Chapter 17, only “Managed and Unmanaged Memory.”
INTERFACES As mentioned earlier, by deriving from an interface, a class is declaring that it implements certain functions. Because not all objectoriented languages support interfaces, this section examines C#’s implementation of interfaces in detail. It illustrates interfaces by presenting the complete definition of one of the interfaces that has been predefined by Microsoft: System.IDisposable. IDisposable contains one method, Dispose, which is intended to be implemented 251
Download from finelybook www.finelybook.com
by classes to clean up resources: public interface IDisposable { void Dispose(); }
This code shows that declaring an interface works syntactically in much the same way as declaring an abstract class. Be aware, however, that it is not permitted to supply implementations of any of the members of an interface. In general, an interface can contain only declarations of methods, properties, indexers, and events. Compare interfaces to abstract classes: An abstract class can have implementations or abstract members without implementation. However, an interface can never have any implementation; it is purely abstract. Because the members of an interface are always abstract, the abstract keyword is not needed with interfaces. Similarly to abstract classes, you can never instantiate an interface; it contains only the signatures of its members. In addition, you can declare variables of a type of an interface. An interface has neither constructors (how can you construct something that you can’t instantiate?) nor fields (because that would imply some internal implementation). An interface is also not allowed to contain operator overloads—although this possibility is always discussed with the language design and might change at some time in the future. It’s also not permitted to declare modifiers on the members in an interface definition. Interface members are always implicitly public, and they cannot be declared as virtual. That’s up to implementing classes to decide. Therefore, it is fine for implementing classes to declare access modifiers, as demonstrated in the example in this section. For example, consider IDisposable. If a class wants to declare publicly that it implements the Dispose method, it must implement IDisposable, which in C# terms means that the class derives from IDisposable: 252
Download from finelybook www.finelybook.com
class SomeClass: IDisposable { // This class MUST contain an implementation of the // IDisposable.Dispose() method, otherwise // you get a compilation error. public void Dispose() { // implementation of Dispose() method } // rest of class }
In this example, if SomeClass derives from IDisposable but doesn’t contain a Dispose implementation with the exact same signature as defined in IDisposable, you get a compilation error because the class is breaking its agreed-on contract to implement IDisposable. Of course, it’s no problem for the compiler if a class has a Dispose method but doesn’t derive from IDisposable. The problem is that other code would have no way of recognizing that SomeClass has agreed to support the IDisposable features.
NOTE is a relatively simple interface because it defines only one method. Most interfaces contain more members. The correct implementation of IDisposable is not really that simple; it’s covered in Chapter 17. IDisposable
Defining and Implementing Interfaces This section illustrates how to define and use interfaces by developing a short program that follows the interface inheritance paradigm. The example is based on bank accounts. Assume that you are writing code that will ultimately allow computerized transfers between bank accounts. Assume also for this example that there are many companies that implement bank accounts, but they have all mutually agreed that any classes representing bank accounts will implement an interface, IBankAccount, which exposes methods to deposit or withdraw money, 253
Download from finelybook www.finelybook.com
and a property to return the balance. It is this interface that enables outside code to recognize the various bank account classes implemented by different bank accounts. Although the aim is to enable the bank accounts to communicate with each other to allow transfers of funds between accounts, that feature isn’t introduced just yet. To keep things simple, you keep all the code for the example in the same source file. Of course, if something like the example were used in real life, you could surmise that the different bank account classes would not only be compiled to different assemblies, but also be hosted on different machines owned by the different banks. That’s all much too complicated for the purposes of this example. However, to maintain some realism, you define different namespaces for the different companies. To begin, you need to define the IBankAccount interface (code file UsingInterfaces/IBankAccount.cs): namespace Wrox.ProCSharp { public interface IBankAccount { void PayIn(decimal amount); bool Withdraw(decimal amount); decimal Balance { get; } } }
Notice the name of the interface, IBankAccount. It’s a best-practice convention to begin an interface name with the letter I, to indicate it’s an interface.
NOTE Chapter 2, “Core C#,” points out that in most cases, .NET usage guidelines discourage the so-called Hungarian notation in which names are preceded by a letter that indicates the type of object being defined. Interfaces are one of the few exceptions for which Hungarian notation is recommended. 254
Download from finelybook www.finelybook.com
The idea is that you can now write classes that represent bank accounts. These classes don’t have to be related to each other in any way; they can be completely different classes. They will all, however, declare that they represent bank accounts by the mere fact that they implement the IBankAccount interface. Let’s start off with the first class, a saver account run by the Royal Bank of Venus (code file UsingInterfaces/VenusBank.cs): namespace Wrox.ProCSharp.VenusBank { public class SaverAccount: IBankAccount { private decimal _balance; public void PayIn(decimal amount) => _balance += amount; public bool Withdraw(decimal amount) { if (_balance >= amount) { _balance -= amount; return true; } Console.WriteLine("Withdrawal attempt failed."); return false; } public decimal Balance => _balance; public override string ToString() => $"Venus Bank Saver: Balance = {_balance,6:C}"; } }
It should be obvious what the implementation of this class does. You maintain a private field, balance, and adjust this amount when money is deposited or withdrawn. You display an error message if an attempt to withdraw money fails because of insufficient funds. Notice also that because we are keeping the code as simple as possible, we are not implementing extra properties, such as the account holder’s name! In real life that would be essential information, of course, but for this example it’s unnecessarily complicated. The only really interesting line in this code is the class declaration: public class SaverAccount: IBankAccount
255
Download from finelybook www.finelybook.com
You’ve declared that SaverAccount is derived from one interface, IBankAccount, and you have not explicitly indicated any other base classes (which means that SaverAccount is derived directly from System.Object). By the way, derivation from interfaces acts completely independently from derivation from classes. Being derived from IBankAccount means that SaverAccount gets all the members of IBankAccount; but because an interface doesn’t actually implement any of its methods, SaverAccount must provide its own implementations of all of them. If any implementations are missing, you can rest assured that the compiler will complain. Recall also that the interface just indicates the presence of its members. It’s up to the class to determine whether it wants any of them to be virtual or abstract (though abstract functions are only allowed if the class itself is abstract). For this particular example, you don’t have any reason to make any of the interface functions virtual. To illustrate how different classes can implement the same interface, assume that the Planetary Bank of Jupiter also implements a class to represent one of its bank accounts—a Gold Account (code file UsingInterfaces/JupiterBank.cs): namespace Wrox.ProCSharp.JupiterBank { public class GoldAccount: IBankAccount { // ... } }
The details of the GoldAccount class aren’t presented here; in the sample code, it’s basically identical to the implementation of SaverAccount. We stress that GoldAccount has no connection with SaverAccount, other than they both happen to implement the same interface. Now that you have your classes, you can test them. You first need a few using declarations: using Wrox.ProCSharp; using Wrox.ProCSharp.VenusBank; using Wrox.ProCSharp.JupiterBank;
256
Download from finelybook www.finelybook.com
Now you need a Main method (code file UsingInterfaces/Program.cs): namespace Wrox.ProCSharp { class Program { static void Main() { IBankAccount venusAccount = new SaverAccount(); IBankAccount jupiterAccount = new GoldAccount(); venusAccount.PayIn(200); venusAccount.Withdraw(100); Console.WriteLine(venusAccount.ToString()); jupiterAccount.PayIn(500); jupiterAccount.Withdraw(600); jupiterAccount.Withdraw(100); Console.WriteLine(jupiterAccount.ToString()); } } }
This code produces the following output: > BankAccounts Venus Bank Saver: Balance = $100.00 Withdrawal attempt failed. Jupiter Bank Saver: Balance = $400.00
The main point to notice about this code is the way that you have declared both your reference variables as IBankAccount references. This means that they can point to any instance of any class that implements this interface. However, it also means that you can call only methods that are part of this interface through these references— if you want to call any methods implemented by a class that are not part of the interface, you need to cast the reference to the appropriate type. In the example code, you were able to call ToString (not implemented by IBankAccount) without any explicit cast, purely because ToString is a System.Object method, so the C# compiler knows that it will be supported by any class (put differently, the cast from any interface to System.Object is implicit). Chapter 6, “Operators and Casts,” covers the syntax for performing casts. Interface references can in all respects be treated as class references— but the power of an interface reference is that it can refer to any class 257
Download from finelybook www.finelybook.com
that implements that interface. For example, this allows you to form arrays of interfaces, whereby each element of the array is a different class: IBankAccount[] accounts = new IBankAccount[2]; accounts[0] = new SaverAccount(); accounts[1] = new GoldAccount();
Note, however, that you would get a compiler error if you tried something like this: accounts[1] = new SomeOtherClass(); // SomeOtherClass does NOT implement // IBankAccount: WRONG!!
The preceding causes a compilation error similar to this: Cannot implicitly convert type 'Wrox.ProCSharp. SomeOtherClass' to 'Wrox.ProCSharp.IBankAccount'
Interface Inheritance It’s possible for interfaces to inherit from each other in the same way that classes do. This concept is illustrated by defining a new interface, ITransferBankAccount, which has the same features as IBankAccount but also defines a method to transfer money directly to a different account (code file UsingInterfaces/ITransferBankAccount): namespace Wrox.ProCSharp { public interface ITransferBankAccount: IBankAccount { bool TransferTo(IBankAccount destination, decimal amount); } }
Because ITransferBankAccount is derived from IBankAccount, it gets all the members of IBankAccount as well as its own. That means that any class that implements (derives from) ITransferBankAccount must implement all the methods of IBankAccount, as well as the new TransferTo method defined in ITransferBankAccount. Failure to 258
Download from finelybook www.finelybook.com
implement all these methods results in a compilation error. Note that the TransferTo method uses an IBankAccount interface reference for the destination account. This illustrates the usefulness of interfaces: When implementing and then invoking this method, you don’t need to know anything about what type of object you are transferring money to—all you need to know is that this object implements IBankAccount. To illustrate ITransferBankAccount, assume that the Planetary Bank of Jupiter also offers a current account. Most of the implementation of the CurrentAccount class is identical to implementations of SaverAccount and GoldAccount (again, this is just to keep this example simple—that won’t normally be the case), so in the following code only the differences are highlighted (code file UsingInterfaces/JupiterBank.cs): public class CurrentAccount: ITransferBankAccount { private decimal _balance; public void PayIn(decimal amount) => _balance += amount; public bool Withdraw(decimal amount) { if (_balance >= amount) { _balance -= amount; return true; } Console.WriteLine("Withdrawal attempt failed."); return false; } public decimal Balance => _balance; public bool TransferTo(IBankAccount destination, decimal amount) { bool result = Withdraw(amount); if (result) { destination.PayIn(amount); } return result; } public override string ToString() => $"Jupiter Bank Current Account: Balance =
259
Download from finelybook www.finelybook.com
{_balance,6:C}"; }
The class can be demonstrated with this code: static void Main() { IBankAccount venusAccount = new SaverAccount(); ITransferBankAccount jupiterAccount = new CurrentAccount(); venusAccount.PayIn(200); jupiterAccount.PayIn(500); jupiterAccount.TransferTo(venusAccount, 100); Console.WriteLine(venusAccount.ToString()); Console.WriteLine(jupiterAccount.ToString()); }
The preceding code produces the following output, which, as you can verify, shows that the correct amounts have been transferred: > CurrentAccount Venus Bank Saver: Balance = $300.00 Jupiter Bank Current Account: Balance = $400.00
IS AND AS OPERATORS Before concluding inheritance with interfaces and classes, we need to have a look at two important operators related to inheritance: the is and as operators. You’ve already seen that you can directly assign objects of a specific type to a base class or an interface—if the type has a direct relation in the hierarchy. For example, the SaverAccount created earlier can be directly assigned to an IBankAccount because the SaverAccount type implements the interface IBankAccount: IBankAccount venusAccount = new SaverAccount();
What if you have a method accepting an object type, and you want to get access to the IBankAccount members? The object type doesn’t have the members of the IBankAccount interface. You can do a cast. Cast the object (you can also use any parameter of type of any interface and cast it to the type you need) to an IBankAccount and work with that:
260
Download from finelybook www.finelybook.com
public void WorkWithManyDifferentObjects(object o) { IBankAccount account = (IBankAccount)o; // work with the account }
This works as long as you always supply an object of type IBankAccount to this method. Of course, if an object of type object is accepted, there will be the case when invalid objects are passed. This is when you get an InvalidCastException. It’s never a good idea to accept exceptions in normal cases. You can read more about this in Chapter 14. This is where the is and as operators come into play. Instead of doing the cast directly, it’s a good idea to check whether the parameter implements the interface IBankAccount. The as operator works similar to the cast operator within the class hierarchy—it returns a reference to the object. However, it never throws an InvalidCastException. Instead, this operator returns null in case the object is not of the type asked for. Here, it is a good idea to verify for null before using the reference; otherwise a NullReferenceException will be thrown later using the following reference: public void WorkWithManyDifferentObjects(object o) { IBankAccount account = o as IBankAccount; if (account != null) { // work with the account } }
Instead of using the as operator, you can use the is operator. The is operator returns true or false, depending on whether the condition is fulfilled and the object is of the specified type. If the condition is true, the resulting object is written to the variable declared of the matching type as shown in the following code snippet: public void WorkWithManyDifferentObjects(object o) { if (o is IBankAccount account) { // work with the account }
261
Download from finelybook www.finelybook.com
}
NOTE Adding the variable declaration to the is operator is a new feature of C# 7. This is part of the pattern matching functionality that is discussed in detail in Chapter 13, “Functional Programming with C#.” Instead of having bad surprises by exceptions based on casts, conversions within the class hierarchy work well with the is and as operators.
SUMMARY This chapter described how to code inheritance in C#. The chapter described how C# offers rich support for both multiple interface and single implementation inheritance and explained that C# provides a number of useful syntactical constructs designed to assist in making code more robust. These include the override keyword, which indicates when a function should override a base function; the new keyword, which indicates when a function hides a base function; and rigid rules for constructor initializers that are designed to ensure that constructors are designed to interoperate in a robust manner. The next chapter continues with an important C# language construct: generics.
262
Download from finelybook www.finelybook.com
5 Generics WHAT’S IN THIS CHAPTER? An overview of generics Creating generic classes Features of generic classes Generic interfaces Generic structs Generic methods
WROX.COM DOWNLOADS FOR THIS CHAPTER The Wrox.com code downloads for this chapter are found at wrox.com on the Download Code tab. The source code is also available at https://github.com/ProfessionalCSharp/ProfessionalCSharp7 the directory Generics.
The code for this chapter is divided into the following major examples: Linked List Objects Linked List Sample Document Manager 263
in
Download from finelybook www.finelybook.com
Variance Generic Methods Specialization
GENERICS OVERVIEW Generics are an important concept of not only C# but also .NET. Generics are more than a part of the C# programming language; they are deeply integrated with the IL (Intermediate Language) code in the assemblies. With generics, you can create classes and methods that are independent of contained types. Instead of writing a number of methods or classes with the same functionality for different types, you can create just one method or class. Another option to reduce the amount of code is using the Object class. However, passing using types derived from the Object class is not type safe. Generic classes make use of generic types that are replaced with specific types as needed. This allows for type safety: The compiler complains if a specific type is not supported with the generic class. Generics are not limited to classes; in this chapter, you also see generics with interfaces and methods. You can find generics with delegates in Chapter 8, “Delegates, Lambdas, and Events.” Generics are not specific only to C#; similar concepts exist with other languages. For example, C++ templates have some similarity to generics. However, there’s a big difference between C++ templates and .NET generics. With C++ templates, the source code of the template is required when a template is instantiated with a specific type. The C++ compiler generates separate binary code for each type that is an instance of a specific template. Unlike C++ templates, generics are not only a construct of the C# language but are defined with the Common Language Runtime (CLR). This makes it possible to instantiate generics with a specific type in Visual Basic even though the generic class was defined with C#. The following sections explore the advantages and disadvantages of generics, particularly in regard to the following: 264
Download from finelybook www.finelybook.com
Performance Type safety Binary code reuse Code bloat Naming guidelines
Performance One of the big advantages of generics is performance. In Chapter 10, “Collections,” you see non-generic and generic collection classes from the namespaces System.Collections and System.Collections.Generic. Using value types with non-generic collection classes results in boxing and unboxing when the value type is converted to a reference type, and vice versa.
NOTE Boxing and unboxing are discussed in Chapter 6, “Operators and Casts.” Here is just a short refresher about these terms. Value types are stored on the stack, whereas reference types are stored on the heap. C# classes are reference types; structs are value types. .NET makes it easy to convert value types to reference types, so you can use a value type everywhere an object (which is a reference type) is needed. For example, an int can be assigned to an object. The conversion from a value type to a reference type is known as boxing. Boxing occurs automatically if a method requires an object as a parameter, and a value type is passed. In the other direction, a boxed value type can be converted to a value type by using unboxing. With unboxing, the cast operator is required. The following example shows that the ArrayList class from the namespace System.Collections stores objects; the Add method is defined to require an object as a parameter, so an integer type is boxed. When the values from an ArrayList are read, unboxing occurs 265
Download from finelybook www.finelybook.com
when the object is converted to an integer type. This may be obvious with the cast operator that is used to assign the first element of the ArrayList collection to the variable i1, but it also happens inside the foreach statement where the variable i2 of type int is accessed: var list = new ArrayList(); list.Add(44); // boxing — convert a value type to a reference type int i1 = (int)list[0]; // unboxing — convert a reference type to // a value type foreach (int i2 in list) { Console.WriteLine(i2); // unboxing }
Boxing and unboxing are easy to use but have a big performance impact, especially when iterating through many items. Instead of using objects, the List class from the namespace System.Collections.Generic enables you to define the type when it is used. In the example here, the generic type of the List class is defined as int, so the int type is used inside the class that is generated dynamically from the Just-In-Time (JIT) compiler. Boxing and unboxing no longer happen: var list = new List(); list.Add(44); // no boxing — value types are stored in the List int i1 = list[0]; // no unboxing, no cast needed foreach (int i2 in list) { Console.WriteLine(i2); }
Type Safety Another feature of generics is type safety. As with the ArrayList class, if objects are used, any type can be added to this collection. The following example shows adding an integer, a string, and an object of type MyClass to the collection of type ArrayList: var list = new ArrayList();
266
Download from finelybook www.finelybook.com
list.Add(44); list.Add("mystring"); list.Add(new MyClass());
If this collection is iterated using the following foreach statement, which iterates using integer elements, the compiler accepts this code. However, because not all elements in the collection can be cast to an int, a runtime exception will occur: foreach (int i in list) { Console.WriteLine(i); }
Errors should be detected as early as possible. With the generic class List, the generic type T defines what types are allowed. With a definition of List, only integer types can be added to the collection. The compiler doesn’t compile this code because the Add method has invalid arguments: var list = new List(); list.Add(44); list.Add("mystring"); // compile time error list.Add(new MyClass()); // compile time error
Binary Code Reuse Generics enable better binary code reuse. A generic class can be defined once and can be instantiated with many different types. Unlike C++ templates, it is not necessary to access the source code. For example, here the List class from the namespace System.Collections.Generic is instantiated with an int, a string, and a MyClass type: var list = new List(); list.Add(44); var stringList = new List(); stringList.Add("mystring"); var myClassList = new List(); myClassList.Add(new MyClass());
Generic types can be defined in one language and used from any other 267
Download from finelybook www.finelybook.com
.NET language.
Code Bloat You might be wondering how much code is created with generics when instantiating them with different specific types. Because a generic class definition goes into the assembly, instantiating generic classes with specific types doesn’t duplicate these classes in the IL code. However, when the generic classes are compiled by the JIT compiler to native code, a new class for every specific value type is created. Reference types share all the same implementation of the same native class. This is because with reference types, only a 4-byte memory address (with 32-bit systems) is needed within the generic instantiated class to reference a reference type. Value types are contained within the memory of the generic instantiated class; and because every value type can have different memory requirements, a new class for every value type is instantiated.
Naming Guidelines If generics are used in the program, it helps when generic types can be distinguished from non-generic types. Here are naming guidelines for generic types: Prefix generic type names with the letter T. If the generic type can be replaced by any class because there’s no special requirement, and only one generic type is used, the character T is good as a generic type name: public class List { } public class LinkedList { }
If there’s a special requirement for a generic type (for example, it must implement an interface or derive from a base class), or if two or more generic types are used, use descriptive names for the type names: public delegate void EventHandler(object sender, TEventArgs e); public delegate TOutput Converter(TInput
268
Download from finelybook www.finelybook.com
from); public class SortedList { }
CREATING GENERIC CLASSES The example in this section starts with a normal, non-generic simplified linked list class that can contain objects of any kind, and then converts this class to a generic class. With a linked list, one element references the next one. Therefore, you must create a class that wraps the object inside the linked list and references the next object. The class LinkedListNode contains a property named Value that is initialized with the constructor. In addition to that, the LinkedListNode class contains references to the next and previous elements in the list that can be accessed from properties (code file LinkedListObjects/LinkedListNode.cs): public class LinkedListNode { public LinkedListNode(object value) => Value = value; public object Value { get; } public LinkedListNode Next { get; internal set; } public LinkedListNode Prev { get; internal set; } }
The LinkedList class includes First and Last properties of type LinkedListNode that mark the beginning and end of the list. The method AddLast adds a new element to the end of the list. First, an object of type LinkedListNode is created. If the list is empty, then the First and Last properties are set to the new element; otherwise, the new element is added as the last element to the list. By implementing the GetEnumerator method, it is possible to iterate through the list with the foreach statement. The GetEnumerator method makes use of the yield statement for creating an enumerator type: public class LinkedList: IEnumerable { public LinkedListNode First { get; private set; } public LinkedListNode Last { get; private set; } public LinkedListNode AddLast(object node) {
269
Download from finelybook www.finelybook.com
var newNode = new LinkedListNode(node); if (First == null) { First = newNode; Last = First; } else { LinkedListNode previous = Last; Last.Next = newNode; Last = newNode; Last.Prev = previous; } return newNode; } public IEnumerator GetEnumerator() { LinkedListNode current = First; while (current != null) { yield return current.Value; current = current.Next; } } }
NOTE The yield statement creates a state machine for an enumerator. This statement is explained in Chapter 7, “Arrays.” Now you can use the LinkedList class with any type. The following code segment instantiates a new LinkedList object and adds two integer types and one string type. As the integer types are converted to an object, boxing occurs as explained earlier in this chapter. With the foreach statement, unboxing happens. In the foreach statement, the elements from the list are cast to an integer, so a runtime exception occurs with the third element in the list because casting to an int fails (code file LinkedListObjects/Program.cs):
270
Download from finelybook www.finelybook.com
var list1 = new LinkedList(); list1.AddLast(2); list1.AddLast(4); list1.AddLast("6"); foreach (int i in list1) { Console.WriteLine(i); }
Now make a generic version of the linked list. A generic class is defined similarly to a normal class with the generic type declaration. You can then use the generic type within the class as a field member or with parameter types of methods. The class LinkedListNode is declared with a generic type T. The property Value is now type T instead of object; the constructor is changed as well to accept an object of type T. A generic type can also be returned and set, so the properties Next and Prev are now of type LinkedListNode (code file LinkedListSample/LinkedListNode.cs): public class LinkedListNode { public LinkedListNode(T value) => Value = value; public T Value { get; } public LinkedListNode Next { get; internal set; } public LinkedListNode Prev { get; internal set; } }
In the following code, the class LinkedList is changed to a generic class as well. LinkedList contains LinkedListNode elements. The type T from the LinkedList defines the type T of the properties First and Last. The method AddLast now accepts a parameter of type T and instantiates an object of LinkedListNode. Besides the interface IEnumerable, a generic version is also available: IEnumerable. IEnumerable derives from IEnumerable and adds the GetEnumerator method, which returns IEnumerator. LinkedList implements the generic interface IEnumerable (code file LinkedListSample/LinkedList.cs): public class LinkedList: IEnumerable { public LinkedListNode First { get; private set; }
271
Download from finelybook www.finelybook.com
public LinkedListNode Last { get; private set; } public LinkedListNode AddLast(T node) { var newNode = new LinkedListNode(node); if (First == null) { First = newNode; Last = First; } else { LinkedListNode previous = Last; Last.Next = newNode; Last = newNode; Last.Prev = previous; } return newNode; } public IEnumerator GetEnumerator() { LinkedListNode current = First; while (current != null) { yield return current.Value; current = current.Next; } } IEnumerator IEnumerable.GetEnumerator() => GetEnumerator(); }
NOTE Enumerators and the interfaces IEnumerable and IEnumerator are discussed in Chapter 7. Using the generic LinkedList, you can instantiate it with an int type, and there’s no boxing. Also, you get a compiler error if you don’t pass an int with the method AddLast. Using the generic IEnumerable, the foreach statement is also type safe, and you get a compiler error if that variable in the foreach statement is not an int 272
Download from finelybook www.finelybook.com
(code file LinkedListSample/Program.cs): var list2 = new LinkedList(); list2.AddLast(1); list2.AddLast(3); list2.AddLast(5); foreach (int i in list2) { Console.WriteLine(i); }
Similarly, you can use the generic LinkedList with a string type and pass strings to the AddLast method: var list3 = new LinkedList(); list3.AddLast("2"); list3.AddLast("four"); list3.AddLast("foo"); foreach (string s in list3) { Console.WriteLine(s); }
NOTE Every class that deals with the object type is a possible candidate for a generic implementation. Also, if classes make use of hierarchies, generics can be very helpful in making casting unnecessary.
GENERICS FEATURES When creating generic classes, you might need some additional C# keywords. For example, it is not possible to assign null to a generic type. In this case, the keyword default can be used, as demonstrated in the next section. If the generic type does not require the features of the Object class but you need to invoke some specific methods in the generic class, you can define constraints. This section discusses the following topics: 273
Download from finelybook www.finelybook.com
Default values Constraints Inheritance Static members This example begins with a generic document manager, which is used to read and write documents from and to a queue. Start by creating a new Console project named DocumentManager and add the class DocumentManager. The method AddDocument adds a document to the queue. The read-only property IsDocumentAvailable returns true if the queue is not empty (code file DocumentManager/DocumentManager.cs): using System; using System.Collections.Generic; namespace Wrox.ProCSharp.Generics { public class DocumentManager { private readonly Queue _documentQueue = new Queue (); private readonly object _lockQueue = new object(); public void AddDocument(T doc) { lock (_lockQueue) { _documentQueue.Enqueue(doc); } } public bool IsDocumentAvailable => _documentQueue.Count > 0; } }
Threading and the lock statement are discussed in Chapter 21, “Tasks and Parallel Programming.”
Default Values Now you add a GetDocument method to the DocumentManager class. Inside this method the type T should be assigned to null. However, it 274
Download from finelybook www.finelybook.com
is not possible to assign null to generic types. That’s because a generic type can also be instantiated as a value type, and null is allowed only with reference types. To circumvent this problem, you can use the default keyword. With the default keyword, null is assigned to reference types and 0 is assigned to value types: public T GetDocument() { T doc = default; lock (_lockQueue) { doc = _documentQueue.Dequeue(); } return doc; }
NOTE The default keyword has multiple meanings depending on its context. The switch statement uses a default for defining the default case, and with generics default is used to initialize generic types either to null or to 0, depending on whether it is a reference or value type.
Constraints If the generic class needs to invoke some methods from the generic type, you have to add constraints. With DocumentManager, all the document titles should be displayed in the DisplayAllDocuments method. The Document class implements the interface IDocument with the read-only properties Title and Content (code file DocumentManager/Document.cs): public interface IDocument { string Title { get; } string Content { get; } }
275
Download from finelybook www.finelybook.com
public class Document: IDocument { public Document(string title, string content) { Title = title; Content = content; } public string Title { get; } public string Content { get; } }
To display the documents with the DocumentManager class, you can cast the type T to the interface IDocument to display the title: public void DisplayAllDocuments() { foreach (T doc in documentQueue) { Console.WriteLine(((IDocument)doc).Title); } }
The problem here is that doing a cast results in a runtime exception if type T does not implement the interface IDocument. Instead, it would be better to define a constraint with the DocumentManager class specifying that the type TDocument must implement the interface IDocument. To clarify the requirement in the name of the generic type, T is changed to TDocument. The where clause defines the requirement to implement the interface IDocument (code file DocumentManager/DocumentManager.cs): public class DocumentManager where TDocument: IDocument {
NOTE When adding a constraint to a generic type, it’s a good idea to have some information with the generic parameter name. The 276
Download from finelybook www.finelybook.com
sample code is now using TDocument instead of T for the generic parameter. For the compiler, the parameter name doesn’t matter, but it is more readable. This way you can write the foreach statement in such a way that the type TDocument contains the property Title. You get support from Visual Studio IntelliSense and the compiler: public void DisplayAllDocuments() { foreach (TDocument doc in documentQueue) { Console.WriteLine(doc.Title); } }
In the Main method, the DocumentManager class is instantiated with the type Document that implements the required interface IDocument. Then new documents are added and displayed, and one of the documents is retrieved (code file DocumentManager/Program.cs): public static void Main() { var dm = new DocumentManager(); dm.AddDocument(new Document("Title A", "Sample A")); dm.AddDocument(new Document("Title B", "Sample B")); dm.DisplayAllDocuments(); if (dm.IsDocumentAvailable) { Document d = dm.GetDocument(); Console.WriteLine(d.Content); } }
The DocumentManager now works with any class that implements the interface IDocument. In the sample application, you’ve seen an interface constraint. Generics support several constraint types, indicated in the following table. CONSTRAINT DESCRIPTION 277
Download from finelybook www.finelybook.com
With a struct constraint, type T must be a value type. where T: class The class constraint indicates that type T must be a reference type. where T: IFoo Specifies that type T is required to implement interface IFoo. where T: Foo Specifies that type T is required to derive from base class Foo. where T: new() A constructor constraint; specifies that type T must have a default constructor. where T1: T2 With constraints it is also possible to specify that type T1 derives from a generic type T2. where T: struct
NOTE Constructor constraints can be defined only for the default constructor. It is not possible to define a constructor constraint for other constructors. With a generic type, you can also combine multiple constraints. The constraint where T: IFoo, new() with the MyClass declaration specifies that type T implements the interface IFoo and has a default constructor: public class MyClass where T: IFoo, new() { //...
NOTE One important restriction of the where clause with C# is that it’s not possible to define operators that must be implemented by the generic type. Operators cannot be defined in interfaces. With the 278
Download from finelybook www.finelybook.com
clause, it is only possible to define base classes, interfaces, and the default constructor. where
Inheritance The LinkedList class created earlier implements the interface IEnumerable: public class LinkedList: IEnumerable { //...
A generic type can implement a generic interface. The same is possible by deriving from a class. A generic class can be derived from a generic base class: public class Base { } public class Derived: Base { }
The requirement is that the generic types of the interface must be repeated, or the type of the base class must be specified, as in this case: public class Base { } public class Derived: Base { }
This way, the derived class can be a generic or non-generic class. For example, you can define an abstract generic base class that is implemented with a concrete type in the derived class. This enables you to write generic specialization for specific types: public abstract class Calc {
279
Download from finelybook www.finelybook.com
public abstract T Add(T x, T y); public abstract T Sub(T x, T y); } public class IntCalc: Calc { public override int Add(int x, int y) => x + y; public override int Sub(int x, int y) => x — y; }
You can also create a partial specialization, such as deriving the StringQuery class from Query and defining only one of the generic parameters, for example, a string for TResult. For instantiating the StringQuery, you need only to supply the type for TRequest: public class Query { } public StringQuery : Query { }
Static Members Static members of generic classes are shared with only one instantiation of the class, and they require special attention. Consider the following example, where the class StaticDemo contains the static field x: public class StaticDemo { public static int x; }
Because the class StaticDemo is used with both a string type and an int type, two sets of static fields exist: StaticDemo.x = 4; StaticDemo.x = 5; Console.WriteLine(StaticDemo.x); // writes 4
GENERIC INTERFACES 280
Download from finelybook www.finelybook.com
Using generics, you can define interfaces that define methods with generic parameters. In the linked list sample, you’ve already implemented the interface IEnumerable, which defines a GetEnumerator method to return IEnumerator. .NET offers a lot of generic interfaces for different scenarios; examples include IComparable, ICollection, and IExtensibleObject. Often older, non-generic versions of the same interface exist; for example, .NET 1.0 had an IComparable interface that was based on objects. IComparable is based on a generic type: public interface IComparable { int CompareTo(T other); }
NOTE Don't be confused by the in and out keywords used with the generic parameter. They are explained soon in the “Covariance and Contra-Variance” section. The older, non-generic IComparable interface requires an object with the CompareTo method. This requires a cast to specific types, such as to the Person class for using the LastName property: public class Person: IComparable { public int CompareTo(object obj) { Person other = obj as Person; return this.lastname.CompareTo(other.LastName); } //
When implementing the generic version, it is no longer necessary to cast the object to a Person: public class Person: IComparable { public int CompareTo(Person other) =>
281
Download from finelybook www.finelybook.com
LastName.CompareTo(other.LastName); //...
Covariance and Contra-Variance Prior to .NET 4, generic interfaces were invariant. .NET 4 added important changes for generic interfaces and generic delegates: covariance and contra-variance. Covariance and contra-variance are used for the conversion of types with arguments and return types. For example, can you pass a Rectangle to a method that requests a Shape? Let’s get into examples to see the advantages of these extensions. With .NET, parameter types are covariant. Assume you have the classes Shape and Rectangle, and Rectangle derives from the Shape base class. The Display method is declared to accept an object of the Shape type as its parameter: public void Display(Shape o) { }
Now you can pass any object that derives from the Shape base class. Because Rectangle derives from Shape, a Rectangle fulfills all the requirements of a Shape and the compiler accepts this method call: var r = new Rectangle { Width= 5, Height=2.5 }; Display(r);
Return types of methods are contra-variant. When a method returns a Shape it is not possible to assign it to a Rectangle because a Shape is not necessarily always a Rectangle; but the opposite is possible. If a method returns a Rectangle as the GetRectangle method, public Rectangle GetRectangle();
the result can be assigned to a Shape: Shape s = GetRectangle();
Before version 4 of the .NET Framework, this behavior was not possible with generics. Since C# 4, the language is extended to support covariance and contra-variance with generic interfaces and generic delegates. Let’s start by defining a Shape base class and a Rectangle 282
Download from finelybook www.finelybook.com
class (code files Variance/Shape.cs and Rectangle.cs): public class Shape { public double Width { get; set; } public double Height { get; set; } public override string ToString() => $"Width: {Width}, Height: {Height}"; } public class Rectangle: Shape { }
Covariance with Generic Interfaces A generic interface is covariant if the generic type is annotated with the out keyword. This also means that type T is allowed only with return types. The interface IIndex is covariant with type T and returns this type from a read-only indexer (code file Variance/IIndex.cs): public interface IIndex { T this[int index] { get; } int Count { get; } }
The IIndex interface is implemented with the RectangleCollection class. RectangleCollection defines Rectangle for generic type T:
NOTE If a read-write indexer is used with the IIndex interface, the generic type T is passed to the method and retrieved from the method. This is not possible with covariance; the generic type must be defined as invariant. Defining the type as invariant is done without out and in annotations (code file Variance/RectangleCollection.cs): public class RectangleCollection: IIndex
283
Download from finelybook www.finelybook.com
{ private Rectangle[] data = new Rectangle[3] { new Rectangle { Height=2, Width=5 }, new Rectangle { Height=3, Width=7 }, new Rectangle { Height=4.5, Width=2.9 } }; private static RectangleCollection _coll; public static RectangleCollection GetRectangles() => _coll ?? (_coll = new RectangleCollection()); public Rectangle this[int index] { get { if (index < 0 || index > data.Length) throw new ArgumentOutOfRangeException(nameof(index)); return data[index]; } } public int Count => data.Length; }
NOTE The RectangleCollection.GetRectangles method makes use of the coalescing operator. If the variable coll is null, the right side of the operator is invoked to create a new instance of RectangleCollection and assign it to the variable coll, which is returned from this method afterward. This operator is explained in detail in Chapter 6. The RectangleCollection.GetRectangles method returns a RectangleCollection that implements the IIndex interface, so you can assign the return value to a variable rectangle of the IIndex type. Because the interface is covariant, it is also possible to assign the returned value to a variable of IIndex. Shape does not need anything more than a Rectangle has to offer. 284
Download from finelybook www.finelybook.com
Using the shapes variable, the indexer from the interface and the Count property are used within the for loop (code file Variance/Program.cs): public static void Main() { IIndex rectangles = RectangleCollection.GetRectangles(); IIndex shapes = rectangles; for (int i = 0; i < shapes.Count; i++) { Console.WriteLine(shapes[i]); } }
Contra-Variance with Generic Interfaces A generic interface is contra-variant if the generic type is annotated with the in keyword. This way, the interface is only allowed to use generic type T as input to its methods (code file Variance/IDisplay.cs): public interface IDisplay { void Show(T item); }
The ShapeDisplay class implements IDisplay and uses a Shape object as an input parameter (code file Variance/ShapeDisplay.cs): public class ShapeDisplay: IDisplay { public void Show(Shape s) => Console.WriteLine( $"{s.GetType().Name} Width: {s.Width}, Height: {s.Height}"); }
Creating a new instance of ShapeDisplay returns IDisplay, which is assigned to the shapeDisplay variable. Because IDisplay is contra-variant, it is possible to assign the result to IDisplay, where Rectangle derives from Shape. This time the methods of the interface define only the generic type as input, and Rectangle fulfills all the requirements of a Shape (code file Variance/Program.cs): 285
Download from finelybook www.finelybook.com
public static void Main() { //... IDisplay shapeDisplay = new ShapeDisplay(); IDisplay rectangleDisplay = shapeDisplay; rectangleDisplay.Show(rectangles[0]); }
GENERIC STRUCTS Similar to classes, structs can be generic as well. They are very similar to generic classes with the exception of inheritance features. In this section you look at the generic struct Nullable, which is defined by the .NET Framework. An example of a generic struct in the .NET Framework is Nullable. A number in a database and a number in a programming language have an important difference: A number in the database can be null, whereas a number in C# cannot be null. Int32 is a struct, and because structs are implemented as value types, they cannot be null. This difference often causes headaches and a lot of additional work to map the data. The problem exists not only with databases but also with mapping XML data to .NET types. One solution is to map numbers from databases and XML files to reference types, because reference types can have a null value. However, this also means additional overhead during runtime. With the structure Nullable, this can be easily resolved. The following code segment shows a simplified version of how Nullable is defined. The structure Nullable defines a constraint specifying that the generic type T needs to be a struct. With classes as generic types, the advantage of low overhead is eliminated; and because objects of classes can be null anyway, there’s no point in using a class with the Nullable type. The only overhead in addition to the T type defined by Nullable is the hasValue Boolean field that defines whether the value is set or null. Other than that, the generic struct defines the read-only properties HasValue and Value and some operator overloads. The operator overload to cast the Nullable type to T is defined as explicit because it can throw an exception in case 286
Download from finelybook www.finelybook.com
is false. The operator overload to cast to Nullable is defined as implicit because it always succeeds: hasValue
public struct Nullable where T: struct { public Nullable(T value) { _hasValue = true; _value = value; } private bool _hasValue; public bool HasValue => _hasValue; private T _value; public T Value { get { if (!_hasValue) { throw new InvalidOperationException("no value"); } return _value; } } public static explicit operator T(Nullable value) => _value.Value; public static implicit operator Nullable(T value) => new Nullable(value); public override string ToString() => !HasValue ? string.Empty : _value.ToString(); }
In this example, Nullable is instantiated with Nullable. The variable x can now be used as an int, assigning values and using operators to do some calculation. This behavior is made possible by casting operators of the Nullable type. However, x can also be null. The Nullable properties HasValue and Value can check whether there is a value, and the value can be accessed: 287
Download from finelybook www.finelybook.com
Nullable x; x = 4; x += 3; if (x.HasValue) { int y = x.Value; } x = null;
Because nullable types are used often, C# has a special syntax for defining variables of this type. Instead of using syntax with the generic structure, the ? operator can be used. In the following example, the variables x1 and x2 are both instances of a nullable int type: Nullable x1; int? x2;
A nullable type can be compared with null and numbers, as shown. Here, the value of x is compared with null, and if it is not null it is compared with a value less than 0: int? x = GetNullableType(); if (x == null) { Console.WriteLine("x is null"); } else if (x < 0) { Console.WriteLine("x is smaller than 0"); }
Now that you know how Nullable is defined, let’s get into using nullable types. Nullable types can also be used with arithmetic operators. The variable x3 is the sum of the variables x1 and x2. If any of the nullable types have a null value, the result is null: int? x1 = GetNullableType(); int? x2 = GetNullableType(); int? x3 = x1 + x2;
NOTE 288
Download from finelybook www.finelybook.com
The GetNullableType method, which is called here, is just a placeholder for any method that returns a nullable int. For testing you can implement it to simply return null or to return any integer value. Non-nullable types can be converted to nullable types. With the conversion from a non-nullable type to a nullable type, an implicit conversion is possible where casting is not required. This type of conversion always succeeds: int y1 = 4; int? x1 = y1;
In the reverse situation, a conversion from a nullable type to a nonnullable type can fail. If the nullable type has a null value and the null value is assigned to a non-nullable type, then an exception of type InvalidOperationException is thrown. That’s why the cast operator is required to do an explicit conversion: int? x1 = GetNullableType(); int y1 = (int)x1;
Instead of doing an explicit cast, it is also possible to convert a nullable type to a non-nullable type with the coalescing operator. The coalescing operator uses the syntax ?? to define a default value for the conversion in case the nullable type has a value of null. Here, y1 gets a 0 value if x1 is null: int? x1 = GetNullableType(); int y1 = x1 ?? 0;
GENERIC METHODS In addition to defining generic classes, it is also possible to define generic methods. With a generic method, the generic type is defined with the method declaration. Generic methods can be defined within non-generic classes. The method Swap defines T as a generic type that is used for two arguments and a variable temp: 289
Download from finelybook www.finelybook.com
void Swap(ref T x, ref T y) { T temp; temp = x; x = y; y = temp; }
A generic method can be invoked by assigning the generic type with the method call: int i = 4; int j = 5; Swap(ref i, ref j);
However, because the C# compiler can get the type of the parameters by calling the Swap method, it is not necessary to assign the generic type with the method call. The generic method can be invoked as simply as non-generic methods: int i = 4; int j = 5; Swap(ref i, ref j);
Generic Methods Example This example uses a generic method to accumulate all the elements of a collection. To show the features of generic methods, the following Account class, which contains Name and Balance properties, is used (code file GenericMethods/Account.cs): public class Account { public string Name { get; } public decimal Balance { get; } public Account(string name, Decimal balance) { Name = name; Balance = balance; } }
All the accounts in which the balance should be accumulated are added to an accounts list of type List (code file 290
Download from finelybook www.finelybook.com
GenericMethods/Program.cs): var accounts = new List() { new Account("Christian", 1500), new Account("Stephanie", 2200), new Account("Angela", 1800), new Account("Matthias", 2400), new Account("Katharina", 3800), };
A traditional way to accumulate all Account objects is by looping through them with a foreach statement, as shown here. Because the foreach statement uses the IEnumerable interface to iterate the elements of a collection, the argument of the AccumulateSimple method is of type IEnumerable. The foreach statement works with every object implementing IEnumerable. This way, the AccumulateSimple method can be used with all collection classes that implement the interface IEnumerable. In the implementation of this method, the property Balance of the Account object is directly accessed (code file GenericMethods/Algorithms.cs): public static class Algorithms { public static decimal AccumulateSimple(IEnumerable source) { decimal sum = 0; foreach (Account a in source) { sum += a.Balance; } return sum; } }
The AccumulateSimple method is invoked like this: decimal amount = Algorithms.AccumulateSimple(accounts);
Generic Methods with Constraints The problem with the first implementation is that it works only with Account objects. This can be avoided by using a generic method. 291
Download from finelybook www.finelybook.com
The second version of the Accumulate method accepts any type that implements the interface IAccount. As you saw earlier with generic classes, you can restrict generic types with the where clause. You can use the same clause with generic methods that you use with generic classes. The parameter of the Accumulate method is changed to IEnumerable, a generic interface that is implemented by generic collection classes (code file GenericMethods/Algorithms.cs): public static decimal Accumulate (IEnumerable source) where TAccount: IAccount { decimal sum = 0; foreach (TAccount a in source) { sum += a.Balance; } return sum; }
The Account class is now refactored to implement the interface IAccount (code file GenericMethods/Account.cs): public class Account: IAccount { //...
The IAccount interface defines the read-only properties Balance and Name (code file GenericMethods/IAccount.cs): public interface IAccount { decimal Balance { get; } string Name { get; } }
The new Accumulate method can be invoked by defining the Account type as a generic type parameter (code file GenericMethods/Program.cs): decimal amount = Algorithm.Accumulate(accounts);
Because the generic type parameter can be automatically inferred by the compiler from the parameter type of the method, it is valid to 292
Download from finelybook www.finelybook.com
invoke the Accumulate method this way: decimal amount = Algorithm.Accumulate(accounts);
Generic Methods with Delegates The requirement for the generic types to implement the interface IAccount may be too restrictive. The following example hints at how the Accumulate method can be changed by passing a generic delegate. Chapter 8 provides all the details about how to work with generic delegates, and how to use lambda expressions. This Accumulate method uses two generic parameters: T1 and T2. T1 is used for the collection-implementing IEnumerable parameter, which is the first one of the methods. The second parameter uses the generic delegate Func. Here, the second and third generic parameters are of the same T2 type. A method needs to be passed that has two input parameters (T1 and T2) and a return type of T2 (code file GenericMethods/Algorithms.cs). public static T2 Accumulate(IEnumerable source, Func action) { T2 sum = default(T2); foreach (T1 item in source) { sum = action(item, sum); } return sum; }
In calling this method, it is necessary to specify the generic parameter types because the compiler cannot infer this automatically. With the first parameter of the method, the accounts collection that is assigned is of type IEnumerable. With the second parameter, a lambda expression is used that defines two parameters of type Account and decimal, and returns a decimal. This lambda expression is invoked for every item by the Accumulate method (code file GenericMethods/Program.cs): decimal amount = Algorithm.Accumulate( accounts, (item, sum) => sum += item.Balance);
293
Download from finelybook www.finelybook.com
Don’t scratch your head over this syntax yet. The sample should give you a glimpse of the possible ways to extend the Accumulate method. Chapter 8 covers lambda expressions in detail.
Generic Methods Specialization You can overload generic methods to define specializations for specific types. This is true for methods with generic parameters as well. The Foo method is defined in four versions. The first accepts a generic parameter; the second one is a specialized version for the int parameter. The third Foo method accepts two generic parameters, and the fourth one is a specialized version of the third one with the first parameter of type int. During compile time, the best match is taken. If an int is passed, then the method with the int parameter is selected. With any other parameter type, the compiler chooses the generic version of the method (code file Specialization/Program.cs): public class MethodOverloads { public void Foo(T obj) => Console.WriteLine($"Foo(T obj), obj type: {obj.GetType().Name}"); public void Foo(int x) => Console.WriteLine("Foo(int x)"); public void Foo(T1 obj1, T2 obj2) => Console.WriteLine($"Foo(T1 obj1, T2 obj2); " + $"{obj1.GetType().Name} {obj2.GetType().Name}"); public void Foo(int obj1, T obj2) => Console.WriteLine($"Foo(int obj1, T obj2); {obj2.GetType().Name}"); public void Bar(T obj) => Foo(obj); }
The Foo method can now be invoked with any parameter type. The sample code passes int and string values to invoke all four Foo methods: static void Main() {
294
Download from finelybook www.finelybook.com
var test = new MethodOverloads(); test.Foo(33); test.Foo("abc"); test.Foo("abc", 42); test.Foo(33, "abc"); }
Running the program, you can see by the output that the method with the best match is taken: Foo(int x) Foo(T obj), obj type: String Foo(T1 obj1, T2 obj2); String Int32 Foo(int obj1, T obj2); String
Be aware that the method invoked is defined during compile time and not runtime. This can be easily demonstrated by adding a generic Bar method that invokes the Foo method, passing the generic parameter value along: public class MethodOverloads { // ... public void Bar(T obj) => Foo(obj);
The Main method is now changed to invoke the Bar method passing an int value: static void Main() { var test = new MethodOverloads(); test.Bar(44);
From the output on the console you can see that the generic Foo method was selected by the Bar method and not the overload with the int parameter. That’s because the compiler selects the method that is invoked by the Bar method during compile time. Because the Bar method defines a generic parameter, and because there’s a Foo method that matches this type, the generic Foo method is called. This is not changed during runtime when an int value is passed to the Bar method: Foo(T obj), obj type: Int32
295
Download from finelybook www.finelybook.com
SUMMARY This chapter introduced a very important feature of the CLR: generics. With generic classes you can create type-independent classes, and generic methods allow type-independent methods. Interfaces, structs, and delegates can be created in a generic way as well. Generics make new programming styles possible. You’ve seen how algorithms, particularly actions and predicates, can be implemented to be used with different classes—and all are type safe. Generic delegates make it possible to decouple algorithms from collections. You will see more features and uses of generics throughout this book. Chapter 8 introduces delegates that are often implemented as generics; Chapter 10 provides information about generic collection classes; and Chapter 12, “Language Integrated Query,” discusses generic extension methods. The next chapter focuses on operators and casts.
296
Download from finelybook www.finelybook.com
6 Operators and Casts WHAT’S IN THIS CHAPTER? Operators in C# Using nameof and null-conditional operators Implicit and explicit conversions Converting value types to reference types using boxing Comparing value types and reference types Overloading the standard operators for custom types Implementing the Index Operator Converting between reference types by casting
WROX.COM CODE DOWNLOADS FOR THIS CHAPTER The Wrox.com code downloads for this chapter are found at www.wrox.com on the Download Code tab. The source code is also available at https://github.com/ProfessionalCSharp/ProfessionalCSharp7 in the directory OperatorsAndCasts. The code for this chapter is divided into the following major examples: OperatorsSample 297
Download from finelybook www.finelybook.com
BinaryCalculations OperatorOverloadingSample OperatorOverloadingSample2 OverloadingComparisonSample CustomIndexerSample CastingSample
OPERATORS AND CASTS The preceding chapters have covered most of what you need to start writing useful programs using C#. This chapter continues the discussion with essential language elements and illustrates some powerful aspects of C# that enable you to extend its capabilities. This chapter covers information about using operators, including operators that have been added with C# 6, such as the null-conditional operator and the nameof operator, as well as operator extensions of C# 7, such as pattern matching with the is operator. Later in this chapter, you see how operators are overloaded. The chapter also shows you how to implement custom functionality when using operators.
OPERATORS C# operators are very similar to C++ and Java operators; however, there are differences. C# supports the operators listed in the following table: CATEGORY
OPERATOR
Arithmetic
+– * / %
Logical
& | ^ ˜ && ║ !
String concatenation
+
Increment and decrement
++– –
Bit shifting
≪ ≫
298
Download from finelybook www.finelybook.com
Comparison
== != < > =
Assignment
= += -= *= /= %= &= |= ^= ≪= ≫=
Member access (for objects and structs)
.
Indexing (for arrays and indexers)
[]
Cast
()
Conditional (the ternary operator)
?:
Delegate concatenation and removal (discussed + in Chapter 8, “Delegates, Lambdas, and Events”) Object creation
new
Type information
sizeof is typeof as
Overflow exception control
checked unchecked
Indirection and address
[]
Namespace alias qualifier (discussed in Chapter 2, “Core C#”)
::
Null coalescing operator
??
Null-conditional operator
?. ?[]
Name of an identifier
nameof()
NOTE Note that four specific operators (sizeof, *, ->, and &) are available only in unsafe code (code that bypasses C#’s type-safety checking), which is discussed in Chapter 17, “Managed and Unmanaged Memory.” One of the biggest pitfalls to watch out for when using C# operators is that, as with other C-style languages, C# uses different operators for assignment (=) and comparison (==). For instance, the following statement means “let x equal three”: x = 3;
If you now want to compare x to a value, you need to use the double 299
Download from finelybook www.finelybook.com
equals sign ==: Fortunately, C#’s strict type-safety rules prevent the very common C error whereby assignment is performed instead of comparison in logical statements. This means that in C# the following statement will generate a compiler error: if (x = 3) // compiler error { }
Visual Basic programmers who are accustomed to using the ampersand (&) character to concatenate strings will have to make an adjustment. In C#, the plus sign (+) is used instead for concatenation, whereas the & symbol denotes a logical AND between two different integer values. The pipe symbol, |, enables you to perform a logical OR between two integers. Visual Basic programmers also might not recognize the modulus (%) arithmetic operator. This returns the remainder after division, so, for example, x % 5 returns 2 if x is equal to 7. You will use few pointers in C#, and therefore few indirection operators. More specifically, the only place you will use them is within blocks of unsafe code, because that is the only place in C# where pointers are allowed. Pointers and unsafe code are discussed in Chapter 17.
Operator Shortcuts The following table shows the full list of shortcut assignment operators available in C#: SHORTCUT OPERATOR EQUIVALENT TO x++, ++x
x = x + 1
x– –, – –x
x = x – 1
x += y
x = x + y
x -= y
x = x—y
x *= y
x = x * y
x /= y
x = x / y
x %= y
x = x % y
300
Download from finelybook www.finelybook.com
x ≫= y
x = x ≫ y
x ≪= y
x = x ≪ y
x &= y
x = x & y
x |= y
x = x | y
You may be wondering why there are two examples each for the ++ increment and the – – decrement operators. Placing the operator before the expression is known as a prefix; placing the operator after the expression is known as a postfix. Note that there is a difference in the way they behave. The increment and decrement operators can act both as entire expressions and within expressions. When used by themselves, the effect of both the prefix and postfix versions is identical and corresponds to the statement x = x + 1. When used within larger expressions, the prefix operator increments the value of x before the expression is evaluated; in other words, x is incremented and the new value is used in the expression. Conversely, the postfix operator increments the value of x after the expression is evaluated—the expression is evaluated using the original value of x. The following example uses the increment operator (++) as an example to demonstrate the difference between the prefix and postfix behavior (code file OperatorsSample/Program.cs): int x = 5; if (++x == 6) // true – x is incremented to 6 before the evaluation { Console.WriteLine("This will execute"); } if (x++ == 7) // false – x is incremented to 7 after the evaluation { Console.WriteLine("This won't"); }
The first if condition evaluates to true because x is incremented from 5 to 6 before the expression is evaluated. The condition in the second if statement is false, however, because x is incremented to 7 only after the entire expression has been evaluated (while x == 6).
301
Download from finelybook www.finelybook.com
The prefix and postfix operators – –x and x– – behave in the same way, but decrement rather than increment the operand. The other shortcut operators, such as += and -=, require two operands, and are used to modify the value of the first operand by performing an arithmetic or logical operation on it. For example, the next two lines are equivalent: x += 5; x = x + 5;
The following sections look at some of the primary and cast operators that you will frequently use within your C# code.
The Conditional-Expression Operator (?:) The conditional-expression operator (?:), also known as the ternary operator, is a shorthand form of the if…else construction. It gets its name from the fact that it involves three operands. It allows you to evaluate a condition, returning one value if that condition is true, or another value if it is false. The syntax is as follows: condition ? true_value: false_value
Here, condition is the Boolean expression to be evaluated, true_value is the value that is returned if condition is true, and false_value is the value that is returned otherwise. When used sparingly, the conditional-expression operator can add a dash of terseness to your programs. It is especially handy for providing one of a couple of arguments to a function that is being invoked. You can use it to quickly convert a Boolean value to a string value of true or false. It is also handy for displaying the correct singular or plural form of a word (code file OperatorsSample/Program.cs): int x = 1; string s = x + " "; s += (x == 1 ? "man": "men"); Console.WriteLine(s);
This code displays 1 man if x is equal to one but displays the correct plural form for any other number. Note, however, that if your output 302
Download from finelybook www.finelybook.com
needs to be localized to different languages, you have to write more sophisticated routines to take into account the different grammatical rules of different languages.
The checked and unchecked Operators Consider the following code: byte b = byte.MaxValue; b++; Console.WriteLine(b);
The byte data type can hold values only in the range 0 to 255. Assigning byte.MaxValue to a byte results in 255. With 255, all bits of the 8 available bits in the bytes are set: 11111111. Incrementing this value by one causes an overflow and results in 0. How the CLR handles this depends on a number of issues, including compiler options; so, whenever there’s a risk of an unintentional overflow, you need some way to ensure that you get the result you want. To do this, C# provides the checked and unchecked operators. If you mark a block of code as checked, the CLR enforces overflow checking, throwing an OverflowException if an overflow occurs. The following changes the preceding code to include the checked operator (code file OperatorsSample/Program.cs): byte b = 255; checked { b++; } Console.WriteLine(b);
When you try to run this code, you get an error message like this: System.OverflowException: Arithmetic operation resulted in an overflow.
You can enforce overflow checking for all unmarked code with the Visual Studio project settings Check for Arithmetic Overflow/Underflow in the Advance Build Settings. You can change 303
Download from finelybook www.finelybook.com
this also directly in the csproj project file: Exe netcoreapp2.0 true
If you want to suppress overflow checking, you can mark the code as unchecked: byte b = 255; unchecked { b++; } Console.WriteLine(b);
In this case, no exception is raised, but you lose data because the byte type cannot hold a value of 256, the overflowing bits are discarded, and your b variable holds a value of zero (0). Note that unchecked is the default behavior. The only time you are likely to need to explicitly use the unchecked keyword is when you need a few unchecked lines of code inside a larger block that you have explicitly marked as checked.
NOTE By default, overflow and underflow are not checked because enforcing checks has a performance impact. When you use checked as the default setting with your project, the result of every arithmetic operation needs to be verified whether the value is out of bounds. Arithmetic operations are also done with for loops using i++. For not having this performance impact, it’s better to keep the default setting (Check for Arithmetic Overflow/Underflow) unchecked and use the checked operator where needed.
304
Download from finelybook www.finelybook.com
The is Operator The is operator allows you to check whether an object is compatible with a specific type. The phrase “is compatible” means that an object either is of that type or is derived from that type. For example, to check whether a variable is compatible with the object type, you could use the following bit of code (code file OperatorsSample/Program.cs): int i = 10; if (i is object) { Console.WriteLine("i is an object"); } int,
like all C# data types, inherits from object; therefore, the expression i is object evaluates to true in this case, and the appropriate message will be displayed. C# 7 extends the is operator with pattern matching. You can check for constants, types, and var. Examples of constant checks are shown in the following code snippet, which checks for the constant 42 and the constant null: int i = 42; if (i is 42) { Console.WriteLine("i has the value 42"); } object o = null; if (o is null) { Console.WriteLine("o is null"); }
Using the is operator with type matching, a variable can be declared right of the type. If the is operator returns true, the variable is filled with a reference to the object of the type. This variable can then be used within the scope of the if statement where the is operator is used: public static void AMethodUsingPatternMatching(object o) {
305
Download from finelybook www.finelybook.com
if (o is Person p) { Console.WriteLine($"o is a Person with firstname {p.FirstName}"); } } //... AMethodUsingPatternMatching (new Person("Katharina", "Nagel"));
The as Operator The as operator is used to perform explicit type conversions of reference types. If the type being converted is compatible with the specified type, conversion is performed successfully. However, if the types are incompatible, the as operator returns the value null. As shown in the following code, attempting to convert an object reference to a string returns null if the object reference does not actually refer to a string instance (code file OperatorsSample/Program.cs): object object string string
o1 o2 s1 s2
= = = =
"Some String"; 5; o1 as string; // s1 = "Some String" o2 as string; // s2 = null
The as operator allows you to perform a safe type conversion in a single step without the need to first test the type using the is operator and then perform the conversion.
NOTE The is and as operators are shown with inheritance in Chapter 4, “Object Orientation with C#.” Also check Chapter 13, “Functional Programming with C#” for more information on pattern matching and the is operator.
The sizeof Operator You can determine the size (in bytes) required on the stack by a value 306
Download from finelybook www.finelybook.com
type using the sizeof operator (code file OperatorsSample/Program.cs): Console.WriteLine(sizeof(int));
This displays the number 4 because an int is 4 bytes long. You can also use the sizeof operator with structs if the struct contains only value types—for example, the Point class as shown here (code file OperatorsSample/Point.cs): public struct Point { public Point(int x, int y) { X = x; Y = y; } public int X { get; } public int Y { get; } }
NOTE You cannot use sizeof with classes. Using sizeof with custom types, you need to write the code within an unsafe code block (code file OperatorsSample/Program.cs): unsafe { Console.WriteLine(sizeof(Point)); }
NOTE By default, unsafe code is not allowed. You need to specify the AllowUnsafeBlocks in the csproj project file. Chapter 17 looks at unsafe code in more detail. 307
Download from finelybook www.finelybook.com
The typeof Operator The typeof operator returns a System.Type object representing a specified type. For example, typeof(string) returns a Type object representing the System.String type. This is useful when you want to use reflection to find information about an object dynamically. For more information, see Chapter 16, “Reflection, Metadata, and Dynamic Programming.”
The nameof Operator The nameof operator is new since C# 6. This operator accepts a symbol, property, or method and returns the name. How can this be used? One example is when the name of a variable is needed, as in checking a parameter for null: public void Method(object o) { if (o == null) throw new ArgumentNullException(nameof(o));
Of course, it would be similar to throw the exception by passing a string instead of using the nameof operator. However, passing a string doesn’t give a compiler error if you misspell the name. Also, when you change the name of the parameter, you can easily miss changing the string passed to the ArgumentNullException constructor. if (o == null) throw new ArgumentNullException("o");
Using the nameof operator for the name of a variable is just one use case. You can also use it to get the name of a property—for example, for firing a change event (using the interface INotifyPropertyChanged) in a property set accessor and passing the name of a property. public string FirstName { get => _firstName; set { _firstName = value; OnPropertyChanged(nameof(FirstName)); }
308
Download from finelybook www.finelybook.com
}
The nameof operator can also be used to get the name of a method. This also works if the method is overloaded because all overloads result in the same value: the name of the method. public void Method() { Log($"{nameof(Method)} called");
The index Operator You use the index operator (brackets) for accessing arrays in Chapter 7, “Arrays.” In the following code snippet, the index operator is used to access the third element of the array named arr1 by passing the number 2: int[] arr1 = {1, 2, 3, 4}; int x = arr1[2]; // x == 3
Similar to accessing elements of an array, the index operator is implemented with collection classes (discussed in Chapter 10, “Collections”). The index operator doesn’t require an integer within the brackets. Index operators can be defined with any type. The following code snippet creates a generic dictionary where the key is a string, and the value an int. With dictionaries, the key can be used with the indexer. In the following sample, the string first is passed to the index operator to set this element in the dictionary and then the same string is passed to the indexer to retrieve this element: var dict = new Dictionary(); dict["first"] = 1; int x = dict["first"];
NOTE Later in this chapter in the “Implementing Custom Index Operators” section, you can read how to create index operators in 309
Download from finelybook www.finelybook.com
your own classes.
Nullable Types and Operators An important difference between value types and reference types is that reference types can be null. A value type, such as int, cannot be null. This is a special issue on mapping C# types to database types. A database number can be null. In earlier C# versions, a solution was to use a reference type for mapping a nullable database number. However, this method affects performance because the garbage collector needs to deal with reference types. Now you can use a nullable int instead of a normal int. The overhead for this is just an additional Boolean that is used to check or set the null value. A nullable type still is a value type. With the following code snippet, the variable i1 is an int that gets 1 assigned to it. i2 is a nullable int that has i1 assigned. The nullability is defined by using the ? with the type. int? can have an integer value assigned similar to the assignment of i1. The variable i3 demonstrates that assigning null is also possible with nullable types (code file NullableTypesSample/Program.cs): int i1 = 1; int? i2 = 2; int? i3 = null;
Every struct can be defined as a nullable type as shown with long? and DateTime?: long? l1 = null; DateTime? d1 = null;
If you use nullable types in your programs, you must always consider the effect a null value can have when used in conjunction with the various operators. Usually, when using a unary or binary operator with nullable types, the result will be null if one or both of the operands is null. For example: int? a = null; int? b = a + 4; // b = null int? c = a * 5; // c = null
310
Download from finelybook www.finelybook.com
When comparing nullable types, if only one of the operands is null, the comparison always equates to false. This means that you cannot assume a condition is true just because its opposite is false, as often happens in programs using non-nullable types. For example, in the following example if a is null, the else clause is always invoked no matter whether b has a value of +5 or -5. int? a = null; int? b = -5; if (a >= b) // if a or b is null, this condition is false { Console.WriteLine("a >= b"); } else { Console.WriteLine("a < b"); }
NOTE The possibility of a null value means that you cannot freely combine nullable and non-nullable types in an expression. This is discussed in the section “Type Conversions” later in this chapter.
NOTE When you use the C# keyword ? with the type declaration—for example, int?—the compiler resolves this to use the generic type Nullable. The C# compiler converts the shorthand notation to the generic type to reduce typing needs.
The Null Coalescing Operator The null coalescing operator (??) provides a shorthand mechanism to cater to the possibility of null values when working with nullable and 311
Download from finelybook www.finelybook.com
reference types. The operator is placed between two operands—the first operand must be a nullable type or reference type, and the second operand must be of the same type as the first or of a type that is implicitly convertible to the type of the first operand. The null coalescing operator evaluates as follows: If the first operand is not null, then the overall expression has the value of the first operand. If the first operand is null, then the overall expression has the value of the second operand. For example: int? a = null; int b; b = a ?? 10; // b has the value 10 a = 3; b = a ?? 10; // b has the value 3
If the second operand cannot be implicitly converted to the type of the first operand, a compile-time error is generated. The null coalescing operator is not only important with nullable types but also with reference types. In the following code snippet, the property Val returns the value of the _val variable only if it is not null. In case it is null, a new instance of MyClass is created, assigned to the _val variable, and finally returned from the property. This second part of the expression within the get accessor only happens when the variable _val is null. private MyClass _val; public MyClass Val { get => _val ?? (_val = new MyClass()); }
The Null-Conditional Operator A feature of C# to reduce the number of code lines is the nullconditional operator. A great number of code lines in production code verifies null conditions. Before accessing members of a variable that is passed as a method parameter, it needs to be checked to determine 312
Download from finelybook www.finelybook.com
whether the variable has a value of null. Otherwise a NullReferenceException would be thrown. A .NET design guideline specifies that code should never throw exceptions of these types and should always check for null conditions. However, such checks could be missed easily. This code snippet verifies whether the passed parameter p is not null. In case it is null, the method just returns without continuing: public void ShowPerson(Person p) { if (p == null) return; string firstName = p.FirstName; //... }
Using the null-conditional operator to access the FirstName property (p?.FirstName), when p is null, only null is returned without continuing to the right side of the expression (code file OperatorsSample/Program.cs): public void ShowPerson(Person p) { string firstName = p?.FirstName; //... }
When a property of an int type is accessed using the null-conditional operator, the result cannot be directly assigned to an int type because the result can be null. One option to resolve this is to assign the result to a nullable int: int? age = p?.Age;
Of course, you can also solve this issue by using the null coalescing operator and defining another result (for example, 0) in case the result of the left side is null: int age1 = p?.Age ?? 0;
Multiple null-conditional operators can also be combined. Here the Address property of a Person object is accessed, and this property in turn defines a City property. Null checks need to be done for the 313
Download from finelybook www.finelybook.com
object, and if it is not null, also for the result of the Address property: Person
Person p = GetPerson(); string city = null; if (p != null && p.HomeAddress != null) { city = p.HomeAddress.City; }
When you use the null-conditional operator, the code becomes much simpler: string city = p?.HomeAddress?.City;
You can also use the null-conditional operator with arrays. With the following code snippet, a NullReferenceException is thrown using the index operator to access an element of an array variable that is null: int[] arr = null; int x1 = arr[0];
Of course, traditional null checks could be done to avoid this exceptional condition. A simpler version uses ?[0] to access the first element of the array. In case the result is null, the null coalescing operator returns the value for the x1 variable: int x1 = arr?[0] ?? 0;
Operator Precedence and Associativity The following table shows the order of precedence of the C# operators. The operators at the top of the table are those with the highest precedence (that is, the ones evaluated first in an expression containing multiple operators). GROUP
OPERATORS
Primary
. ?. () [] ?[] x++ x–– new typeof sizeof checked unchecked
Unary
+ —! ˜ ++x ––x and casts
Multiplication/division * / %
314
Download from finelybook www.finelybook.com
Addition/subtraction
+ -
Shift operators
≪ ≫
Relational
< >= is as
Comparison
== !=
Bitwise AND
&
Bitwise XOR
^
Bitwise OR
|
Logical AND
&&
Logical OR
||
Null coalescing
??
Conditional-expression operator
?:
Assignment and Lambda
= += -= *= /= %= &= |= ^= ≪= ≫= ≫>= =>
Besides operator precedence, with binary operators you need to be aware of operator evaluations from left to right or right to left. With a few exceptions, all binary operators are left associative. For example, x + y + z
is evaluated as (x + y) + z
You need to pay attention to the operator precedence before the associativity. With the following expression, first y and z are multiplied before the result of this multiplication is assigned to x, because multiplication has a higher precedency than addition: x + y * z
The important exceptions with associativity are the assignment operators; these are right associative. The following expression is evaluated from right to left: x = y = z
Because of the right associativity, all variables x, y, and z have the value 3 because it is evaluated from right to left. This wouldn’t be the 315
Download from finelybook www.finelybook.com
case if this operator would be evaluated from left to right: int int int x =
z y x y
= = = =
3; 2; 1; z;
An important right associative operator that might be misleading is the conditional-expression operator. The expression a ? b: c ? d: e
is evaluated as a = b: (c ? d: e)
because it is right-associative.
NOTE In complex expressions, avoid relying on operator precedence to produce the correct result. Using parentheses to specify the order in which you want operators applied clarifies your code and prevents potential confusion.
USING BINARY OPERATORS Working with binary values historically has been an important concept to understand when learning programming because the computer works with 0’s and 1’s. Many people probably missed learning this nowadays as they start to learn programming with Blocks, Scratch, and possibly JavaScript. If you are already fluent with 0 and 1, this section might still help you as a refresher. With C# 7, working with binary values has become easier than it was in the past because of the use of digit separators and binary literals. Both of these features are discussed in Chapter 2, “Core C#.” Binary operators have been available since the first version of C#, and they are covered in this section. 316
Download from finelybook www.finelybook.com
First, let’s start with simple calculations using binary operators. The method SimpleCalculations first declares and initializes the variables binary1 and binary2 with binary values—using the binary literal and digit separators. Using the & operator, the two values are combined with the binary ADD operator and written to the variable binaryAnd. Following, the | operator is used to create the binaryOr variable, the ^ operator for the binaryXOR variable, and the ~ operator for the reverse1 variable (code file BinaryCalculations/Program.cs): static void SimpleCalculations() { Console.WriteLine(nameof(SimpleCalculations)); uint binary1 = 0b1111_0000_1100_0011_1110_0001_0001_1000; uint binary2 = 0b0000_1111_1100_0011_0101_1010_1110_0111; uint binaryAnd = binary1 & binary2; DisplayBits("AND", binaryAnd, binary1, binary2); uint binaryOR = binary1 | binary2; DisplayBits("OR", binaryOR, binary1, binary2); uint binaryXOR = binary1 ^ binary2; DisplayBits("XOR", binaryXOR, binary1, binary2); uint reverse1 = ~binary1; DisplayBits("NOT", reverse1, binary1); Console.WriteLine(); }
To display uint and int variables in a binary form, the extension method ToBinaryString is created. Convert.ToString offers an overload with two int parameters, where the second int value is the toBase parameter. Using this, you can format the output string binary by passing the value 2, octal (8), decimal (10), and hexadecimal (16). By default, if a binary value starts with 0 values, these values are ignored and not printed. The PadLeft method fills up these 0 values in the string. The number of string characters needed is calculated by the sizeof operator and a left shift of four bits. The sizeof operator returns the number of bytes for the specified type, as discussed earlier in this chapter. For displaying the bits, the number of bytes need to be multiplied by 8, which is the same as shifting three bits to the left. Another extension method is AddSeparators, which adds _ separators after every four digits using LINQ methods (code file BinaryCalculations/BinaryExtensions.cs):
317
Download from finelybook www.finelybook.com
public static class BinaryExtensions { public static string ToBinaryString(this uint number) => Convert.ToString(number, toBase: 2).PadLeft(sizeof(uint) ≪ 3, '0'); public static string ToBinaryString(this int number) => Convert.ToString(number, toBase: 2).PadLeft(sizeof(int) ≪ 3, '0'); public static string AddSeparators(this string number) => string.Join('_', Enumerable.Range(0, number.Length / 4) .Select(i => number.Substring(i * 4, 4)).ToArray()); }
NOTE The AddSeparators method makes use of LINQ. LINQ is discussed in detail in Chapter 12, “Language Integrated Query.” The method DisplayBits, which is invoked from the previously shown SimpleCalculations method, makes use of the ToBinaryString and AddSeparators extension methods. Here, the operands used for the operation are displayed, as well as the result (code file BinaryCalculations/Program.cs): static void DisplayBits(string title, uint result, uint left, uint? right = null) { Console.WriteLine(title); Console.WriteLine(left.ToBinaryString().AddSeparators()); if (right.HasValue) { Console.WriteLine(right.Value.ToBinaryString().AddSeparators()); } Console.WriteLine(result.ToBinaryString().AddSeparators()); Console.WriteLine(); }
When you run the application, you can see the following output using 318
Download from finelybook www.finelybook.com
the binary & operator. With this operator, the resulting bits are only 1 when both input values are also 1: AND 1111_0000_1100_0011_1110_0001_0001_1000 0000_1111_1100_0011_0101_1010_1110_0111 0000_0000_1100_0011_0100_0000_0000_0000
Applying the binary | operator, the result bit is set (1) if one of the input bits is set: OR 1111_0000_1100_0011_1110_0001_0001_1000 0000_1111_1100_0011_0101_1010_1110_0111 1111_1111_1100_0011_1111_1011_1111_1111
With the ^ operator, the result is set if just one of the original bits is set, but not both: XOR 1111_0000_1100_0011_1110_0001_0001_1000 0000_1111_1100_0011_0101_1010_1110_0111 1111_1111_0000_0000_1011_1011_1111_1111
And finally, with the ~ operator, the result is the negation of the original: NOT 1111_0000_1100_0011_1110_0001_0001_1000 0000_1111_0011_1100_0001_1110_1110_0111
Shifting Bits As you’ve already seen in the previous sample, shifting three bits to the left is a multiplication by 8. A shift by one bit is a multiplication by 2. This is a lot faster than invoking the multiply operator— in case you need to multiply by 2, 4, 8, 16, 32, and so on. The following code snippet sets one bit in the variable s1, and in the for loop the bit always shifts by one bit (code file BinaryCalculations/Program.cs): static void ShiftingBits() {
319
Download from finelybook www.finelybook.com
Console.WriteLine(nameof(ShiftingBits)); ushort s1 = 0b01; for (int i = 0; i < 16; i++) { Console.WriteLine($"{s1.ToBinarString()} {s1} hex: {s1:X}"); s1 = (ushort)(s1 ≪ 1); } Console.WriteLine(); }
With the program output you can see binary, decimal, and hexadecimal values with the loop: 0000000000000001 0000000000000010 0000000000000100 0000000000001000 0000000000010000 0000000000100000 0000000001000000 0000000010000000 0000000100000000 0000001000000000 0000010000000000 0000100000000000 0001000000000000 0010000000000000 0100000000000000 1000000000000000
1 hex: 1 2 hex: 2 4 hex: 4 8 hex: 8 16 hex: 10 32 hex: 20 64 hex: 40 128 hex: 80 256 hex: 100 512 hex: 200 1024 hex: 400 2048 hex: 800 4096 hex: 1000 8192 hex: 2000 16384 hex: 4000 32768 hex: 8000
Signed and Unsigned Numbers One important thing to remember working with binaries is that using signed types such as int, long, short, the leftmost bit is used to represent the sign. When you use an int, the highest number available is 2147483647—the positive number of 31 bits or 0x7FFF FFFF. With an uint, the highest number available is 4294967295 or 0xFFFF FFFF. This represents the positive number of 32 bits. With the int, the other half of the number range is used for negative numbers. To understand how negative numbers are represented, the following code snippet initializes the maxNumber variable to the highest positive number that fits into 31 bits using int.MaxValue. Then, in a for loop, 320
Download from finelybook www.finelybook.com
the variable is incremented three times. From all the results, binary, decimal, and hexadecimal values are shown (code file BinaryCalculations/Program.cs): private static void SignedNumbers() { Console.WriteLine(nameof(SignedNumbers)); void DisplayNumber(string title, int x) => Console.WriteLine($"{title,-11} " + $"bin: {x.ToBinaryString().AddSeparators()}, " + $"dec: {x}, hex: {x:X}"); int maxNumber = int.MaxValue; DisplayNumber("max int", maxNumber); for (int i = 0; i < 3; i++) { maxNumber++; DisplayNumber($"added {i + 1}", maxNumber); } Console.WriteLine(); //... }
With the output of the application, you can see all the bits—except for the sign bit—are set to achieve the maximum integer value. The output shows the same value in different formats—binary, decimal, and hexadecimal. Adding 1 to the first output results in an overflow of the int type setting the sign bit, and all other bits are 0. This is the highest negative value for the int type. After this result, two more increments are done: max int bin: 0111_1111_1111_1111_1111_1111_1111_1111, dec: 2147483647, hex: 7FFFFFFF added 1 bin: 1000_0000_0000_0000_0000_0000_0000_0000, dec: -2147483648, hex: 80000000 added 2 bin: 1000_0000_0000_0000_0000_0000_0000_0001, dec: -2147483647, hex: 80000001 added 3 bin: 1000_0000_0000_0000_0000_0000_0000_0010, dec: -2147483646, hex: 80000002
321
Download from finelybook www.finelybook.com
With the next code snippet, the variable zero is initialized to 0. In the for loop, this variable is decremented three times: int zero = 0; DisplayNumber("zero", zero); for (int i = 0; i < 3; i++) { zero--; DisplayNumber($"subtracted {i + 1}", zero); } Console.WriteLine();
With the output, you can see 0 is represented with all the bits not set. Doing a decrement results in decimal -1, which is all the bits set— including the sign bit: zero bin: 0000_0000_0000_0000_0000_0000_0000_0000, dec: 0, hex: 0 subtracted 1 bin: 1111_1111_1111_1111_1111_1111_1111_1111, dec: -1, hex: FFFFFFFF subtracted 2 bin: 1111_1111_1111_1111_1111_1111_1111_1110, dec: -2, hex: FFFFFFFE subtracted 3 bin: 1111_1111_1111_1111_1111_1111_1111_1101, dec: -3, hex: FFFFFFFD
Next, start with the largest negative number for an int. The number is incremented three times: int minNumber = int.MinValue; DisplayNumber("min number", minNumber); for (int i = 0; i < 3; i++) { minNumber++; DisplayNumber($"added {i + 1}", minNumber); } Console.WriteLine();
The highest negative number was already shown earlier when overflowing the highest positive number. Earlier you saw this same number when int.MinValue was used. This number is then incremented three times: min number bin: 1000_0000_0000_0000_0000_0000_0000_0000, dec: -2147483648, hex: 80000000
322
Download from finelybook www.finelybook.com
added 1 bin: 1000_0000_0000_0000_0000_0000_0000_0001, dec: -2147483647, hex: 80000001 added 2 bin: 1000_0000_0000_0000_0000_0000_0000_0010, dec: -2147483646, hex: 80000002 added 3 bin: 1000_0000_0000_0000_0000_0000_0000_0011, dec: -2147483645, hex: 80000003
TYPE SAFETY Chapter 1, “.NET Applications and Tools,” noted that the Intermediate Language (IL) enforces strong type safety upon its code. Strong typing enables many of the services provided by .NET, including security and language interoperability. As you would expect from a language compiled into IL, C# is also strongly typed. Among other things, this means that data types are not always seamlessly interchangeable. This section looks at conversions between primitive types.
NOTE C# also supports conversions between different reference types and allows you to define how data types that you create behave when converted to and from other types. Both of these topics are discussed later in this chapter. Generics, however, enable you to avoid some of the most common situations in which you would need to perform type conversions. See Chapter 5, “Generics,” and Chapter 10 for details.
Type Conversions Often, you need to convert data from one type to another. Consider the following code: byte value1 = 10; byte value2 = 23; byte total;
323
Download from finelybook www.finelybook.com
total = value1 + value2; Console.WriteLine(total);
When you attempt to compile these lines, you get the following error message: Cannot implicitly convert type 'int' to 'byte'
The problem here is that when you add 2 bytes together, the result is returned as an int, not another byte. This is because a byte can contain only 8 bits of data, so adding 2 bytes together could very easily result in a value that cannot be stored in a single byte. If you want to store this result in a byte variable, you have to convert it back to a byte. The following sections discuss two conversion mechanisms supported by C#—implicit and explicit. Implicit Conversions Conversion between types can normally be achieved automatically (implicitly) only if you can guarantee that the value is not changed in any way. This is why the previous code failed; by attempting a conversion from an int to a byte, you were potentially losing 3 bytes of data. The compiler won’t let you do that unless you explicitly specify that’s what you want to do. If you store the result in a long instead of a byte, however, you will have no problems: byte value1 = 10; byte value2 = 23; long total; // this will compile fine total = value1 + value2; Console.WriteLine(total);
Your program has compiled with no errors at this point because a long holds more bytes of data than a byte, so there is no risk of data being lost. In these circumstances, the compiler is happy to make the conversion for you, without your needing to ask for it explicitly. The following table shows the implicit type conversions supported in C#: FROM TO sbyte
short, int, long, float, double, decimal, BigInteger
324
Download from finelybook www.finelybook.com
byte
short, ushort, int, uint, long, ulong, float, double, decimal, BigInteger
short
int, long, float, double, decimal, BigInteger
ushort
int, uint, long, ulong, float, double, decimal, BigInteger
int
long, float, double, decimal, BigInteger
uint
long, ulong, float, double, decimal, BigInteger
long, ulong
float, double, decimal, BigInteger
float
double, BigInteger
char
ushort, int, uint, long, ulong, float, double, decimal, BigInteger
NOTE is a struct that contains a number of any size. You can initialize it from smaller types, pass a number array to create one big number, or parse a string for a huge number. This type implements methods for mathematical calculations. The namespace for BigInteger is System.Numeric. BigInteger
As you would expect, you can perform implicit conversions only from a smaller integer type to a larger one, not from larger to smaller. You can also convert between integers and floating-point values; however, the rules are slightly different here. Though you can convert between types of the same size, such as int/uint to float and long/ulong to double, you can also convert from long/ulong back to float. You might lose 4 bytes of data doing this, but it only means that the value of the float you receive will be less precise than if you had used a double; the compiler regards this as an acceptable possible error because the magnitude of the value is not affected. You can also assign an unsigned variable to a signed variable as long as the value limits of the unsigned type fit between the limits of the signed variable. Nullable types introduce additional considerations when implicitly converting value types: 325
Download from finelybook www.finelybook.com
Nullable types implicitly convert to other nullable types following the conversion rules described for non-nullable types in the previous table; that is, int? implicitly converts to long?, float?, double?, and decimal. Non-nullable types implicitly convert to nullable types according to the conversion rules described in the preceding table; that is, int implicitly converts to long?, float?, double?, and decimal?. Nullable types do not implicitly convert to non-nullable types; you must perform an explicit conversion as described in the next section. That’s because there is a chance that a nullable type will have the value null, which cannot be represented by a non-nullable type. Explicit Conversions Many conversions cannot be implicitly made between types, and the compiler returns an error if any are attempted. The following are some of the conversions that cannot be made implicitly: int
to short—Data loss is possible.
int
to uint—Data loss is possible.
uint
to int—Data loss is possible.
float
to int—Everything is lost after the decimal point.
Any numeric type to char—Data loss is possible. to any numeric type—The decimal type is internally structured differently from both integers and floating-point numbers. decimal
int?
to int—The nullable type may have the value null.
However, you can explicitly carry out such conversions using casts. When you cast one type to another, you deliberately force the compiler to make the conversion. A cast looks like this: long val = 30000; int i = (int)val; // A valid cast. The maximum int is 2147483647
326
Download from finelybook www.finelybook.com
You indicate the type to which you are casting by placing its name in parentheses before the value to be converted. If you are familiar with C, this is the typical syntax for casts. If you are familiar with the C++ special cast keywords such as static_cast, note that these do not exist in C#; you have to use the older C-type syntax. Casting can be a dangerous operation to undertake. Even a simple cast from a long to an int can cause problems if the value of the original long is greater than the maximum value of an int: long val = 3000000000; int i = (int)val; // An invalid cast. The maximum int is 2147483647
In this case, you get neither an error nor the result you expect. If you run this code and output the value stored in i, this is what you get: -1294967296
It is good practice to assume that an explicit cast does not return the results you expect. As shown earlier, C# provides a checked operator that you can use to test whether an operation causes an arithmetic overflow. You can use the checked operator to confirm that a cast is safe and to force the runtime to throw an overflow exception if it is not: long val = 3000000000; int i = checked((int)val);
Bearing in mind that all explicit casts are potentially unsafe, take care to include code in your application to deal with possible failures of the casts. Chapter 14, “Errors and Exceptions,” introduces structured exception handling using the try and catch statements. Using casts, you can convert most primitive data types from one type to another; for example, in the following code, the value 0.5 is added to price, and the total is cast to an int: double price = 25.30; int approximatePrice = (int)(price + 0.5);
This gives the price rounded to the nearest dollar. However, in this 327
Download from finelybook www.finelybook.com
conversion, data is lost—namely, everything after the decimal point. Therefore, such a conversion should never be used if you want to continue to do more calculations using this modified price value. However, it is useful if you want to output the approximate value of a completed or partially completed calculation—if you don’t want to bother the user with a lot of figures after the decimal point. This example shows what happens if you convert an unsigned integer into a char: ushort c = 43; char symbol = (char)c; Console.WriteLine(symbol);
The output is the character that has an ASCII number of 43: the + sign. You can try any kind of conversion you want between the numeric types (including char) and it will work, such as converting a decimal into a char, or vice versa. Converting between value types is not restricted to isolated variables, as you have seen. You can convert an array element of type double to a struct member variable of type int: struct ItemDetails { public string Description; public int ApproxPrice; } //… double[] Prices = { 25.30, 26.20, 27.40, 30.00 }; ItemDetails id; id.Description = "Hello there."; id.ApproxPrice = (int)(Prices[0] + 0.5);
To convert a nullable type to a non-nullable type or another nullable type where data loss may occur, you must use an explicit cast. This is true even when converting between elements with the same basic underlying type—for example, int? to int or float? to float. This is because the nullable type may have the value null, which cannot be represented by the non-nullable type. As long as an explicit cast between two equivalent non-nullable types is possible, so is the explicit cast between nullable types. However, when casting from a 328
Download from finelybook www.finelybook.com
nullable type to a non-nullable type and the variable has the value null, an InvalidOperationException is thrown. For example: int? a = null; int b = (int)a; // Will throw exception
Using explicit casts and a bit of care and attention, you can convert any instance of a simple value type to almost any other. However, there are limitations on what you can do with explicit type conversions —as far as value types are concerned, you can only convert to and from the numeric and char types and enum types. You cannot directly cast Booleans to any other type or vice versa. If you need to convert between numeric and string, you can use methods provided in the .NET class library. The Object class implements a ToString method, which has been overridden in all the .NET predefined types and which returns a string representation of the object: int i = 10; string s = i.ToString();
Similarly, if you need to parse a string to retrieve a numeric or Boolean value, you can use the Parse method supported by all the predefined value types: string s = "100"; int i = int.Parse(s); Console.WriteLine(i + 50); // Add 50 to prove it is really an int
Note that Parse registers an error by throwing an exception if it is unable to convert the string (for example, if you try to convert the string Hello to an integer). Again, exceptions are covered in Chapter 14.
Boxing and Unboxing In Chapter 2 you learned that all types—both the simple predefined types, such as int and char, and the complex types, such as classes and structs—derive from the object type. This means you can treat even 329
Download from finelybook www.finelybook.com
literal values as though they are objects: string s = 10.ToString();
However, you also saw that C# data types are divided into value types, which are allocated on the stack, and reference types, which are allocated on the managed heap. How does this square with the capability to call methods on an int, if the int is nothing more than a 4-byte value on the stack? C# achieves this through a bit of magic called boxing. Boxing and its counterpart, unboxing, enable you to convert value types to reference types and then back to value types. We include this in the section on casting because this is essentially what you are doing—you are casting your value to the object type. Boxing is the term used to describe the transformation of a value type to a reference type. Basically, the runtime creates a temporary reference-type box for the object on the heap. This conversion can occur implicitly, as in the preceding example, but you can also perform it explicitly: int myIntNumber = 20; object myObject = myIntNumber;
Unboxing is the term used to describe the reverse process, whereby the value of a previously boxed value type is cast back to a value type. Here we use the term cast because this has to be done explicitly. The syntax is similar to explicit type conversions already described: int myIntNumber = 20; object myObject = myIntNumber; // Box the int int mySecondNumber = (int)myObject; // Unbox it back into an int
A variable can be unboxed only if it has been boxed. If you execute the last line when myObject is not a boxed int, you get a runtime exception thrown at runtime. One word of warning: When unboxing, you have to be careful that the receiving value variable has enough room to store all the bytes in the value being unboxed. C#’s ints, for example, are only 32 bits long, so 330
Download from finelybook www.finelybook.com
unboxing a long value (64 bits) into an int, as shown here, results in an InvalidCastException: long myLongNumber = 333333423; object myObject = (object)myLongNumber; int myIntNumber = (int)myObject;
COMPARING OBJECTS FOR EQUALITY After discussing operators and briefly touching on the equality operator, it is worth considering for a moment what equality means when dealing with instances of classes and structs. Understanding the mechanics of object equality is essential for programming logical expressions and is important when implementing operator overloads and casts, the topic of the rest of this chapter. The mechanisms of object equality vary depending on whether you are comparing reference types (instances of classes) or value types (the primitive data types, instances of structs, or enums). The following sections present the equality of reference types and value types independently.
Comparing Reference Types for Equality You might be surprised to learn that System.Object defines three different methods for comparing objects for equality: ReferenceEquals and two versions of Equals: one method that is static and one virtual instance method that can be overridden. You can also implement the interface IEquality, which defines an Equals method that has a generic type parameter instead of object. Add to this the comparison operator (==) and you actually have many ways to compare for equality. Some subtle differences exist between the different methods, which are examined next. The ReferenceEquals Method is a static method that tests whether two references refer to the same instance of a class, specifically whether the two references contain the same address in memory. As a static method, it cannot be overridden, so the System.Object implementation is what ReferenceEquals
331
Download from finelybook www.finelybook.com
you always have. ReferenceEquals always returns true if supplied with two references that refer to the same object instance, and false otherwise. It does, however, consider null to be equal to null (code file EqualsSample/Program.cs): static void ReferenceEqualsSample() { SomeClass x = new SomeClass(), y = new SomeClass(), z = x; bool b1 = object.ReferenceEquals(null, null);// true bool b2 = object.ReferenceEquals(null, x); // false bool b3 = object.ReferenceEquals(x, y); // false because x and y // different objects bool b4 = object.ReferenceEquals(x, z); // true because x and z // the same object //... }
returns returns returns references returns references
The Virtual Equals Method The System.Object implementation of the virtual version of Equals also works by comparing references. However, because this method is virtual, you can override it in your own classes to compare objects by value. In particular, if you intend instances of your class to be used as keys in a dictionary, you need to override this method to compare values. Otherwise, depending on how you override Object.GetHashCode, the dictionary class that contains your objects either will not work at all or will work very inefficiently. Note that when overriding Equals, your override should never throw exceptions. Again, that’s because doing so can cause problems for dictionary classes and possibly some other .NET base classes that internally call this method. The Static Equals Method The static version of Equals actually does the same thing as the virtual instance version. The difference is that the static version takes two 332
Download from finelybook www.finelybook.com
parameters and compares them for equality. This method is able to cope when either of the objects is null; therefore, it provides an extra safeguard against throwing exceptions if there is a risk that an object might be null. The static overload first checks whether the references it has been passed are null. If they are both null, it returns true (because null is considered to be equal to null). If just one of them is null, it returns false. If both references actually refer to something, it calls the virtual instance version of Equals. This means that when you override the instance version of Equals, the effect is the same as if you were overriding the static version as well. Comparison Operator (==) It is best to think of the comparison operator as an intermediate option between strict value comparison and strict reference comparison. In most cases, writing the following means that you are comparing references: bool b = (x == y); // x, y object references
However, it is accepted that there are some classes whose meanings are more intuitive if they are treated as values. In those cases, it is better to override the comparison operator to perform a value comparison. Overriding operators is discussed next, but the obvious example of this is the System.String class for which Microsoft has overridden this operator to compare the contents of the strings rather than their references.
Comparing Value Types for Equality When comparing value types for equality, the same principles hold as for reference types: ReferenceEquals is used to compare references, Equals is intended for value comparisons, and the comparison operator is viewed as an intermediate case. However, the big difference is that value types need to be boxed to be converted to references so that methods can be executed on them. In addition, Microsoft has already overloaded the instance Equals method in the System.ValueType class to test equality appropriate to value types. If you call sA.Equals(sB) where sA and sB are instances of some struct, 333
Download from finelybook www.finelybook.com
the return value is true or false, according to whether sA and sB contain the same values in all their fields. On the other hand, no overload of == is available by default for your own structs. Writing (sA == sB) in any expression results in a compilation error unless you have provided an overload of == in your code for the struct in question. Another point is that ReferenceEquals always returns false when applied to value types because, to call this method, the value types need to be boxed into objects. Even if you write the following, you still get the result of false: bool b = ReferenceEquals(v,v); // v is a variable of some value type
The reason is that v is boxed separately when converting each parameter, which means you get different references. Therefore, there really is no reason to call ReferenceEquals to compare value types because it doesn’t make much sense. Although the default override of Equals supplied by System.ValueType will almost certainly be adequate for the vast majority of structs that you define, you might want to override it again for your own structs to improve performance. Also, if a value type contains reference types as fields, you might want to override Equals to provide appropriate semantics for these fields because the default override of Equals will simply compare their addresses.
OPERATOR OVERLOADING This section looks at another type of member that you can define for a class or a struct: the operator overload. Operator overloading is something that will be familiar to C++ developers. However, because the concept is new to both Java and Visual Basic developers, we explain it here. C++ developers will probably prefer to skip ahead to the main operator overloading example. The point of operator overloading is that you do not always just want to call methods or properties on objects. Often, you need to do things like add quantities together, multiply them, or perform logical operations such as comparing objects. Suppose you defined a class 334
Download from finelybook www.finelybook.com
that represents a mathematical matrix. In the world of math, matrices can be added together and multiplied, just like numbers. Therefore, it is quite plausible that you would want to write code like this: Matrix a, b, c; // assume a, b and c have been initialized Matrix d = c * (a + b);
By overloading the operators, you can tell the compiler what + and * do when used in conjunction with a Matrix object, enabling you to write code like the preceding. If you were coding in a language that did not support operator overloading, you would have to define methods to perform those operations. The result would certainly be less intuitive and would probably look something like this: Matrix d = c.Multiply(a.Add(b));
With what you have learned so far, operators such as + and * have been strictly for use with the predefined data types, and for good reason: The compiler knows what all the common operators mean for those data types. For example, it knows how to add two longs or how to divide one double by another double, and it can generate the appropriate intermediate language code. When you define your own classes or structs, however, you have to tell the compiler everything: what methods are available to call, what fields to store with each instance, and so on. Similarly, if you want to use operators with your own types, you have to tell the compiler what the relevant operators mean in the context of that class. You do that by defining overloads for the operators. The other thing to stress is that overloading is not just concerned with arithmetic operators. You also need to consider the comparison operators, ==, , !=, >=, and $"( {X}, {Y}, {Z} )";
}
This example has two constructors that require specifying the initial value of the vector, either by passing in the values of each component or by supplying another Vector whose value can be copied. Constructors like the second one, that takes a single Vector argument, are often termed copy constructors because they effectively enable you 339
Download from finelybook www.finelybook.com
to initialize a class or struct instance by copying another instance. Here is the interesting part of the Vector struct—the operator overload that provides support for the addition operator: public static Vector operator +(Vector left, Vector right) => new Vector(left.X + right.X, left.Y + right.Y, left.Z + right.Z);
The operator overload is declared in much the same way as a static method, except that the operator keyword tells the compiler it is actually an operator overload you are defining. The operator keyword is followed by the actual symbol for the relevant operator, in this case the addition operator (+). The return type is whatever type you get when you use this operator. Adding two vectors results in a vector; therefore, the return type is also a Vector. For this particular override of the addition operator, the return type is the same as the containing class, but that is not necessarily the case, as you see later in this example. The two parameters are the things you are operating on. For binary operators (those that take two parameters), such as the addition and subtraction operators, the first parameter is the value on the left of the operator, and the second parameter is the value on the right. The implementation of this operator returns a new Vector that is initialized using X, Y, and Z properties from the left and right variables. C# requires that all operator overloads be declared as public and static, which means they are associated with their class or struct, not with a particular instance. Because of this, the body of the operator overload has no access to non-static class members or the this identifier. This is fine because the parameters provide all the input data the operator needs to know to perform its task. Now all you need to do is write some simple code to test the Vector struct (code file OperatorOverloadingSample/Program.cs): static void Main() { Vector vect1, vect2, vect3; vect1 = new Vector(3.0, 3.0, 1.0);
340
Download from finelybook www.finelybook.com
vect2 = new Vector(2.0, -4.0, -4.0); vect3 = vect1 + vect2; Console.WriteLine($"vect1 = {vect1}"); Console.WriteLine($"vect2 = {vect2}"); Console.WriteLine($"vect3 = {vect3}"); }
Compiling and running this code returns the following result: vect1 = ( 3, 3, 1 ) vect2 = ( 2, -4, -4 ) vect3 = ( 5, -1, -3 )
In addition to adding vectors, you can multiply and subtract them and compare their values. In this section, you develop the Vector example further by adding a few more operator overloads. You won’t develop the complete set that you’d probably need for a fully functional Vector type, but you develop enough to demonstrate some other aspects of operator overloading. First, you overload the multiplication operator to support multiplying vectors by a scalar and multiplying vectors by another vector. Multiplying a vector by a scalar simply means multiplying each component individually by the scalar: for example, 2 * (1.0, 2.5, 2.0) returns (2.0, 5.0, 4.0). The relevant operator overload looks similar to this (code file OperatorOverloadingSample2/Vector.cs): public static Vector operator *(double left, Vector right) => new Vector(left * right.X, left * right.Y, left * right.Z);
This by itself, however, is not sufficient. If a and b are declared as type Vector, you can write code like this: b = 2 * a;
The compiler implicitly converts the integer 2 to a double to match the operator overload signature. However, code like the following does not compile: b = a * 2;
The point is that the compiler treats operator overloads exactly like method overloads. It examines all the available overloads of a given 341
Download from finelybook www.finelybook.com
operator to find the best match. The preceding statement requires the first parameter to be a Vector and the second parameter to be an integer, or something to which an integer can be implicitly converted. You have not provided such an overload. The compiler cannot start swapping the order of parameters, so the fact that you’ve provided an overload that takes a double followed by a Vector is not sufficient. You need to explicitly define an overload that takes a Vector followed by a double as well. There are two possible ways of implementing this. The first way involves breaking down the vector multiplication operation in the same way that you have done for all operators so far: public static Vector operator *(Vector left, double right) => new Vector(right * left.X, right * left.Y, right * left.Z);
Given that you have already written code to implement essentially the same operation, however, you might prefer to reuse that code by writing the following: public static Vector operator *(Vector left, double right) => right * left;
This code works by effectively telling the compiler that when it sees a multiplication of a Vector by a double, it can simply reverse the parameters and call the other operator overload. The sample code for this chapter uses the second version because it looks neater and illustrates the idea in action. This version also makes the code more maintainable because it saves duplicating the code to perform the multiplication in two separate overloads. Next, you need to overload the multiplication operator to support vector multiplication. Mathematics provides a couple of ways to multiply vectors, but the one of interest here is known as the dot product or inner product, which actually returns a scalar as a result. That’s the reason for this example—to demonstrate that arithmetic operators don’t have to return the same type as the class in which they are defined. In mathematical terms, if you have two vectors (x, y, z) and (X, Y, Z) then the inner product is defined to be the value of x*X + y*Y + z*Z. That might look like a strange way to multiply two things together, but 342
Download from finelybook www.finelybook.com
it is actually very useful because it can be used to calculate various other quantities. If you ever write code that displays complex 3D graphics, such as using Direct3D or DirectDraw, you will almost certainly find that your code needs to work out inner products of vectors quite often as an intermediate step in calculating where to place objects on the screen. What’s relevant here is that you want users of your Vector to be able to write double X = a*b to calculate the inner product of two Vector objects (a and b). The relevant overload looks like this: public static double operator *(Vector left, Vector right) => left.X * right.X + left.Y * right.Y + left.Z * right.Z;
Now that you understand the arithmetic operators, you can confirm that they work using a simple test method (code file OperatorOverloadingSample2/Program.cs): static void Main() { // stuff to demonstrate arithmetic operations Vector vect1, vect2, vect3; vect1 = new Vector(1.0, 1.5, 2.0); vect2 = new Vector(0.0, 0.0, -10.0); vect3 = vect1 + vect2; Console.WriteLine($"vect1 = {vect1}"); Console.WriteLine($"vect2 = {vect2}"); Console.WriteLine($"vect3 = vect1 + vect2 = {vect3}"); Console.WriteLine($"2 * vect3 = {2 * vect3}"); Console.WriteLine($"vect3 += vect2 gives {vect3 += vect2}"); Console.WriteLine($"vect3 = vect1 * 2 gives {vect3 = vect1 * 2}"); Console.WriteLine($"vect1 * vect3 = {vect1 * vect3}"); }
Running this code produces the following result: vect1 = ( 1, 1.5, 2 ) vect2 = ( 0, 0, -10 ) vect3 = vect1 + vect2 = ( 1, 1.5, -8 ) 2 * vect3 = ( 2, 3, -16 ) vect3 += vect2 gives ( 1, 1.5, -18 ) vect3 = vect1 * 2 gives ( 2, 3, 4 ) vect1 * vect3 = 14.5
343
Download from finelybook www.finelybook.com
This shows that the operator overloads have given the correct results; but if you look at the test code closely, you might be surprised to notice that it actually used an operator that wasn’t overloaded—the addition assignment operator, +=: Console.WriteLine($"vect3 += vect2 gives {vect3 += vect2}");
Although += normally counts as a single operator, it can be broken down into two steps: the addition and the assignment. Unlike the C++ language, C# does not allow you to overload the = operator; but if you overload +, the compiler automatically uses your overload of + to work out how to perform a += operation. The same principle works for all the assignment operators, such as -=, *=, /=, &=, and so on.
Overloading the Comparison Operators As shown earlier in the section “Operators,” C# has six comparison operators, and they are paired as follows: == >
and !=
and <
>=
and !(left == right);
Now override the Equals and GetHashCode methods. These methods should always be overridden when the == operator is overridden. Otherwise the compiler complains with a warning. public override bool Equals(object obj) { if (obj == null) return false; return this == (Vector)obj; } public override int GetHashCode() => X.GetHashCode() ^ (Y.GetHashCode() ^ Z.GetHashCode();
The Equals method can invoke in turn the == operator. The implementation of the hash code should be fast and always return the same value for the same object. This method is important when using dictionaries. Within dictionaries, it is used to build up the tree for objects, so it’s best to distribute the returned values in the integer range. The GetHashCode method of the double type returns the integer representation of the double. For the Vector type, the hash values of the underlying types are just combined with XOR. For value types, you should also implement the interface IEquatable>T this == other;
As usual, you should quickly confirm that your override works with some test code. This time you’ll define three Vector objects and compare them (code file OverloadingComparisonSample/Program.cs): static void Main() { var vect1 = new Vector(3.0, 3.0, -10.0); var vect2 = new Vector(3.0, 3.0, -10.0); var vect3 = new Vector(2.0, 3.0, 6.0); Console.WriteLine($"vect1 == vect2 returns vect2)}"); Console.WriteLine($"vect1 == vect3 returns vect3)}"); Console.WriteLine($"vect2 == vect3 returns vect3)}"); Console.WriteLine(); Console.WriteLine($"vect1 != vect2 returns vect2)}"); Console.WriteLine($"vect1 != vect3 returns vect3)}"); Console.WriteLine($"vect2 != vect3 returns vect3)}"); }
{(vect1 == {(vect1 == {(vect2 ==
{(vect1 != {(vect1 != {(vect2 !=
Running the example produces these results at the command line: vect1 vect1 vect2 vect1 vect1 vect2
== == == != != !=
vect2 vect3 vect3 vect2 vect3 vect3
returns returns returns returns returns returns
True False False False True True
Which Operators Can You Overload? It is not possible to overload all the available operators. The operators that you can overload are listed in the following table: CATEGORY OPERATORS RESTRICTIONS Arithmetic +, *, /, -, % None binary Arithmetic
+, -, ++, – –
None 347
Download from finelybook www.finelybook.com
unary Bitwise binary
&, |, ^, ≪, ≫
Bitwise unary
!, ~,true, false
Comparison
Assignment
Index
Cast
None
The true and false operators must be overloaded as a pair. ==, !=,>=, Comparison operators must be , $"{FirstName} {LastName}"; }
The class PersonCollection defines a private array field that contains Person elements and a constructor where a number of Person objects can be passed (code file CustomIndexerSample/PersonCollection.cs): public class PersonCollection { private Person[] _people; public PersonCollection(params Person[] people) => _people = people.ToArray(); }
For allowing indexer-syntax to be used to access the PersonCollection and return Person objects, you can create an indexer. The indexer looks very similar to a property as it also contains get and set accessors. What’s different is the name. Specifying an indexer makes use of the this keyword. The brackets that follow the this keyword specify the type that is used with the index. An array offers indexers with the int type, so int types are here used as well to pass the information directly to the contained array _people. The use of the set and get accessors is very similar to properties. The get accessor is invoked when a value is retrieved, the set accessor when a (Person object) is passed on the right side. public Person this[int index] { get => _people[index]; set => _people[index] = value; }
With indexers, you cannot only define int types as the indexing type. Any type works, as is shown here with the DateTime struct as indexing type. This indexer is used to return every person with a specified birthday. Because multiple persons can have the same birthday, not a single Person object is returned but a list of persons with the interface IEnumerable. The Where method used makes the filtering based on a lambda expression. The Where method is defined in the namespace System.Linq: 350
Download from finelybook www.finelybook.com
public IEnumerable this[DateTime birthDay] { get => _people.Where(p => p.Birthday == birthDay); }
The indexer using the DateTime type offers retrieving person objects, but doesn’t allow you to set person objects as there’s only a get accessor but no set accessor. A shorthand notation exists to create the same code with an expression-bodied member (the same syntax available with properties): public IEnumerable this[DateTime birthDay] => _people.Where(p => p.Birthday == birthDay);
The Main method of the sample application creates a PersonCollection object and passes four Person objects to the constructor. With the first WriteLine method, the third element is accessed using the get accessor of the indexer with the int parameter. Within the foreach loop, the indexer with the DateTime parameter is used to pass a specified date (code file CustomIndexerSample/Program.cs): static void Main() { var p1 = new Person("Ayrton", "Senna", new DateTime(1960, 3, 21)); var p2 = new Person("Ronnie", "Peterson", new DateTime(1944, 2, 14)); var p3 = new Person("Jochen", "Rindt", new DateTime(1942, 4, 18)); var p4 = new Person("Francois", "Cevert", new DateTime(1944, 2, 25)); var coll = new PersonCollection(p1, p2, p3, p4); Console.WriteLine(coll[2]); foreach (var r in coll[new DateTime(1960, 3, 21)]) { Console.WriteLine(r); } Console.ReadLine(); }
Running the program, the first WriteLine method writes Jochen Rindt to the console; the result of the foreach loop is Ayrton Senna as that person has the same birthday as is assigned within the second indexer.
351
Download from finelybook www.finelybook.com
USER-DEFINED CASTS Earlier in this chapter (see the “Explicit Conversions” section), you learned that you can convert values between predefined data types through a process of casting. You also saw that C# allows two different types of casts: implicit and explicit. This section looks at these types of casts. For an explicit cast, you explicitly mark the cast in your code by including the destination data type inside parentheses: int i = 3; long l = i; // implicit short s = (short)i; // explicit
For the predefined data types, explicit casts are required where there is a risk that the cast might fail or some data might be lost. The following are some examples: When converting from an int to a short, the short might not be large enough to hold the value of the int. When converting from signed to unsigned data types, incorrect results are returned if the signed variable holds a negative value. When converting from floating-point to integer data types, the fractional part of the number will be lost. When converting from a nullable type to a non-nullable type, a value of null causes an exception. By making the cast explicit in your code, C# forces you to affirm that you understand there is a risk of data loss, and therefore presumably you have written your code to take this into account. Because C# allows you to define your own data types (structs and classes), it follows that you need the facility to support casts to and from those data types. The mechanism is to define a cast as a member operator of one of the relevant classes. Your cast operator must be marked as either implicit or explicit to indicate how you are intending it to be used. The expectation is that you follow the same guidelines as for the predefined casts: if you know that the cast is 352
Download from finelybook www.finelybook.com
always safe regardless of the value held by the source variable, then you define it as implicit. Conversely, if you know there is a risk of something going wrong for certain values—perhaps some loss of data or an exception being thrown—then you should define the cast as explicit.
NOTE You should define any custom casts you write as explicit if there are any source data values for which the cast will fail or if there is any risk of an exception being thrown. The syntax for defining a cast is similar to that for overloading operators discussed earlier in this chapter. This is not a coincidence—a cast is regarded as an operator whose effect is to convert from the source type to the destination type. To illustrate the syntax, the following is taken from an example struct named Currency, which is introduced later in this section: public static implicit operator float (Currency value) { // processing }
The return type of the operator defines the target type of the cast operation, and the single parameter is the source object for the conversion. The cast defined here allows you to implicitly convert the value of a Currency into a float. Note that if a conversion has been declared as implicit, the compiler permits its use either implicitly or explicitly. If it has been declared as explicit, the compiler only permits it to be used explicitly. In common with other operator overloads, casts must be declared as both public and static.
NOTE C++ developers will notice that this is different from C++, in 353
Download from finelybook www.finelybook.com
which casts are instance members of classes.
Implementing User-Defined Casts This section illustrates the use of implicit and explicit user-defined casts in an example called CastingSample. In this example, you define a struct, Currency, which holds a positive USD ($) monetary value. C# provides the decimal type for this purpose, but it is possible you will still want to write your own struct or class to represent monetary values if you need to perform sophisticated financial processing and therefore want to implement specific methods on such a class.
NOTE The syntax for casting is the same for structs and classes. This example happens to be for a struct, but it would work just as well if you declared Currency as a class. Initially, the definition of the Currency struct is as follows (code file CastingSample/Currency.cs): public struct Currency { public uint Dollars { get; } public ushort Cents { get; } public Currency(uint dollars, ushort cents) { Dollars = dollars; Cents = cents; } public override string ToString() => $"${Dollars}. {Cents,-2:00}"; }
The use of unsigned data types for the Dollar and Cents properties ensures that a Currency instance can hold only positive values. It is restricted this way to illustrate some points about explicit casts later. 354
Download from finelybook www.finelybook.com
You might want to use a class like this to hold, for example, salary information for company employees (people’s salaries tend not to be negative!). Start by assuming that you want to be able to convert Currency instances to float values, where the integer part of the float represents the dollars. In other words, you want to be able to write code like this: var balance = new Currency(10, 50); float f = balance; // We want f to be set to 10.5
To be able to do this, you need to define a cast. Hence, you add the following to your Currency definition: public static implicit operator float (Currency value) => value.Dollars + (value.Cents/100.0f);
The preceding cast is implicit. It is a sensible choice in this case because, as it should be clear from the definition of Currency, any value that can be stored in the currency can also be stored in a float. There is no way that anything should ever go wrong in this cast.
NOTE There is a slight cheat here: In fact, when converting a uint to a float, there can be a loss in precision, but Microsoft has deemed this error sufficiently marginal to count the uint-to-float cast as implicit. However, if you have a float that you would like to be converted to a Currency, the conversion is not guaranteed to work. A float can store negative values, whereas Currency instances can’t, and a float can store numbers of a far higher magnitude than can be stored in the (uint) Dollar field of Currency. Therefore, if a float contains an inappropriate value, converting it to a Currency could give unpredictable results. Because of this risk, the conversion from float to Currency should be defined as explicit. Here is the first attempt, 355
Download from finelybook www.finelybook.com
which does not return quite the correct results, but it is instructive to examine why: public static explicit operator Currency (float value) { uint dollars = (uint)value; ushort cents = (ushort)((value-dollars)*100); return new Currency(dollars, cents); }
The following code now successfully compiles: float amount = 45.63f; Currency amount2 = (Currency)amount;
However, the following code, if you tried it, would generate a compilation error because it attempts to use an explicit cast implicitly: float amount = 45.63f; Currency amount2 = amount; // wrong
By making the cast explicit, you warn the developer to be careful because data loss might occur. However, as you soon see, this is not how you want your Currency struct to behave. Try writing a test harness and running the sample. Here is the Main method, which instantiates a Currency struct and attempts a few conversions. At the start of this code, you write out the value of balance in two different ways—this is needed to illustrate something later in the example (code file CastingSample/Program.cs): static void Main() { try { var balance = new Currency(50,35); Console.WriteLine(balance); Console.WriteLine($"balance is {balance}"); // implicitly invokes ToString float balance2 = balance; Console.WriteLine($"After converting to float, = {balance2}"); balance = (Currency) balance2; Console.WriteLine($"After converting back to Currency, = {balance}"); Console.WriteLine("Now attempt to convert out of range
356
Download from finelybook www.finelybook.com
value of " + "-$50.50 to a Currency:"); checked { balance = (Currency) (-50.50); Console.WriteLine($"Result is {balance}"); } } catch(Exception e) { Console.WriteLine($"Exception occurred: {e.Message}"); } }
Notice that the entire code is placed in a try block to catch any exceptions that occur during your casts. In addition, the lines that test converting an out-of-range value to Currency are placed in a checked block in an attempt to trap negative values. Running this code produces the following output: 50.35 Balance is $50.35 After converting to float, = 50.35 After converting back to Currency, = $50.34 Now attempt to convert out of range value of -$50.50 to a Currency: Result is $4294967246.00
This output shows that the code did not quite work as expected. First, converting back from float to Currency gave a wrong result of $50.34 instead of $50.35. Second, no exception was generated when you tried to convert an obviously out-of-range value. The first problem is caused by rounding errors. If a cast is used to convert from a float to a uint, the computer truncates the number rather than rounds it. The computer stores numbers in binary rather than decimal, and the fraction 0.35 cannot be exactly represented as a binary fraction (just as 1⁄3 cannot be represented exactly as a decimal fraction; it comes out as 0.3333 recurring). The computer ends up storing a value very slightly lower than 0.35 that can be represented exactly in binary format. Multiply by 100 and you get a number fractionally less than 35, which is truncated to 34 cents. Clearly, in this 357
Download from finelybook www.finelybook.com
situation, such errors caused by truncation are serious, and the way to avoid them is to ensure that some intelligent rounding is performed in numerical conversions instead. Luckily, Microsoft has written a class that does this: System.Convert. The System.Convert object contains a large number of static methods to perform various numerical conversions, and the one that we want is Convert.ToUInt16. Note that the extra care taken by the System.Convert methods comes at a performance cost. You should use them only when necessary. Let’s examine the second problem—why the expected overflow exception wasn’t thrown. The issue here is this: The place where the overflow really occurs isn’t actually in the Main routine at all—it is inside the code for the cast operator, which is called from the Main method. The code in this method was not marked as checked. The solution is to ensure that the cast itself is computed in a checked context, too. With both this change and the fix for the first problem, the revised code for the conversion looks like the following: public static explicit operator Currency (float value) { checked { uint dollars = (uint)value; ushort cents = Convert.ToUInt16((value-dollars)*100); return new Currency(dollars, cents); } }
Note that you use Convert.ToUInt16 to calculate the cents, as described earlier, but you do not use it for calculating the dollar part of the amount. System.Convert is not needed when calculating the dollar amount because truncating the float value is what you want there.
NOTE The System.Convert methods also carry out their own overflow checking. Hence, for the particular case we are considering, there 358
Download from finelybook www.finelybook.com
is no need to place the call to Convert.ToUInt16 inside the checked context. The checked context is still required, however, for the explicit casting of value to dollars. You won’t see a new set of results with this new checked cast just yet because you have some more modifications to make to the CastingSample example later in this section.
NOTE If you are defining a cast that will be used very often, and for which performance is at an absolute premium, you may prefer not to do any error checking. That is also a legitimate solution, provided that the behavior of your cast and the lack of error checking are very clearly documented. Casts Between Classes The Currency example involves only classes that convert to or from float—one of the predefined data types. However, it is not necessary to involve any of the simple data types. It is perfectly legitimate to define casts to convert between instances of different structs or classes that you have defined. You need to be aware of a couple of restrictions, however: You cannot define a cast if one of the classes is derived from the other (these types of casts already exist, as you see later). The cast must be defined inside the definition of either the source or the destination data type. To illustrate these requirements, suppose that you have the class hierarchy shown in Figure 6-1.
359
Download from finelybook www.finelybook.com
FIGURE 6-1 In other words, classes C and D are indirectly derived from A. In this case, the only legitimate user-defined cast between A, B, C, or D would be to convert between classes C and D, because these classes are not derived from each other. The code to do so might look like the following (assuming you want the casts to be explicit, which is usually the case when defining casts between user-defined classes): public static explicit operator D(C value) { //... } public static explicit operator C(D value) { //... }
For each of these casts, you can choose where you place the definitions —inside the class definition of C or inside the class definition of D, but not anywhere else. C# requires you to put the definition of a cast inside either the source class (or struct) or the destination class (or struct). A side effect of this is that you cannot define a cast between two classes unless you have access to edit the source code for at least one of them. This is sensible because it prevents third parties from introducing casts into your classes. After you have defined a cast inside one of the classes, you cannot also define the same cast inside the other class. Obviously, there should be only one cast for each conversion; otherwise, the compiler would not 360
Download from finelybook www.finelybook.com
know which one to use. Casts Between Base and Derived Classes To see how these casts work, start by considering the case in which both the source and the destination are reference types, and consider two classes, MyBase and MyDerived, where MyDerived is derived directly or indirectly from MyBase. First, from MyDerived to MyBase, it is always possible (assuming the constructors are available) to write this: MyDerived derivedObject = new MyDerived(); MyBase baseCopy = derivedObject;
Here, you are casting implicitly from MyDerived to MyBase. This works because of the rule that any reference to a type MyBase is allowed to refer to objects of class MyBase or anything derived from MyBase. In OO programming, instances of a derived class are, in a real sense, instances of the base class, plus something extra. All the functions and fields defined on the base class are defined in the derived class, too. Alternatively, you can write this: MyBase derivedObject = new MyDerived(); MyBase baseObject = new MyBase(); MyDerived derivedCopy1 = (MyDerived) derivedObject; // OK MyDerived derivedCopy2 = (MyDerived) baseObject; // Throws exception
This code is perfectly legal C# (in a syntactic sense, that is) and illustrates casting from a base class to a derived class. However, the final statement throws an exception when executed. When you perform the cast, the object being referred to is examined. Because a base class reference can, in principle, refer to a derived class instance, it is possible that this object is actually an instance of the derived class that you are attempting to cast to. If that is the case, the cast succeeds, and the derived reference is set to refer to the object. If, however, the object in question is not an instance of the derived class (or of any class derived from it), the cast fails and an exception is thrown. Notice that the casts that the compiler has supplied, which convert 361
Download from finelybook www.finelybook.com
between base and derived class, do not actually do any data conversion on the object in question. All they do is set the new reference to refer to the object if it is legal for that conversion to occur. To that extent, these casts are very different in nature from the ones that you normally define yourself. For example, in the CastingSample example earlier, you defined casts that convert between a Currency struct and a float. In the float-to-Currency cast, you actually instantiated a new Currency struct and initialized it with the required values. The predefined casts between base and derived classes do not do this. If you want to convert a MyBase instance into a real MyDerived object with values based on the contents of the MyBase instance, you cannot use the cast syntax to do this. The most sensible option is usually to define a derived class constructor that takes a base class instance as a parameter, and have this constructor perform the relevant initializations: class DerivedClass: BaseClass { public DerivedClass(BaseClass base) { // initialize object from the Base instance } // ...
Boxing and Unboxing Casts The previous discussion focused on casting between base and derived classes where both participants were reference types. Similar principles apply when casting value types, although in this case it is not possible to simply copy references—some copying of data must occur. It is not, of course, possible to derive from structs or primitive value types. Casting between base and derived structs invariably means casting between a primitive type or a struct and System.Object. (Theoretically, it is possible to cast between a struct and System.ValueType, though it is hard to see why you would want to do this.) The cast from any struct (or primitive type) to object is always available as an implicit cast—because it is a cast from a derived type to 362
Download from finelybook www.finelybook.com
a base type—and is just the familiar process of boxing. For example, using the Currency struct: var balance = new Currency(40,0); object baseCopy = balance;
When this implicit cast is executed, the contents of balance are copied onto the heap into a boxed object, and the baseCopy object reference is set to this object. What actually happens behind the scenes is this: When you originally defined the Currency struct, the .NET Framework implicitly supplied another (hidden) class, a boxed Currency class, which contains all the same fields as the Currency struct but is a reference type, stored on the heap. This happens whenever you define a value type, whether it is a struct or an enum, and similar boxed reference types exist corresponding to all the primitive value types of int, double, uint, and so on. It is not possible, or necessary, to gain direct programmatic access to any of these boxed classes in source code, but they are the objects that are working behind the scenes whenever a value type is cast to object. When you implicitly cast Currency to object, a boxed Currency instance is instantiated and initialized with all the data from the Currency struct. In the preceding code, it is this boxed Currency instance to which baseCopy refers. By these means, it is possible for casting from derived to base type to work syntactically in the same way for value types as for reference types. Casting the other way is known as unboxing. Like casting between a base reference type and a derived reference type, it is an explicit cast because an exception is thrown if the object being cast is not of the correct type: object derivedObject = new Currency(40,0); object baseObject = new object(); Currency derivedCopy1 = (Currency)derivedObject; // OK Currency derivedCopy2 = (Currency)baseObject; // Exception thrown
This code works in a way similar to the code presented earlier for reference types. Casting derivedObject to Currency works fine because derivedObject actually refers to a boxed Currency instance—the cast is 363
Download from finelybook www.finelybook.com
performed by copying the fields out of the boxed Currency object into a new Currency struct. The second cast fails because baseObject does not refer to a boxed Currency object. When using boxing and unboxing, it is important to understand that both processes actually copy the data into the new boxed or unboxed object. Hence, manipulations on the boxed object, for example, do not affect the contents of the original value type.
Multiple Casting One thing you have to watch for when you are defining casts is that if the C# compiler is presented with a situation in which no direct cast is available to perform a requested conversion, it attempts to find a way of combining casts to do the conversion. For example, with the Currency struct, suppose the compiler encounters a few lines of code like this: var balance = new Currency(10,50); long amount = (long)balance; double amountD = balance;
You first initialize a Currency instance, and then you attempt to convert it to a long. The trouble is that you haven’t defined the cast to do that. However, this code still compiles successfully. Here’s what happens: The compiler realizes that you have defined an implicit cast to get from Currency to float, and the compiler already knows how to explicitly cast a float to a long. Hence, it compiles that line of code into IL code that converts balance first to a float, and then converts that result to a long. The same thing happens in the final line of the code, when you convert balance to a double. However, because the cast from Currency to float and the predefined cast from float to double are both implicit, you can write this conversion in your code as an implicit cast. If you prefer, you could also specify the casting route explicitly: var balance = new Currency(10,50); long amount = (long)(float)balance; double amountD = (double)(float)balance;
364
Download from finelybook www.finelybook.com
However, in most cases, this would be seen as needlessly complicating your code. The following code, by contrast, produces a compilation error: var balance = new Currency(10,50); long amount = balance;
The reason is that the best match for the conversion that the compiler can find is still to convert first to float and then to long. The conversion from float to long needs to be specified explicitly, though. Not all of this by itself should give you too much trouble. The rules are, after all, fairly intuitive and designed to prevent any data loss from occurring without the developer knowing about it. However, the problem is that if you are not careful when you define your casts, it is possible for the compiler to select a path that leads to unexpected results. For example, suppose that it occurs to someone else in the group writing the Currency struct that it would be useful to be able to convert a uint containing the total number of cents in an amount into a Currency (cents, not dollars, because the idea is not to lose the fractions of a dollar). Therefore, this cast might be written to try to achieve this: // Do not do this! public static implicit operator Currency (uint value) => new Currency(value/100u, (ushort)(value%100));
Note the u after the first 100 in this code to ensure that value/100u is interpreted as a uint. If you had written value/100, the compiler would have interpreted this as an int, not a uint. The comment Do not do this! is clearly noted in this code, and here is why: The following code snippet merely converts a jNuint containing 350 into a Currency and back again; but what do you think bal2 will contain after executing this? uint bal = 350; Currency balance = bal; uint bal2 = (uint)balance;
The answer is not 350 but 3! Moreover, it all follows logically. You convert 350 implicitly to a Currency, giving the result balance.Dollars 365
Download from finelybook www.finelybook.com
= 3, balance.Cents = 50.
Then the compiler does its usual figuring out of the best path for the conversion back. Balance ends up being implicitly converted to a float (value 3.5), and this is converted explicitly to a uint with value 3. Of course, other instances exist in which converting to another data type and back again causes data loss. For example, converting a float containing 5.8 to an int and back to a float again loses the fractional part, giving you a result of 5, but there is a slight difference in principle between losing the fractional part of a number and dividing an integer by more than 100. Currency has suddenly become a rather dangerous class that does strange things to integers! The problem is that there is a conflict between how your casts interpret integers. The casts between Currency and float interpret an integer value of 1 as corresponding to one dollar, but the latest uintto-Currency cast interprets this value as one cent. This is an example of very poor design. If you want your classes to be easy to use, you should ensure that all your casts behave in a way that is mutually compatible, in the sense that they intuitively give the same results. In this case, the solution is obviously to rewrite the uint-to-Currency cast so that it interprets an integer value of 1 as one dollar: public static implicit operator Currency (uint value) => new Currency(value, 0);
Incidentally, you might wonder whether this new cast is necessary at all. The answer is that it could be useful. Without this cast, the only way for the compiler to carry out a uint-to-Currency conversion would be via a float. Converting directly is a lot more efficient in this case, so having this extra cast provides performance benefits, though you need to ensure that it provides the same result as via a float, which you have now done. In other situations, you may also find that separately defining casts for different predefined data types enables more conversions to be implicit rather than explicit, though that is not the case here. A good test of whether your casts are compatible is to ask whether a conversion will give the same results (other than perhaps a loss of accuracy as in float-to-int conversions) regardless of which path it 366
Download from finelybook www.finelybook.com
takes. The Currency class provides a good example of this. Consider this code: var balance = new Currency(50, 35); ulong bal = (ulong) balance;
At present, there is only one way that the compiler can achieve this conversion: by converting the Currency to a float implicitly, then to a ulong explicitly. The float-to-ulong conversion requires an explicit conversion, but that is fine because you have specified one here. Suppose, however, that you then added another cast, to convert implicitly from a Currency to a uint. You actually do this by modifying the Currency struct by adding the casts both to and from uint (code file CastingSample/Currency.cs): public static implicit operator Currency (uint value) => new Currency(value, 0); public static implicit operator uint (Currency value) => value.Dollars;
Now the compiler has another possible route to convert from Currency to ulong: to convert from Currency to uint implicitly, then to ulong implicitly. Which of these two routes will it take? C# has some precise rules about the best route for the compiler when there are several possibilities. (The rules are not covered in this book, but if you are interested in the details, see the MSDN documentation.) The best answer is that you should design your casts so that all routes give the same answer (other than possible loss of precision), in which case it doesn’t really matter which one the compiler picks. (As it happens in this case, the compiler picks the Currency-to-uint-to-ulong route in preference to Currency-to-float-to-ulong.) To test casting the Currency to uint, add this test code to the Main method (code file CastingSample/Program.cs): static void Main() { try { var balance = new Currency(50,35); Console.WriteLine(balance); Console.WriteLine($"balance is {balance}");
367
Download from finelybook www.finelybook.com
uint balance3 = (uint) balance; Console.WriteLine($"Converting to uint gives {balance3}"); } catch (Exception ex) { Console.WriteLine($"Exception occurred: {e.Message}"); } }
Running the sample now gives you these results: 50 balance is $50.35 Converting to uint gives 50
The output shows that the conversion to uint has been successful, though, as expected, you have lost the cents part of the Currency in making this conversion. Casting a negative float to Currency has also produced the expected overflow exception now that the float-toCurrency cast itself defines a checked context. However, the output also demonstrates one last potential problem that you need to be aware of when working with casts. The very first line of output does not display the balance correctly, displaying 50 instead of 50.35. So, what is going on? The problem here is that when you combine casts with method overloads, you get another source of unpredictability. The WriteLine statement using the format string implicitly calls the Currency.ToString method, ensuring that the Currency is displayed as a string. The very first code line with WriteLine, however, simply passes a raw Currency struct to the WriteLine method. Now, WriteLine has many overloads, but none of them takes a Currency struct. Therefore, the compiler starts fishing around to see what it can cast the Currency to in order to make it match up with one of the overloads of WriteLine. As it happens, one of the WriteLine overloads is designed to display uints quickly and efficiently, and it takes a uint as a parameter—you have now supplied a cast that converts Currency implicitly to uint. 368
Download from finelybook www.finelybook.com
In fact, WriteLine has another overload that takes a double as a parameter and displays the value of that double. If you look closely at the output running the example previously where the cast to uint did not exist, you see that the first line of output displayed Currency as a double, using this overload. In that example, there wasn’t a direct cast from Currency to uint, so the compiler picked Currency-to-float-todouble as its preferred way of matching up the available casts to the available WriteLine overloads. However, now that there is a direct cast to uint available in SimpleCurrency2, the compiler has opted for that route. The upshot of this is that if you have a method call that takes several overloads and you attempt to pass it a parameter whose data type doesn’t match any of the overloads exactly, then you are forcing the compiler to decide not only what casts to use to perform the data conversion, but also which overload, and hence which data conversion, to pick. The compiler always works logically and according to strict rules, but the results may not be what you expected. If there is any doubt, you are better off specifying which cast to use explicitly.
SUMMARY This chapter looked at the standard operators provided by C#, described the mechanics of object equality, and examined how the compiler converts the standard data types from one to another. It also demonstrated how you can implement custom operator support on your data types using operator overloads. Finally, you looked at a special type of operator overload, the cast operator, which enables you to specify how instances of your types are converted to other data types. The next chapter dives into arrays where the index operator has an important role.
369
Download from finelybook www.finelybook.com
7 Arrays WHAT’S IN THIS CHAPTER? Simple arrays Multidimensional arrays Jagged arrays The Array class Arrays as parameters Enumerators Structural comparison Spans Array Pools
WROX.COM CODE DOWNLOADS FOR THIS CHAPTER The Wrox.com code downloads for this chapter are found at www.wrox.com on the Download Code tab. The source code is also available at https://github.com/ProfessionalCSharp/ProfessionalCSharp7 in the directory Arrays. The code for this chapter is divided into the following major examples: 370
Download from finelybook www.finelybook.com
SimpleArrays SortingSample ArraySegment YieldSample StructuralComparison SpanSample ArrayPoolSample
MULTIPLE OBJECTS OF THE SAME TYPE If you need to work with multiple objects of the same type, you can use collections (see Chapter 10, “Collections”) and arrays. C# has a special notation to declare, initialize, and use arrays. Behind the scenes, the Array class comes into play, which offers several methods to sort and filter the elements inside the array. Using an enumerator, you can iterate through all the elements of the array.
NOTE For using multiple objects of different types, you can combine them using classes, structs, and tuples. Classes and structs are discussed in Chapter 3, “Objects and Types.” Tuples are covered in Chapter 13, “Functional Programming with C#.”
SIMPLE ARRAYS If you need to use multiple objects of the same type, you can use an array. An array is a data structure that contains a number of elements of the same type.
Array Declaration 371
Download from finelybook www.finelybook.com
An array is declared by defining the type of elements inside the array, followed by empty brackets and a variable name. For example, an array containing integer elements is declared like this: int[] myArray;
Array Initialization After declaring an array, memory must be allocated to hold all the elements of the array. An array is a reference type, so memory on the heap must be allocated. You do this by initializing the variable of the array using the new operator, with the type and the number of elements inside the array. Here, you specify the size of the array: myArray = new int[4];
NOTE Value types and reference types are covered in Chapter 3. With this declaration and initialization, the variable myArray references four integer values that are allocated on the managed heap (see Figure 7-1).
FIGURE 7-1
NOTE 372
Download from finelybook www.finelybook.com
An array cannot be resized after its size is specified without copying all the elements. If you don’t know how many elements should be in the array in advance, you can use a collection (see Chapter 10). Instead of using a separate line to declare and initialize an array, you can use a single line: int[] myArray = new int[4];
You can also assign values to every array element using an array initializer. You can use array initializers only while declaring an array variable, not after the array is declared: int[] myArray = new int[4] {4, 7, 11, 2};
If you initialize the array using curly brackets, you can also omit the size of the array because the compiler can count the number of elements: int[] myArray = new int[] {4, 7, 11, 2};
There’s even a shorter form using the C# compiler. Using curly brackets you can write the array declaration and initialization. The code generated from the compiler is the same as the previous result: int[] myArray = {4, 7, 11, 2};
Accessing Array Elements After an array is declared and initialized, you can access the array elements using an indexer. Arrays support only indexers that have integer parameters. With the indexer, you pass the element number to access the array. The indexer always starts with a value of 0 for the first element. Therefore, the highest number you can pass to the indexer is the number of elements minus one, because the index starts at zero. In the following example, the array myArray is declared and initialized with four integer values. The elements can be accessed with indexer values 373
Download from finelybook www.finelybook.com
0, 1, 2, and 3. int[] myArray = new int[] {4, 7, 11, 2}; int v1 = myArray[0]; // read first element int v2 = myArray[1]; // read second element myArray[3] = 44; // change fourth element
NOTE If you use a wrong indexer value that is bigger than the length of the array, an exception of type IndexOutOfRangeException is thrown. If you don’t know the number of elements in the array, you can use the Length property, as shown in this for statement: for (int i = 0; i < myArray.Length; i++) { Console.WriteLine(myArray[i]); }
Instead of using a for statement to iterate through all the elements of the array, you can also use the foreach statement: foreach (var val in myArray) { Console.WriteLine(val); }
NOTE The foreach statement makes use of the IEnumerable and IEnumerator interfaces and traverses through the array from the first index to the last. This is discussed in detail later in this chapter.
374
Download from finelybook www.finelybook.com
Using Reference Types In addition to being able to declare arrays of predefined types, you can also declare arrays of custom types. Let’s start with the following Person class, the properties FirstName and LastName using autoimplemented readonly properties, and an override of the ToString method from the Object class (code file SimpleArrays/Person.cs): public class Person { public Person(string firstName, string lastName) { FirstName = firstName; LastName = lastName; } public string FirstName { get; } public string LastName { get; } public override string ToString() => $"{FirstName} {LastName}"; }
Declaring an array of two Person elements is similar to declaring an array of int: Person[] myPersons = new Person[2];
However, be aware that if the elements in the array are reference types, memory must be allocated for every array element. If you use an item in the array for which no memory was allocated, a NullReferenceException is thrown.
NOTE For information about errors and exceptions, see Chapter 14, “Errors and Exceptions.” You can allocate every element of the array by using an indexer starting from 0 (code file SimpleArrays/Program.cs):
375
Download from finelybook www.finelybook.com
myPersons[0] = new Person("Ayrton", "Senna"); myPersons[1] = new Person("Michael", "Schumacher");
Figure 7-2 shows the objects in the managed heap with the Person array. myPersons is a variable that is stored on the stack. This variable references an array of Person elements that is stored on the managed heap. This array has enough space for two references. Every item in the array references a Person object that is also stored in the managed heap.
FIGURE 7-2 Similar to the int type, you can also use an array initializer with custom types: Person[] myPersons2 = { new Person("Ayrton", "Senna"), new Person("Michael", "Schumacher") };
MULTIDIMENSIONAL ARRAYS Ordinary arrays (also known as one-dimensional arrays) are indexed by a single integer. A multidimensional array is indexed by two or more integers. Figure 7-3 shows the mathematical notation for a two-dimensional array that has three rows and three columns. The first row has the values 1, 2, and 3, and the third row has the values 7, 8, and 9.
376
Download from finelybook www.finelybook.com
FIGURE 7-3 To declare this two-dimensional array with C#, you put a comma inside the brackets. The array is initialized by specifying the size of every dimension (also known as rank). Then the array elements can be accessed by using two integers with the indexer (code file SimpleArrays/Program.cs): int[,] twodim = new int[3, 3]; twodim[0, 0] = 1; twodim[0, 1] = 2; twodim[0, 2] = 3; twodim[1, 0] = 4; twodim[1, 1] = 5; twodim[1, 2] = 6; twodim[2, 0] = 7; twodim[2, 1] = 8; twodim[2, 2] = 9;
NOTE After declaring an array, you cannot change the rank. You can also initialize the two-dimensional array by using an array indexer if you know the values for the elements in advance. To initialize the array, one outer curly bracket is used, and every row is initialized by using curly brackets inside the outer curly brackets: int[,] twodim = { {1, 2, 3}, {4, 5, 6}, {7, 8, 9} };
NOTE When using an array initializer, you must initialize every element of the array. It is not possible to defer the initialization of some 377
Download from finelybook www.finelybook.com
values until later. By using two commas inside the brackets, you can declare a threedimensional array: int[,,] { { 1, { { 5, { { 9, };
threedim = { 2 }, { 3, 4 } }, 6 }, { 7, 8 } }, 10 }, { 11, 12 } }
Console.WriteLine(threedim[0, 1, 1]);
JAGGED ARRAYS A two-dimensional array has a rectangular size (for example, 3 × 3 elements). A jagged array provides more flexibility in sizing the array. With a jagged array every row can have a different size. Figure 7-4 contrasts a two-dimensional array that has 3 × 3 elements with a jagged array. The jagged array shown contains three rows, with the first row containing two elements, the second row containing six elements, and the third row containing three elements.
FIGURE 7-4 A jagged array is declared by placing one pair of opening and closing brackets after another. To initialize the jagged array, only the size that defines the number of rows in the first pair of brackets is set. The second brackets that define the number of elements inside the row are kept empty because every row has a different number of elements. Next, the element number of the rows can be set for every row (code file SimpleArrays/Program.cs): 378
Download from finelybook www.finelybook.com
int[][] jagged = new int[3][]; jagged[0] = new int[2] { 1, 2 }; jagged[1] = new int[6] { 3, 4, 5, 6, 7, 8 }; jagged[2] = new int[3] { 9, 10, 11 };
You can iterate through all the elements of a jagged array with nested for loops. In the outer for loop every row is iterated, and the inner for loop iterates through every element inside a row: for (int row = 0; row < jagged.Length; row++) { for (int element = 0; element < jagged[row].Length; element++) { Console.WriteLine($"row: {row}, element: {element}, " + $"value: {jagged[row][element]}"); } }
The output of the iteration displays the rows and every element within the rows: row: row: row: row: row: row: row: row: row: row: row:
0, 0, 1, 1, 1, 1, 1, 1, 2, 2, 2,
element: element: element: element: element: element: element: element: element: element: element:
0, 1, 0, 1, 2, 3, 4, 5, 0, 1, 2,
value: value: value: value: value: value: value: value: value: value: value:
1 2 3 4 5 6 7 8 9 10 11
ARRAY CLASS Declaring an array with brackets is a C# notation using the Array class. Using the C# syntax behind the scenes creates a new class that derives from the abstract base class Array. This makes it possible to use methods and properties that are defined with the Array class with every C# array. For example, you’ve already used the Length property or iterated through the array by using the foreach statement. By doing this, you are using the GetEnumerator method of the Array class. 379
Download from finelybook www.finelybook.com
Other properties implemented by the Array class are LongLength, for arrays in which the number of items doesn’t fit within an integer, and Rank, to get the number of dimensions. Let’s have a look at other members of the Array class by getting into various features.
Creating Arrays The Array class is abstract, so you cannot create an array by using a constructor. However, instead of using the C# syntax to create array instances, it is also possible to create arrays by using the static CreateInstance method. This is extremely useful if you don’t know the type of elements in advance, because the type can be passed to the CreateInstance method as a Type object. The following example shows how to create an array of type int with a size of 5. The first argument of the CreateInstance method requires the type of the elements, and the second argument defines the size. You can set values with the SetValue method, and read values with the GetValue method (code file SimpleArrays/Program.cs): Array intArray1 = Array.CreateInstance(typeof(int), 5); for (int i = 0; i < 5; i++) { intArray1.SetValue(33, i); } for (int i = 0; i < 5; i++) { Console.WriteLine(intArray1.GetValue(i)); }
You can also cast the created array to an array declared as int[]: int[] intArray2 = (int[])intArray1;
method has many overloads to create multidimensional arrays and to create arrays that are not 0 based. The following example creates a two-dimensional array with 2 × 3 elements. The first dimension is 1 based; the second dimension is 10 based: The CreateInstance
380
Download from finelybook www.finelybook.com
int[] lengths = { 2, 3 }; int[] lowerBounds = { 1, 10 }; Array racers = Array.CreateInstance(typeof(Person), lengths, lowerBounds);
Setting the elements of the array, the SetValue method accepts indices for every dimension: racers.SetValue(new racers.SetValue(new racers.SetValue(new racers.SetValue(new racers.SetValue(new racers.SetValue(new
Person("Alain", "Prost"), 1, 10); Person("Emerson", "Fittipaldi", 1, 11); Person("Ayrton", "Senna"), 1, 12); Person("Michael", "Schumacher"), 2, 10); Person("Fernando", "Alonso"), 2, 11); Person("Jenson", "Button"), 2, 12);
Although the array is not 0 based, you can assign it to a variable with the normal C# notation. You just have to take care not to cross the boundaries: Person[,] racers2 = (Person[,])racers; Person first = racers2[1, 10]; Person last = racers2[2, 12];
Copying Arrays Because arrays are reference types, assigning an array variable to another one just gives you two variables referencing the same array. For copying arrays, the array implements the interface ICloneable. The Clone method that is defined with this interface creates a shallow copy of the array. If the elements of the array are value types, as in the following code segment, all values are copied (see Figure 7-5):
381
Download from finelybook www.finelybook.com
FIGURE 7-5 int[] intArray1 = {1, 2}; int[] intArray2 = (int[])intArray1.Clone();
If the array contains reference types, only the references are copied, not the elements. Figure 7-6 shows the variables beatles and beatlesClone, where beatlesClone is created by calling the Clone method from beatles. The Person objects that are referenced are the same for beatles and beatlesClone. If you change a property of an element of beatlesClone, you change the same object of beatles (code file SimpleArray/Program.cs):
FIGURE 7-6 Person[] beatles = { new Person { FirstName="John", LastName="Lennon" }, new Person { FirstName="Paul", LastName="McCartney" } }; Person[] beatlesClone = (Person[])beatles.Clone();
Instead of using the Clone method, you can use the Array.Copy method, which also creates a shallow copy. However, there’s one important difference with Clone and Copy: Clone creates a new array; with Copy you have to pass an existing array with the same rank and enough elements.
NOTE If you need a deep copy of an array containing reference types, 382
Download from finelybook www.finelybook.com
you have to iterate the array and create new objects.
Sorting The Array class uses the Quicksort algorithm to sort the elements in the array. The Sort method requires the interface IComparable to be implemented by the elements in the array. Simple types such as System.String and System.Int32 implement IComparable, so you can sort elements containing these types. With the sample program, the array name contains elements of type string, and this array can be sorted (code file SortingSample/Program.cs): string[] names = { "Christina Aguilera", "Shakira", "Beyonce", "Lady Gaga" }; Array.Sort(names); foreach (var name in names) { Console.WriteLine(name); }
The output of the application shows the sorted result of the array: Beyonce Christina Aguilera Lady Gaga Shakira
If you are using custom classes with the array, you must implement the interface IComparable. This interface defines just one method, CompareTo, which must return 0 if the objects to compare are equal; a value smaller than 0 if the instance should go before the object from the parameter; and a value larger than 0 if the instance should go after the object from the parameter. Change the Person class to implement the interface IComparable. The comparison is first done on the value of the 383
Download from finelybook www.finelybook.com
LastName by using the Compare method of the String class. If the LastName has the same value, the FirstName is compared (code file SortingSample/Person.cs): public class Person: IComparable { public int CompareTo(Person other) { if (other == null) return 1; int result = string.Compare(this.LastName, other.LastName); if (result == 0) { result = string.Compare(this.FirstName, other.FirstName); } return result; } //…
Now it is possible to sort an array of Person objects by the last name (code file SortingSample/Program.cs): Person[] persons = { new Person("Damon", "Hill"), new Person("Niki", "Lauda"), new Person("Ayrton", "Senna"), new Person("Graham", "Hill") }; Array.Sort(persons); foreach (var p in persons) { Console.WriteLine(p); }
Using the sort of the Person class, the output returns the names sorted by last name: Damon Hill Graham Hill Niki Lauda Ayrton Senna
If the Person object should be sorted differently, or if you don’t have the option to change the class that is used as an element in the array, 384
Download from finelybook www.finelybook.com
you can implement the interface IComparer or IComparer. These interfaces define the method Compare. One of these interfaces must be implemented by the class that should be compared. The IComparer interface is independent of the class to compare. That’s why the Compare method defines two arguments that should be compared. The return value is similar to the CompareTo method of the IComparable interface. The class PersonComparer implements the IComparer interface to sort Person objects either by firstName or by lastName. The enumeration PersonCompareType defines the different sorting options that are available with PersonComparer: FirstName and LastName. How the compare should be done is defined with the constructor of the class PersonComparer, where a PersonCompareType value is set. The Compare method is implemented with a switch statement to compare either by LastName or by FirstName (code file SortingSample/PersonComparer.cs): public enum PersonCompareType { FirstName, LastName } public class PersonComparer: IComparer { private PersonCompareType _compareType; public PersonComparer(PersonCompareType compareType) => _compareType = compareType; public int Compare(Person x, Person y) { if (x is null && y is null) return 0; if (x is null) return 1; if (y is null) return -1; switch (_compareType) { case PersonCompareType.FirstName: return string.Compare(x.FirstName, y.FirstName); case PersonCompareType.LastName: return string.Compare(x.LastName, y.LastName); default: throw new ArgumentException("unexpected compare type"); } }
385
Download from finelybook www.finelybook.com
}
Now you can pass a PersonComparer object to the second argument of the Array.Sort method. Here, the people are sorted by first name (code file SortingSample/Program.cs): Array.Sort(persons, new PersonComparer(PersonCompareType.FirstName)); foreach (var p in persons) { Console.WriteLine(p); }
The persons array is now sorted by first name: Ayrton Senna Damon Hill Graham Hill Niki Lauda
NOTE The Array class also offers Sort methods that require a delegate as an argument. With this argument you can pass a method to do the comparison of two objects rather than relying on the IComparable or IComparer interfaces. Chapter 8, “Delegates, Lambdas, and Events,” discusses how to use delegates.
ARRAYS AS PARAMETERS Arrays can be passed as parameters to methods, and returned from methods. Returning an array, you just have to declare the array as the return type, as shown with the following method GetPersons: static Person[] GetPersons() => new Person[] { new Person("Damon", "Hill"), new Person("Niki", "Lauda"), new Person("Ayrton", "Senna"), new Person("Graham", "Hill")
386
Download from finelybook www.finelybook.com
};
Passing arrays to a method, the array is declared with the parameter, as shown with the method DisplayPersons: static void DisplayPersons(Person[] persons) { //… }
ARRAY COVARIANCE With arrays, covariance is supported. This means that an array can be declared as a base type and elements of derived types can be assigned to the elements. For example, you can declare a parameter of type object[] as shown and pass a Person[] to it: static void DisplayArray(object[] data) { //… }
NOTE Array covariance is only possible with reference types, not with value types. In addition, array covariance has an issue that can only be resolved with runtime exceptions. If you assign a Person array to an object array, the object array can then be used with anything that derives from the object. The compiler accepts, for example, passing a string to array elements. However, because a Person array is referenced by the object array, a runtime exception, ArrayTypeMismatchException, occurs.
ENUMERATORS By using the foreach statement you can iterate elements of a collection 387
Download from finelybook www.finelybook.com
(see Chapter 10) without needing to know the number of elements inside the collection. The foreach statement uses an enumerator. Figure 7-7 shows the relationship between the client invoking the foreach method and the collection. The array or collection implements the IEnumerable interface with the GetEnumerator method. The GetEnumerator method returns an enumerator implementing the IEnumerator interface. The interface IEnumerator is then used by the foreach statement to iterate through the collection.
FIGURE 7-7
NOTE The GetEnumerator method is defined with the interface IEnumerable. The foreach statement doesn’t really need this interface implemented in the collection class. It’s enough to have a method with the name GetEnumerator that returns an object implementing the IEnumerator interface.
IEnumerator Interface The foreach statement uses the methods and properties of the 388
Download from finelybook www.finelybook.com
interface to iterate all elements in a collection. For this, defines the property Current to return the element where the cursor is positioned, and the method MoveNext to move to the next element of the collection. MoveNext returns true if there’s an element, and false if no more elements are available. IEnumerator IEnumerator
The generic version of this interface IEnumerator derives from the interface IDisposable and thus defines a Dispose method to clean up resources allocated by the enumerator.
NOTE The IEnumerator interface also defines the Reset method for COM interoperability. Many .NET enumerators implement this by throwing an exception of type NotSupportedException.
foreach Statement The C# foreach statement is not resolved to a foreach statement in the IL code. Instead, the C# compiler converts the foreach statement to methods and properties of the IEnumerator interface. Here’s a simple foreach statement to iterate all elements in the persons array and display them person by person: foreach (var p in persons) { Console.WriteLine(p); }
The foreach statement is resolved to the following code segment. First, the GetEnumerator method is invoked to get an enumerator for the array. Inside a while loop, as long as MoveNext returns true, the elements of the array are accessed using the Current property: IEnumerator enumerator = persons.GetEnumerator(); while (enumerator.MoveNext()) { Person p = enumerator.Current; Console.WriteLine(p);
389
Download from finelybook www.finelybook.com
}
yield Statement Since the first release of C#, it has been easy to iterate through collections by using the foreach statement. With C# 1.0, it was still a lot of work to create an enumerator. C# 2.0 added the yield statement for creating enumerators easily. The yield return statement returns one element of a collection and moves the position to the next element, and yield break stops the iteration. The next example shows the implementation of a simple collection using the yield return statement. The class HelloCollection contains the method GetEnumerator. The implementation of the GetEnumerator method contains two yield return statements where the strings Hello and World are returned (code file YieldSample/Program.cs): using System; using System.Collections; namespace Wrox.ProCSharp.Arrays { public class HelloCollection { public IEnumerator GetEnumerator() { yield return "Hello"; yield return "World"; } } }
NOTE A method or property that contains yield statements is also known as an iterator block. An iterator block must be declared to return an IEnumerator or IEnumerable interface, or the generic versions of these interfaces. This block may contain multiple yield return or yield break statements; a return statement is not allowed. 390
Download from finelybook www.finelybook.com
Now it is possible to iterate through the collection using a foreach statement: public void HelloWorld() { var helloCollection = new HelloCollection(); foreach (var s in helloCollection) { Console.WriteLine(s); } }
With an iterator block, the compiler generates a yield type, including a state machine, as shown in the following code segment. The yield type implements the properties and methods of the interfaces IEnumerator and IDisposable. In the example, you can see the yield type as the inner class Enumerator. The GetEnumerator method of the outer class instantiates and returns a new yield type. Within the yield type, the variable state defines the current position of the iteration and is changed every time the method MoveNext is invoked. MoveNext encapsulates the code of the iterator block and sets the value of the current variable so that the Current property returns an object depending on the position: public class HelloCollection { public IEnumerator GetEnumerator() => new Enumerator(0); public class Enumerator: IEnumerator, IEnumerator, IDisposable { private int _state; private string _current; public Enumerator(int state) => _state = state; bool System.Collections.IEnumerator.MoveNext() { switch (state) { case 0: _current = "Hello"; _state = 1; return true; case 1: _current = "World"; _state = 2;
391
Download from finelybook www.finelybook.com
return true; case 2: break; } return false; } void System.Collections.IEnumerator.Reset() => throw new NotSupportedException(); string System.Collections.Generic.IEnumerator.Current => current; object System.Collections.IEnumerator.Current => current; void IDisposable.Dispose() { } } }
NOTE Remember that the yield statement produces an enumerator, and not just a list filled with items. This enumerator is invoked by the foreach statement. As each item is accessed from the foreach, the enumerator is accessed. This makes it possible to iterate through huge amounts of data without reading all the data into memory in one turn. Different Ways to Iterate Through Collections In a slightly larger and more realistic way than the Hello World example, you can use the yield return statement to iterate through a collection in different ways. The class MusicTitles enables iterating the titles in a default way with the GetEnumerator method, in reverse order with the Reverse method, and through a subset with the Subset method (code file YieldSample/MusicTitles.cs): public class MusicTitles { string[] names = {"Tubular Bells", "Hergest Ridge", "Ommadawn", "Platinum"};
392
Download from finelybook www.finelybook.com
public IEnumerator GetEnumerator() { for (int i = 0; i < 4; i++) { yield return names[i]; } } public IEnumerable Reverse() { for (int i = 3; i >= 0; i—) { yield return names[i]; } } public IEnumerable Subset(int index, int length) { for (int i = index; i < index + length; i++) { yield return names[i]; } } }
NOTE The default iteration supported by a class is the GetEnumerator method, which is defined to return IEnumerator. Named iterations return IEnumerable. The client code to iterate through the string array first uses the GetEnumerator method, which you don’t have to write in your code because it is used by default with the implementation of the foreach statement. Then the titles are iterated in reverse, and finally a subset is iterated by passing the index and number of items to iterate to the Subset method (code file YieldSample/Program.cs): var titles = new MusicTitles(); foreach (var title in titles) { Console.WriteLine(title); }
393
Download from finelybook www.finelybook.com
Console.WriteLine(); Console.WriteLine("reverse"); foreach (var title in titles.Reverse()) { Console.WriteLine(title); } Console.WriteLine(); Console.WriteLine("subset"); foreach (var title in titles.Subset(2, 2)) { Console.WriteLine(title); }
Returning Enumerators with Yield Return With the yield statement you can also do more complex things, such as return an enumerator from yield return. Using the following TicTac-Toe game as an example, players alternate putting a cross or a circle in one of nine fields. These moves are simulated by the GameMoves class. The methods Cross and Circle are the iterator blocks for creating iterator types. The variables cross and circle are set to Cross and Circle inside the constructor of the GameMoves class. By setting these fields, the methods are not invoked, but they are set to the iterator types that are defined with the iterator blocks. Within the Cross iterator block, information about the move is written to the console and the move number is incremented. If the move number is higher than 8, the iteration ends with yield break; otherwise, the enumerator object of the circle yield type is returned with each iteration. The Circle iterator block is very similar to the Cross iterator block; it just returns the cross iterator type with each iteration (code file YieldSample/GameMoves.cs): public class GameMoves { private IEnumerator _cross; private IEnumerator _circle; public GameMoves() { _cross = Cross(); _circle = Circle(); } private int _move = 0;
394
Download from finelybook www.finelybook.com
const int MaxMoves = 9; public IEnumerator Cross() { while (true) { Console.WriteLine($"Cross, move {_move}"); if (++_move >= MaxMoves) { yield break; } yield return _circle; } } public IEnumerator Circle() { while (true) { Console.WriteLine($"Circle, move {move}"); if (++_move >= MaxMoves) { yield break; } yield return _cross; } } }
From the client program, you can use the class GameMoves as follows. The first move is set by setting enumerator to the enumerator type returned by game.Cross. In a while loop, enumerator.MoveNext is called. The first time this is invoked, the Cross method is called, which returns the other enumerator with a yield statement. The returned value can be accessed with the Current property and is set to the enumerator variable for the next loop: var game = new GameMoves(); IEnumerator enumerator = game.Cross(); while (enumerator.MoveNext()) { enumerator = enumerator.Current as IEnumerator; }
The output of this program shows alternating moves until the last 395
Download from finelybook www.finelybook.com
move: Cross, move 0 Circle, move 1 Cross, move 2 Circle, move 3 Cross, move 4 Circle, move 5 Cross, move 6 Circle, move 7 Cross, move 8
STRUCTURAL COMPARISON Arrays as well as tuples implement the interfaces IStructuralEquatable and IStructuralComparable. These interfaces compare not only references but also the content. This interface is implemented explicitly, so it is necessary to cast the arrays and tuples to this interface on use. IStructuralEquatable is used to compare whether two tuples or arrays have the same content; IStructuralComparable is used to sort tuples or arrays.
NOTE Tuples are discussed in Chapter 13. With the sample demonstrating IStructuralEquatable, the Person class implementing the interface IEquatable is used. IEquatable defines a strongly typed Equals method where the values of the FirstName and LastName properties are compared (code file StructuralComparison/Person.cs): public class Person: IEquatable { public int Id { get; } public string FirstName { get; } public string LastName { get; } public Person(int id, string firstName, string lastName) {
396
Download from finelybook www.finelybook.com
Id = id; FirstName = firstName; LastName = lastName; } public override string ToString() => $"{Id}, {FirstName} {LastName}"; public override bool Equals(object obj) { if (obj == null) { return base.Equals(obj); } return Equals(obj as Person); } public override int GetHashCode() => Id.GetHashCode(); public bool Equals(Person other) { if (other == null) return base.Equals(other); return Id == other.Id && FirstName == other.FirstName && LastName == other.LastName; } }
Now two arrays containing Person items are created. Both arrays contain the same Person object with the variable name janet, and two different Person objects that have the same content. The comparison operator!= returns true because there are indeed two different arrays referenced from two variable names, persons1 and persons2. Because the Equals method with one parameter is not overridden by the Array class, the same happens as with the == operator to compare the references, and they are not the same (code file StructuralComparison/Program.cs): var janet = new Person("Janet", "Jackson"); Person[] people1 = { new Person("Michael", "Jackson"), janet }; Person[] people2 = { new Person("Michael", "Jackson")
397
Download from finelybook www.finelybook.com
janet }; if (people1 != people2) { Console.WriteLine("not the same reference"); }
Invoking the Equals method defined by the IStructuralEquatable interface—that is, the method with the first parameter of type object and the second parameter of type IEqualityComparer—you can define how the comparison should be done by passing an object that implements IEqualityComparer. A default implementation of the IEqualityComparer is done by the EqualityComparer class. This implementation checks whether the type implements the interface IEquatable, and invokes the IEquatable.Equals method. If the type does not implement IEquatable, the Equals method from the base class Object is invoked to do the comparison. implements IEquatable, where the content of the objects is compared, and the arrays indeed contain the same content: Person
if ((people1 as IStructuralEquatable).Equals(people2, EqualityComparer.Default)) { Console.WriteLine("the same content"); }
SPANS For a fast way to access managed or unmanaged continuous memory, you can use the Span struct. One example where Span can be used is an array; the Span struct holds continuous memory behind the scenes. Another example is a long string. Using Span with strings is covered in Chapter 9, “Strings and Regular Expressions.” Using Span, you can directly access array elements. The elements of the array are not copied, but they can be used directly, which is faster than a copy. In the following code snippet, first a simple int array is created and initialized. A Span object is created, invoking the constructor and passing the array to the Span. The Span type offers an indexer, 398
Download from finelybook www.finelybook.com
and thus the elements of the Span can be accessed using this indexer. Here, the second element is changed to the value 11. Because the array arr1 is referenced from the span, the second element of the array is changed by changing the Span element (code file SpanSample/Program.cs): private static Span IntroSpans() { int[] arr1 = { 1, 4, 5, 11, 13, 18 }; var span1 = new Span(arr1); span1[1] = 11; Console.WriteLine($"arr1[1] is changed via span1[1]: {arr1[1]}"); return span1; }
Creating Slices A powerful feature of Span is that you can use it to access parts, or slices, of an array. Using the slices, the array elements are not copied; they’re directly accessed from the span. The following code snippet shows two ways to create slices. With the first one, a constructor overload is used to pass the start and length of the array that should be used. With the variable span3 that references this newly created Span, it’s only possible to access three elements of the array arr2, starting with the fourth element. Another overload of the constructor exists where you can pass just the start of the slice. With this overload, the remains of the array are taken until the end. You can also create a slice from a Span object, invoking the Slice method. Similar overloads exist here. With the variable span4, the previously created span1 is used to create a slice with four elements starting with the third element of span1 (code file SpanSample/Program.cs): private static Span CreateSlices(Span span1) { Console.WriteLine(nameof(CreateSlices)); int[] arr2 = { 3, 5, 7, 9, 11, 13, 15 }; var span2 = new Span(arr2); var span3 = new Span(arr2, start: 3, length: 3); var span4 = span1.Slice(start: 2, length: 4);
399
Download from finelybook www.finelybook.com
DisplaySpan("content of span3", span3); DisplaySpan("content of span4", span4); Console.WriteLine(); return span2; }
The DisplaySpan method is used to display the contents of a span. The method of the following code snippet makes use of the ReadOnlySpan. This span type can be used if you don’t need to change the content that the span references, which is the case in the DisplaySpan method. ReadOnlySpan is discussed later in this chapter in more detail: private static void DisplaySpan(string title, ReadOnlySpan span) { Console.WriteLine(title); for (int i = 0; i < span.Length; i++) { Console.Write($"{span[i]}."); } Console.WriteLine(); }
When you run the application, the content of span3 and span4 is shown —a subset of the arr2 and arr1: content of span3 9.11.13. content of span4 6.8.10.12.
NOTE is safe from crossing the boundaries. In cases when you’re creating spans that exceed the contained array length, an exception of type ArgumentOutOfRangeException is thrown. Read Chapter 14 for more information on exception handling. Span
Changing Values Using Spans 400
Download from finelybook www.finelybook.com
You’ve seen how to directly change elements of the array that are referenced by the span using the indexer of the Span type. There are more options as shown in the following code snippet. You can invoke the Clear method, which fills a span containing int types with 0; you can invoke the Fill method to fill the span with the value passed to the Fill method; and you can copy a Span to another Span. With the CopyTo method, if the destination span is not large enough, an exception of type ArgumentException is thrown. You can avoid this outcome by using the TryCopyTo method. This method doesn’t throw an exception if the destination span is not large enough; instead it returns false as being not successful with the copy (code file SpanSample/Program.cs): private static void ChangeValues(Span span1, Span span2) { Console.WriteLine(nameof(ChangeValues)); Span span4 = span1.Slice(start: 4); span4.Clear(); DisplaySpan("content of span1", span1); Span span5 = span2.Slice(start: 3, length: 3); span5.Fill(42); DisplaySpan("content of span2", span2); span5.CopyTo(span1); DisplaySpan("content of span1", span1); if (!span1.TryCopyTo(span4)) { Console.WriteLine("Couldn't copy span1 to span4 because span4 is " + "too small"); Console.WriteLine($"length of span4: {span4.Length}, length of " + $"span1: {span1.Length}"); } Console.WriteLine(); }
When you run the application, you can see the content of span1 where the last two numbers have been cleared using span4, the content of span2 where span5 was used to fill the value 42 with three elements, and again the content of span1 where the first three numbers have 401
Download from finelybook www.finelybook.com
been copied over from span5. Copying span1 to span4 was not successful because span4 has just a length of 4, whereas span1 has a length of 6: content of span1 2.11.6.8.0.0. content of span2 3.5.7.42.42.42.15. content of span1 42.42.42.8.0.0. Couldn't copy span1 to span4 because span4 is too small length of span4: 2, length of span1: 6
ReadOnly Spans If you need only read-access to an array segment, you can use ReadOnlySpan as was already shown in the DisplaySpan method. With ReadOnlySpan, the indexer is read-only, and this type doesn’t offer Clear and Fill methods. You can however, invoke the CopyTo method to copy the content of the ReadOnlySpan to a Span. The following code snippet creates readOnlySpan1 from an array with the constructor of ReadOnlySpan. readOnlySpan2 and readOnlySpan3 are created by direct assignments from Span and int[]. Implicit cast operators are available with ReadOnlySpan (code file SpanSample/Program.cs): private static void ReadonlySpan(Span span1) { Console.WriteLine(nameof(ReadonlySpan)); int[] arr = span1.ToArray(); ReadOnlySpan readOnlySpan1 = new ReadOnlySpan (arr); DisplaySpan("readOnlySpan1", readOnlySpan1); ReadOnlySpan readOnlySpan2 = span1; DisplaySpan("readOnlySpan2", readOnlySpan2); ReadOnlySpan readOnlySpan3 = arr; DisplaySpan("readOnlySpan3", readOnlySpan3); Console.WriteLine(); }
402
Download from finelybook www.finelybook.com
NOTE How to implement implicit cast operators is discussed in Chapter 6, “Operators and Casts.”
NOTE Previous editions of this book demonstrated the use of ArraySegment. Although ArraySegment is still available, it has some shortcomings, and you can use the more flexible Span as a replacement. In case you’re already using ArraySegment, you can keep the code and interact with spans. The constructor of Span also allows passing an ArraySegment to create a Span instance.
ARRAY POOLS If you have an application where a lot of arrays are created and destroyed, the garbage collector has some work to do. To reduce the work of the garbage collector, you can use array pools with the ArrayPool class. ArrayPool manages a pool of arrays. Arrays can be rented from and returned to the pool. Memory is managed from the ArrayPool itself.
Creating the Array Pool You can create an ArrayPool by invoking the static Create method. For efficiency, the array pool manages memory in multiple buckets for arrays of similar sizes. With the Create method, you can define the maximum array length and the number of arrays within a bucket before another bucket is required: ArrayPool customPool = ArrayPool.Create(
403
Download from finelybook www.finelybook.com
maxArrayLength: 40000, maxArraysPerBucket: 10);
The default for the maxArrayLength is 1024 * 1024 bytes, and the default for maxArraysPerBucket is 50. The array pool uses multiple buckets for faster access to arrays when many arrays are used. Arrays of similar sizes are kept in the same bucket as long as possible, and the maximum number of arrays is not reached. You can also use a predefined shared pool by accessing the Shared property of the ArrayPool class: ArrayPool sharedPool = ArrayPool.Shared;
Renting Memory from the Pool Requesting memory from the pool happens by invoking the Rent method. The Rent method accepts the minimum array length that should be requested. If memory is already available in the pool, it is returned. If it is not available, memory is allocated for the pool and returned afterward. In the following code snippet, an array of 1024, 2048, 3096, and so on elements is requested in a for loop (code file ArrayPoolSample/Program.cs): private static void UseSharedPool() { for (int i = 0; i < 10; i++) { int arrayLength = (i + 1) ≪ 10; int[] arr = ArrayPool.Shared.Rent(arrayLength); Console.WriteLine($"requested an array of {arrayLength} " + $"and received {arr.Length}"); //… } }
The Rent method returns an array with at least the requested number of elements. The array returned could have more memory available. The shared pool keeps arrays with at least 16 elements. The element count of the arrays managed always duplicates—for example, 16, 32, 64, 128, 256, 512, 1024, 2048, 4096, 8192 elements and so on. When you run the application, you can see that larger arrays are 404
Download from finelybook www.finelybook.com
returned if the requested array size doesn’t fit the arrays managed by the pool: requested requested requested requested requested requested requested requested requested requested
an an an an an an an an an an
array array array array array array array array array array
of of of of of of of of of of
1024 and received 1024 2048 and received 2048 3072 and received 4096 4096 and received 4096 5120 and received 8192 6144 and received 8192 7168 and received 8192 8192 and received 8192 9216 and received 16384 10240 and received 16384
Returning Memory to the Pool After you no longer need the array, you can return it to the pool. After the array is returned, you can later reuse it by another rent. You return the array to the pool by invoking the Return method of the array pool and passing the array to the Return method. With an optional parameter, you can specify if the array should be cleared before it is returned to the pool. Without clearing it, the next one renting an array from the pool could read the data. Clearing the data, you avoid this, but you need more CPU time (code file: ArrayPoolSample/Program.cs): ArrayPool.Shared.Return(arr, clearArray: true);
NOTE Information about the garbage collector and how to get information about memory addresses is in Chapter 17, “Managed and Unmanaged Memory.”
SUMMARY In this chapter, you’ve seen the C# notation to create and use simple, 405
Download from finelybook www.finelybook.com
multidimensional, and jagged arrays. The Array class is used behind the scenes of C# arrays, enabling you to invoke properties and methods of this class with array variables. You’ve seen how to sort elements in the array by using the IComparable and IComparer interfaces; and you’ve learned how to create and use enumerators, the interfaces IEnumerable and IEnumerator, and the yield statement. The last sections of this chapter show you how to efficiently use arrays with Span and ArrayPool. The next chapter gets into details of more important features of C#: delegates, lambdas, and events.
406
Download from finelybook www.finelybook.com
8 Delegates, Lambdas, and Events WHAT’S IN THIS CHAPTER? Delegates Lambda expressions Closures Events
WROX.COM CODE DOWNLOADS FOR THIS CHAPTER The Wrox.com code downloads for this chapter are found at www.wrox.com on the Download Code tab. The source code is also available at https://github.com/ProfessionalCSharp/ProfessionalCSharp7 in the directory Delegates. The code for this chapter is divided into the following major examples: Simple Delegates Bubble Sorter Lambda Expressions Events Sample
407
Download from finelybook www.finelybook.com
REFERENCING METHODS Delegates are the .NET variant of addresses to methods. Compare this to C++, where a function pointer is nothing more than a pointer to a memory location that is not type-safe. You have no idea what a pointer is really pointing to, and items such as parameters and return types are not known. This is completely different with .NET; delegates are type-safe classes that define the return types and types of parameters. The delegate class not only contains a reference to a method, but can hold references to multiple methods. Lambda expressions are directly related to delegates. When the parameter is a delegate type, you can use a lambda expression to implement a method that’s referenced from the delegate. This chapter explains the basics of delegates and lambda expressions, and shows you how to implement methods called by delegates with lambda expressions. It also demonstrates how .NET uses delegates as the means of implementing events.
DELEGATES Delegates exist for situations in which you want to pass methods around to other methods. To see what that means, consider this line of code: int i = int.Parse("99");
You are so used to passing data to methods as parameters, as in this example, that you don’t consciously think about it, so the idea of passing methods around instead of data might sound a little strange. However, sometimes you have a method that does something, and rather than operate on data, the method might need to do something that involves invoking another method. To complicate things further, you do not know at compile time what this second method is. That information is available only at runtime and hence needs to be passed in as a parameter to the first method. That might sound confusing, but it should become clearer with a couple of examples: Threads and tasks—It is possible in C# to tell the computer to 408
Download from finelybook www.finelybook.com
start a new sequence of execution in parallel with what it is currently doing. Such a sequence is known as a thread, and you start one using the Start method on an instance of one of the base classes, System.Threading.Thread. If you tell the computer to start a new sequence of execution, you must tell it where to start that sequence; that is, you must supply the details of a method in which execution can start. In other words, the constructor of the Thread class takes a parameter that defines the method to be invoked by the thread. Generic library classes—Many libraries contain code to perform various standard tasks. It is usually possible for these libraries to be self-contained, in the sense that you know when you write to the library exactly how the task must be performed. However, sometimes the task contains a subtask, which only the individual client code that uses the library knows how to perform. For example, say that you want to write a class that takes an array of objects and sorts them in ascending order. Part of the sorting process involves repeatedly taking two of the objects in the array and comparing them to see which one should come first. If you want to make the class capable of sorting arrays of any object, there is no way that it can tell in advance how to do this comparison. The client code that hands your class the array of objects must also tell your class how to do this comparison for the particular objects it wants sorted. The client code has to pass your class details of an appropriate method that can be called to do the comparison. Events—The general idea here is that often you have code that needs to be informed when some event takes place. GUI programming is full of situations like this. When the event is raised, the runtime needs to know what method should be executed. This is done by passing the method that handles the event as a parameter to a delegate. This is discussed later in this chapter. In C and C++, you can just take the address of a function and pass it as a parameter. There’s no type safety with C. You can pass any function to a method where a function pointer is required. Unfortunately, this direct approach not only causes some problems with type safety but 409
Download from finelybook www.finelybook.com
also neglects the fact that when you are doing object-oriented programming, methods rarely exist in isolation; they usually need to be associated with a class instance before they can be called. Because of these problems, the .NET Framework does not syntactically permit this direct approach. Instead, if you want to pass methods around, you wrap the details of the method in a new kind of object: a delegate. Delegates, quite simply, are a special type of object—special in the sense that, whereas all the objects defined up to now contain data, a delegate contains the address of a method, or the address of multiple methods.
Declaring Delegates When you want to use a class in C#, you do so in two stages. First, you need to define the class—that is, you need to tell the compiler what fields and methods make up the class. Then (unless you are using only static methods), you instantiate an object of that class. With delegates it is the same process. You start by declaring the delegates you want to use. Declaring delegates means telling the compiler what kind of method a delegate of that type will represent. Then you create one or more instances of that delegate. Behind the scenes, the compiler creates a class that represents the delegate. The syntax for declaring delegates looks like this: delegate void IntMethodInvoker(int x);
This declares a delegate called IntMethodInvoker, and indicates that each instance of this delegate can hold a reference to a method that takes one int parameter and returns void. The crucial point to understand about delegates is that they are type-safe. When you define the delegate, you provide full details about the signature and the return type of the method that it represents.
NOTE One good way to understand delegates is to think of a delegate as 410
Download from finelybook www.finelybook.com
something that gives a name to a method signature and the return type. Suppose that you want to define a delegate called TwoLongsOp that represents a method that takes two longs as its parameters and returns a double. You could do so like this: delegate double TwoLongsOp(long first, long second);
Or, to define a delegate that represents a method that takes no parameters and returns a string, you might write this: delegate string GetAString();
The syntax is similar to that for a method definition, except there is no method body and the definition is prefixed with the keyword delegate. Because what you are doing here is basically defining a new class, you can define a delegate in any of the same places that you would define a class—that is to say, either inside another class, outside of any class, or in a namespace as a top-level object. Depending on how visible you want your definition to be, and the scope of the delegate, you can apply any of the normal access modifiers to delegate definitions—public, private, protected, and so on: public delegate string GetAString();
NOTE We really mean what we say when we describe defining a delegate as defining a new class. Delegates are implemented as classes derived from the class System.MulticastDelegate, which is derived from the base class System.Delegate. The C# compiler is aware of this class and uses its delegate syntax to hide the details of the operation of this class. This is another good example of how C# works in conjunction with the base classes to make programming as easy as possible.
411
Download from finelybook www.finelybook.com
After you have defined a delegate, you can create an instance of it so that you can use it to store details about a particular method.
NOTE There is an unfortunate problem with terminology here. When you are talking about classes, there are two distinct terms: class, which indicates the broader definition, and object, which means an instance of the class. Unfortunately, with delegates there is only the one term; delegate can refer to both the class and the object. When you create an instance of a delegate, what you have created is also referred to as a delegate. You need to be aware of the context to know which meaning is being used when we talk about delegates.
Using Delegates The following code snippet demonstrates the use of a delegate. It is a rather long-winded way of calling the ToString method on an int (code file GetAStringDemo/Program.cs): private delegate string GetAString(); public static void Main() { int x = 40; GetAString firstStringMethod = new GetAString(x.ToString); Console.WriteLine($"String is {firstStringMethod()}"); // With firstStringMethod initialized to x.ToString(), // the above statement is equivalent to saying // Console.WriteLine($"String is {x.ToString()}"); }
This code instantiates a delegate of type GetAString and initializes it so it refers to the ToString method of the integer variable x. Delegates in C# always syntactically take a one-parameter constructor, the parameter being the method to which the delegate refers. This method must match the signature with which you originally defined the delegate. In this case, you would get a compilation error if you tried to 412
Download from finelybook www.finelybook.com
initialize the variable firstStringMethod with any method that did not take any parameters and return a string. Notice that because int.ToString is an instance method (as opposed to a static one), you need to specify the instance (x) as well as the name of the method to initialize the delegate properly. The next line uses the delegate to display the string. In any code, supplying the name of a delegate instance, followed by parentheses containing any parameters, has the same effect as calling the method wrapped by the delegate. Hence, in the preceding code snippet, the Console.WriteLine statement is completely equivalent to the commented-out line. In fact, supplying parentheses to the delegate instance is the same as invoking the Invoke method of the delegate class. Because firstStringMethod is a variable of a delegate type, the C# compiler replaces firstStringMethod with firstStringMethod.Invoke: firstStringMethod(); firstStringMethod.Invoke();
For less typing, at every place where a delegate instance is needed, you can just pass the name of the address. This is known by the term delegate inference. This C# feature works as long as the compiler can resolve the delegate instance to a specific type. The example initialized the variable firstStringMethod of type GetAString with a new instance of the delegate GetAString: GetAString firstStringMethod = new GetAString(x.ToString);
You can write the same just by passing the method name with the variable x to the variable firstStringMethod: GetAString firstStringMethod = x.ToString;
The code that is created by the C# compiler is the same. The compiler detects that a delegate type is required with firstStringMethod, so it creates an instance of the delegate type GetAString and passes the address of the method with the object x to the constructor.
413
Download from finelybook www.finelybook.com
NOTE Be aware that you can’t type the brackets to the method name as x.ToString() and pass it to the delegate variable. This would be an invocation of the method. The invocation of the ToString method returns a string object that can’t be assigned to the delegate variable. You can only assign the address of a method to the delegate variable. Delegate inference can be used anywhere a delegate instance is required. Delegate inference can also be used with events because events are based on delegates (as you see later in this chapter). One feature of delegates is that they are type-safe to the extent that they ensure that the signature of the method being called is correct. However, interestingly, they don’t care what type of object the method is being called against or even whether the method is a static method or an instance method.
NOTE An instance of a given delegate can refer to any instance or static method on any object of any type, provided that the signature of the method matches the signature of the delegate. To demonstrate this, the following example expands the previous code snippet so that it uses the firstStringMethod delegate to call a couple of other methods on another object—an instance method and a static method. For this, you use the Currency struct. The Currency struct has its own overload of ToString and a static method with the same signature to GetCurrencyUnit. This way, the same delegate variable can be used to invoke these methods (code file GetAStringDemo/Currency.cs):
414
Download from finelybook www.finelybook.com
struct Currency { public uint Dollars; public ushort Cents; public Currency(uint dollars, ushort cents) { Dollars = dollars; Cents = cents; } public override string ToString() => $"${Dollars}. {Cents,2:00}"; public static string GetCurrencyUnit() => "Dollar"; public static explicit operator Currency (float value) { checked { uint dollars = (uint)value; ushort cents = (ushort)((value—dollars) * 100); return new Currency(dollars, cents); } } public static implicit operator float (Currency value) => value.Dollars + (value.Cents / 100.0f); public static implicit operator Currency (uint value) => new Currency(value, 0); public static implicit operator uint (Currency value) => value.Dollars; }
Now you can use the GetAString instance as follows (code file GetAStringDemo/Program.cs): private delegate string GetAString(); public static void Main() { int x = 40; GetAString firstStringMethod = x.ToString; Console.WriteLine($"String is {firstStringMethod()}"); var balance = new Currency(34, 50); // firstStringMethod references an instance method
415
Download from finelybook www.finelybook.com
firstStringMethod = balance.ToString; Console.WriteLine($"String is {firstStringMethod()}"); // firstStringMethod references a static method firstStringMethod = new GetAString(Currency.GetCurrencyUnit); Console.WriteLine($"String is {firstStringMethod()}"); }
This code shows how you can call a method via a delegate and subsequently reassign the delegate to refer to different methods on different instances of classes, even static methods or methods against instances of different types of class, provided that the signature of each method matches the delegate definition. When you run the application, you get the output from the different methods that are referenced by the delegate: String is 40 String is $34.50 String is Dollar
However, you still haven’t seen the process of passing a delegate to another method, and nothing particularly useful has been achieved yet. It is possible to call the ToString method of int and Currency objects in a much more straightforward way than using delegates. Unfortunately, the nature of delegates requires a fairly complex example before you can really appreciate their usefulness. The next section presents two delegate examples. The first one simply uses delegates to call a couple of different operations. It illustrates how to pass delegates to methods and how you can use arrays of delegates— although arguably it still doesn’t do much that you couldn’t do a lot more simply without delegates. The second, much more complex, example presents a BubbleSorter class, which implements a method to sort arrays of objects into ascending order. This class would be difficult to write without using delegates.
Simple Delegate Example This example defines a MathOperations class that uses a couple of static methods to perform two operations on doubles. Then you use 416
Download from finelybook www.finelybook.com
delegates to invoke these methods. The MathOperations class looks like this (code file SimpleDelegates/MathOperations): class MathOperations { public static double MultiplyByTwo(double value) => value * 2; public static double Square(double value) => value * value; }
You invoke these methods as follows (code file SimpleDelegates/Program.cs): using System; namespace Wrox.ProCSharp.Delegates { delegate double DoubleOp(double x); class Program { static void Main() { DoubleOp[] operations = { MathOperations.MultiplyByTwo, MathOperations.Square }; for (int i=0; i < operations.Length; i++) { Console.WriteLine($"Using operations[{i}]:); ProcessAndDisplayNumber(operations[i], 2.0); ProcessAndDisplayNumber(operations[i], 7.94); ProcessAndDisplayNumber(operations[i], 1.414); Console.WriteLine(); } } static void ProcessAndDisplayNumber(DoubleOp action, double value) { double result = action(value); Console.WriteLine($"Value is {value}, result of operation is {result}"); } }
417
Download from finelybook www.finelybook.com
}
In this code, you instantiate an array of DoubleOp delegates (remember that after you have defined a delegate class, you can basically instantiate instances just as you can with normal classes, so putting some into an array is no problem). Each element of the array is initialized to refer to a different operation implemented by the MathOperations class. Then, you loop through the array, applying each operation to three different values. This illustrates one way of using delegates—to group methods together into an array so that you can call several methods in a loop. The key lines in this code are the ones in which you pass each delegate to the ProcessAndDisplayNumber method, such as here: ProcessAndDisplayNumber(operations[i], 2.0);
The preceding passes in the name of a delegate but without any parameters. Given that operations[i] is a delegate, syntactically: means the delegate (that is, the method represented by the delegate) operations[i]
operations[i](2.0)
means call this method, passing in the value in
parentheses The ProcessAndDisplayNumber method is defined to take a delegate as its first parameter: static void ProcessAndDisplayNumber(DoubleOp action, double value)
Then, when in this method, you call: double result = action(value);
This causes the method that is wrapped up by the action delegate instance to be called, and its return result stored in Result. Running this example gives you the following: SimpleDelegate Using operations[0]: Value is 2, result of operation is 4 Value is 7.94, result of operation is 15.88
418
Download from finelybook www.finelybook.com
Value Using Value Value Value
is 1.414, result of operation is 2.828 operations[1]: is 2, result of operation is 4 is 7.94, result of operation is 63.0436 is 1.414, result of operation is 1.999396
Action and Func Delegates Instead of defining a new delegate type with every parameter and return type, you can use the Action and Func delegates. The generic Action delegate is meant to reference a method with void return. This delegate class exists in different variants so that you can pass up to 16 different parameter types. The Action class without the generic parameter is for calling methods without parameters. Action is for calling a method with one parameter; Action for a method with two parameters; and Action for a method with eight parameters. The Func delegates can be used in a similar manner. Func allows you to invoke methods with a return type. Like Action, Func is defined in different variants to pass up to 16 parameter types and a return type. Func is the delegate type to invoke a method with a return type and without parameters. Func is for a method with one parameter, and Func is for a method with four parameters. The example in the preceding section declared a delegate with a double parameter and a double return type: delegate double DoubleOp(double x);
Instead of declaring the custom delegate DoubleOp you can use the Func delegate. You can declare a variable of the delegate type or, as shown here, an array of the delegate type: Func[] operations = { MathOperations.MultiplyByTwo, MathOperations.Square };
419
Download from finelybook www.finelybook.com
and use it with the ProcessAndDisplayNumber method as a parameter: static void ProcessAndDisplayNumber(Func action, double value) { double result = action(value); Console.WriteLine($"Value is {value}, result of operation is {result}"); }
BubbleSorter Example You are now ready for an example that shows the real usefulness of delegates. You are going to write a class called BubbleSorter. This class implements a static method, Sort, which takes as its first parameter an array of objects, and rearranges this array into ascending order. For example, if you were to pass in this array of ints, {0, 5, 6, 2, 1}, it would rearrange this array into {0, 1, 2, 5, 6}. The bubble-sorting algorithm is a well-known and very simple way to sort numbers. It is best suited to small sets of numbers, because for larger sets of numbers (more than about 10), far more efficient algorithms are available. It works by repeatedly looping through the array, comparing each pair of numbers and, if necessary, swapping them, so that the largest numbers progressively move to the end of the array. For sorting ints, a method to do a bubble sort might look like this: bool swapped = true; do { swapped = false; for (int i = 0; i < sortArray.Length—1; i++) { if (sortArray[i] > sortArray[i+1])) // problem with this test { int temp = sortArray[i]; sortArray[i] = sortArray[i + 1]; sortArray[i + 1] = temp; swapped = true; } }
420
Download from finelybook www.finelybook.com
} while (swapped);
This is all very well for ints, but you want your Sort method to be able to sort any object. In other words, if some client code hands you an array of Currency structs or any other class or struct that it may have defined, you need to be able to sort the array. This presents a problem with the line if(sortArray[i] < sortArray[i+1]) in the preceding code, because that requires you to compare two objects on the array to determine which one is greater. You can do that for ints, but how do you do it for a new class that doesn’t implement the < operator? The answer is that the client code that knows about the class must pass in a delegate wrapping a method that does the comparison. Also, instead of using an int type for the temp variable, a generic Sort method can be implemented using a generic type. With a generic Sort method accepting type T, a comparison method is needed that has two parameters of type T and a return type of bool for the if comparison. This method can be referenced from a Func delegate, where T1 and T2 are the same type: Func. This way, you give your Sort method the following signature: static public void Sort(IList sortArray, Func comparison)
The documentation for this method states that comparison must refer to a method that takes two arguments, and returns true if the value of the first argument is smaller than the second one. Now you are all set. Here’s the definition for the BubbleSorter class (code file BubbleSorter/BubbleSorter.cs): class BubbleSorter { static public void Sort(IList sortArray, Func comparison) { bool swapped = true; do { swapped = false; for (int i = 0; i < sortArray.Count—1; i++)
421
Download from finelybook www.finelybook.com
{ if (comparison(sortArray[i+1], sortArray[i])) { T temp = sortArray[i]; sortArray[i] = sortArray[i + 1]; sortArray[i + 1] = temp; swapped = true; } } } while (swapped); } }
To use this class, you need to define another class, which you can use to set up an array that needs sorting. For this example, assume that the Mortimer Phones mobile phone company has a list of employees and wants them sorted according to salary. Each employee is represented by an instance of a class, Employee, which looks like this (code file BubbleSorter/Employee.cs): class Employee { public Employee(string name, decimal salary) { Name = name; Salary = salary; } public string Name { get; } public decimal Salary { get; } public override string ToString() => $"{Name}, {Salary:C}"; public static bool CompareSalary(Employee e1, Employee e2) => e1.Salary < e2.Salary; }
Note that to match the signature of the Func delegate, you must define CompareSalary in this class as taking two Employee references and returning a Boolean. In the implementation, the comparison based on salary is performed. Now you are ready to write some client code to request a sort (code file BubbleSorter/Program.cs): 422
Download from finelybook www.finelybook.com
using System; namespace Wrox.ProCSharp.Delegates { class Program { static void Main() { Employee[] employees = { new Employee("Bugs Bunny", 20000), new Employee("Elmer Fudd", 10000), new Employee("Daffy Duck", 25000), new Employee("Wile Coyote", 1000000.38m), new Employee("Foghorn Leghorn", 23000), new Employee("RoadRunner", 50000) }; BubbleSorter.Sort(employees, Employee.CompareSalary); foreach (var employee in employees) { Console.WriteLine(employee); } } } }
Running this code shows that the Employees are correctly sorted according to salary: Elmer Fudd, $10,000.00 Bugs Bunny, $20,000.00 Foghorn Leghorn, $23,000.00 Daffy Duck, $25,000.00 RoadRunner, $50,000.00 Wile Coyote, $1,000,000.38
Multicast Delegates So far, each of the delegates you have used wraps just one method call. Calling the delegate amounts to calling that method. If you want to call more than one method, you need to make an explicit call through a delegate more than once. However, it is possible for a delegate to wrap more than one method. Such a delegate is known as a multicast delegate. When a multicast delegate is called, it successively calls each 423
Download from finelybook www.finelybook.com
method in order. For this to work, the delegate signature should return a void; otherwise, you would only get the result of the last method invoked by the delegate. With a void return type, you can use the Action delegate (code file MulticastDelegates/Program.cs): class Program { static void Main() { Action operations = MathOperations.MultiplyByTwo; operations += MathOperations.Square;
In the earlier example, you wanted to store references to two methods, so you instantiated an array of delegates. Here, you simply add both operations into the same multicast delegate. Multicast delegates recognize the operators + and +=. Alternatively, you can expand the last two lines of the preceding code, as in this snippet: Action operation1 = MathOperations.MultiplyByTwo; Action operation2 = MathOperations.Square; Action operations = operation1 + operation2;
Multicast delegates also recognize the operators – and -= to remove method calls from the delegate.
NOTE In terms of what’s going on under the hood, a multicast delegate is a class derived from System.MulticastDelegate, which in turn is derived from System.Delegate. System.MulticastDelegate has additional members to allow the chaining of method calls into a list. To illustrate the use of multicast delegates, the following code recasts the SimpleDelegate example into a new example: MulticastDelegate. Because you now need the delegate to refer to methods that return void, you rewrite the methods in the MathOperations class so they 424
Download from finelybook www.finelybook.com
display their results instead of returning them (code file MulticastDelegates/MathOperations.cs): class MathOperations { public static void MultiplyByTwo(double value) { double result = value * 2; Console.WriteLine($"Multiplying by 2: {value} gives {result}"); } public static void Square(double value) { double result = value * value; Console.WriteLine($"Squaring: {value} gives {result}"); } }
To accommodate this change, you also have to rewrite ProcessAndDisplayNumber (code file MulticastDelegates/Program.cs): static void ProcessAndDisplayNumber(Action action, double value) { Console.WriteLine(); Console.WriteLine($"ProcessAndDisplayNumber called with value = {value}"); action(value); }
Now you can try out your multicast delegate: static void Main() { Action operations = MathOperations.MultiplyByTwo; operations += MathOperations.Square; ProcessAndDisplayNumber(operations, 2.0); ProcessAndDisplayNumber(operations, 7.94); ProcessAndDisplayNumber(operations, 1.414); Console.WriteLine(); }
Each time ProcessAndDisplayNumber is called, it displays a message saying that it has been called. Then the following statement causes each of the method calls in the action delegate instance to be called in 425
Download from finelybook www.finelybook.com
succession: action(value);
Running the preceding code produces this result: ProcessAndDisplayNumber called with value = 2 Multiplying by 2: 2 gives 4 Squaring: 2 gives 4 ProcessAndDisplayNumber called with value = 7.94 Multiplying by 2: 7.94 gives 15.88 Squaring: 7.94 gives 63.0436 ProcessAndDisplayNumber called with value = 1.414 Multiplying by 2: 1.414 gives 2.828 Squaring: 1.414 gives 1.999396
If you are using multicast delegates, be aware that the order in which methods chained to the same delegate will be called is formally undefined. Therefore, avoid writing code that relies on such methods being called in any particular order. Invoking multiple methods by one delegate might cause an even bigger problem. The multicast delegate contains a collection of delegates to invoke one after the other. If one of the methods invoked by a delegate throws an exception, the complete iteration stops. Consider the following MulticastIteration example. Here, the simple delegate Action that returns void without arguments is used. This delegate is meant to invoke the methods One and Two, which fulfill the parameter and return type requirements of the delegate. Be aware that method One throws an exception (code file MulticastDelegatesUsingInvocationList/Program.cs): using System; namespace Wrox.ProCSharp.Delegates { class Program { static void One() { Console.WriteLine("One"); throw new Exception("Error in one");
426
Download from finelybook www.finelybook.com
} static void Two() { Console.WriteLine("Two"); }
In the Main method, delegate d1 is created to reference method One; next, the address of method Two is added to the same delegate. d1 is invoked to call both methods. The exception is caught in a try/catch block: static void Main() { Action d1 = One; d1 += Two; try { d1(); } catch (Exception) { Console.WriteLine("Exception caught"); } }
Only the first method is invoked by the delegate. Because the first method throws an exception, iterating the delegates stops here and method Two is never invoked. The result might differ because the order of calling the methods is not defined: One Exception Caught
NOTE Errors and exceptions are explained in detail in Chapter 14, “Errors and Exceptions.” In such a scenario, you can avoid the problem by iterating the list on your own. The Delegate class defines the method GetInvocationList 427
Download from finelybook www.finelybook.com
that returns an array of Delegate objects. You can now use this delegate to invoke the methods associated with them directly, catch exceptions, and continue with the next iteration (code file MulticastDelegatesUsingInvocationList/Program.cs): static void Main() { Action d1 = One; d1 += Two; Delegate[] delegates = d1.GetInvocationList(); foreach (Action d in delegates) { try { d(); } catch (Exception) { Console.WriteLine("Exception caught"); } } }
When you run the application with the code changes, you can see that the iteration continues with the next method after the exception is caught: One Exception caught Two
Anonymous Methods Up to this point, a method must already exist for the delegate to work (that is, the delegate is defined with the same signature as the method(s) it will be used with). However, there is another way to use delegates—with anonymous methods. An anonymous method is a block of code that is used as the parameter for the delegate. The syntax for defining a delegate with an anonymous method doesn’t change. It’s when the delegate is instantiated that things change. The following simple console application shows how using an anonymous method can work (code file AnonymousMethods/Program.cs): 428
Download from finelybook www.finelybook.com
class Program { static void Main() { string mid = ", middle part,"; Func anonDel = delegate(string param) { param += mid; param += " and this was added to the string."; return param; }; Console.WriteLine(anonDel("Start of string")); } }
The delegate Func takes a single string parameter and returns a string. anonDel is a variable of this delegate type. Instead of assigning the name of a method to this variable, a simple block of code is used, prefixed by the delegate keyword, followed by a string parameter. As you can see, the block of code uses a method-level string variable, mid, which is defined outside of the anonymous method and adds it to the parameter that was passed in. The code then returns the string value. When the delegate is called, a string is passed in as the parameter and the returned string is output to the console. The benefit of using anonymous methods is that it reduces the amount of code you have to write. You don’t need to define a method just to use it with a delegate. This becomes evident when you define the delegate for an event (events are discussed later in this chapter), and it helps reduce the complexity of code, especially where several events are defined. With anonymous methods, the code does not perform faster. The compiler still defines a method; the method just has an automatically assigned name that you don’t need to know. You must follow a couple of rules when using anonymous methods. You can’t have a jump statement (break, goto, or continue) in an anonymous method that has a target outside of the anonymous method. The reverse is also true: A jump statement outside the anonymous method cannot have a target inside the anonymous method. 429
Download from finelybook www.finelybook.com
Unsafe code cannot be accessed inside an anonymous method, and the ref and out parameters that are used outside of the anonymous method cannot be accessed. Other variables defined outside of the anonymous method can be used. If you have to write the same functionality more than once, don’t use anonymous methods. In this case, instead of duplicating the code, write a named method. You have to write it only once and reference it by its name.
NOTE The syntax for anonymous methods was introduced with C# 2. With new programs you really don’t need this syntax anymore because lambda expressions (explained in the next section) offer the same—and more—functionality. However, you’ll find the syntax for anonymous methods in many places in existing source code, which is why it’s good to know it. Lambda expressions have been available since C# 3.
LAMBDA EXPRESSIONS One way where lambda expressions are used is to assign a lambda expression to a delegate type: implement code inline. Lambda expressions can be used whenever you have a delegate parameter type. The previous example using anonymous methods is modified here to use a lambda expression. class Program { static void Main() { string mid = ", middle part,"; Func lambda = param => { param += mid; param += " and this was added to the string.";
430
Download from finelybook www.finelybook.com
return param; }; Console.WriteLine(lambda("Start of string")); } }
The left side of the lambda operator, =>, lists the parameters needed. The right side following the lambda operator defines the implementation of the method assigned to the variable lambda.
Parameters With lambda expressions there are several ways to define parameters. If there’s only one parameter, just the name of the parameter is enough. The following lambda expression uses the parameter named s. Because the delegate type defines a string parameter, s is of type string. The implementation invokes the String.Format method to return a string that is finally written to the console when the delegate is invoked: change uppercase TEST (code file LambdaExpressions/Program.cs): Func oneParam = s => $"change uppercase {s.ToUpper()}"; Console.WriteLine(oneParam("test"));
If a delegate uses more than one parameter, you can combine the parameter names inside brackets. Here, the parameters x and y are of type double as defined by the Func delegate: Func twoParams = (x, y) => x * y; Console.WriteLine(twoParams(3, 2));
For convenience, you can add the parameter types to the variable names inside the brackets. If the compiler can’t match an overloaded version, using parameter types can help resolve the matching delegate: Func twoParamsWithTypes = (double x, double y) => x * y; Console.WriteLine(twoParamsWithTypes(4, 2));
Multiple Code Lines 431
Download from finelybook www.finelybook.com
If the lambda expression consists of a single statement, a method block with curly brackets and a return statement are not needed. There’s an implicit return added by the compiler: Func square = x => x * x;
It’s completely legal to add curly brackets, a return statement, and semicolons. Usually it’s just easier to read without them: Func square = x => { return x * x; }
However, if you need multiple statements in the implementation of the lambda expression, curly brackets and the return statement are required: Func lambda = param => { param += mid; param += " and this was added to the string."; return param; };
Closures With lambda expressions you can access variables outside the block of the lambda expression. This is known by the term closure. Closures are a great feature, but they can also be very dangerous if not used correctly. In the following example, a lambda expression of type Func requires one int parameter and returns an int. The parameter for the lambda expression is defined with the variable x. The implementation also accesses the variable someVal, which is outside the lambda expression. As long as you do not assume that the lambda expression creates a new method that is used later when f is invoked, this might not look confusing at all. Looking at this code block, the returned value calling f should be the value from x plus 5, but this might not be the case (code file LambdaExpressions/Program.cs):
432
Download from finelybook www.finelybook.com
int someVal = 5; Func f = x => x + someVal;
Assuming the variable someVal is later changed, and then the lambda expression is invoked, the new value of someVal is used. The result here of invoking f(3) is 10: someVal = 7; WriteLine(f(3));
Similarly, when you’re changing the value of a closure variable within the lambda expression, you can access the changed value outside of the lambda expression. Now, you might wonder how it is possible at all to access variables outside of the lambda expression from within the lambda expression. To understand this, consider what the compiler does when you define a lambda expression. With the lambda expression x => x + someVal, the compiler creates an anonymous class that has a constructor to pass the outer variable. The constructor depends on how many variables you access from the outside. With this simple example, the constructor accepts an int. The anonymous class contains an anonymous method that has the implementation as defined by the lambda expression, with the parameters and return type: public class AnonymousClass { private int someVal; public AnonymousClass(int someVal) { this.someVal = someVal; } public int AnonymousMethod(int x) => x + someVal; }
Using the lambda expression and invoking the method creates an instance of the anonymous class and passes the value of the variable from the time when the call is made.
NOTE 433
Download from finelybook www.finelybook.com
In case you are using closures with multiple threads, you can get into concurrency conflicts. It’s best to only use immutable types for closures. This way it’s guaranteed the value can’t change, and synchronization is not needed.
NOTE You can use lambda expressions anywhere the type is a delegate. Another use of lambda expressions is when the type is Expression or Expression, in which case the compiler creates an expression tree. This feature is discussed in Chapter 12, “Language Integrated Query.”
EVENTS Events are based on delegates and offer a publish/subscribe mechanism to delegates. You can find events everywhere across the framework. In Windows applications, the Button class offers the Click event. This type of event is a delegate. A handler method that is invoked when the Click event is fired needs to be defined, with the parameters as defined by the delegate type. In the code example shown in this section, events are used to connect the CarDealer and Consumer classes. The CarDealer class offers an event when a new car arrives. The Consumer class subscribes to the event to be informed when a new car arrives.
Event Publisher You start with a CarDealer class that offers a subscription based on events. CarDealer defines the event named NewCarInfo of type EventHandler with the event keyword. Inside the method NewCar, the event NewCarInfo is fired by invoking the method RaiseNewCarInfo. The implementation of this method verifies whether the delegate is not null and raises the event (code file 434
Download from finelybook www.finelybook.com
EventsSample/CarDealer.cs): using System; namespace Wrox.ProCSharp.Delegates { public class CarInfoEventArgs: EventArgs { public CarInfoEventArgs(string car) => Car = car; public string Car { get; } } public class CarDealer { public event EventHandler NewCarInfo; public void NewCar(string car) { Console.WriteLine($"CarDealer, new car {car}"); NewCarInfo?.Invoke(this, new CarInfoEventArgs(car)); } } }
NOTE The null propagation operator.? used in the previous example is new since C# 6. This operator is discussed in Chapter 6, “Operators and Casts.” The class CarDealer offers the event NewCarInfo of type EventHandler. As a convention, events typically use methods with two parameters; the first parameter is an object and contains the sender of the event, and the second parameter provides information about the event. The second parameter is different for various event types. .NET 1.0 defined several hundred delegates for events for all different data types. That’s no longer necessary with the generic delegate EventHandler. EventHandler defines a handler that returns void and accepts two parameters. With EventHandler, the first parameter needs to be of type object, and the second parameter is of type T. 435
Download from finelybook www.finelybook.com
EventHandler also defines a constraint on T; from the base class EventArgs, which is the case with CarInfoEventArgs:
it must derive
public event EventHandler NewCarInfo;
The delegate EventHandler is defined as follows: public delegate void EventHandler(object sender, TEventArgs e) where TEventArgs: EventArgs
Defining the event in one line is a C# shorthand notation. The compiler creates a variable of the delegate type EventHandler and adds methods to subscribe and unsubscribe from the delegate. The long form of the shorthand notation is shown next. This is very similar to auto-properties and full properties. With events, the add and remove keywords are used to add and remove a handler to the delegate: private EventHandler _newCarInfo; public event EventHandler NewCarInfo { add => _newCarInfo += value; remove => _newCarInfo -= value; }
NOTE The long notation to define events is useful if more needs to be done than just adding and removing the event handler, such as adding synchronization for multiple thread access. The UWP and WPF controls make use of the long notation to add bubbling and tunneling functionality with the events. The class CarDealer fires the event by calling the Invoke method of the delegate. This invokes all the handlers that are subscribed to the event. Remember, as previously shown with multicast delegates, the order of the methods invoked is not guaranteed. To have more control over 436
Download from finelybook www.finelybook.com
calling the handler methods you can use the Delegate class method GetInvocationList to access every item in the delegate list and invoke each on its own, as shown earlier. NewCarInfo?.Invoke(this, new CarInfoEventArgs(car));
Firing the event is just a one-liner. However, this is only with C# 6. Before C# 6, firing the event was more complex. Here is the same functionality implemented before C# 6. Before firing the event, you need to check whether the event is null. Because between a null check and firing the event the event could be set to null by another thread, a local variable is used, as shown in the following example: EventHandler newCarInfo = NewCarInfo; if (newCarInfo != null) { newCarInfo(this, new CarInfoEventArgs(car)); }
Since C# 6, all this could be replaced by using null propagation, with a single code line as you’ve seen earlier. Before firing the event, it is necessary to check whether the delegate NewCarInfo is not null. If no one subscribed, the delegate is null: protected virtual void RaiseNewCarInfo(string car) { NewCarInfo?.Invoke(this, new CarInfoEventArgs(car)); }
Event Listener The class Consumer is used as the event listener. This class subscribes to the event of the CarDealer and defines the method NewCarIsHere that in turn fulfills the requirements of the EventHandler delegate with parameters of type object and CarInfoEventArgs (code file EventsSample/Consumer.cs): public class Consumer { private string _name; public Consumer(string name) => _name = name;
437
Download from finelybook www.finelybook.com
public void NewCarIsHere(object sender, CarInfoEventArgs e) { Console.WriteLine($"{_name}: car {e.Car} is new"); } }
Now the event publisher and subscriber need to connect. This is done by using the NewCarInfo event of the CarDealer to create a subscription with +=. The consumer Valtteri subscribes to the event, then the consumer Max, and next Valtteri unsubscribes with -= (code file EventsSample/Program.cs): class Program { static void Main() { var dealer = new CarDealer(); var valtteri = new Consumer("Valtteri"); dealer.NewCarInfo += valtteri.NewCarIsHere; dealer.NewCar("Williams"); var max = new Consumer("Max"); dealer.NewCarInfo += max.NewCarIsHere; dealer.NewCar("Mercedes"); dealer.NewCarInfo -= valtteri.NewCarIsHere; dealer.NewCar("Ferrari"); } }
Running the application, a Williams arrived and Valtteri was informed. After that, Max registers for the subscription as well, both Valtteri and Max are informed about the new Mercedes. Then Valtteri unsubscribes and only Max is informed about the Ferrari: CarDealer, new car Williams Valtteri: car Williams is new CarDealer, new car Mercedes Valtteri: car Mercedes is new Max: car Mercedes is new CarDealer, new car Ferrari Max: car Ferrari is new
SUMMARY 438
Download from finelybook www.finelybook.com
This chapter provided the basics of delegates, lambda expressions, and events. You learned how to declare a delegate and add methods to the delegate list; you learned how to implement methods called by delegates with lambda expressions; and you learned the process of declaring event handlers to respond to an event, as well as how to create a custom event and use the patterns for raising the event. Using delegates and events in the design of a large application can reduce dependencies and the coupling of layers. This enables you to develop components that have a higher reusability factor. Lambda expressions are C# language features based on delegates. With these, you can reduce the amount of code you need to write. Lambda expressions are not only used with delegates, but also with the Language Integrated Query (LINQ) as you see in Chapter 12. The next chapter covers the use of strings and regular expressions.
439
Download from finelybook www.finelybook.com
9 Strings and Regular Expressions WHAT’S IN THIS CHAPTER? Building strings Formatting expressions Using regular expressions Using Span with Strings
WROX.COM CODE DOWNLOADS FOR THIS CHAPTER The Wrox.com code downloads for this chapter are found at www.wrox.com on the Download Code tab. The source code is also available at https://github.com/ProfessionalCSharp/ProfessionalCSharp7 in the directory StringsAndRegularExpressions. The code for this chapter is divided into the following major examples: StringSample StringFormats RegularExpressionPlayground SpanWithStrings Strings have been used consistently since the beginning of this book, as every program needs strings. However, you might not 440
Download from finelybook www.finelybook.com
have realized that the stated mapping that the string keyword in C# refers to is the System.String .NET base class. String is a very powerful and versatile class, but it is by no means the only stringrelated class in the .NET armory. This chapter begins by reviewing the features of String and then looks at some nifty things you can do with strings using some of the other .NET classes—in particular those in the System.Text and System.Text.RegularExpressions namespaces. This chapter covers the following areas: Building strings—If you’re performing repeated modifications on a string—for example, to build a lengthy string prior to displaying it or passing it to some other method or application—the String class can be very inefficient. When you find yourself in this kind of situation, another class, System.Text.StringBuilder, is more suitable because it has been designed exactly for this scenario. Formatting expressions—This chapter takes a closer look at the formatting expressions that have been used in the Console.WriteLine method throughout the past few chapters. These formatting expressions are processed using two useful interfaces: IFormatProvider and IFormattable. By implementing these interfaces on your own classes, you can define your own formatting sequences so that Console.WriteLine and similar classes display the values of your classes in whatever way you specify. Regular expressions—.NET also offers some very sophisticated classes that deal with cases in which you need to identify or extract substrings that satisfy certain fairly sophisticated criteria; for example, finding all occurrences within a string where a character or set of characters is repeated: finding all words that begin with “s” and contain at least one “n”: or strings that adhere to an employee ID or a Social Security number construction. Although you can write methods to perform this kind of processing using the String class, writing such methods is cumbersome. Instead, some classes, specifically those from System.Text.RegularExpressions, are designed to perform this 441
Download from finelybook www.finelybook.com
kind of processing. Spans—.NET Core offers the generic Span struct, which allows fast access to memory. Span allows accessing slices of strings without copying the string.
EXAMINING SYSTEM.STRING Before digging into the other string classes, this section briefly reviews some of the available methods in the String class itself. is a class specifically designed to store a string and allow a large number of operations on the string. In addition, due to the importance of this data type, C# has its own keyword and associated syntax to make it particularly easy to manipulate strings using this class. System.String
You can concatenate strings using operator overloads: string message1 = "Hello"; // returns "Hello" message1 += ", There"; // returns "Hello, There" string message2 = message1 + "!"; // returns "Hello, There!"
C# also allows extraction of a particular character using an indexerlike syntax: string message = "Hello"; char char4 = message[4]; // returns 'o'. Note the string is zero-indexed
This enables you to perform such common tasks as replacing characters, removing whitespace, and changing case. The following table introduces the key methods. METHOD
DESCRIPTION Compare Compares the contents of strings, taking into account the culture (locale) in assessing equivalence between certain characters. CompareOrdinal Same as Compare but doesn’t take culture into account.
442
Download from finelybook www.finelybook.com
Combines separate string instances into a single instance. CopyTo Copies a specific number of characters from the selected index to an entirely new instance of an array. Format Formats a string containing various values and specifies how each value should be formatted. IndexOf Locates the first occurrence of a given substring or character in the string. IndexOfAny Locates the first occurrence of any one of a set of characters in a string. Insert Inserts a string instance into another string instance at a specified index. Join Builds a new string by combining an array of strings. LastIndexOf Same as IndexOf but finds the last occurrence. LastIndexOfAny Same as IndexOfAny but finds the last occurrence. PadLeft Pads out the string by adding a specified repeated character to the left side of the string. PadRight Pads out the string by adding a specified repeated character to the right side of the string. Replace Replaces occurrences of a given character or substring in the string with another character or substring. Split Splits the string into an array of substrings; the breaks occur wherever a given character occurs. Substring Retrieves the substring starting at a specified position in a string. ToLower Converts the string to lowercase. ToUpper Converts the string to uppercase. Trim Removes leading and trailing whitespace. Concat
NOTE 443
Download from finelybook www.finelybook.com
Please note that this table is not comprehensive; it is intended to give you an idea of the features offered by strings.
Building Strings As you have seen, String is an extremely powerful class that implements a large number of very useful methods. However, the String class has a shortcoming that makes it very inefficient for making repeated modifications to a given string—it is an immutable data type, which means that after you initialize a string object, that string object can never change. The methods and operators that appear to modify the contents of a string actually create new strings, copying across the contents of the old string if necessary. For example, consider the following code (code file StringSample/Program.cs): string greetingText = "Hello from all the people at Wrox Press. "; greetingText += "We do hope you enjoy this book as much as we enjoyed writing it.";
When this code executes, first an object of type System.String is created and initialized to hold the text Hello from all the people at Wrox Press. (Note that there’s a space after the period.) When this happens, the .NET runtime allocates just enough memory in the string to hold this text (41 chars), and the variable greetingText is set to refer to this string instance. In the next line, syntactically it looks like more text is being added onto the string, but it is not. Instead, a new string instance is created with just enough memory allocated to store the combined text—that’s 104 characters in total. The original text, Hello from all the people at Wrox Press. , is copied into this new string instance along with the extra text: We do hope you enjoy this book as much as we enjoyed writing it. Then, the address stored in the variable greetingText is updated, so the variable correctly points to the new String object. The old String object is now unreferenced—there are no variables that refer to it—so it will be removed the next time the garbage collector comes along to clean out any unused objects in your application. 444
Download from finelybook www.finelybook.com
By itself, that doesn’t look too bad, but suppose you wanted to create a very simple encryption scheme by adding 1 to the ASCII value of each character in the string. This would change the string to Ifmmp gspn bmm uif qfpqmf bu Xspy Qsftt. Xf ep ipqf zpv fokpz uijt cppl bt nvdi bt xf fokpzfe xsjujoh ju. Several ways of doing this exist, but the simplest and (if you are restricting yourself to using the String class) almost certainly the most efficient way is to use the String.Replace
method, which replaces all occurrences of a given substring in a string with another substring. Using Replace, the code to encode the text looks like this (code file StringSample/Program.cs): string greetingText = "Hello from all the people at Wrox Press. "; greetingText += "We do hope you enjoy this book as much as we " + "enjoyed writing it."; Console.WriteLine($"Not encoded:\n {greetingText}"); for(int i = 'z'; i>= 'a'; i--) { char old1 = (char)i; char new1 = (char)(i+1); greetingText = greetingText.Replace(old1, new1); } for(int i = 'Z'; i>='A'; i--) { char old1 = (char)i; char new1 = (char)(i+1); greetingText = greetingText.Replace(old1, new1); } Console.WriteLine($"Encoded:\n {greetingText}");
NOTE Simply, this code does not change Z to A or z to a. These letters are encoded to [ and {, respectively. In this example, the Replace method works in a fairly intelligent way, to the extent that it won’t create a new string unless it actually makes changes to the old string. The original string contained 23 different 445
Download from finelybook www.finelybook.com
lowercase characters and three different uppercase ones. The Replace method will therefore have allocated a new string 26 times in total, with each new string storing 103 characters. That means because of the encryption process, there will be string objects capable of storing a combined total of 2,678 characters now sitting on the heap waiting to be garbage collected! Clearly, if you use strings to do text processing extensively, your applications will run into severe performance problems. To address this kind of issue, Microsoft supplies the System.Text.StringBuilder class. StringBuilder is not as powerful as String in terms of the number of methods it supports. The processing you can do on a StringBuilder is limited to substitutions and appending or removing text from strings. However, it works in a much more efficient way. When you construct a string using the String class, just enough memory is allocated to hold the string object. The StringBuilder, however, normally allocates more memory than is needed. You, as a developer, have the option to indicate how much memory the StringBuilder should allocate; but if you do not, the amount defaults to a value that varies according to the size of the string with which the StringBuilder instance is initialized. The StringBuilder class has two main properties: Length—Indicates
the length of the string that it contains
Capacity—Indicates
the maximum length of the string in the
memory allocation Any modifications to the string take place within the block of memory assigned to the StringBuilder instance, which makes appending substrings and replacing individual characters within strings very efficient. Removing or inserting substrings is inevitably still inefficient because it means that the following part of the string must be moved. Only if you perform an operation that exceeds the capacity of the string is it necessary to allocate new memory and possibly move the entire contained string. In adding extra capacity, based on our experiments the StringBuilder appears to double its capacity if it detects that the capacity has been exceeded and no new value for 446
Download from finelybook www.finelybook.com
capacity has been set. For example, if you use a StringBuilder object to construct the original greeting string, you might write this code: var greetingBuilder = new StringBuilder("Hello from all the people at Wrox Press. ", 150); greetingBuilder.Append("We do hope you enjoy this book as much " + "as we enjoyed writing it");
NOTE To use the StringBuilder class, you need a System.Text reference in your code. This code sets an initial capacity of 150 for the StringBuilder. It is always a good idea to set a capacity that covers the likely maximum length of a string, to ensure that the StringBuilder does not need to relocate because its capacity was exceeded. By default, the capacity is set to 16. Theoretically, you can set a number as large as the number you pass in an int, although the system will probably complain that it does not have enough memory if you try to allocate the maximum of two billion characters (the theoretical maximum that a StringBuilder instance is allowed to contain). Then, on calling the AppendFormat method, the remaining text is placed in the empty space, without the need to allocate more memory. However, the real efficiency gain from using a StringBuilder is realized when you make repeated text substitutions. For example, if you try to encrypt the text in the same way as before, you can perform the entire encryption without allocating any more memory whatsoever: var greetingBuilder = new StringBuilder("Hello from all the people at Wrox Press. ", 150); greetingBuilder.AppendFormat("We do hope you enjoy this book
447
Download from finelybook www.finelybook.com
as much " + "as we enjoyed writing it"); Console.WriteLine("Not Encoded:\n" + greetingBuilder); for(int i = 'z'; i>='a'; i--) { char old1 = (char)i; char new1 = (char)(i+1); greetingBuilder = greetingBuilder.Replace(old1, new1); } for(int i = 'Z'; i>='A'; i--) { char old1 = (char)i; char new1 = (char)(i+1); greetingBuilder = greetingBuilder.Replace(old1, new1); } Console.WriteLine($"Encoded:\n {greetingBuilder}");
This code uses the StringBuilder.Replace method, which does the same thing as String.Replace but without copying the string in the process. The total memory allocated to hold strings in the preceding code is 150 characters for the StringBuilder instance, as well as the memory allocated during the string operations performed internally in the final WriteLine statement. Normally, you want to use StringBuilder to perform any manipulation of strings, and String to store or display the final result.
StringBuilder Members You have seen a demonstration of one constructor of StringBuilder, which takes an initial string and capacity as its parameters. There are others. For example, you can supply only a string: var sb = new StringBuilder("Hello");
Or you can create an empty StringBuilder with a given capacity: var sb = new StringBuilder(20);
Apart from the Length and Capacity properties, there is a read-only MaxCapacity property that indicates the limit to which a given StringBuilder instance is allowed to grow. By default, this is specified by int.MaxValue (roughly two billion, as noted earlier), but you can set 448
Download from finelybook www.finelybook.com
this value to something lower when you construct the StringBuilder object: // This will set the initial capacity to 100, but the max will be 500. // Hence, this StringBuilder can never grow to more than 500 characters, // otherwise it will raise an exception if you try to do that. var sb = new StringBuilder(100, 500);
You can also explicitly set the capacity at any time, though an exception is raised if you set the capacity to a value less than the current length of the string or a value that exceeds the maximum capacity: var sb = new StringBuilder("Hello"); sb.Capacity = 100;
The following table lists the main StringBuilder methods. METHOD
DESCRIPTION Append Appends a string to the current string. AppendFormat Appends a string that has been formatted from a format specifier. Insert Inserts a substring into the current string. Remove Removes characters from the current string. Replace Replaces all occurrences of a character with another character or a substring with another substring in the current string. ToString Returns the current string cast to a System.String object (overridden from System.Object). Several overloads of many of these methods exist.
NOTE AppendFormat
is the method that is ultimately called when you call 449
Download from finelybook www.finelybook.com
Console.WriteLine,
which is responsible for determining what all the format expressions like {0:D} should be replaced with. This method is examined in the next section. There is no cast (either implicit or explicit) from StringBuilder to String. If you want to output the contents of a StringBuilder as a String, you must use the ToString method. Now that you have been introduced to the StringBuilder class and have learned some of the ways in which you can use it to increase performance, be aware that this class does not always deliver the increased performance you are seeking. Basically, you should use the StringBuilder class when you are manipulating multiple strings. However, if you are just doing something as simple as concatenating two strings, you will find that System.String performs better.
STRING FORMATS In previous chapters you’ve seen passing variables to strings with the $ prefix. This chapter examines what’s behind this C# feature and covers all the other functionality offered by format strings.
String Interpolation C# 6 introduced string interpolation by using the $ prefix for strings. The following example creates the string s2 using the $ prefix. This prefix allows having placeholders in curly brackets to reference results from code. {s1} is a placeholder in the string, where the compiler puts into the value of variable s1 into the string s2 (code file StringFormats/Program.cs): string s1 = "World"; string s2 = $"Hello, {s1}";
In reality, this is just syntax sugar. From strings with the $ prefix, the compiler creates invocations to the String.Format method. So, the previous code snippet gets translated to this: string s1 = "World";
450
Download from finelybook www.finelybook.com
string s2 = String.Format("Hello, {0}", s1);
The first parameter of the String.Format method that is used accepts a format string with placeholders that are numbered starting from 0, followed by the parameters that are put into the string holes. The new string format is just a lot handier and doesn’t require that much code to write. It’s not just variables you can use to fill in the holes of the string. Any method that returns a value can be used: string s2 = $"Hello, {s1.ToUpper()}";
This translates to a similar statement: string s2 = String.Format("Hello, {0}", s1.ToUpper());
It’s also possible to have multiple holes in the string, like so: int x = 3, y = 4; string s3 = $"The result of {x} + {y} is {x + y}";
which translates to string s3 = String.Format("The result of {0} and {1} is {2}", x, y, x + y);
FormattableString What the interpolated string gets translated to can easily be seen by assigning the string to a FormattableString. The interpolated string can be directly assigned because the FormattableString is a better match than the normal string. This type defines a Format property that returns the resulting format string, an ArgumentCount property, and the method GetArgument to return the values: int x = 3, y = 4; FormattableString s = $"The result of {x} + {y} is {x + y}"; Console.WriteLine($"format: {s.Format}"); for (int i = 0; i < s.ArgumentCount; i++) { Console.WriteLine($"argument {i}: {s.GetArgument(i)}"); }
451
Download from finelybook www.finelybook.com
Running this code snippet results in this output: format: The argument 0: argument 1: argument 2:
result of {0} + {1} is {2} 3 4 7
NOTE The class FormattableString is defined in the System namespace but requires .NET 4.6. In case you would like to use the FormattableString with older .NET versions, you can create this type on your own, or use the StringInterpolationBridge NuGet package. Using Other Cultures with String Interpolation Interpolated strings by default make use of the current culture. This can be changed easily. The helper method Invariant changes the interpolated string to use the invariant culture instead of the current one. As interpolated strings can be assigned to a FormattableString type, they can be passed to this method. FormattableString defines a ToString method that allows passing an IFormatProvider. The interface IFormatProvider is implemented by the CultureInfoclass. Passing CultureInfo.InvariantCulture to the IFormatProvider parameter changes the string to use the invariant culture: private string Invariant(FormattableString s) => s.ToString(CultureInfo.InvariantCulture);
NOTE Chapter 27, “Localization,” discusses language-specific issues for format strings as well as cultures and invariant cultures.
452
Download from finelybook www.finelybook.com
In the following code snippet, the Invariant method is used to pass a string to the second WriteLine method. The first invocation of WriteLine uses the current culture while the second one uses the invariant culture: var day = new DateTime(2025, 2, 14); Console.WriteLine($"{day:d}"); Console.WriteLine(Invariant($"{day:d}"));
If you have the English-US culture setting, the result is shown here. If you have a different culture configured with your system, the first result differs. In any case, you see a difference with the invariant culture: 2/14/2025 02/14/2015
For using the invariant culture, you don’t need to implement your own method; instead you can use the static Invariant method of the FormattableString class directly: Console.WriteLine(FormattableString.Invariant($"{day:d}"));
Escaping Curly Brackets In case you want the curly brackets in an interpolated string, you can escape those using double curly brackets: string s = "Hello"; Console.WriteLine($"{{s}} displays the value of s: {s}");
The WriteLine method is translated to this implementation: Console.WriteLine(String.Format("{s} displays the value of s: {0}", s));
Thus, the output is this: {s} displays the value of s : Hello
You can also escape curly brackets to build a new format string from a format string. Let’s have a look at this code snippet: string formatString = $"{s}, {{0}}";
453
Download from finelybook www.finelybook.com
string s2 = "World"; Console.WriteLine(formatString, s2);
With the string variable formatString, the compiler creates a call to String.Format just by putting a placeholder 0 to insert the variable s: string formatString = String.Format("{0}, {{0}}", s);
This in turn results in this format string where the variable s is replaced with the value Hello, and the outermost curly brackets of the second format are removed: string formatString = "Hello, {0}";
With the WriteLine method in the last line, now the string World gets inserted into the new placeholder 0 using the value of the variable s2: Console.WriteLine("Hello, World");
DateTime and Number Formats Other than just using string formats for placeholders, specific formats depending on a data type are available. Let’s start with a date. A format string follows the expressions within the placeholder separated by a colon. Examples shown here are the D and d format for the DateTime type: var day = new DateTime(2025, 2, 14); Console.WriteLine($"{day:D}"); Console.WriteLine($"{day:d}");
The result shows a long date format string with the uppercase D and a short date string with the lowercase d: Friday, February 14, 2025 2/14/2025
The DateTime type results in different outputs depending on uppercase or lowercase strings used. Depending on the language setting of your system, the output might look different. The date and time is language specific. The DateTime type supports a lot of different standard format strings to 454
Download from finelybook www.finelybook.com
have all date and time representations—for example, t for a short time format and T for a long time format, g and G to display date and time. All the other options are not discussed here, as you can find them in the MSDN documentation for the ToString method of the DateTime type.
NOTE One thing that should be mentioned is building a custom format string for DateTime. A custom date and time format string can combine format specifiers, such as dd-MMM-yyyy: Console.WriteLine($"{day:dd-MMM-yyyy}");
The result is shown here: 14-Feb-2025
This custom format string makes use of dd to display two digits for the day (this is important if the day is before the 10th; here you can see a difference between d and dd), MMM for an abbreviated name of the month (pay attention to uppercase; mm specifies minutes) and yyyy for the year with a four-digit number. Again, you can find all the other format specifiers for custom date and time format strings in the MSDN documentation. Format strings for numbers don’t differentiate between uppercase and lowercase. Let’s have a look at the n, e, x, and c standard numeric format strings: int i = 2477; Console.WriteLine($"{i:n} {i:e} {i:x} {i:c}");
The n format string defines a number format to show integral and decimal digits with group separators, e using exponential notation, x for a conversion to hexadecimal, and c to display a currency: 2,477.00 2.477000e+003 9ad $2,477.00
455
Download from finelybook www.finelybook.com
For numeric representations you can also use custom format strings. The # format specifier is a digit placeholder and displays a digit if available; otherwise no digit appears. The 0 format specifier is a zero placeholder and displays the corresponding digit or zero if a digit is not present. double d = 3.1415; Console.WriteLine($"{d:###.###}"); Console.WriteLine($"{d:000.000}");
With the double value from the sample code, the first result rounds the value after the comma to three digits; with the second result three digits before the comma are shown as well: 3.142 003.142
The Microsoft documentation gives information on all the standard numeric format strings for percent, round-trip and fixed-point displays, and custom format strings for different looks for exponential value displays, decimal points, group separators, and more.
Custom String Formats Format strings are not restricted to built-in types; you can create your own format strings for your own types. You just need to implement the interface IFormattable. Start with a simple Person class that contains FirstName and LastName properties (code file StringFormats/Person.cs): public class Person { public string FirstName { get; set; } public string LastName { get; set; } }
For a simple string presentation of this class, the ToString method of the base class is overridden. This method returns a string consisting of FirstName and LastName: public override string ToString() => FirstName + " " + LastName;
456
Download from finelybook www.finelybook.com
Other than a simple string representation, the Person class should also support the format strings F to just return the first name, L for the last name, and A, which stands for “all” and should give the same string representation as the ToString method. To implement custom strings, the interface IFormattable defines the method ToString with two parameters: a string parameter for the format and an IFormatProvider parameter. The IFormatProvider parameter is not used in the sample code. You can use this parameter for different representations based on the culture, as the CultureInfo class implements this interface. Other classes that implement this interface are NumberFormatInfo and DateTimeFormatInfo. You can use these classes to configure string representations for numbers and DateTime passing instances to the second parameter of the ToString method. The implementation of the ToString method just uses the switch statement to return different strings based on the format string. To allow calling the ToString method directly just with the format string without a format provider, the ToString method is overloaded. This method in turn invokes the ToString method with two parameters: public class Person : IFormattable { public string FirstName { get; set; } public string LastName { get; set; } public override string ToString() => FirstName + " " + LastName; public virtual string ToString(string format) => ToString(format, null); public string ToString(string format, IFormatProvider formatProvider) { switch (format) { case null: case "A": return ToString(); case "F": return FirstName; case "L": return LastName; default: throw new FormatException($"invalid format string
457
Download from finelybook www.finelybook.com
{format}"); } } }
With this in place, you can invoke the ToString method explicitly by passing a format string or implicitly by using string interpolation. The implicit call makes use of the two-parameter ToString passing null with the IFormatProvider parameter (code file StringFormats/Program.cs): var p1 = new Person { FirstName = "Stephanie", LastName = "Nagel" }; Console.WriteLine(p1.ToString("F")); Console.WriteLine($"{p1:F}");
REGULAR EXPRESSIONS Regular expressions are one of those small technology aids that are incredibly useful in a wide range of programs. You can think of regular expressions as a mini-programming language with one specific purpose: to locate substrings within a large string expression. It is not a new technology; it originated in the UNIX environment and is commonly used with the Perl programming language, as well as with JavaScript. Regular expressions are supported by a number of .NET classes in the namespace System.Text.RegularExpressions. You can also find the use of regular expressions in various parts of the .NET Framework. For instance, they are used within the ASP.NET validation server controls. If you are not familiar with the regular expressions language, this section introduces both regular expressions and their related .NET classes. If you are familiar with regular expressions, you may want to just skim through this section to pick out the references to the .NET base classes. You might like to know that the .NET regular expression engine is designed to be mostly compatible with Perl 5 regular expressions, although it has a few extra features.
Introduction to Regular Expressions 458
Download from finelybook www.finelybook.com
The regular expressions language is designed specifically for string processing. It contains two features: A set of escape codes for identifying specific types of characters. You are probably familiar with the use of the * character to represent any substring in command-line expressions. (For example, the command Dir Re* lists the files with names beginning with Re.) Regular expressions use many sequences like this to represent items such as any one character, a word break, one optional character, and so on. A system for grouping parts of substrings and intermediate results during a search operation. With regular expressions, you can perform very sophisticated and high-level operations on strings. For example, you can do all the following: Identify (and perhaps either flag or remove) all repeated words in a string (for example, “The computer books books” to “The computer books”). Convert all words to title case (for example, “this is a Title” to “This Is A Title”). Convert all words longer than three characters to title case (for example, “this is a Title” to “This is a Title”). Ensure that sentences are properly capitalized. Separate the various elements of a URI (for example, given http://www.wrox.com, extract the protocol, computer name, filename, and so on). Of course, all these tasks can be performed in C# using the various methods on System.String and System.Text.StringBuilder. However, in some cases, this would require writing a fair amount of C# code. Using regular expressions, this code can normally be compressed to just a couple of lines. Essentially, you instantiate a System.Text.RegularExpressions.RegEx object (or, even simpler, invoke a static RegEx method), pass it the string to be processed, and pass in a regular expression (a string containing the instructions in the 459
Download from finelybook www.finelybook.com
regular expressions language), and you’re done. A regular expression string looks at first sight rather like a regular string, but interspersed with escape sequences and other characters that have a special meaning. For example, the sequence \b indicates the beginning or end of a word (a word boundary), so if you wanted to indicate you were looking for the characters th at the beginning of a word, you would search for the regular expression, \bth (that is, the sequence word boundary-t-h). If you wanted to search for all occurrences of th at the end of a word, you would write th\b (the sequence t-h-word boundary). However, regular expressions are much more sophisticated than that and include, for example, facilities to store portions of text that are found in a search operation. This section only scratches the surface of the power of regular expressions.
NOTE For more on regular expressions, please see Andrew Watt’s Beginning Regular Expressions (John Wiley & Sons, 2005). Suppose your application needed to convert U.S. phone numbers to an international format. In the United States, the phone numbers have the format 314-123-1234, which is often written as (314) 123-1234. When converting this national format to an international format, you have to include +1 (the country code of the United States) and add parentheses around the area code: +1 (314) 123-1234. As find-andreplace operations go, that is not too complicated. It would still require some coding effort if you were going to use the String class for this purpose (meaning you would have to write your code using the methods available from System.String). The regular expressions language enables you to construct a short string that achieves the same result. This section is intended only as a very simple example, so it concentrates on searching strings to identify certain substrings, not on modifying them. 460
Download from finelybook www.finelybook.com
The RegularExpressionsPlayground Example The regular expression samples in this chapter make use of the following namespaces: System System.Text.RegularExpressions
The rest of this section develops a short example called RegularExpressionsPlayground that illustrates some of the features of regular expressions, and how to use the .NET regular expressions engine in C# by performing and displaying the results of some searches. The text you are going to use as your sample document is part of the introduction to the previous edition of this book (code file RegularExpressionsPlayground/Program.cs): const string text = @"Professional C# 6 and .NET Core 1.0 provides complete coverage " + "of the latest updates, features, and capabilities, giving you " + "everything you need for C#. Get expert instruction on the latest " + "changes to Visual Studio 2015, Windows Runtime, ADO.NET, ASP.NET, " + "Windows Store Apps, Windows Workflow Foundation, and more, with " + "clear explanations, no-nonsense pacing, and valuable expert insight. " + "This incredibly useful guide serves as both tutorial and desk " + "reference, providing a professional-level review of C# architecture " + "and its application in a number of areas. You'll gain a solid " + "background in managed code and .NET constructs within the context of " + "the 2015 release, so you can get acclimated quickly and get back to work.";
NOTE 461
Download from finelybook www.finelybook.com
This code nicely illustrates the utility of verbatim strings that are prefixed by the @ symbol. This prefix is extremely helpful with regular expressions. This text is referred to as the input string. To get your bearings and get used to the regular expressions of .NET classes, you start with a basic plain-text search that does not feature any escape sequences or regular expression commands. Suppose that you want to find all occurrences of the string ion. This search string is referred to as the pattern. Using regular expressions and the input variable declared previously, you could write the following (code file RegularExpressionPlayground/Program.cs): public static void Find1(text) { const string pattern = "ion"; MatchCollection matches = Regex.Matches(text, pattern, RegexOptions.IgnoreCase | RegexOptions.ExplicitCapture); WriteMatches(text, matches); }
This code uses the static method Matches of the Regex class in the System.Text.RegularExpressions namespace. This method takes as parameters some input text, a pattern, and a set of optional flags taken from the RegexOptions enumeration. In this case, you have specified that all searching should be case-insensitive. The other flag, ExplicitCapture, modifies how the match is collected in a way that, for your purposes, makes the search a bit more efficient—you see why this is later in this chapter (although it does have other uses that we don’t explore here). Matches returns a reference to a MatchCollection object. A match is the technical term for the results of finding an instance of the pattern in the expression. It is represented by the class System.Text.RegularExpressions.Match. Therefore, you return a MatchCollection that contains all the matches, each represented by a Match object. In the preceding code, you simply iterate over the collection and use the Index property of the Match class, which returns the index in the input text where the match was found. The result of the Find1 method lists six matches with this output: 462
Download from finelybook www.finelybook.com
No. of Index: Index: Index: Index: Index: Index:
matches: 7, 172, 300, 334, 481, 535,
6 String: String: String: String: String: String:
ion, ion, ion, ion, ion, ion,
ofessional C# truction on t undation, and lanations, no ofessional-le lication in a
The following table details some of the RegexOptions enumerations. MEMBER NAME
DESCRIPTION CultureInvariant Specifies that the culture of the string is ignored. ExplicitCapture Modifies the way the match is collected by making sure that valid captures are the ones that are explicitly named. IgnoreCase Ignores the case of the string that is input. IgnorePatternWhitespace Removes unescaped whitespace from the string and enables comments that are specified with the pound or hash sign. Multiline Changes the characters ^ and $ so that they are applied to the beginning and end of each line and not just to the beginning and end of the entire string. RightToLeft Causes the inputted string to be read from right to left instead of the default left to right (ideal for some Asian and other languages that are read in this direction). Singleline Specifies a single-line mode where the meaning of the dot (.) is changed to match every character. So far, nothing is new from the preceding example apart from some .NET base classes. However, the power of regular expressions comes from that pattern string. The reason is that the pattern string is not limited to only plain text. As hinted earlier, it can also contain what are known as meta-characters, which are special characters that provide commands, as well as escape sequences, which work in much the same 463
Download from finelybook www.finelybook.com
way as C# escape sequences. They are characters preceded by a backslash (\) and have special meanings. For example, suppose you wanted to find words beginning with n. You could use the escape sequence \b, which indicates a word boundary (a word boundary is just a point where an alphanumeric character precedes or follows a whitespace character or punctuation symbol): const string pattern = @"\bn"; MatchCollection myMatches = Regex.Matches(input, pattern, RegexOptions.IgnoreCase | RegexOptions.ExplicitCapture);
Notice the @ character in front of the string. You want the \b to be passed to the .NET regular expressions engine at runtime—you don’t want the backslash intercepted by a well-meaning C# compiler that thinks it’s an escape sequence in your source code. If you want to find words ending with the sequence ure, you write this: const string pattern = @"ure\b";
If you want to find all words beginning with the letter a and ending with the sequence ure (which has as its only match the words architecture in the example), you have to put a bit more thought into your code. You clearly need a pattern that begins with \ba and ends with ure\b, but what goes in the middle? You need to somehow tell the applications that between the a and the ure there can be any number of characters as long as none of them are whitespace. In fact, the correct pattern looks like this: const string pattern = @"\ba\S*ure\b";
Eventually you will get used to seeing weird sequences of characters like this when working with regular expressions. It works quite logically. The escape sequence \S indicates any character that is not a whitespace character. The * is called a quantifier. It means that the preceding character can be repeated any number of times, including zero times. The sequence \S* means any number of characters as long as they are not whitespace characters. The preceding pattern, therefore, matches any single word that begins with a and ends with 464
Download from finelybook www.finelybook.com
ure.
The following table lists some of the main special characters or escape sequences that you can use. It is not comprehensive; a fuller list is available in the Microsoft documentation. SYMBOL DESCRIPTION ^ Beginning of input text $
End of input text
.
Any single character except the newline character (\ ) Preceding character may be repeated zero or more times Preceding character may be repeated one or more times Preceding character may be repeated zero or one time Any whitespace character
*
+
?
\s
\S
\b
EXAMPLE MATCHES ^B B, but only if first character in text X$ X, but only if last character in text i.ation isation, ization
ra*t
rt, rat, raat, raaat,
and so on ra+t
rat, raat, raaat and so on, but not rt
ra?t
rt
\sa
[space]a, \ta, \na (\t and \n have the same meanings as in C#) aF, rF, cF, but not \tf Any word ending in
Any character that isn’t \SF whitespace Word boundary ion\b
and rat only
ion \B
Any position that isn’t a \BX\B word boundary
Any X in the middle of a word
If you want to search for one of the meta-characters, you can do so by escaping the corresponding character with a backslash. For example, . 465
Download from finelybook www.finelybook.com
(a single period) means any single character other than the newline character, whereas \. means a dot. You can request a match that contains alternative characters by enclosing them in square brackets. For example, [1c] means one character that can be either 1 or c. If you wanted to search for any occurrence of the words map or man, you would use the sequence ma[np]. Within the square brackets, you can also indicate a range, for example [a-z], to indicate any single lowercase letter, [A-E] to indicate any uppercase letter between A and E (including the letters A and E themselves), or [0–9] to represent a single digit. A shorthand notation for [0-9] is \d. If you wanted to search for an integer (that is, a sequence that contains only the characters 0 through 9), you could write [0–9]+ or [\d]+. The ^ has a different meaning used within square brackets. Used outside square brackets, it marks the beginning of input text. Within square brackets, it means any character except the following.
NOTE The use of the + character specifies there must be at least one such digit, but there may be more than one—so this would match 9, 83, 854, and so on.
Displaying Results In this section, you code the RegularExpressionsPlayground example to get a feel for how regular expressions work. The core of the example is a method called WriteMatches, which writes out all the matches from a MatchCollection in a more detailed format. For each match, it displays the index of where the match was found in the input string, the string of the match, and a slightly longer string, which consists of the match plus up to 10 surrounding characters from the input text—up to five characters before the match and up to five afterward. (It is fewer than five characters if the match occurred within 466
Download from finelybook www.finelybook.com
five characters of the beginning or end of the input text.) In other words, a match on the word applications that occurs near the end of the input text quoted earlier when starting with the RegularExpressionPlayground example would display web applications imme (five characters before and after the match), but a match on the final word immediately would display ions immediately. (only one character after the match), because after that you get to the end of the string. This longer string enables you to see more clearly where the regular expression locates the match (code file RegularExpressionPlayground/Program.cs): public static void WriteMatches(string text, MatchCollection matches) { Console.WriteLine($"Original text was: \n\n{text}\n"); Console.WriteLine($"No. of matches: {matches.Count}"); foreach (Match nextMatch in matches) { int index = nextMatch.Index; string result = nextMatch.ToString(); int charsBefore = (index < 5) ? index : 5; int fromEnd = text.Length - index - result.Length; int charsAfter = (fromEnd < 5) ? fromEnd : 5; int charsToDisplay = charsBefore + charsAfter + result.Length; Console.WriteLine($"Index: {index}, \tString: {result}, \t" + "{text.Substring(index - charsBefore, charsToDisplay)}"); } }
The bulk of the processing in this method is devoted to the logic of figuring out how many characters in the longer substring it can display without overrunning the beginning or end of the input text. Note that you use another property on the Match object, Value, which contains the string identified for the match. Other than that, RegularExpressionsPlayground simply contains a number of methods with names such as Find1, Find2, and so on, which perform some of the searches based on the examples in this section. For example, Find2 looks for any string that contains a at the beginning of a word and ure at the end: 467
Download from finelybook www.finelybook.com
public static void Find2(string text) { string pattern = @"\ba\S*ure\b"; MatchCollection matches = Regex.Matches(text, pattern, RegexOptions.IgnoreCase); Console.WriteMatches(text, matches); }
Along with this is a simple Main method that you can edit to select one of the Find methods: public static void Main() { Find2(); Console.ReadLine(); }
The code also needs to make use of the RegularExpressions namespace: using System; using System.Text.RegularExpressions;
Running the example with the Find2 method shown previously gives this result: No. of matches: 1 Index: 506, String: architecture,
f C# architecture and
Matches, Groups, and Captures One nice feature of regular expressions is that you can group characters. It works the same way as compound statements in C#. In C#, you can group any number of statements by putting them in braces, and the result is treated as one compound statement. In regular expression patterns, you can group any characters (including meta-characters and escape sequences), and the result is treated as a single character. The only difference is that you use parentheses instead of braces. The resultant sequence is known as a group. For example, the pattern (an)+ locates any occurrences of the sequence an. The + quantifier applies only to the previous character, but because you have grouped the characters together, it now applies 468
Download from finelybook www.finelybook.com
to repeats of an treated as a unit. This means that if you apply (an)+ to the input text, bananas came to Europe late in the annals of history, the anan from bananas is identified; however, if you write an+, the program selects the ann from annals, as well as two separate sequences of an from bananas. The expression (an)+ identifies occurrences of an, anan, ananan, and so on, whereas the expression an+ identifies occurrences of an, ann, annn, and so on.
NOTE You might be wondering why with the preceding example (an)+ selects anan from the word “banana” but doesn’t identify either of the two occurrences of an from the same word. The rule is that matches must not overlap. If a couple of possibilities would overlap, then by default the longest possible sequence is matched. Groups are even more powerful than that. By default, when you form part of the pattern into a group, you are also asking the regular expression engine to remember any matches against just that group, as well as any matches against the entire pattern. In other words, you are treating that group as a pattern to be matched and returned in its own right. This can be extremely useful if you want to break up strings into component parts. For example, URIs have the format ://:, where the port is optional. An example of this is http://www.wrox.com:80. Suppose you want to extract the protocol, the address, and the port from a URI in which there may or may not be whitespace (but no punctuation) immediately following the URI. You could do so using this expression: \b(https?)(://)([.\w]+)([\s:]([\d]{2,5})?)\b
Here is how this expression works: First, the leading and trailing \b sequences ensure that you consider only portions of text that are entire words. Within that, the first group, (https?) identifies either the http or https protocol. ? after the s character specifies that this 469
Download from finelybook www.finelybook.com
character might come 0 or 1 times, thus http and https are allowed. The parentheses cause the protocol to be stored as a group. The second group is a simple one with (://). This just specifies the characters :// in that order. The third group ([.\w]+) is more interesting. This group contains a parenthetical expression of either the . character (dot) or any alphanumeric character specified by \w. These characters can be repeated any time, and thus matches www.wrox.com. The fourth group ([\s:]([\d]{2,5})?) is a longer expression that contains an inner group. The first parenthetical expression within this group allows either whitespace characters specified by \s or the colon. The inner group specifies a digit with [\d]. The expression {2,5} specifies that the preceding character (the digit) is allowed at least two times and not more than five times. The complete expression with the digits is allowed 0 or 1 time specified by ? that follows the inner group. Having this group optional is very important because the port number is not always specified in a URI; in fact, it is usually absent. Let’s define a string to run this expression on (code file RegularExpressionsPlayground/Program.cs): string line = "Hey, I've just found this amazing URI at " + "http:// what was it –oh yes https://www.wrox.com or " + "http://www.wrox.com:80";
The code to match with this expression uses the Matches method similar to what was used before. The difference is that you iterate all Group objects within the Match.Groups property and write the resulting index and value of every group to the console: string pattern = @"\b(https?)(://)([.\w]+)([\s:]([\d] {2,4})?)\b"; var r = new Regex(pattern); MatchCollection mc = r.Matches(line); foreach (Match m in mc) { Console.WriteLine($"Match: {m}"); foreach (Group g in m.Groups) { if (g.Success)
470
Download from finelybook www.finelybook.com
{ Console.WriteLine($"group index: {g.Index}, value: {g.Value}"); } } Console.WriteLine(); }
Running the program, these groups and values are found: Match group group group group group Match group group group group group group
https://www.wrox.com index 70, value: https://www.wrox.com index 70, value: https index 75, value: :// index 78, value: www.wrox.com index 90, value: http://www.wrox.com:80 index 94, value http://www.wrox.com:80 index 94, value: http index 98, value: :// index 101, value: www.wrox.com index 113, value: :80 index 114, value: 80
With this, the URI from the text is matched, and the different parts of the URI are nicely grouped. However, grouping offers more features. Some groups, such as the separation between the protocol and the address, can be ignored, and groups can also be named. Change the regular expression to name every group and to ignore some. Specifying ? at the beginning of a group names a group. For example, the regular expression groups for protocol, address, and port are named accordingly. You ignore groups using ?: at the group’s beginning. Don’t be confused by ?::// within the group. You are searching for ://, and the group is ignored by placing ?: in front of this: string pattern = @"\b(?https?)(?:://)" + @"(?[.\w]+)([\s:](?[\d]{2,4})?)\b";
To get the groups from a regular expression, the Regex class defines the method GetGroupNames. In the code snippet, all the group names are used with every match to write group name and values using the Groups property and indexer: 471
Download from finelybook www.finelybook.com
Regex r = new Regex(pattern, RegexOptions.ExplicitCapture); MatchCollection mc = r.Matches(line); foreach (Match m in mc) { Console.WriteLine($"match: {m} at {m.Index}"); foreach (var groupName in r.GetGroupNames()) { Console.WriteLine($"match for {groupName}: {m.Groups[groupName].Value}"); } }
When you run the program, you can see the name of the groups with their values: match: https://www.wrox.com at 70 match for 0: https://www.wrox.com match for protocol: https match for address: www.wrox.com match for port: match: http://www.wrox.com:80 at 94 match for 0: http://www.wrox.com:80 match for protocol: http match for address: www.wrox.com match for port: 80
STRINGS AND SPANS Today’s programming code often deals with long strings that need to be manipulated. For example, the Web API returns a long string in JSON or XML format. Splitting up such large strings into many smaller strings means that many objects are created, and the garbage collector has a lot to do afterward to free the memory from these strings when they are no longer needed. .NET Core has a new way around this: the Span type. This type is covered in Chapter 7, “Arrays.” This type references a slice of an array without the need to copy its contents. Likewise, Span can be used to reference a slice of a string without the need to copy the original content. The following code snippet creates a span from a very long string referenced by the variable text. It’s the same string as used previously 472
Download from finelybook www.finelybook.com
with regular expressions. A ReadOnlySpan is returned from the AsSpan extension method. AsSpan extends the string type and returns a ReadOnlySpan, as a string consists of char elements. Internally, Span makes use of the ref keyword to keep references. With the Slice method, a slice from the complete string is taken. The start is selected with the first parameter, the index where the text Visual is first found in the string. From there, 13 characters are used as defined by the second parameter. The result again is a ReadOnlySpan. Only with the ToArray method of the span is memory allocated. The ToArray method allocates memory needed by the slide. The char array then is passed to the constructor of the string type to create a new string (code file SpanWithStrings/Program.cs): int ix = text.IndexOf("Visual"); ReadOnlySpan spanToText = text.AsSpan(); ReadOnlySpan slice = spanToText.Slice(ix, 13); string newString = new string(slice.ToArray()); Console.WriteLine(newString);
The newly allocated string from the slice contains Visual Studio.
NOTE Spans with arrays are covered in Chapter 7. Read more about spans mapping to native memory and the ref keyword in Chapter 17, “Managed and Unmanaged Memory.” The Web API returning JSON or XML is covered in Chapter 32, “Web API.” You can read details about JSON and XML in Bonus Chapter 2, “XML and JSON,” which you can find online.
SUMMAR You have quite several available data types at your disposal when working with the .NET Framework. One of the most frequently used types in your applications (especially applications that focus on submitting and retrieving data) is the string data type. The 473
Download from finelybook www.finelybook.com
importance of string is the reason why this book has an entire chapter that focuses on how to use the string data type and manipulate it in your applications. When working with strings in the past, it was quite common to just slice and dice the strings as needed using concatenation. With the .NET Framework, you can use the StringBuilder class to accomplish a lot of this task with better performance than before. Another feature of strings is the string interpolation. In most applications this feature can make string handling a lot easier. Advanced string manipulation using regular expressions is an excellent tool to search through and validate your strings. Last, you’ve seen how the Span struct can be used efficiently to work with large strings without the need to allocate and release memory blocks. The next chapter is the first of two parts covering different collection classes.
474
Download from finelybook www.finelybook.com
10 Collections WHAT’S IN THIS CHAPTER? Understanding collection interfaces and types Working with lists, queues, and stacks Working with linked and sorted lists Using dictionaries and sets Evaluating performance
WROX.COM CODE DOWNLOADS FOR THIS CHAPTER The Wrox.com code downloads for this chapter are found at http://www.wrox.com on the Download Code tab. The source code is also available at https://github.com/ProfessionalCSharp/ProfessionalCSharp7 in the directory Collections. The code for this chapter is divided into the following major examples: List Samples Queue Sample Linked List Sample Sorted List Sample 475
Download from finelybook www.finelybook.com
Dictionary Sample Set Sample
OVERVIEW Chapter 7, “Arrays,” covers arrays and the interfaces implemented by the Array class. The size of arrays is fixed. If the number of elements is dynamic, you should use a collection class instead of an array. is a collection class that can be compared to arrays; but there are also other kinds of collections: queues, stacks, linked lists, dictionaries, and sets. The other collection classes have partly different APIs to access the elements in the collection and often a different internal structure for how the items are stored in memory. This chapter covers these collection classes and their differences, including performance differences. List
COLLECTION INTERFACES AND TYPES Most collection classes are in the System.Collections and System.Collections.Generic namespaces. Generic collection classes are located in the System.Collections.Generic namespace. Collection classes that are specialized for a specific type are located in the System.Collections.Specialized namespace. Thread-safe collection classes are in the System.Collections.Concurrent namespace. Immutable collection classes are in the System.Collections.Immutable namespace. Of course, there are also other ways to group collection classes. Collections can be grouped into lists, collections, and dictionaries based on the interfaces that are implemented by the collection class.
NOTE You can read detailed information about the interfaces IEnumerable and IEnumerator in Chapter 7. 476
Download from finelybook www.finelybook.com
The following table describes the most important interfaces implemented by collections and lists. INTERFACE IEnumerable
ICollection
IList
ISet
IDictionary
ILookup
DESCRIPTION The interface IEnumerable is required by the foreach statement. This interface defines the method GetEnumerator, which returns an enumerator that implements the IEnumerator interface. ICollectionis implemented by generic collection classes. With this you can get the number of items in the collection Count property), and copy the collection to an array (CopyTo method). You can also add and remove items from the collection (Add, Remove, Clear). The IList interface is for lists where elements can be accessed from their position. This interface defines an indexer, as well as ways to insert or remove items from specific positions (Insert, RemoveAt methods). IList derives from ICollection. This interface is implemented by sets. Sets allow combining different sets into a union, getting the intersection of two sets, and checking whether two sets overlap. ISet derives from ICollection. The interface IDictionary is implemented by generic collection classes that have a key and a value. With this interface all the keys and values can be accessed, items can be accessed with an indexer of type key, and items can be added or removed. Like the IDictionary interface, lookups have keys and values. However, with lookups the collection can contain multiple 477
Download from finelybook www.finelybook.com
values with one key. IComparer The interface IComparer is implemented by a comparer and used to sort elements inside a collection with the Compare method. IEqualityComparer IEqualityCompareris implemented by a comparer that can be used for keys in a dictionary. With this interface the objects can be compared for equality.
LISTS For resizable lists, .NET offers the generic class List. This class implements the IList, ICollection, IEnumerable, IList, ICollection, and IEnumerable interfaces. The following examples use the members of the class Racer as elements to be added to the collection to represent a Formula-1 racer. This class has five properties: Id, FirstName, LastName, Country, and the number of Wins. With the constructors of the class, the name of the racer and the number of wins can be passed to set the members. The method ToString is overridden to return the name of the racer. The class Racer also implements the generic interface IComparable for sorting racer elements and IFormattable (code file ListSamples/Racer.cs): public class Racer: IComparable, IFormattable { public int Id { get; } public string FirstName { get; } public string LastName { get; } public string Country { get; } public int Wins { get; } public Racer(int id, string firstName, string lastName, string country) :this(id, firstName, lastName, country, wins: 0) { } public Racer(int id, string firstName, string lastName, string country,int wins) {
478
Download from finelybook www.finelybook.com
Id = id; FirstName = firstName; LastName = lastName; Country = country; Wins = wins; } public override string ToString() => $"{FirstName} {LastName}"; public string ToString(string format, IFormatProvider formatProvider) { if (format == null) format = "N"; switch (format.ToUpper()) { case "N": // name return ToString(); case "F": // first name return FirstName; case "L": // last name return LastName; case "W": // Wins return $"{ToString()}, Wins: {Wins}"; case "C": // Country return $"{ToString()}, Country: {Country}"; case "A": // All return $"{ToString()}, Country: {Country} Wins: {Wins}"; default: throw new FormatException(String.Format(formatProvider, $"Format {format} is not supported")); } } public string ToString(string format) => ToString(format, null); public int CompareTo(Racer other) { int compare = LastName?.CompareTo(other?.LastName) ?? -1; if (compare == 0) { return FirstName?.CompareTo(other?.FirstName) ?? -1; } return compare; }
479
Download from finelybook www.finelybook.com
}
Creating Lists You can create list objects by invoking the default constructor. With the generic class List, you must specify the type for the values of the list with the declaration. The following code shows how to declare a List with int and a list with Racer elements. ArrayList is a nongeneric list that accepts any Object type for its elements. Using the default constructor creates an empty list. As soon as elements are added to the list, the capacity of the list is extended to allow 4 elements. If the fifth element is added, the list is resized to allow 8 elements. If 8 elements are not enough, the list is resized again to contain 16 elements. With every resize the capacity of the list is doubled. var intList = new List(); var racers = new List();
When the capacity of the list changes, the complete collection is reallocated to a new memory block. With the implementation of List, an array of type T is used. With reallocation, a new array is created, and Array.Copy copies the elements from the old array to the new array. To save time, if you know the number of elements in advance, that should be in the list; you can define the capacity with the constructor. The following example creates a collection with a capacity of 10 elements. If the capacity is not large enough for the elements added, the capacity is resized to 20 and then to 40 elements—doubled again: List intList = new List(10);
You can get and set the capacity of a collection by using the Capacity property: intList.Capacity = 20;
The capacity is not the same as the number of elements in the collection. The number of elements in the collection can be read with the Count property. Of course, the capacity is always larger or equal to 480
Download from finelybook www.finelybook.com
the number of items. As long as no element was added to the list, the count is 0: Console.WriteLine(intList.Count);
If you are finished adding elements to the list and don’t want to add any more, you can get rid of the unneeded capacity by invoking the TrimExcess method; however, because the relocation takes time, TrimExcess has no effect if the item count is more than 90 percent of capacity: intList.TrimExcess();
Collection Initializers You can also assign values to collections using collection initializers. The syntax of collection initializers is similar to array initializers, which are explained in Chapter 7. With a collection initializer, values are assigned to the collection within curly brackets at the time the collection is initialized: var intList = new List() {1, 2}; var stringList = new List() { "one", "two" };
NOTE Collection initializers are not reflected within the IL code of the compiled assembly. The compiler converts the collection initializer to invoke the Add method for every item from the initializer list.
Adding Elements You can add elements to the list with the Add method, shown in the following example. The generic instantiated type defines the parameter type of the Add method: var intList = new List();
481
Download from finelybook www.finelybook.com
intList.Add(1); intList.Add(2); var stringList = new List(); stringList.Add("one"); stringList.Add("two");
The variable racers is defined as type List. With the new operator, a new object of the same type is created. Because the class List was instantiated with the concrete class Racer, now only Racer objects can be added with the Add method. In the following sample code, five Formula-1 racers are created and added to the collection. The first three are added using the collection initializer, and the last two are added by explicitly invoking the Add method (code file ListSamples/Program.cs): var graham = new Racer(7, "Graham", "Hill", "UK", 14); var emerson = new Racer(13, "Emerson", "Fittipaldi", "Brazil", 14); var mario = new Racer(16, "Mario", "Andretti", "USA", 12); var racers = new List(20) {graham, emerson, mario}; racers.Add(new Racer(24, "Michael", "Schumacher", "Germany", 91)); racers.Add(new Racer(27, "Mika", "Hakkinen", "Finland", 20));
With the AddRange method of the List class, you can add multiple elements to the collection at once. The method AddRange accepts an object of type IEnumerable, so you can also pass an array as shown here (code file ListSamples/Program.cs): racers.AddRange(new Racer[] { new Racer(14, "Niki", "Lauda", "Austria", 25), new Racer(21, "Alain", "Prost", "France", 51)});
NOTE The collection initializer can be used only during declaration of the collection. The AddRange method can be invoked after the collection is initialized. In case you get the data dynamically after creating the collection, you need to invoke AddRange.
482
Download from finelybook www.finelybook.com
If you know some elements of the collection when instantiating the list, you can also pass any object that implements IEnumerable to the constructor of the class. This is very similar to the AddRange method (code file ListSamples/Program.cs): var racers = new List( new Racer[] { new Racer(12, "Jochen", "Rindt", "Austria", 6), new Racer(22, "Ayrton", "Senna", "Brazil", 41) });
Inserting Elements You can insert elements at a specified position with the Insert method (code file ListSamples/Program.cs): racers.Insert(3, new Racer(6, "Phil", "Hill", "USA", 3));
The method InsertRange offers the capability to insert a number of elements, similar to the AddRange method shown earlier. If the index set is larger than the number of elements in the collection, an exception of type ArgumentOutOfRangeException is thrown.
Accessing Elements All classes that implement the IList and IList interface offer an indexer, so you can access the elements by using an indexer and passing the item number. The first item can be accessed with an index value 0. By specifying racers[3], for example, you access the fourth element of the list: Racer r1 = racers[3];
When you use the Count property to get the number of elements, you can do a for loop to iterate through every item in the collection, and you can use the indexer to access every item (code file ListSamples/Program.cs): for (int i = 0; i < racers.Count; i++) { Console.WriteLine(racers[i]); }
483
Download from finelybook www.finelybook.com
NOTE Indexed access to collection classes is available with ArrayList, StringCollection, and List. Because List implements the interface IEnumerable, you can iterate through the items in the collection using the foreach statement as well (code file ListSamples/Program.cs): foreach (var r in racers) { Console.WriteLine(r); }
NOTE Chapter 7 explains how the foreach statement is resolved by the compiler to make use of the IEnumerable and IEnumerator interfaces.
Removing Elements You can remove elements by index or pass the item that should be removed. Here, the fourth element is removed from the collection: racers.RemoveAt(3);
You can also directly pass a Racer object to the Remove method to remove this element. Removing by index is faster, because here the collection must be searched for the item to remove. The Remove method first searches in the collection to get the index of the item with the IndexOf method and then uses the index to remove the item. IndexOf first checks whether the item type implements the interface IEquatable. If it does, the Equals method of this interface is invoked to find the item in the collection that is the same as the one passed to 484
Download from finelybook www.finelybook.com
the method. If this interface is not implemented, the Equals method of the Object class is used to compare the items. The default implementation of the Equals method in the Object class does a bitwise compare with value types, but compares only references with reference types.
NOTE Chapter 6, “Operators and Casts,” explains how you can override the Equals method. In the following example, the racer referenced by the variable graham is removed from the collection. The variable graham was created earlier when the collection was filled. Because the interface IEquatable and the Object.Equals method are not overridden with the Racer class, you cannot create a new object with the same content as the item that should be removed and pass it to the Remove method (code file ListSamples/Program.cs): if (!racers.Remove(graham)) { Console.WriteLine("object not found in collection"); }
The method RemoveRange removes a number of items from the collection. The first parameter specifies the index where the removal of items should begin; the second parameter specifies the number of items to be removed: int index = 3; int count = 5; racers.RemoveRange(index, count);
To remove all items with some specific characteristics from the collection, you can use the RemoveAll method. This method uses the Predicate parameter when searching for elements, which is discussed next. To remove all elements from the collection, use the Clear method defined with the ICollection interface. 485
Download from finelybook www.finelybook.com
Searching There are different ways to search for elements in the collection. You can get the index to the found item, or the item itself. You can use methods such as IndexOf, LastIndexOf, FindIndex, FindLastIndex, Find, and FindLast. To just check whether an item exists, the List class offers the Exists method. The method IndexOf requires an object as parameter and returns the index of the item if it is found inside the collection. If the item is not found, –1 is returned. Remember that IndexOf is using the IEquatable interface to compare the elements (code file ListSamples/Program.cs): int index1 = racers.IndexOf(mario);
With the IndexOf method, you can also specify that the complete collection should not be searched, instead specifying an index where the search should start and the number of elements that should be iterated for the comparison. Instead of searching a specific item with the IndexOf method, you can search for an item that has some specific characteristics that you can define with the FindIndex method. FindIndex requires a parameter of type Predicate: public int FindIndex(Predicate match);
The Predicate type is a delegate that returns a Boolean value and requires type T as parameter. If the predicate returns true, there’s a match, and the element is found. If it returns false, the element is not found, and the search continues. public delegate bool Predicate(T obj);
With the List class that is using Racer objects for type T, you can pass the address of a method that returns a bool and defines a parameter of type Racer to the FindIndex method. Finding the first racer of a specific country, you can create the FindCountry class as shown next. The FindCountryPredicate method has the signature and return type defined by the Predicate delegate. The Find method 486
Download from finelybook www.finelybook.com
uses the variable country to search for a country that you can pass with the constructor of the class (code file ListSamples/FindCountry.cs): public class FindCountry { public FindCountry(string country) => _country = country; private string _country; public bool FindCountryPredicate(Racer racer) => racer?.Country == _country; }
With the FindIndex method, you can create a new instance of the FindCountry class, pass a country string to the constructor, and pass the address of the Find method. In the following example, after FindIndex completes successfully, index2 contains the index of the first item where the Country property of the racer is set to Finland (code file ListSamples/Program.cs): int index2 = racers.FindIndex(new FindCountry("Finland").FindCountryPredicate);
Instead of creating a class with a handler method, you can use a lambda expression here as well. The result is the same as before. Now the lambda expression defines the implementation to search for an item where the Country property is set to Finland: int index3 = racers.FindIndex(r => r.Country == "Finland");
Like the IndexOf method, with the FindIndex method you can also specify the index where the search should start and the count of items that should be iterated through. To do a search for an index beginning from the last element in the collection, you can use the FindLastIndex method. The method FindIndex returns the index of the found item. Instead of getting the index, you can also go directly to the item in the collection. The Find method requires a parameter of type Predicate, much as the FindIndex method. The Find method in the following example searches for the first racer in the list that has the FirstName property set to Niki. Of course, you can also do a FindLast search to find the last 487
Download from finelybook www.finelybook.com
item that fulfills the predicate. Racer racer = racers.Find(r => r.FirstName == "Niki");
To get not only one but all the items that fulfill the requirements of a predicate, you can use the FindAll method. The FindAll method uses the same Predicate delegate as the Find and FindIndex methods. The FindAll method does not stop when the first item is found; instead the FindAll method iterates through every item in the collection and returns all items for which the predicate returns true. With the FindAll method invoked in the next example, all racer items are returned where the property Wins is set to more than 20. All racers who won more than 20 races are referenced from the bigWinners list: List bigWinners = racers.FindAll(r => r.Wins > 20);
Iterating through the variable bigWinners with a foreach statement gives the following result: foreach (Racer r in bigWinners) { Console.WriteLine($"{r:A}"); } Michael Schumacher, Germany Wins: 91 Niki Lauda, Austria Wins: 25 Alain Prost, France Wins: 51
The result is not sorted, but you’ll see that done next.
NOTE Format specifiers and the IFormattable interface is discussed in detail in Chapter 9, “Strings and Regular Expressions.”
Sorting The List class enables sorting its elements by using the Sort method. Sort uses the quick sort algorithm whereby all elements are 488
Download from finelybook www.finelybook.com
compared until the complete list is sorted. You can use several overloads of the Sort method. The arguments that can be passed are a generic delegate Comparison, the generic interface IComparer, and a range together with the generic interface IComparer: public public public public
void void void void
List.Sort(); List.Sort(Comparison); List.Sort(IComparer); List.Sort(Int32, Int32, IComparer);
Using the Sort method without arguments is possible only if the elements in the collection implement the interface IComparable. Here, the class Racer implements the interface IComparable to sort racers by the last name: racers.Sort();
If you need to do a sort other than the default supported by the item types, you need to use other techniques, such as passing an object that implements the IComparer interface. The class RacerComparer implements the interface IComparer for Racer types. This class enables you to sort by the first name, last name, country, or number of wins. The kind of sort that should be done is defined with the inner enumeration type CompareType. The CompareType is set with the constructor of the class RacerComparer. The interface IComparer defines the method Compare, which is required for sorting. In the implementation of this method, the Compare and CompareTo methods of the string and int types are used (code file ListSamples/RacerComparer.cs): public class RacerComparer : IComparer { public enum CompareType { FirstName, LastName, Country, Wins } private CompareType _compareType;
489
Download from finelybook www.finelybook.com
public RacerComparer(CompareType compareType) { _compareType = compareType; } public int Compare(Racer x, Racer y) { if (x == null && y == null) return 0; if (x == null) return -1; if (y == null) return 1; int result; switch (_compareType) { case CompareType.FirstName: return string.Compare(x.FirstName, y.FirstName); case CompareType.LastName: return string.Compare(x.LastName, y.LastName); case CompareType.Country: result = string.Compare(x.Country, y.Country); if (result == 0) return string.Compare(x.LastName, y.LastName); else return result; case CompareType.Wins: return x.Wins.CompareTo(y.Wins); default: throw new ArgumentException("Invalid Compare Type"); } } }
NOTE The Compare method returns 0 if the two elements passed to it are equal with the order. If a value less than 0 is returned, the first argument is less than the second. With a value larger than 0, the first argument is greater than the second. Passing null with an argument, the method shouldn’t throw a NullReferenceException. Instead, null should take its place before any other element; thus –1 is returned if the first argument is null, and +1 if the second argument is null.
490
Download from finelybook www.finelybook.com
You can now use an instance of the RacerComparer class with the Sort method. Passing the enumeration RacerComparer.CompareType.Country sorts the collection by the property Country: racers.Sort(new RacerComparer(RacerComparer.CompareType.Country));
Another way to do the sort is by using the overloaded Sort method, which requires a Comparison delegate: public void List.Sort(Comparison); Comparison is a delegate to a method that has two parameters of type T and a return type int. If the parameter values are equal, the method must return 0. If the first parameter is less than the second,
a value less than zero must be returned; otherwise, a value greater than zero is returned: public delegate int Comparison(T x, T y);
Now you can pass a lambda expression to the Sort method to do a sort by the number of wins. The two parameters are of type Racer, and in the implementation the Wins properties are compared by using the int method CompareTo. Also in the implementation, r2 and r1 are used in reverse order, so the number of wins is sorted in descending order. After the method has been invoked, the complete racer list is sorted based on the racer’s number of wins: racers.Sort((r1, r2) => r2.Wins.CompareTo(r1.Wins));
You can also reverse the order of a complete collection by invoking the Reverse method.
Read-Only Collections After collections are created they are read/write, of course; otherwise, you couldn’t fill them with any values. However, after the collection is filled, you can create a read-only collection. The List collection has the method AsReadOnly that returns an object of type ReadOnlyCollection. The class ReadOnlyCollection implements the same interfaces as List, but all methods and properties that 491
Download from finelybook www.finelybook.com
change the collection throw a NotSupportedException. Beside the interfaces of List, ReadOnlyCollection also implements the interfaces IReadOnlyCollection and IReadOnlyList. With the members of these interfaces, the collection cannot be changed.
QUEUES A queue is a collection whose elements are processed first in, first out (FIFO), meaning the item that is put first in the queue is read first. Examples of queues are standing in line at the airport, a human resources queue to process employee applicants, print jobs waiting to be processed in a print queue, and a thread waiting for the CPU in a round-robin fashion. Sometimes the elements of a queue differ in their priority. For example, in the queue at the airport, business passengers are processed before economy passengers. In this case, multiple queues can be used, one queue for each priority. At the airport this is easily handled with separate check-in queues for business and economy passengers. The same is true for print queues and threads. You can have an array or a list of queues whereby one item in the array stands for a priority. Within every array item there’s a queue, where processing happens using the FIFO principle.
NOTE Later in this chapter, a different implementation with a linked list is used to define a list of priorities. A queue is implemented with the Queue class in the namespace System.Collections.Generic. Internally, the Queue class uses an array of type T, similar to the List type. It implements the interfaces IEnumerable and ICollection, but it doesn’t implement ICollection because this interface defines Add and Remove methods that shouldn’t be available for queues. The Queue class does not implement the interface IList, so you cannot access the queue using an indexer. The queue just allows you to 492
Download from finelybook www.finelybook.com
add an item to it, which is put at the end of the queue (with the Enqueue method), and to get items from the head of the queue (with the Dequeue method). Figure 10-1 shows the items of a queue. The Enqueue method adds items to one end of the queue; the items are read and removed at the other end of the queue with the Dequeue method. Invoking the Dequeue method once more removes the next item from the queue.
FIGURE 10-1 Methods of the Queue class are described in the following table. SELECTED DESCRIPTION QUEUE MEMBERS Count Returns the number of items in the queue. Enqueue Adds an item to the end of the queue. Dequeue Reads and removes an item from the head of the queue. If there are no more items in the queue when the Dequeue method is invoked, an exception of type InvalidOperationException is thrown. Peek Reads an item from the head of the queue but does not remove the item. TrimExcess Resizes the capacity of the queue. The Dequeue method removes items from the queue, but it doesn’t resize the capacity of the queue. To get rid of the empty items at the beginning of the queue, use the TrimExcess method. When creating queues, you can use constructors similar to those used with the List type. The default constructor creates an empty queue, but you can also use a constructor to specify the capacity. As items are 493
Download from finelybook www.finelybook.com
added to the queue, the capacity is increased to hold 4, 8, 16, and 32 items if the capacity is not defined. Like the List class, the capacity is always doubled as required. The default constructor of the nongeneric Queue class is different because it creates an initial array of 32 empty items. With an overload of the constructor, you can also pass any other collection that implements the IEnumerable interface that is copied to the queue. The following example demonstrating the use of the Queue class is a document management application. One thread is used to add documents to the queue, and another thread reads documents from the queue and processes them. The items stored in the queue are of type Document. The Document class defines a title and content (code file QueueSample/Document.cs): public class Document { public string Title { get; } public string Content { get; } public Document(string title, string content) { Title = title; Content = content; } }
The DocumentManager class is a thin layer around the Queue class. It defines how to handle documents: adding documents to the queue with the AddDocument method and getting documents from the queue with the GetDocument method. Inside the AddDocument method, the document is added to the end of the queue using the Enqueue method. The first document from the queue is read with the Dequeue method inside GetDocument. Because multiple threads can access the DocumentManager concurrently, access to the queue is locked with the lock statement.
NOTE 494
Download from finelybook www.finelybook.com
Threading and the lock statement are discussed in Chapter 21, “Tasks and Parallel Programming.” is a read-only Boolean property that returns true if there are documents in the queue and false if not (code file QueueSample/DocumentManager.cs): IsDocumentAvailable
public class DocumentManager { private readonly object _syncQueue = new object(); private readonly Queue _documentQueue = new Queue(); public void AddDocument(Document doc) { lock (_syncQueue) { _documentQueue.Enqueue(doc); } } public Document GetDocument() { Document doc = null; lock (_syncQueue) { doc = _documentQueue.Dequeue(); } return doc; } public bool IsDocumentAvailable => _documentQueue.Count > 0; }
The class ProcessDocuments processes documents from the queue in a separate task. The only method that can be accessed from the outside is Start. In the Start method, a new task is instantiated. A ProcessDocuments object is created to start the task, and the Run method is defined as the start method of the task. The StartNew method of the TaskFactory (which is accessed from the static Factory property of the Task class) requires a delegate Action parameter where the address of the Run method can be passed to. The StartNew method 495
Download from finelybook www.finelybook.com
of the TaskFactory immediately starts the task. With the Run method of the ProcessDocuments class, an endless loop is defined. Within this loop, the property IsDocumentAvailable is used to determine whether there is a document in the queue. If so, the document is taken from the DocumentManager and processed. Processing in this example is writing information only to the console. In a real application, the document could be written to a file, written to the database, or sent across the network (code file QueueSample/ProcessDocuments.cs): public class ProcessDocuments { public static Task Start(DocumentManager dm) => Task.Run(new ProcessDocuments(dm).Run); protected ProcessDocuments(DocumentManager dm) => _documentManager = dm ?? throw new ArgumentNullExcption(nameof(dm)); private DocumentManager _documentManager; protected async Task Run() { while (true) { if (_documentManager.IsDocumentAvailable) { Document doc = _documentManager.GetDocument(); Console.WriteLine("Processing document {0}", doc.Title); } await Task.Delay(new Random().Next(20)); } } }
In the Main method of the application, a DocumentManager object is instantiated, and the document processing task is started. Then 1,000 documents are created and added to the DocumentManager (code file QueueSample/Program.cs): public class Program { public static async Task Main()
496
Download from finelybook www.finelybook.com
{ var dm = new DocumentManager(); Task processDocuments = ProcessDocuments.Start(dm); // Create documents and add them to the DocumentManager for (int i = 0; i < 1000; i++) { var doc = new Document($"Doc {i.ToString()}", "content"); dm.AddDocument(doc); Console.WriteLine($"Added document {doc.Title}"); await Task.Delay(new Random().Next(20)); } await processDocuments; Console.ReadLine(); } }
NOTE With the QueueSample, the Main method is declared to return a Task. This feature requires at least C# 7.1. You can read more about asynchronous Main methods in Chapter 15, “Asynchronous Programming.” When you start the application, the documents are added to and removed from the queue, and you get output like the following: Added document Doc 279 Processing document Doc Added document Doc 280 Processing document Doc Added document Doc 281 Processing document Doc Processing document Doc Processing document Doc Processing document Doc Added document Doc 282 Processing document Doc Added document Doc 283 Processing document Doc
236 237 238 239 240 241 242 243
497
Download from finelybook www.finelybook.com
A real-life scenario using the task described with the sample application might be an application that processes documents received with a Web API service.
STACKS A stack is another container that is very similar to the queue. You just use different methods to access the stack. The item that is added last to the stack is read first, so the stack is a last in, first out (LIFO) container. Figure 10-2 shows the representation of a stack where the Push method adds an item to the stack, and the Pop method gets the item that was added last.
FIGURE 10-2 Like the Queue class, the Stack class implements the interfaces IEnumerable and ICollection. Members of the Stack class are listed in the following table. 498
Download from finelybook www.finelybook.com
SELECTED STACK MEMBERS
DESCRIPTION
Count
Returns the number of items in the stack. Adds an item on top of the stack. Removes and returns an item from the top of the stack. If the stack is empty, an exception of type InvalidOperationException is thrown. Returns an item from the top of the stack but does not remove the item. Checks whether an item is in the stack and returns true if it is.
Push Pop
Peek
Contains
In this example, three items are added to the stack with the Push method. With the foreach method, all items are iterated using the IEnumerable interface. The enumerator of the stack does not remove the items; it just returns them item by item (code file StackSample/Program.cs): var alphabet = new Stack(); alphabet.Push('A'); alphabet.Push('B'); alphabet.Push('C'); foreach (char item in alphabet) { Console.Write(item); } Console.WriteLine();
Because the items are read in order from the last item added to the first, the following result is produced: CBA
Reading the items with the enumerator does not change the state of the items. With the Pop method, every item that is read is also removed from the stack. This way, you can iterate the collection using a while loop and verify the Count property if items still exist: var alphabet = new Stack();
499
Download from finelybook www.finelybook.com
alphabet.Push('A'); alphabet.Push('B'); alphabet.Push('C'); Console.Write("First iteration: "); foreach (char item in alphabet) { Console.Write(item); } Console.WriteLine(); Console.Write("Second iteration: "); while (alphabet.Count > 0) { Console.Write(alphabet.Pop()); } Console.WriteLine();
The result gives CBA twice—once for each iteration. After the second iteration, the stack is empty because the second iteration used the Pop method: First iteration: CBA Second iteration: CBA
LINKED LISTS is a doubly linked list, whereby one element references the next and the previous one, as shown in Figure 10-3. This way you can easily walk forward through the complete list by moving to the next element, or backward by moving to the previous element. LinkedList
FIGURE 10-3 The advantage of a linked list is that if items are inserted anywhere in the list, the linked list is very fast. When an item is inserted, only the Next reference of the previous item and the Previous reference of the 500
Download from finelybook www.finelybook.com
next item must be changed to reference the inserted item. With the List class, when an element is inserted all subsequent elements must be moved. Of course, there’s also a disadvantage with linked lists. Items of linked lists can be accessed only one after the other. It takes a long time to find an item that’s somewhere in the middle or at the end of the list. A linked list cannot just store the items inside the list; together with every item, the linked list must have information about the next and previous items. That’s why the LinkedList contains items of type LinkedListNode. With the class LinkedListNode, you can get to the next and previous items in the list. The LinkedListNode class defines the properties List, Next, Previous, and Value. The List property returns the LinkedList object that is associated with the node. Next and Previous are for iterating through the list and accessing the next or previous item. Value returns the item that is associated with the node. Value is of type T. The LinkedList class itself defines members to access the first (First) and last (Last) item of the list, to insert items at specific positions (AddAfter, AddBefore, AddFirst, AddLast), to remove items from specific positions (Remove, RemoveFirst, RemoveLast), and to find elements where the search starts from either the beginning (Find) or the end (FindLast) of the list. The sample application to demonstrate linked lists uses a linked list together with a list. The linked list contains documents as in the queue example, but the documents have an additional priority associated with them. The documents will be sorted inside the linked list depending on the priority. If multiple documents have the same priority, the elements are sorted according to the time when the document was inserted. Figure 10-4 describes the collections of the sample application. LinkedList is the linked list containing all the Document objects. The figure shows the title and priority of the documents. The title indicates when the document was added to the list: The first document added has the title "One", the second document has the title "Two", and so on. You can see that the documents One and Four have 501
Download from finelybook www.finelybook.com
the same priority, 8, but because One was added before Four, it is earlier in the list.
FIGURE 10-4 When new documents are added to the linked list, they should be added after the last document that has the same priority. The 502
Download from finelybook www.finelybook.com
LinkedList collection contains elements of type LinkedListNode. The class LinkedListNode adds Next and Previous properties to walk from one node to the next. For referencing such elements, the List is defined as List. For fast access to the last document of every priority, the collection List contains up to 10
elements, each referencing the last document of every priority. In the upcoming discussion, the reference to the last document of every priority is called the priority node. Using the previous example, the Document class is extended to contain the priority, which is set with the constructor of the class (code file LinkedListSample/Document.cs): public class Document { public string Title { get; } public string Content { get; } public byte Priority { get; } public Document(string title, string content, byte priority) { Title = title; Content = content; Priority = priority; } }
The heart of the solution is the PriorityDocumentManager class. This class is very easy to use. With the public interface of this class, new Document elements can be added to the linked list, the first document can be retrieved, and for testing purposes it also has a method to display all elements of the collection as they are linked in the list. The class PriorityDocumentManager contains two collections. The collection of type LinkedList contains all documents. The collection of type List contains references of up to 10 elements that are entry points for adding new documents with a specific priority. Both collection variables are initialized with the constructor of the class PriorityDocumentManager. The list collection is also initialized with null (code file LinkedListSample/PriorityDocumentManager.cs): 503
Download from finelybook www.finelybook.com
public class PriorityDocumentManager { private readonly LinkedList _documentList; // priorities 0.9 private readonly List _priorityNodes; public PriorityDocumentManager() { _documentList = new LinkedList(); _priorityNodes = new List(10); for (int i = 0; i < 10; i++) { _priorityNodes.Add(new LinkedListNode(null)); } }
Part of the public interface of the class is the method AddDocument. AddDocument does nothing more than call the private method AddDocumentToPriorityNode. The reason for having the implementation inside a different method is that AddDocumentToPriorityNode may be called recursively, as you will see soon: public void AddDocument(Document d) { if (d == null) throw new ArgumentNullException(nameof(d)); AddDocumentToPriorityNode(d, d.Priority); }
The first action that is done in the implementation of AddDocumentToPriorityNode is a check to see if the priority fits in the allowed priority range. Here, the allowed range is between 0 and 9. If a wrong value is passed, an exception of type ArgumentException is thrown. Next, you check whether there’s already a priority node with the same priority as the priority that was passed. If there’s no such priority node in the list collection, AddDocumentToPriorityNode is invoked recursively with the priority value decremented to check for a priority node with the next lower priority. If there’s no priority node with the same priority or any priority with a lower value, the document can be safely added to the end of the linked list by calling the method AddLast. In addition, the linked list node is 504
Download from finelybook www.finelybook.com
referenced by the priority node that’s responsible for the priority of the document. If there’s an existing priority node, you can get the position inside the linked list where the document should be inserted. In the following example, you must determine whether a priority node already exists with the correct priority, or if there’s just a priority node that references a document with a lower priority. In the first case, you can insert the new document after the position referenced by the priority node. Because the priority node always must reference the last document with a specific priority, the reference of the priority node must be set. It gets more complex if only a priority node referencing a document with a lower priority exists. Here, the document must be inserted before all documents with the same priority as the priority node. To get the first document of the same priority, a while loop iterates through all linked list nodes, using the Previous property, until a linked list node is reached that has a different priority. This way, you know the position where the document must be inserted, and the priority node can be set: private void AddDocumentToPriorityNode(Document doc, int priority) { if (priority > 9 || priority < 0) throw new ArgumentException("Priority must be between 0 and 9"); if (_priorityNodes[priority].Value == null) { ––priority; if (priority = 3 orderby numberYears descending, r.LastName select new { Name = r.FirstName + " " + r.LastName, TimesChampion = numberYears }; foreach (var r in query) { Console.WriteLine($"{r.Name} {r.TimesChampion}"); } }
The result is shown here: Michael Schumacher 7 Juan Manuel Fangio 5 Lewis Hamilton 4 Alain Prost 4 Sebastian Vettel 4 Jack Brabham 3 Niki Lauda 3
601
Download from finelybook www.finelybook.com
Nelson Piquet 3 Ayrton Senna 3 Jackie Stewart 3
The Sum method summarizes all numbers of a sequence and returns the result. In the next example, Sum is used to calculate the sum of all race wins for a country. First the racers are grouped based on country; then, with the new anonymous type created, the Wins property is assigned to the sum of all wins from a single country (code file EnumerableSample/LinqSamples.cs): static void AggregateSum() { var countries = (from c in from r in Formula1.GetChampions() group r by r.Country into c select new { Country = c.Key, Wins = (from r1 in c select r1.Wins).Sum() } orderby c.Wins descending, c.Country select c).Take(5); foreach (var country in countries) { Console.WriteLine("{country.Country} {country.Wins}"); } }
The most successful countries based on the Formula-1 race champions are as follows: UK 216 Germany 162 Brazil 78 France 51 Finland 45
The methods Min, Max, Average, and Aggregate are used in the same way as Count and Sum. Min returns the minimum number of the values in the collection, and Max returns the maximum number. Average calculates the average number. With the Aggregate method you can 602
Download from finelybook www.finelybook.com
pass a lambda expression that performs an aggregation of all the values.
Conversion Operators In this chapter you’ve already seen that query execution is deferred until the items are accessed. Using the query within an iteration, the query is executed. With a conversion operator, the query is executed immediately, and the result is returned in an array, a list, or a dictionary. In the next example, the ToList extension method is invoked to immediately execute the query and put the result into a List (code file EnumerableSample/LinqSamples.cs): static void ToList() { List racers = (from r in Formula1.GetChampions() where r.Starts > 200 orderby r.Starts descending select r).ToList(); foreach (var racer in racers) { Console.WriteLine($"{racer} {racer:S}"); } }
The result of this query shows Jenson Button first: Jenson Button 306 Fernando Alonso 291 Michael Schumacher 287 Kimi Räikkönen 271 Nico Rosberg 207 Nelson Piquet 204
It’s not always that simple to get the returned objects into the list. For example, for fast access from a car to a racer within a collection class, you can use the new class Lookup.
NOTE 603
Download from finelybook www.finelybook.com
The Dictionary class supports only a single value for a key. With the class Lookup from the namespace System.Linq, you can have multiple values for a single key. These classes are covered in detail in Chapter 10, “Collections.” Using the compound from query, the sequence of racers and cars is flattened, and an anonymous type with the properties Car and Racer is created. With the lookup that is returned, the key should be of type string referencing the car, and the value should be of type Racer. To make this selection, you can pass a key and an element selector to one overload of the ToLookup method. The key selector references the Car property, and the element selector references the Racer property (code file EnumerableSample/LinqSamples.cs): static void ToLookup() { var racers = (from r in Formula1.GetChampions() from c in r.Cars select new { Car = c, Racer = r }).ToLookup(cr => cr.Car, cr => cr.Racer); if (racers.Contains("Williams")) { foreach (var williamsRacer in racers["Williams"]) { Console.WriteLine(williamsRacer); } } }
The result of all “Williams” champions accessed using the indexer of the Lookup class is shown here: Alan Jones Keke Rosberg Nigel Mansell Alain Prost Damon Hill
604
Download from finelybook www.finelybook.com
Jacques Villeneuve
In case you need to use a LINQ query over an untyped collection, such as the ArrayList, you can use the Cast method. In the following example, an ArrayList collection that is based on the Object type is filled with Racer objects. To make it possible to define a strongly typed query, you can use the Cast method (code file EnumerableSample/LinqSamples.cs): static void ConvertWithCast { var list = new System.Collections.ArrayList(Formula1.GetChampions() as System.Collections.ICollection); var query = from r in list.Cast() where r.Country == "USA" orderby r.Wins descending select r; foreach (var racer in query) { Console.WriteLine("{racer:A}", racer); } }
The results include the only Formula 1 champions from the U.S.: Mario Andretti, country: USA, starts: 128, wins: 12 Phil Hill, country: USA, starts: 48, wins: 3
Generation Operators The generation operators Range, Empty, and Repeat are not extension methods, but normal static methods that return sequences. With LINQ to Objects, these methods are available with the Enumerable class. Have you ever needed a range of numbers filled? Nothing is easier than using the Range method. This method receives the start value with the first parameter and the number of items with the second parameter (code file EnumerableSample/LinqSamples.cs): static void GenerateRange()
605
Download from finelybook www.finelybook.com
{ var values = Enumerable.Range(1, 20); foreach (var item in values) { Console.Write($"{item} ", item); } Console.WriteLine(); }
NOTE The Range method does not return a collection filled with the values as defined. This method does a deferred query execution like the other methods. It returns a RangeEnumerator that simply does a yield return with the values incremented. Of course, the result now looks like this: 1 2 3 4 5 6 7 8 9 10 11 12 13 14 15 16 17 18 19 20
You can combine the result with other extension methods to get a different result—for example, using the Select extension method: var values = Enumerable.Range(1, 20).Select(n => n * 3);
The Empty method returns an iterator that does not return values. This can be used for parameters that require a collection for which you can pass an empty collection. The Repeat method returns an iterator that returns the same value a specific number of times.
PARALLEL LINQ The class ParallelEnumerable in the System.Linq namespace splits the work of queries across multiple threads that run simultaneously. Although the Enumerable class defines extension methods to the IEnumerable interface, most extension methods of the ParallelEnumerable class are extensions for the class 606
Download from finelybook www.finelybook.com
ParallelQuery. One important exception is the AsParallel method, which extends IEnumerable and returns ParallelQuery, so a normal collection class can be queried
in
a parallel manner.
Parallel Queries To demonstrate Parallel LINQ (PLINQ), a large collection is needed. With small collections you don’t see any effect when the collection fits inside the CPU’s cache. In the following code, a large int collection is filled with random values (code file ParallelLinqSample/Program.cs): static IEnumerable SampleData() { const int arraySize = 50000000; var r = new Random(); return Enumerable.Range(0, arraySize).Select(x => r.Next(140)).ToList(); }
Now you can use a LINQ query to filter the data, do some calculations, and get an average of the filtered data. The query defines a filter with the where clause to summarize only the items with values < 20, and then the aggregation function sum is invoked. The only difference to the LINQ queries you’ve seen so far is the call to the AsParallel method: static void LinqQuery(IEnumerable data) { var res = (from x in data.AsParallel() where Math.Log(x) < 4 select x).Average(); //... }
Like the LINQ queries shown already, the compiler changes the syntax to invoke the methods AsParallel, Where, Select, and Average. AsParallel is defined with the ParallelEnumerable class to extend the IEnumerable interface, so it can be called with a simple array. AsParallel returns ParallelQuery. Because of the returned type, the Where method chosen by the compiler is ParallelEnumerable.Where instead of Enumerable.Where. In the 607
Download from finelybook www.finelybook.com
following code, the Select and Average methods are from ParallelEnumerable as well. In contrast to the implementation of the Enumerable class, with the ParallelEnumerable class the query is partitioned so that multiple threads can work on the query. The collection can be split into multiple parts whereby different threads work on each part to filter the remaining items. After the partitioned work is completed, merging must occur to get the summary result of all parts: static void ExtensionMethods(IEnumerable data) { var res = data.AsParallel() .Where(x => Math.Log(x) < 4) .Select(x => x).Average(); //... }
When you run this code, you can also start the task manager, so you can confirm that all CPUs of your system are busy. If you remove the AsParallel method, multiple CPUs might not be used. Of course, if you don’t have multiple CPUs on your system, then don’t expect to see an improvement with the parallel version.
Partitioners The AsParallel method is an extension not only to the IEnumerable interface, but also to the Partitioner class. With this you can influence the partitions to be created. The Partitioner class is defined within the namespace System.Collections.Concurrent and has different variants. The Create method accepts arrays or objects implementing IList. Depending on that, as well as on the parameter loadBalance , which is of type Boolean and available with some overloads of the method, a different partitioner type is returned. For arrays, the classes DynamicPartitionerForArray and StaticPartitionerForArray, are used. Both of which derive from the abstract base class OrderablePartitioner. In the following example, the code from the “Parallel Queries” section is changed to manually create a partitioner instead of relying on the 608
Download from finelybook www.finelybook.com
default one (code file ParallelLinqSample/Program.cs): static void UseAPartitioner(IList data) { var result = (from x in Partitioner.Create(data, true).AsParallel() where Math.Log(x) < 4 select x).Average(); //... }
You can also influence the parallelism by invoking the methods WithExecutionMode and WithDegreeOfParallelism. With WithExecutionMode you can pass a value of ParallelExecutionMode, which can be Default or ForceParallelism. By default, Parallel LINQ avoids parallelism with high overhead. With the method WithDegreeOfParallelism you can pass an integer value to specify the maximum number of tasks that should run in parallel. This is useful if not all CPU cores should be used by the query.
NOTE You can read more about tasks and threads in Chapter 21, “Tasks and Parallel Programming.”
Cancellation .NET offers a standard way to cancel long-running tasks, and this is also true for Parallel LINQ. To cancel a long-running query, you can add the method WithCancellation to the query and pass a CancellationToken to the parameter. The CancellationToken is created from the CancellationTokenSource. The query is run in a separate thread where the exception of type OperationCanceledException is caught. This exception is fired if the query is cancelled. From the main thread the task can be cancelled by invoking the Cancel method of the CancellationTokenSource (code file ParallelLinqSample/Program.cs): 609
Download from finelybook www.finelybook.com
static void UseCancellation(IEnumerable data) { var cts = new CancellationTokenSource(); Task.Run(() => { try { var res = (from x in data.AsParallel().WithCancellation(cts.Token) where Math.Log(x) < 4 select x).Average(); Console.WriteLine($"query finished, sum: {res}"); } catch (OperationCanceledException ex) { Console.WriteLine(ex.Message); } }); Console.WriteLine("query started"); Console.Write("cancel? "); string input = ReadLine(); if (input.ToLower().Equals("y")) { // cancel! cts.Cancel(); } }
NOTE You can read more about cancellation and the CancellationToken in Chapter 21.
EXPRESSION TREES With LINQ to Objects, the extension methods require a delegate type as parameter; this way, a lambda expression can be assigned to the parameter. Lambda expressions can also be assigned to parameters of type Expression. The C# compiler defines different behavior for 610
Download from finelybook www.finelybook.com
lambda expressions depending on the type. If the type is Expression, the compiler creates an expression tree from the lambda expression and stores it in the assembly. The expression tree can be analyzed during runtime and optimized for querying against the data source. Let's turn to a query expression that was used previously: var brazilRacers = from r in racers where r.Country == "Brazil" orderby r.Wins select r;
The preceding query expression uses the extension methods Where, OrderBy, and Select. The Enumerable class defines the Where extension method with the delegate type Func as parameter predicate: public static IEnumerable Where( this IEnumerable source, Func predicate);
This way, the lambda expression is assigned to the predicate. Here, the lambda expression is like an anonymous method, as explained earlier: Func predicate = r => r.Country == "Brazil";
The Enumerable class is not the only class for defining the Where extension method. The Where extension method is also defined by the class Queryable. This class has a different definition of the Where extension method: public static IQueryable Where( this IQueryable source, Expression predicate);
Here, the lambda expression is assigned to the type Expression, which behaves differently: Expression predicate = r => r.Country == "Brazil";
Instead of using delegates, the compiler emits an expression tree to the assembly. The expression tree can be read during runtime. Expression trees are built from classes derived from the abstract base class 611
Download from finelybook www.finelybook.com
Expression. The Expression
class is not the same as Expression. Some of the expression classes that inherit from Expression include BinaryExpression, ConstantExpression, InvocationExpression, LambdaExpression, NewExpression, NewArrayExpression, TernaryExpression, UnaryExpression, and more. The compiler creates an expression tree resulting from the lambda expression. For example, the lambda expression r.Country == "Brazil" makes use of ParameterExpression, MemberExpression, ConstantExpression, and MethodCallExpression to create a tree and store the tree in the assembly. This tree is then used during runtime to create an optimized query to the underlying data source. With the sample application, the method DisplayTree is implemented to display an expression tree graphically on the console. In the following example, an Expression object can be passed, and depending on the expression type some information about the expression is written to the console. Depending on the type of the expression, DisplayTree is called recursively (code file ExpressionTreeSample/Program.cs): static void DisplayTree(int indent, string message, Expression expression) { string output = $"{string.Empty.PadLeft(indent, '>')} {message} " + $"! NodeType: {expression.NodeType}; Expr: {expression}"; indent++; switch (expression.NodeType) { case ExpressionType.Lambda: Console.WriteLine(output); LambdaExpression lambdaExpr = (LambdaExpression)expression; foreach (var parameter in lambdaExpr.Parameters) { DisplayTree(indent, "Parameter", parameter); } DisplayTree(indent, "Body", lambdaExpr.Body); break; case ExpressionType.Constant: ConstantExpression constExpr =
612
Download from finelybook www.finelybook.com
(ConstantExpression)expression; Console.WriteLine($"{output} Const Value: {constExpr.Value}"); break; case ExpressionType.Parameter: ParameterExpression paramExpr = (ParameterExpression)expression; Console.WriteLine($"{output} Param Type: {paramExpr.Type.Name}"); break; case ExpressionType.Equal: case ExpressionType.AndAlso: case ExpressionType.GreaterThan: BinaryExpression binExpr = (BinaryExpression)expression; if (binExpr.Method != null) { Console.WriteLine($"{output} Method: {binExpr.Method.Name}"); } else { Console.WriteLine(output); } DisplayTree(indent, "Left", binExpr.Left); DisplayTree(indent, "Right", binExpr.Right); break; case ExpressionType.MemberAccess: MemberExpression memberExpr = (MemberExpression)expression; Console.WriteLine($"{output} Member Name: {memberExpr.Member.Name}, " + " Type: {memberExpr.Expression}"); DisplayTree(indent, "Member Expr", memberExpr.Expression); break; default: Console.WriteLine(); Console.WriteLine($"{expression.NodeType} {expression.Type.Name}"); break; } }
NOTE 613
Download from finelybook www.finelybook.com
The method DisplayTree does not deal with all expression types— only the types that are used with the following example expression. The expression that is used for showing the tree is already well known. It’s a lambda expression with a Racer parameter, and the body of the expression takes racers from Brazil only if they have won more than six races: Expression expression = r => r.Country == "Brazil" && r.Wins > 6;
Looking at the tree result, you can see from the output that the lambda expression consists of a Parameter and an AndAlso node type. The AndAlso node type has an Equal node type to the left and a GreaterThan node type to the right. The Equal node type to the left of the AndAlso node type has a MemberAccess node type to the left and a Constant node type to the right, and so on: Lambda! NodeType: Lambda; Expr: r => ((r.Country == "Brazil") AndAlso (r.Wins > 6)) > Parameter! NodeType: Parameter; Expr: r Param Type: Racer > Body! NodeType: AndAlso; Expr: ((r.Country == "Brazil") AndAlso (r.Wins > 6)) >> Left! NodeType: Equal; Expr: (r.Country == "Brazil") Method: op_Equality >>> Left! NodeType: MemberAccess; Expr: r.Country Member Name: Country, Type: String >>>> Member Expr! NodeType: Parameter; Expr: r Param Type: Racer >>> Right! NodeType: Constant; Expr: "Brazil" Const Value: Brazil >> Right! NodeType: GreaterThan; Expr: (r.Wins > 6) >>> Left! NodeType: MemberAccess; Expr: r.Wins Member Name: Wins, Type: Int32 >>>> Member Expr! NodeType: Parameter; Expr: r Param Type: Racer >>> Right! NodeType: Constant; Expr: 6 Const Value: 6
Examples where the Expression type is used are with the Entity Framework Core and the client provider for WCF Data Services. These technologies define methods with Expression parameters. This way 614
Download from finelybook www.finelybook.com
the LINQ provider accessing the database can create a runtimeoptimized query by reading the expressions to get the data from the database.
LINQ PROVIDERS .NET includes several LINQ providers. A LINQ provider implements the standard query operators for a specific data source. LINQ providers might implement more extension methods than are defined by LINQ, but the standard operators must at least be implemented. LINQ to XML implements additional methods that are particularly useful with XML, such as the methods Elements, Descendants, and Ancestors defined by the class Extensions in the System.Xml.Linq namespace. Implementation of the LINQ provider is selected based on the namespace and the type of the first parameter. The namespace of the class that implements the extension methods must be opened; otherwise, the extension class is not in scope. The parameter of the Where method defined by LINQ to Objects and the Where method defined by LINQ to Entities is different. The Where method of LINQ to Objects is defined with the Enumerable class: public static IEnumerable Where( this IEnumerable source, Func predicate);
Inside the System.Linq namespace is another class that implements the operator Where. This implementation is used by LINQ to Entities. You can find the implementation in the class Queryable: public static IQueryable Where( this IQueryable source, Expression predicate);
Both classes are implemented in the System.Core assembly in the System.Linq namespace. How does the compiler select what method to use, and what’s the magic with the Expression type? The lambda expression is the same regardless of whether it is passed with a 615
Download from finelybook www.finelybook.com
Func parameter or an Expression parameter—only the compiler behaves differently. The selection is done based on the source parameter. The method that
matches best based on its parameters is chosen by the compiler. Properties of Entity Framework Core contexts are of type DbSet. DbSet implements IQueryable, and thus Entity Framework Core uses the Where method of the Queryable class.
SUMMARY This chapter described and demonstrated the LINQ query and the language constructs on which the query is based, such as extension methods and lambda expressions. You’ve looked at the various LINQ query operators—not only for filtering and ordering of data sources, but also for partitioning, grouping, doing conversions, joins, and so on. With Parallel LINQ, you’ve seen how longer queries can easily be parallelized. Another important concept of this chapter is the expression tree. Expression trees enable building the query to the data source at runtime because the tree is stored in the assembly. You can read about its great advantages in Chapter 26. LINQ is a very in-depth topic, and you can see Bonus Chapter 2 for information on using LINQ with XML data. Other third-party providers are also available for download, such as LINQ to MySQL, LINQ to Amazon, LINQ to Flickr, LINQ to LDAP, and LINQ to SharePoint. No matter what data source you have, with LINQ you can use the same query syntax. The next chapter covers functional programming. Many of the newer C# features are based on this programming paradigm.
616
Download from finelybook www.finelybook.com
13 Functional Programming with C# WHAT’S IN THIS CHAPTER? Functional programming overview Expression-bodied members Extension methods The using static declaration Local functions Tuples Pattern matching
WROX.COM CODE DOWNLOADS FOR THIS CHAPTER You can find the Wrox.com code downloads for this chapter at www.wrox.com. The source code is also available at https://github.com/ProfessionalCSharp/ProfessionalCSharp7 the directory FunctionalProgramming.
The code for this chapter is divided into the following major examples: ExpressionBodiedMembers LocalFunctions Tuples 617
in
Download from finelybook www.finelybook.com
PatternMatching
WHAT IS FUNCTIONAL PROGRAMMING? C# never has been a pure object-oriented programming language. From the beginning, C# has been a component-oriented programming language. What does component-oriented mean? C# offers inheritance and polymorphism that’s also used by object-oriented programming languages; in addition, it offers native support for properties, events, and annotations via attributes. Later versions with LINQ and expressions have also included declarative programming. Using declarative LINQ expressions, the compiler saves an expression tree that is used later by a provider to dynamically generate SQL statements.
NOTE Object-oriented features of C# are discussed in Chapter 4, “ObjectOriented Programming with C#,” events are covered in Chapter 8, “Delegates, Lambdas, and Events,” and LINQ is covered in Chapter 12, “Language Integrated Query.” C# is not purely bound to a single programming language paradigm. Instead, features that are practical with today’s applications created with C# are added to the syntax of C#. In the last years more and more features associated with functional programming have been added as well. What are the foundations of functional programming? The most important concepts of functional programming are based on two approaches: avoiding state mutation and having functions as a firstclass concept. The next two sections get more into details on these two things.
618
Download from finelybook www.finelybook.com
NOTE This chapter does not claim to give you all the information to write applications with the pure functional programming paradigm. Complete books are needed for this. (If you want to write programs with this paradigm, you should consider switching to the F# programming language instead of using C#.) This chapter goes a pragmatic way—like C# does. Some features used with functional programming are useful with all application types; that’s why these features are offered in C#. Over time, more and more functional programming features will be added to C# in a way that fits the C# programming style.
Avoiding State Mutation With the programming language F#, which is a functional-first language, creating a custom type, an object of this type is by default immutable. An object can be initialized in a constructor, but it can’t be changed later. If mutability is needed, the type needs to be explicitly declared to be mutable. This is different with C#. With C#, some of the predefined types are immutable such as the string type. Methods that are used to change the string always return a new string. What about collections? The methods used by LINQ don’t change a collection. Instead, methods such as Where and OrderBy return a new collection that is filtered and a new collection that is ordered. On the other hand, the List collection offers methods for sorting that are implemented in a mutable way; the original collection is sorted. For more immutability, .NET offers complete immutable collections in the namespace System.Collections.Immutable. These collections don’t offer methods that change the collection. Instead, new collections are always returned. What’s the advantage of using immutable types? Because it’s 619
Download from finelybook www.finelybook.com
guaranteed no one can change an instance, multiple threads can be used to access it concurrently without the need for synchronization. With immutable types, it’s also easier to create unit tests. For creating custom types, some features were added with C# 6 to create immutable types. Since C# 6, you have been able to create an auto implemented read-only property with just a get accessor: public string FirstName { get; }
Out of this, the compiler creates a read-only field that can be initialized only in the constructor and a property with a get accessor returning this field.
NOTE Strings are covered in Chapter 9, “Strings and Regular Expressions.” Immutable collections are covered in Chapter 11, “Special Collections.” Because of some library requirements, where you can use immutable types is somewhat limited. Over the last years, the limitations have been removed in more and more places. For example, the NuGet package Newtonsoft.Json allows using immutable types for JSON serialization and deserialization. This library makes use of a constructor that matches arguments needed to create an instance. Entity Framework was such a limitation in the last years. However, since Entity Framework Core 1.1, table columns can be mapped to fields instead of to read/write properties.
NOTE JSON serialization is covered in Bonus Chapter 2, “XML and JSON,” which you can find online. Entity Framework Core is covered in Chapter 26, “Entity Framework Core.” Threads and 620
Download from finelybook www.finelybook.com
synchronization are covered in Chapter 21, “Tasks and Parallel Programming.”
NOTE This chapter does not cover the C# features to create immutable types because this is already covered in Chapter 3, “Objects and Types.” C# allows creating auto-implemented properties just with a get accessor where the compiler creates a readonly field and a get accessor returning the value of this field. Future versions of C# are planned to have more features to create immutable types, such as records.
Functions as First Class With functional programming, functions are first class. This means that functions can be used as arguments of functions, functions can be returned from functions, and functions can be assigned to variables. This always has been possible with C#: Delegates can hold addresses of functions, delegates can be used as arguments of methods, and delegates can be returned from methods. However, you need to be aware that comparing the invocation of a normal function to the invocation of a delegate, the delegate has some overhead associated. With a delegate, an instance of a delegate class is created, and this instance holds a collection of method references. When you invoke a delegate, the collection is iterated to invoke every method assigned to the delegate.
NOTE Delegates are covered in Chapter 8.
621
Download from finelybook www.finelybook.com
Higher-Order Functions Functional programming defines the term higher-order function as a function that takes another function as parameter or that returns a function. Some do both. With a C# implementation, delegates are used as parameters and return types of a method. Examples of higher-order functions are methods defined for LINQ as you’ve seen in the previous chapter. For example, the Where method receives a Func predicate: public static IEnumerable Where(this IEnumerable source, Func predicate);
How a higher-order function can both receive a function as a parameter as well as return a function is shown later in this chapter. Pure Functions Functional programming defines the term pure function. Pure functions should be preferred if possible. Pure functions fulfill two requirements: Pure functions always return the same result for the same arguments that are passed. Pure functions don’t result in a side effect, such as changing state, or depend on external sources. Of course, not all methods can be implemented as a pure function. Pure functions just have the advantage that testing becomes easy; there’s no external dependency. When creating a method to access external sources, you might think about splitting the method into two parts: a part that is pure with probably complex logic and a part that cannot be pure. Now that you’ve had an overview of the important concepts of functional programming, it’s time to get into C# syntax details on how C# helps these concepts.
EXPRESSION-BODIED MEMBERS 622
Download from finelybook www.finelybook.com
C# 6 allowed expression-bodied members with methods and properties that only defined a get accessor. Now, with C# 7, expression-bodied members can be used everywhere as long as only one statement is used with the implementation. With functional programming, many methods are only one-liners, and thus this feature can be used often; the number of code lines is reduced because as curly brackets are not needed.
NOTE This feature is already introduced in other chapters of this book, such as expression-bodied properties and expression-bodied methods in Chapter 3 and expression-bodied event accessors in Chapter 8, so not every aspect of them is covered in this chapter. Let’s look at the following code snippet in which expression-bodied members are used with property accessors—the get and set accessors —with the implementation of the ToString method, and the implementation of the constructor. The constructor is defined to accept the name as a string parameter and requires this to split the string into first name and last name. This is done with one statement where first the string is split up into a string array, and next this string array is used to extract two strings, named _firstName and _lastName, using out parameters (code file ExpressionBodiedMembers/Person.cs): public class Person { public Person(string name) => name.Split(' ').ToStrings(out _firstName, out _lastName); private string _firstName; public string FirstName { get => _firstName; set => _firstName = value; } private string _lastName; public string LastName
623
Download from finelybook www.finelybook.com
{ get => _lastName; set => _lastName = value; } public override string ToString() => $"{FirstName} {LastName}"; }
The custom out parameters are filled with the extension method ToStrings from the following code snippet. This is an extension method for the string array, and it moves the elements of the array to the output parameters (code file ExpressionBodiedMembers/StringArrayExtensions.cs): public static class StringArrayExtensions { public static void ToStrings(this string[] values, out string value1, out string value2) { if (values == null) throw new ArgumentNullException(nameof(values)); if (values.Length != 2) throw new IndexOutOfRangeException( "only arrays with 2 values allowed"); value1 = values[0]; value2 = values[1]; } }
With all this in place, a Person can be created with the name consisting of one string, and the FirstName and LastName properties accessed to read the name (code file ExpressionBodiedMembers/Program.cs): Person p = new Person("Katharina Nagel"); Console.WriteLine($"{p.FirstName} {p.LastName}");
EXTENSION METHODS Extension methods already have been covered in Chapter 12, and the previous section of this chapter implements a custom extension method. However, as extension methods help a lot with functional 624
Download from finelybook www.finelybook.com
programming concepts, so I’m showing another example here. With functional programming, many methods are very short and consist of a single statement, whereas expression-bodied members like those shown earlier help reduce the number of code lines. For example, the using statement can be changed to a method instead. The following extension method named Use is an extension method for all classes implementing the IDiposable interface. The using statement is used within the implementation to release the item after its use. For the user of the item, an Action delegate can be passed to the Use method (code file UsingStatic/FunctionalExtensions.cs: public static class FunctionalExtensions { public static void Use(this T item, Action action) where T : IDisposable { using (item) { action(item); } } }
A sample class that implements the interface IDisposable is defined with the Resource class. This class offers the Foo method in addition to the IDiposable functionality (code file UsingStatic/Resource.cs): class Resource : IDisposable { public void Foo() => Console.WriteLine("Foo"); private bool disposedValue = false; protected virtual void Dispose(bool disposing) { if (!disposedValue) { if (disposing) { Console.WriteLine("release resource"); } disposedValue = true; } }
625
Download from finelybook www.finelybook.com
public void Dispose() => Dispose(true); }
Now think about how a typical using statement block for accessing this Resource object would look: using (var r = new Resource()) { r.Foo(); }
With the Use method, accessing and disposing of the resource can be done in a single statement (code file UsingStatic/Program.cs): new Resource().Use(r => r.Foo());
USING STATIC Many practical extensions can be implemented with extension methods, such as you’ve seen with the Use extension method or the many extension methods for LINQ that are covered in Chapter 12. You’ll also see many extension methods offered by .NET in many of the following chapters of the book. Not all practical extensions have a type that can be extended. For some scenarios simple static methods can be advantageous. For easier invocation of these methods, the using static declaration can be used to get rid of the class name. For example, instead of writing Console.WriteLine("Hello World!");
you can write WriteLine("Hello World!");
if System.Console is opened: using static System.Console;
After using this declaration, you can use all static members of the class Console—such as WriteLine, Write, ReadLine, Read, Beep, and others— 626
Download from finelybook www.finelybook.com
without writing the Console class. You just need to make sure to not get into conflicts when opening static members of other classes, or using methods of a base class when static methods were meant. Let’s get into a practical example. High-order functions take functions as parameters, return a function, or do both. When working with functions, it can be useful to combine two functions to one. You do this with the Compose method, as shown in the following code snippet (code file UsingStatic/FunctionalExtensions.cs): public static class FunctionalExtensions { //... public static Func Compose( Func f1, Func f2) => a => f2(f1(a)); }
This generic method defines three type parameters and two parameters of the delegate type Func. Just remember, the delegate Func references a method with one argument and a return type that can be of a different type. The Compose method accepts two Func parameters to pass two methods that are combined to one. The first method (f1) passed to Compose can have two different types—one for input (T1) and one for output (T2)—whereas the second method (f2) passed needs the same input type (T2) as the output type (T2) of the first method and can have a different output type (TResult). The Compose method itself returns a Func delegate with the same input type (T1) as the first method, and the same output type as the second method (TResult). The implementation might look a little scary because two lambda operators follow one after the other. This construct will become clear as you understand what the method returns: a method. The method that is returned is of type Func. After the first lambda operator, a => f2(f1(a)); defines this method. The variable a is of type T1, and the return of the method is of type TResult, which is the same result type as returned from f2. f2 receives f1 with the input as parameter. To use the Compose method, first two delegates f1 and f2 are created that add 1 or 2 to the input. These delegates are combined with the 627
Download from finelybook www.finelybook.com
method. The Compose method can be invoked without a class name because the using static declaration opens the static members of the class FunctionalExtensions. After creating f3 with the Compose method, the f3 method is invoked (code file UsingStatic/Program.cs): Compose
using System; using static System.Console; using static UsingStatic.FunctionalExtensions; namespace UsingStatic { class Program { static void Main() { //... Func f1 = x => x + 1; Func f2 = x => x + 2; Func f3 = Compose(f1, f2); var x1 = f3(39); WriteLine(x1); //... } } }
The result written to the console is, of course, 42. As the Compose method is declared, the parameter types can be different between the input and the output. In the following code snippet, the first method passed to the Compose method receives a string and returns a Person object; the second method receives a Person and returns a string. If the compiler can’t identify the parameter type from the variable and the return type, the concrete delegate type must be specified as shown with the method that receives a string and returns a Person. The variable name alone doesn’t help the compiler to know its type. With the second method passed to the Compose method it’s already clear that the input is of the same type as the return from the first method, so a type specification is not necessary. After the invocation of the Compose method, the variable greetPerson is a combination of the two input methods:
628
Download from finelybook www.finelybook.com
var greetPerson = Compose( new Func(name => new Person(name)), person => $"Hello, {person.FirstName}"); WriteLine(greetPerson("Mario Andretti"));
Invoking the greetPerson method with the string Mario Andretti in the WriteLine method, writes the string Hello, Mario to the console.
LOCAL FUNCTIONS A new feature of C# 7 is local functions: Methods can be declared within methods. A local function is declared within the scope of a method, a property accessor, a constructor, or lambda expressions. A local function can only be invoked within the scope of the containing member. Instead of using a private method that is needed in just one place, you can use a local function. Let’s get into an example and start without a local function—a lambda expression that will be replaced by a local function in the next turn. The following code snippet declares a lambda expression that’s assigned to the delegate variable add. The variable add is in the scope of the method IntroWithLambdaExpression, and thus it can be invoked only within this method (code file LocalFunctions/Program.cs): private static void IntroWithLambdaExpression() { Func add = (x, y) => { return x + y; }; int result = add(37, 5); Console.WriteLine(result); }
Instead of declaring a lambda expression, you can define a local function. A local function is declared in a similar way to a normal method, with a return type, the name, and parameters. The local function is invoked in the same way as the lambda expression shown earlier: private static void IntroWithLocalFunctions()
629
Download from finelybook www.finelybook.com
{ int add(int x, int y) { return x + y; } int result = add(37, 5); Console.WriteLine(result); }
Compared to the lambda expression, the syntax is simpler with the local function, and the local function also performs better. Whereas a delegate needs an instance of a class and a collection of references to methods, with a local function only the reference to the function is needed, and this function can be invoked directly. The overhead is like other methods. Of course, if the local function can be implemented with a single statement, the implementation can be done using an expressionbodied member: private static void IntroWithLocalFunctionsWithExpressionBodies() { int add(int x, int y) => x + y; int result = add(37, 5); Console.WriteLine(result); }
Within the method body, the local function can be implemented in any location. There’s no need to implement them in the top of the body; it can also be implemented elsewhere, and the local function can be invoked before that. This behavior is like normal methods. However, unlike normal methods, local functions cannot be virtual, abstract, private, or use other modifiers. The only modifiers allowed are async and unsafe. Like lambda expressions, local functions can access variables from the outer scope (also known as closures) as shown in the following code snippet where the local function accesses variable z, which is defined outside of the local function: private static void IntroWithLocalFunctionsWithClosures()
630
Download from finelybook www.finelybook.com
{ int z = 3; int result = add(37, 5); Console.WriteLine(result); int add(int x, int y) => x + y + z; }
NOTE The only modifiers allowed with local functions are async and unsafe. The async modifier is explained in Chapter 15, “Asynchronous Programming,” and the unsafe modifier is explained in Chapter 17, “Managed and Unmanaged Memory.” A reason to use local functions is if you need the functionality only within the scope of a method (or property, constructor, and so on). There still would be other options to local functions. Performance is a good reason to use local functions instead of lambda expressions. In comparing local functions to normal private methods, local functions don’t have a performance advantage. Of course, local functions can use closures, whereas private methods can’t. Is this enough reason to use local functions? To understand the real benefits of local functions, you need to see some useful examples, which are shown in the next sections.
Local Functions with the yield Statement The previous chapter, “Language Integrated Query,” includes a simple implementation of the Where method with the yield statement. What isn’t covered there is the checking of parameters. Let’s add this to the implementation of the Where1 method, checking the source and predicate parameters for null (code file LocalFunctions/EnumerableExtensions.cs): public static IEnumerable Where1(this IEnumerable source,
631
Download from finelybook www.finelybook.com
Func predicate) { if (source == null) throw new ArgumentNullException(nameof(source)); if (predicate == null) throw new ArgumentNullException(nameof(predicate)); foreach (T item in source) { if (predicate(item)) { yield return item; } } }
Writing code to test for the ArgumentNullException, the preprocessor statement #line is defined to start with the source code line 1000. The exception does not happen in the line 1004 where the null is passed to the Where1 method; instead it happens in line 1006 with the foreach statement. The reason for finding this error late is because of the deferred execution of the yield statement in the implementation of the Where1 method (code file LocalFunctions/Program.cs): private static void YieldSampleSimple() { #line 1000 Console.WriteLine(nameof(YieldSampleSimple)); try { string[] names = { "James", "Niki", "John", "Gerhard", "Jack" }; var q = names.Where1(null); foreach (var n in q) // callstack position for exception { Console.WriteLine(n); } } catch (ArgumentNullException ex) { Console.WriteLine(ex); } Console.WriteLine(); }
632
Download from finelybook www.finelybook.com
To fix this issue, and to give earlier error information to the caller, the Where1 method is implemented in two parts with the Where2 method. Here, the Where2 method just checks for incorrect parameters and does not include yield statements. The implementation with yield return is done in a separate private method, the WhereImpl. This method is invoked from the Where2 method after the input parameters have been checked (code file LocalFunctions/EnumerationExtensions.cs): public static IEnumerable Where2(this IEnumerable source, Func predicate) { if (source == null) throw new ArgumentNullException(nameof(source)); if (predicate == null) throw new ArgumentNullException(nameof(predicate)); return Where2Impl(source, predicate); } private static IEnumerable Where2Impl(IEnumerable source, Func predicate) { foreach (T item in source) { if (predicate(item)) { yield return item; } } }
Calling the method now, the stack trace shows the error happened in line 1004, where the Where2 method was invoked (code file LocalFunctions/Program.cs): private static void YieldSampleWithPrivateMethod() { #line 1000 Console.WriteLine(nameof(YieldSampleWithPrivateMethod)); try { string[] names = { "James", "Niki", "John", "Gerhard", "Jack" };
633
Download from finelybook www.finelybook.com
var q = names.Where2(null); exception
// callstack position for
foreach (var n in q) { Console.WriteLine(n); } } catch (ArgumentNullException ex) { Console.WriteLine(ex); } Console.WriteLine(); }
The issue was fixed with the Where2 method. However, now you have a private method that is needed in only one place. The body of the Where2 method includes parameter checks and the invocation of the method Where2Impl. This is a great scenario for a private method. The implementation of the Where3 method includes the checks for the input parameters as before, as well as a private function instead of the previous private method Where2Impl. The local function can have a simpler signature, as it’s possible to access the variable’s source and predicate from the outer scope (code file LocalFunctions/EnumerableExtensions.cs): public static IEnumerable Where3(this IEnumerable source, Func predicate) { if (source == null) throw new ArgumentNullException(nameof(source)); if (predicate == null) throw new ArgumentNullException(nameof(predicate)); return Iterator(); IEnumerable Iterator() { foreach (T item in source) { if (predicate(item)) { yield return item; }
634
Download from finelybook www.finelybook.com
} } }
Invoking the method Where3 results in the same behavior as invoking the method Where2. The stack trace shows the issue with the invocation of the Where3 method.
Recursive Local Functions Another scenario that uses local function is recursive invocation, which is shown in the next example with the QuickSort method. Here, the local function Sort is invoked recursively until the collection is sorted (code file LocalFunctions/Algorithms.cs): public static void QuickSort(T[] elements) where T : IComparable { void Sort(int start, int end) { int i = start, j = end; var pivot = elements[(start + end) / 2]; while (i 0) j--; if (i $"{FirstName} {LastName}"; //... }
Declaring and Initializing Tuples A tuple can be declared using parentheses and initialized using a tuple literal that is created with parentheses as well. In the following code snippet, on the left side a tuple variable t is declared containing a string, an int, and a Person. On the right side, a tuple literal is used to create a tuple with the string magic, the number 42, and a Person object initialized using a constructor of the Person class. The tuple can be accessed using the variable t with the members declared in the parentheses (s, i, and p in this example; code file Tuples/Program.cs): private static void IntroTuples() { (string s, int i, Person p) t = ("magic", 42, new Person( "Stephanie", "Nagel")); Console.WriteLine($"s: {t.s}, i: {t.i}, p: {t.p}"); //... }
When you run the application, the output shows the values of the tuple: s: magic, i: 42, p: Stephanie Nagel
The tuple literal also can be assigned to a tuple variable without declaring its members. This way the members of the tuple are accessed 637
Download from finelybook www.finelybook.com
using the member names of the ValueTuple struct: Item1, Item2, and Item3: private static void IntroTuples() { //... var t2 = ("magic", 42, new Person("Matthias", "Nagel")); Console.WriteLine($"string: {t2.Item1}, int: {t2.Item2}, person: {t2.Item3}"); //... }
You can assign names to the tuple in the tuple literal by defining the name followed by a colon, which is the same syntax as with object literals: private static void IntroTuples() { //... var t3 = (s: "magic", i: 42, p: new Person("Matthias", "Nagel")); Console.WriteLine($"s: {t3.s}, i: {t3.i}, p: {t3.p}"); //... }
With all this, names are just a convenience. You can assign one tuple to another one when the types match; the names do not matter: private static void IntroTuples() { //... (string astring, int anumber, Person aperson) t4 = t3; Console.WriteLine($"s: {t4.astring}, i: {t4.anumber}, p: {t4.aperson}"); }
Tuple Deconstruction You also can deconstruct tuples into variables. To do this you just need to remove the tuple variable from the previous code sample and just define variable names in parentheses. The variables can then be directly accessed that contain the values of the tuple parts (code file Tuples/Program.cs):
638
Download from finelybook www.finelybook.com
private static void TupleDeconstruction() { (string s, int i, Person p) = ("magic", 42, new Person("Stephanie", "Nagel")); Console.WriteLine($"s: {s}, i: {i}, p: {p}"); //... }
You can also declare the variables for deconstruction using the var keyword; the types are defined by the tuple literal. You can also declare the variables before initialization and deconstruct the tuple to existing variables: private static void TupleDeconstruction() { //... (var s1, var i1, var p1) = ("magic", 42, new Person("Stephanie", "Nagel")); Console.WriteLine($"s: {s1}, i: {i1}, p: {p1}"); string s2; int i2; Person p2; (s2, i2, p2) = ("magic", 42, new Person("Katharina", "Nagel")); Console.WriteLine($"s: {s2}, i: {i2}, p: {p2}"); //... }
In case you don’t need all the parts of the tuple, you can use _ to ignore this part as shown here: private static void TupleDeconstruction() { //... (string s3, _, _) = ("magic", 42, new Person("Katharina", "Nagel")); Console.WriteLine(s3); }
NOTE 639
Download from finelybook www.finelybook.com
Probably you already used _ when you invoked methods with out parameter modifiers for cases where the result was not needed. In this scenario, using _ is only a naming convention. Using _ with tuples is different. You don’t need to declare a type, and you can use _ multiple times; it’s a compiler feature to ignore this part with deconstruction.
Returning Tuples Let’s get into a more useful example: a method returning a tuple. The method Divide from the following code snippet receives two parameters and returns a tuple consisting of two int values. The result is returned with a tuple literal (code file Tuples/Program.cs): static (int result, int remainder) Divide(int dividend, int divisor) { int result = dividend / divisor; int remainder = dividend % divisor; return (result, remainder); }
The result is deconstructed into the result and remainder variables: private static void ReturningTuples() { (int result, int remainder) = Divide(7, 2); Console.WriteLine($"7 / 2 - result: {result}, remainder: {remainder}"); }
NOTE Using tuples, you can avoid declaring method signatures with out parameters. out parameters cannot be used with async methods; this restriction does not apply with tuples.
Behind the Scenes 640
Download from finelybook www.finelybook.com
Using the new tuple syntax, the C# compiler creates ValueTuple structures behind the scenes. .NET defines multiple ValueTuple structures for one to seven generic parameters, and another one where the eighth parameter can be another tuple. Using a tuple literal results in an invocation of Tuple.Create. The Tuple structure defines fields named Item1, Item2, Item3, and so on to access all the items (code file Tuples/Program.cs): private static void BehindTheScenes() { (string s, int i) t1 = ("magic", 42); // tuple literal Console.WriteLine($"{t1.s} {t1.i}"); ValueTuple t2 = ValueTuple.Create("magic", 42); Console.WriteLine($"{t2.Item1}, {t2.Item2}"); }
How does the naming of the fields come from returning tuples from methods? A method signature, as shown here with the Divide method, public static (int result, int remainder) Divide(int dividend, int divisor)
is translated to the return of a ValueTuple with the TupleElementNames attribute for the return type: [return: TupleElementNames(new string[] {"result", "remainder" })] public static ValueTuple Divide(int dividend, int divisor)
When using this manner of invoking the method, the compiler reads the information from the attribute to match the names to the ItemX fields. With the invocation, the ItemX fields are used instead of the nicer names. With the automatic usage of the TupleElementNames attribute, a method returning a tuple can be declared inside a library (code file TuplesLib/SimpleMath.cs): public class SimpleMath { public static (int result, int remainder) Divide(int dividend, int divisor)
641
Download from finelybook www.finelybook.com
{ int result = dividend / divisor; int remainder = dividend % divisor; return (result, remainder); } }
The library is used from the console application where the result and remainder names are directly available: private static void UseALibrary() { var t = SimpleMath.Divide(5, 3); Console.WriteLine($"result: {t.result}, remainder: {t.remainder}"); }
Whereas the older Tuple type is a class, the new tuple ValueTuple is a struct. This reduces the work needed by the garbage collector as value types are stored on the stack. The old Tuple type is implemented as an immutable class with read-only properties. With the new ValueTuple, the members are public fields. Public fields make this type mutable (code file Tuples/Program.cs): static void Mutability() { // old tuple is a immutable reference type Tuple t1 = Tuple.Create("old tuple", 42); // t1.Item1 = "new string"; // not possible with Tuple // new tuple is a mutable value type (string s, int i) t2 = ("new tuple", 42); t2.s = "new string"; t2.i = 43; t2.i++; Console.WriteLine($"new string: {t2.s} int: {t2.i}"); }
NOTE It looks like Microsoft broke some rules with ValueType: Structs 642
Download from finelybook www.finelybook.com
should be immutable, and fields should not be declared public. However, the new tuples can be compared to simple value types such as int and long; breaking the rules with tuples is completely excusable to also get best performance optimizations.
Compatibility of ValueTuple with Tuple The older tuple types haven’t been used much because of the unkind naming. However, for programs using the Tuple type, there’s an easy conversion to a ValueTuple. The Tuple type can be converted to a ValueTuple by invoking the ToValueTuple extension method. As the old Tuple type doesn’t offer the nicer names, you need to define the names with parentheses (code file Tuples/Program.cs): static void TupleCompatibility() { // convert Tuple to ValueTuple Tuple t1 = Tuple.Create("a string", 42, true, new Person("Katharina", "Nagel")); Console.WriteLine($"old tuple - string: {t1.Item1}, number: {t1.Item2}, bool: {t1.Item3}, Person: {t1.Item4}"); (string s, int i, bool b, Person p) t2 = t1.ToValueTuple(); Console.WriteLine($"new tuple - string: {t2.s}, number: {t2.i}, bool: {t2.b}, Person: {t2.p}"); //... }
Old tuples can also be deconstructed to specific fields. The following example shows deconstructing the tuple t1 to the fields s, i, and b: static void TupleCompatibility() { //... (string s, int i, bool b, Person p) = t1; // Deconstruct Console.WriteLine($"new tuple - string: {s}, number: {i}, bool: {b}, Person {p}"); //...
643
Download from finelybook www.finelybook.com
}
It’s also possible to do this the other way around. New value tuples can be converted to tuples with the ToTuple method. Of course, then you need to specify the members using Item1, Item2, Item3, and so on. static void TupleCompatibility() { //... // convert ValueTuple to Tuple Tuple t3 = t2.ToTuple(); Console.WriteLine($"old tuple - string: {t1.Item1}, number: {t1.Item2}, " + $"bool: {t1.Item3}, Person: {t1.Item4}"); }
Infer Tuple Names A new feature of C# 7.1 is the inference of tuple names. The Divide method declared earlier returns a tuple with the names result and remainder. The returned tuple is written to the variable t1 where these names are used to access the tuple fields. When you invoke the Divide method the second time, the tuple result is written to a tuple with the names res and rem. From the returned tuple, the result is written to res, and remainder is written to rem. t3 is created using a tuple literal where the res and rem fields are defined, and the values from tuple t1 are assigned accordingly. The fourth tuple in this example makes use of name inference. t4 is created using a tuple literal where the names are the same as the names from tuple t1. Accessing the result and remainder fields without giving a name to the tuple members takes the same names as coming from t1. t4 also has members named result and remainder (code file Tuples/Program.cs): private static void TupleNames() { var t1 = Divide(9, 4); Console.WriteLine($"{t1.result}, {t1.remainder}"); (int res, int rem) t2 = Divide(11, 3); Console.WriteLine($"{t2.res}, {t2.rem}"); var t3 = (res: t1.result, rem: t1.remainder);
644
Download from finelybook www.finelybook.com
// use inferred names var t4 = (t1.result, t1.remainder); Console.WriteLine($"{t4.result}, {t4.remainder}"); }
NOTE Inference of tuple names requires at least C# 7.1. You need to specify this version using LangVersion in the csproj project file or by using the Project Settings in Visual Studio.
Tuples with Linked Lists A practical use of tuples is with linked lists. With a linked list, an item (which is a LinkedListNode) contains the value and a reference to the next item. In the following code snippet, you create a LinkedList that contains 10 elements. Then the do/while statement is used to walk through this list. Within the loop, a tuple literal is used to access the Value and Next properties of the LinkedListNode. With deconstruction, the value is written to the variable value, and the next item in the linked list is written to the variable node, which itself is the LinkedListNode again (code file Tuples/Program.cs): static void TuplesWithLinkedList() { Console.WriteLine(nameof(TuplesWithLinkedList)); var list = new LinkedList(Enumerable.Range(0, 10)); int value; LinkedListNode node = list.First; do { (value, node) = (node.Value, node.Next); Console.WriteLine(value); } while (node != null); Console.WriteLine(); }
645
Download from finelybook www.finelybook.com
NOTE Linked lists are discussed in Chapter 10, “Collections.”
Tuples with LINQ The previous chapter demonstrates anonymous types and tuples with a LINQ statement. Let’s change one LINQ query from anonymous types to tuples. The following LINQ query creates an anonymous type with LastName and Starts property in the parameter of the Select method (code file Tuples/Program.cs): static void UsingAnonymousTypes() { var racerNamesAndStarts = Formula1.GetChampions() .Where(r => r.Country == "Italy") .OrderByDescending(r => r.Wins) .Select(r => new { r.LastName, r.Starts }); foreach (var r in racerNamesAndStarts) { Console.WriteLine($"{r.LastName}, starts: {r.Starts}"); } }
Changing the curly brackets to parentheses creates a tuple with the fields LastName and Starts: static void UsingTuples() { var racerNamesAndStarts = Formula1.GetChampions() .Where(r => r.Country == "Italy") .OrderByDescending(r => r.Wins) .Select(r => ( r.LastName, r.Starts
646
Download from finelybook www.finelybook.com
)); foreach (var r in racerNamesAndStarts) { Console.WriteLine($"{r.LastName}, starts: {r.Starts}"); } }
NOTE With anonymous types, a class is created, and thus instances of this class are allocated on the heap and need to be collected from the garbage collector. By comparison, tuples are value types and stored on the stack. Tuples can have a performance advantage.
Deconstruction You’ve already seen deconstruction with tuples—writing tuples into simple variables. Deconstruction can also be done with any type: deconstructing a class or struct into its parts. For example, the previously shown Person class can be deconstructed into first name and last name (code file Tuples/Program.cs): private static void Deconstruct() { var p1 = new Person("Katharina", "Nagel"); (var first, var last) = p1; Console.WriteLine($"{first} {last}"); }
All that needs to be done is to create a Deconstruct method that fills the separate parts into out parameters (code file Tuples/Person.cs): public class Person { public Person(string firstName, string lastName) { FirstName = firstName; LastName = lastName;
647
Download from finelybook www.finelybook.com
} public string FirstName { get; } public string LastName { get; } public override string ToString() => $"{FirstName} {LastName}"; public void Deconstruct(out string firstName, out string lastName) { firstName = FirstName; lastName = LastName; } }
Deconstruction is implemented with the method name Deconstruct. This method is always of type void and returns the part with out parameters. You might wonder why a method creating a tuple can’t be implemented by returning a tuple. The reason is that overloads are allowed. You can implement multiple Deconstruct methods using different parameter types. This wouldn’t be possible when returning a tuple. With C#, an overloaded method cannot be selected just by its return type.
Deconstruction with Extension Methods Deconstruction can also be implemented without adding a Deconstruct method to the class that should be deconstructed: by using extension methods. The following code example defines an extension method for the Racer type to deconstruct a Racer to firstName, lastName, starts, and wins (code file Tuples/RacerExtensions.cs): public static class RacerExtensions { public static void Deconstruct(this Racer r, out string firstName, out string lastName, out int starts, out int wins) { firstName = r.FirstName; lastName = r.LastName; starts = r.Starts; wins = r.Wins; } }
648
Download from finelybook www.finelybook.com
The following code snippet deconstructs a Racer to the variables first and last. Starts and wins are ignored (code file Tuples/Program.cs): static void DeconstructWithExtensionsMethods() { var racer = Formula1.GetChampions().Where( r => r.LastName == "Lauda").First(); (string first, string last, _, _) = racer; Console.WriteLine($"{first} {last}"); }
Tuples are one of the most important improvements (if not the most important one) of C# 7. Next, let’s get into pattern matching, which is another great feature of C# 7.
PATTERN MATCHING From an object-oriented view, it would be best to always use concrete types and interfaces to solve a problem. However, often this is not easy to do. From a database, a query might give you different object types that are not related to any hierarchy. When you access API services, a list or a single object can be returned—or perhaps nothing at all is returned. Thus, a method often should work with diverse types. This is where pattern matching can help. For the example, an array of different objects is created. The array named data contains null with the first element, the integer with the value 42, a string, an object of type Person, and an array containing Person objects (code file PatternMatching/Program.cs): static void Main() { var p1 = new Person("Katharina", "Nagel"); var p2 = new Person("Matthias", "Nagel"); var p3 = new Person("Stephanie", "Nagel"); object[] data = { null, 42, "astring", p1, new Person[] { p2, p3 } }; foreach (var item in data) { IsOperator(item); }
649
Download from finelybook www.finelybook.com
foreach (var item in data) { SwitchStatement(item); } }
With pattern matching in C# 7, the is operator and the switch statement have been enhanced with three kinds of patterns: the const pattern, the type pattern, and the var pattern. Let’s get into details starting with the is operator.
Pattern Matching with the is Operator A simple match with the is operator is the const pattern. With this pattern, you can compare an object to constant values such as null or 42 (code file PatternMatching/Program.cs): static void IsOperator(object item) { // const pattern if (item is null) { Console.WriteLine("item is null"); } if (item is 42) { Console.WriteLine("item is 42"); } //... }
When you run the application with the previously declared array, the first two items of the array match with the two if statements as shown in this program output: item is null item is 42
NOTE 650
Download from finelybook www.finelybook.com
Parameters of methods usually have been checked for null comparing to null using the equal operator. For example, if (item == null) throw ArgumentNullException("null");
This can now be replaced using pattern matching: if (item is null) throw ArgumentNullException("null");
Behind the scenes, the C# compiler generates the same Intermediate Language (IL) code. The most interesting pattern match is the type pattern. With this pattern you can match for a specific type, such as int or string. This pattern also enables you to declare a variable, such as if (item is int i). The variable i is assigned to the item if the pattern applies: static void IsOperator(object item) { //... // type pattern if (item is int) { Console.WriteLine($"Item is of type int"); } if (item is int i) { Console.WriteLine($"Item is of type int with the value {i}"); } if (item is string s) { Console.WriteLine($"Item is a string: {s}"); } //... }
With the previous type patterns, these matches apply with the value 42 and the string astring: Item is of type int Item is of type int with a value 42 Item is a string: astring
651
Download from finelybook www.finelybook.com
Declaring a variable of the type allows strongly typed access. You can access all the members of the type without the need for a cast. This also allows using logical operators in the if statement to check for other constraints than just the type, such as if the FirstName starts with the string Ka: static void IsOperator(object item) { //... if (item is Person p && p.FirstName.StartsWith("Ka")) { Console.WriteLine($"Item is a person: {p.FirstName} {p.LastName}"); } if (item is IEnumerable people) { string names = string.Join(", ", people.Select(p1 => p1.FirstName).ToArray()); Console.WriteLine($"it's a Person collection containing {names}"); } //... }
With the previous two type patterns and the object array applied, these matches apply: Item is a person: Katharina Nagel it's a Person collection containing Matthias, Stephanie
One more pattern type needs to be discussed: the var pattern. Everything can be applied to a var; you just get the concrete type. With the sample code, the GetType method is invoked to get the name of the type and to write the concrete type to the console. When the value is null, the var pattern applies as well. That’s why the null-conditional operator is used with the every variable. every is null if the item is null, which writes the string null to the console: static void IsOperator(object item) { //... // var pattern if (item is var every)
652
Download from finelybook www.finelybook.com
{ Console.WriteLine($"it's var of type {every?.GetType().Name ?? "null"} " + $"with the value {every ?? "nothing"}"); } }
The output of the application for the var pattern shows that all items of the array match with this pattern: it's var of type null with the value nothing it's var of type Int32 with the value 42 it's var of type String with the value astring it's var of type Person with the value Katharina Nagel it's var of type Person[] with the value PatternMatching.Person[]
Pattern Matching with the switch Statement With the switch statement, the three pattern types can be used as well. The following code snippet shows the const pattern with cases for null and 42; the type pattern for int, string, and Person; and the var pattern. Like the extension of the is operator, with the switch statement a variable can be specified with the type pattern to write the matching result to this variable. You also can apply an additional filter with the when clause. The first type match for the Person class applies only when the FirstName property of the Person has the value Katharina. With the switch statement, the ordering of the cases is important. As soon as one case applies, the other cases are not checked further. If the first match to the Person type with the when clause applies, the second case for Person does not apply. That’s why when filtering must be done before general cases for a type. The var pattern that is defined with the last case matches with every object passed to the switch. However, this case is checked only if none of the other cases that are defined earlier apply. The default clause can be on every position of the switch statement, and it applies only if none of the cases match. It’s just a good practice to put this clause last (code file PatternMatching/Program.cs): static void SwitchStatement(object item) { switch (item)
653
Download from finelybook www.finelybook.com
{ case null: case 42: Console.WriteLine("it's a const pattern"); break; case int i: Console.WriteLine($"it's a type pattern with int: {i}"); break; case string s: Console.WriteLine($"it's a type pattern with string: {s}"); break; case Person p when p.FirstName == "Katharina": Console.WriteLine($"type pattern match with Person and " + $"when clause: {p}"); break; case Person p: Console.WriteLine($"type pattern match with Person: {p}"); break; case var every: Console.WriteLine($"var pattern match: {every?.GetType().Name}"); break; default: } }
When you run the application, the const pattern of the switch statement applies with null and 42, the string pattern applies with the string astring, with the Person object the first Person case applies, and finally, the Person array matches the var pattern—because no other pattern applied earlier. A match to the type pattern with the int type did not apply because the const pattern was an earlier match: it's a const pattern it's a const pattern it's a type pattern with string: astring type pattern match with Person and when clause: Katharina Nagel var pattern match: Person[]
Pattern Matching with Generics 654
Download from finelybook www.finelybook.com
If you need pattern matching with generics, you need the compiler be configured to at least C# 7.1. C# 7.1 adds pattern matching for generics. With C# 7, you can define a generic method as shown and use the is operator to check a variable of a generic type for a specific type to apply (code file PatternMatching/HttpManager.cs): public void Send(T package) { if (package is HealthPackage hp) { hp.CheckHealth(); } //... }
You can do pattern matching with generics similarly to the manner you use with generic classes. You can also use generics with pattern matching and the switch statement as well.
NOTE Generic methods and generic classes are discussed in Chapter 5, “Generics.”
SUMMARY In this chapter, you’ve seen new features of C# 7 such as local functions, tuples, and pattern matching. All these features are coming from the functional programming paradigm, but all are very useful for creating normal .NET applications. Local functions are useful in a few scenarios, such as for allowing better error handling with delayed methods using the yield statement. Tuples offer an efficient way to combine different data types. It’s not necessary to always create custom classes for such combinations. You’ve also seen how tuples can replace anonymous types in LINQ queries. Pattern matching allows dealing with different types using enhancements of the is operator and the switch statement. 655
Download from finelybook www.finelybook.com
The next chapter goes into the details of errors and exceptions.
656
Download from finelybook www.finelybook.com
14 Errors and Exceptions WHAT’S IN THIS CHAPTER? Looking at the exception classes Using try…catch…finally to capture exceptions Filtering exceptions Creating user-defined exceptions Retrieving caller information
WROX.COM CODE DOWNLOADS FOR THIS CHAPTER The Wrox.com code downloads for this chapter are found at www.wrox.com on the Download Code tab. The source code is also available at https://github.com/ProfessionalCSharp/ProfessionalCSharp7 in the directory ErrorsAndExceptions. The code for this chapter is divided into the following major examples: Simple Exceptions ExceptionFilters RethrowExceptions Solicit Cold Call 657
Download from finelybook www.finelybook.com
Caller Information
INTRODUCTION Errors happen, and they are not always caused by the person who coded the application. Sometimes your application generates an error because of an action that was initiated by the end user of the application, or it might be simply due to the environmental context in which your code is running. In any case, you should anticipate errors occurring in your applications and code accordingly. .NET has enhanced the ways in which you deal with errors. C#’s mechanism for handling error conditions enables you to provide custom handling for each type of error condition, as well as to separate the code that identifies errors from the code that handles them. No matter how good your coding is, your programs should be capable of handling any possible errors that might occur. For example, in the middle of some complex processing of your code, you might discover that it doesn’t have permission to read a file; or, while it is sending network requests, the network might go down. In such exceptional situations, it is not enough for a method to simply return an appropriate error code—there might be 15 or 20 nested method calls, so what you really want the program to do is jump back up through all those calls to exit the task completely and take the appropriate counteractions. The C# language has very good facilities for handling this kind of situation, through the mechanism known as exception handling. This chapter covers catching and throwing exceptions in many different scenarios. You see exception types from different namespaces and their hierarchy, and you find out how to create custom exception types. You discover different ways to catch exceptions—for example, how to catch exceptions with the exact exception type or a base class. You also see how to deal with nested try blocks, and how you could catch exceptions that way. For code that should be invoked no matter whether an exception occurs or the code continues with any error, you are introduced to creating try/finally code blocks. 658
Download from finelybook www.finelybook.com
By the end of this chapter, you will have a good grasp of advanced exception handling in your C# applications.
EXCEPTION CLASSES In C#, an exception is an object created (or thrown) when a particular exceptional error condition occurs. This object contains information that should help identify the problem. Although you can create your own exception classes (and you do so later), .NET includes many predefined exception classes—too many to provide a comprehensive list here. The class hierarchy diagram in Figure 14-1 shows a few of these classes to give you a sense of the general pattern. This section provides a quick survey of some of the exceptions available in the .NET base class library.
FIGURE 14-1 All the classes in Figure 14-1 are part of the System namespace, except for IOException and CompositionException and the classes derived from these two classes. IOException and its derived classes are part of the namespace System.IO. The System.IO namespace deals with 659
Download from finelybook www.finelybook.com
reading from and writing to files. CompositionException and its derived classes are part of the namespace System.ComponentModel.Composition. This namespace deals with dynamically loading parts and components. In general, there is no specific namespace for exceptions. Exception classes should be placed in whatever namespace is appropriate to the classes that can generate them—hence, I/O-related exceptions are in the System.IO namespace. You find exception classes in quite a few of the base class namespaces. The generic exception class, System.Exception, is derived from System.Object, as you would expect for a .NET class. In general, you should not throw generic System.Exception objects in your code, because they provide no specifics about the error condition. Two important classes in the hierarchy are derived from System.Exception: SystemException—This
class is for exceptions that are usually thrown by the .NET runtime or that are considered to be of a generic nature and might be thrown by almost any application. For example, StackOverflowException is thrown by the .NET runtime if it detects that the stack is full. However, you might choose to throw ArgumentException or its subclasses in your own code if you detect that a method has been called with inappropriate arguments. Subclasses of SystemException include classes that represent both fatal and nonfatal errors. ApplicationException—With
the initial design of NET, this class was meant to be the base class for custom application exception classes. However, some exception classes that are thrown by the CLR derive from this base class (for example, TargetInvocationException), and exceptions thrown from applications derive from SystemException (for example, ArgumentException). Therefore, it’s no longer a good practice to derive custom exception types from ApplicationException, as this doesn’t offer any benefits. Instead, custom exception classes can derive directly from the Exception base class. Many pre-defined exception classes directly derive from Exception. Other exception classes that might come in handy include the 660
Download from finelybook www.finelybook.com
following: StackOverflowException—This
exception is thrown when the area of memory allocated to the stack is full. A stack overflow can occur if a method continuously calls itself recursively. This is generally a fatal error, because it prevents your application from doing anything apart from terminating (in which case it is unlikely that even the finally block will execute). Trying to handle errors like this yourself is usually pointless; instead, you should have the application gracefully exit. EndOfStreamException—The usual cause of an EndOfStreamException is an attempt to read past
the end of a file. A stream represents a flow of data between data sources. Streams are covered in detail in Chapter 23, “Networking.” OverflowException—An example when this occurs is if you attempt to cast an int containing a value of -40 to a uint in a checked
context. The other exception classes shown in Figure 14-1 are not discussed here. They are just shown to illustrate the hierarchy of exception classes. The class hierarchy for exceptions is somewhat unusual in that most of these classes do not add any functionality to their respective base classes. However, in the case of exception handling, the common reason for adding inherited classes is to indicate more specific error conditions. Often, it isn’t necessary to override methods or add any new ones (although it is not uncommon to add extra properties that carry extra information about the error condition). For example, you might have a base ArgumentException class intended for method calls whereby inappropriate values are passed in, and an ArgumentNullException class derived from it, which is intended to handle a null argument if passed.
CATCHING EXCEPTIONS Given that .NET includes a selection of predefined base class exception objects, this section describes how you use them in your code to trap 661
Download from finelybook www.finelybook.com
error conditions. In dealing with possible error conditions in C# code, you typically divide the relevant part of your program into blocks of three different types: blocks encapsulate the code that forms part of the normal operation of your program and that might encounter some serious error conditions. try
blocks encapsulate the code dealing with the various error conditions that your code might have encountered by working through any of the code in the accompanying try block. This block could also be used for logging errors. catch
blocks encapsulate the code that cleans up any resources or takes any other action that you normally want handled at the end of a try or catch block. It is important to understand that the finally block is executed whether an exception is thrown. Because the purpose of the finally block is to contain cleanup code that should always be executed, the compiler flags an error if you place a return statement inside a finally block. An example of using the finally block is closing any connections that were opened in the try block. Understand that the finally block is completely optional. If your application does not require any cleanup code (such as disposing of or closing any open objects), then there is no need for this block. finally
The following steps outline how these blocks work together to trap error conditions: 1. The execution flow first enters the try block. 2. If no errors occur in the try block, execution proceeds normally through the block, and when the end of the try block is reached, the flow of execution jumps to the finally block if one is present (Step 5). However, if an error does occur within the try block, execution jumps to a catch block (Step 3). 3. The error condition is handled in the catch block. 4. At the end of the catch block, execution automatically transfers to the finally block if one is present. 662
Download from finelybook www.finelybook.com
5. The finally block is executed (if present). The C# syntax used to bring all this about looks roughly like this: try { // code for normal execution } catch { // error handling } finally { // clean up }
A few variations on this theme exist: You can omit the finally block because it is optional. You can also supply as many catch blocks as you want to handle specific types of errors. However, you don’t want to get too carried away and have a huge number of catch blocks. You can define filters with catch blocks to catch the exception with the specific block only if the filter matches. You can omit the catch blocks altogether, in which case the syntax serves not to identify exceptions but to guarantee that code in the finally block will be executed when execution leaves the try block. This is useful if the try block contains several exit points. So far so good, but the question that has yet to be answered is this: If the code is running in the try block, how does it know when to switch to the catch block if an error occurs? If an error is detected, the code does something known as throwing an exception. In other words, it instantiates an exception object class and throws it: throw new OverflowException();
Here, you have instantiated an exception object of the OverflowException class. As soon as the application encounters a throw statement inside a try block, it immediately looks for the catch block associated with that try block. If more than one catch block is 663
Download from finelybook www.finelybook.com
associated with the try block, it identifies the correct catch block by checking which exception class the catch block is associated with. For example, when the OverflowException object is thrown, execution jumps to the following catch block: catch (OverflowException ex) { // exception handling here }
In other words, the application looks for the catch block that indicates a matching exception class instance of the same class (or of a base class). With this extra information, you can expand the try block just demonstrated. Assume, for the sake of argument, that two possible serious errors can occur in the try block: an overflow and an array out of bounds. Assume also that your code contains two Boolean variables, Overflow and OutOfBounds, which indicate whether these conditions exist. You have already seen that a predefined exception class exists to indicate overflow (OverflowException); similarly, an IndexOutOfRangeException class exists to handle an array that is out of bounds. Now your try block looks like this: try { // code for normal execution if (Overflow == true) { throw new OverflowException(); } // more processing if (OutOfBounds == true) { throw new IndexOutOfRangeException(); } // otherwise continue normal execution } catch (OverflowException ex) { // error handling for the overflow error condition }
664
Download from finelybook www.finelybook.com
catch (IndexOutOfRangeException ex) { // error handling for the index out of range error condition } finally { // clean up }
This is because you can have throw statements that are nested in several method calls inside the try block, but the same try block continues to apply even as execution flow enters these other methods. If the application encounters a throw statement, it immediately goes back up through all the method calls on the stack, looking for the end of the containing try block and the start of the appropriate catch block. During this process, all the local variables in the intermediate method calls will correctly go out of scope. This makes the try…catch architecture well suited to the situation described at the beginning of this section, whereby the error occurs inside a method call that is nested inside 15 or 20 method calls, and processing must stop immediately. As you can probably gather from this discussion, try blocks can play a very significant role in controlling the flow of your code’s execution. However, it is important to understand that exceptions are intended for exceptional conditions, hence their name. You wouldn’t want to use them as a way of controlling when to exit a do…while loop.
Exceptions and Performance Exception handling has a performance implication. In cases that are common, you shouldn’t use exceptions to deal with errors. For example, when converting a string to a number, you can use the Parse method of the int type. This method throws a FormatException in case the string passed to this method can’t be converted to a number, and it throws an OverflowException if a number can be converted but it doesn’t fit into an int: { if (n is null) throw new ArgumentNullException(nameof(n));
665
Download from finelybook www.finelybook.com
try { int i = int.Parse(n); Console.WriteLine($"converted: {i}"); } catch (FormatException ex) { Console.WriteLine(ex.Message); } catch (OverflowException ex) { Console.WriteLine(ex.Message); } }
If the method NumberDemo1 usually is used only in a way to pass numbers in a string and receiving not a number is exceptional, it’s okay to program it this way. However, in cases when it’s normal from the program flow to expect strings that cannot be converted, you can use the TryParse method. This method doesn’t throw an exception if the string cannot be converted to a number. Instead, TryParse returns true if parsing succeeds, and it returns false if parsing fails: static void NumberDemo2(string n) { if (n is null) throw new ArgumentNullException(nameof(n)); if (int.TryParse(n, out int result)) { Console.WriteLine($"converted {result}"); } else { Console.WriteLine("not a number"); } }
Implementing Multiple Catch Blocks The easiest way to see how try…catch…finally blocks work in practice is with a couple of examples. The first example is called SimpleExceptions. It repeatedly asks the user to type in a number and then displays it. However, for the sake of this example, imagine that the number must be between 0 and 5; otherwise, the program isn’t able to process the number properly. Therefore, you throw an 666
Download from finelybook www.finelybook.com
exception if the user types anything outside this range. The program then continues to ask for more numbers for processing until the user simply presses the Enter key without entering anything.
NOTE You should note that this code does not provide a good example of when to use exception handling, but it shows good practice on how to use exception handling. As their name suggests, exceptions are provided for other than normal circumstances. Users often type silly things, so this situation doesn’t really count. Normally, your program handles incorrect user input by performing an instant check and asking the user to retype the input if it isn’t valid. However, generating exceptional situations is difficult in a small example that you can read through in a few minutes, so I will tolerate this less-than-ideal one to demonstrate how exceptions work. The examples that follow present more realistic situations. The code for SimpleExceptions looks like this (code file SimpleExceptions/Program.cs): public class Program { public static void Main() { while (true) { try { string userInput; Console.Write("Input a number between 0 and 5 " + "(or just hit return to exit)> "); userInput = Console.ReadLine(); if (string.IsNullOrEmpty(userInput)) { break; } int index = Convert.ToInt32(userInput);
667
Download from finelybook www.finelybook.com
if (index < 0 ││ index > 5) { throw new IndexOutOfRangeException($"You typed in {userInput}"); } Console.WriteLine($"Your number was {index}"); } catch (IndexOutOfRangeException ex) { Console.WriteLine("Exception: " + $"Number should be between 0 and 5. {ex.Message}"); } catch (Exception ex) { Console.WriteLine($"An exception was thrown. Message was: " + $"{ex.Message}"); } finally { Console.WriteLine("Thank you\n"); } } } }
The core of this code is a while loop, which continually uses ReadLine to ask for user input. ReadLine returns a string, so your first task is to convert it to an int using the System.Convert.ToInt32 method. The System.Convert class contains various useful methods to perform data conversions, and it provides an alternative to the int.Parse method. In general, System.Convert contains methods to perform various type conversions. Recall that the C# compiler resolves int to instances of the System.Int32 base class.
NOTE It is also worth pointing out that the parameter passed to the catch block is scoped to that catch block—which is why you can use the same parameter name, ex, in successive catch blocks in the preceding code. 668
Download from finelybook www.finelybook.com
In the preceding example, you also check for an empty string because it is your condition for exiting the while loop. Notice how the break statement breaks right out of the enclosing try block as well as the while loop because this is valid behavior. Of course, when execution breaks out of the try block, the Console.WriteLine statement in the finally block is executed. Although you just display a greeting here, more commonly you will be doing tasks like closing file handles and calling the Dispose method of various objects to perform any cleanup. After the application leaves the finally block, it simply carries on executing into the next statement that it would have executed had the finally block not been present. In the case of this example, though, you iterate back to the start of the while loop and enter the try block again (unless the finally block was entered as a result of executing the break statement in the while loop, in which case you simply exit the while loop). Next, you check for your exception condition: if (index < 0 || index > 5) { throw new IndexOutOfRangeException($"You typed in {userInput}"); }
When throwing an exception, you need to specify what type of exception to throw. Although the class System.Exception is available, it is intended only as a base class. It is considered bad programming practice to throw an instance of this class as an exception, because it conveys no information about the nature of the error condition. Instead, .NET contains many other exception classes that are derived from Exception. Each of these matches a particular type of exception condition, and you are free to define your own as well. The goal is to provide as much information as possible about the particular exception condition by throwing an instance of a class that matches the particular error condition. In the preceding example, System.IndexOutOfRangeException is the best choice for the circumstances. IndexOutOfRangeException has several constructor overloads. The one chosen in the example takes a string describing the error. Alternatively, you might choose to derive your own custom 669
Download from finelybook www.finelybook.com
object that describes the error condition in the context of your application. Exception
Suppose that the user next types a number that is not between 0 and 5. The number is picked up by the if statement and an IndexOutOfRangeException object is instantiated and thrown. At this point, the application immediately exits the try block and hunts for a catch block that handles IndexOutOfRangeException. The first catch block it encounters is this: catch (IndexOutOfRangeException ex) { Console.WriteLine($"Exception: Number should be between 0 and 5." + $"{ex.Message}"); }
Because this catch block takes a parameter of the appropriate class, the catch block receives the exception instance and is executed. In this case, you display an error message and the Exception.Message property (which corresponds to the string passed to the IndexOutOfRangeException’s constructor). After executing this catch block, control then switches to the finally block, just as if no exception had occurred. Notice that in the example you have also provided another catch block: catch (Exception ex) { Console.WriteLine($"An exception was thrown. Message was: {ex.Message}"); }
This catch block would also be capable of handling an IndexOutOfRangeException if it weren’t for the fact that such exceptions will already have been caught by the previous catch block. A reference to a base class can also refer to any instances of classes derived from it, and all exceptions are derived from Exception. This catch block isn’t executed because the application executes only the first suitable catch block it finds from the list of available catch blocks. This catch block isn’t executed when an exception of type IndexOutOfRangeException is 670
Download from finelybook www.finelybook.com
thrown. The application only executes the first suitable catch block it finds from the list of available catch blocks. This second catch block catches other exceptions derived from the Exception base class. Be aware that the three separate calls to methods within the try block (Console.ReadLine, Console.Write, and Convert.ToInt32) might throw other exceptions. If the user types something that is not a number—say a or hello—the Convert.ToInt32 method throws an exception of the class System.FormatException to indicate that the string passed into ToInt32 is not in a format that can be converted to an int. When this happens, the application traces back through the method calls, looking for a handler that can handle this exception. Your first catch block (the one that takes an IndexOutOfRangeException) will not do. The application then looks at the second catch block. This one will do because FormatException is derived from Exception, so a FormatException instance can be passed in as a parameter here. The structure of the example is fairly typical of a situation with multiple catch blocks. You start with catch blocks that are designed to trap specific error conditions. Then, you finish with more general blocks that cover any errors for which you have not written specific error handlers. Indeed, the order of the catch blocks is important. Had you written the previous two blocks in the opposite order, the code would not have compiled, because the second catch block is unreachable (the Exception catch block would catch all exceptions). Therefore, the uppermost catch blocks should be the most granular options available, ending with the most general options. Now that you have analyzed the code for the example, you can run it. The following output illustrates what happens with different inputs and demonstrates both the IndexOutOfRangeException and the FormatException being thrown: SimpleExceptions Input a number between 0 and 5 (or just hit return to exit)> 4 Your number was 4 Thank you Input a number between 0 and 5 (or just hit return to exit)> 0
671
Download from finelybook www.finelybook.com
Your number was 0 Thank you Input a number between 0 10 Exception: Number should Thank you Input a number between 0 hello An exception was thrown. a correct format. Thank you Input a number between 0 Thank you
and 5 (or just hit return to exit)> be between 0 and 5. You typed in 10 and 5 (or just hit return to exit)> Message was: Input string was not in
and 5 (or just hit return to exit)>
Catching Exceptions from Other Code The previous example demonstrates the handling of two exceptions. One of them, IndexOutOfRangeException, was thrown by your own code. The other, FormatException, was thrown from inside one of the base classes. It is very common for code in a library to throw an exception if it detects that a problem has occurred, or if one of the methods has been called inappropriately by being passed the wrong parameters. However, library code rarely attempts to catch exceptions; this is regarded as the responsibility of the client code. Often, exceptions are thrown from the base class libraries while you are debugging. The process of debugging to some extent involves determining why exceptions have been thrown and removing the causes. Your aim should be to ensure that by the time the code is actually shipped, exceptions occur only in very exceptional circumstances and, if possible, are handled appropriately in your code.
System.Exception Properties The example illustrated the use of only the Message property of the exception object. However, a number of other properties are available in System.Exception, as shown in the following table. PROPERTY Data
DESCRIPTION Enables you to add key/value statements to the exception that can be used to supply extra 672
Download from finelybook www.finelybook.com
information about it. HelpLink A link to a help file that provides more information about the exception. InnerException If this exception was thrown inside a catch block, then InnerException contains the exception object that sent the code into that catch block. Message Text that describes the error condition. Source The name of the application or object that caused the exception. StackTrace Provides details about the method calls on the stack (to help track down the method that threw the exception). HResult A numerical value that is assigned to the exception. TargetSite A .NET reflection object that describes the method that threw the exception. The property value for StackTrace is supplied automatically by the .NET runtime if a stack trace is available. Source will always be filled in by the .NET runtime as the name of the assembly in which the exception was raised (though you might want to modify the property in your code to give more specific information), whereas Data, Message, HelpLink, and InnerException must be filled in by the code that threw the exception, by setting these properties immediately before throwing the exception. For example, the code to throw an exception might look something like this: if (ErrorCondition == true) { var myException = new ClassMyException("Help!!!!"); myException.Source = "My Application Name"; myException.HelpLink = "MyHelpFile.txt"; myException.Data["ErrorDate"] = DateTime.Now; myException.Data.Add("AdditionalInfo", "Contact Bill from the Blue Team"); throw myException; }
Here, ClassMyException is the name of the particular exception class 673
Download from finelybook www.finelybook.com
you are throwing. Note that it is common practice for the names of all exception classes to end with Exception. In addition, note that the Data property is assigned in two possible ways.
Exception Filters Since version 6, C# has allowed exception filters. A catch block runs only if the filter returns true. You can have different catch blocks that act differently when catching different exception types. In some scenarios, it’s useful to have the catch blocks act differently based on the content of an exception. For example, when using the Windows Runtime, you often get COM exceptions for all different kinds of exceptions, or when doing network calls you get a network exception for many different scenarios—for example, if the server is not available, or the data supplied do not match the expectations. It’s good to react to these errors differently. Some exceptions can be recovered in different ways, while with others the user might need some information. The following code sample throws the exception of type MyCustomException and sets the ErrorCode property of this exception (code file ExceptionFilters/Program.cs): public static void ThrowWithErrorCode(int code) { throw new MyCustomException("Error in Foo") { ErrorCode = code }; }
In the Main method, the try block safeguards the method invocation with two catch blocks. The first catch block uses the when keyword to filter only exceptions if the ErrorCode property equals 405. The expression for the when clause needs to return a Boolean value. If the result is true, this catch block handles the exception. If it is false, other catches are looked for. Passing 405 to the method ThrowWithErrorCode, the filter returns true, and the first catch handles the exception. Passing another value, the filter returns false and the second catch handles the exception. With filters, you can have multiple handlers to handle the same exception type. 674
Download from finelybook www.finelybook.com
Of course, you can also remove the second catch block and not handle the exception in that circumstance. try { ThrowWithErrorCode(405); } catch (MyCustomException ex) when (ex.ErrorCode == 405) { Console.WriteLine($"Exception caught with filter {ex.Message} " + $"and {ex.ErrorCode}"); } catch (MyCustomException ex) { Console.WriteLine($"Exception caught {ex.Message} and {ex.ErrorCode}"); }
Re-throwing Exceptions When you catch exceptions it’s also very common to re-throw exceptions. You can change the exception type while throwing the exception again. With this you can give the caller more information about what happened. The original exception might not have enough information about the context of what was going on. You can also log exception information and give the caller different information. For example, for a user running the application, exception information does not really help. A system administrator reading log files can react accordingly. An issue with re-throwing exceptions is that the caller often needs to find out the reason for what happened with the earlier exception, and where this did happen. Depending on how exceptions are thrown, stack trace information might be lost. For you to see the different options on re-throwing exceptions, the sample program RethrowExceptions shows the different options. For this sample, two custom exception types are created. The first one, MyCustomException, defines the property ErrorCode in addition to the members of the base class Exception; the second one, AnotherCustomException, supports passing an inner exception (code 675
Download from finelybook www.finelybook.com
file RethrowExceptions/MyCustomException.cs): public class MyCustomException : Exception { public MyCustomException(string message) : base(message) { } public int ErrorCode { get; set; } } public class AnotherCustomException : Exception { public AnotherCustomException(string message, Exception innerException) : base(message, innerException) { } }
The method HandleAll invokes the methods HandleAndThrowAgain, HandleAndThrowWithInnerException , HandleAndRethrow, and HandleWithFilter. The exception that is thrown is caught to write the exception message as well as the stack trace to the console. To better find what line numbers are referenced from the stack trace, the #line preprocessor directive is used that restarts the line numbering. With this, the invocation of the methods using the delegate m is in line 114 (code file RethrowExceptions/Program.cs): #line 100 public static void HandleAll() { var methods = new Action[] { HandleAndThrowAgain, HandleAndThrowWithInnerException, HandleAndRethrow, HandleWithFilter }; foreach (var m in methods) { try { m(); // line 114 } catch (Exception ex) {
676
Download from finelybook www.finelybook.com
Console.WriteLine(ex.Message); Console.WriteLine(ex.StackTrace); if (ex.InnerException != null) { Console.WriteLine($"\tInner Exception{ex.Message}"); Console.WriteLine(ex.InnerException.StackTrace); } Console.WriteLine(); } } }
The method ThrowAnException is the one to throw the first exception. This exception is thrown in line 8002. During development, it helps to know where this exception is thrown: #line 8000 public static void ThrowAnException(string message) { throw new MyCustomException(message); // line 8002 }
Naïve Use to Rethrow the Exception The method HandleAndThrowAgain does nothing more than log the exception to the console and throw it again using throw ex: #line 4000 public static void HandleAndThrowAgain() { try { ThrowAnException("test 1"); } catch (Exception ex) { Console.WriteLine($"Log exception {ex.Message} and throw again"); throw ex; // you shouldn't do that - line 4009 } }
Running the application, a simplified output showing the stack-trace (without the namespace and the full path to the code files) is shown here: 677
Download from finelybook www.finelybook.com
Log exception test 1 and throw again test 1 at Program.HandleAndThrowAgain() in Program.cs:line 4009 at Program.HandleAll() in Program.cs:line 114
The stack trace shows the call to the m method within the HandleAll method, which in turn invokes the HandleAndThrowAgain method. The information where the exception is thrown at first is completely lost in the call stack of the final catch. This makes it hard to find the original reason of an error. Usually it’s not a good idea to just throw the same exception with throw passing the exception object. Changing the Exception One useful scenario is to change the type of the exception and add information to the error. This is done in the method HandleAndThrowWithInnerException. After logging the error, a new exception of type AnotherException is thrown passing ex as the inner exception: #line 3000 public static void HandleAndThrowWithInnerException() { try { ThrowAnException("test 2"); // line 3004 } catch (Exception ex) { Console.WriteLine($"Log exception {ex.Message} and throw again"); throw new AnotherCustomException("throw with inner exception", ex); // 3009 } }
Checking the stack trace of the outer exception, you see line numbers 3009 and 114 similar to before. However, the inner exception gives the original reason of the error. It gives the line of the method that invoked the erroneous method (3004) and the line where the original (the inner) exception was thrown (8002): Log exception test 2 and throw again throw with inner exception
678
Download from finelybook www.finelybook.com
at Program.HandleAndThrowWithInnerException() in Program.cs:line 3009 at Program.HandleAll() in Program.cs:line 114 Inner Exception throw with inner exception at Program.ThrowAnException(String message) in Program.cs:line 8002 at Program.HandleAndThrowWithInnerException() in Program.cs:line 3004
No information is lost this way.
NOTE When trying to find reasons for an error, have a look at whether an inner exception exists. This often gives helpful information.
NOTE When catching exceptions, it’s good practice to change the exception when rethrowing. For example, catching an SqlException can result in throwing a business-related exception such as InvalidIsbnException. Rethrowing the Exception In case the exception type should not be changed, the same exception can be rethrown just with the throw statement. Using throw without passing an exception object throws the current exception of the catch block and keeps the exception information: #line 2000 public static void HandleAndRethrow() { try { ThrowAnException("test 3"); }
679
Download from finelybook www.finelybook.com
catch (Exception ex) { Console.WriteLine($"Log exception {ex.Message} and rethrow"); throw; // line 2009 } }
With this in place, the stack information is not lost. The exception was originally thrown in line 8002, and rethrown in line 2009. Line 114 contains the delegate m that invoked HandleAndRethrow: Log exception test 3 and rethrow test 3 at Program.ThrowAnException(String message) in Program.cs:line 8002 at Program.HandleAndRethrow() in Program.cs:line 2009 at Program.HandleAll() in Program.cs:line 114
Using Filters to Add Functionality When rethrowing exceptions using the throw statement, the call stack contains the address of the throw. When you use exception filters, it is possible to not change the call stack at all. Now add a when keyword that passes a filter method. This filter method named Filter logs the message and always returns false. That’s why the catch block is never invoked: #line 1000 public void HandleWithFilter() { try { ThrowAnException("test 4"); // line 1004 } catch (Exception ex) when(Filter(ex)) { Console.WriteLine("block never invoked"); } } #line 1500 public bool Filter(Exception ex) { Console.WriteLine($"just log {ex.Message}"); return false;
680
Download from finelybook www.finelybook.com
}
Now when you look at the stack trace, the exception originates in the HandleAll method in line 114 that in turn invokes HandleWithFilter, line 1004 contains the invocation to ThrowAnException, and line 8002 contains the line where the exception was thrown: just log test 4 test 4 at Program.ThrowAnException(String message) in Program.cs:line 8002 at Program.HandleWithFilter() in Program.cs:line 1004 at RethrowExceptions.Program.HandleAll() in Program.cs:line 114
NOTE The primary use of exception filters is to filter exceptions based on a value of the exception. Exception filters can also be used for other effects, such as writing log information without changing the call stack. However, exception filters should be fast running, so you should only do simple checks and avoid side effects. Logging is one of the excusable exceptions.
What Happens If an Exception Isn’t Handled? Sometimes an exception might be thrown but there is no catch block in your code that is able to handle that kind of exception. The SimpleExceptions example can serve to illustrate this. Suppose, for example, that you omitted the FormatException and catch-all catch blocks, and supplied only the block that traps an IndexOutOfRangeException. In that circumstance, what would happen if a FormatException were thrown? The answer is that the .NET runtime would catch it. Later in this section, you learn how you can nest try blocks; and, in fact, there is already a nested try block behind the scenes in the example. The .NET runtime has effectively placed the entire program inside another huge 681
Download from finelybook www.finelybook.com
try block—it does this for every .NET program. This try block has a catch handler that can catch any type of exception. If an exception
occurs that your code does not handle, the execution flow simply passes right out of your program and is trapped by this catch block in the .NET runtime. However, the results of this probably will not be what you want, as the execution of your code is terminated promptly. The user sees a dialog that complains that your code has not handled the exception and provides any details about the exception the .NET runtime was able to retrieve. At least the exception has been caught! In general, if you are writing an executable, try to catch as many exceptions as you reasonably can and handle them in a sensible way. If you are writing a library, it is normally best to catch exceptions that you can handle in a useful way, or where you can add additional information to the context and throw other exception types as shown in the previous section. Assume that the calling code handles any errors it encounters.
USER-DEFINED EXCEPTION CLASSES In the previous section, you already created a user-defined exception. You are now ready to look at a larger example that illustrates exceptions. This example, called SolicitColdCall, contains two nested try blocks and illustrates the practice of defining your own custom exception classes and throwing another exception from inside a try block. This example assumes that a sales company wants to increase its customer base. The company’s sales team is going to phone a list of people to invite them to become customers, a practice known in sales jargon as cold-calling. To this end, you have a text file available that contains the names of the people to be cold-called. The file should be in a well-defined format in which the first line contains the number of people in the file and each subsequent line contains the name of the next person. In other words, a correctly formatted file of names might look like this: 4 George Washington
682
Download from finelybook www.finelybook.com
Benedict Arnold John Adams Thomas Jefferson
This version of cold-calling is designed to display the name of the person on the screen (perhaps for the salesperson to read). That is why only the names, and not the phone numbers, of the individuals are contained in the file. For this example, your program asks the user for the name of the file and then simply reads it in and displays the names of people. That sounds like a simple task, but even so a couple of things can go wrong and require you to abandon the entire procedure: The user might type the name of a file that does not exist. This is caught as a FileNotFound exception. The file might not be in the correct format. There are two possible problems here. One, the first line of the file might not be an integer. Two, there might not be as many names in the file as the first line of the file indicates. In both cases, you want to trap this oddity as a custom exception that has been written especially for this purpose, ColdCallFileFormatException. There is something else that can go wrong that doesn’t cause you to abandon the entire process but does mean you need to abandon a person’s name and move on to the next name in the file (and therefore trap it by an inner try block). Some people are spies working for rival sales companies, so you obviously do not want to let these people know what you are up to by accidentally phoning one of them. For simplicity, assume that you can identify who the spies are because their names begin with B. Such people should have been screened out when the data file was first prepared, but in case any have slipped through, you need to check each name in the file and throw a SalesSpyFoundException if you detect a sales spy. This, of course, is another custom exception object. Finally, you implement this example by coding a class, ColdCallFileReader, which maintains the connection to the cold-call file and retrieves data from it. You code this class in a safe way, which means that its methods all throw exceptions if they are called 683
Download from finelybook www.finelybook.com
inappropriately—for example, if a method that reads a file is called before the file has even been opened. For this purpose, you write another exception class: UnexpectedException.
Catching the User-Defined Exceptions The code sample for user-defined exceptions makes use of the following namespaces: System System.IO
Start with the Main method of the SolicitColdCall sample, which catches your user-defined exceptions. Note that you need to call up file-handling classes in the System.IO namespace as well as the System namespace (code file SolicitColdCall/Program.cs): public class Program { public static void Main() { Console.Write("Please type in the name of the file " + "containing the names of the people to be cold called > "); string fileName = ReadLine(); ColdCallFileReaderLoop1(fileName); Console.WriteLine(); Console.ReadLine(); } public static ColdCallfFileReaderLoop1(string filename) { var peopleToRing = new ColdCallFileReader(); try { peopleToRing.Open(fileName); for (int i = 0; i < peopleToRing.NPeopleToRing; i++) { peopleToRing.ProcessNextPerson(); } Console.WriteLine("All callers processed correctly"); } catch(FileNotFoundException) {
684
Download from finelybook www.finelybook.com
Console.WriteLine($"The file {fileName} does not exist"); } catch(ColdCallFileFormatException ex) { Console.WriteLine($"The file {fileName} appears to have been corrupted"); Console.WriteLine($"Details of problem are: {ex.Message}"); if (ex.InnerException != null) { Console.WriteLine($"Inner exception was: {ex.InnerException.Message}"); } } catch(Exception ex) { Console.WriteLine($"Exception occurred:\n{ex.Message}"); } finally { peopleToRing.Dispose(); } } }
This code is a little more than just a loop to process people from the file. You start by asking the user for the name of the file. Then you instantiate an object of a class called ColdCallFileReader, which is defined shortly. The ColdCallFileReader class is the class that handles the file reading. Notice that you do this outside the initial try block— that’s because the variables that you instantiate here need to be available in the subsequent catch and finally blocks, and if you declare them inside the try block they would go out of scope at the closing curly brace of the try block, where the compiler would complain about it. In the try block, you open the file (using the ColdCallFileReader.Open method) and loop over all the people in it. The ColdCallFileReader.ProcessNextPerson method reads in and displays the name of the next person in the file, and the ColdCallFileReader.NPeopleToRing property indicates how many people should be in the file (obtained by reading the file’s first line). 685
Download from finelybook www.finelybook.com
There are three catch blocks: one for FileNotFoundException, one for ColdCallFileFormatException, and one to trap any other .NET exceptions. In the case of a FileNotFoundException, you display a message to that effect. Notice that in this catch block, the exception instance is not actually used at all. This catch block is used to illustrate the userfriendliness of the application. Exception objects generally contain technical information that is useful for developers, but not the sort of stuff you want to show to end users. Therefore, in this case you create a simpler message of your own. For the ColdCallFileFormatException handler, you have done the opposite, specifying how to obtain fuller technical information, including details about the inner exception, if one is present. Finally, if you catch any other generic exceptions, you display a userfriendly message, instead of letting any such exceptions fall through to the .NET runtime. Note that here you are not handling any other exceptions that aren’t derived from System.Exception because you are not calling directly into non-.NET code. The finally block is there to clean up resources. In this case, that means closing any open file—performed by the ColdCallFileReader.Dispose method.
NOTE C# offers the using statement where the compiler itself creates a try/finally block calling the Dispose method in the finally block. The using statement is available on objects implementing a Dispose method. You can read the details of the using statement in Chapter 17, “Managed and Unmanaged Memory.”
Throwing the User-Defined Exceptions Now take a look at the definition of the class that handles the file 686
Download from finelybook www.finelybook.com
reading and (potentially) throws your user-defined exceptions: ColdCallFileReader. Because this class maintains an external file connection, you need to ensure that it is disposed of correctly in accordance with the principles outlined for the disposing of objects in Chapter 4, “Object-Oriented Programming with C#.” Therefore, you derive this class from IDisposable. First, you declare some private fields (code file SolicitColdCall/ColdCallFileReader.cs): public class ColdCallFileReader: IDisposable { private FileStream _fs; private StreamReader _sr; private uint _nPeopleToRing; private bool _isDisposed = false; private bool _isOpen = false;
and StreamReader, both in the System.IO namespace, are the base classes that you use to read the file. FileStream enables you to connect to the file in the first place, whereas StreamReader is designed to read text files and implements a method, ReadLine, which reads a line of text from a file. You look at StreamReader more closely in Chapter 22, “Files and Streams,” which discusses file handling in depth. FileStream
The _isDisposed field indicates whether the Dispose method has been called. ColdCallFileReader is implemented so that after Dispose has been called, it is not permitted to reopen connections and reuse the object. _isOpen is also used for error checking—in this case, checking whether the StreamReader actually connects to an open file. The process of opening the file and reading in that first line—the one that tells you how many people are in the file—is handled by the Open method: public void Open(string fileName) { if (_isDisposed) { throw new ObjectDisposedException("peopleToRing"); } _fs = new FileStream(fileName, FileMode.Open);
687
Download from finelybook www.finelybook.com
_sr = new StreamReader(_fs); try { string firstLine = _sr.ReadLine(); _nPeopleToRing = uint.Parse(firstLine); _isOpen = true; } catch (FormatException ex) { throw new ColdCallFileFormatException( $"First line isn\'t an integer {ex}"); } }
The first thing you do in this method (as with all other ColdCallFileReader methods) is check whether the client code has inappropriately called it after the object has been disposed of, and if so, throw a predefined ObjectDisposedException object. The Open method checks the _isDisposed field to determine whether Dispose has already been called. Because calling Dispose implies that the caller has now finished with this object, you regard it as an error to attempt to open a new file connection if Dispose has been called. Next, the method contains the first of two inner try blocks. The purpose of this one is to catch any errors resulting from the first line of the file not containing an integer. If that problem arises, the .NET runtime throws a FormatException, which you trap and convert to a more meaningful exception that indicates a problem with the format of the cold-call file. Note that System.FormatException is there to indicate format problems with basic data types, not with files, so it’s not a particularly useful exception to pass back to the calling routine in this case. The new exception thrown will be trapped by the outermost try block. Because no cleanup is needed here, there is no need for a finally block. If everything is fine, you set the isOpen field to true to indicate that there is now a valid file connection from which data can be read. The ProcessNextPerson method also contains an inner try block: public void ProcessNextPerson() { if (_isDisposed)
688
Download from finelybook www.finelybook.com
{ throw new ObjectDisposedException("peopleToRing"); } if (!_isOpen) { throw new UnexpectedException( "Attempted to access coldcall file that is not open"); } try { string name = _sr.ReadLine(); if (name == null) { throw new ColdCallFileFormatException("Not enough names"); } if (name[0] == 'B') { throw new SalesSpyFoundException(name); } Console.WriteLine(name); } catch(SalesSpyFoundException ex) { Console.WriteLine(ex.Message); } finally { } }
Two possible problems exist with the file here (assuming there actually is an open file connection; the ProcessNextPerson method checks this first). One, you might read in the next name and discover that it is a sales spy. If that condition occurs, then the exception is trapped by the first catch block in this method. Because that exception has been caught here, inside the loop, it means that execution can subsequently continue in the Main method of the program, and the subsequent names in the file continue to be processed. A problem might also occur if you try to read the next name and discover that you have already reached the end of the file. The StreamReader object’s ReadLine method works like this: If it has gone past the end of the file, it doesn’t throw an exception but simply 689
Download from finelybook www.finelybook.com
returns null. Therefore, if you find a null string, you know that the format of the file was incorrect because the number in the first line of the file indicated a larger number of names than were actually present in the file. If that happens, you throw a ColdCallFileFormatException, which will be caught by the outer exception handler (which causes the execution to terminate). Again, you don’t need a finally block here because there is no cleanup to do; however, this time an empty finally block is included just to show that you can do so, if you want. The example is nearly finished. You have just two more members of ColdCallFileReader to look at: the NPeopleToRing property, which returns the number of people that are supposed to be in the file, and the Dispose method, which closes an open file. Notice that the Dispose method returns immediately if it has already been called—this is the recommended way of implementing it. It also confirms that there actually is a file stream to close before closing it. This example is shown here to illustrate defensive coding techniques: public uint NPeopleToRing { get { if (_isDisposed) { throw new ObjectDisposedException("peopleToRing"); } if (!_isOpen) { throw new UnexpectedException( "Attempted to access cold–call file that is not open"); } return _nPeopleToRing; } } public void Dispose() { if (_isDisposed) { return; }
690
Download from finelybook www.finelybook.com
_isDisposed = true; _isOpen = false; _fs?.Dispose(); _fs = null; }
Defining the User-Defined Exception Classes Finally, you need to define three of your own exception classes. Defining your own exception is quite easy because there are rarely any extra methods to add. It is just a case of implementing a constructor to ensure that the base class constructor is called correctly. Here is the full implementation of SalesSpyFoundException (code file SolicitColdCall/SalesSpyFoundException.cs): public class SalesSpyFoundException: Exception { public SalesSpyFoundException(string spyName) : base($"Sales spy found, with name {spyName}") { } public SalesSpyFoundException(string spyName, Exception innerException) : base($"Sales spy found with name {spyName}", innerException) { } }
Notice that it is derived from Exception, as you would expect for a custom exception. In fact, in practice, you would probably have added an intermediate class, something like ColdCallFileException, derived from Exception, and then derived both of your exception classes from this class. This ensures that the handling code has that extra-fine degree of control over which exception handler handles each exception. However, to keep the example simple, you will not do that. You have done one bit of processing in SalesSpyFoundException. You have assumed that the message passed into its constructor is just the name of the spy found, so you turn this string into a more meaningful error message. You have also provided two constructors: one that simply takes a message, and one that also takes an inner exception as a 691
Download from finelybook www.finelybook.com
parameter. When defining your own exception classes, it is best to include, at a minimum, at least these two constructors (although you will not actually be using the second SalesSpyFoundException constructor in this example). Now for the ColdCallFileFormatException. This follows the same principles as the previous exception, but you don’t do any processing on the message (code file SolicitColdCall/ColdCallFileFormatException.cs): public class ColdCallFileFormatException: Exception { public ColdCallFileFormatException(string message) : base(message) { } public ColdCallFileFormatException(string message, Exception innerException) : base(message, innerException) { } }
Finally, you have UnexpectedException, which looks much the same as ColdCallFileFormatException (code file SolicitColdCall/UnexpectedException.cs): public class UnexpectedException: Exception { public UnexpectedException(string message) : base(message) { } public UnexpectedException(string message, Exception innerException) : base(message, innerException) { } }
Now you are ready to test the program. First, try the people.txt file. The contents are defined here: 692
Download from finelybook www.finelybook.com
4 George Washington Benedict Arnold John Adams Thomas Jefferson
This has four names (which match the number given in the first line of the file), including one spy. Then try the following people2.txt file, which has an obvious formatting error: 49 George Washington Benedict Arnold John Adams Thomas Jefferson
Finally, try the example but specify the name of a file that does not exist, such as people3.txt. Running the program three times for the three filenames returns these results: SolicitColdCall Please type in the name of the file containing the names of the people to be cold called > people.txt George Washington Sales spy found, with name Benedict Arnold John Adams Thomas Jefferson All callers processed correctly SolicitColdCall Please type in the name of the file containing the names of the people to be cold called > people2.txt George Washington Sales spy found, with name Benedict Arnold John Adams Thomas Jefferson The file people2.txt appears to have been corrupted. Details of the problem are: Not enough names SolicitColdCall Please type in the name of the file containing the names of the people to be cold called > people3.txt The file people3.txt does not exist.
This application has demonstrated a number of different ways in 693
Download from finelybook www.finelybook.com
which you can handle the errors and exceptions that you might find in your own applications.
CALLER INFORMATION When dealing with errors, it is often helpful to get information about the error where it occurred. Earlier in this chapter, the #line preprocessor directive is used to change the line numbering of the code to get better information with the call stack. Getting the line numbers, filenames, and member names from within code, you can use attributes and optional parameters that are directly supported by the C# compiler. The attributes CallerLineNumber, CallerFilePath, and CallerMemberName, defined within the namespace System.Runtime.CompilerServices, can be applied to parameters. Normally with optional parameters, the compiler assigns the default values on method invocation in case these parameters are not supplied with the call information. With caller information attributes, the compiler doesn’t fill in the default values; it instead fills in the line number, file path, and member name. The code sample CallerInformation makes use of the following namespaces: System System.Runtime.CompilerServices
The Log method from the following code snippet demonstrates how to use these attributes. With the implementation, the information is written to the console (code file CallerInformation/Program.cs): public void Log([CallerLineNumber] int line = -1, [CallerFilePath] string path = null, [CallerMemberName] string name = null) { Console.WriteLine((line < 0) ? "No line" : "Line " + line); Console.WriteLine((path == null) ? "No file path" : path); Console.WriteLine((name == null) ? "No member name" : name); Console.WriteLine(); }
694
Download from finelybook www.finelybook.com
Let’s invoke this method with some different scenarios. In the following Main method, the Log method is called by using an instance of the Program class, within the set accessor of the property, and within a lambda expression. Argument values are not assigned to the method, enabling the compiler to fill it in: public static void Main() { var p = new Program(); p.Log(); p.SomeProperty = 33; Action a1 = () => p.Log(); a1(); } private int _someProperty; public int SomeProperty { get => _someProperty; set { Log(); _someProperty = value; } }
The result of the running program is shown next. Where the Log method was invoked, you can see the line numbers, the filename, and the caller member name. With the Log inside the Main method, the member name is Main. The invocation of the Log method inside the set accessor of the property SomeProperty shows SomeProperty. The Log method inside the lambda expression doesn’t show the name of the generated method, but instead the name of the method where the lambda expression was invoked (Main), which is more useful, of course. Line 12 c:\ProCSharp\ErrorsAndExceptions\CallerInformation\Program.cs Main Line 26 c:\ProCSharp\ErrorsAndExceptions\CallerInformation\Program.cs SomeProperty Line 14 c:\ProCSharp\ErrorsAndExceptions\CallerInformation\Program.cs
695
Download from finelybook www.finelybook.com
Main
Using the Log method within a constructor, the caller member name shows ctor. With a destructor, the caller member name is Finalize, as this is the method name generated.
NOTE The destructor and finalizer are covered in Chapter 17.
NOTE A great use of the CallerMemberName attribute is with the implementation of the interface INotifyPropertyChanged. This interface requires the name of the property to be passed with the method implementation. You can see the implementation of this interface in several chapters in this book—for example, Chapter 34, “Patterns with XAML Apps.”
SUMMARY This chapter examined the rich mechanism C# provides for dealing with error conditions through exceptions. You are not limited to the generic error codes that could be output from your code; instead, you have the capability to go in and uniquely handle the most granular of error conditions. Sometimes these error conditions are provided to you through .NET itself; at other times, though, you might want to code your own error conditions as illustrated in this chapter. In either case, you have many ways to protect the workflow of your applications from unnecessary and dangerous faults. The next chapter goes into important keywords for asynchronous programming: async and await.
696
Download from finelybook www.finelybook.com
15 Asynchronous Programming WHAT’S IN THIS CHAPTER? The importance of asynchronous programming Asynchronous patterns Foundations of asynchronous programming Error handling with asynchronous methods Asynchronous programming with Windows Apps
WROX.COM CODE DOWNLOADS FOR THIS CHAPTER The Wrox.com code downloads for this chapter are found at www.wrox.com on the Download Code tab. The source code is also available at https://github.com/ProfessionalCSharp/ProfessionalCSharp7 in the directory Async. The code for this chapter is divided into the following major examples: AsyncHistory Foundations Error Handling AsyncWindowsApp 697
Download from finelybook www.finelybook.com
WHY ASYNCHRONOUS PROGRAMMING IS IMPORTANT The .NET Framework 4.5 added the Task Parallel Library (TPL) to .NET to make parallel programming easier. C# 5.0 added two keywords to make asynchronous programming easier: async and await. These two keywords are the main focus of this chapter. With asynchronous programming a method is called that runs in the background (typically with the help of a thread or task), and the calling thread is not blocked. In this chapter, you can read about different patterns on asynchronous programming such as the asynchronous pattern, the event-based asynchronous pattern, and the task-based asynchronous pattern (TAP). TAP makes use of the async and await keywords. When you compare these patterns, you can see the real advantage of this style of asynchronous programming. After discussing the different patterns, you see the foundation of asynchronous programming by creating tasks and invoking asynchronous methods. You find out what’s behind the scenes with continuation tasks and the synchronization context. Error handling needs some special emphasis; as with asynchronous tasks, some scenarios require some different handling with errors. The last part of this chapter discusses specific scenarios with Universal Windows apps, what you need to be aware of with asynchronous programming.
NOTE Chapter 21, “Tasks and Parallel Programming,” covers other information about parallel programming. Users find it annoying when an application does not immediately react to requests. With the mouse, we have become accustomed to 698
Download from finelybook www.finelybook.com
experiencing a delay, as we’ve learned that behavior over several decades. With a touch UI, an application needs to immediately react to requests. Otherwise, the user tries to redo the action. Because asynchronous programming was hard to achieve with older versions of the .NET Framework, it was not always done when it should have been. One of the applications that blocked the UI thread fairly often is an older version of Visual Studio. With that version, opening a solution containing hundreds of projects meant you could take a long coffee break. Visual Studio 2017 offers the Lightweight Solution Load feature, which loads projects only as needed and with the selected project loaded first. Since Visual Studio 2015, the NuGet package manager is no longer implemented as a modal dialog. The new NuGet package manager can load information about packages asynchronously while you do other things at the same time. These are just a few examples of important changes built into Visual Studio related to asynchronous programming. Many APIs with .NET offer both a synchronous and an asynchronous version. Because the synchronous version of the API was a lot easier to use, it was often used where it wasn’t appropriate. With the new Windows Runtime (WinRT), if an API call is expected to take longer than 40 milliseconds, only an asynchronous version is available. Since C# 5.0, programming asynchronously is as easy as programming in a synchronous manner, so there shouldn’t be any barrier to using the asynchronous APIs, but of course there can be traps, which are covered in this chapter.
.NET HISTORY OF ASYNCHRONOUS PROGRAMMING Before stepping into the new async and await keywords, it is best to understand asynchronous patterns from the .NET Framework. Asynchronous features have been available since .NET Framework 1.0, and many classes in the .NET Framework implement one or more such patterns. Here, we start doing a synchronous networking call followed by the 699
Download from finelybook www.finelybook.com
different asynchronous patterns: Asynchronous pattern Event-based asynchronous pattern Task-based asynchronous pattern The asynchronous pattern, which was the first way of handling asynchronous features, is not only available with several APIs but also with a base functionality such as the delegate type. Because doing updates on the UI—both with Windows Forms and WPF—with the asynchronous pattern is quite complex, .NET Framework 2.0 introduced the event-based asynchronous pattern. With this pattern, an event handler is invoked from the thread that owns the synchronization context, so updating UI code is easily handled with this pattern. Previously, this pattern was also known with the name asynchronous component pattern. With the .NET Framework 4.5, another way to achieve asynchronous programming was introduced: the task-based asynchronous pattern (TAP). This pattern is based on the Task type and makes use of a compiler feature with the keywords async and await. The sample code for the HistorySample uses at least C# 7.1 and these namespaces: System System.IO System.Net System.Threading.Tasks
A sample app doing an HTTP request is a good use case as several of the System.Net APIs offer synchronous as well as asynchronous APIs.
Synchronous Call Let’s start with the synchronized version using the WebClient class. This class offers several synchronous APIs, such as DownloadString, 700
Download from finelybook www.finelybook.com
DownloadFile, and DownloadData. In the following code snippet, DownloadString makes an HTTP request and writes the response
in the string content. A substring of this string is written to the console (code file AsyncHistory/Program.cs): private const string url = "http://www.cninnovation.com"; private static void SynchronizedAPI() { Console.WriteLine(nameof(SynchronizedAPI)); using (var client = new WebClient()) { string content = client.DownloadString(url); Console.WriteLine(content.Substring(0, 100)); } Console.WriteLine(); }
The method DownloadString blocks the calling thread until the result is returned. It’s not a good idea to invoke this method from the user interface thread of the client application because it blocks the user interface. The wait is unpleasant to the user because the application is unresponsive during this network call.
Asynchronous Pattern One way to make the call asynchronously is by using the asynchronous pattern. Many APIs of .NET offer the asynchronous pattern. With the .NET Framework, also the delegate type supports this pattern. Just be aware that when you invoke these methods of the delegate with .NET Core, an exception with the information that the platform is not supported is thrown. The asynchronous pattern defines a BeginXXX method and an EndXXX method. For example, if a synchronous method DownloadString is offered, the asynchronous variants would be BeginDownloadString and EndDownloadString. The BeginXXX method takes all input arguments of the synchronous method, and EndXXX takes the output arguments and return type to return the result. With the asynchronous pattern, the BeginXXX method also defines a parameter of AsyncCallback, which accepts a delegate that is invoked as soon as the asynchronous method 701
Download from finelybook www.finelybook.com
is completed. The BeginXXX method returns IAsyncResult, which can be used for polling to verify whether the call is completed, and to wait for the end of the method. The WebClient class doesn’t offer an implementation of the asynchronous pattern. Instead, the WebRequest class can be used. The WebRequest class itself is used by the WebClient. WebRequest offers this pattern with the methods BeginGetResponse and EndGetResponse (GetResponse is the synchronous version of this API). In the following code snippet, a WebRequest is created using the Create method of the WebRequest class. Using this request object, the BeginGetResponse method starts the asynchronous HTTP GET request to the server. The calling thread is not blocked. The first parameter of the method is an AsyncCallback. This is a delegate referencing a void method with an IAsyncResult argument. The implementation is done with the local function ReadResponse. This method is invoked as soon as the network request is completed. Within the implementation, the request object is used again to retrieve the result using GetResponseStream. In the code sample, Stream and StreamReader are used to access the returned string content (code file AsyncHistory/Program.cs): private static void AsynchronousPattern() { Console.WriteLine(nameof(AsynchronousPattern)); WebRequest request = WebRequest.Create(url); IAsyncResult result = request.BeginGetResponse(ReadResponse, null); void ReadResponse(IAsyncResult ar) { using (WebResponse response = request.EndGetResponse(ar)) { Stream stream = response.GetResponseStream(); var reader = new StreamReader(stream); string content = reader.ReadToEnd(); Console.WriteLine(content.Substring(0, 100)); Console.WriteLine(); } } }
702
Download from finelybook www.finelybook.com
Because a local function is used with the implementation, the request variable from the outer scope can be directly accessed with the closure functionality of the local function. Similar behavior is available with lambda expressions. In case a separate method would be used, the request object must be passed to this method. This is possible by passing the request object as the second argument of the BeginGetResponse method. This parameter can be retrieved in the called method using the AsyncState property of the IAsyncResult.
NOTE Local functions are explained in Chapter 13, “Functional Programming with C#.” There’s a problem with using the asynchronous pattern with UI applications: The method invoked from the AsyncCallback is not running in the UI thread, thus you cannot access members of UI elements without switching to the UI thread. An exception with the information The calling thread cannot access this object because a different thread owns it. would be the thrown. To make this easier, the .NET Framework 2.0 introduced the event-based asynchronous pattern, which makes it easier to deal with UI updates. This pattern is discussed next.
Event-Based Asynchronous Pattern The method EventBasedAsyncPattern makes use of the event-based asynchronous pattern. This pattern defines a method with the suffix Async. Again, the example code uses the WebClient class. With the synchronous method DownloadString, the WebClient class offers the asynchronous variant DownloadStringAsync. When the request is completed, the DownloadStringCompleted event is fired. With the event handler of this event, the result can be retrieved. The DownloadStringCompleted event is of type DownloadStringCompletedEventHandler. The second argument is of type DownloadStringCompletedEventArgs. This argument returns the result 703
Download from finelybook www.finelybook.com
string with the Result property (code file AsyncHistory/Program.cs): private static void EventBasedAsyncPattern() { Console.WriteLine(nameof(EventBasedAsyncPattern)); using (var client = new WebClient()) { client.DownloadStringCompleted += (sender, e) => { Console.WriteLine(e.Result.Substring(0, 100)); }; client.DownloadStringAsync(new Uri(url)); Console.WriteLine(); } }
With the DownloadStringCompleted event, the event handler is invoked with the thread that holds the synchronization context. Using Windows Forms, WPF, and the Universal Windows Platform, this is the UI thread. Thus, you can directly access UI elements from the event handler. This is the big advantage of this pattern compared to the asynchronous pattern. The difference between this event-based asynchronous pattern and synchronous programming is the order of method calls; they’re reversed for the asynchronous pattern. Before invoking the asynchronous method, you need to define what happens when the method call is completed. The following section plunges into the new world of asynchronous programming with the async and await keywords.
Task-Based Asynchronous Pattern The WebClient class was updated with the .NET Framework 4.5 to offer the task-based asynchronous pattern (TAP) as well. This pattern defines a suffix Async method that returns a Task type. Because the WebClient class already offers a method with the Async suffix to implement the task-based asynchronous pattern, the new method has the name DownloadStringTaskAsync. The method DownloadStringTaskAsync is declared to return Task. You do not need to declare a variable of Task to 704
Download from finelybook www.finelybook.com
assign the result from DownloadStringTaskAsync; instead, you can declare a variable of type string, and you can use the await keyword. The await keyword unblocks the thread to do other tasks. As soon as the method DownloadStringTaskAsync completes its background processing, the UI thread can continue and get the result from the background task to the string variable resp. Also, the code following this line continues (code file AsyncHistory/Program.cs): private static async Task TaskBasedAsyncPatternAsync() { Console.WriteLine(nameof(TaskBasedAsyncPatternAsync)); using (var client = new WebClient()) { string content = await client.DownloadStringTaskAsync(url); Console.WriteLine(content.Substring(0, 100)); Console.WriteLine(); } }
NOTE The async keyword creates a state machine similar to the yield return statement, which is discussed in Chapter 7, “Arrays.” The code is much simpler now. There is no blocking, and no manually switching back to the UI thread, as this is done automatically. Also, the code follows the same order as you’re used to with synchronous programming.
NOTE A more modern HTTP client is implemented with the class HttpClient. This class offers only asynchronous methods supporting the task-based asynchronous pattern. How this class can be used is explained in Chapter 23, “Networking.” 705
Download from finelybook www.finelybook.com
Async Main Method The entry point of the console application, the Main method, has the async modifier applied to allow the await keyword in the implementation. Using this declaration of the Main method to return a task requires C# 7.1 (code file AsyncHistory/Program.cs): static async Task Main() { SynchronizedAPI(); AsynchronousPattern(); EventBasedAsyncPattern(); await TaskBasedAsyncPatternAsync(); Console.ReadLine(); }
NOTE To specify version 7.1 of the C# compiler you need to add the LangVersion element to the csproj project file, or you can make a change to Visual Studio in the Advanced Build Project Settings. Now that you’ve seen the advantages of the async and await keywords, the next section examines the programming foundation behind these keywords.
FOUNDATION OF ASYNCHRONOUS PROGRAMMING The async and await keywords are just a compiler feature. The compiler creates code by using the Task class. Instead of using the new keywords, you could get the same functionality with C# 4 and methods of the Task class; it’s just not as convenient. This section gives information about what the compiler does with the async and await keywords. It shows you an effortless way to create an asynchronous method and demonstrates how to invoke multiple asynchronous methods in parallel. You also see how you can change a 706
Download from finelybook www.finelybook.com
class to offer the asynchronous pattern with the new keywords. The sample code for all the Foundations sample makes use of these namespaces: System System.Collections.Generic System.IO System.Linq System.Net System.Runtime.CompilerServices System.Threading System.Threading.Tasks
NOTE This downloadable sample application makes use of commandline arguments, so you can easily verify each scenario. For example, using the dotnet CLI, you can pass the -async commandline parameter with this command: dotnet run -- -async. Using Visual Studio, you can also configure the application arguments in the Debug Project Settings. To better understand what’s going on, the TraceThreadAndTask method is created to write thread and task information to the console. Task.CurrentId returns the identifier of the task. Thread.CurrentThread.ManagedThreadId returns the identifier of the current thread (code file Foundations/Program.cs): public static void TraceThreadAndTask(string info) { string taskInfo = Task.CurrentId == null ? "no task" : "task " + Task.CurrentId;
707
Download from finelybook www.finelybook.com
Console.WriteLine($"{info} in thread {Thread.CurrentThread.ManagedThreadId}" + $"and {taskInfo}"); }
Creating Tasks Let’s start with the synchronous method Greeting, which takes a while before returning a string (code file Foundations/Program.cs): static string Greeting(string name) { TraceThreadAndTask($"running {nameof(Greeting)}"); Task.Delay(3000).Wait(); return $"Hello, {name}"; }
To make such a method asynchronously, you define the method GreetingAsync. The task-based asynchronous pattern specifies that an asynchronous method is named with the Async suffix and re-turns a task. GreetingAsync is defined to have the same input parameters as the Greeting method but returns Task. Task defines a task that returns a string in the future. A simple way to return a task is by using the Task.Run method. The generic version Task.Run () creates a task that returns a string. As the compiler already knows the return type from the implementation (Greeting returns a string), you can also simplify the implementation by just using Task.Run(): static Task GreetingAsync(string name) => Task.Run(() => { TraceThreadAndTask($"running {nameof(GreetingAsync)}"); return Greeting(name); });
Calling an Asynchronous Method You can call this asynchronous method GreetingAsync by using the await keyword on the task that is returned. The await keyword requires the method to be declared with the async modifier. The code within this method does not continue before the GreetingAsync 708
Download from finelybook www.finelybook.com
method is completed. However, you can reuse the thread that started the CallerWithAsync method. This thread is not blocked (code file Foundations/Program.cs): private async static void CallerWithAsync() { TraceThreadAndTask($"started {nameof(CallerWithAsync)}"); string result = await GreetingAsync("Stephanie"); Console.WriteLine(result); TraceThreadAndTask($"ended {nameof(CallerWithAsync)}"); }
When you run the application, you can see from the first output that there’s no task. The GreetingAsync method is running in a task, and this task is using a different thread from the caller. The synchronous Greeting method then runs in this task. As the Greeting method returns, the GreetingAsync method returns, and the scope is back in the CallerWithAsync method after the await. Now, the CallerWithAsync method runs in a different thread than before. There’s not a task anymore, but although the method started with thread 2, after the await thread 3 was used. The await made sure that the continuation happens after the task was completed, but it now uses a different thread. This behavior is different between Console applications and applications that have a synchronization context as you see later in this chapter in the “Async with Windows Apps” section: started CallerWithAsync in thread 2 and no task running GreetingAsync in thread 3 and task 1 running Greeting in thread 3 and task 1 Hello, Stephanie ended CallerWithAsync in thread 3 and no task
Instead of passing the result from the asynchronous method to a variable, you can also use the await keyword directly by passing an argument. Here, the result from the GreetingAsync method is awaited as it was in the previous code snippet, but this time the result is directly passed to the Console.WriteLine method: private async static void CallerWithAsync2() { TraceThreadAndTask($"started {nameof(CallerWithAsync2)}"); Console.WriteLine(await GreetingAsync("Stephanie"));
709
Download from finelybook www.finelybook.com
TraceThreadAndTask($"ended {nameof(CallerWithAsync2)}"); }
NOTE With C# 7, the async modifier can be used with methods that return void or return an object that offers the GetAwaiter method. .NET offers the Task and ValueTask types. With the Windows Runtime you also can use IAsyncOperation. You should avoid using the async modifier with void methods; read more about this in the “Error Handling” section later in this chapter. The next section explains what’s driving the await keyword. Behind the scenes, continuation tasks are used.
Using the Awaiter You can use the async keyword with any object that offers the GetAwaiter method and returns an awaiter. An awaiter implements the interface INotifyCompletion with the method OnCompleted. This method is invoked when the task is completed. With the following code snippet, instead of using await on the Task, the GetAwaiter method of the task is used. GetAwaiter from the Task class returns a TaskAwaiter. Using the OnCompleted method, a local function is assigned that is invoked when the task is completed (code file Foundations/Program.cs): private static void CallerWithAwaiter() { TraceThreadAndTask($"starting {nameof(CallerWithAwaiter)}"); TaskAwaiter awaiter = GreetingAsync("Matthias").GetAwaiter(); awaiter.OnCompleted(OnCompleteAwaiter); void OnCompleteAwaiter() { Console.WriteLine(awaiter.GetResult()); TraceThreadAndTask($"ended {nameof(CallerWithAwaiter)}");
710
Download from finelybook www.finelybook.com
} }
When you run the application, you can see a result similar to the scenario in which you used the await keyword: starting CallerWithAwaiter in thread 2 and no task running GreetingAsync in thread 3 and task 1 running Greeting in thread 3 and task 1 Hello, Matthias ended CallerWithAwaiter in thread 3 and no task
The compiler converts the await keyword by putting all the code that follows within the block of a OnCompleted method.
Continuation with Tasks You can also handle continuation by using features of the Task object. GreetingAsync returns a Task object. The Task object contains information about the task created, and allows waiting for its completion. The ContinueWith method of the Task class defines the code that should be invoked as soon as the task is finished. The delegate assigned to the ContinueWith method receives the completed task with its argument, which allows accessing the result from the task using the Result property (code file Foundations/Program.cs): private static void CallerWithContinuationTask() { TraceThreadAndTask("started CallerWithContinuationTask"); var t1 = GreetingAsync("Stephanie"); t1.ContinueWith(t => { string result = t.Result; Console.WriteLine(result); TraceThreadAndTask("ended CallerWithContinuationTask"); }); }
Synchronization Context 711
Download from finelybook www.finelybook.com
If you verify the thread that is used within the methods you will find that in all three methods—CallerWithAsync CallerWithAwaiter, and CallerWithContinuationTask—different threads are used during the lifetime of the methods. One thread is used to invoke the method GreetingAsync, and another thread takes action after the await keyword or within the code block in the ContinueWith method. With a console application usually this is not an issue. However, you have to ensure that at least one foreground thread is still running before all background tasks that should be completed are finished. The sample application invokes Console.ReadLine to keep the main thread running until the return key is pressed. With applications that are bound to a specific thread for some actions (for example, with WPF applications or Windows apps, UI elements can only be accessed from the UI thread), this is an issue. Using the async and await keywords you don’t have to do any special actions to access the UI thread after an await completion. By default, the generated code switches the thread to the thread that has the synchronization context. A WPF application sets a DispatcherSynchronizationContext, and a Windows Forms application sets a WindowsFormsSynchronizationContext. Windows apps use the WinRTSynchronizationContext. If the calling thread of the asynchronous method is assigned to the synchronization context, then with the continuous execution after the await, by default the same synchronization context is used. If the same synchronization context shouldn’t be used, you must invoke the Task method ConfigureAwait(continueOnCapturedContext: false). An example that illustrates this usefulness is a Windows app in which the code that follows the await is not using any UI elements. In this case, it is faster to avoid the switch to the synchronization context.
Using Multiple Asynchronous Methods Within an asynchronous method you can call multiple asynchronous methods. How you code this depends on whether the results from one asynchronous method are needed by another.
712
Download from finelybook www.finelybook.com
Calling Asynchronous Methods Sequentially You can use the await keyword to call every asynchronous method. In cases where one method is dependent on the result of another method, this is very useful. Here, the second call to GreetingAsync is completely independent of the result of the first call to GreetingAsync. Thus, the complete method MultipleAsyncMethods could return the result faster if await is not used with every single method, as shown in the following example (code file Foundations/Program.cs): private async static void MultipleAsyncMethods() { string s1 = await GreetingAsync("Stephanie"); string s2 = await GreetingAsync("Matthias"); Console.WriteLine($"Finished both methods. {Environment.NewLine} " + $"Result 1: {s1}{Environment.NewLine} Result 2: {s2}"); }
Using Combinators If the asynchronous methods are not dependent on each other, it is a lot faster not to await on each separately; instead assign the return of the asynchronous method to a Task variable. The GreetingAsync method returns Task. Both these methods can now run in parallel. Combinators can help with this. A combinator accepts multiple parameters of the same type and returns a value of the same type. The passed parameters are "combined" to one. Task combinators accept multiple Task objects as parameter and return a Task. The sample code invokes the Task.WhenAll combinator method that you can await to have both tasks finished (code file Foundations/Program.cs): private async static void MultipleAsyncMethodsWithCombinators1() { Task t1 = GreetingAsync("Stephanie"); Task t2 = GreetingAsync("Matthias"); await Task.WhenAll(t1, t2); Console.WriteLine($"Finished both methods. {Environment.NewLine} " + $"Result 1: {t1.Result}{Environment.NewLine} Result 2:
713
Download from finelybook www.finelybook.com
{t2.Result}"); }
The Task class defines the WhenAll and WhenAny combinators. The Task returned from the WhenAll method is completed as soon as all tasks passed to the method are completed; the Task returned from the WhenAny method is completed as soon as one of the tasks passed to the method is completed. The WhenAll method of the Task type defines several overloads. If all the tasks return the same type, you can use an array of this type for the result of the await. The GreetingAsync method returns a Task, and awaiting for this method results in a string. Therefore, you can use Task.WhenAll to return a string array: private async static void MultipleAsyncMethodsWithCombinators2() { Task t1 = GreetingAsync("Stephanie"); Task t2 = GreetingAsync("Matthias"); string[] result = await Task.WhenAll(t1, t2); Console.WriteLine($"Finished both methods. {Environment.NewLine} " + $"Result 1: {result[0]}{Enviornment.NewLine} Result 2: {result[1]}"); }
The WhenAll method is of practical use when the waiting task can continue only when all tasks it’s waiting for are finished. The WhenAny method can be used when the calling task can do some work when any task it’s waiting for is completed. It can use a result from the task to go on.
Using ValueTasks C# 7 is more flexible with the await keyword; it can now await any object offering the GetAwaiter method. A new type that can be used with await is ValueTask. Contrary to the Task which is a class, ValueTask is a struct. This has a performance advantage as the ValueTask doesn’t have an object on the heap. What is the real overhead of a Task object compared to the 714
Download from finelybook www.finelybook.com
asynchronous method call? A method that needs to be invoked asynchronously typically has a lot more overhead than an object on the heap. Most times, the overhead of a Task object on the heap can be ignored—but not always. For example, a method can have one path where data is retrieved from a service with an asynchronous API. With this data retrieval, the data is written to a local cache. When you invoke the method the second time, the data can be retrieved in a fast manner without needing to create a Task object. The sample method GreetingValueTaskAsync does exactly this. In case the name is already found in the dictionary, the result is returned as a ValueTask. If the name isn’t in the dictionary, the GreetingAsync method is invoked, which returns a Task. Awaiting on this task to retrieve the result, a ValueTask is returned again (code file Foundations/Program.cs): private readonly static Dictionary names = new Dictionary(); static async ValueTask GreetingValueTaskAsync(string name) { if (names.TryGetValue(name, out string result)) { return result; } else { result = await GreetingAsync(name); names.Add(name, result); return result; } }
The UseValueTask method invokes the method GreetingValueTaskAsync two times with the same name. The first time, the data is retrieved using the GreetingAsync method; the second time, data is found in the dictionary and returned from there: private static async void UseValueTask() { string result = await GreetingValueTaskAsync("Katharina"); Console.WriteLine(result);
715
Download from finelybook www.finelybook.com
string result2 = await GreetingValueTaskAsync("Katharina"); Console.WriteLine(result2); }
In case a method doesn’t use the async modifier and a ValueTask needs to be returned, ValueTask objects can be created using the constructor passing the result, or passing a Task object: static ValueTask GreetingValueTask2Async(string name) { if (names.TryGetValue(name, out string result)) { return new ValueTask(result); } else { Task t1 = GreetingAsync(name); TaskAwaiter awaiter = t1.GetAwaiter(); awaiter.OnCompleted(OnCompletion); return new ValueTask(t1); void OnCompletion() { names.Add(name, awaiter.GetResult()); } } }
Converting the Asynchronous Pattern Not all classes from the .NET Framework introduced the new asynchronous method style. There are still many classes that offer the asynchronous pattern with the BeginXXX and EndXXX methods and not with task-based asynchronous methods; you will see this when you work with different classes from the frame-work. However, you can convert the asynchronous pattern to the new task-based asynchronous pattern. This example uses the HttpWebRequest class with the BeginGetResponse method to convert this method to the task-based async pattern. Task.Factory.FromAsync is a generic method that offers a few overloads to convert the asynchronous pattern to the task-based asynchronous pattern. With the sample application, when the BeginGetResponse 716
Download from finelybook www.finelybook.com
method of the HttpWebRequest is invoked, the asynchronous network request is started. This method returns an IAsyncResult, which is the first argument to the FromAsync method. The second argument is a reference to the method EndGetResponse, and it requires a delegate with the IAsyncResult argument—which the EndGetResponse method is. The second argument also requires a return of WebResponse as defined by the generic parameter for the FromAsync method. The EndGetResponse method is invoked by the task helper functionality when the IAsyncResult signals completion (code file Foundations/Program.cs): private static async void ConvertingAsyncPattern() { HttpWebRequest request = WebRequest.Create("http://www.microsoft.com") as HttpWebRequest; using (WebResponse response = await Task.Factory.FromAsync( request.BeginGetResponse(null, null), request.EndGetResponse)) { Stream stream = response.GetResponseStream(); using (var reader = new StreamReader(stream)) { string content = reader.ReadToEnd(); Console.WriteLine(content.Substring(0, 100)); } } }
WARNING With legacy applications, often the BeginInvoke method of the delegate is used when using the asynchronous pattern. The compiler does not complain when you use this method from a .NET Core application. However, during runtime you get a platform not supported exception.
717
Download from finelybook www.finelybook.com
ERROR HANDLING Chapter 14, “Errors and Exceptions,” provides detailed coverage of errors and exception handling. However, in the context of asynchronous methods, you should be aware of some special handling of errors. The code for the ErrorHandling example makes use of these namespaces: System System.Threading.Tasks
Let’s start with a simple method that throws an exception after a delay (code file ErrorHandling/Program.cs): static async Task ThrowAfter(int ms, string message) { await Task.Delay(ms); throw new Exception(message); }
If you call the asynchronous method without awaiting it, you can put the asynchronous method within a try/catch block—and the exception will not be caught. That’s because the method DontHandle has already completed before the exception from ThrowAfter is thrown. You need to await the ThrowAfter method, as shown in the example that follows in the next section. Pay attention that the exception is not caught in this code snippet: private static void DontHandle() { try { ThrowAfter(200, "first"); // exception is not caught because this method is finished // before the exception is thrown } catch (Exception ex) { Console.WriteLine(ex.Message); }
718
Download from finelybook www.finelybook.com
}
WARNING Asynchronous methods that return void cannot be awaited. The issue with this is that exceptions that are thrown from async void methods cannot be caught. That’s why it is best to return a Task type from an asynchronous method. Handler methods or overridden base methods are exempted from this rule.
Handling Exceptions with Asynchronous Methods A good way to deal with exceptions from asynchronous methods is to use await and put a try/catch statement around it, as shown in the following code snippet. The HandleOneError method releases the thread after calling the ThrowAfter method asynchronously, but it keeps the Task referenced to continue as soon as the task is completed. When that happens (which, in this case, is when the exception is thrown after two seconds), the catch matches and the code within the catch block is invoked (code file ErrorHandling/Program.cs): private static async void HandleOneError() { try { await ThrowAfter(2000, "first"); } catch (Exception ex) { Console.WriteLine($"handled {ex.Message}"); } }
Handling Exceptions with Multiple Asynchronous Methods What if two asynchronous methods are invoked and both throw exceptions? In the following example, first the ThrowAfter method is 719
Download from finelybook www.finelybook.com
invoked, which throws an exception with the message first after two seconds. After this method is completed, the ThrowAfter method is invoked, throwing an exception after one second. Because the first call to ThrowAfter already throws an exception, the code within the try block does not continue to invoke the second method, instead landing within the catch block to deal with the first exception (code file ErrorHandling/Program.cs): private static async void StartTwoTasks() { try { await ThrowAfter(2000, "first"); await ThrowAfter(1000, "second"); // the second call is not invoked // because the first method throws // an exception } catch (Exception ex) { Console.WriteLine($"handled {ex.Message}"); } }
Now start the two calls to ThrowAfter in parallel. The first method throws an exception after two seconds and the second one after one second. With Task.WhenAll you wait until both tasks are completed, whether an exception is thrown or not. Therefore, after a wait of about two seconds, Task.WhenAll is completed, and the exception is caught with the catch statement. However, you only see the exception information from the first task that is passed to the WhenAll method. It’s not the task that threw the exception first (which is the second task), but the first task in the list: private async static void StartTwoTasksParallel() { try { Task t1 = ThrowAfter(2000, "first"); Task t2 = ThrowAfter(1000, "second"); await Task.WhenAll(t1, t2); } catch (Exception ex)
720
Download from finelybook www.finelybook.com
{ // just display the exception information of the first task // that is awaited within WhenAll Console.WriteLine($"handled {ex.Message}"); } }
One way to get the exception information from all tasks is to declare the task variables t1 and t2 outside of the try block, so they can be accessed from within the catch block. Here you can check the status of the task to determine whether they are in a faulted state with the IsFaulted property. In case of an exception, the IsFaulted property returns true. The exception information itself can be accessed by using Exception.InnerException of the Task class. Another, and usually better, way to retrieve exception information from all tasks is demonstrated next.
Using AggregateException Information To get the exception information from all failing tasks, you can write the result from Task.WhenAll to a Task variable. This task is then awaited until all tasks are completed. Otherwise the exception would still be missed. As described in the last section, with the catch statement only the exception of the first task can be retrieved. However, now you have access to the Exception property of the outer task. The Exception property is of type AggregateException. This exception type defines the property InnerExceptions (not only InnerException), which contains a list of all the exceptions that have been awaited for. Now you can easily iterate through all the exceptions (code file ErrorHandling/Program.cs): private static async void ShowAggregatedException() { Task taskResult = null; try { Task t1 = ThrowAfter(2000, "first"); Task t2 = ThrowAfter(1000, "second"); await (taskResult = Task.WhenAll(t1, t2)); } catch (Exception ex)
721
Download from finelybook www.finelybook.com
{ Console.WriteLine($"handled {ex.Message}"); foreach (var ex1 in taskResult.Exception.InnerExceptions) { Console.WriteLine($"inner exception {ex1.Message}"); } } }
ASYNC WITH WINDOWS APPS Using the async keyword with Universal Windows Platform (UWP) apps works the same as what you’ve already seen in this chapter. However, you need to be aware that after calling await from the UI thread, when the asynchronous method returns, you’re by default back in the UI thread. This makes it easy to update UI elements after the asynchronous method is completed.
NOTE To build and create Universal Windows Platform (UWP) app, you need Windows 10, and your Windows system must be configured in “developer mode.” Enable the developer mode by opening the Windows settings, chose the Update & Security tile, select the “For developers” category, and click the radio button “Developer mode.” This allows your system to run sideloaded apps (apps without installing them from the Windows Store), and adds a Windows package for the developer mode. To understand the functionality—and the issues—a Universal Windows App is created. This app contains five buttons and a TextBlock element to demonstrate different scenarios (code file AsyncWindowsApps/MainPage.xaml):
NOTE Programming UWP apps is covered in detail in Chapters 33 to 36. In the OnStartAsync method, the thread ID of the UI thread is written to the TextBlock element. Next the asynchronous method Task.Delay, which does not block the UI thread, is invoked, and after this method completed the thread ID is written to the TextBlock again (code file AsyncWindowsApps/MainPage.xaml.cs): private async void OnStartAsync(object sender, RoutedEventArgs e) { text1.Text = $"UI thread: {GetThread()}"; await Task.Delay(1000); text1.Text += $"\n after await: {GetThread()}"; }
For accessing the thread ID, you use the Environment class. With UWP apps, the Thread class is not available—at least not until build 15063: private string GetThread() => $"thread: {Environment.CurrentManagedThreadId}";
When you run the application, you can see similar output in the text element. Contrary to console applications, with UWP apps defining a synchronization context, after the await you can see the same thread as before. This allows direct access to UI elements: UI thread: thread 3 after await: thread 3
723
Download from finelybook www.finelybook.com
Configure Await In case you don’t need access to UI elements, you can configure await to not use the synchronization context. The following code snippet demonstrates the configuration and also shows why you shouldn’t access UI elements from a background thread. With the method OnStartAsyncConfigureAwait, after writing the ID of the UI thread to the text information, the local function AsyncFunction is invoked. In this local function, the starting thread is written before the asynchronous method Task.Delay is invoked. Using the task returned from this method, the ConfigureAwait is invoked. With this method, the task is configured by passing the continueOnCapturedContext argument set to false. With this context configuration, you see that the thread after the await is not the UI thread anymore. Using a different thread to write the result to the result variable is okay. What you should never do is shown in the try block: accessing UI elements from a non-UI thread. The exception you get contains the HRESULT value as shown in the when clause. Just this exception is caught in the catch: the result is returned to the caller. With the caller, ConfigureAwait is invoked as well, but this time the continueOnCapturedContext is set to true. Here, both before and after the await, the method is running in the UI thread (code file AsyncWindowsApp/MainWindow.xaml.cs): private async void OnStartAsyncConfigureAwait(object sender, RoutedEventArgs e) { text1.Text = $"UI thread: {GetThread()}"; string s = await AsyncFunction().ConfigureAwait( continueOnCapturedContext: true); // after await, with continueOnCapturedContext true we are back in the UI thread text1.Text += $"\n{s}\nafter await: {GetThread()}"; async Task AsyncFunction() { string result = $"\nasync function: {GetThread()}\n"; await Task.Delay(1000).ConfigureAwait(continueOnCapturedContext:
724
Download from finelybook www.finelybook.com
false); result += $"\nasync function after await : {GetThread()}"; try { text1.Text = "this is a call from the wrong thread"; return "not reached"; } catch (Exception ex) when (ex.HResult == -2147417842) { return result; // we know it's the wrong thread // don't access UI elements from the previous try block } } }
NOTE Exception handling and filtering is explained in Chapter 14. When you run the application, you can see output similar to the following. In the async local function after the await, a different thread is used. The text “not reached” is never written, because the exception is thrown: UI thread: thread 3 async function: thread 3 async function after await: thread 6 after await: thread 3
WARNING In later UWP chapters in this book, data binding is used instead of directly accessing properties of UI elements. However, with UWP 725
Download from finelybook www.finelybook.com
you also can’t write properties that are bound to UI elements from a non UI-thread.
Switch to the UI Thread In some scenarios, there’s no effortless way around using a background thread and accessing UI elements. Here, you can switch to the UI thread with the CoreDispatcher object that is returned from the Dispatcher property. The Dispatcher property is defined in the DependencyObject class. DependencyObject is a base class of UI elements. Invoking the RunAsync method of the CoreDispatcher object runs the passed lambda expression again in a UI thread (code file AsyncWindowsApp/MainWindow.xaml.cs): private async void OnStartAsyncWithThreadSwitch(object sender, RoutedEventArgs e) { text1.Text = $"UI thread: {GetThread()}"; string s = await AsyncFunction(); text1.Text += $"\nafter await: {GetThread()}"; async Task AsyncFunction() { string result = $"\nasync function: {GetThread()}\n"; await Task.Delay(1000).ConfigureAwait(continueOnCapturedContext: false); result += $"\nasync function after await : {GetThread()}"; await Dispatcher.RunAsync(CoreDispatcherPriority.Normal, () => { text1.Text += $"\nasync function switch back to the UI thread: {GetThread()}"; }); return result; } }
726
Download from finelybook www.finelybook.com
When you run the application, you can see always the UI thread used when using RunAsync: UI Thread: thread 3 async function switch back to the UI thread: thread 3 async function: thread 3 async function after await: thread 5 after await: thread 3
Using IAsyncOperation Asynchronous methods are defined by the Windows Runtime to not return a Task or a ValueTask. Task and ValueTask are not part of the Windows Runtime. Instead, these methods return an object that implements the interface IAsyncOperation. IAsyncOperation does not define the method GetAwaiter as needed by the await keyword. However, an IAsyncOperation is automatically converted to a Task when you use the await keyword. You can also use the AsTask extension method to convert an IAsyncOperation object to a task. With the example application, in the method OnIAsyncOperation, the ShowAsync method of the MessageDialog is invoked. This method returns an IAsyncOperaition, and you can simply use the await keyword to get the result (code file AsyncWindowsApp/MainWindow.xaml.cs): private async void OnIAsyncOperation(object sender, RoutedEventArgs e) { var dlg = new MessageDialog("Select One, Two, Or Three", "Sample"); dlg.Commands.Add(new UICommand("One", null, 1)); dlg.Commands.Add(new UICommand("Two", null, 2)); dlg.Commands.Add(new UICommand("Three", null, 3)); IUICommand command = await dlg.ShowAsync(); text1.Text = $"Command {command.Id} with the label {command.Label} invoked";
727
Download from finelybook www.finelybook.com
}
Avoid Blocking Scenarios It’s dangerous using Wait on a Task and the async keyword together. With applications using the synchronization context, this can easily result in a deadlock. In the method OnStartDeadlock, the local function DelayAsync is invoked. DelayAsync waits on the completion of Task.Delay before continuing in the foreground thread. However, the caller invokes the Wait method on the task returned from DelayAsync. The Wait method blocks the calling thread until the task is completed. In this case, the Wait is invoked from the foreground thread, so the Wait blocks the foreground thread. The await on Task.Delay can never complete, because the foreground thread is not available. This is a classical deadlock scenario (code file AsyncWindowsApps/MainWindow.xaml.cs): private void OnStartDeadlock(object sender, RoutedEventArgs e) { DelayAsync().Wait(); } private async Task DelayAsync() { await Task.Delay(1000); }
WARNING Avoid using Wait and await together in applications using the synchronization context.
SUMMARY This chapter introduced the async and await keywords. Having looked at several examples, you’ve seen the advantages of the task-based 728
Download from finelybook www.finelybook.com
asynchronous pattern compared to the asynchronous pattern and the event-based asynchronous pattern available with earlier editions of .NET. You’ve also seen how easy it is to create asynchronous methods with the help of the Task class, and learned how to use the async and await keywords to wait for these methods without blocking threads. Finally, you looked at the error-handling aspect of asynchronous methods. For more information on parallel programming, and details about threads and tasks, see Chapter 21. The next chapter continues with core features of C# and .NET and gives detailed information on reflection, metadata, and dynamic programming.
729
Download from finelybook www.finelybook.com
16 Reflection, Metadata, and Dynamic Programming WHAT’S IN THIS CHAPTER? Using custom attributes Inspecting the metadata at runtime using reflection Building access points from classes that enable reflection Working with the dynamic type Creating dynamic objects with DynamicObject and ExpandoObject
WROX.COM CODE DOWNLOADS FOR THIS CHAPTER The Wrox.com code downloads for this chapter are found at www.wrox.com on the Download Code tab. The source code is also available at https://github.com/ProfessionalCSharp/ProfessionalCSharp7 in the directory ReflectionAndDynamic. The code for this chapter is divided into the following major examples: LookupWhatsNew TypeView
730
Download from finelybook www.finelybook.com
VectorClass WhatsNewAttributes Dynamic DynamicFileReader
INSPECTING CODE AT RUNTIME AND DYNAMIC PROGRAMMING This chapter focuses on custom attributes, reflection, and dynamic programming. Custom attributes are mechanisms that enable you to associate custom metadata with program elements. This metadata is created at compile time and embedded in an assembly. Reflection is a generic term that describes the capability to inspect and manipulate program elements at runtime. For example, reflection allows you to do the following: Enumerate the members of a type. Instantiate a new object. Execute the members of an object. Find out information about a type. Find out information about an assembly. Inspect the custom attributes applied to a type. Create and compile a new assembly. This list represents a great deal of functionality and encompasses some of the most powerful and complex capabilities provided by the .NET class library. Because one chapter does not have the space to cover all the capabilities of reflection, I focus on those elements that you are likely to use most frequently. To demonstrate custom attributes and reflection, in this chapter you first develop an example based on a company that regularly ships upgrades of its software and wants to have details about these upgrades documented automatically. In the example, you define 731
Download from finelybook www.finelybook.com
custom attributes that indicate the date when program elements were last modified, and what changes were made. You then use reflection to develop an application that looks for these attributes in an assembly and can automatically display all the details about what upgrades have been made to the software since a given date. Another example in this chapter considers an application that reads from or writes to a database and uses custom attributes as a way to mark which classes and properties correspond to which database tables and columns. By reading these attributes from the assembly at runtime, the program can automatically retrieve or write data to the appropriate location in the database, without requiring specific logic for each table or column. The second big aspect of this chapter is dynamic programming, which has been a part of the C# language since version 4 when the dynamic type was added. The growth of languages such as Ruby and Python, and the increased use of JavaScript, have intensified interest in dynamic programming. Although C# is still a statically typed language, the additions for dynamic programming give the C# language capabilities that some developers are looking for. Using dynamic language features allows for calling script functions from within C#. In this chapter, you look at the dynamic type and the rules for using it. You also see what an implementation of DynamicObject looks like and how you can use it. ExpandoObject, which is the frameworks implementation of DynamicObject, is also covered.
CUSTOM ATTRIBUTES You have already seen in this book how you can define attributes on various items within your program. These attributes have been defined by Microsoft as part of .NET, and many of them receive special support from the C# compiler. This means that for those particular attributes, the compiler can customize the compilation process in specific ways—for example, laying out a struct in memory according to the details in the StructLayout attributes. .NET also enables you to define your own attributes. Obviously, these 732
Download from finelybook www.finelybook.com
attributes don’t have any effect on the compilation process because the compiler has no intrinsic awareness of them. However, these attributes are emitted as metadata in the compiled assembly when they are applied to program elements. By itself, this metadata might be useful for documentation purposes, but what makes attributes really powerful is that by using reflection, your code can read this metadata and use it to make decisions at runtime. This means that the custom attributes that you define can directly affect how your code runs. For example, custom attributes can be used to enable declarative code access security checks for custom permission classes, to associate information with program elements that can then be used by testing tools, or when developing extensible frameworks that allow the loading of plug-ins or modules.
Writing Custom Attributes To understand how to write your own custom attributes, it is useful to know what the compiler does when it encounters an element in your code that has a custom attribute applied to it. To take the database example, suppose that you have a C# property declaration that looks like this: [FieldName("SocialSecurityNumber")] public string SocialSecurityNumber { get { //...
When the C# compiler recognizes that this property has an attribute applied to it (FieldName), it first appends the string Attribute to this name, forming the combined name FieldNameAttribute. The compiler then searches all the namespaces in its search path (those namespaces that have been mentioned in a using statement) for a class with the specified name. Note that if you mark an item with an attribute whose name already ends in the string Attribute, the compiler does not add the string to the name a second time; it leaves the attribute name unchanged. Therefore, the preceding code is equivalent to this: [FieldNameAttribute("SocialSecurityNumber")]
733
Download from finelybook www.finelybook.com
public string SocialSecurityNumber { get { //...
The compiler expects to find a class with this name, and it expects this class to be derived directly or indirectly from System.Attribute. The compiler also expects that this class contains information governing the use of the attribute. In particular, the attribute class needs to specify the following: The types of program elements to which the attribute can be applied (classes, structs, properties, methods, and so on) Whether it is legal for the attribute to be applied more than once to the same program element Whether the attribute, when applied to a class or interface, is inherited by derived classes and interfaces The mandatory and optional parameters the attribute takes If the compiler cannot find a corresponding attribute class, or if it finds one but the way that you have used that attribute does not match the information in the attribute class, the compiler raises a compilation error. For example, if the attribute class indicates that the attribute can be applied only to classes, but you have applied it to a struct definition, a compilation error occurs. Continuing with the example, assume that you have defined the FieldName attribute like this: [AttributeUsage(AttributeTargets.Property, AllowMultiple=false, Inherited=false)] public class FieldNameAttribute: Attribute { private string _name; public FieldNameAttribute(string name) { _name = name; } }
The following sections discuss each element of this definition. 734
Download from finelybook www.finelybook.com
Specifying the AttributeUsage Attribute The first thing to note is that the attribute class itself is marked with an attribute—the System.AttributeUsage attribute. This is an attribute defined by Microsoft for which the C# compiler provides special support. (You could argue that AttributeUsage isn’t an attribute at all; it is more like a meta-attribute, because it applies only to other attributes, not simply to any class.) The primary purpose of AttributeUsage is to identify the types of program elements to which your custom attribute can be applied. This information is provided by the first parameter of the AttributeUsage attribute. This parameter is mandatory, and it is of an enumerated type, AttributeTargets. In the previous example, you have indicated that the FieldName attribute can be applied only to properties, which is fine, because that is exactly what you have applied it to in the earlier code fragment. The members of the AttributeTargets enumeration are as follows: All Assembly Class Constructor Delegate Enum Event Field GenericParameter Interface Method Module Parameter Property ReturnValue
735
Download from finelybook www.finelybook.com
Struct
This list identifies all the program elements to which you can apply attributes. Note that when applying the attribute to a program element, you place the attribute in square brackets immediately before the element. However, two values in the preceding list do not correspond to any program element: Assembly and Module. An attribute can be applied to an assembly or a module as a whole, rather than to an element in your code; in this case the attribute can be placed anywhere in your source code, but it must be prefixed with the Assembly or Module keyword: [assembly:SomeAssemblyAttribute(Parameters)] [module:SomeAssemblyAttribute(Parameters)]
When indicating the valid target elements of a custom attribute, you can combine these values using the bitwise OR operator. For example, if you want to indicate that your FieldName attribute can be applied to both properties and fields, you use the following: [AttributeUsage(AttributeTargets.Property | AttributeTargets.Field, AllowMultiple=false, Inherited=false)] public class FieldNameAttribute: Attribute
You can also use AttributeTargets.All to indicate that your attribute can be applied to all types of program elements. The AttributeUsage attribute also contains two other parameters: AllowMultiple and Inherited. These are specified using the syntax of = , instead of simply specifying the values for these parameters. These parameters are optional—you can omit them. The AllowMultiple parameter indicates whether an attribute can be applied more than once to the same item. The fact that it is set to false indicates that the compiler should raise an error if it sees something like this: [FieldName("SocialSecurityNumber")] [FieldName("NationalInsuranceNumber")] public string SocialSecurityNumber { //...
736
Download from finelybook www.finelybook.com
If the Inherited parameter is set to true, an attribute applied to a class or interface is also automatically applied to all derived classes or interfaces. If the attribute is applied to a method or property, it automatically applies to any overrides of that method or property, and so on. Specifying Attribute Parameters This section demonstrates how you can specify the parameters that your custom attribute takes. When the compiler encounters a statement such as the following, it examines the parameters passed into the attribute—which is a string—and looks for a constructor for the attribute that takes exactly those parameters: [FieldName("SocialSecurityNumber")] public string SocialSecurityNumber { //...
If the compiler finds an appropriate constructor, it emits the specified metadata to the assembly. If the compiler does not find an appropriate constructor, a compilation error occurs. As discussed later in this chapter, reflection involves reading metadata (attributes) from assemblies and instantiating the attribute classes they represent. Because of this, the compiler must ensure that an appropriate constructor exists that allows the runtime instantiation of the specified attribute. In the example, you have supplied just one constructor for FieldNameAttribute, and this constructor takes one string parameter. Therefore, when applying the FieldName attribute to a property, you must supply one string as a parameter, as shown in the preceding code. To allow a choice of what types of parameters should be supplied with an attribute, you can provide different constructor overloads, although normal practice is to supply just one constructor and use properties to define any other optional parameters, as explained next. Specifying Optional Attribute Parameters 737
Download from finelybook www.finelybook.com
As demonstrated with the AttributeUsage attribute, an alternative syntax enables optional parameters to be added to an attribute. This syntax involves specifying the names and values of the optional parameters. It works through public properties or fields in the attribute class. For example, suppose that you modify the definition of the SocialSecurityNumber property as follows: [FieldName("SocialSecurityNumber", Comment="This is the primary key field")] public string SocialSecurityNumber { get; set; } { //...
In this case, the compiler recognizes the = syntax of the second parameter and does not attempt to match this parameter to a FieldNameAttribute constructor. Instead, it looks for a public property or field (although public fields are not considered good programming practice, so normally you will work with properties) of that name that it can use to set the value of this parameter. If you want the previous code to work, you have to add some code to FieldNameAttribute: [AttributeUsage(AttributeTargets.Property, AllowMultiple=false, Inherited=false)] public class FieldNameAttribute : Attribute { public string Comment { get; set; } private string _fieldName; public FieldNameAttribute(string fieldName) { _fieldName = fieldname; } //... }
Custom Attribute Example: WhatsNewAttributes In this section you start developing the example mentioned at the beginning of the chapter. WhatsNewAttributes provides for an attribute that indicates when a program element was last modified. This is a more ambitious code example than many of the others in that it consists of three separate assemblies: 738
Download from finelybook www.finelybook.com
WhatsNewAttributes—Contains VectorClass—Contains
the definitions of the attributes
the code to which the attributes have been
applied LookUpWhatsNew—Contains
the project that displays details about
items that have changed Of these, only the LookUpWhatsNew assembly is a console application of the type that you have used up until now. The remaining two assemblies are libraries—they each contain class definitions but no program entry point. The WhatsNewAttributes Library This section starts with the core WhatsNewAttributes .NET Standard library. The source code is contained in the file WhatsNewAttributes.cs, which is located in the WhatsNewAttributes project of the WhatsNewAttributes solution in the example code for this chapter. The WhatsNewAttributes.cs file defines two attribute classes, LastModifiedAttribute and SupportsWhatsNewAttribute. You use the attribute LastModifiedAttribute to mark when an item was last modified. It takes two mandatory parameters (parameters that are passed to the constructor): the date of the modification and a string containing a description of the changes. One optional parameter named issues (for which a public property exists) can be used to describe any outstanding issues for the item. In practice, you would probably want this attribute to apply to anything. To keep the code simple, its usage is limited here to classes, methods, and constructors. You allow it to be applied more than once to the same item (AllowMultiple=true) because an item might be modified more than once, and each modification has to be marked with a separate attribute instance. is a smaller class representing an attribute that doesn’t take any parameters. The purpose of this assembly attribute is to mark an assembly for which you are maintaining documentation via the LastModifiedAttribute. This way, the program that examines this assembly later knows that the assembly it is reading is one on which SupportsWhatsNew
739
Download from finelybook www.finelybook.com
you are actually using your automated documentation process. Here is the complete source code for this part of the example (code file WhatsNewAttributes/WhatsNewAttributes.cs): [AttributeUsage(AttributeTargets.Class | AttributeTargets.Method | AttributeTargets.Constructor, AllowMultiple=true, Inherited=false)] public class LastModifiedAttribute: Attribute { private readonly DateTime _dateModified; private readonly string _changes; public LastModifiedAttribute(string dateModified, string changes) { _dateModified = DateTime.Parse(dateModified); _changes = changes; } public DateTime DateModified => _dateModified; public string Changes => _changes; public string Issues { get; set; } } [AttributeUsage(AttributeTargets.Assembly)] public class SupportsWhatsNewAttribute: Attribute { }
Based on what has been discussed, this code should be fairly clear. Notice, however, that the properties DateModified and Changes are read-only. Using the expression syntax, the compiler creates get accessors. There is no need for set accessors because you are requiring these parameters to be set in the constructor as mandatory parameters. You need the get accessors so that you can read the values of these attributes. The VectorClass Library The VectorClass .NET Standard library references the WhatsNewAttributes library. After adding the using declarations, the global assembly attribute marks the assembly to support the WhatsNew 740
Download from finelybook www.finelybook.com
attributes (code file VectorClass/Vector.cs): [assembly: SupportsWhatsNew]
The sample code for VectorClass makes use of the following namespaces: System System.Collections System.Collections.Generic WhatsNewAttributes
Now for the code for the Vector class. Some LastModified attributes are added to the class to mark changes: [LastModified("19 Jul 2017", "updated for C# 7 and .NET Core 2")] [LastModified("6 Jun 2015", "updated for C# 6 and .NET Core")] [LastModified("14 Deb 2010", "IEnumerable interface implemented: " + "Vector can be treated as a collection")] [LastModified("10 Feb 2010", "IFormattable interface implemented " + "Vector accepts N and VE format specifiers")] public class Vector : IFormattable, IEnumerable { public Vector(double x, double y, double z) { X = x; Y = y; Z = z; } [LastModified("19 Jul 2017", "Reduced the number of code lines")] public Vector(Vector vector) : this (vector.X, vector.Y, vector.Z { } public double X { get; } public double Y { get; } public double Z { get; } public string ToString(string format, IFormatProvider
741
Download from finelybook www.finelybook.com
formatProvider) { //...
You also mark the contained VectorEnumerator class: [LastModified("6 Jun 2015", "Changed to implement the generic interface IEnumerator")] [LastModified("14 Feb 2010", "Class created as part of collection support for Vector")] private class VectorEnumerator : IEnumerator {
The version number for the library is defined in the csproj project file (project file VectorClass/VectorClass.csproj): netstandard2.0 2.1.0
That’s as far as you can get with this example for now. You are unable to run anything yet because all you have are two libraries. After taking a look at reflection in the next section, you will develop the final part of the example, in which you look up and display these attributes.
USING REFLECTION In this section, you take a closer look at the System.Type class, which enables you to access information concerning the definition of any data type. You also look at the System.Reflection.Assembly class, which you can use to access information about an assembly or to load that assembly into your program. Finally, you combine the code in this section with the code in the previous section to complete the WhatsNewAttributes example.
The System.Type Class So far you have used the Type class only to hold the reference to a type as follows:
742
Download from finelybook www.finelybook.com
Type t = typeof(double);
Although previously referred to as a class, Type is an abstract base class. Whenever you instantiate a Type object, you are actually instantiating a class derived from Type. Type has one derived class corresponding to each actual data type, though in general the derived classes simply provide different overloads of the various Type methods and properties that return the correct data for the corresponding data type. They do not typically add new methods or properties. In general, there are three common ways to obtain a Type reference that refers to any given type. You can use the C# typeof operator as shown in the preceding code. This operator takes the name of the type (not in quotation marks, however) as a parameter. You can use the GetType method, which all classes inherit from System.Object: double d = 10; Type t = d.GetType();
is called against a variable, rather than taking the name of a type. Note, however, that the Type object returned is still associated with only that data type. It does not contain any information that relates to that instance of the type. The GetType method can be useful if you have a reference to an object but you are not sure what class that object is actually an instance of. GetType
You can call the static method of the Type class, GetType: Type t = Type.GetType("System.Double");
is really the gateway to much of the reflection functionality. It implements a huge number of methods and properties—far too many to provide a comprehensive list here. However, the following subsections should give you a good idea of the kinds of things you can do with the Type class. Note that the available properties are all read-only; you use Type to find out about the data type—you cannot use it to make any modifications to the type! Type
Type Properties 743
Download from finelybook www.finelybook.com
You can divide the properties implemented by Type into three categories. First, a number of properties retrieve the strings containing various names associated with the class, as shown in the following table: PROPERTY RETURNS Name The name of the data type FullName The fully qualified name of the data type (including the namespace name) Namespace The name of the namespace in which the data type is defined Second, it is possible to retrieve references to further type objects that represent related classes, as shown in the following table. PROPERTY
RETURNS TYPE REFERENCE CORRESPONDING TO BaseType The immediate base type of this type UnderlyingSystemType The type to which this type maps in the .NET runtime (recall that certain .NET base types actually map to specific predefined types recognized by IL). This member is only available in the full Framework. A number of Boolean properties indicate whether this type is, for example, a class, an enum, and so on. These properties include IsAbstract, IsArray, IsClass, IsEnum, IsInterface, IsPointer, IsPrimitive (one of the predefined primitive data types), IsPublic, IsSealed, and IsValueType. The following example uses a primitive data type: Type intType = typeof(int); Console.WriteLine(intType.IsAbstract); // writes false Console.WriteLine(intType.IsClass); // writes false Console.WriteLine(intType.IsEnum); // writes false Console.WriteLine(intType.IsPrimitive); // writes true Console.WriteLine(intType.IsValueType); // writes true
This example uses the Vector class: 744
Download from finelybook www.finelybook.com
Type vecType = typeof(Vector); Console.WriteLine(vecType.IsAbstract); // writes false Console.WriteLine(vecType.IsClass); // writes true Console.WriteLine(vecType.IsEnum); // writes false Console.WriteLine(vecType.IsPrimitive); // writes false Console.WriteLine(vecType.IsValueType); // writes false
Finally, you can also retrieve a reference to the assembly in which the type is defined. This is returned as a reference to an instance of the System.Reflection.Assembly class, which is examined shortly: Type t = typeof (Vector); Assembly containingAssembly = new Assembly(t);
Methods Most of the methods of System.Type are used to obtain details about the members of the corresponding data type—the constructors, properties, methods, events, and so on. Quite a large number of methods exist, but they all follow the same pattern. For example, two methods retrieve details about the methods of the data type: GetMethod and GetMethods. GetMethod returns a reference to a System.Reflection.MethodInfo object, which contains details about a method. GetMethods returns an array of such references. As the names suggest, the difference is that GetMethods returns details about all the methods, whereas GetMethod returns details about just one method with a specified parameter list. Both methods have overloads that take an extra parameter, a BindingFlags enumerated value that indicates which members should be returned—for example, whether to return public members, instance members, static members, and so on. For example, the simplest overload of GetMethods takes no parameters and returns details about all the public methods of the data type: Type t = typeof(double); foreach (MethodInfo nextMethod in t.GetMethods()) { //... }
The member methods of Type that follow the same pattern are shown in the following table. Note that plural names return an array. 745
Download from finelybook www.finelybook.com
TYPE OF OBJECT RETURNED
METHOD(S)
ConstructorInfo
GetConstructor, GetConstructors
EventInfo
GetEvent, GetEvents
FieldInfo
GetField, GetFields
MemberInfo
GetMember, GetMembers, GetDefaultMembers
MethodInfo
GetMethod, GetMethods
PropertyInfo
GetProperty, GetProperties
The GetMember and GetMembers methods return details about any or all members of the data type, regardless of whether these members are constructors, properties, methods, and so on.
The TypeView Example This section demonstrates some of the features of the Type class with a short example, TypeView, which you can use to list the members of a data type. The example demonstrates how to use TypeView for a double; however, you can swap this type with any other data type just by changing one line of the code in the example. The result of running the application is this output to the console: Analysis of type Double Type Name: Double Full Name: System.Double Namespace: System Base Type: ValueType public members: System.Double Method IsInfinity System.Double Method IsPositiveInfinity System.Double Method IsNegativeInfinity System.Double Method IsNaN System.Double Method CompareTo System.Double Method CompareTo System.Double Method Equals System.Double Method op_Equality System.Double Method op_Inequality System.Double Method op_LessThan System.Double Method op_GreaterThan
746
Download from finelybook www.finelybook.com
System.Double System.Double System.Double System.Double System.Double System.Double System.Double System.Double System.Double System.Double System.Double System.Double System.Double System.Double System.Double System.Object System.Double System.Double System.Double System.Double System.Double System.Double
Method op_LessThanOrEqual Method op_GreaterThanOrEqual Method Equals Method GetHashCode Method ToString Method ToString Method ToString Method ToString Method Parse Method Parse Method Parse Method Parse Method TryParse Method TryParse Method GetTypeCode Method GetType Field MinValue Field MaxValue Field Epsilon Field NegativeInfinity Field PositiveInfinity Field NaN
The console displays the name, full name, and namespace of the data type as well as the name of the base type. Next, it simply iterates through all the public instance members of the data type, displaying for each member the declaring type, the type of member (method, field, and so on), and the name of the member. The declaring type is the name of the class that actually declares the type member (for example, System.Double if it is defined or overridden in System.Double, or the name of the relevant base type if the member is simply inherited from a base class). does not display signatures of methods because you are retrieving details about all public instance members through MemberInfo objects, and information about parameters is not available through a MemberInfo object. To retrieve that information, you would need references to MethodInfo and other more specific objects, which means that you would need to obtain details about each type of member separately. TypeView
The sample code for TypeView makes use of the following namespaces: System
747
Download from finelybook www.finelybook.com
System.Reflection System.Text
does display details about all public instance members for doubles, the only details defined are fields and methods. The entire code is in one class, Program, which has a couple of static methods and one static field, a StringBuilder instance called OutputText, which is used to build the text to be displayed in the message box. The Main method and class declaration look like this (code file TypeView/Program.cs): TypeView
class Program { private static StringBuilder OutputText = new StringBuilder(); static void Main() { // modify this line to retrieve details of any other data type Type t = typeof(double); AnalyzeType(t); Console.WriteLine($"Analysis of type {t.Name}"); Console.WriteLine(OutputText.ToString()); Console.ReadLine(); } //... }
The Main method implementation starts by declaring a Type object to represent your chosen data type. You then call a method, AnalyzeType, which extracts the information from the Type object and uses it to build the output text. Finally, you write the output to the console. AnalyzeType is where the bulk of the work is done: static void AnalyzeType(Type t) { TypeInfo typeInfo = t.GetTypeInfo(); AddToOutput($"Type Name: {t.Name}"); AddToOutput($"Full Name: {t.FullName}"); AddToOutput($"Namespace: {t.Namespace}"); Type tBase = t.BaseType;
748
Download from finelybook www.finelybook.com
if (tBase != null) { AddToOutput($"Base Type: {tBase.Name}"); } AddToOutput("\npublic members:"); foreach (MemberInfo NextMember in t.GetMembers()) { AddToOutput($"{member.DeclaringType} {member.MemberType} {member.Name}"); } }
You implement the AnalyzeType method by calling various properties of the Type object to get the information you need concerning the type names and then calling the GetMembers method to get an array of MemberInfo objects that you can use to display the details for each member. Note that you use a helper method, AddToOutput, to build the text to be displayed: static void AddToOutput(string Text) => OutputText.Append("\n" + Text);
The Assembly Class The Assembly class is defined in the System.Reflection namespace and provides access to the metadata for a given assembly. It also contains methods that enable you to load and even execute an assembly— assuming that the assembly is an executable. As with the Type class, Assembly contains too many methods and properties to cover here, so this section is confined to covering those methods and properties that you need to get started and that you use to complete the WhatsNewAttributes example. Before you can do anything with an Assembly instance, you need to load the corresponding assembly into the running process. You can do this with either the static members Assembly.Load or Assembly.LoadFrom. The difference between these methods is that Load takes the name of the assembly, and the runtime searches in a variety of locations in an attempt to locate the assembly. These locations include the local directory and the global assembly cache. LoadFrom takes the full path name of an assembly and does not attempt to find 749
Download from finelybook www.finelybook.com
the assembly in any other location: Assembly assembly1 = Assembly.Load("SomeAssembly"); Assembly assembly2 = Assembly.LoadFrom (@"C:\My Projects\Software\SomeOtherAssembly");
A number of other overloads of both methods exist, which supply additional security information. After you have loaded an assembly, you can use various properties on it to find out, for example, its full name: string name = assembly1.FullName;
Getting Details About Types Defined in an Assembly One nice feature of the Assembly class is that it enables you to obtain details about all the types that are defined in the corresponding assembly. You simply call the Assembly.GetTypes method, which returns an array of System.Type references containing details about all the types. You can then manipulate these Type references as explained in the previous section: Type[] types = theAssembly.GetTypes(); foreach(Type definedType in types) { DoSomethingWith(definedType); }
Getting Details About Custom Attributes The methods you use to find out which custom attributes are defined on an assembly or type depend on the type of object to which the attribute is attached. If you want to find out what custom attributes are attached to an assembly as a whole, you need to call a static method of the Attribute class, GetCustomAttributes, passing in a reference to the assembly:
NOTE This is actually quite significant. You might have wondered why, 750
Download from finelybook www.finelybook.com
when you defined custom attributes, you had to go to all the trouble of actually writing classes for them, and why Microsoft didn’t come up with some simpler syntax. Well, the answer is here. The custom attributes genuinely exist as objects, and when an assembly is loaded you can read in these attribute objects, examine their properties, and call their methods. Attribute[] definedAttributes = Attribute.GetCustomAttributes(assembly1); // assembly1 is an Assembly object GetCustomAttributes,
which is used to get assembly attributes, has a few overloads. If you call it without specifying any parameters other than an assembly reference, it simply returns all the custom attributes defined for that assembly. You can also call GetCustomAttributes by specifying a second parameter, which is a Type object that indicates the attribute class in which you are interested. In this case, GetCustomAttributes returns an array consisting of all the attributes present that are of the specified type. Note that all attributes are retrieved as plain Attribute references. If you want to call any of the methods or properties you defined for your custom attributes, you need to cast these references explicitly to the relevant custom attribute classes. You can obtain details about custom attributes that are attached to a given data type by calling another overload of Assembly.GetCustomAttributes, this time passing a Type reference that describes the type for which you want to retrieve any attached attributes. To obtain attributes that are attached to methods, constructors, fields, and so on, however, you need to call a GetCustomAttributes method that is a member of one of the classes MethodInfo, ConstructorInfo, FieldInfo, and so on. If you expect only a single attribute of a given type, you can call the GetCustomAttribute method instead, which returns a single Attribute object. You will use GetCustomAttribute in the WhatsNewAttributes example to find out whether the SupportsWhatsNew attribute is present in the assembly. To do this, you call GetCustomAttribute, passing in a reference to the WhatsNewAttributes assembly, and the type of the Supports-WhatsNewAttribute attribute. If this attribute is present, you 751
Download from finelybook www.finelybook.com
get an Attribute instance. If no instances of it are defined in the assembly, you get null. If two or more instances are found, GetCustomAttribute throws a System.Reflection.AmbiguousMatchException. This is what that call would look like: Attribute supportsAttribute = Attribute.GetCustomAttributes(assembly1, typeof(SupportsWhatsNewAttribute));
Completing the WhatsNewAttributes Example You now have enough information to complete the WhatsNewAttributes example by writing the source code for the final assembly in the sample, the LookUpWhatsNew assembly. This part of the application is a console application. However, it needs to reference the other assemblies of WhatsNewAttributes and VectorClass. The sample code for the LookupWhatsNew project references the libraries WhatsNewAttributes and VectorClass and makes uses the following namespaces: System System.Collections.Generic System.Linq System.Reflection System.Text WhatsNewAttributes
The Program class contains the main program entry point as well as the other methods. All the methods you define are in this class, which also has two static fields—outputText, which contains the text as you build it in preparation for writing it to the message box, and backDateTo, which stores the date you have selected. All modifications made since this date will be displayed. Normally, you would display a dialog inviting the user to pick this date, but we don’t want to get sidetracked into that kind of code. For this reason, backDateTo is hard-coded to a 752
Download from finelybook www.finelybook.com
value of 1 Feb 2017. You can easily change this date when you download the code (code file LookupWhatsNew/Program.cs): class Program { private static readonly StringBuilder outputText = new StringBuilder(1000); private static DateTime backDateTo = new DateTime(2017, 2, 1); static void Main() { Assembly theAssembly = Assembly.Load(new AssemblyName("VectorClass")); Attribute supportsAttribute = theAssembly.GetCustomAttribute( typeof(SupportsWhatsNewAttribute)); AddToOutput($"Assembly: {theAssembly.FullName}"); if (supportsAttribute == null) { AddToOutput("This assembly does not support WhatsNew attributes"); return; } else { AddToOutput("Defined Types:"); } IEnumerable types = theAssembly.ExportedTypes; foreach(Type definedType in types) { DisplayTypeInfo(definedType); } Console.WriteLine($"What\`s New since {backDateTo:D}"); Console.WriteLine(outputText.ToString()); Console.ReadLine(); } //... }
The Main method first loads the VectorClass assembly, and then verifies that it is marked with the SupportsWhatsNew attribute. You know VectorClass has the SupportsWhatsNew attribute applied to it 753
Download from finelybook www.finelybook.com
because you have only recently compiled it, but this is a check that would be worth making if users were given a choice of which assembly they want to check. Assuming that all is well, you use the Assembly.ExportedTypes property to get a collection of all the types defined in this assembly, and then loop through them. For each one, you call a method, DisplayTypeInfo, which adds the relevant text, including details regarding any instances of LastModifiedAttribute, to the outputText field. Finally, you show the complete text to the console. The DisplayTypeInfo method looks like this (code file LookupWhatsNew/Program.cs): private static void DisplayTypeInfo(Type type) { // make sure we only pick out classes if (!type.GetTypeInfo().IsClass)) { return; } AddToOutput($"{Environment.NewLine}class {type.Name}"); IEnumerable lastModifiedAttributes = type.GetTypeInfo().GetCustomAttributes() .OfType() .Where(a => a.DateModified >= backDateTo).ToArray(); if (attributes.Count() == 0) { AddToOutput($"\tNo changes to the class {type.Name}" + $"{Environment.NewLine}"); } else { foreach (LastFieldModifiedAttribute attribute in lastModifiedattributes) { WriteAttributeInfo(attribute); } } AddToOutput("changes to methods of this class:"); foreach (MethodInfo method in type.GetTypeInfo().DeclaredMembers.OfType())
754
Download from finelybook www.finelybook.com
{ IEnumerable attributesToMethods = method.GetCustomAttributes().OfType() .Where(a => a.DateModified >= backDateTo).ToArray(); if (attributesToMethods.Count() > 0) { AddToOutput($"{method.ReturnType} {method.Name}()"); foreach (Attribute attribute in attributesToMethods) { WriteAttributeInfo(attribute); } } } }
Notice that the first thing you do in this method is check whether the Type reference you have been passed actually represents a class. Because, to keep things simple, you have specified that the LastModified attribute can be applied only to classes or member methods, you would be wasting time by doing any processing if the item is not a class (it could be a class, delegate, or enum). Next, you use the type.GetTypeInfo().GetCustomAttributes() method to determine whether this class has any LastModifiedAttribute instances attached to it. If so, you add their details to the output text, using a helper method, WriteAttributeInfo. Finally, you use the DeclaredMembers property of the TypeInfo type to iterate through all the member methods of this data type, and then do the same with each method as you did for the class—check whether it has any LastModifiedAttribute instances attached to it; if so, you display them using WriteAttributeInfo. The next bit of code shows the WriteAttributeInfo method, which is responsible for determining what text to display for a given LastModifiedAttribute instance. Note that this method is passed an Attribute reference, so it needs to cast this to a LastModifiedAttribute reference first. After it has done that, it uses the properties that you originally defined for this attribute to retrieve its parameters. It confirms that the date of the attribute is sufficiently recent before actually adding it to the text for display (code file 755
Download from finelybook www.finelybook.com
LookupWhatsNew/Program.cs): private static void WriteAttributeInfo(Attribute attribute) { if (attribute is LastModifiedAttribute lastModifiedAttribute) { AddToOutput($"\tmodified: {lastModifiedAttribute.DateModified:D}: " + $"{lastModifiedAttribute.Changes}"); if (lastModifiedAttribute.Issues != null) { AddToOutput($"\tOutstanding issues: {lastModifiedAttribute.Issues}"); } } }
Finally, here is the helper AddToOutput method: static void AddToOutput(string text) => outputText.Append($"{Environment.NewLine}{text}");
Running this code produces the results shown here: What`s New since Wednesday, February 1, 2017 Assembly: VectorClass, Version=2.1.0.0, Culture=neutral, PublicKeyToken=null Defined Types: class Vector modified: Wednesday, July 19, 2017: updated for C# 7 and .NET Core 2 changes to methods of this class: System.String ToString() modified: Wednesday, July 19, 2017: changed ijk format from StringBuilder to format string
Note that when you list the types defined in the VectorClass assembly, you actually pick up two classes: Vector and the embedded VectorEnumerator class. In addition, note that because the backDateTo date of 1 Feb is hard-coded in this example, you actually pick up the attributes that are dated July 19 but not those dated earlier.
756
Download from finelybook www.finelybook.com
USING DYNAMIC LANGUAGE EXTENSIONS FOR REFLECTION Until now you’ve used reflection for reading metadata. You can also use reflection to create instances dynamically from types that aren’t known at compile time. The next sample shows creating an instance of the Calculator class without the compiler knowing of this type at compile time. The assembly CalculatorLib is loaded dynamically without adding a reference. During runtime, the Calculator object is instantiated, and a method is called. After you know how to use the Reflection API, you’ll do the same using the C# dynamic keyword. This keyword has been part of the C# language since version 4.
Creating the Calculator Library The library that is loaded is a simple Class Library (.NET Standard) containing the type Calculator with implementations of the Add and Subtract methods. As the methods are really simple, they are implemented using the expression syntax (code file CalculatorLib/Calculator.cs): public class Calculator { public double Add(double x, double y) => x + y; public double Subtract(double x, double y) => x - y; }
After you compile the library, copy the generated DLL to the folder c:/addins.
Instantiating a Type Dynamically For using reflection to create the Calculator instance dynamically, you create a Console App (.NET Core) with the name ClientApp. The constant CalculatorTypeName defines the name of the Calculator type, including the namespace. The Main method requires a commandline argument with the path to the library and then invokes the methods UsingReflection and UsingReflectionWithDynamic, two variants doing reflection (code file 757
Download from finelybook www.finelybook.com
DynamicSamples/ClientApp/Program.cs): class Program { private const string CalculatorTypeName = "CalculatorLib.Calculator"; static void Main(string[] args) { if (args.Length != 1) { ShowUsage(); return; } UsingReflection(args[0]); UsingReflectionWithDynamic(args[0]); } private static void ShowUsage() { Console.WriteLine($"Usage: {nameof(ClientApp)} path"); Console.WriteLine(); Console.WriteLine("Copy CalculatorLib.dll to an addin directory"); Console.WriteLine("and pass the absolute path of this directory " + "when starting the application to load the library"); }
Before using reflection to invoke a method, you need to instantiate the Calculator type. The method GetCalculator loads the assembly dynamically using the method LoadFile of the Assembly class and creates an instance of the Calculator type with the CreateInstance method: private static object GetCalculator() { Assembly assembly = Assembly.LoadFile(CalculatorLibPath); return assembly.CreateInstance(CalculatorTypeName); }
The sample code for the ClientApp makes use of the following dependency and .NET namespaces: Dependency
758
Download from finelybook www.finelybook.com
System.Runtime.Loader .NET Namespaces Microsoft.CSharp.RuntimeBinder System System.Reflection
Invoking a Member with the Reflection API Next, the Reflection API is used to invoke the method Add of the Calculator instance. First, the calculator instance is retrieved with the helper method GetCalculator. If you would like to add a reference to the CalculatorLib, you could use new Calculator to create an instance. But here it’s not that easy. Invoking the method using reflection has the advantage that the type does not need to be available at compile time. You could add it at a later time just by copying the library in the specified directory. To invoke the member using reflection, the Type object of the instance is retrieved using GetType—a method of the base class Object. With the help of the extension method GetMethod, a MethodInfo object for the method Add is accessed. The MethodInfo defines the Invoke method to call the method using any number of parameters. The first parameter of the Invoke method needs the instance of the type where the member is invoked. The second parameter is of type object[] to pass all the parameters needed by the invocation. You’re passing the values of the x and y variables here (code file DynamicSamples/ClientApp/Program.cs): private static void UsingReflection() { double x = 3; double y = 4; object calc = GetCalculator(); object result = calc.GetType().GetMethod("Add") .Invoke(calc, new object[] { x, y }); Console.WriteLine($"the result of {x} and {y} is {result}"); }
759
Download from finelybook www.finelybook.com
When you run the program, the calculator is invoked, and this result is written to the console: The result of 3 and 4 is 7
This is quite some work to do for calling a member dynamically. The next section looks at how easy it is to use the dynamic keyword.
Invoking a Member with the Dynamic Type Using reflection with the dynamic keyword, the object that is returned from the GetCalculator method is assigned to a variable of a dynamic type. The GetCalculator method itself is not changed; it still returns an object. The result is returned to a variable that is of type dynamic. With this, the Add method is invoked, and two double values are passed to it (code file DynamicSamples/ClientApp/Program.cs): private static void ReflectionNew() { double x = 3; double y = 4; dynamic calc = GetCalculator(); double result = calc.Add(x, y); Console.WriteLine($"the result of {x} and {y} is {result}"); }
The syntax is really simple; it looks like calling a method with strongly typed access. However, there’s no IntelliSense within Visual Studio because you can immediately see coding this from the Visual Studio editor, so it’s easy to make typos. There’s also no compile-time check. The compiler runs fine when you invoke the Multiply method. Just remember you only defined Add and Subtract methods with the calculator. try { result = calc.Multiply(x, y); } catch (RuntimeBinderException ex) { Console.WriteLine(ex);
760
Download from finelybook www.finelybook.com
}
When you run the application and invoke the Multiply method, you get a RuntimeBinderException: Microsoft.CSharp.RuntimeBinder.RuntimeBinderException: 'CalculatorLib.Calculator' does not contain a definition for 'Multiply' at CallSite.Target(Closure , CallSite , Object , Double , Double ) at System.Dynamic.UpdateDelegates.UpdateAndExecute3[T0,T1,T2,TRet] (CallSite site, T0 arg0, T1 arg1, T2 arg2) at ClientApp.Program.UsingReflectionWithDynamic(String addinPath) in...
Using the dynamic type also has more overhead compared to accessing objects in a strongly typed manner. Therefore, the keyword is useful only in some specific scenarios such as reflection. You don’t have a compiler check invoking the InvokeMember method of the Type; instead, a string is passed for the name of the member. Using the dynamic type, which has a simpler syntax, has a big advantage compared to using the Reflection API in such scenarios. The dynamic type can also be used with COM integration and scripting environments as shown after discussing the dynamic keyword more in detail.
THE DYNAMIC TYPE The dynamic type enables you to write code that bypasses compile-time type checking. The compiler assumes that the operation defined for an object of type dynamic is valid. If that operation isn’t valid, the error isn’t detected until runtime. This is shown in the following example: class Program { static void Main() { var staticPerson = new Person(); dynamic dynamicPerson = new Person(); staticPerson.GetFullName("John", "Smith");
761
Download from finelybook www.finelybook.com
dynamicPerson.GetFullName("John", "Smith"); } } class Person { public string FirstName { get; set; } public string LastName { get; set; } public string GetFullName() => $"{FirstName} {LastName}"; }
This example does not compile because of the call to staticPerson.GetFullName(). There isn't a method on the Person object that takes two parameters, so the compiler raises the error. If that line of code were commented out, the example would compile. If executed, a runtime error would occur. The exception that is raised is RuntimeBinderException. The RuntimeBinder is the object in the runtime that evaluates the call to determine whether Person really does support the method that was called. Binding is discussed later in the chapter. Unlike the var keyword, an object that is defined as dynamic can change type during runtime. Remember that when the var keyword is used, the determination of the object’s type is delayed. After the type is defined, it can’t be changed. Not only can you change the type of a dynamic object, you can change it many times. This differs from casting an object from one type to another. When you cast an object, you are creating a new object with a different but compatible type. For example, you cannot cast an int to a Person object. In the following example, you can see that if the object is a dynamic object, you can change it from int to Person: dynamic dyn; dyn = 100; Console.WriteLine(dyn.GetType()); Console.WriteLine(dyn); dyn = "This is a string"; Console.WriteLine(dyn.GetType()); Console.WriteLine(dyn); dyn = new Person() { FirstName = "Bugs", LastName = "Bunny" }; Console.WriteLine(dyn.GetType()); Console.WriteLine($"{dyn.FirstName} {dyn.LastName}");
762
Download from finelybook www.finelybook.com
The result of executing this code would be that the dyn object actually changes type from System.Int32 to System.String to Person. If dyn had been declared as an int or string, the code would not have compiled.
NOTE There are a couple of limitations to the dynamic type. A dynamic object does not support extension methods. Nor can anonymous functions (lambda expressions) be used as parameters to a dynamic method call, so LINQ does not work well with dynamic objects. Most LINQ calls are extension methods, and lambda expressions are used as arguments to those extension methods.
Dynamic Behind the Scenes So what’s going on behind the scenes to make the dynamic functionality available with C#? C# is a statically typed language. That hasn’t changed. Take a look at the IL (Intermediate Language) that’s generated when the dynamic type is used. First, this is the example C# code that you’re looking at (code file DynamicSamples/DecompileSample/Program.cs): class Program { static void Main() { StaticClass staticObject = new StaticClass(); DynamicClass dynamicObject = new DynamicClass(); Console.WriteLine(staticObject.IntValue); Console.WriteLine(dynamicObject.DynValue); Console.ReadLine(); } } class StaticClass { public int IntValue = 100; }
763
Download from finelybook www.finelybook.com
class DynamicClass { public dynamic DynValue = 100; }
Besides the Program class, you have two classes: StaticClass and DynamicClass. StaticClass has a single field that returns an int. DynamicClass has a single field that returns a dynamic object. The Main method creates these objects and prints out the value that the methods return. Simple enough. Now comment out the references to the DynamicClass in Main like this: static void Main() { StaticClass staticObject = new StaticClass(); //DynamicClass dynamicObject = new DynamicClass(); Console.WriteLine(staticObject.IntValue); //Console.WriteLine(dynamicObject.DynValue); Console.ReadLine(); }
Using the ildasm tool, you can look at the IL that is generated for the Main method: .method private hidebysig static void Main() cil managed { .entrypoint // Code size 22 (0x16) .maxstack 8 IL_0000: newobj instance void DecompileSample.StaticClass::.ctor() IL_0005: ldfld int32 DecompileSample.StaticClass::IntValue IL_000a: call void [System.Console]System.Console::WriteLine(int32) IL_000f: call string [System.Console]System.Console::ReadLine() IL_0014: pop IL_0015: ret } // end of method Program::Main
Without getting into the details of IL, you can still pretty much tell what’s going on just by looking at this section of code. Line 0000, the StaticClass constructor, is called. Line 0005 calls the IntValue field of 764
Download from finelybook www.finelybook.com
StaticClass. The
next line writes out the value.
Now comment out the StaticClass references and uncomment the DynamicClass references: static void Main() { //StaticClass staticObject = new StaticClass(); DynamicClass dynamicObject = new DynamicClass(); //Console.WriteLine(staticObject.IntValue); Console.WriteLine(dynamicObject.DynValue); Console.ReadLine(); }
Compile the application again, and the following is generated:
.method private hidebysig static void Main() cil managed { .entrypoint // Code size 119 (0x77) .maxstack 9 .locals init (class DecompileSample.DynamicClass V_0) IL_0000: newobj instance void DecompileSample.DynamicClass::.ctor() IL_0005: stloc.0 IL_0006: ldsfld class [System.Linq.Expressions]System.Runtime.CompilerServices.CallSite`1 DecompileSample.Program/'o__0'::'p__0' IL_000b: brtrue.s IL_004c IL_000d: ldc.i4 0x100 IL_0012: ldstr „WriteLine" IL_0017: ldnull IL_0018: ldtoken DecompileSample.Program IL_001d: call class [System.Runtime]System.Type [System.Runtime]System.Type::GetTypeFromHandle(valuetype [System.Runtime]System.RuntimeTypeHandle) IL_0022: ldc.i4.2 IL_0023: newarr [Microsoft.CSharp]Microsoft.CSharp.RuntimeBinder.CSharpArgumentInfo IL_0028: IL_0029: IL_002a: IL_002c:
dup ldc.i4.0 ldc.i4.s ldnull
33
765
Download from finelybook www.finelybook.com
IL_002d: call class [Microsoft.CSharp]Microsoft.CSharp.RuntimeBinder.CSharpArgumentInfo
[Microsoft.CSharp]Microsoft.CSharp.RuntimeBinder.CSharpArgumentInfo::Cre [ Microsoft.CSharp]Microsoft.CSharp.RuntimeBinder.CSharpArgumentInfoFlags, string) IL_0032: stelem.ref IL_0033: dup IL_0034: ldc.i4.1 IL_0035: ldc.i4.0 IL_0036: ldnull IL_0037: call class [Microsoft.CSharp]Microsoft.CSharp.RuntimeBinder.CSharpArgumentInfo
[Microsoft.CSharp]Microsoft.CSharp.RuntimeBinder.CSharpArgumentInfo::Cre [ Microsoft.CSharp]Microsoft.CSharp.RuntimeBinder.CSharpArgumentInfoFlags, string) IL_003c: stelem.ref IL_003d: call class [System.Linq.Expressions]System.Runtime.CompilerServices.CallSiteBinder
[Microsoft.CSharp]Microsoft.CSharp.RuntimeBinder.Binder::InvokeMember(va [ Microsoft.CSharp]Microsoft.CSharp.RuntimeBinder.CSharpBinderFlags, string, class [System.Runtime]System.Collections.Generic.IEnumerable`1, class [System.Runtime]System.Type, class [System.Runtime]System.Collections.Generic.IEnumerable`1)
IL_0042: call class [System.Linq.Expressions]System.Runtime.CompilerServices.CallSite`1 class [System.Linq.Expressions]System.Runtime.CompilerServices.CallSite`1::Create(class [System.Linq.Expressions]System.Runtime.CompilerServices.CallSiteBinder)
766
Download from finelybook www.finelybook.com
IL_0047: stsfld class [System.Linq.Expressions]System.Runtime.CompilerServices.CallSite`1 DecompileSample.Program/'o__0'::'p__0' IL_004c: ldsfld class [System.Linq.Expressions]System.Runtime.CompilerServices.CallSite`1 DecompileSample.Program/'o__0'::'p__0' IL_0051: ldfld !0 class [System.Linq.Expressions]System.Runtime.CompilerServices.CallSite`1::Target IL_0056: ldsfld class [System.Linq.Expressions]System.Runtime.CompilerServices.CallSite`1 DecompileSample.Program/'o__0'::'p__0' IL_005b: ldtoken [System.Console]System.Console IL_0060: call class [System.Runtime]System.Type [System.Runtime]System.Type::GetTypeFromHandle(valuetype [System.Runtime]System.RuntimeTypeHandle) IL_0065: ldloc.0 IL_0066: ldfld object DecompileSample.DynamicClass::DynValue IL_006b: callvirt instance void class [System.Runtime]System.Action`3::Invoke(!0, !1, !2) IL_0070: call string [System.Console]System.Console::ReadLine() IL_0075: pop IL_0076: ret } // end of method Program::Main
It’s safe to say that the C# compiler is doing a little extra work to support the dynamic type. Looking at the generated code, you can see references to System.Runtime.CompilerServices.CallSite and System.Runtime.CompilerServices.CallSiteBinder. 767
Download from finelybook www.finelybook.com
The CallSite is a type that handles the lookup at runtime. When a call is made on a dynamic object at runtime, something has to check that object to determine whether the member really exists. The call site caches this information, so the lookup doesn’t have to be performed repeatedly. Without this process, performance in looping structures would be questionable. After the CallSite does the member lookup, the CallSiteBinder is invoked. It takes the information from the call site and generates an expression tree representing the operation to which the binder is bound. There is obviously a lot going on here. Great care has been taken to optimize what would appear to be a very complex operation. Clearly, using the dynamic type can be useful, but it does come with a price.
DYNAMICOBJECT AND EXPANDOOBJECT What if you want to create your own dynamic object? You have a couple of options for doing that: by deriving from DynamicObject or by using ExpandoObject. Using DynamicObject is a little more work than using ExpandoObject because with DynamicObject you have to override a couple of methods. ExpandoObject is a sealed class that is ready to use.
DynamicObject Consider an object that represents a person. Normally, you would define properties for the first name, middle name, and last name. Now imagine the capability to build that object during runtime, with the system having no prior knowledge of what properties the object might have or what methods the object might support. That’s what having a DynamicObject-based object can provide. There might be very few times when you need this sort of functionality, but until now the C# language had no way of accommodating such a requirement (code file DynamicSamples/DynamicSample/WroxDynamicObject.cs): public class WroxDynamicObject : DynamicObject {
768
Download from finelybook www.finelybook.com
private Dictionary _dynamicData = new Dictionary(); public override bool TryGetMember(GetMemberBinder binder, out object result) { bool success = false; result = null; if (_dynamicData.ContainsKey(binder.Name)) { result = _dynamicData[binder.Name]; success = true; } else { result = "Property Not Found!"; } return success; } public override bool TrySetMember(SetMemberBinder binder, object value) { _dynamicData[binder.Name] = value; return true; } public override bool TryInvokeMember(InvokeMemberBinder binder, object[] args, out object result) { dynamic method = _dynamicData[binder.Name]; result = method((DateTime)args[0]); return result != null; } }
First look at what the DynamicObject looks like (code file DynamicSamples/DynamicSample/WroxDyamicObject.cs): In this example, you’re overriding three methods: TrySetMember, TryGetMember, and TryInvokeMember. adds the new method, property, or field to the object. In this case, you store the member information in a Dictionary object. The SetMemberBinder object that is passed into the TrySetMember TrySetMember
769
Download from finelybook www.finelybook.com
method contains the Name property, which is used to identify the element in the Dictionary. The TryGetMember retrieves the object stored in the Dictionary based on the GetMemberBinder Name property. Here is the code that makes use of the new dynamic object just created (code file DynamicSamples/DynamicSample/Program.cs): dynamic wroxDyn = new WroxDynamicObject(); wroxDyn.FirstName = "Bugs"; wroxDyn.LastName = "Bunny"; Console.WriteLine(wroxDyn.GetType()); Console.WriteLine($"{wroxDyn.FirstName} {wroxDyn.LastName}");
It looks simple enough, but where is the call to the methods you overrode? That’s where .NET helps. DynamicObject handles the binding for you; all you have to do is reference the properties FirstName and LastName as if they were there all the time. You can also easily add a method. You can use the same WroxDynamicObject and add a GetTomorrowDate method to it. It takes a DateTime object and returns a date string representing the next day. Here’s the code: dynamic wroxDyn = new WroxDynamicObject(); Func GetTomorrow = today => today.AddDays(1).ToShortDateString(); wroxDyn.GetTomorrowDate = GetTomorrow; Console.WriteLine($"Tomorrow is {wroxDyn.GetTomorrowDate(DateTime.Now)}");
You create the delegate GetTomorrow using Func. The method the delegate represents is the call to AddDays. One day is added to the Date that is passed in, and a string of that date is returned. The delegate is then set to GetTomorrowDate on the wroxDyn object. The last line calls the new method, passing in the current day’s date. Hence the dynamic magic and you have an object with a valid method.
ExpandoObject works similarly to the WroxDynamicObject created in the previous section. The difference is that you don’t have to override any ExpandoObject
770
Download from finelybook www.finelybook.com
methods, as shown in the following code example (code file DynamicSamples/DynamicSample/WroxDynamicObject.cs): static void DoExpando() { dynamic expObj = new ExpandoObject(); expObj.FirstName = "Daffy"; expObj.LastName = "Duck"; Console.WriteLine($"{expObj.FirstName} {expObj.LastName}"); Func GetTomorrow = today => today.AddDays(1).ToShortDateString(); expObj.GetTomorrowDate = GetTomorrow; Console.WriteLine($"Tomorrow is {expObj.GetTomorrowDate(DateTime.Now)}"); expObj.Friends = new List(); expObj.Friends.Add(new Person() { FirstName = "Bob", LastName = "Jones" }); expObj.Friends.Add(new Person() { FirstName = "Robert", LastName = "Jones" }); expObj.Friends.Add(new Person() { FirstName = "Bobby", LastName = "Jones" }); foreach (Person friend in expObj.Friends) { Console.WriteLine($"{friend.FirstName} {friend.LastName}"); } }
Notice that this code is almost identical to what you did earlier. You add a FirstName and LastName property, add a GetTomorrow function, and then do one additional thing: add a collection of Person objects as a property of the object. At first glance it might seem that this is no different from using the dynamic type, but there are a couple of subtle differences that are important. First, you can’t just create an empty dynamic typed object. The dynamic type must have something assigned to it. For example, the following code won’t work: dynamic dynObj; dynObj.FirstName = "Joe";
As shown in the previous example, this is possible with ExpandoObject.
771
Download from finelybook www.finelybook.com
Second, because the dynamic type has to have something assigned to it, it reports back the type assigned to it if you do a GetType call. For example, if you assign an int, it reports back that it is an int. This doesn’t happen with ExpandoObject or an object derived from DynamicObject. If you have to control the addition and access of properties in your dynamic object, then deriving from DynamicObject is your best option. With DynamicObject, you can use several methods to override and control exactly how the object interacts with the runtime. For other cases, using the dynamic type or the ExpandoObject might be appropriate. Following is another example of using dynamic and ExpandoObject. Assume that the requirement is to develop a general-purpose commaseparated values (CSV) file parsing tool. You won’t know from one execution to another what data will be in the file, only that the values will be comma-separated and that the first line will contain the field names. First, open the file and read in the stream. You can use a simple helper method to do this (code file DynamicSamples/DynamicFileReader/DynamicFileHelper.cs): public class DynamicFileHelper { //... private StreamReader OpenFile(string fileName) { if(File.Exists(fileName)) { return new StreamReader(fileName); } return null; } //... }
This just opens the file and creates a new StreamReader to read the file contents. Now you want to get the field names, which you can do easily by reading in the first line from the file and using the Split function to 772
Download from finelybook www.finelybook.com
create a string array of field names: string[] headerLine = fileStream.ReadLine().Split(',').Trim().ToArray();
Next is the interesting part. You read in the next line from the file, create a string array just like you did with the field names, and start creating your dynamic objects. Here’s what the code looks like (code file DynamicSamples/DynamicFileReader/DynamicFileHelper.cs): public class DynamicFileHelper { //... public IEnumerable ParseFile(string fileName) { var retList = new List(); while (fileStream.Peek() > 0) { string[] dataLine = fileStream.ReadLine().Split(',').Trim().ToArray(); dynamic dynamicEntity = new ExpandoObject(); for(int i=0;i y) return ref x; else return ref y; }
Without needing to make copies of the variables x and y, passing them to the method Max gives a fast way to return the higher value. This can be really useful if this method is invoked often: static void UseMax() { Console.WriteLine(nameof(UseMax)); int x = 4, y = 5; ref int z = ref Max(ref x, ref y); Console.WriteLine($"{z} is the max of {x} and {y}"); //... }
This is the message returned: 5 is the max of 4 and 5
Returning a reference is fast because behind the scenes you use only pointers. However, this also means that the original item where the reference points to can be changed. For example, changing the variable z that references the data from x or y, depending what’s larger, also changes the value of the original variable: static void UseMax() { //... z = x + y; Console.WriteLine($"y after changing z: {y}");
829
Download from finelybook www.finelybook.com
Console.WriteLine(); }
When you run the program, you can see that y now has the value that was assigned to z: y after changing z: 9
Ref and Arrays Another example to show the features of ref return and ref local shows this keyword with arrays. The class Container defines a member of type int[] that is initialized in the constructor. The GetItem method returns an item of the array by reference. This allows of a fast path directly within the array of the container (code file ReferenceSemantics/Container.cs): public class Container { public Container(int[] data) => _data = data; private int[] _data; //... public ref int GetItem(int index) => ref _data[index]; public void ShowAll() { Console.WriteLine(string.Join(", ", _data)); Console.WriteLine(); } }
When using this Container, a sample array containing a list of 10 items is passed to the constructor. The fourth item is retrieved from the GetItem method, this item is changed to 33, and finally all the items are written to the console using the ShowAll method (code file ReferenceSemantics/Program.cs): private static void UseItemOfContainer() { Console.WriteLine(nameof(UseItemOfContainer)); var c = new Container(Enumerable.Range(0, 10).Select(x =>
830
Download from finelybook www.finelybook.com
x).ToArray()); ref int item = ref c.GetItem(3); item = 33; c.ShowAll(); Console.WriteLine(); }
When you run the application, you can see the fourth item changed from the outside: UseItemOfContainer 0, 1, 2, 33, 4, 5, 6, 7, 8, 9
Let’s see what can be done not only with items of arrays but with complete arrays by adding the GetData method. This method returns a reference to the array itself (code file ReferenceSemantics/Container.cs): public class Container { //... public ref int[] GetData() => ref _data; //... }
Using the GetData method of the Container class, a reference from the array is returned and written to the ref local variable d1. A new array with three elements is assigned to this variable (code file ReferenceSemantics/Program.cs): private static void UseArrayOfContainer() { Console.WriteLine(nameof(UseArrayOfContainer)); var c = new Container(Enumerable.Range(0, 10).Select(x => x).ToArray()); ref int[] d1 = ref c.GetData(); d1 = new int[] { 4, 5, 6 }; c.ShowAll(); Console.WriteLine(); }
Because a reference to the array is returned, the complete array can be replaced. The container now contains the newly created array with the 831
Download from finelybook www.finelybook.com
elements 4, 5, and 6: UseArrayOfContainer 4, 5, 6
NOTE The ref keyword for ref returns and ref locals requires references that stay alive when returning the reference. For example, you can return references to value types as long as they are contained in a reference type, and thus are on the managed heap. Using structs, you cannot define methods to return references of members of the struct. You can return references to structs that are received as references, as you’ve seen with the Max method. These value types are guaranteed alive with the return of the method, because they are passed by the caller that waits for the return of the method.
NOTE Chapter 3, “Objects and Types,” covers defining parameters with the ref, out, and in modifiers. These modifiers are important in regard to reference semantics as well. Using the in parameter that’s new with C# 7.2 with value types defines that the value type is passed by reference (similar to using the ref keyword with the parameter), but doesn’t allow changing it. in is like ref readonly for the parameters.
SPAN Chapter 3 includes creating reference types (classes) and value types (structs). Instances of classes are stored on the managed heap. The value of structs can be stored on the stack, or, when boxing is used, on the managed heap. Now we have another kind: a type that can have its 832
Download from finelybook www.finelybook.com
value only on the stack but never on the heap, sometimes called reflike types. Boxing is not possible with these types. Such a type is declared with the ref struct keyword. Using ref struct gives some additional behaviors and restrictions. The restrictions are the following: They can’t be added as array items. They can’t be used as generic type argument. They can’t be boxed. They can’t be static fields. They can only be instance fields of ref-like types. and ReadOnlySpan are ref-like types covered in this section. These types are already covered in Chapter 7 with extension methods for arrays and in Chapter 9 with extension methods for strings. Here, additional features are covered to reference data on the managed heap, the stack, and the native heap. Span
Spans Referencing the Managed Heap A Span can reference memory on the managed heap, as you’ve shown in Chapters 7 and 9. In the following code snippet, an array is created, and with the extension method AsSpan, a new Span is created referencing the memory of the array on the managed heap. After creating the Span referenced from the variable span1, a slice of the Span is created that is filled with the value 42. The next Console.WriteLine writes the values of the span span1 to the console (code file SpanSample/Program.cs): private static void SpanOnTheHeap() { Console.WriteLine(nameof(SpanOnTheHeap)); Span span1 = (new int[] { 1, 5, 11, 71, 22, 19, 21, 33 }).AsSpan(); span1.Slice(start: 4, length: 3).Fill(42); Console.WriteLine(string.Join(", ", span1.ToArray())); Console.WriteLine();
833
Download from finelybook www.finelybook.com
}
When you run the application, you can see the output of span1 with the 42 filled within the slice of the span: SpanOnTheHeap 1, 5, 11, 71, 42, 42, 42, 33
Spans Referencing the Stack can be used to reference memory on the stack. Referencing a single variable on the stack is not as interesting as referencing a block of memory; that’s why the following code snippet makes use of the stackalloc keyword. stackalloc returns a long* which requires the method SpanOnTheStack to be declared unsafe. A constructor of the Span type allows passing a pointer with the additional parameter for the size. Next, the variable span1 is used with the indexer to fill every item (code file SpanSample/Program.cs): Span
private static unsafe void SpanOnTheStack() { Console.WriteLine(nameof(SpanOnTheStack)); long* lp = stackalloc long[20]; var span1 = new Span(lp, 20); for (int i = 0; i < 20; i++) { span1[i] = i; } Console.WriteLine(string.Join(", ", span1.ToArray())); Console.WriteLine(); }
When you run the program, the following output shows the span with the initialized data on the stack: SpanOnTheStack 0, 1, 2, 3, 4, 5, 6, 7, 8, 9, 10, 11, 12, 13, 14, 15, 16, 17, 18, 19
Spans Referencing the Native Heap 834
Download from finelybook www.finelybook.com
A great feature of spans is they can also reference memory on the native heap. Memory on the native heap usually is allocated from native APIs. In the following code snippet, the AllocHGlobal method of the Marshal class is used to allocate 100 bytes on the native heap. The Marshal class returns a pointer with the IntPtr type. To directly access the int*, the ToPointer method of IntPtr is invoked. This is the pointer required by the constructor of the Span class. Writing int values to this memory, you need to pay attention how many bytes are needed. As an int contains 32 bits, the number of bytes is divided by 4 with a bit shift of two bits. After this, the native memory is filled by invoking the Fill method of the Span. With a for loop, every item referenced from the Span is written to the console (code file SpanSample/Program.cs): private static unsafe void SpanOnNativeMemory() { Console.WriteLine(nameof(SpanOnNativeMemory)); const int nbytes = 100; IntPtr p = Marshal.AllocHGlobal(nbytes); try { int* p2 = (int*)p.ToPointer(); Span span = new Span(p2, nbytes ≫ 2); span.Fill(42); int max = nbytes ≫ 2; for (int i = 0; i < max; i++) { Console.Write($"{span[i]} "); } Console.WriteLine(); } finally { Marshal.FreeHGlobal(p); } Console.WriteLine(); }
When you run the application, the values stored in the native heap are written to the console: SpanOnNativeMemory 42 42 42 42 42 42 42 42 42 42 42 42 42 42 42 42 42 42 42 42 42 42 42 42 42
835
Download from finelybook www.finelybook.com
NOTE Using Span to access native memory and the stack, unsafe code was needed because of the memory allocation and creation of the Span by passing a pointer. After the initialization, unsafe code is no longer required using the Span.
Span Extension Methods For the Span type, extension methods are defined to make it easier to work with this type. The following code snippet demonstrates the use of the Overlaps, the Reverse, and the IndexOf methods. With the Overlaps method, it is checked if the span that is used to invoke this extension method overlaps the span passed with the argument. The Reverse method reverses the content of the span. The IndexOf method returns the index of the span passed with the argument (code file SpanSample/Program.cs): private static void SpanExtensions() { Console.WriteLine(nameof(SpanExtensions)); Span span1 = (new int[] { 1, 5, 11, 71, 22, 19, 21, 33 }).AsSpan(); Span span2 = span1.Slice(3, 4); bool overlaps = span1.Overlaps(span2); Console.WriteLine($"span1 overlaps span2: {overlaps}"); span1.Reverse(); Console.WriteLine($"span1 reversed: {string.Join(", ", span1.ToArray())}"); Console.WriteLine($"span2 (a slice) after reversing span1: " + $"{string.Join(", ", span2.ToArray())}"); int index = span1.IndexOf(span2); Console.WriteLine($"index of span2 in span1: {index}"); Console.WriteLine(); }
Running the program produces this output: SpanExtensions
836
Download from finelybook www.finelybook.com
span1 span1 span2 index
overlaps span2: True reversed: 33, 21, 19, 22, 71, 11, 5, 1 (a slice) after reversing span1: 22, 71, 11, 5 of span2 in span1: 3
Other extension methods defined for the Span type are StartWith to check if a span starts with the sequence of another span, SequenceEqual to compare the sequence of two spans, SequenceCompareTo for ordering of sequences, and LastIndexOf which returns the first matching index starting from the end of the span.
PLATFORM INVOKE Not all the features of Windows API calls are available from .NET. This is true not only for old Windows API calls but also for very new features. Maybe you’ve written some DLLs that export unmanaged methods and you would like to use them from C# as well. To reuse an unmanaged library that doesn’t contain COM objects—it contains only exported functions—you can use Platform Invoke (P/Invoke). With P/Invoke, the CLR loads the DLL that includes the function that should be called and marshals the parameters. To use the unmanaged function, first you have to determine the name of the function as it is exported. You can do this by using the dumpbin tool with the /exports option. For example, the command dumpbin /exports c:\windows\system32\kernel32.dll | more
lists all exported functions from the DLL kernel32.dll. In the example, you use the CreateHardLink Windows API function to create a hard link to an existing file. With this API call, you can have several filenames that reference the same file as long as the filenames are on one hard disk only. This API call is not available from .NET Core, so you must use platform invoke. To call a native function, you have to define a C# external method with the same number of arguments, and the argument types that are defined with the unmanaged method must have mapped types with 837
Download from finelybook www.finelybook.com
managed code. The Windows API call CreateHardLink has this definition in C++: BOOL CreateHardLink( LPCTSTR lpFileName, LPCTSTR lpExistingFileName, LPSECURITY_ATTRIBUTES lpSecurityAttributes);
This definition must be mapped to .NET data types. The return type is a BOOL with unmanaged code; this simply maps to the bool data type. LPCTSTR defines a long pointer to a const string. The Windows API uses the Hungarian naming convention for the data type. LP is a long pointer, C is a const, and STR is a null-terminated string. The T marks the type as a generic type, and the type is resolved to either LPCSTR (an ANSI string) or LPWSTR (a wide Unicode string), depending on the compiler’s settings to 32 or 64 bit. C strings map to the .NET type String. LPSECURITY_ATTRIBUTES, which is a long pointer to a struct of type SECURITY_ATTRIBUTES. Because you can pass NULL to this argument, mapping this type to IntPtr is okay. The C# declaration of this method must be marked with the extern modifier because there’s no implementation of this method within the C# code. Instead, the method implementation is in the DLL kernel32.dll, which is referenced with the attribute [DllImport]. The return type of the .NET declaration CreateHardLink is of type bool, and the native method CreateHardLink returns a BOOL, so some additional clarification is useful. Because there are different Boolean data types with C++ (for example, the native bool and the Windows-defined BOOL, which have different values), the attribute [MarshalAs] specifies to what native type the .NET type bool should map: [DllImport("kernel32.dll", SetLastError="true", EntryPoint="CreateHardLink", CharSet=CharSet.Unicode)] [return: MarshalAs(UnmanagedType.Bool)] public static extern bool CreateHardLink(string newFileName, string existingFilename, IntPtr securityAttributes);
NOTE 838
Download from finelybook www.finelybook.com
The website http://www.pinvoke.net is very helpful with the conversion from native to managed code. The settings that you can specify with the attribute [DllImport] are listed in the following table. DLLIMPORT DESCRIPTION PROPERTY OR FIELD EntryPoint You can give the C# declaration of the function a different name than the one it has with the unmanaged library. The name of the method in the unmanaged library is defined in the field EntryPoint. CallingConvention Depending on the compiler or compiler settings that were used to compile the unmanaged function, you can use different calling conventions. The calling convention defines how the parameters are handled and where to put them on the stack. You can define the calling convention by setting an enumerable value. The Windows API usually uses the StdCall calling convention on the Windows operating system, and it uses the Cdecl calling convention on Windows CE. Setting the value to CallingConvention.Winapi works for the Windows API in both the Windows and the Windows CE environments. CharSet String parameters can be either ANSI or Unicode. With the CharSet setting, you can define how strings are managed. Possible values that are defined with the CharSet enumeration are Ansi, Unicode, and Auto. CharSet.Auto uses Unicode on the Windows NT platform, and ANSI on Microsoft’s older operating systems. SetLastError If the unmanaged function sets an error by using 839
Download from finelybook www.finelybook.com
the Windows API SetLastError, you can set the SetLastError field to true. This way, you can read the error number afterward by using Marshal.GetLastWin32Error. To make the CreateHardLink method easier to use from a .NET environment, you should follow these guidelines: Create an internal class named NativeMethods that wraps the platform invoke method calls. Create a public class to offer the native method functionality to .NET applications. Use security attributes to mark the required security. In the following example, the public method CreateHardLink in the class FileUtility is the method that can be used by .NET applications. This method has the filename arguments reversed compared to the native Windows API method CreateHardLink. The first argument is the name of the existing file, and the second argument is the new file. This is similar to other classes in the framework, such as File.Copy. Because the third argument used to pass the security attributes for the new filename is not used with this implementation, the public method has just two parameters. The return type is changed as well. Instead of returning an error by returning the value false, an exception is thrown. In case of an error, the unmanaged method CreateHardLink sets the error number with the unmanaged API SetLastError. To read this value from .NET, the [DllImport] field SetLastError is set to true. Within the managed method CreateHardLink, the error number is read by calling Marshal.GetLastWin32Error. To create an error message from this number, the Win32Exception class from the namespace System.ComponentModel is used. This class accepts an error number with the constructor, and returns a localized error message. In case of an error, an exception of type IOException is thrown, which has an inner exception of type Win32Exception. The public method CreateHardLink has the FileIOPermission attribute applied to check whether the caller has the necessary permission (code file PInvokeSampleLib/NativeMethods.cs).
840
Download from finelybook www.finelybook.com
[SecurityCritical] internal static class NativeMethods { [DllImport("kernel32.dll", SetLastError = true, EntryPoint = "CreateHardLinkW", CharSet = CharSet.Unicode)] [return: MarshalAs(UnmanagedType.Bool)] private static extern bool CreateHardLink( [In, MarshalAs(UnmanagedType.LPWStr)] string newFileName, [In, MarshalAs(UnmanagedType.LPWStr)] string existingFileName, IntPtr securityAttributes); internal static void CreateHardLink(string oldFileName, string newFileName) { if (!CreateHardLink(newFileName, oldFileName, IntPtr.Zero)) { var ex = new Win32Exception(Marshal.GetLastWin32Error()); throw new IOException(ex.Message, ex); } } } public static class FileUtility { [FileIOPermission(SecurityAction.LinkDemand, Unrestricted = true)] public static void CreateHardLink(string oldFileName, string newFileName) { NativeMethods.CreateHardLink(oldFileName, newFileName); } }
This library uses the following dependency and namespaces: Dependency: System.Security.Permissions Namespaces: System System.IO
841
Download from finelybook www.finelybook.com
System.Runtime.InteropServices System.Security System.Security.Permissions
WARNING The PlatformInvoke sample compiles successfully on Linux but doesn’t run because the library kernel32.dll cannot be found on the Linux operating system. You can now use this class to easily create hard links. If the file passed with the first argument of the program does not exist, you get an exception with the message: The system cannot find the file specified. If the file exists, you get a new filename referencing the original file. You can easily verify this by changing text in one file; it shows up in the other file as well (code file PInvokeSample/Program.cs): class Program { static void Main(string[] args) { if (args.Length != 2) { Console.WriteLine("usage: PInvokeSample " + "existingfilename newfilename"); return; } try { FileUtility.CreateHardLink(args[0], args[1]); } catch (IOException ex) { Console.WriteLine(ex.Message); } } }
842
Download from finelybook www.finelybook.com
With native method calls on Windows, often you have to use Windows handles. A Window handle is a 32- or 64-bit value for which, depending on the handle types, some values are not allowed. With .NET 1.0 for handles, usually the IntPtr structure was used because you can set every possible 32-bit value with this structure. However, with some handle types, this led to security problems and possible threading race conditions and leaked handles with the finalization phase. That’s why .NET 2.0 introduced the SafeHandle class. The class SafeHandle is an abstract base class for every Windows handle. Derived classes inside the Microsoft.Win32.SafeHandles namespace are SafeHandleZeroOrMinusOneIsInvalid and SafeHandleMinusOneIsInvalid. As the name indicates, these classes do not accept invalid 0 or –1 values. Further derived handle types are SafeFileHandle, SafeWaitHandle, SafeNCryptHandle, and SafePipeHandle, which can be used by the specific Windows API calls. For example, to map the Windows API CreateFile, you can use the following declaration to return a SafeFileHandle. Of course, usually you could use the .NET classes File and FileInfo instead. [DllImport("Kernel32.dll", SetLastError = true, CharSet = CharSet.Unicode)] internal static extern SafeFileHandle CreateFile( string fileName, [MarshalAs(UnmanagedType.U4)] FileAccess fileAccess, [MarshalAs(UnmanagedType.U4)] FileShare fileShare, IntPtr securityAttributes, [MarshalAs(UnmanagedType.U4)] FileMode creationDisposition, int flags, SafeFileHandle template);
SUMMARY Remember that in order to become a truly proficient C# programmer, you must have a solid understanding of how memory allocation and garbage collection work. This chapter described how the CLR manages and allocates memory on the heap and the stack. It also illustrated how to write classes that free unmanaged resources correctly, and how to use pointers in C#. These are both advanced topics that are poorly understood and often implemented incorrectly by novice 843
Download from finelybook www.finelybook.com
programmers. At a minimum, this chapter should have helped you understand how to release resources using the IDisposable interface and the using statement. You’ve also seen C# 7.0 and 7.2 enhancements passing values by reference and returning values by reference, particularly ref return and ref locals, as well as using the ref readonly modifier. The next chapter covers a roundtrip through all features of Visual Studio 2017.
844
Download from finelybook www.finelybook.com
18 Visual Studio 2017 WHAT’S IN THIS CHAPTER? Using Visual Studio 2017 Creating and working with projects Debugging Refactoring with Visual Studio Working with various technologies: UWP, ASP.NET Core, and more Analyzing applications Creating and using containers with Docker
WROX.COM CODE DOWNLOADS FOR THIS CHAPTER The wrox.com code downloads for this chapter are found at www.wrox.com on the Download Code tab. The source code is also available at https://github.com/ProfessionalCSharp/ProfessionalCSharp7 in the directory VisualStudio. The code for this chapter is divided into the following major examples: DockerSample WebAppWithVS 845
Download from finelybook www.finelybook.com
WORKING WITH VISUAL STUDIO 2017 At this point, you should be familiar with the C# language and almost ready to move on to the applied sections of the book, which cover how to use C# to program a variety of applications. Before doing that, however, it’s important to understand how you can use Visual Studio and some of the features provided by the .NET environment to get the best from your programs. This chapter explains what programming in the .NET environment means in practice. It covers Visual Studio, the main development environment in which you will write, compile, debug, and optimize your C# programs, and provides guidelines for writing good applications. Visual Studio is the main IDE used for numerous purposes, including writing ASP.NET and ASP.NET Core web applications, Windows Presentation Foundation (WPF) applications, and apps for the Universal Windows Platform (UWP), and for accessing services created by the ASP.NET Web. This chapter also explores what it takes to build applications that are targeted at .NET Core. Visual Studio 2017 is a fully integrated development environment. It is designed to make the process of writing your code, debugging it, and compiling it to an assembly to be shipped as easy as possible. This means that Visual Studio gives you a very sophisticated multipledocument–interface application in which you can do just about everything related to developing your code. It offers the following features: Text editor—Using this editor, you can write your C# (as well as Visual Basic, C++, F#, JavaScript, XAML, JSON, and SQL) code. This text editor is quite sophisticated. For example, as you type, it automatically lays out your code by indenting lines, matching start and end brackets of code blocks, and color-coding keywords. It also performs some syntax checks as you type, and underlines code that causes compilation errors, also known as design-time debugging. In addition, it features IntelliSense, which automatically displays 846
Download from finelybook www.finelybook.com
the names of classes, fields, or methods as you begin to type them. As you start typing parameters to methods, it also shows you the parameter lists for the available overloads. Figure 18-1 shows the IntelliSense feature in action with a UWP app. This dialog has a new feature with Visual Studio 2017: You can use the buttons at the bottom to select to see only properties, events, or methods. This helps a lot with the large member lists.
FIGURE 18-1 Design view editor—This editor enables you to place userinterface and data-access controls in your project; Visual Studio automatically adds the necessary C# code to your source files to instantiate these controls in your project. (This is possible because all .NET controls are instances of base classes.) Supporting windows—These windows enable you to view and modify aspects of your project, such as the classes in your source code, as well as the available properties (and their startup values) for Windows Forms and Web Forms classes. You can also use these windows to specify compilation options, such as which assemblies your code needs to reference. Integrated debugger—It is in the nature of programming that 847
Download from finelybook www.finelybook.com
your code will not run correctly the first time you try it. Or the second time. Or the third time. Visual Studio seamlessly links to a debugger for you, enabling you to set breakpoints and watches on variables from within the environment. Integrated Microsoft help—Visual Studio enables you to access the Microsoft documentation from within the IDE. For example, if you are not sure of the meaning of a keyword while using the text editor, simply select the keyword and press the F1 key, and Visual Studio accesses https://docs.microsoft.com to show you related topics. Similarly, if you are not sure what a certain compilation error means, you can bring up the documentation for that error by selecting the error message and pressing F1. Access to other programs—Visual Studio can also access some other utilities that enable you to examine and modify aspects of your computer or network, without your having to leave the developer environment. With the tools available, you can check running services and database connections, look directly into your SQL Server tables, browse your Microsoft Azure Cloud services, and even browse the Web using a web browser window. Visual Studio extensions—Some extensions of Visual Studio are already installed with a normal installation of Visual Studio, and many more extensions from both Microsoft and third parties are available. These extensions enable you to analyze code, offer project or item templates, access other services, and more. With the .NET Compiler Platform, integration of tools with Visual Studio has become easier.
NOTE By pressing Ctrl+Space, you can bring back the IntelliSense list box if you need it or if for any reason it is not visible. In case you want to see some code below the IntelliSense box, just keep pressing the Ctrl button.
848
Download from finelybook www.finelybook.com
The recent releases of Visual Studio had some interesting progress. One big part was with the user interface, the other big part with the background functionality and the .NET Compiler Platform. With the user interface, Visual Studio 2010 redesigned the shell to be based on WPF instead of native Windows controls. Visual Studio 2012 had some user interface (UI) changes based on this. In particular, the UI was enhanced to have more focus on the main work area—the editor—and to allow doing more tasks directly from the code editor instead of needing to use many other tools. Of course, you need some tools outside the code editor, but more functionality has been built into a few of these tools, so the number of tools typically needed can be reduced. With Visual Studio 2017, some more UI features have been enhanced. You can immediately see the first UI enhancement in the Visual Studio Installer, which has taken some inspiration from the design of the Windows 8 tiles to make it easier to select Workloads (see Figure 18-2).
849
Download from finelybook www.finelybook.com
FIGURE 18-2 With the .NET Compiler Platform (code name Roslyn), the .NET compiler has been completely rewritten; it now integrates functionality throughout the compiler pipeline, such as syntax analysis, semantics analysis, binding, and code emitting. Based on this, Microsoft had to rewrite many Visual Studio integration tools. The code editor, IntelliSense, and refactoring are all based on the .NET Compiler Platform. For XAML code editing, Visual Studio and Blend for Visual Studio share the same engines. Not only the code engines are the same: while Visual Studio 2013 got the XAML engine from Blend, since Blend for Visual Studio 2015, Blend got the shell from Visual Studio. As you start Blend for Visual Studio you see that it looks like Visual Studio, and you 850
Download from finelybook www.finelybook.com
can immediately start working with it. Another special feature of Visual Studio is search. Visual Studio has so many commands and features that it is often hard to find the menu or toolbar button you are looking for. Just enter a part of the command you’re looking for into the Quick Launch, and you’ll see available options. Quick Launch is located at the top-right corner of the window (see Figure 18-3). Search functionality is also available from the toolbox, Solution Explorer, the code editor (which you can invoke by pressing Ctrl+F), the assemblies on the Reference Manager, and more.
FIGURE 18-3
Visual Studio Editions Visual Studio 2017 is available in a few editions. The least expensive is Visual Studio 2017 Community Edition, which is free in some cases. It’s free for individual developers, open-source projects, academic research, education, and small professional teams. You can purchase the Professional and Enterprise editions. Only the 851
Download from finelybook www.finelybook.com
Enterprise edition includes all the features. Exclusive to the Enterprise edition is IntelliTrace, load testing, and some architecture tools. The Microsoft Fakes framework (unit test isolation) is only available with Visual Studio Enterprise. This chapter’s tour of Visual Studio 2017 includes a few features that are available only with specific editions. For detailed information about the features of each edition of Visual Studio 2017, see https://www.visualstudio.com/vs/compare/.
Visual Studio Settings When you start Visual Studio the first time, you are asked to select a settings collection that matches your environment, for example, General Development, Visual Basic, Visual C#, Visual C++, or Web Development. These different settings reflect the different tools historically used for these languages. When writing applications on the Microsoft platform, different tools were used to create Visual Basic, C++, and web applications. Similarly, Visual Basic, Visual C++, and Visual InterDev had completely different programming environments, with completely different settings and tool options. Now, you can create apps for all these technologies with Visual Studio, but Visual Studio still offers the keyboard shortcuts that you can choose based on Visual Basic, Visual C++, and Visual InterDev. Of course, you also can select specific C# settings as well. After choosing the main category of settings to define keyboard shortcuts, menus, and the position of tool windows, you can change every setting with Tools ➪ Customize (toolbars and commands) and Tools ➪ Options (here you find the settings for all the tools). You can also reset the settings collection with Tools ➪ Import and Export Settings, which invokes a wizard that enables you to select a default collection of settings (see Figure 18-4).
852
Download from finelybook www.finelybook.com
FIGURE 18-4 The following sections walk through the process of creating, coding, and debugging a project, demonstrating what Visual Studio can do to help you at each stage.
CREATING A PROJECT After installing Visual Studio 2017, you will want to start your first project. With Visual Studio, you rarely start with a blank file and then add C# code, in the way that you have been doing in the previous chapters in this book. (Of course, the option of asking for an empty application project is there if you really do want to start writing your code from scratch or if you are going to create a solution that will 853
Download from finelybook www.finelybook.com
contain a few projects.) Instead, the idea is that you tell Visual Studio roughly what type of project you want to create, and it generates the files and C# code that provide a framework for that type of project. You then proceed to add your code to this outline. For example, if you want to build a Windows desktop application (a WPF application), Visual Studio starts you off with an XAML file and a file containing C# source code that creates a basic form. This form can communicate with Windows and receiving events. It can be maximized, minimized, or resized; all you need to do is add the controls and functionality you want. If your application is intended to be a command-line utility (a console application), Visual Studio gives you a basic namespace, a class, and a Main method to get you started. Last, but hardly least, when you create your project, Visual Studio also sets up the compilation options that you are likely to supply to the C# compiler—whether it is to compile to a command-line application, a library, or a WPF application. It also tells the compiler which base class libraries and NuGet packages you need to reference (a WPF GUI application needs to reference many of the WPF-related libraries; a console application probably does not). Of course, you can modify all these settings as you are editing if necessary. The first time you start Visual Studio, you are presented with an IDE containing menus, a toolbar, and a page with getting-started information, how-to videos, and latest news (see Figure 18-5). The Start Page contains various links to useful websites and links to some actual articles, and it enables you to open existing projects or start a new project altogether.
854
Download from finelybook www.finelybook.com
FIGURE 18-5 In the case of Figure 18-5, the Start Page reflects what is shown after you have already used Visual Studio 2017, as it includes a list of the most recently edited projects. You can just click one of these projects to open it again.
Multi-Targeting .NET Visual Studio enables you to target the version of the .NET version that you want to work with. When you open the New Project dialog, shown in Figure 18-6, a drop-down list in the top area of the dialog displays the available options.
855
Download from finelybook www.finelybook.com
FIGURE 18-6 In this case, you can see that the drop-down list enables you to target the .NET Frameworks 44, 4.5, 4.5.1, 4.5.2, 4.6, 4.6.1, 4.7, and 4.7.1. However, with many application types, this option does not apply. If you create .NET Core apps, or Windows Universal apps, it doesn’t matter what you select. However, you can change the .NET Core version or Windows Runtime version target later. If you want to change the target framework with a .NET Core application, you can right-click the project in the Solution Explorer, select the Project Properties, choose the Application tab, and select the .NET Core version from the Target Framework list (see Figure 18-7).
856
Download from finelybook www.finelybook.com
FIGURE 18-7 This is not that different with Windows apps. Here, right-click the project in the Solution Explorer, select the Project Properties, choose the Application tab, and now you can select the target and the minimum build versions, as shown in Figure 18-8.
FIGURE 18-8 857
Download from finelybook www.finelybook.com
Selecting a Project Type To create a new project, select File ➪ New Project from the Visual Studio menu. The New Project dialog displays (see Figure 18-9), giving you your first inkling of the variety of projects you can create.
FIGURE 18-9 Using this dialog, you effectively select the initial framework files and code you want Visual Studio to generate for you, the programming language you want to create your project with, and different categories of application types. The following tables describe the most important options that are available to you under the Visual C# projects as related to this book. Legacy project templates you might still need are not covered here; for these, you should consult older editions of this book. Using Windows Universal Project Templates 858
Download from finelybook www.finelybook.com
The first table covers templates for the Universal Windows Platform. These templates are available on both Windows 10 and Windows 8.1, but you need a Windows 10 system to test the application. The templates are used to create applications running on Windows 10 using any device family—the PC, X-Box, IoT devices, and more. IF YOU CHOOSE… Blank App (Universal Windows) Class Library (Universal Windows) Windows Runtime Component (Universal Windows) Unit Test App (Universal Windows) Coded UI Test Project (Universal Windows) Windows Application Packaging Project
YOU GET THE C# CODE AND COMPILATION OPTIONS TO GENERATE… A basic empty Universal Windows app with XAML, without styles and other base classes. A .NET class library that can be called up by other Windows Store apps programmed with .NET. You can use the API of the Windows Runtime within this library. A Windows Runtime class library that can be called up by other Windows Store apps developed with different programming languages (C#, C++, JavaScript). A library that contains unit tests for Universal Windows Platform apps. A project to define coded UI tests for Windows apps.
A WPF or Windows Forms project. You can build a Windows 10 installation package and mix the app with modern Windows 10 code.
NOTE 859
Download from finelybook www.finelybook.com
For Windows 10, the number of default templates for Universal apps have been reduced. Creating Windows Store apps for Windows 8, Visual Studio offers more project templates to predefine Grid-based, Split-based, or Hub-based apps. For Windows 10 only an empty template is available. You can either start with the empty template or consider using the Windows Template Studio as a starter. The Windows Template Studio project template is available as soon as you install the Windows Template Studio Visual Studio extension from Microsoft, which is available via Tools ➪ Extensions and Updates. Using .NET Core Project Templates Interesting enhancements with Visual Studio 2017 are available with the .NET Core project templates. Initially, there are five selections, which are described in the following table. IF YOU CHOOSE… Console App (.NET Core)
YOU GET THE C# CODE AND COMPILATION OPTIONS TO GENERATE… A console app with .NET Core. This is the template you primarily used when creating the code for the previous chapters. Class A class library that can be used with .NET Core Library applications. Don’t use this template if you want to (.NET Core) share the library between .NET Core, Universal Apps, and Xamarin. Look for the Standard Library instead. You need to use this library for creating some specific .NET Core features that are not available with .NET Standard. Unit Test A unit test project to test .NET Core and .NET Standard Project projects and libraries with MSTest. (.NET Core) xUnit Test A unit test project to test.NET Core and .NET Standard Project projects and libraries with xUnit. (.NET Core) ASP.NET An ASP.NET Core web application, no matter whether 860
Download from finelybook www.finelybook.com
Core Web it’s a website returning HTML code to the client or a Application service returning JSON. The selections that are available after you have selected this project template are described in the next table. After selecting the ASP.NET Core Web Application Template, you get the choice of selecting some preconfigured templates as shown in Figure 18-10. Use the combo box at the top to choose between .NET Core and .NET Framework. ASP.NET Core runs on .NET Framework as well, not only on .NET Core. Then you can select the ASP.NET Core version number, which depends on the SDKs you’ve installed. A selection of .NET Framework is only useful if you need to use legacy libraries that only run with the .NET Framework. Otherwise keep the selection with .NET Core. If you select .NET Core and ASP.NET Core 2.0, you see a similar screen to Figure 18-10. These templates are described in the following table.
FIGURE 18-10 IF YOU
YOU GET THE C# CODE AND COMPILATION 861
Download from finelybook www.finelybook.com
CHOOSE… OPTIONS TO GENERATE… Empty An ASP.NET Core web application. When choosing this template, you do not get a complete empty project, but a good starter to create a basic web app with .NET Core. This template is the template to start with in the Chapter 30, “ASP.NET Core,” and Chapter 31, “ASP.NET Core MVC.” You’ll learn what needs to be added. Web API A service offering a Web API using ASP.NET Core. The Web API template makes it possible to easily create RESTful services. This project is covered in Chapter 32, “Web API.” Web A web application with Razor Pages. This is a new Application option with ASP.NET Core 2.0 and is covered in Chapter 31. MVC A web application using ASP.NET Core MVC. This template makes use of the full-blown Model-ViewController pattern. You can use this to create a rich web application. This template is covered in Chapter 31 as well. Angular A web application using the Angular script library to create a Single Page Application (SPA) together with ASP.NET Core for the backend services. React.js A web application using React.js and ASP.NET Core for the backend services. React.js is another SPA technology. React.js and A web application using React.js and Redux for the Redux client, and ASP.NET Core for the backend services. This time, the Redux library is used in addition to React.js. Using .NET Standard Templates This category includes just a single template, but it is so important to get coverage here. You can create a Class Library (.NET Standard). From now on this is the preferred class library to create. This library 862
Download from finelybook www.finelybook.com
can be shared between .NET Framework, .NET Core, Universal Apps, Xamarin, and more technologies. You just need to pay attention to the version of the .NET Standard you select after creating this library. .NET Standard libraries are covered in detail in Chapter 19, “Libraries, Assemblies, Packages, and NuGet.”
NOTE The .NET Standard Library replaces the Portable Library. Portable Libraries are now listed as legacy in Visual Studio. By far this is not a full list of the Visual Studio 2017 project templates, but it reflects some of the most commonly used templates.
EXPLORING AND CODING A PROJECT This section looks at the features that Visual Studio provides to help you add and explore code with your project. You find out about using the Solution Explorer to explore files and code, use features from the editor—such as IntelliSense and code snippets—and explore other windows, such as the Properties window and the Document Outline.
Solution Explorer After creating a project—for example, a Console App (.NET Core) that was used mostly in earlier chapters—the most important tool you will use, other than the code editor, is the Solution Explorer. With this tool you can navigate through all files and items of your project, and see all the classes and members of classes.
NOTE When running a console app from within Visual Studio, there’s a common misconception that it’s necessary to have a 863
Download from finelybook www.finelybook.com
method at the last line of the Main method to keep the console window open. That’s not the case. You can start the application with Debug ➪ Start without Debugging (or press Ctrl+F5) instead of Debug ➪ Start Debugging (or F5). This keeps the window open until you press a key. Using F5 to start the application makes sense if breakpoints are set, and then Visual Studio halts at the breakpoints anyway. Console.ReadLine
Working with Projects and Solutions The Solution Explorer displays your projects and solutions. It’s important to understand the distinction between these: A project is a set of all the source-code files and resources that will compile into a single assembly (or in some cases, a single module). For example, a project might be a class library or a Windows GUI application. A solution is the set of all the projects that make up a particular software package (application). To understand this distinction, consider what happens when you ship a project, which consists of more than one assembly. For example, you might have a user interface, custom controls, and other components that ship as libraries of parts of the application. You might even have a different user interface for administrators, and a service that is called across the network. Each of these parts of the application might be contained in a separate assembly, and hence they are regarded by Visual Studio as separate projects. However, it is quite likely that you will be coding these projects in parallel and in conjunction with one another. Thus, it is quite useful to be able to edit them all as one single unit in Visual Studio. Visual Studio enables this by regarding all the projects as forming one solution, and treating the solution as the unit that it reads in and allows you to work on. Up until now, this chapter has been loosely talking about creating a console project. In fact, in the example you are working on, Visual Studio has created a solution for you—although this particular solution contains just one project. You can see this scenario reflected in the 864
Download from finelybook www.finelybook.com
Solution Explorer (see Figure 18-11), which contains a tree structure that defines your solution.
FIGURE 18-11 In this case, the project contains your source file, Program.cs, as well as a project configuration file, ConsoleApp1.csproj, which enables you to define project descriptions, versions, and dependencies. The project file is not clearly seen in Solution Explorer. You just need to select the project (ConsoleApp1 in Figure 18-11) and then select Edit ConsoleApp1.csproj from the context menu (either click the Menu button on your keyboard or right-click). With .NET Core projects, you can do this without unloading the solution. When you work with other project types (for example, Universal Windows Apps), you first need to unload the solution before you edit the project file directly from within Visual Studio. The Solution Explorer also indicates the NuGet packages and projects that your project references. You can see this by expanding the Dependencies folder in the Solution Explorer.
NOTE With older project types you see a References folder instead of Dependencies.
865
Download from finelybook www.finelybook.com
If you have not changed any of the default settings in Visual Studio, you will probably find the Solution Explorer in the top-right corner of your screen. If you cannot see it, just go to the View menu and select Solution Explorer. The solution is described by a file with the extension .sln; in this example, it is ConsoleApp1.sln. The solution file is a text file that contains information about all the projects contained within the solution, as well as global items that can be used with all contained projects.
REVEALING HIDDEN FILES By default, Solution Explorer hides some files. By clicking the button Show All Files on the Solution Explorer toolbar, you can display all hidden files. For example, the bin and obj directories store compiled and intermediate files. Subfolders of obj hold various temporary or intermediate files; subfolders of bin hold the compiled assemblies. Adding Projects to a Solution As you work through the following sections, you see how Visual Studio works with Windows apps and console apps. To that end, you create a Windows project called SimpleApp that you add to your current solution, ConsoleApp1.
NOTE Creating the SimpleApp project means that you end up with a solution containing a UWP app and a console app. That is not a very common scenario—you are more likely to have one application and several libraries—but it enables you to see more code! You might, however, create a solution like this if, for example, you are writing a utility that you want to run either as a 866
Download from finelybook www.finelybook.com
UWP app or as a command-line utility, or you need some extra command-line features with your app. You can create the new project in several ways. One way is to select New ➪ Project from the File menu (as you have done already), or you can select Add ➪ New Project from the File menu. Selecting Add ➪ New Project from the File menu brings up the familiar Add New Project dialog; as shown in Figure 18-12, however, Visual Studio wants to create the new project in the preexisting ConsoleApp1 location of the solution.
FIGURE 18-12 If you select this option, a new project is added, so the ConsoleApp1 solution now contains a console application and a Blank App (Universal Windows).
867
Download from finelybook www.finelybook.com
NOTE In accordance with Visual Studio’s language independence, the new project does not need to be a C# project. It is perfectly acceptable to put a C# project, a Visual Basic project, and a C++ project in the same solution. We will stick with C# here because this is a C# book! With the platform versions, select Target and Minimum versions that are installed on your system. You can select the latest version for both the Target and the Minimum version (see Figure 18-13).
FIGURE 18-13 Of course, this means that ConsoleApp1 is not really an appropriate name for the solution anymore. To change the name, you can rightclick the name of the solution and select Rename from the context menu. Call the new solution DemoSolution. The Solution Explorer window should now look like Figure 18-14.
868
Download from finelybook www.finelybook.com
FIGURE 18-14 As you can see, Visual Studio has made your newly added UWP project automatically reference some of the extra base classes that are important for UWP functionality. Note that if you look in Windows Explorer, the name of the solution file has changed to DemoSolution.sln. In general, if you want to rename any files, the Solution Explorer window is the best place to do so, because Visual Studio then automatically updates any references to that file in the other project files. If you rename files using only Windows Explorer, you might break the solution because Visual Studio is not able to locate all the files it needs to read into the IDE. As a result, you need to manually edit the project and solution files to update the file references. Setting the Startup Project Bear in mind that if you have multiple projects in a solution, you need to configure which one should run as the startup project. You can also configure multiple projects to start simultaneously. There are a lot of ways to do this. After selecting a project in the Solution Explorer, the context menu offers a Set as Startup Project option, which enables one startup project at a time. You can also use the context menu Debug ➪ 869
Download from finelybook www.finelybook.com
Start new instance to start one project after the other. To simultaneously start more than one project, click the solution in the Solution Explorer and select the context menu Set Startup Projects. This opens the dialog shown in Figure 18-15. After you check Multiple Startup Projects, you can define what projects should be started.
FIGURE 18-15 Discovering Types and Members A UWP application contains a lot more initial code than a console application when Visual Studio first creates it. That is because creating a window is an intrinsically more complex process. Chapter 34, “Patterns with XAML Apps,” discusses the code for a UWP application in detail. For now, have a look at the XAML code in MainPage.xaml and in the C# source code MainPage.xaml.cs. There’s also some hidden generated C# code. Iterating through the tree in the Solution Explorer, below MainPage.xaml.cs you find the class MainPage. With all the code 870
Download from finelybook www.finelybook.com
files, the Solution Explorer shows the types within that file. Within the type MainPage you can see the members of the class. _contentLoaded is a field of type bool. Clicking this field opens the file MainPage.g.i.cs. This file—a part of the MainPage class—is generated by the designer and contains initialization code. Previewing Items A feature offered by the Solution Explorer is the button to Preview Selected Items. When this button is enabled, and you click an item in the Solution Explorer, the editor for this item opens, as usual. However, if the item was not opened previously, the tab flow of the editor shows the new opened item in the rightmost position. Now, when you click another item, the previously opened one is closed. This helps significantly with reducing the number of open items. In the editor tab of the previewed item is the Keep Open button, which promotes the item to stay open even when another item is clicked; the tab for the item that you’re keeping open moves to the left. Using Scopes Setting scopes allows you to focus on a specific part of the solution. The list of items shown by the Solution Explorer can grow huge. For example, opening the context menu of a type enables you to select the base type from the menu Base Types. Here you can see the complete inheritance hierarchy of the type, as shown in Figure 18-16.
871
Download from finelybook www.finelybook.com
FIGURE 18-16 Because Solution Explorer contains more information than you can easily view with one screen, you can open multiple Solution Explorer windows at once with the menu option New Solution Explorer View, and you can set the scope to a specific element—for example, to a project or a class—by selecting Scope to This from the context menu. To return to the previous scope, click the Back button. Adding Items to a Project Directly from within Solution Explorer you can add different items to the project. Selecting the project and selecting the context menu Add ➪ New Item opens the dialog shown in Figure 18-17. Another way to get to the same dialog is by using the main menu Project ➪ Add New Item. Here you find many different categories, such as code items to add classes or interfaces, items for using the ASP.NET Core or other technologies, and a lot more.
FIGURE 18-17
872
Download from finelybook www.finelybook.com
Managing References and Dependencies Adding references with Visual Studio needs some special considerations because of differences with project types. Depending on the project type, you see Dependencies or References in the Solution Explorer. Opening the context menu while clicking on this item, you can see the Add References menu item to open the Reference Manager. The Reference Manager, shown in Figure 18-18, enables you to add references to other projects in the same solution, add references to shared projects in the same solution, and browse for assemblies.
FIGURE 18-18
NOTE Shared projects enable you to share code between different technologies without creating a library. This feature is covered in Chapter 19. Depending on the project types you’re adding references to, the Reference Manager gives different options. With .NET Framework projects, you can also reference shared assemblies and COM objects. 873
Download from finelybook www.finelybook.com
When you’re creating Universal Windows Platform apps, you can reference Universal Windows Extensions, for example API extensions available with Windows IoT or Windows Mobile, as shown in Figure 18-19.
FIGURE 18-19 All the functionality of .NET Core is available with NuGet packages. Many enhancements for the .NET Framework are available with NuGet packages as well. You can access the NuGet Package Manager (see Figure 18-20) from the context menu in the Solution Explorer, or you can select Project ➪ Manage NuGet Packages. You can browse for new packages to install, see the packages installed, and update installed packages. Figure 18-20 shows an indication that a package update is available with the installed packages.
874
Download from finelybook www.finelybook.com
FIGURE 18-20 You can configure the sources of NuGet packages by opening the Options dialog by selecting Tools ➪ Options. In the Options dialog select the NuGet Package Manager ➪ Package Sources in the tree view (see Figure 18-21). By default, Microsoft’s NuGet server is configured, but you can also configure other NuGet servers or your own. With .NET Core and ASP.NET Core 1.0, Microsoft offers feeds with NuGet packages that are updated on a daily basis.
875
Download from finelybook www.finelybook.com
FIGURE 18-21 Using the NuGet Package Manager, you can not only select the package source, but you can also select a filter to see all packages that are installed, or where an upgrade is available, and search for packages on the server.
NOTE With ASP.NET Core, JavaScript libraries are no longer used from NuGet server. Instead, JavaScript package managers, such as NPM and Bower, are directly supported from within Visual Studio 2017. This is discussed in Chapter 30. Another option you have with dependencies or references is the menu Add Connected Service. This opens the dialog as shown in Figure 1822, which allows easily adding specific features to your applications. 876
Download from finelybook www.finelybook.com
Selecting one of these packages adds NuGet packages, makes some configuration changes in the app, and usually opens a web page to help what needs to be done next. You can access more Connected Services via the Find More Services… link in this dialog.
FIGURE 18-22
Working with the Code Editor The Visual Studio code editor is where most of your development work takes place. This editor increased in size in Visual Studio after the removal of some toolbars from the default configuration, and the removal of borders from the menus, toolbars, and tab headers. The following sections look at some of the most useful features of this editor. The Folding Editor One notable feature of Visual Studio is its use of a folding editor as its default code editor. Figure 18-23 shows the code for the console application that you generated earlier. Notice the little minus signs on the left-hand side of the window. These signs mark the points where the editor assumes that a new block of code (or documentation 877
Download from finelybook www.finelybook.com
comment) begins. You can click these icons to close the view of the corresponding block of code just as you would close a node in a tree control (see Figure 18-24).
FIGURE 18-23
878
Download from finelybook www.finelybook.com
FIGURE 18-24 This means that while you are editing you can focus on just the areas of code you want to look at, hiding the bits of code you are not interested in working with at that moment. If you do not like the way the editor has chosen to block off your code, you can indicate your own blocks of collapsible code with the C# preprocessor directives, #region and #endregion. For example, to collapse the code inside the Main method, you would add the code shown in Figure 18-25.
879
Download from finelybook www.finelybook.com
FIGURE 18-25 The code editor automatically detects the #region block and places a new minus sign by the #region directive, enabling you to close the region. Enclosing this code in a region enables the editor to close it (see Figure 18-26), marking the area with the comment you specified in the #region directive. The compiler, however, ignores the directives and compiles the Main method as normal.
880
Download from finelybook www.finelybook.com
FIGURE 18-26 Navigating Within the Editor On the top line of the editor are three combo boxes. The right combo box enables you to navigate between members of the type you’re in. The middle combo box enables you to navigate between types. The left combo box enables you to navigate between different applications or frameworks. For example, if you are working on the source code of a shared project, in the left combo box of the editor you can select one of the projects where the shared project is used to see the code that is active for the selected project. The code that is not compiled for the selected project is dimmed. You can create code segments for different platforms using C# preprocessor commands. IntelliSense In addition to the folding editor feature, Visual Studio’s code editor also incorporates Microsoft’s popular IntelliSense capability, which not only saves you typing but also ensures that you use the correct parameters. IntelliSense remembers your preferred choices and starts 881
Download from finelybook www.finelybook.com
with these initially instead of at the beginning of the sometimes rather lengthy lists that IntelliSense can now provide. The code editor also performs some syntax checking on your code, underlining these errors with a short wavy line, even before you compile the code. Hovering the mouse pointer over the underlined text brings up a small box that contains a description of the error. CodeLens Did you ever change a method and wonder, “Did I miss a method calling this?” With the CodeLens it’s easy to find callers. The number of references is directly shown in the editor (see Figure 18-27). When you click the references link, the CodeLens opens so you can see the code of the callers and navigate to them.
FIGURE 18-27 If the source code is checked into a source control system like Visual Studio Online using Git or TFS, you can also see the authors and changes made. If you’re using unit tests (covered in Chapter 28), you can see the number of successful and failing test runs, and you can immediately switch to detailed information.
NOTE 882
Download from finelybook www.finelybook.com
The CodeLens is not available in the Visual Studio Community edition. Using Code Snippets Great productivity features from the code editor are code snippets. Just by writing cw in the editor, the editor creates a Console.WriteLine();. Visual Studio comes with many code snippets, including the following: do, for, forr, foreach, equals
and while for creating loops
for an implementation of the Equals method
and exception for creating Attribute- and Exceptionderived types attribute
You can see all the code snippets available with the Code Snippets Manager (see Figure 18-28) by selecting Tools ➪ Code Snippets Manager. You can also create custom snippets.
883
Download from finelybook www.finelybook.com
FIGURE 18-28 EditorConfig Visual Studio supports different coding styles. With earlier editions of Visual Studio, you could configure your environment for a coding style. However, when you work with different projects, you might need different coding styles. EditorConfig supports different coding styles if you configure the Follow Project Coding Conventions option in Tools ➪ Options ➪ Text Editor ➪ General. To use EditorConfig you can add .editorconfig files to the project directory or a subdirectory. The configuration applies for all the source code files in this directory and subdirectories. In subdirectories, you can add more .editorconfig files that overrule the configuration from a parent directory. The .editorconfig file used by the ASP.NET Core MVC team is shown 884
Download from finelybook www.finelybook.com
in the following code snippet. With this file you can define the indent size based on different file extensions, and you can also define coding guidelines—for example, if var should be preferred or disallowed, if the this qualifier should or should not be used, if C# defined types should be preferred to .NET types, if throw expressions should be allowed, and so on. With these settings, you can define whether the editor should generate a suggestion, a warning, or an error: # EditorConfig is awesome:http://EditorConfig.org # top-most EditorConfig file root = true # Don't use tabs for indentation. [*] indent_style = space # (Please don't specify an indent_size here; that has too many unintended # consequences.) # Code files [*.{cs,csx,vb,vbx}] indent_size = 4 # Xml project files [*. {csproj,vbproj,vcxproj,vcxproj.filters,proj,projitems,shproj}] indent_size = 2 # Xml config files [*. {props,targets,ruleset,config,nuspec,resx,vsixmanifest,vsct}] indent_size = 2 # JSON files [*.json] indent_size = 2 # Dotnet code style settings: [*.cs] # Sort using and Import directives with System.* appearing first dotnet_sort_system_directives_first = true # Don't use this. qualifier
885
Download from finelybook www.finelybook.com
dotnet_style_qualification_for_field = false:suggestion dotnet_style_qualification_for_property = false:suggestion # use int x = .. over Int32 dotnet_style_predefined_type_for_locals_parameters_members = true:suggestion # use int.MaxValue over Int32.MaxValue dotnet_style_predefined_type_for_member_access = true:suggestion # Require var all the time. csharp_style_var_for_built_in_types = true:suggestion csharp_style_var_when_type_is_apparent = true:suggestion csharp_style_var_elsewhere = true:suggestion # Disallow throw expressions. csharp_style_throw_expression = false:suggestion # Newline settings csharp_new_line_before_open_brace = all csharp_new_line_before_else = true csharp_new_line_before_catch = true csharp_new_line_before_finally = true csharp_new_line_before_members_in_object_initializers = true csharp_new_line_before_members_in_anonymous_types = true
Using this .editorconfig file, you can see a suggestion by typing int x = 42 as shown in Figure 18-29. Pay attention because you might need to re-open your source code after changing .editorconfig to have the new configuration activated.
886
Download from finelybook www.finelybook.com
FIGURE 18-29
NOTE You can get details about the file format, plugins for various editors, the editorconfig project page, and more on http://editorconfig.org.
Learning and Understanding Other Windows In addition to the code editor and Solution Explorer, Visual Studio provides other windows that enable you to view and/or manage your projects from different points of view.
NOTE 887
Download from finelybook www.finelybook.com
The rest of this section describes several other windows. If any of these windows are not visible on your monitor, you can select them from the View menu. To show the design view and code editor, right-click the filename in Solution Explorer and select View Designer or View Code from the context menu, or select the item from the toolbar at the top of Solution Explorer. The design view and code editor share the same tabbed window. Using the Design View Window If you are designing a user interface application, such as a Windows app, or a Class Library (Universal Windows), you can use the Design View window. This window presents a visual overview of what your form will look like. You normally use the Design View window in conjunction with a window known as the toolbox. The toolbox contains many .NET components that you can drag onto your program. Toolbox components vary according to project type. Figure 18-30 shows the items displayed within a Windows app.
888
Download from finelybook www.finelybook.com
FIGURE 18-30 To add your own custom categories to the toolbox, execute the following steps:
889
Download from finelybook www.finelybook.com
1. Right-click any category. 2. Select Add Tab from the context menu. You can move your code snippets to the items in the toolbox, so you can easily access them. You can also place other tools in the toolbox by selecting Choose Items from the same context menu; this is particularly useful for adding your own custom components or Universal Windows Components that are not present in the toolbox by default, as shown in Figure 18-31.
FIGURE 18-31 Using the Properties Window As mentioned in the first part of the book, .NET classes can implement properties. The Properties window is available with projects and files and when you’re selecting items using the Design view. Figure 18-32 shows the Properties view with a control of a Windows app. 890
Download from finelybook www.finelybook.com
FIGURE 18-32 With this window you can see all the properties of an item and configure it accordingly. You can change some properties by entering text in a text box; others have predefined selections, and some have a custom editor. You can also add event handlers to events with the Properties window. Using the Class View Window Although the Solution Explorer can show classes and members of classes, that’s normally the job of the Class View (see Figure 18-33). To invoke the class view, select View ➪ Class View. The Class View shows the hierarchy of the namespaces and classes in your code. It provides a tree view that you can expand to see which namespaces contain what classes, and what classes contain what members.
891
Download from finelybook www.finelybook.com
FIGURE 18-33 A nice feature of the Class View is that if you right-click the name of any item for which you have access to the source code, then the 892
Download from finelybook www.finelybook.com
context menu displays the Go To Definition option, which takes you to the definition of the item in the code editor. Alternatively, you can do this by double-clicking the item in Class View (or, indeed, by rightclicking the item you want in the source code editor and choosing the same option from the resulting context menu). The context menu also enables you to add a field, method, property, or indexer to a class. In other words, you specify the details for the relevant member in a dialog, and the code is added for you. This feature can be particularly useful for adding properties and indexers, as it can save you quite a bit of typing. Using the Object Browser Window An important aspect of programming in the .NET environment is being able to find out what methods and other code items are available in the base classes and any other libraries that you are referencing from your assembly. This feature is available through a window called the Object Browser (see Figure 18-34). You can access this window by selecting Object Browser from the View menu in Visual Studio 2017. With this tool you can browse for and select existing component sets— such as .NET Framework versions from 4 to 4.7.1, what’s available with the Windows Runtime, and .NET for UWP—and view the classes and members of the classes that are available with this subset. You can select the Windows Runtime by selecting Universal Windows in the Browse drop-down to find all namespaces, types, and methods of this native new API for UWP apps.
893
Download from finelybook www.finelybook.com
FIGURE 18-34
NOTE Don’t be annoyed with the Object Browser that many selections offered from the drop-down list don’t show any results. This is by design. Using the Server Explorer Window You can use the Server Explorer window, shown in Figure 18-35, to find out about aspects of the computers in your network while coding. With the Servers section, you can find information about services running (which is extremely useful in developing Windows Services), create new performance counts, and access the event logs. The Data Connections section enables not only connecting to existing databases and querying data, but also creating a new database. Visual Studio 894
Download from finelybook www.finelybook.com
2017 also has a lot of Microsoft Azure information built in to Server Explorer, including options for App Services, Virtual Machines, Notifications, Storage, and more.
FIGURE 18-35 Using the Cloud Explorer The Cloud Explorer (see Figure 18-36) is an explorer that is available with Visual Studio 2017 if you install the Azure SDK. With the Cloud Explorer you can get access to your Microsoft Azure subscription and have access to your resources, view log files, attach debuggers, start and stop services, go directly to the Azure portal, and start debug sessions.
895
Download from finelybook www.finelybook.com
FIGURE 18-36 Using the Document Outline A window available with WPF and UWP apps is the Document Outline. Figure 18-37 shows this window opened with an application from Bonus Chapter 1, “Composition,” which you can find online. Here, you can view the logical structure and hierarchy of the XAML elements, lock elements to prevent changing them unintentionally, easily move elements within the hierarchy, group elements within a new container element, and change layout types.
896
Download from finelybook www.finelybook.com
FIGURE 18-37 With this tool you can also create XAML templates and graphically edit data binding.
Arranging Windows While exploring Visual Studio, you might have noticed that many of the windows have some interesting functionality that’s more reminiscent of toolbars. In particular, they can all either float (also on a second display), or they can be docked. When they are docked, they display an extra icon that looks like a pin next to the minimize button in the top-right corner of each window. This icon really does act like a pin—you can use it to pin the window open. A pinned window (the pin is displayed vertically) behaves just like the regular windows you are used to. When windows are unpinned (the pin is displayed horizontally), however, they remain open only as long as they have the focus. As soon as they lose the focus (because you clicked or moved your mouse somewhere else), they smoothly retreat into the main border around the entire Visual Studio application. Pinning and 897
Download from finelybook www.finelybook.com
unpinning windows provides another way to make the best use of the limited space on your screen. A feature with Visual Studio 2017 is that you can store different layouts. It’s likely that you’re running in different environments. For example, in your office you might have connected your laptop to two big screens, but this is not the case when you’re programming in a plane, where you only have a single screen. In the past, you probably always arranged the windows according to your needs and had to change this several times a day. Another scenario in which you might need different layouts is when you’re doing web development and creating UWP and Xamarin apps. Now you can save your layout and easily switch from one to the other. From the Window menu, select Save Window Layout to save your current arrangement of the tools. Use Window ➪ Apply Window Layout to select one of your saved layouts to arrange the windows as you have saved them.
BUILDING A PROJECT Visual Studio is not only about coding your projects. It is an IDE that manages the full life cycle of your project, including the building or compiling of your solutions. This section examines the options that Visual Studio provides for building your project.
Building, Compiling, and Making Code Before examining the various build options, it is important to clarify some terminology. You will often see three different terms used in connection with the process of getting from your source code to some sort of executable code: compiling, building, and making. The origin of these three terms reflects the fact that until recently, the process of getting from source code to executable code involved more than one step (this is still the case in C++). This was due in large part to the number of source files in a program. In C++, for example, each source file needs to be compiled individually. This results in what are known as object files, each containing something like executable code, but where each object file 898
Download from finelybook www.finelybook.com
relates to only one source file. To generate an executable, these object files need to be linked together, a process that is officially known as linking. The combined process was usually referred to—at least on the Windows platform—as building your code. However, in C# terms the compiler is more sophisticated, able to read in and treat all your source files as one block. Hence, there is not really a separate linking stage, so in the context of C#, the terms compile and build are used interchangeably. The term make basically means the same thing as build, although it is not really used in the context of C#. The term make originated on old mainframe systems on which, when a project was composed of many source files, a separate file would be written containing instructions to the compiler on how to build a project—which files to include and what libraries to link to, and so on. This file was generally known as a makefile and it is still quite standard on UNIX systems. The MSBuild project file something like the old makefile; it’s just a new advanced XML variant. With MSBuild projects, you can use the MSBuild command with the project file as input, and all the sources will be compiled. Using build files is very helpful on a separate build server on which all developers check their code in, and overnight the build process is done. Chapter 1 mentions the .NET Core command line (CLI) tools, the command line to build with the .NET Core environment, which now uses MSBuild behind the scenes.
Debugging and Release Builds The idea of having separate builds is very familiar to C++ developers, and to a lesser degree to those with a Visual Basic background. The point here is that when you are debugging, you typically want your executable to behave differently from when you are ready to ship the software. When you are ready to ship your software, you want the executable to be as small and fast as possible. Unfortunately, these two requirements are not compatible with your needs when you are debugging code, as explained in the following sections. Optimization High performance is achieved partly by the compiler’s many 899
Download from finelybook www.finelybook.com
optimizations of the code. This means that the compiler actively looks at your source code as it is compiling to identify places where it can modify the precise details of what you are doing in a way that does not change the overall effect but makes things more efficient. For example, suppose the compiler encountered the following source code: double InchesToCm(double ins) => ins * 2.54; // later on in the code Y = InchesToCm(X);
It might replace it with this: Y = X * 2.54;
Similarly, it might replace { string message = "Hi"; Console.WriteLine(message); }
with this: Console.WriteLine("Hi");
By doing so, the compiler bypasses having to declare any unnecessary object reference in the process. It is not possible to exactly pin down what optimizations the C# compiler does—nor whether the two previous examples would occur with any particular situation—because those kinds of details are not documented. (Chances are good that for managed languages such as C#, the previous optimizations would occur at JIT compilation time, not when the C# compiler compiles source code to assembly.) Obviously, for proprietary reasons, companies that write compilers are usually quite reluctant to provide many details about the tricks that their compilers use. Note that optimizations do not affect your source code—they affect only the contents of the executable code. However, the previous examples should give you a good idea of what to expect from optimizations. The problem is that although optimizations like the examples just shown help a great deal in making your code run faster, they are 900
Download from finelybook www.finelybook.com
detrimental for debugging. In the first example, suppose that you want to set a breakpoint inside the InchesToCm method to see what is going on in there. How can you possibly do that if the executable code does not actually have an InchesToCm method because the compiler has removed it? Moreover, how can you set a watch on the Message variable when that does not exist in the compiled code either? Debugger Symbols During debugging, you often have to look at the values of variables, and you specify them by their source code names. The trouble is that executable code generally does not contain those names—the compiler replaces the names with memory addresses. .NET has modified this situation somewhat to the extent that certain items in assemblies are stored with their names, but this is true of only a small minority of items—such as public classes and methods—and those names will still be removed when the assembly is JIT-compiled. Asking the debugger to tell you the value in the variable called HeightInInches is not going to get you very far if, when the debugger examines the executable code, it sees only addresses and no reference to the name HeightInInches anywhere. Therefore, to debug properly, you need to make extra debugging information available in the executable. This information includes, among other things, names of variables and line information that enables the debugger to match up which executable machine assembly language instructions correspond to your original source code instructions. You will not, however, want that information in a release build, both for proprietary reasons (debugging information makes it a lot easier for other people to disassemble your code) and because it increases the size of the executable. Extra Source Code Debugging Commands A related issue is that quite often while you are debugging there will be extra lines in your code to display crucial debugging-related information. Obviously, you want the relevant commands removed entirely from the executable before you ship the software. You could do this manually, but wouldn’t it be so much easier if you could simply 901
Download from finelybook www.finelybook.com
mark those statements in some way so that the compiler ignores them when it is compiling your code to be shipped? You’ve already seen in the first part of the book how this can be done in C# by defining a suitable processor symbol, and possibly using this in conjunction with the Conditional attribute, giving you what is known as conditional compilation. What all these factors add up to is that you need to compile almost all commercial software in a slightly different way when debugging than in the final product that is shipped. Visual Studio can handle this because, as you have already seen, it stores details about all the options it is supposed to pass to the compiler when it has your code compiled. All that Visual Studio must do to support different types of builds is store more than one set of such details. These different sets of build information are referred to as configurations. When you create a project, Visual Studio automatically gives you two configurations— Debug and Release: Debug—This configuration commonly specifies that no optimizations are to take place, extra debugging information is to be present in the executable, and the compiler is to assume that the debug preprocessor symbol Debug is present unless it is explicitly #undefined in the source code. Release—This configuration specifies that the compiler should optimize the compilation, that there should be no extra debugging information in the executable, and that the compiler should not assume that any particular preprocessor symbol is present. You can define your own configurations as well. You might want to do this, for example, to set up professional-level builds and enterpriselevel builds so that you can ship two versions of the software. In the past, because of issues related to Unicode character encodings being supported on Windows NT but not on Windows 95, it was common for C++ projects to feature a Unicode configuration and an MBCS (multibyte character set) configuration.
Selecting a Configuration At this point you might be wondering how Visual Studio, given that it 902
Download from finelybook www.finelybook.com
stores details about more than one configuration, determines which one to use when arranging for a project to be built. The answer is that there is always an active configuration, which is the configuration that is used when you ask Visual Studio to build a project. (Note that configurations are set for each project, rather than each solution.) By default, when you create a project, the Debug configuration is the active configuration. You can change which configuration is the active one by clicking the Build menu option and selecting the Configuration Manager item. It is also available through a drop-down menu in the main Visual Studio toolbar.
Editing Configurations In addition to choosing the active configuration, you can also examine and edit the configurations. To do this, select the relevant project in Solution Explorer and then select Properties from the Project menu. This brings up a sophisticated dialog. (Alternatively, you can access the same dialog by right-clicking the name of the project in Solution Explorer and then selecting Properties from the context menu.) This dialog contains a tabbed view that enables you to select many different general areas to examine or edit. Space does not permit showing these areas, but this section outlines a couple of the most important ones. Depending on the project type, the options available are very different. First, look at the properties of the Universal Windows application in Figure 18-38, which shows a tabbed view of the available properties. This screenshot shows the general Application settings.
903
Download from finelybook www.finelybook.com
FIGURE 18-38 Among the points to note are that you can select the name of the assembly as well as the default namespace generated with the new items. By clicking the Assembly Information button, you can enter version numbers, title, description, company, and other information. Clicking the Package Manifest button switches to the Package Manifest editor covered in Chapter 33. Figure 18-39 shows the same configuration for a .NET Core Console application. You also can see Application settings, but this screen looks different. Assembly name and default namespace are also configurable, but here you can select the version of the target framework, the output type of the app, and a startup object in case you have multiple Main methods.
904
Download from finelybook www.finelybook.com
FIGURE 18-39 Figure 18-40 shows the build configuration properties of the Universal Windows app. Note that a list box near the top of the dialog enables you to specify which configuration you want to look at. You can see—in the case of the Debug configuration—that the compiler assumes that the DEBUG and TRACE preprocessor symbols have been defined. In addition, the code is not optimized, extra debug information is generated, and the .NET Native tool chain is not used.
905
Download from finelybook www.finelybook.com
FIGURE 18-40 Figure 18-41 shows the build configuration properties of a .NET Core project. Again, in the debug configuration, code is not optimized, and DEBUG and TRACE preprocessor symbols have been defined.
906
Download from finelybook www.finelybook.com
FIGURE 18-41
DEBUGGING YOUR CODE At this point, you are ready to run and debug the application. In C#, the main technique involved in debugging is simply setting breakpoints and using them to examine what is going on in your code at a certain point in its execution.
Setting Breakpoints 907
Download from finelybook www.finelybook.com
You can set breakpoints from Visual Studio on any line of your code that is executed. The simplest way is to click the line in the code editor, within the shaded area near the far left of the document window (or press the F9 key when the appropriate line is selected). This sets up a breakpoint on that line, which pauses execution and transfers control to the debugger as soon as that line is reached in the execution process. A breakpoint is indicated by a red circle to the left of the line in the code editor. Visual Studio also highlights the line by displaying the text and background in a different color. Clicking the circle again removes the breakpoint. If breaking every time at a particular line is not adequate for your problem, you can also set conditional breakpoints. To do this, select Debug ➪ Windows ➪ Breakpoints. This brings up a dialog that requests details about the breakpoint you want to set. When you click the Settings of a breakpoint (see Figure 18-42), you can do the following:
FIGURE 18-42 Specify conditions—for example, you can specify to hit the breakpoint only if a conditional expression returns true. You can also specify a hit count to break a loop that has been passed a certain number of times. Set actions to log a message to the Output Window and continue execution. With this dialog you also have the option to export and import breakpoint settings, which is useful for working with different breakpoint arrangements depending on what scenario you want to 908
Download from finelybook www.finelybook.com
debug into, and to store the debug settings.
Using Data Tips and Debugger Visualizers After a breakpoint has been hit, you will usually want to investigate the values of variables. The simplest way to do this is to hover the mouse cursor over the name of the variable in the code editor. This causes a little data tip box (shown in Figure 18-43) that shows the value of that variable to pop up, which can also be expanded for greater detail.
FIGURE 18-43 Some of the values shown in the data tip offer a magnifying glass. Clicking this magnifying class provides one or more options to use a debugger visualizer—depending on the type. Figure 18-44 shows the JSON Visualizer, which displays JSON content. Several other visualizers are available as well, such as HTML, XML, and Text visualizers.
909
Download from finelybook www.finelybook.com
FIGURE 18-44
Live Visual Tree A feature of Visual Studio 2017 offered for XAML-based applications is the Live Visual Tree. While debugging a UWP and WPF application, you can open the Live Visual Tree (see Figure 18-45) via Debug ➪ Windows ➪ Live Visual Tree to see the live tree of the XAML elements including its properties in the Live Property Explorer. Using this window, you can click the Selection button to select an element in the UI to see its element in the live tree. In the Live Property Explorer, you 910
Download from finelybook www.finelybook.com
can directly change properties, and see the results on the running application.
FIGURE 18-45
Monitoring and Changing Variables Sometimes you might prefer a more continuous look at values. For that you can use the Autos, Locals, and Watch windows to examine the contents of variables. Each of these windows is designed to monitor different variables: Autos—Monitors the last few variables that have been accessed as the program was executing. Locals—Monitors variables that are accessible in the method 911
Download from finelybook www.finelybook.com
currently being executed. Watch—Monitors any variables that you have explicitly specified by typing their names into the Watch window. You can drag and drop variables to the Watch window. These windows are only visible when the program is running under the debugger. If you do not see them, select Debug ➪ Windows, and then select the desired menu. The Watch window offers four different windows in case there’s so much to watch and you want to group that. With all these windows you can both watch and change the values, enabling you to try different paths in the program without leaving the debugger. The Locals window is shown in Figure 18-46.
FIGURE 18-46 Another window that doesn’t directly relate to the other windows discussed but is still an important one for monitoring and changing variables is the Immediate window. This window also makes it possible for you to look at variable values. You can use this window to enter code and run it. This is very helpful when you’re doing some tests during a debug session; it enables you to home in on details, try a method out, and change a debug run dynamically.
Exceptions Exceptions are great when you are ready to ship your application, ensuring that error conditions are handled appropriately. Used well, they can ensure that users are never presented with technical or annoying dialogs. Unfortunately, exceptions are not so great when you are trying to debug your application. The problem is twofold: 912
Download from finelybook www.finelybook.com
If an exception occurs when you are debugging, you often do not want it to be handled automatically—especially if automatically handling it means retiring gracefully and terminating execution! Rather, you want the debugger to help you determine why the exception has occurred. Of course, if you have written good, robust, defensive code, your program automatically handles almost anything—including the bugs that you want to detect! If an exception for which you have not written a handler occurs, the .NET runtime still searches for one. Unfortunately, by the time it discovers there isn’t one, it will have terminated your program. There will not be a call stack left, and you will not be able to look at the values of any of your variables because they will all have gone out of scope. Of course, you can set breakpoints in your catch blocks, but that often does not help very much because when the catch block is reached, flow of execution will, by definition, have exited the corresponding try block. That means the variables you probably wanted to examine the values of, to figure out what has gone wrong, will have gone out of scope. You will not even be able to look at the stack trace to find what method was being executed when the throw statement occurred because control will have left that method. Setting the breakpoints at the throw statement obviously solves this; but if you are coding defensively, there will be many throw statements in your code. How can you tell which one threw the exception? Visual Studio provides a very neat answer to all of this. You can configure the exception types where the debugger should break. This is configured in the menu Debug ➪ Windows ➪ Exception Settings. With this window (see Figure 18-47) you can specify what happens when an exception is thrown. You can choose to continue execution or to stop and start debugging—in which case execution stops and the debugger steps in at the throw statement.
913
Download from finelybook www.finelybook.com
FIGURE 18-47 What makes this a powerful tool is that you can customize the behavior according to which class of exception is thrown. You can configure to break into the debugger whenever it encounters any exception thrown by a .NET base class, but not to break into the debugger for specific exception types. Visual Studio is aware of all the exception classes available in the .NET base classes, and of quite a few exceptions that can be thrown outside the .NET environment. Visual Studio is not automatically aware of any custom exception classes that you write, but you can manually add your exception classes to the list, and specify which of your exceptions should cause execution to stop immediately. To do this, just click the Add button (which is enabled when you have selected a top-level node from the tree) and type in the name of your exception class.
Multithreading Visual Studio also offers great support for debugging multithreaded programs. When debugging multithreaded programs, you must understand that the program behaves differently depending on whether it is running in the debugger or not. If you reach a breakpoint, 914
Download from finelybook www.finelybook.com
Visual Studio stops all threads of the program, so you have the chance to access the current state of all the threads. To switch between different threads, you can enable the Debug Location toolbar. This toolbar contains a combo box for all processes and another combo box for all threads of the running application. When you select a different thread, you find the code line where the thread currently halts and the variables currently accessible from different threads. The Tasks window (shown in Figure 18-48) shows all running tasks, including their statuses, locations, task names, the current threads that are used by the tasks, the application domains, and the process identifiers. This window also indicates when different threads block each other, causing a deadlock.
FIGURE 18-48 Figure 18-49 shows the Parallel Stacks window, where you can see different threads or tasks (depending on the selection) in a hierarchical view. You can jump to the source code directly by clicking the task or thread.
FIGURE 18-49
REFACTORING TOOLS Many developers develop their applications first for functionality. 915
Download from finelybook www.finelybook.com
After the functionality is in place, they rework their applications to make them more manageable and more readable. This process is called refactoring. Refactoring involves reworking code for readability and performance, providing type safety, and ensuring that applications adhere to standard OO (object-oriented) programming practices. Reworking also happens when updates are made to applications. The C# environment of Visual Studio 2017 includes a set of refactoring tools, which you can find under the Refactoring option in the Visual Studio menu. To see this in action, create a new class called Car in Visual Studio: public class Car { public string _color; public string _doors; public int Go() { int speedMph = 100; return speedMph; } }
Now suppose that for the purpose of refactoring, you want to change the code a bit so that the color and door variables are encapsulated in public .NET properties. The refactoring capabilities of Visual Studio 2017 enable you to simply right-click either of these properties in the document window and select Quick Actions. You see different options for refactoring, such as generating a constructor to fill the fields or to generate the methods Equals and GetHashCode or to encapsulate the fields as shown in Figure 18-50.
916
Download from finelybook www.finelybook.com
FIGURE 18-50 From this dialog you can provide the name of the property and click the Preview link, or you can directly accept the changes. When you select the button to encapsulate the fields, the code is reworked into the following: public class Car { private string _color; private string _doors; public string Color { get => _color; set => _color = value; } public string Doors { get => _doors; set => _doors = value; } public int Go() { int speedMph = 100; return speedMph;
917
Download from finelybook www.finelybook.com
} }
As you can see, these code fixes make it quite simple to refactor your code—not only on one page but throughout an entire application. Also included are capabilities to do the following: Rename method names, local variables, fields, and more. Extract methods from a selection of code. Extract interfaces based on a set of existing type members. Promote local variables to parameters. Rename or reorder parameters. You will find that the refactoring capabilities provided by Visual Studio 2017 offer a great way to get cleaner, more readable, and betterstructured code.
DIAGNOSTIC TOOLS Visual Studio 2017 offers many useful tools that can help you analyze and proactively troubleshoot your application. This section looks at some of these Visual Studio analysis tools. Like the architecture tools, the analyzer tools are available with Visual Studio 2017 Enterprise. To analyze a complete run of the application, you can use the diagnostics tools. These tools enable you to find what methods are called, how often methods are called, how much time is spent in what methods, how much memory is used, and much more. With Visual Studio 2017, the diagnostics tools are started automatically when you start the debugger. With the diagnostics tools, you can also see IntelliTrace (historical debugging) events (see Figure 18-51). When you hit a breakpoint, you can have a look at previous information in time such as previous breakpoints, exceptions that were thrown, database access, ASP.NET Core events, tracing, or user input gestures, such as a user clicking a button. By clicking the information of previous events, you can have a look at local variables, the call stack, 918
Download from finelybook www.finelybook.com
and method calls that were done. This makes it easy to find problems without restarting a debug session and setting breakpoints to methods that have been invoked before you see the issue.
FIGURE 18-51
NOTE IntelliTrace is only available in the Visual Studio 2017 Enterprise edition.
919
Download from finelybook www.finelybook.com
Another way to start diagnostics tools is to start them via the profiler: Debug ➪ Performance Profiler or Analyze ➪ Performance Profiler. Here you have more control over the features to start (see Figure 1852). Depending on the project type used, more or fewer features are available. With UWP projects you can see the application timeline, memory usage, CPU usage, and memory. Other tools are HTML UI Responsiveness, JavaScript Memory, UI Analysis, and a Performance Wizard.
FIGURE 18-52 The first option, Application Timeline (see Figure 18-53), gives information about the UI thread and the time it is spending in parsing, layout, rendering, I/O, and application code. Depending on where the most time is spent, you know where optimization can be useful.
920
Download from finelybook www.finelybook.com
FIGURE 18-53 If you select the CPU Usage option (Figure 18-54), the overhead of monitoring is low. With this option, performance information is sampled after specific time intervals. You don’t see all method calls invoked, especially if they are running just for a short time. Again, the advantage of this option is low overhead. When running a profiling session, you must always be aware that you’re monitoring not only the performance of the application, but the performance of getting the data as well. You shouldn’t profile all data at once, as sampling all the data influences the outcome. Collecting information about .NET memory allocation helps you identify memory leaks and provides information about what type of objects need how much memory. Resource contention data helps with the analysis of threads, enabling you to easily identify whether different threads block each other.
921
Download from finelybook www.finelybook.com
FIGURE 18-54 After an analysis run is completed, you can get detailed report information as shown in Figure 18-55. You can see CPU usage by the application, a hot path indicating which functions are taking the most time, and a sorted list of the functions that have used the most CPU time.
922
Download from finelybook www.finelybook.com
FIGURE 18-55 The profiler has many more screens—too many to show here. One view is a function view that you can sort based on the number of calls made to the function, or the elapsed inclusive and exclusive times used by the function. This information can help you identify methods deserving of another look in terms of performance, whereas others might not be worthwhile because they are not called often, or they do not take an inordinate amount of time. Clicking within a function, you can invoke details about it, as shown in Figure 18-56. This enables you to see which functions are called and immediately step into the source code. The Caller/Callee view also provides information about what functions have been called by what function. 923
Download from finelybook www.finelybook.com
FIGURE 18-56
CREATING AND USING CONTAINERS WITH DOCKER A great new feature of Visual Studio is its Docker integration. Because Docker is relatively new in the .NET world, it deserves an introduction. What is Docker good for? Docker offers virtualization; it’s a container technology that enables you to package and deploy applications and services isolated with all its dependencies. Compared to a virtual machine, it’s lightweight because the images can be a lot smaller as one image is based on another one. One Docker container also doesn’t need to reserve one CPU core and memory because they can be shared. 924
Download from finelybook www.finelybook.com
Development can create a Docker image that’s used by production. It’s no longer, “It runs on my machine.” Here are the key terms to understand about Docker: Image—A deployment unit. An image is a package that includes all dependencies (frameworks) and configuration needed to run the application. An image can derive from other images. After an image is created, it is immutable. Registry—A store where you can find Docker images. Docker’s official registry, where you can find thousands of images, is at https://hub.docker.com. At https://hub.docker.com/r/microsoft/dotnet/ you can pull official Microsoft .NET Core images for Linux and Windows Server. Container—A running image. The container is a runtime environment for one application or service. You can scale it by creating multiple instances of a container from the same image. A container runs in a host. You can download Docker Community Edition for Windows from https://store.docker.com/editions/community/docker-cedesktop-windows to host Docker on Windows 10. Microsoft Azure
has several offerings to run your Docker images in the cloud. Dockerfile—A text file with instructions to build a Docker image. You can use the Docker command line to process the dockerfile. To understand Docker, it’s best to try it out.
Hello Docker! After installing Docker Community Edition, you can use the Docker commands to pull and run Docker containers. The first command to start with is the Docker version of “Hello World!” From the command line, you just need to invoke docker run hello-world. When you start this the first time, you can see a result like the following output shows. Because the Docker image hello-world is not yet locally installed, the Docker image is pulled from the Docker registry and started. After a successful download, you’ll see Hello from Docker! displayed:
925
Download from finelybook www.finelybook.com
> docker run hello-world Unable to find image 'hello-world:latest' locally latest: Pulling from library/hello-world ca4f61b1923c: Pull complete Digest: sha256:ca0eeb6fb05351dfc8759c20733c91def84cb8007aa89a5bf606bc8b315b9fc7 Status: Downloaded newer image for hello-world:latest Hello from Docker!
When you invoke the command a second time, because the Docker image is already downloaded locally, you get immediate results: > docker run hello-world Hello from Docker!
Running ASP.NET Core in a Docker Container Next, let’s pull a Docker container from Microsoft and create and run an ASP.NET Core application. To pull and run the container, you start the command docker run with these options: > docker run -p 8000:80 -e "ASPNETCORE_URLS=http://+:80" -it --rm microsoft/dotnet
The option -p maps the port 80 from the container to the port 8000 outside the container. On your local system, port 80 is probably already occupied by a web server. The option -e sets an environmental variable within the container. By setting the environmental variable ASPNETCORE_URLS, you can specify the port number that is the listening port used by the Kestrel server hosting ASP.NET Core. The option -it starts the container interactive with a terminal; thus, when the command completes, you type in the command prompt of the container. The option --rm removes the container if it already exists before the container is downloaded again. The last part of the command specifies the image to be pulled from the hub and started. The image microsoft/dotnet contains the .NET Core SDK with the command-line tools.
926
Download from finelybook www.finelybook.com
NOTE pulls the latest microsoft/dotnet Docker image with the released SDK. By adding tags to the name, you can pull specific versions and also pull a version with just the runtime that can be used for production. microsoft/dotnet:-sdk retrieves the .NET Core SDK, microsoft/dotnet:-runtime an image with the runtime, and microsoft/dotnet:runtime-deps a smaller image that doesn’t include the runtime but does include the native binaries needed for hosting self-contained apps. Self-contained apps are explained in Chapter 1, “.NET Applications and Tools.” Details on the images are available at https://hub.docker.com/r/microsoft/dotnet/. microsoft/dotnet
When you start the command, the image is pulled from the Docker hub, started, and you can enter in the Docker container. Let’s create an ASP.NET Core MVC application and start it with the following commands: # # # # # #
mkdir websample cd websample dotnet new mvc dotnet restore dotnet build dotnet run
Now you can access http://localhost:8000 from a browser outside of the container and access the ASP.NET Core website in the container. From outside the Docker container, you can use the command > docker images
to see all the downloaded images and > docker container list
to see the active containers running. This is a shorthand notation: > docker ps
927
Download from finelybook www.finelybook.com
Creating a Dockerfile With the commands used so far, you’ve seen how to pull and run a Docker container. Next let’s create a custom Docker image that runs an ASP.NET Core application. This time, you create a release build and build a publish package. First, you use the ASP.NET Core CLI to create an ASP.NET Core MVC web application. Passing -c Release to the dotnet build command builds release code. The option -o ./Publish for the dotnet publish command writes the output for publishing in the Publish subdirectory. > > > > > >
mkdir DockerSample cd DockerSample dotnet new mvc dotnet restore dotnet build -c Release dotnet publish -c Release -o ./Publish
Next, create a dockerfile in the same directory as the web application, in the current directory of the command prompt (code file DockerSample/dockerfile): FROM microsoft/aspnetcore WORKDIR /app COPY ./publish . RUN dir . ENTRYPOINT [ "dotnet", "/app/DockerSample.dll" ] RUN echo 'completed building image'
WARNING When running Docker on Linux, pay attention to the case sensitivity of the filenames. With Linux, the file dockersample.dll is different from DockerSample.dll. Let’s get through every command. A dockerfile starts with a FROM. The newly built image is based on the image microsoft/aspnetcore. This image contains only the runtime. For a build-image, you can use 928
Download from finelybook www.finelybook.com
microsoft/aspnetcore-build. microsoft/aspnetcore itself is based on microsoft/dotnet. The microsoft/aspnetcore image contains a set of
native images for the ASP.NET Core libraries, so no time is spent on the first run to compile the libraries. FROM microsoft/aspnetcore
The next command sets the working directory inside the image to be created to the /app folder. WORKDIR /app
The COPY command copies the content from the local ./Publish directory to the current directory inside the image—the previously defined working directory: COPY ./publish .
The next command just displays the file in the current directory to see if the copy succeeded: RUN dir .
The ENTRYPOINT defines the command that should be started when running the container with its arguments. At runtime, the ASP.NET Core app is started with dotnet and the name of the DLL: ENTRYPOINT [ "dotnet", "/app/dockersample.dll" ]
With the dockerfile in place, you can build a docker image with the command docker build. The option -t gives a name to the image. The last . in the command defines the directory that should be searched for the dockerfile: > docker build -t mysampleapp .
NOTE With the -t option of the docker build command, you can tag the image—for example, with a version number such as docker build 929
Download from finelybook www.finelybook.com
-t mysampleapp:1.4 .
After a successful build, you can run the Docker image and map port 80 from the container to port 8002 outside of the container: > docker run -p 8002:80 mysampleapp
When you use the production code and the precompiled ASP.NET Core image, you experience a fast response as you use the browser to access the ASP.NET Core web application.
Using Visual Studio Now let’s get into Visual Studio 2017. How is the experience of Docker integrated? A web application using the project template Web Application (Model-View-Controller) is created. The project is named WebAppWithVS. You’ll see this name in the generated dockerfile. With the first dialog, you can already enable Docker support by selecting a check box and choosing between a Linux or Windows container (Figure 18-57). Leave this option deselected. It’s easy to add Docker support later.
930
Download from finelybook www.finelybook.com
FIGURE 18-57 When you use the project template, the same files are created as when you use the command line. You can add Docker support to an existing project by selecting Project ➪ Docker Support. In the dialog shown in Figure 18-58 you select the target OS. Let’s host it on Linux.
FIGURE 18-58 Now you get a dockerfile with the project. This dockerfile includes more than one FROM for multi-stage docker builds. Here, multiple images are created depending on whether a debug or release build is 931
Download from finelybook www.finelybook.com
done. Let’s get through this file with multiple steps. The first FROM is based on the image microsoft/aspnetcore:2.0, which is defined AS base to reference it with the name base later. With the first image definition, the working directory is set to /app, and the port number 80 is exposed (code file WebAppWithVS/Dockerfile): FROM microsoft/aspnetcore:2.0 AS base WORKDIR /app EXPOSE 80
The second FROM is completely independent of the first one. This FROM defines the image base aspnetcore-build:2.0. The image with the build tag is the ASP.NET Core image, including the SDK. The working directory is now /src. Next, two COPY commands are used to copy the solution and the project file to the src directory. Running dotnet restore restores all NuGet packages, and the next COPY command copies the complete folder with its subdirectories to the src directory. The new working directory is set to the folder of the web application— before running dotnet build: FROM microsoft/aspnetcore-build:2.0 AS build WORKDIR /src COPY *.sln ./ COPY WebAppWithVS/WebAppWithVS.csproj WebAppWithVS/ RUN dotnet restore COPY . . WORKDIR /src/WebAppWithVS RUN dotnet build -c Release -o /app
The next image definition makes use of the previously configured build image: FROM build AS publish. The new name is publish, where the .NET command dotnet publish is invoked to create the files for publication in the /app subdirectory: FROM build AS publish RUN dotnet publish -c Release -o /app
The last FROM defines an image named final that’s based on the first image defined: the base image. The working directory is now /app. The COPY command copies the /app directory from the previously defined publish image (the publish was done to the /app directory) to the working directory. Finally, the entry point of the container is set to the 932
Download from finelybook www.finelybook.com
dotnet
command:
FROM base AS final WORKDIR /app COPY --from=publish /app . ENTRYPOINT ["dotnet", "WebAppWithVS.dll"]
With the Dockerfile in place, you just need to invoke the Docker commands as shown previously to create the images needed. However, instead of using the Docker commands you can use Docker Compose, which is a tool to run multiple Docker applications. For this tool you need a YAML file that defines services that make up the application. From the services, dockerfiles are referenced to build the images. As you add Docker support with Visual Studio to a project, you can find another project in the solution: docker-compose. The dockercompose project contains files using the YAML syntax with the yml file extension.
NOTE YAML (YAML Ain’t Markup Language) is a syntax created that is not as verbose as XML. YAML uses whitespaces with the syntax. The file docker-compose.yml is automatically created. After the version number for Docker Compose, services: lists the services that are built. The service name webappwithvs needs to match the value in the element defined in the CSPROJ configuration file. The CSPROJ file also lists the Microsoft.Docker.Sdk that’s used to trigger this project. The name of the image that’s created is specified by image. You can change this image name. The image name is tagged with dev (for the Debug build) and latest (for the Release build) (configuration file WebAppWithVS/docker-compose/docker-compose.yml): version: '3' services: webappwithvs: image: webappwithvs
933
Download from finelybook www.finelybook.com
build: context: . dockerfile: WebApWithVS/Dockerfile
Building and running the project with debug and release builds now creates and runs images with the names webappwithvs:dev and webappwithvs:latest. While this is already a great feature of Visual Studio to automatically build the images, the best is that you can set breakpoints, start the debugger, and debug from Visual Studio running on a Windows machine into Docker images running on Linux —all on the same system!
SUMMARY This chapter explored one of the most important programming tools in the .NET environment: Visual Studio 2017. The bulk of the chapter examined how this tool facilitates writing code in C#. You’ve learned about various project templates, the Solution Explorer, and various features of the editor. You’ve also debugged your code. You’ve seen refactoring in action and been introduced to the new integration of Docker. The first part of the book concludes with this chapter. The next chapter starts to dive into .NET Standard libraries by covering libraries, assemblies, and NuGet packages.
934
Download from finelybook www.finelybook.com
PART II .NET Core and the Windows Runtime Chapter 19: Libraries, Assemblies, Packages, and NuGet Chapter 20: Dependency Injection Chapter 21: Tasks and Parallel Programming Chapter 22: Files and Streams Chapter 23: Networking Chapter 24: Security Chapter 25: ADO.NET and Transactions Chapter 26: Entity Framework Core Chapter 27: Localization Chapter 28: Testing Chapter 29: Tracing, Logging, and Analytics
935
Download from finelybook www.finelybook.com
19 Libraries, Assemblies, Packages, and NuGet WHAT’S IN THIS CHAPTER? Differences between libraries, assemblies, packages Creating libraries Using .NET Standard Using shared projects Creating NuGet packages
WROX.COM CODE DOWNLOADS FOR THIS CHAPTER The wrox.com code downloads for this chapter are found at www.wrox.com on the Download Code tab. The source code is also available at https://github.com/ProfessionalCSharp/ProfessionalCSharp7 in the directory Libraries. The code for this chapter is divided into the following major examples: UsingLibs UsingLegacyLibs UsingASharedProject 936
Download from finelybook www.finelybook.com
CreateNuGet
THE HELL OF LIBRARIES Libraries make it possible for you to reuse code in multiple applications. With Windows, libraries have a long history, and architecture guidelines have taken different directions with newer technologies. Before .NET, dynamic link libraries (DLLs) could be shared between different applications. These DLLs have been installed in a shared directory. It wasn’t possible to have multiple versions of these libraries on the same system, but they should have been upward compatible. Of course, this wasn’t always the case. In addition, there were problems with application installations that did not pay attention to the guidelines and replaced a shared library with an older one. This was the DLL Hell. .NET tried to solve this with assemblies. Assemblies are libraries that could be shared. In addition to normal DLLs, assemblies contain extensible metadata with information about the library and a version number, and it’s possible to install multiple versions side by side in the global assembly cache. Microsoft tried to fix versioning issues, but this added another layer of complexity. Let’s assume you’re using library A and B from your application X (see Figure 19-1). Application X references version 1.1 from library A and version 1.0 from library B. The issue is that library B references library A as well, but it references a different version—version 1.0. One process can only have one version of a library loaded. What version of the library A is loaded into the process? In case library B is used before library A, version 1.0 wins. This is a big issue as soon as application X needs to use library A itself.
937
Download from finelybook www.finelybook.com
FIGURE 19-1 To avoid this issue, you could configure assembly redirects. You can define an assembly redirect for application X to load version 1.1 from library A. Library B then needs to use version 1.1 from library A as well. In case library A is upward-compatible, this shouldn’t be an issue. Of course, compatibility doesn’t always exist, and issues can be more complex. Publishers of components can create a publisher policy to define redirects with the library itself. This redirect can be overridden by the application. There’s a lot of complexity with this, which resulted in Assembly Hell.
NOTE With .NET Core there’s no global sharing of assemblies as it was with the .NET Framework. Only the .NET runtime can be shared between different applications. NuGet packages add another abstraction layer to libraries. A NuGet package can contain multiple versions of one or more assemblies, along with other stuff, such as automatic configuration of assembly 938
Download from finelybook www.finelybook.com
redirects. Instead of waiting for new .NET Framework releases, you could add functionality via NuGet packages, which allowed for faster updates of the packages. NuGet packages are a great delivery vehicle. Some libraries like Entity Framework switched to NuGet to allow for faster updates than the .NET Framework offered. However, there are some issues with NuGet. Often adding NuGet packages to projects fail. NuGet packages might not be compatible with the project. When adding packages was successful, it can happen that the package made some incorrect configuration with the project, e.g. wrong binding redirects. This results in the feeling of the NuGet Package Hell. The problems from DLLs moved to different abstraction layers and are indeed different. With newer NuGet versions and advancements in NuGet, Microsoft has tried to solve the issues with NuGet. Directions in the architecture of .NET Core also changed. With .NET Core, packages have been made more granular. For example, with the .NET Framework, the Console class is inside the mscorlib assembly, which is an assembly needed by every .NET Framework application. Of course, not every .NET application needs the Console class. With .NET Core 1.0, a separate package System.Console exists that contains the Console class and a few related classes. The goal was to make it easier to update and select what packages are really needed. With some Beta versions of .NET Core 1.0, the project files contained a large list of packages, which didn’t make development easier. Just before the release of .NET Core 1.0, Microsoft introduced meta-packages (or reference-packages). A meta-package doesn’t include code but instead a list of other packages. With .NET Core 2.0 includes another simplification. When you created a “Hello, World!” Console application with .NET Core 1.1, the generated project.asset.json file has a size of 313 KB. This file (in the obj directory) shows the tree of dependencies. With .NET Core 2.0, the file size was reduced to 33 KB because of larger packages with fewer references. This chapter goes into the detail of assemblies and NuGet packages, 939
Download from finelybook www.finelybook.com
explains how to share code using .NET Standard libraries, and also explains differences with Windows Runtime components.
ASSEMBLIES An assembly is a library or executable that includes additional metadata. Using .NET Core, the application containing the Main method is created as a library with the file extension .dll. This DLL needs a hosting process to load this library, which you do using dotnet run, or just dotnet from a runtime environment. When you create standalone applications with .NET Core, different executables are created for every platform to load the library. Let’s have a look at a simple “Hello, World!” console application created in the directory ConsoleApp, using the command > dotnet new console
After building the application, the DLL can be found in the bin/debug/netcoreapp2.0 directory. The netcoreapp2.0 directory depends on the target framework listed in the csproj project file. Assembly information can be read using the ildasm.exe (IL Disassembler) command-line utility. Ildasm.exe shows the types of the assembly with its members, with the additional metadata as shown in Figure 19-2.
940
Download from finelybook www.finelybook.com
FIGURE 19-2 Clicking MANIFEST (refer to Figure 19-2), opens metadata information for the assembly as shown in Figure 19-3. The assembly which has the name ConsoleApp, references the assemblies System.Runtime and System.Console. You also can see several configured assembly attributes such as AssemblyCompanyNameAttribute, AssemblyConfigurationAttribute, AssemblyDescriptionAttribute, AssemblyFileVersionAttribute, and others.
FIGURE 19-3 Assembly metadata that describes the application can be configured using Visual Studio; select Package in the Project Properties (see Figure 19-4).
941
Download from finelybook www.finelybook.com
FIGURE 19-4 Of course, you can also directly edit the project file (code file ConsoleApp/ConsoleApp.csproj): Exe netcoreapp2.0 Christian Nagel CN innovation Sample App Sample App for Professional C# Copyright (c) CN innovation https://github.com/ProfessionalCSharp
https://github.com/ProfessionalCSharp/ProfessionalCSharp7 git Wrox Press, Sample, Libraries
942
Download from finelybook www.finelybook.com
NOTE With previous projects, such metadata information was typically added to the file AssemblyInfo.cs by adding this information with global C# attributes. You can still do it this way, but then you need to configure the csproj file to not automatically generate the attributes.
CREATING LIBRARIES You can use shared code by creating libraries. With Visual Studio 2017, you’ve many options to create libraries, as shown here: Class Library (.NET Core) Class Library (.NET Standard) Class Library (.NET Framework) WPF Custom Control Library (.NET Framework) WPF User Control Library (.NET Framework) Windows Forms Control Library (.NET Framework) Class Library (Universal Windows) Class Library (Legacy Portable) Shared Project The Shared Project listed is not really a class library, but you can use it for sharing code from multiple projects. See the section “Using Shared Projects” later in this chapter for more information. The class libraries identified with .NET Framework in the preceding list are meant to be used with .NET Framework applications, and they 943
Download from finelybook www.finelybook.com
can have specific restrictions. The WPF User Control Library and WPF Custom Control Library can be used only from WPF applications. Similarly, the Windows Forms Control Library can be used only from Windows Forms applications. Class Library (Legacy Portable) already has legacy in its name. This project template, which was originally known as Portable Class Library (PCL) shouldn’t be used with new applications. This library enables you to share code between different technologies, such as sharing code between Silverlight, WPF, Xamarin, .NET Core, and so on. Depending on the platform and version selection, different APIs are available. The more platforms and the older the version chosen, the fewer APIs are available. As more and more platforms have been added, this increased the complexity of the definitions and also increased complexity on using portable libraries from portable libraries. .NET Standard provides a replacement for portable libraries.
.NET Standard The .NET Standard makes a linear definition of APIs available, which is different than the matrix definition with APIs that was available for portable libraries. Every version of the .NET Standard adds APIs, and APIs are never removed. The higher the version of the .NET Standard, the more APIs you can use. However, the .NET Standard doesn’t implement the APIs; it just defines the APIs that need to be implemented by a .NET platform. This can be compared to interfaces and concrete classes. An interface just defines a contract for members that need to be implemented by a class. With the .NET Standard, the .NET Standard specifies what APIs need to be available, and a .NET platform—supporting a specific version of the standard—needs to implement these APIs. You can find which APIs are available with which standard version, as well as the differences between the standards, at https://github.com/dotnet/standard/tree/master/docs/versions. Every version of the .NET Standard adds APIs to the standard: .NET Standard 1.1 added 2,414 APIs to .NET Standard 1.0. 944
Download from finelybook www.finelybook.com
Version 1.2 added just 46 APIs. With 1.3, 3,314 APIs were added. Version 1.4 added only 18 Cryptography APIs . Version 1.5 mainly enhanced reflection support and added 242 APIs. Version 1.6 added more Cryptography APIs and enhanced regular expressions, with a total of 146 additional APIs. With .NET Standard 2.0, Microsoft made a big investment to make it easier to move legacy applications to .NET Core. With this new standard, 19,507 APIs have been added. Not all of these APIs were new. Some were already implemented with .NET Framework 4.6.1. For example, old APIs like DataSet, DataTable, and others are now available with the .NET Standard. This was a move to make it easier to bring legacy applications to the .NET Standard. A huge investment was needed for .NET Core, because .NET Core 2.0 implements the .NET Standard 2.0. What APIs are not in the standard and never will be? Platform-specific APIs are not expected to be part of the .NET Standard. For example, Windows Presentation Foundation (WPF) and Windows Forms define Windows-specific APIs that will not make it into the standard. You can, however, create WPF and Windows Forms applications and use .NET Standard libraries from there. You cannot create .NET Standard libraries that contain WPF or Windows Forms controls. New APIs that are tested are coming first to .NET Core. As soon as the APIs stabilize, there’s a good chance they will be available with a future version of the .NET Standard. Let’s get into more details on the platform support of .NET Standard. If you need to support Windows Phone Silverlight 8.1, you need to restrict your library to the APIs that are available with .NET Standard 1.0. Of course, nowadays there’s typically no need to support any Silverlight version. Let’s get into more important .NET platforms. For using libraries from the Universal Windows Platform, you need to pay attention to what build number you want to support. If you’re 945
Download from finelybook www.finelybook.com
supporting only the Fall Creators Update of Windows 10, you can already use .NET Standard 2.0. For supporting the Creators Update and older Windows 10 builds, you just can go up to .NET Standard 1.4. Newer versions are not possible in such cases. If you create a library containing ASP.NET Core 1.1 controllers, the library needs to be version 1.6 of the standard.
NOTE To support the most platforms possible, you need to select a lower .NET Standard version. To have more APIs available, select a higher .NET Standard version.
Creating a .NET Standard Library To create a .NET Standard library, you can use the .NET Core CLI tools with the command dotnet new classlib
Using the .NET Core 2.0 CLI tools, this creates a library with this csproj definition (code file UsingLibs/SimpleLib/SimpleLib.csproj): netstandard2.0
You can change the version of the .NET Standard library by changing the TargetFramework element. From Visual Studio, you can use the Application Settings of the Project Properties to change the .NET Standard version (see Figure 19-5).
946
Download from finelybook www.finelybook.com
FIGURE 19-5
Solution Files When you work with multiple projects (for example, a console application and a library), it’s helpful to work with solution files. With the newer versions of the .NET Core CLI tools, you can use solutions from the command line as well as using them from Visual Studio. For example, > dotnet new sln
creates a solution file in the current directory. Using the dotnet sln add command, you can add projects to the solution file: dotnet sln add SimpleLib/SimpleLib.csproj
The project files are added to the solution file as shown in the following snippet (solution file UsingLibs\UsingLibs.sln): Microsoft Visual Studio Solution File, Format Version 12.00 # Visual Studio 15 VisualStudioVersion = 15.0.26124.0
947
Download from finelybook www.finelybook.com
MinimumVisualStudioVersion = 15.0.26124.0 Project("{FAE04EC0-301F-11D3-BF4B-00C04F79EFBC}") = "SimpleLib", "SimpleLib\SimpleLib.csproj", "{C58F9225-7407-45A0-932A81AC3906F228}" EndProject Project("{FAE04EC0-301F-11D3-BF4B-00C04F79EFBC}") = "ConsoleApp", "ConsoleApp\ConsoleApp.csproj", "{31E6F88A-C0BC-4277-A9E919DAFDEB1A7A}" EndProject Global # ...
When you’re using Visual Studio, you can select the solution in the Solution Explorer to add new projects. From the context menu, select Add and then select Existing Project to add existing projects.
Referencing Projects You can reference a library by using the dotnet add reference command. The current directory just needs to be positioned in the directory of the project where the library should be added: dotnet add reference ..\SimpleLib\SimpleLib.csproj
The reference is added using a ProjectReference element in the csproj file (project file UsingLibs/ConsoleApp/ConsoleApp.csproj): Exe netcoreapp2.0
Using the Solution Explorer in Visual Studio, you can add projects to other projects by selecting the Dependencies node and then selecting 948
Download from finelybook www.finelybook.com
the Add Reference command from the Project menu. This dialog box shown in Figure 19-6 opens.
FIGURE 19-6
Referencing NuGet Packages If the library is already packaged within a NuGet package, the NuGet package can be directly referenced with the command dotnet add package: dotnet add package Microsoft.Composition
Instead of adding a ProjectReference as before, this adds a PackageReference: Exe netcoreapp2.0
949
Download from finelybook www.finelybook.com
To request a specific version of the package, you can specify the -version option with the .NET Core CLI command. With Visual Studio, you can use the NuGet Package Manager (see Figure 19-7) to find packages and select a specific version of the package. With this tool, you also can get details on the package with links to the project and licensing information.
FIGURE 19-7
NOTE Not all the packages you find on www.nuget.org are useful with your application. You should check licensing information to make sure the license fits with your project needs. Also, you should check the package author. If it’s an open-source package, how active is the community behind it? 950
Download from finelybook www.finelybook.com
NuGet Sources Where are the packages coming from? www.nuget.org is a server where Microsoft and third parties upload .NET packages. After the packages have been downloaded from the NuGet server for the first time, the packages are stored in the user profile. Thus, it becomes a lot faster to create another project with the same packages. On Windows, the directory for the packages in the user profile is %userprofile%\.nuget\packages. Other temporary directories are used as well. To get all the information about these directories, it’s best to install the NuGet command-line utility, which you can download from https://dist.nuget.org/. To see the folders for the global packages, the HTTP cache, and the temp packages, you can use nuget locals: > nuget locals all -list
In some companies, it’s permissible to use only packages that have been approved and are stored in a local NuGet server. The default configuration for the NuGet server is in the file NuGet.Config in the directory %appdata%/nuget. A default configuration looks similar to the following NuGet.Config file. Packages are loaded from https://api.nuget.org and the local NuGetFallbackFolder:
You can change the defaults by adding and removing package sources. 951
Download from finelybook www.finelybook.com
Microsoft doesn’t store packages from the daily build on the main NuGet server. To use daily builds of .NET Core NuGet packages, you need to configure other NuGet servers. You can also configure local directories where you put your custom NuGet packages. The following NuGet.Config file adds a local directory and the nightly feed of .NET Core packages to the package sources.
Instead of changing the default configuration file, you can place a configuration file into the project directory. This way, the configured package sources are valid only for the project.
Using .NET Framework Libraries As already mentioned earlier in the chapter, a big advantage of the .NET Standard 2.0 is the additional APIs coming from the .NET Framework. This makes it easier to move legacy .NET applications to the new .NET. .NET Standard libraries can be used from many different .NET technologies. Of course, you can reference .NET Standard libraries from .NET Core, but also from Mono and .NET Framework projects. A WPF application can make use of a .NET Standard library. Such a scenario was already possible with libraries created with .NET Core 1.0. But now, with .NET Standard 2.0, the interop scenario is extended. You can also reference an old .NET Framework library from a .NET Standard library as long as the .NET Framework library uses only APIs available with the .NET Standard. How is this possible? Trying such interop scenarios with earlier .NET Core versions often resulted in compilation errors—for example, the object type is defined two times. The reason for such issues can be easily explained. With older .NET technologies, such as the .NET 952
Download from finelybook www.finelybook.com
Framework, core types such as the object class are defined in mscorlib. With newer technologies such as .NET Core, the object type is defined in System.Runtime. Using both, you often ended up with duplicates of objects and other core types. .NET Standard 2.0 changed the behavior. The .NET Standard defines an API set, but not an implementation. The complete implementation of the API needs to be done from the .NET platform, such as .NET Framework and .NET Core. The standard is implemented using type forwarding, which is forwarding types of the standard to a concrete implementation. The new library that lists the types from the .NET Standard is NetStandard.dll. This library is different for every platform. NetStandard.dll lists the types but doesn’t contain any implementation. Instead, this library contains type forwarders to the specific implementation. For example, when you add a .NET Standard library to a .NET framework project, the NetStandard.dll is referenced automatically and contains a type forwarder for the System.Console class to the mscorlib assembly: .class extern forwarder System.Console { .assembly extern mscorlib }
Accordingly, with a .NET Core project, the NetStandard.dll contains a redirect of System.Console to the library System.Console: .class extern forwarder System.Console { .assembly extern System.Console }
Let’s see this in action by creating a legacy .NET Framework library with the class Legacy. The methods ConsoleMessage and WindowsMessage just write output. ConsoleMessage writes output to the console. WindowsMessage, makes use of the .NET Framework library System.Windows.Forms, and opens a MessageBox. Additionally, the method ShowConsoleType gives information where the Console class is coming from (code file UsingLegacyLibs/DotnetFrameworkLib/Legacy.cs): 953
Download from finelybook www.finelybook.com
public class Legacy { public static void ConsoleMessage(string message) { Console.WriteLine($"From the .NET Framework Lib: {message}"); } public static void ShowConsoleType() { Console.WriteLine($"The type {nameof(Console)} is from " + $"{Assembly.GetAssembly(typeof(Console)).FullName}"); } public static void WindowsMessage(string message) { MessageBox.Show($"Windows Forms: {message}"); } }
What you need to be pay attention to in this scenario is that the Console class is part of .NET Standard, but the MessageBox class is not. Windows Forms is specific to Windows and will not be a part of the .NET Standard. Next, a .NET Standard Library references this .NET Framework library. You can handle this in a simple way by adding a reference to the project. The project file contains a ProjectReference to the .NET Framework library (project file UsingLegacyLibs/DotnetStandardLib/DotnetStandardLib.csproj): netstandard2.0
The Wrapper class defined in the .NET Standard library just forwards the method calls to the .NET Framework library. There’s no compilation error on building the .NET Standard library when 954
Download from finelybook www.finelybook.com
referencing the .NET Framework library (code file UsingLegacyLibs/DotnetStandardLib/Wrapper.cs): public class Wrapper { public static void ConsoleMessage(string message) => Legacy.ConsoleMessage(message); public static void WindowsMessage(string message) => Legacy.WindowsMessage(message); public static void ShowConsoleType() => Legacy.ShowConsoleType(); }
Next, a .NET Core console application makes use of the Wrapper class. The Program class invokes the three methods. However, check the handling of the FileNotFoundException exception when calling the WindowsMessage method (code file UsingLegacyLibs/UsingLegacyLibs/Program.cs): static void Main() { Wrapper.ConsoleMessage("Hello from .NET Core"); Wrapper.ShowConsoleType(); try { Wrapper.WindowsMessage("Hello from .NET Core"); } catch (FileNotFoundException ex) { Console.WriteLine(ex.Message); } }
The application runs as shown in the following output. The Console class is from the System.Console assembly. Invoking WindowsMessage results in a FileNotFoundException because the System.Windows.Forms assembly cannot be found: From the .NET Framework Lib: Hello from .NET Core The type Console is from System.Console, Version=4.1.0.0, Culture=neutral, PublicKeyToken=b03f5f7f11d50a3a Could not load file or assembly 'System.Windows.Forms,
955
Download from finelybook www.finelybook.com
Version=4.0.0.0, Culture=neutral, PublicKeyToken=b77a5c561934e089'. The system cannot find the file specified.
When you create a .NET Framework Console application, there’s no need to wrap the invocation of the WindowsMessage call into a try/catch handler because System.Windows.Forms is available (code file UsingLegacyLibs/DotnetFrameworkApp/Program.cs): static void Main() { Wrapper.ConsoleMessage("Hello from the .NET Framework"); Wrapper.ShowConsoleType(); Wrapper.WindowsMessage("Hello from the .NET Framework"); }
Running this application shows that the Console class is coming from the mscorlib assembly, and a window pops up for the MessageBox: From the .NET Framework Lib: Hello from the .NET Framework The type Console is from mscorlib, Version=4.0.0.0, Culture=neutral, PublicKeyToken=b77a5c561934e089
WARNING It’s easy to reference .NET Framework assemblies from .NET Core applications and build the application. However, this does not mean that every functionality of the .NET Framework assembly is available—only the types that are defined in the .NET Standard. Using just these types enables you to use .NET Framework libraries on Linux. Usually it’s better to go for compilation errors if types are not available. Rebuilding .NET Framework libraries as .NET Standard libraries gives you this feature. Just in case you don’t have the source code available, such as from vendors that don’t offer .NET Standard libraries yet, you can still use the library from .NET Core. To check binaries and find out what types are not compatible with which version of the .NET Standard, you can 956
Download from finelybook www.finelybook.com
use the .NET Portability Analyzer that is available as a commandline tool and a Visual Studio extension (see https://github.com/Microsoft/dotnet-apiport). Running the .NET Portability analyzer on the sample .NET Framework library shows you information on what platform versions support particular types and members (see table). TARGET TYPE
TARGET MEMBER
.NET CORE DialogResult DialogResult Not supported MessageBox MessageBox Not supported MessagBox Show Not supported Assembly GetAssembly Supported: 2.0+
.NET .NET FRAMEWORK STANDARD Supported: 1.1+ Not supported Supported: 1.1+ Not supported Supported: 1.1+ Not supported Supported: 1.1+ Supported: 2.0+
USING SHARED PROJECTS Shared projects are not really libraries, but they are still helpful in sharing code. Shared projects give an alternative to a library to share the code but include the code with the project that references the shared project. This way, platform-specific code can be added to the shared project. However, this feature is useful only if not too much code is different. When there are a lot of code differences, it might be a better idea to create platform-specific libraries. With the following code example, a .NET Core application and a Universal Windows App are created, and both reference a shared project. The shared project contains code that can be used with both platforms, but each also contains code that is platform specific. The difference starts with namespaces that are not available everywhere. You can use preprocessor directives to check for conditional compilation symbols. The preprocessor directive 957
Download from finelybook www.finelybook.com
Windows_UWP is defined with Universal Windows apps UsingASharedProject/SharedProject/Message.cs):
(code file
using System; using System.Threading.Tasks; #if WINDOWS_UWP using Windows.UI.Popups; #endif
The Message class defines Show, ShowAsync, and Add methods. The Add method is available for every platform. The Show method is available only when the NETCOREAPP2_0 directive is defined, and the ShowAsync method is available only for UWP apps. The class can be defined with the internal access modifier because it’s not used outside of the assembly boundaries: internal class Message { #if NETCOREAPP2_0 public static void Show(string message) { Console.WriteLine(message); } #elif WINDOWS_UWP public static async Task ShowAsync(string message) { await new MessageDialog(message).ShowAsync(); } #endif public static int Add(int x, int y) => x + y; }
Using Visual Studio, a shared project can be added from the Reference Manager with the Shared Project selection as shown in Figure 19-8. Source code is included, and the Import element is used with the project file (project file UsingASharedProject/UsingASharedProject/UsingASharedProject.csproj
958
Download from finelybook www.finelybook.com
FIGURE 19-8 Exe netcoreapp2.0
The Message class can now be used similarly to the way it would be used as a class of the same project (code file UsingASharedProject/UsingASharedProject/Program.cs): using SharedProject; namespace UsingASharedProject { class Program { static void Main() { Message.Show(".NET Core");
959
Download from finelybook www.finelybook.com
} } }
From the UWP application, the Message class can be used in the same way. Here, the ShowAsync method is invoked in the Click handler of a Button (code file UsingASharedProject/UniversalApp/MainPage.xaml.cs): private async void OnButtonClick(object sender, RoutedEventArgs e) { await Message.ShowAsync("Hello from UWP"); }
NOTE When you work with the Visual Studio editor on the source code of the shared project, you can select the drop-down view on top of the editor to select the current project you would like to work with. This grays out the code that is currently not available based on the defined preprocessor definitions.
CREATING NUGET PACKAGES We’ve taken an excursion to shared projects, but now let’s continue with libraries—and creating NuGet packages from libraries. NuGet packages can be created easily by using the .NET Core CLI tools and with Visual Studio 2017.
NuGet Packages with the Command Line Metadata information about the NuGet package can be added to the project file csproj as shown earlier in the “Assemblies” section. To create a NuGet package from the command line, you can use the dotnet pack command: > dotnet pack --configuration Release
960
Download from finelybook www.finelybook.com
Remember to set the configuration. By default, the Debug configuration is built. After a successful packaging, you can find the NuGet package in the directory bin/Release or related directories, depending on the selected configuration with the file extension .nupkg. A .nupkg file is a zip file that contains the binary with additional metadata. You can rename this file to a zip file to see its contents. You can copy the generated NuGet package to a folder on your system or to a network share to make it available to your team. The sample is copied to the folder c:/MyPackages. To use this folder, the NuGet.config file can be changed to include this package source as shown in the section NuGet Sources. You also can reference the folder directly using the dotnet add package command: > dotnet add package SampleLib --source c:/MyPackages
Supporting Multiple Platforms The .NET Standard 2.0 has been enhanced to support a lot more APIs that are available on every new .NET platform. However, this is still not enough for some applications. You might either need legacy libraries that use more APIs than are available from the .NET Standard, or you might need features that are different between APIs such as WPF, UWP, and Xamarin. .NET Core also offers more features than are available from the .NET Standard. Previously you’ve seen how Shared Projects can be used to support different platforms. Another option is to create different binaries from the same source code as shown in the next example. The sample library SampleLib supports both .NET Standard 2.0 as well as .NET Framework 4.7 with different binaries. To build multiple binaries, the TargetFramework element can be changed to TargetFrameworks, and all the target framework monikers for the target frameworks where binaries should be created are listed within. The example adds the target framework monikers netstandard2.0 and net47. For code differences based on the target frameworks, different conditional compilation symbols are defined (project file CreateNuGet/SampleLib/SampleLib.csproj): 961
Download from finelybook www.finelybook.com
netstandard2.0;net47 NETSTANDARD2_0 DOTNET47
NOTE The list of target framework monikers is shown at https://docs.microsoft.com/nuget/schema/target-frameworks.
With the code, so you can easily see different functionality, different strings are initialized with different values, and this value is returned from the Show method (code file CreateNuGet/SampleLib/Demo.cs): public class Demo { #if NETSTANDARD2_0 private static string s_info = ".NET Standard 2.0"; #elif DOTNET47 private static string s_info = ".NET 4.7"; #else private static string s_info = "Unknown"; #endif public static string Show() => s_info; }
With this setup, you build the application with multiple target frameworks, and a DLL for every target framework is created. When you create a NuGet, one package is created that contains all the libraries. 962
Download from finelybook www.finelybook.com
When you create a .NET Core Console application, you can build the application for multiple target frameworks as well. Like the library before, with the console application multiple target frameworks are configured. The console application will be built for .NET Core 2.0 and the .NET Framework 4.7 (project file CreateNuGet/DotnetCaller/DotnetCaller.csproj): netcoreapp2.0;net47
It’s also possible to add packages only for specific target frameworks. You can do this with the dotnet add package command by adding the -framework option: > dotnet add package SampleLib --framework net47 --source c:/MyPackages
This shows up with a condition based on the target framework in the project file as shown:
With the sample application, the same package is needed, but different assemblies from the package need to be selected. This is done automatically based on the project, and the package just needs to be added to the project. The complete project file for the console application is shown here (project file CreateNuGet/DotnetCaller/DotnetCaller.csproj): Exe netcoreapp2.0;net47
Building the console application creates multiple binaries that contain references to different libraries.
963
Download from finelybook www.finelybook.com
> dotnet run --framework net47
results in the output .NET 4.7
Using the .NET Core variant > dotnet run --framework netcoreapp2.0
results in this output .NET Standard 2.0
Be aware that selecting a different .NET Framework version, such as .NET 4.6.1, also results in .NET Standard 2.0. This is because the library built with .NET Framework 4.7 is not compatible with .NET 4.6.1 (only newer versions of .NET Framework are), but .NET 4.6.1 is compatible with .NET Standard 2.0, so this library matches.
NuGet Packages with Visual Studio Visual Studio 2017 allows you to create packages. In the Solution Explorer, when you select the project, you can open the context menu and select Pack to create a NuGet package. In the Project properties of the Package settings, you can also select to create a NuGet package on every build. This is probably overkill if you don’t plan to distribute packages on every build. However, with this setting you should configure the package metadata as well as the assembly and package version (see Figure 19-9).
964
Download from finelybook www.finelybook.com
FIGURE 19-9 You can use packages within Visual Studio by selecting Dependencies in the Solution Explorer, opening the context menu, and selecting Manage NuGet Packages. This opens the NuGet Package Manager (see Figure 19-10) where you can select the package sources (including the packages from the local folder if you configured this via clicking on the Settings icon). You can browse the available packages, see the packages installed with the project, and check whether updates of packages are available.
965
Download from finelybook www.finelybook.com
FIGURE 19-10
NOTE In case you want to create NuGet packages not only for internal use but also for publishing on the NuGet server, only adding the library to the NuGet file is not enough. You can add a readme file, add libraries from related projects, define dependencies, and create build scripts. For this, you need the NuGet utility from www.nuget.org. Visit https://docs.microsoft.com/nuget to get more information about how to do this.
SUMMARY This chapter explained the differences between DLLs, assemblies, and 966
Download from finelybook www.finelybook.com
NuGet packages. You’ve seen how to create and distribute libraries with NuGet packages. The .NET Standard defines an API set that is implemented from different .NET platforms. You’ve seen how a .NET Standard library can be used from .NET Core and the .NET Framework, and how types come from different libraries, such as mscorlib and System.Runtime. The next chapter gets into the details of an important pattern: dependency injection. In this chapter you learn about another way of sharing code with different platforms by injecting platform-specific features.
967
Download from finelybook www.finelybook.com
20 Dependency Injection WHAT’S IN THIS CHAPTER? Defining dependency injection Using dependency injection with Microsoft.Extensions.DependencyInjection Working with lifetime of services Using options and configuration to initialize services Using DI to create platform independence for WPF, UWP, and Xamarin Using other dependency injection containers
WROX.COM CODE DOWNLOADS FOR THIS CHAPTER The wrox.com code downloads for this chapter are found at www.wrox.com on the Download Code tab. The source code is also available at https://github.com/ProfessionalCSharp/ProfessionalCSharp7 in the directory DependencyInjection. The code for this chapter is divided into the following major examples: NoDI WithDI WithDIContainer 968
Download from finelybook www.finelybook.com
ServicesLifetime DIWithOptions DIWithConfigurations PlatformIndependenceSample DIWithAutofac
WHAT IS DEPENDENCY INJECTION? Faster development cycles demand unit tests and better updatability. Making some code changes should not result in errors in unexpected places. Creating more modular applications where dependencies are reduced helps with that. Dependency injection (DI) allows injection dependencies from the outside of a class, thus the class where the dependency is injected only needs to know about a contract (usually a C# interface). The class can be independent of the creation of its objects. Dependency injection allows for easier unit tests. With the unit test, only a specific class needs testing, and the dependencies needed can be replaced by a special mock class that contains test data. You can also use different implementations to differentiate between production mode and development mode. For example, in production you might need to access an SAP server, or you might need to authenticate with a specific active directory that is not accessible for all developers. During development, during every debug session you don’t want to wait to have a successful authentication, and you don’t need the SAP server to develop the user interface. Here you can have—for the same contract—different implementations where authentication is simulated, and you can work with test data instead of accessing the SAP server. You can also use different implementations with different platforms. You can, for example, create a .NET Standard library where all the common functionality is implemented for UWP, WPF, and Xamarin applications, and you can redirect to platform-specific code as needed. 969
Download from finelybook www.finelybook.com
Dependency injection also enables you to replace standard functionality with custom features. ASP.NET Core and Entity Framework Core is heavily based on dependency injection. These technologies use hundreds of contracts—for example, to find a controller, to map a HTTP request to a controller, to convert data received to a parameter, to map a database table to an entity type, and so on. You easily can replace the custom functionality by using a different implementation. DI is the core pattern of agile software development and continuous software delivery practices. A dependency injection container is not required with dependency injection, but it helps for managing the dependencies. As soon as you have a growing list of services managed by the dependency injection container, you can see its advantages. ASP.NET Core and Entity Framework Core use Microsoft.Extensions.DependencyInjection as a container to manage all the dependencies to manage hundreds of services. Although dependency injection and dependency injection containers increase the complexity in very small applications, as soon as your application grows larger and needs multiple services, dependency injection reduces the complexity and fosters implementations that are not tightly bound. This chapter starts with a small application that doesn’t use dependency injection; in subsequent examples it turns into an application that does use dependency injection and uses a dependency injection container. This chapter also covers lifetime management and configuration of services. In the last sections of this chapter you see how you can use dependency injection to cover platform-specific services with WPF, UWP, and Xamarin. Finally, the chapter discusses integrating third-party containers with Microsoft.Extensions.DependencyInjection.
Using a Service Without Dependency Injection Let’s start an example without using dependency injection; later we’ll change it to use dependency injection. The service implementation 970
Download from finelybook www.finelybook.com
that is used is defined in the class GreetingService. This class defines the method Greet that returns a string (code file NoDI/GreetingService.cs): public class GreetingService { public string Greet(string name) => $"Hello, {name}"; }
The class HomeController makes use of this service. In the Hello method, the GreetingService is instantiated, and the Greet method is invoked (code file NoDI/HomeController.cs): public class HomeController { public string Hello(string name) { var service = new GreetingService(); return service.Greet(name); } }
Let’s have a look at the Main method of the Program class. Here, the HomeController is instantiated, the Hello method invoked, and the result is written to the console (code file NoDI/Program.cs): static void Main() { var controller = new HomeController(); string result = controller.Hello("Stephanie"); Console.WriteLine(result); }
The program is working, and Hello, Stephanie is written to the console. What are the issues with that? The HomeController and GreetingService are tightly coupled. It’s not easy to replace the GreetingService in the HomeController for a different implementation. This GreetingService is a simple one that returns a string. In normal applications, you typically have a more complex scenario—for example, the GreetingService might access an API service using HTTP requests, or it might access the database using Entity Framework. You might want to change the service used in one 971
Download from finelybook www.finelybook.com
place instead of finding all the places where the service is used. Also, when you create a unit test for the HomeController, the GreetingService is tested as well. With a unit test, you want to test just the functionality of the methods of a single class without using other dependencies. In the HomeController, the GreetingService cannot be easily replaced for unit tests. Technically it’s possible to make replacements of the internal implementation of the GreetingService method for unit tests. With the Microsoft Fakes framework, it is possible to change the implementation of the method by replacing specific methods and properties of the GreetingService class. This change is defined with the unit test and happens only when the unit test runs: “faking” the original method by a different one. There are better ways to do this: by using dependency injection. In the next section, you see how to change this implementation to use dependency injection.
NOTE Entity Framework Core is covered in detail in Chapter 26, “Entity Framework Core.” Check Chapter 28, “Testing,” for more information on unit testing. API services are explained in Chapter 32, “ASP.NET Web API.”
Using Dependency Injection Let’s make the HomeController independent of the implementation of the GreetingService. You can do this by creating the interface IGreetingService that defines the functionality needed by the HomeController (code file WithDI/IGreetingService.cs): public interface IGreetingService { string Greet(string name); } GreetingService
now implements the interface IGreetingService (code 972
Download from finelybook www.finelybook.com
file WithDI/GreetingService.cs): public class GreetingService : IGreetingService { public string Greet(string name) => $"Hello, {name}"; }
All the HomeController now needs is a reference to an object that implements the interface IGreetingService. This is injected with the constructor of the HomeController, assigned to the private field, and used with the method Hello (code file WithDI/HomeController.cs): public class HomeController { private readonly IGreetingService _greetingService; public HomeController(IGreetingService greetingService) { _greetingService = greetingService ?? throw new ArgumentNullException(nameof(greetingService)); } public string Hello(string name) => _greetingService.Greet(name); }
With this implementation, the HomeController makes use of the inversion of control design principle. The HomeController doesn’t instantiate the GreetingService like it did before. Instead, the control to define the concrete class that is used by the HomeController is given to the outside; in other words, the control is inversed.
NOTE Inversion of control is also known as the Hollywood principle: Don’t call us; we call you. Inversion of control also reduces the dependencies on different technologies and creates more common code. For example, you can use the same view-models and service contracts from WPF, UWP, and Xamarin applications in a common .NET Standard 973
Download from finelybook www.finelybook.com
library. Some services need to be implemented differently with WPF, UWP, and Xamarin. The implementation for such services can come from the hosting application, whereas the contract is defined and used in a .NET Standard library. Read Chapter 34, “Patterns with XAML Apps,” for more information on viewmodels. The class HomeController doesn’t have a dependency on the implementation of a concrete implementation of the IGreetingService interface. The HomeController can use any class that implements the interface IGreetingService. The class just needs to implement all members of this interface. Now, the dependency needs to be injected from the outside, passing a concrete implementation to the constructor of the HelloController class. With the sample code, the inversion of control design principle is implemented using the dependency injection pattern with constructor injection. It’s called constructor injection because the interface is injected in the constructor. The dependency needs to be injected to create a HomeController instance. Let’s change the Main method to pass a concrete implementation of the IGreetingService to the HomeController. Here, the dependency is injected (code file WithDI/Program.cs): static void Main() { var controller = new HomeController(new GreetingService()); string result = controller.Hello("Matthias"); Console.WriteLine(result); }
Creating a unit test for the Hello method of the HomeController, a different implementation can be injected—for example, a MockGreetingService implementing IGreetingService. The sample application is currently very small. The only thing that needs to be injected is a single concrete class that implements a contract. This class is instantiated at the same time you instantiate the HomeController. In real applications, you need to deal with many interfaces and implementations, and you also need to share instances. 974
Download from finelybook www.finelybook.com
A simple way for doing this is to use a dependency injection container that manages all the dependencies. In the next section, the application is changed to use the Microsoft.Extensions.DependencyInjection container.
USING THE .NET CORE DI CONTAINER With a dependency injection container, you can have one place in your application where you define what contracts map to which specific implementation, and you also can specify if a service should be used as a singleton, or a new instance should be created every time it’s used. In the next sample, let’s use the previously created GreetingService to implement IGreetingService as well as the HomeController class, but this time we use a dependency injection container. The sample WithDIContainer makes use of these NuGet packages and namespaces: Packages Microsoft.Extensions.DependencyInjection Namespaces System Microsoft.Extensions.DependencyInjection
Within the Program class, now the RegisterServices method is defined. Here, a new ServiceCollection object is instantiated. ServiceCollection is defined in the namespace Microsoft.Extensions.DependencyInjection after you add the NuGet package Microsoft.Extensions.DependencyInjection. When you use AddSingleton and AddTransient, extension methods to the ServiceCollection are used to register the types that need to be known by the DI container. With the sample application, both the GreetingService and the HomeController are registered in the container, which allows retrieving the HomeController from the container. The class GreetingService is instantiated when the IGreetingService 975
Download from finelybook www.finelybook.com
interface is requested. The HomeController itself does not implement an interface. With this DI container configuration, the HomeController is instantiated when the HomeController is requested. The DI container configuration also defines the lifetime of the services. With GreetingService, the same instance always is returned when IGreetingService is requested. This is different with the HomeController. With the HomeController with every request to retrieve a HomeController, a new instance is created. The lifetime information for the services is specified by using the AddSingleton and the AddTransient methods. Later in this chapter, you can read more about the lifetime of these services. Invoking the method BuildServiceProvider returns a ServiceProvider object that can then be used to access the services registered (code file WithDIContainer/Program.cs): static ServiceProvider RegisterServices() { var services = new ServiceCollection(); services.AddSingleton(); services.AddTransient(); return services.BuildServiceProvider(); }
NOTE With .NET Core 1.1, the BuildServiceProvider returned the interface IServiceProvider instead of returning the concrete class ServiceProvider. With .NET Core 1.1, ServiceProvider was declared internal and thus could be used from the outside only via its public interface IServiceProvider. The implementation changed with .NET Core 2.0 to make the ServiceProvider class public, and to change the method declaration of BuildServiceProvider to return ServiceProvider. This allows directly accessing the Dispose method of the ServiceProvider without the need to cast the returned object to IDisposable to invoke Dispose.
976
Download from finelybook www.finelybook.com
NOTE In case you add the same interface contract multiple times to the services collection, the last one added wins on getting the interface from the container. This makes it easy to replace contracts with different implementations if you need some other functionality, such as with services implemented by ASP.NET Core or Entity Framework Core. On the other hand, with the ServiceCollection class you also have access to remove services and to retrieve a list of all services for a specific contract. Next, let’s change the Main method to invoke the RegisterServices method for making the registration within the DI container and then to invoke the GetRequiredService method of the ServiceProvider to get a reference to a HomeController instance (code file WithDIContainer/Program.cs): static void Main() { using (ServiceProvider container = RegisterServices()) { var controller = container.GetRequiredService(); string result = controller.Hello("Katharina"); Console.WriteLine(result); } }
NOTE With the ServiceProvider class, different overloads of GetService and GetRequiredService exists. The method that is directly implemented in the ServiceProvider class is GetService with a Type parameter. The generic method GetService is an extension 977
Download from finelybook www.finelybook.com
method that takes the generic type parameter and passes it to the GetService method. If the service is not available in the container, GetService returns null. The extension method GetRequiredService checks for a null result and throws an InvalidOperationException in case the service is not found. In case the service provider implements the interface ISupportsRequiredService, the extension method GetRequiredService invokes the GetRequiredService of the provider. The container of .NET Core 2.0 does not implement this interface, but some third-party containers do. When you start the application, on the request of the GetRequiredService method, the DI container creates an instance of the HomeController class. The HomeController constructor requires an object implementing IGreetingService. This interface is also registered with the container; for IGreetingService a GreetingService object needs to be returned. The GreetingService class has a default constructor, so the container can create an instance and pass this instance to the constructor of the HomeController. This instance is used with the controller variable, and it’s used as before to invoke the Hello method. What happens if not every dependency is registered with the DI container? To see this in action, you can remove the configuration of the IGreetingService with the DI container. In that case, the container throws the InvalidOperationException. This error message is shown: Unable to resolve service for type 'WithDIContainer.IGreetingService' while attempting to activate 'WithDIContainer.HomeController'.
LIFETIME OF SERVICES The lifetime of services defines how long a service instance exists. Does it exist for the lifetime of the application? Is a new instance created on every request? There’s also something in-between, as you will see here. Registering a service as a singleton always returns the same instance, 978
Download from finelybook www.finelybook.com
and registering a service as transient returns a new object every time the service is injected. There are more options available, and more issues to think about. Let’s start with another example showing the lifetime features and issues. The example also implements the IDisposable interface with the services, so you can see how this is dealt with. The sample ServicesLifetime makes use of the following NuGet package and namespaces: Package Microsoft.Extensions.DependencyInjection
Namespaces System Microsoft.Extensions.DependencyInjection
To easily differentiate between different instances, every service instantiated will be given a different number. The number is created from a shared service. This shared service defines a simple interface INumberService to return a number (code file ServicesLifetime/INumberService.cs): public interface INumberService { int GetNumber(); }
The implementation of INumberService always returns a new number in the GetNumber method. This service will be registered as a singleton to have the number shared between the other services (code file ServicesLifetime/NumberService.cs): public class NumberService : INumberService { private int _number = 0; public int GetNumber() => Interlocked.Increment(ref _number); }
The other services that will be looked at are defined by the interface contracts IServiceA, IServiceB, and IServiceC with the corresponding 979
Download from finelybook www.finelybook.com
methods A, B, and C. The following code snippet shows the contract for IServiceA (code file ServicesLifetime/IServiceA.cs): public interface IServiceA { void A(); }
With the implementation of ServiceA, the constructor needs injection of the INumberService. With this service, the number is retrieved to assign it to the private field _n. With the implementation of the constructor, the method A, and the Dispose method that implements the IDisposable interface, console output is written, so you can see lifetime information (code file ServicesLifetime/ServiceA.cs): public class ServiceA : IServiceA, IDisposable { private int _n; public ServiceA(INumberService numberService) { _n = numberService.GetNumber(); Console.WriteLine($"ctor {nameof(ServiceA)}, {_n}"); } public void A() => Console.WriteLine($"{nameof(A)}, {_n}"); public void Dispose() => Console.WriteLine($"disposing {nameof(ServiceA)}, {_n}"); }
NOTE The IDiposable interface is explained in detail in Chapter 17, “Managed and Unmanaged Memory.” In addition to the services, the controller ControllerX is implemented. ControllerX requires constructor injection of three services: IServiceA, IServiceB, and INumberService. With the method M, two of the injected services are invoked. Also, constructor and Dispose information is written to the console (code file ServicesLifetime/ControllerX.cs): 980
Download from finelybook www.finelybook.com
public class ControllerX : IDisposable { private readonly IServiceA _serviceA; private readonly IServiceB _serviceB; private readonly int _n; private int _countm = 0; public ControllerX(IServiceA serviceA, IServiceB serviceB, INumberService numberService) { _n = numberService.GetNumber(); Console.WriteLine($"ctor {nameof(ControllerX)}, {_n}"); _serviceA = serviceA; _serviceB = serviceB; } public void M() { Console.WriteLine($"invoked {nameof(M)} for the {++_countm}. time"); _serviceA.A(); _serviceB.B(); } public void Dispose() => Console.WriteLine( $"disposing {nameof(ControllerX)}, {_n}"); }
Using Singleton and Transient Services Let’s start registering singleton and transient services. RegisterServices is implemented as a local function within the method SingletonAndTransient. Here, the services ServiceA, ServiceB, and NumberService and the controller class ControllerX are registered. The NumberService needs to be registered as a singleton to have shared state. ServiceA is registered as a singleton as well. ServiceB and ControllerX are registered transient (code file ServicesLifetime/Program.cs): private static void SingletonAndTransient() { Console.WriteLine(nameof(SingletonAndTransient)); ServiceProvider RegisterServices() {
981
Download from finelybook www.finelybook.com
IServiceCollection services = new ServiceCollection(); services.AddSingleton(); services.AddTransient(); services.AddTransient(); services.AddSingleton(); return services.BuildServiceProvider(); } //... }
and AddTransient are extension methods that make it easier to register services with the Microsoft.Extensions.DependencyInjection framework. Instead of using these helpful methods, you can also register services with the Add method (which is itself invoked by the convenient methods). The Add method requires a ServiceDescriptor that contains the service type, the implementation type, and the kind of the service. The kind of the service is specified using the ServiceLifetime enum type. ServiceLifetime defines the values Singleton, Transient, and Scoped: AddSingleton
services.Add(new ServiceDescriptor(typeof(ControllerX), typeof(ControllerX), ServiceLifetime.Transient));
NOTE The Add method of the ServiceCollection class is explicitly implemented for the interface IServiceCollection. With this, you can see the method only when you use the interface IServiceCollection and not when you have a variable of the ServiceCollection type. Explicit interface implementation is covered in Chapter 4, “Object-Oriented Programming with C#.” The local function RegisterServices method is invoked to retrieve the ServiceProvider, get the ControllerX two times, and invoke the method M before the ServiceProvider gets disposed (code file ServicesLifetime/Program.cs): private static void SingletonAndTransient() {
982
Download from finelybook www.finelybook.com
//... using (ServiceProvider container = RegisterServices()) { ControllerX x = container.GetRequiredService (); x.M(); x.M(); Console.WriteLine($"requesting {nameof(ControllerX)}"); ControllerX x2 = container.GetRequiredService(); x2.M(); Console.WriteLine(); } }
NOTE Local functions are explained in Chapter 13, “Functional Programming with C#.” When you run the application, you can see when the ControllerX is requested, ServiceA and ServiceB are instantiated, and the NumberService returns a new number every time the GetNumber method is invoked. When the ControllerX is requested the second time, not only is the ControllerX newly created but also ServiceB is created and is registered transient. With ServiceB, the same instance is used as before, and no new instance is created: SingletonAndTransient requesting ControllerX ctor ServiceA, 1 ctor ServiceB, 2 ctor ControllerX, 3 invoked M for the 1. time A, 1 B, 2 invoked M for the 2. time A, 1 B, 2 requesting ControllerX
983
Download from finelybook www.finelybook.com
ctor ServiceB, 4 ctor ControllerX, 5 invoked M for the 1. time A, 1 B, 4 disposing disposing disposing disposing disposing
ControllerX, 5 ServiceB, 4 ControllerX, 3 ServiceB, 2 ServiceA, 1
Using Scoped Services Services can also be registered within a scope. This is something inbetween transient and singleton. With singleton, only a single instance is created. Transient creates a new instance every time the service is requested from the container. With scoped, always the same instance is returned from the same scope, but from a different scope a different instance is returned. Scopes are by default defined with ASP.NET Core web applications. Here, the scope is a HTTP Web request. With the scoped service, the same instance is returned if the request to the container is coming from the same HTTP request. With different HTTP requests, other instances are returned. This allows for easily sharing state inside an HTTP request. With non-ASP.NET Core web applications you need to create the scope for yourself to get advantages of scoped services. Let’s start registering services with the local function RegisterServices. ServiceA is registered as a scoped service, ServiceB as singleton, and ServiceC as transient (code file ServicesLifetime/Program.cs): private static void UsingScoped() { Console.WriteLine(nameof(UsingScoped)); ServiceProvider RegisterServices() { var services = new ServiceCollection(); services.AddSingleton(); services.AddScoped();
984
Download from finelybook www.finelybook.com
services.AddSingleton(); services.AddTransient(); return services.BuildServiceProvider(); } //... }
You can create a scope invoking the CreateScope method of the ServiceProvider. This returns a scope object that implements the interface IServiceScope. From there you can access the ServiceProvider belonging to this scope where you can request the services from the container. With the following code snippet, ServiceA and ServiceC are requested two times, whereas ServiceB is requested just once. Then the methods A, B, and C are invoked: private static void UsingScoped() { //... using (ServiceProvider container = RegisterServices()) { using (IServiceScope scope1 = container.CreateScope()) { IServiceA a1 = scope1.ServiceProvider.GetService(); a1.A(); IServiceA a2 = scope1.ServiceProvider.GetService(); a2.A(); IServiceB b1 = scope1.ServiceProvider.GetService(); b1.B(); IServiceC c1 = scope1.ServiceProvider.GetService(); c1.C(); IServiceC c2 = scope1.ServiceProvider.GetService(); c2.C(); } Console.WriteLine("end of scope1"); //... }
After the first scope is disposed, another scope is created. With the second scope, again the services ServiceA, ServiceB, and ServiceC are 985
Download from finelybook www.finelybook.com
requested and methods invoked: private static void UsingScoped() { //... Console.WriteLine("end of scope1"); using (IServiceScope scope2 = container.CreateScope()) { IServiceA a3 = scope2.ServiceProvider.GetService(); a3.A(); IServiceB b2 = scope2.ServiceProvider.GetService(); b2.B(); IServiceC c3 = scope2.ServiceProvider.GetService(); c3.C(); } Console.WriteLine("end of scope2"); Console.WriteLine(); }
When you run the application, you can see the services for the instances are created, methods are invoked, and they’re automatically disposed. As ServiceA is registered as scoped, within the same scope the same instance is used. ServiceC is registered as transient, so here an instance is created with every request to the container. At the end of the scope, the transient and scoped services are automatically disposed, but not ServiceB. ServiceB is registered as singleton and thus needs to survive the end of the scope: UsingScoped ctor ServiceA, 1 A, 1 A, 1 ctor ServiceB, 2 B, 2 ctor ServiceC, 3 C, 3 ctor ServiceC, 4 C, 4 disposing ServiceC, 4 disposing ServiceC, 3 disposing ServiceA, 1
986
Download from finelybook www.finelybook.com
end of scope1
Starting the second scope, ServiceA and ServiceB are instantiated again. When you request ServiceB, the same object previously created is returned. At the end of the scope, ServiceA and ServiceC are disposed again. ServiceB is disposed after disposing the root provider: ctor ServiceA, 5 A, 5 B, 2 ctor ServiceC, 6 C, 6 disposing ServiceC, 6 disposing ServiceA, 5 end of scope2 disposing ServiceB, 2
NOTE You don’t need to invoke the Dispose method on services to release them. With services implementing the IDisposable interface, the container invokes the Dispose method. Transient and scoped services are disposed when the scope is disposed. Singleton services are disposed when the root provider is disposed. With .NET Core 2.0, the service instances are disposed in the reverse order they have been created. This is important when one service needs another one injected. For example, ServiceA requires ServiceB to be injected. Thus, ServiceB is created first, followed by ServiceA. With disposing, ServiceA is disposed first and can still access methods from ServiceB while it’s being disposed. This behavior is different from .NET Core 1.0 where disposing of service instances happened in the order the service instances were created.
Using Custom Factories 987
Download from finelybook www.finelybook.com
Other than defining to use transient, scoped, and singleton, you can also create a custom factory or pass an existing instance to the container. The following code snippet shows how you can do this. You can pass a previously created instance to the container by using an overload of the AddSingleton method. Here, in the RegisterServices method, a NumberService object is created first, and then it’s passed to the AddSingleton method. Using the GetService method, or injecting it in the constructor, is not different from the code you’ve seen before. You just need to be aware that the container is not responsible for invoking the Dispose method in this case. With objects creating and passing to the container, it’s your responsibility to dispose these objects (if the objects need disposing at all). You also can use a factory method that is used to create the instance instead of letting the service be created from the container. In case the service needs a custom initialization or defines constructors that aren’t supported by the DI container, this is a useful option. You can pass a delegate with an IServiceProvider parameter and return the service instance to the AddSingleton, AddScoped, and AddTransient methods. With the sample code, the local function named CreateServiceBFactory returns a ServiceB object. In case the constructor of the service implementation needs other services, these can be retrieved using the passed IServiceProvider instance (code file ServicesLifetime/Program.cs): private static void CustomFactories() { Console.WriteLine(nameof(CustomFactories)); IServiceB CreateServiceBFactory(IServiceProvider provider) => new ServiceB(provider.GetService()); ServiceProvider RegisterServices() { var numberService = new NumberService(); var services = new ServiceCollection(); services.AddSingleton(numberService); add existing
//
services.AddTransient(CreateServiceBFactory); // use a factory
988
Download from finelybook www.finelybook.com
services.AddSingleton(); return services.BuildServiceProvider(); } using (ServiceProvider container = RegisterServices()) { IServiceA a1 = container.GetService(); IServiceA a2 = container.GetService(); IServiceB b1 = container.GetService(); IServiceB b2 = container.GetService(); } Console.WriteLine(); }
INITIALIZATION OF SERVICES USING OPTIONS You’ve already seen that a service can be injected in another service. This can also be used to initialize a service with options. You cannot define non-service contracts with the constructor of a service for initialization because the container does not know how to initialize this. Services are needed. However, to pass options for a service, you can also use a service that is already available with .NET Core. The sample DIWithOptions makes use of these NuGet packages and namespaces: Packages Microsoft.Extensions.DependencyInjection Microsoft.Extensions.Options Namespaces System Microsoft.Extensions.DependencyInjection Microsoft.Extensions.Options
The sample code makes use of the previously used GreetingService with modifications to pass options. The configuration values needed by the service are defined with the class GreetingServiceOptions. The sample code requires a string parameter with the From property (code 989
Download from finelybook www.finelybook.com
file DIWithOptions/GreetingServiceOptions.cs): public class GreetingServiceOptions { public string From { get; set; } }
The options for the service can be passed by specifying a constructor with an IOptions parameter. The previously defined class GreetingServiceOptions is the generic type used with IOptions. The value passed to the constructor is used to initialize the field _from (code file DIWithOptions/GreetingService.cs): public class GreetingService : IGreetingService { public GreetingService(IOptions options) => _from = options.Value.From; private readonly string _from; public string Greet(string name) => $"Hello, {name}! Greetings from {_from}"; }
NOTE The IOptions interface and the service used with options is implemented in the NuGet package Microsoft.Extensions.Options. For making it easy to register the service with the DI container, the extension method AddGreetingService is defined. This method extends the IServiceCollection interface and allows passing the GreetingServiceOptions with a delegate. In the implementation, the Configure method is used to specify the configuration with the IOptions interface. The Configure method is an extension method for IServiceCollection in the Microsoft.Extensions.Options NuGet package (code file DIWithOptions/GreetingServiceExtensions.cs): 990
Download from finelybook www.finelybook.com
public static class GreetingServiceExtensions { public static IServiceCollection AddGreetingService( this IServiceCollection collection, Action setupAction) { if (collection == null) throw new ArgumentNullException(nameof(collection)); if (setupAction == null) throw new ArgumentNullException(nameof(setupAction)); collection.Configure(setupAction); return collection.AddTransient(); } }
The HomeController that makes use of the GreetingService with constructor injection doesn’t need any change (code file DIWithOptions/HomeController.cs): public class HomeController { private readonly IGreetingService _greetingService; public HomeController(IGreetingService greetingService) { _greetingService = greetingService; } public string Hello(string name) => _greetingService.Greet(name); }
You can now register the services with the helper method AddGreetingService. The configuration for the GreetingService is done here by passing the required options. What’s also needed is a service that implements the IOptions interface. Here, an extension method can be used as well: AddOptions. This method adds several interfaces and maps it to implementations that are used with options (code file DIWithOptions/Program.cs): static ServiceProvider RegisterServices() { var services = new ServiceCollection(); services.AddOptions();
991
Download from finelybook www.finelybook.com
services.AddGreetingService(options => { options.From = "Christian"; }); services.AddTransient(); return services.BuildServiceProvider(); }
The service can now be used like before. The HomeController is retrieved from the container, and constructor injection is used in the HomeController where the IGreetingService is used: static void Main() { using (var container = RegisterServices()) { var controller = container.GetService(); string result = controller.Hello("Katharina"); Console.WriteLine(result); } }
When you run the application, now the options are used: Hello, Katharina! Greetings from Christian
USING CONFIGURATION FILES Options as shown in the previous section also can be used when a service needs to be configured from a configuration file. However, there’s a more direct way to do this: You can use the .NET configuration features in conjunction with an extension to the options. Options can be extended with configuration using the NuGet package Microsoft.Extensions.Options.ConfigurationExtensions. The sample DIWithConfiguration makes use of these NuGet packages and namespaces: Packages Microsoft.Extensions.Configuration Microsoft.Extensions.Configuration.Json Microsoft.ExtensionsDependencyInjection
992
Download from finelybook www.finelybook.com
Microsoft.Extensions.Options Microsoft.Extensions.Options.ConfigurationExtensions Namespaces System Microsoft.Extensions.Configuration Microsoft.Extensions.DependencyInjection Microsoft.Extensions.Options
The sample code is based on the sample from the previous section, but now options are extended with configuration. No change needs to be done with the GreetingService class; it’s still initialized using the IOptions interface. What’s changed is the AddGreetingService extension method, which makes it easier to use the service. The second parameter of this method is now of type IConfiguration to receive configuration values. The config parameter is used for passing it to the Configure extension method. The Configure extension method is different one from the one used previously; this one is defined in the NuGet package Microsoft.Extensions.Options.ConfigurationExtensions (code file DIWithConfiguration/GreetingServiceExtensions.cs): public static class GreetingServiceExtensions { public static IServiceCollection AddGreetingService( this IServiceCollection collection, IConfiguration config) { if (collection == null) throw new ArgumentNullException(nameof(collection)); if (config == null) throw new ArgumentNullException(nameof(config)); collection.Configure(config); return collection.AddTransient(); } }
Configuration can be read from environmental variables, program 993
Download from finelybook www.finelybook.com
arguments, and from files with different formats such as XML, INI, and JSON files. Here, the provider to read JSON configuration is used for adding the NuGet packages Microsoft.Extensions.Configuration and Microsoft.Extensions.Json. In the method DefineConfiguration, first a ConfigurationBuilder is created, and then fluent API is used to configure the base path for the directory where the JSON file can be read and to configure the JSON file itself. The file appsettings.json is used to read the configuration. After the setup of the ConfigurationBuilder, invoking the Build method returns an object that implements IConfiguration where the configuration values can be accessed (code file DIWithConfiguration/Program.cs): static void DefineConfiguration() { IConfigurationBuilder configBuilder = new ConfigurationBuilder() .SetBasePath(Directory.GetCurrentDirectory()) .AddJsonFile("appsettings.json"); Configuration = configBuilder.Build(); } public static IConfiguration Configuration { get; set; }
The configuration file specifies the From settings for the GreetingService configuration (configuration file DIWithConfiguration/appsettings.json: { "GreetingService": { "From": "Matthias" } }
NOTE Read more about the .NET Configuration in Chapter 30, “ASP.NET Core.” The ServiceCollection is configured like it was before. The IOptions 994
Download from finelybook www.finelybook.com
interface needs to be specified as well. What’s different is that the new version of the AddGreetingService extension method that passes the IConfiguration value. This can be done by accessing the Configuration property that’s defined previously to read the section GreetingService, which passes the values that contain this section (code file DIWithConfiguration/Program.cs): static ServiceProvider RegisterServices() { var services = new ServiceCollection(); services.AddOptions(); services.AddSingleton(); services.AddGreetingService( Configuration.GetSection("GreetingService")); services.AddTransient(); return services.BuildServiceProvider(); }
Before registering the services, the configuration needs to be specified. You do this in the Main method as shown. When you run the application, it behaves like it did before, but the configuration comes from a file: static void Main() { DefineConfiguration(); var container = RegisterServices(); var controller = container.GetService(); string result = controller.Hello("Katharina"); Console.WriteLine(result); }
CREATING PLATFORM INDEPENDENCE Dependency injection also can be used to use platform-specific features from platform-independent libraries. For example, you can create a .NET Standard Library that is used from WPF, UWP, and Xamarin applications, and it makes calls into platform-specific APIs. Calling a Web API can be implemented so it’s completely platform independent. Doing such simple things like opening a message dialog is platform specific.
995
Download from finelybook www.finelybook.com
NOTE You can read more about the MVVM pattern in Chapter 34, “Patterns with XAML Apps.” Programming UWP applications is covered in detail in the Chapters 33 to 36, and programming applications with Xamarin is introduced in Chapter 37, “Xamarin Forms.” The next sample solution, PlatformIndependenceSample, consists of the projects in the following table. This is a .NET Standard library consisting of services, service contracts, and a view-model. Because the message service is platform specific, for this service only a contract is defined within the library (IMessageService). WPFClient The WPF client application references the DISampleLib and contains a reference to the NuGet package Microsoft.Extensions.DependencyInjection. This application defines a user interface with XAML and makes use of the view-model and services from the .NET Standard library. For the interface IMessageService, the service WPFMessageService is implemented in the WPF project. UWPClient The UWP client application is like the WPF application. It just needs a different implementation of the IMessageService: UWPMessageService. XamarinClient With Xamarin, a Xamarin.Forms application was created. This results in a project for Android, a project for iOS, and a project for UWP. Common code (you can share the user interface) is in a shared project. With every single Xamarin.Forms project the .NET Standard library and the NuGet package Microsoft.Extensions.DependencyInjection need to be referenced. The code for the user interface, the setup DISampleLib
996
Download from finelybook www.finelybook.com
of the DI container, and the implementation of the IMessageService interface—XamarinMessageService—is common between UWP, Android, and iPhone in the shared project.
NOTE To have the Xamarin project templates available with Visual Studio, you need to install the workload Mobile development with .NET using the Visual Studio Installer. You can also use Visual Studio for Mac. To successfully compile for iOS, you also need a Mac.
.NET Standard Library Let’s start with the .NET Standard library implementing services and contracts. The interface IMessageService is a contract. This contract defines the method ShowMessageAsync, where a pop-up window should be shown on calling this method. As mentioned previously, creating these dialogs is not possible from .NET Standard (code file PlatformIndependenceSample/DISampleLib/IMessageService.cs): public interface IMessageService { Task ShowMessageAsync(string message); }
The interface IMessageService is used in the class ShowMessageViewModel. The object implementing this interface will be injected with the constructor of ShowMessageViewModel. This viewmodel class defines the command ShowMessageCommand that is fired from the user interfaces of the specific platforms. On firing of this command, the ShowMessageAsync method of the IMessageService is invoked (code file PlatformIndependenceSample/DISampleLib/ShowMessageViewModel.cs): public class ShowMessageViewModel
997
Download from finelybook www.finelybook.com
{ private readonly IMessageService _messageService; public ShowMessageViewModel(IMessageService messageService) { _messageService = messageService ?? throw new ArgumentNullException(nameof(messageService)); ShowMessageCommand = new RelayCommand(ShowMessage); } public ICommand ShowMessageCommand { get; } public void ShowMessage() { _messageService.ShowMessageAsync("A message from the view-model"); } }
WPF Application The first client application using this library is the WPF application. The WPFMessageService class implements the IMessageService interface. With WPF, dialogs can be opened using MessageBox.Show. This class does not offer asynchronous functionality; thus, a completed task is returned to fulfill the contract from the ShowMessageAsync method (code file PlatformIndependenceSample/WPFClient/WPFMessageService.cs): public class WPFMessageService : IMessageService { public Task ShowMessageAsync(string message) { MessageBox.Show(message); return Task.CompletedTask; } }
In the App class, the DI container is created, and the services are registered. The WPFMessageService class is mapped to the IMessageService interface (code file PlatformIndependenceSample/WPFClient/App.xaml.cs):
998
Download from finelybook www.finelybook.com
protected override void OnStartup(StartupEventArgs e) { base.OnStartup(e); RegisterServices(); } public void RegisterServices() { var services = new ServiceCollection(); services.AddSingleton (); services.AddTransient(); Container = services.BuildServiceProvider(); } public IServiceProvider Container { get; private set; }
In the code-behind file of the user interface, the ViewModel property is set by requesting ShowMessageViewModel from the container (code file PlatformIndependenceSample/WPFClient/MainWindow.xaml.cs): public MainWindow() { InitializeComponent(); ViewModel = (Application.Current as App) .Container.GetService(); this.DataContext = this; } public ShowMessageViewModel ViewModel { get; }
With the XAML code, the Button element defines a Command property that binds to the ShowMessageCommand of the view-model (XAML file PlatformIndependenceSample/WPFClient/MainWindow.xaml):
When you run the application, clicking the button invokes the command in the view-model that is requested from the container, and the command handler invokes a service that in turn is implemented with the WPF application to show the MessageBox shown in Figure 201.
999
Download from finelybook www.finelybook.com
FIGURE 20-1
UWP Application The UWP application is very similar to the WPF application, but there are some important differences. The first one shows up with the UWPMessageService class; to show a dialog, the MessageDialog class is used. This class offers the async method ShowAsync (code file PlatformIndependenceSample/UWPClient/UWPMessageService.cs): public class UWPMessageService : IMessageService { public async Task ShowMessageAsync(string message) => await new MessageDialog(message).ShowAsync(); }
The DI container is filled in the same way except that the UWPMessageSerivce is now used to fulfill the contract for the IMessageService interface (code file PlatformIndependenceSample/UWPClient/App.xaml.cs): public void RegisterServices() { var services = new ServiceCollection(); services.AddSingleton
1000
Download from finelybook www.finelybook.com
(); services.AddTransient(); Container = services.BuildServiceProvider(); } public IServiceProvider Container { get; private set; }
Requesting the view-model from the container is done in the same way as with WPF (code file PlatformIndependenceSample/UWPClient/MainPage.xaml.cs): public MainPage() { this.InitializeComponent(); ViewModel = (Application.Current as App) .Container.GetService(); } public ShowMessageViewModel ViewModel { get; }
Another difference with UWP is the use of compiled binding, but this is not really related to dependency injection (XAML file PlatformIndependenceSample/UWPClient/MainPage.xaml):
When you run the application, you can see the same behavior, but with UWP user interfaces (Figure 20-2).
1001
Download from finelybook www.finelybook.com
FIGURE 20-2
Xamarin Application When you implement the same features with a Xamarin.Forms application, there’s another interesting approach with dependency injection. With Xamarin.Forms, the method to show a message dialog requires a Page object, so the XamarinMessageService that’s implementing IMessageService needs to be configured for receiving a Page object. It’s not possible to change the IMessageService, as the Page type is not available with a .NET Standard library. It’s also not possible to use an extra configuration property with the XamarinMessageService class, as this class is instantiated from the view-model type that is also implemented in the .NET Standard library. A good approach is to add another service with a service contract that is only used within Xamarin.Forms application. The XamarinMessageService constructor demands an object implementing the IPageService interface. This service is then used to retrieve the Page, and with this the DisplayAlert method can be invoked (code file PlatformIndependenceSample/XamarinClient/XamarinMessageService.cs): public class XamarinMessageService : IMessageService { private readonly IPageService _pageService; public XamarinMessageService(IPageService pageService) {
1002
Download from finelybook www.finelybook.com
_pageService = pageService; } public Task ShowMessageAsync(string message) { return _pageService.Page.DisplayAlert("Message", message, "Close"); } }
The contract IPageService just defines a Page property as needed for the dialog (code file PlatformIndependenceSample/XamarinClient/IPageService.cs): public interface IPageService { Page Page { get; set; } }
The implementation of the IPageService is just a simple auto-property (code file PlatformIndependenceSample/XamarinClient/PageService.cs): public class PageService : IPageService { public Page Page { get; set; } }
The container is created in the App class. This time, the XamarinMessageSerivce is mapped as implementation for the IMessageService contract, and IPageService needs to be listed, too (code file PlatformIndependenceSample/XamarinClient/App.xaml.cs): public App() { InitializeComponent(); RegisterServices(); MainPage = new XamarinClient.MainPage(); } public void RegisterServices() { var services = new ServiceCollection(); services.AddSingleton();
1003
Download from finelybook www.finelybook.com
services.AddSingleton(); services.AddTransient(); Container = services.BuildServiceProvider(); } public IServiceProvider Container { get; private set; }
In the code-behind file, the Page property needs to be associated with the PageService (code file PlatformIndependenceSample/XamarinClient/MainPage.xaml.cs): public MainPage() { InitializeComponent(); IServiceProvider container = (Application.Current as App).Container; ViewModel = container.GetService(); this.BindingContext = this; container.GetService().Page = this; } public ShowMessageViewModel ViewModel { get; }
The XAML code looks like the previous samples (XAML file PlatformIndependenceSample/XamarinClient/MainPage.xaml):
When you run the application, the alert message pops up, as shown in Figure 20-3.
1004
Download from finelybook www.finelybook.com
FIGURE 20-3
USING OTHER DI CONTAINERS is a simple DI container; many third-party containers offer additional functionality. For example, Autofac allows configuration of the services in a configuration file. Microsoft.Extensions.DependencyInjection
While ASP.NET Core uses Microsoft.Extensions.DependencyInjection, you can also configure this—using an adapter—to use other third-party dependency injection containers, such as Autofac, Rezolver, Scan, Neleus, CuteAnt, fm, Dryloc, CuteAnt, Stashbox, and others. You just need to add an adapter in the form of a NuGet package and make the initialization according to the container’s needs. The sample project DIWithAutofac uses the same GreetingService and HomeController as implemented previously, but it uses the Autofac dependency injection container adapter. For this, these NuGet packages and namespaces are needed: Packages Autofac.Extensions.DependencyInjection Microsoft.ExtensionsDependencyInjection
1005
Download from finelybook www.finelybook.com
Namespaces Autofac Autofac.Extensions.DependencyInjection Microsoft.Extensions.DependencyInjection System
For using the Autofac container adapter, the services are registered in a ServiceCollection like before. Instead of creating an IServiceProvider, now you use a ContainerBuilder from Autofac. This builder can be populated with the ServiceCollection that invokes the Populate method. This is a way of adding the hundreds of ASP.NET Core services to this container. The container also supports several Register methods to add managed services. The Build method now creates a container and returns it with the IContainer interface (code file DIWithAutoFac/Program.cs): static IContainer RegisterServices() { var services = new ServiceCollection(); services.AddSingleton(); services.AddTransient(); var builder = new ContainerBuilder(); builder.Populate(services); return builder.Build(); }
The Resolve method can now be used to resolve services from this container. Other than this, no changes are needed. The HomeController receives GreetingService via dependency injection (code file DIWithAutoFac/Program.cs): static void Main() { using (IContainer container = RegisterServices()) { var controller = container.Resolve(); string result = controller.Hello("Katharina"); Console.WriteLine(result); } }
1006
Download from finelybook www.finelybook.com
SUMMARY This chapter served as an introduction to dependency injection and continued using Microsoft’s container Microsoft.Extensions.DependencyInjection with various scenarios including configuration via options and .NET Core configuration. You’ve also seen how to use dependency injection with different platforms by using platform-specific features with WPF, UWP, and Xamarin. This book contains several chapters in which dependency injection has an important role. Chapter 26 shows how dependency injection is used with Entity Framework Core, and how you can replace built-in functionality. You can read in Chapter 28 about using dependency injection with unit tests and mocking functionality that should not be tested by a unit test. Chapter 30 and the chapters that follow it cover how dependency injection is used with ASP.NET Core. You will see hundreds of services registered in a container. Chapter 34 shows the MVVM pattern and other patterns that are used with XAML-based applications. Dependency injection is an important foundation in those applications. Chapter 21 goes into the detail of parallel programming with the Task and Parallel classes that help you use multiple cores from the operating system. Issues that come up when you use multiple tasks are covered as well.
1007
Download from finelybook www.finelybook.com
21 Tasks and Parallel Programming WHAT’S IN THIS CHAPTER? An overview of multi-threading Working with the Parallel class Working with Tasks Using the Cancellation framework Using the Data Flow Library Working with timers Understanding threading issues Using the lock keyword Synchronizing with Monitor Synchronizing with mutexes Working with Semaphore and SemaphoreSlim Using ManualResetEvent, AutoResetEvent, and CountdownEvent Working with Barrier Managing readers and writers with ReaderWriterLockSlim
WROX.COM CODE DOWNLOADS FOR THIS CHAPTER 1008
Download from finelybook www.finelybook.com
The Wrox.com code downloads for this chapter are found at www.wrox.com on the Download Code tab. The source code is also available at https://github.com/ProfessionalCSharp/ProfessionalCSharp7 in the directory Tasks. The code for this chapter is divided into the following major examples: Parallel Task Cancellation DataFlow Timer WinAppTimer ThreadingIssues SynchronizationSamples BarrierSample ReaderWriterLockSample
OVERVIEW There are several reasons for using multiple threads. Suppose that you are making a network call from an application that might take some time. You don’t want to stall the user interface and force the user to wait idly until the response is returned from the server. The user could perform some other actions in the meantime or even cancel the request that was sent to the server. Using threads can help. For all activities that require a wait—for example, because of file, database, or network access—you can start a new thread to fulfill other activities at the same time. Even if you have only processing-intensive tasks to do, threading can help. Multiple threads of a single process can run on different CPUs, or, nowadays, on different cores of a 1009
Download from finelybook www.finelybook.com
multiple-core CPU, at the same time. You must be aware of some issues when running multiple threads, however. Because they can run during the same time, you can easily get into problems if the threads access the same data. To avoid that, you must implement synchronization mechanisms. .NET offers an abstraction mechanism to threads: tasks. Tasks allow building relations between tasks—for example, one task should continue when the first one is completed. You can also build a hierarchy consisting of multiple tasks. Instead of using tasks, you can implement parallel activities using the Parallel class. You need to differentiate data parallelism where working with some data is processed simultaneously between different tasks, or task parallelism where different functions are executed simultaneously. When creating parallel programs, you have a lot of different options. You should use the simplest option that fits your scenario. This chapter starts with the Parallel class that offers very easy parallelism. If this is all you need, just use this class. In case you need more control, such as when you need to manage a relation between tasks or to define a method that returns a task, the Task class is the way to go. This chapter also covers the data flow library, which might be the easiest one to use if you need an actor-based programming to flow data through pipelines. In case you even need more control over parallelism, such as setting priorities, the Thread class might be the one to use.
NOTE The use of asynchronous methods with the async and await keywords is covered in Chapter 15, “Asynchronous Programming.” One variant of task parallelism is offered by Parallel LINQ, which is covered in Chapter 12, “Language Integrated Query.” 1010
Download from finelybook www.finelybook.com
Creating a program that runs multiple tasks in parallel can lead to race conditions and deadlocks. You need to be aware of synchronization techniques. It is best when you can avoid synchronization by not sharing data between threads. Of course, this is not always possible. If data sharing is necessary, you must use synchronization so that only one task at a time accesses and changes the shared state. In case you don’t pay attention to synchronization, race conditions and deadlocks can apply. A big issue with race conditions and deadlocks is that errors can occur from time to time. With a higher number of CPU cores, error numbers can increase. Such errors usually are hard to find. So, it’s best to pay attention to synchronization from the beginning. Using multiple tasks is easy if the tasks don’t access the same variables. You can avoid this situation to a certain degree, but at some point, you will find some data needs to be shared. When sharing data, you need to apply synchronization techniques. When threads access the same data and you don’t apply synchronization, you are lucky when the problem pops up immediately. However, this is rarely the case. This chapter shows race conditions and deadlocks, and how you can avoid them by applying synchronization mechanisms. .NET offers several options for synchronization. You can use synchronization objects within a process or across processes. You can use them to synchronize one task or multiple tasks to access one or more resources. Synchronization objects can also be used to inform tasks that something completed. All these synchronization objects are covered in this chapter.
NOTE The need for synchronization can be partly avoided by using immutable data structures as much as possible. With immutable data structures, the data can only be initialized, but cannot be changed afterward. That’s why synchronization is not needed 1011
Download from finelybook www.finelybook.com
with these types. After this long introduction, let’s start with the Parallel class—an uncomplicated way to add parallelism to your application.
PARALLEL CLASS One great abstraction of threads is the Parallel class. With this class, both data and task parallelism are offered. This class is in the namespace System.Threading.Tasks. The Parallel class defines static methods for a parallel for and foreach. With the C# statements for and foreach, the loop is run from one thread. The Parallel class uses multiple tasks and, thus, multiple threads for this job. Whereas the Parallel.For and Parallel.ForEach methods invoke the same code during each iteration, Parallel.Invoke enables you to invoke different methods concurrently. Parallel.Invoke is for task parallelism, and Parallel.ForEach is for data parallelism.
Looping with the Parallel.For Method The Parallel.For method is like the C# for loop statement for performing a task a number of times. With Parallel.For, the iterations run in parallel. The order of iteration is not defined. The sample code for ParallelSamples makes use of the following namespaces: Namespaces System System.Linq System.Threading System.Threading.Tasks
1012
Download from finelybook www.finelybook.com
NOTE This sample makes use of command-line arguments. To work through the different features, pass different arguments as shown on startup of the sample application, or by checking the Main method. From Visual Studio, you can pass command-line arguments in the Debug options of the project properties. Using the dotnet command line, to pass the command-line argument -p, you can start the command dotnet run -- -p. For having information about the thread and the task, the following Log method writes thread and task identifiers to the console (code file ParallelSamples/Program.cs): public static void Log(string prefix) => Console.WriteLine($"{prefix}, task: {Task.CurrentId}, " + $"thread: {Thread.CurrentThread.ManagedThreadId}");
Let’s get into the Parallel.For method. With this method, the first two parameters define the start and end of the loop. The following example has the iterations from 0 to 9. The third parameter is an Action delegate. The integer parameter is the iteration of the loop that is passed to the method referenced by the delegate. The return type of Parallel.For is the struct ParallelLoopResult, which provides information if the loop is completed: public static void ParallelFor() { ParallelLoopResult result = Parallel.For(0, 10, i => { Log($"S {i}"); Task.Delay(10).Wait(); Log($"E {i}"); }); Console.WriteLine($"Is completed: {result.IsCompleted}"); }
In the body of Parallel.For, the index, task identifier, and thread 1013
Download from finelybook www.finelybook.com
identifier are written to the console. As shown in the following output, the order is not guaranteed. You will see different results if you run this program once more. This run of the program had the order 2-4-06-8 and so on with nine tasks and six threads. A task does not necessarily map to one thread: a thread can be reused by different tasks. S 2 task: 1, thread: S 4 task: 2, thread: S 0 task: 4, thread: S 6 task: 5, thread: S 8 task: 3, thread: E 6 task: 5, thread: E 0 task: 4, thread: S 1 task: 4, thread: E 4 task: 2, thread: S 5 task: 8, thread: E 2 task: 1, thread: S 9 task: 9, thread: E 8 task: 3, thread: S 3 task: 7, thread: S 7 task: 6, thread: E 5 task: 8, thread: E 1 task: 4, thread: E 3 task: 7, thread: E 7 task: 6, thread: E 9 task: 9, thread: Is completed: True
3 4 2 5 6 5 2 2 4 4 3 3 6 8 5 4 2 8 5 3
The delay within the parallel body waits for 10 milliseconds to have a better chance to create new threads. If you remove this line, you see fewer threads and tasks to be used. What you can also see with the result is that every end-log of a loop uses the same thread and task as the start-log. Using Task.Delay with the Wait method blocks the current thread until the delay ends. Change the previous example to now use the await keyword with the Task.Delay method (code file ParallelSamples/Program.cs): public static void ParallelForWithAsync() { ParallelLoopResult result = Parallel.For(0, 10, async i => {
1014
Download from finelybook www.finelybook.com
Log($"S {i}"); await Task.Delay(10); Log($"E {i}"); }); Console.WriteLine($"is completed: {result.IsCompleted}"); }
The result is in the following code snippet. With the output after the Thread.Delay method you can see the thread change. For example, loop iteration 8, which had thread ID 7 before the delay, has thread ID 5 after the delay. You can also see that tasks no longer exist—there are only threads—and here previous threads are reused. Another important aspect is that the For method of the Parallel class is completed without waiting for the delay. The Parallel class waits for the tasks it created, but it doesn’t wait for other background activity. It is also possible that you won’t see the output from the methods after the delay at all—if the main thread (which is a foreground thread) is finished, all the background threads are stopped. Foreground and background threads are discussed in the next chapter. S 0, task: 5, thread: 1 S 8, task: 8, thread: 7 S 6, task: 7, thread: 8 S 4, task: 9, thread: 6 S 2, task: 6, thread: 5 S 7, task: 7, thread: 8 S 1, task: 5, thread: 1 S 5, task: 9, thread: 6 S 9, task: 8, thread: 7 S 3, task: 6, thread: 5 Is completed: True E 2, task: , thread: 8 E 0, task: , thread: 8 E 8, task: , thread: 5 E 6, task: , thread: 7 E 4, task: , thread: 6 E 5, task: , thread: 7 E 7, task: , thread: 7 E 1, task: , thread: 6 E 3, task: , thread: 5 E 9, task: , thread: 8
1015
Download from finelybook www.finelybook.com
WARNING As demonstrated here, although using async features with .NET and C# is very easy, it’s still important to know what’s happening behind the scenes, and you have to pay attention to some issues.
Stopping Parallel.For Early You can also break Parallel.For early without looping through all the iterations. A method overload of the For method accepts a third parameter of type Action. By defining a method with these parameters, you can influence the outcome of the loop by invoking the Break or Stop methods of the ParallelLoopState. Remember, the order of iterations is not defined (code file ParallelSamples/Program.cs): public static void StopParallelForEarly() { ParallelLoopResult result = Parallel.For(10, 40, (int i, ParallelLoopState pls) => { Log($"S {i}"); if (i > 12) { pls.Break(); Log($"break now... {i}"); } Task.Delay(10).Wait(); Log($"E {i}"); }); Console.WriteLine($"Is completed: {result.IsCompleted}"); Console.WriteLine($"lowest break iteration: {result.LowestBreakIteration}"); }
This run of the application demonstrates that the iteration breaks up with a value higher than 12, but other tasks can simultaneously run, and tasks with other values can run. All the tasks that have been started before the break can continue to the end. You can use the 1016
Download from finelybook www.finelybook.com
LowestBreakIteration
property to ignore results from tasks that you do
not need: S 31, task: 6, thread: 8 S 17, task: 7, thread: 5 S 10, task: 5, thread: 1 S 24, task: 8, thread: 6 break now 24, task: 8, thread: S 38, task: 9, thread: 7 break now 38, task: 9, thread: break now 31, task: 6, thread: break now 17, task: 7, thread: E 17, task: 7, thread: 5 E 10, task: 5, thread: 1 S 11, task: 5, thread: 1 E 38, task: 9, thread: 7 E 24, task: 8, thread: 6 E 31, task: 6, thread: 8 E 11, task: 5, thread: 1 S 12, task: 5, thread: 1 E 12, task: 5, thread: 1 S 13, task: 5, thread: 1 break now 13, task: 5, thread: E 13, task: 5, thread: 1 Is completed: False lowest break iteration: 13
6 7 8 5
1
Parallel For Initialization might use several threads to do the loops. If you need an initialization that should be done with every thread, you can use the Parallel.For method. The generic version of the For method accepts—in addition to the from and to values—three delegate parameters. The first parameter is of type Func. Because the example here uses a string for TLocal, the method needs to be defined as Func, a method returning a string. This method is invoked only once for each thread that is used to do the iterations. Parallel.For
The second delegate parameter defines the delegate for the body. In the example, the parameter is of type Func. The first parameter is the loop iteration; the second parameter, ParallelLoopState, enables stopping the loop, as shown earlier. With the third parameter, the body method receives the value 1017
Download from finelybook www.finelybook.com
that is returned from the init method. The body method also needs to return a value of the type that was defined with the generic For parameter. The last parameter of the For method specifies a delegate, Action; in the example, a string is received. This method, a thread exit method, is called only once for each thread (code file ParallelSamples/Program.cs): public static void ParallelForWithInit() { Parallel.For(0, 10, () => { // invoked once for each thread Log($"init thread"); return $"t{Thread.CurrentThread.ManagedThreadId}"; }, (i, pls, str1) => { // invoked for each member Log($"body i {i} str1 {str1}"); Task.Delay(10).Wait(); return $"i {i}"; }, (str1) => { // final action on each thread Log($"finally {str1}"); }); }
The result of running this program once is shown here: init thread task: 7, thread: 6 init thread task: 6, thread: 5 body i: 4 str1: t6 task: 7, thread: 6 body i: 2 str1: t5 task: 6, thread: 5 init thread task: 5, thread: 1 body i: 0 str1: t1 task: 5, thread: 1 init thread task: 9, thread: 8 body i: 8 str1: t8 task: 9, thread: 8 init thread task: 8, thread: 7 body i: 6 str1: t7 task: 8, thread: 7 body i: 1 str1: i 0 task: 5, thread: 1 finally i 2 task: 6, thread: 5 init thread task: 16, thread: 5
1018
Download from finelybook www.finelybook.com
finally i 8 task: 9, thread: 8 init thread task: 17, thread: 8 body i: 9 str1: t8 task: 17, thread: 8 finally i 6 task: 8, thread: 7 init thread task: 18, thread: 7 body i: 7 str1: t7 task: 18, thread: 7 finally i 4 task: 7, thread: 6 init thread task: 15, thread: 10 body i: 3 str1: t10 task: 15, thread: 10 body i: 5 str1: t5 task: 16, thread: 5 finally i 1 task: 5, thread: 1 finally i 5 task: 16, thread: 5 finally i 3 task: 15, thread: 10 finally i 7 task: 18, thread: 7 finally i 9 task: 17, thread: 8
The output shows that the init method is called only once for each thread; the body of the loop receives the first string from the initialization and passes this string to the next iteration of the body with the same thread. Lastly, the final action is invoked once for each thread and receives the last result from every body. With this functionality, this method fits perfectly to accumulate a result of a huge data collection.
Looping with the Parallel.ForEach Method Parallel.ForEach iterates through a collection implementing IEnumerable in a way like the foreach statement, but in an
asynchronous manner. Again, the order is not guaranteed (code file ParallelSamples/Program.cs): public static void ParallelForEach() { string[] data = {"zero", "one", "two", "three", "four", "five", "six", "seven", "eight", "nine", "ten", "eleven", "twelve"}; ParallelLoopResult result = Parallel.ForEach(data, s => { Console.WriteLine(s); }); }
1019
Download from finelybook www.finelybook.com
If you need to break up the loop, you can use an overload of the ForEach method with a ParallelLoopState parameter. You can do this in the same way you did earlier with the For method. An overload of the ForEach method can also be used to access an indexer to get the iteration number, as shown here: Parallel.ForEach(data, (s, pls, l) => { Console.WriteLine($"{s} {l}"); });
Invoking Multiple Methods with the Parallel.Invoke Method If multiple tasks should run in parallel, you can use the Parallel.Invoke method, which offers the task parallelism pattern. Parallel.Invoke allows the passing of an array of Action delegates, whereby you can assign methods that should run. The example code passes the Foo and Bar methods to be invoked in parallel (code file ParallelSamples/Program.cs): public static void ParallelInvoke() { Parallel.Invoke(Foo, Bar); } public static void Foo() => Console.WriteLine("foo"); public static void Bar() => Console.WriteLine("bar");
The Parallel class is very easy to use—for both task and data parallelism. If more control is needed, and you don’t want to wait until the action started with the Parallel class is completed, the Task class comes in handy. Of course, it’s also possible to combine the Task and Parallel classes.
TASKS For more control over the parallel actions, you can use the Task class 1020
Download from finelybook www.finelybook.com
from the namespace System.Threading.Tasks. A task represents some unit of work that should be done. This unit of work can run in a separate thread, and it is also possible to start a task in a synchronized manner, which results in a wait for the calling thread. With tasks, you have an abstraction layer but also a lot of control over the underlying threads. Tasks provide much more flexibility in organizing the work you need to do. For example, you can define continuation work—what should be done after a task is complete. This can be differentiated based on whether the task was successful. You can also organize tasks in a hierarchy. For example, a parent task can create new children tasks. Optionally, this can create a dependency, so canceling a parent task also cancels its child tasks.
Starting Tasks To start a task, you can use either the TaskFactory or the constructor of the Task and the Start method. The Task constructor gives you more flexibility in creating the task. The sample code for TaskSamples makes use of the following namespaces: Namespaces System System.Linq System.Threading System.Threading.Tasks
When starting a task, an instance of the Task class can be created, and the code that should run can be assigned with an Action or Action delegate, with either no parameters or one object parameter. In the following example, a method is defined with one parameter: TaskMethod. The implementation invokes the Log method where the ID of the task and the ID of the thread are written to the console, as well as information if the thread is coming from a thread 1021
Download from finelybook www.finelybook.com
pool, and if the thread is a background thread. Writing multiple messages to the console is synchronized by using the lock keyword with the s_logLock synchronization object. This way, parallel calls to Log can be done, and multiple writes to the console are not interleaving each other. Otherwise the title could be written by one task, and the thread information follows by another task (code file TaskSamples/Program.cs): public static void TaskMethod(object o) { Log(o?.ToString()); } private static object s_logLock = new object(); public static void Log(string title) { lock (s_logLock) { Console.WriteLine(title); Console.WriteLine($"Task id: {Task.CurrentId?.ToString() ?? "no task"}, " + $"thread: {Thread.CurrentThread.ManagedThreadId}"); Console.WriteLine($"is pooled thread: " + $"{Thread.CurrentThread.IsThreadPoolThread}"); Console.WriteLine($"is background thread: " + $"{Thread.CurrentThread.IsBackground}"); Console.WriteLine(); } }
The following sections describe different ways to start a new task. Tasks Using the Thread Pool In this section, diverse ways are shown to start a task that uses a thread from the thread pool. The thread pool offers a pool of background threads. The thread pool manages threads on its own, increasing or decreasing the number of threads within the pool as needed. Threads from the pool are used to fulfill some actions and returned to the pool afterward. The first way to create a task is with an instantiated TaskFactory, where the method TaskMethod is passed to the StartNew method, and the task is immediately started. The second approach uses the static 1022
Download from finelybook www.finelybook.com
property of the Task class to get access to the TaskFactory, and to invoke the StartNew method. This is very similar to the first version in that it uses a factory, but there’s less control over factory creation. The third approach uses the constructor of the Task class. When the Task object is instantiated, the task does not run immediately. Instead, it is given the status Created. The task is then started by calling the Start method of the Task class. The fourth approach calls the Run method of the Task that immediately starts the task. The Run method doesn’t have an overloaded variant to pass an Action delegate, but it’s easy to simulate this by assigning a lambda expression of type Action, and using the parameter within its implementation (code file TaskSamples/Program.cs): Factory
public void TasksUsingThreadPool() { var tf = new TaskFactory(); Task t1 = tf.StartNew(TaskMethod, "using a task factory"); Task t2 = Task.Factory.StartNew(TaskMethod, "factory via a task"); var t3 = new Task(TaskMethod, "using a task constructor and Start"); t3.Start(); Task t4 = Task.Run(() => TaskMethod("using the Run method")); }
The output returned with these variants is as follows. All these versions create a new task, and a thread from the thread pool is used: using a task factory Task id: 1, thread: 4 is pooled thread: True is background thread: True factory via a task Task id: 2, thread: 3 is pooled thread: True is background thread: True using a task constructor and Start Task id: 3, thread: 5 is pooled thread: True is background thread: True
1023
Download from finelybook www.finelybook.com
using the Run method Task id: 4, thread: 6 is pooled thread: True is background thread: True
With both the Task constructor and the StartNew method of the TaskFactory, you can pass values from the enumeration TaskCreationOptions. Using this creation option, you can change how the task should behave differently, as is shown in the next sections. Synchronous Tasks A task does not necessarily mean to use a thread from a thread pool—it can use other threads as well. Tasks can also run synchronously, with the same thread as the calling thread. The following code snippet uses the method RunSynchronously of the Task class (code file TaskSamples/Program.cs): private static void RunSynchronousTask() { TaskMethod("just the main thread"); var t1 = new Task(TaskMethod, "run sync"); t1.RunSynchronously(); }
Here, the TaskMethod is first called directly from the main thread before it is invoked from the newly created Task. As you can see from the following console output, the main thread doesn’t have a task ID. It is not a pooled thread. Calling the method RunSynchronously uses the same thread as the calling thread, but creates a task if one wasn’t created previously: just the main thread Task id: no task, thread: 2 is pooled thread: False is background thread: False run sync Task id: 1, thread: 2 is pooled thread: False is background thread: False
Tasks Using a Separate Thread
1024
Download from finelybook www.finelybook.com
If the code of a task should run for a longer time, you should use TaskCreationOptions.LongRunning to instruct the task scheduler to create a new thread, rather than use a thread from the thread pool. This way, the thread doesn’t need to be managed by the thread pool. When a thread is taken from the thread pool, the task scheduler can decide to wait for an already running task to be completed and use this thread instead of creating a new thread with the pool. With a longrunning thread, the task scheduler knows immediately that it doesn’t make sense to wait for this one. The following code snippet creates a long-running task (code file TaskSamples/Program.cs): private static void LongRunningTask() { var t1 = new Task(TaskMethod, "long running", TaskCreationOptions.LongRunning); t1.Start(); }
Indeed, using the option TaskCreationOptions.LongRunning, a thread from the thread pool is not used. Instead, a new thread is created: long running Task id: 5, thread: 7 is pooled thread: False is background thread: True
Futures—Results from Tasks When a task is finished, it can write some stateful information to a shared object. Such a shared object must be thread-safe. Another option is to use a task that returns a result. Such a task is also known as future as it returns a result in the future. With early versions of the Task Parallel Library (TPL), the class had the name Future as well. Now it is a generic version of the Task class. With this class it is possible to define the type of the result that is returned with a task. A method that is invoked by a task to return a result can be declared with any return type. The following example method TaskWithResult returns two int values with the help of a tuple. The input of the method can be void or of type object, as shown here (code file TaskSamples/Program.cs): 1025
Download from finelybook www.finelybook.com
public static (int Result, int Remainder) TaskWithResult(object division) { (int x, int y) = ((int x, int y))division; int result = x / y; int remainder = x % y; Console.WriteLine("task creates a result..."); return (result, remainder); }
NOTE Tuples allow you to combine multiple values into one. Tuples are explained in Chapter 13, “Functional Programming with C#.” When you define a task to invoke the method TaskWithResult, you use the generic class Task. The generic parameter defines the return type. With the constructor, the method is passed to the Func delegate, and the second parameter defines the input value. Because this task needs two input values in the object parameter, a tuple is created as well. Next, the task is started. The Result property of the Task instance t1 blocks and waits until the task is completed. Upon task completion, the Result property contains the result from the task: public static void TaskWithResultDemo() { var t1 = new Task (TaskWithResult, (8, 3)); t1.Start(); Console.WriteLine(t1.Result); t1.Wait(); Console.WriteLine($"result from task: {t1.Result.Result} " + $"{t1.Result.Remainder}"); }
Continuation Tasks With tasks, you can specify that after a task is finished another specific task should start to run—for example, a new task that uses a result 1026
Download from finelybook www.finelybook.com
from the previous one or should do some cleanup if the previous task failed. Whereas the task handler has either no parameter or one object parameter, the continuation handler has a parameter of type Task. Here, you can access information about the originating task (code file TaskSamples/Program.cs): private static void DoOnFirst() { Console.WriteLine($"doing some task {Task.CurrentId}"); Task.Delay(3000).Wait(); } private static void DoOnSecond(Task t) { Console.WriteLine($"task {t.Id} finished"); Console.WriteLine($"this task id {Task.CurrentId}"); Console.WriteLine("do some cleanup"); Task.Delay(3000).Wait(); }
A continuation task is defined by invoking the ContinueWith method on a task. You could also use the TaskFactory for this. t1.OnContinueWith(DoOnSecond) means that a new task invoking the method DoOnSecond should be started as soon as the task t1 is finished. You can start multiple tasks when one task is finished, and a continuation task can have another continuation task, as this next example demonstrates (code file TaskSamples/Program.cs): public static void ContinuationTasks() { Task t1 = new Task(DoOnFirst); Task t2 = t1.ContinueWith(DoOnSecond); Task t3 = t1.ContinueWith(DoOnSecond); Task t4 = t2.ContinueWith(DoOnSecond); t1.Start(); }
So far, the continuation tasks have been started when the previous task was finished, regardless of the result. With values from TaskContinuationOptions, you can define that a continuation task should only start if the originating task was successful (or faulted). 1027
Download from finelybook www.finelybook.com
Some of the possible values are OnlyOnFaulted, NotOnFaulted, OnlyOnCanceled, NotOnCanceled, and OnlyOnRanToCompletion: Task t5 = t1.ContinueWith(DoOnError, TaskContinuationOptions.OnlyOnFaulted);
NOTE The compiler-generated code from the await keyword discussed in Chapter 15 makes use of continuation tasks.
Task Hierarchies With task continuations, one task is started after another. Tasks can also form a hierarchy. When a task starts a new task, a parent/child hierarchy is started. In the code snippet that follows, within the task of the parent, a new task object is created, and the task is started. The code to create a child task is the same as that to create a parent task. The only difference is that the task is created from within another task (code file TaskSamples/Program.cs): public static void ParentAndChild() { var parent = new Task(ParentTask); parent.Start(); Task.Delay(2000).Wait(); Console.WriteLine(parent.Status); Task.Delay(4000).Wait(); Console.WriteLine(parent.Status); } private static void ParentTask() { Console.WriteLine($"task id {Task.CurrentId}"); var child = new Task(ChildTask); child.Start(); Task.Delay(1000).Wait(); Console.WriteLine("parent started child"); }
1028
Download from finelybook www.finelybook.com
private static void ChildTask() { Console.WriteLine("child"); Task.Delay(5000).Wait(); Console.WriteLine("child finished"); }
If the parent task is finished before the child task, the status of the parent task is shown as WaitingForChildrenToComplete. The parent task is completed with the status RanToCompletion as soon as all children tasks are completed as well. Of course, this is not the case if the parent creates a task with the TaskCreationOption DetachedFromParent. Canceling a parent task also cancels the children. The cancellation framework is discussed next.
Returning Tasks from Methods A method that returns a task with results is declared to return Task —for example, a method that returns a task with a collection of strings: public Task TaskMethodAsync() { }
Creating methods that access the network or data access are often asynchronous, with such a result so you can use task features to deal with the results (for example, by using the async keyword as explained in Chapter 15). In case you have a synchronous path or need to implement an interface that is defined that way with synchronous code, there’s no need to create a task for the sake of the result value. The Task class offers creating a result with a completed task that is finished with the status RanToCompletion using the method FromResult: return Task.FromResult( new List() { "one", "two" });
Waiting for Tasks Probably you’ve already seen the WhenAll and WaitAll methods of the 1029
Download from finelybook www.finelybook.com
class and wondered what the difference might be. Both methods wait for all tasks that are passed to these methods to complete. The WaitAll method blocks the calling task until all tasks that are waited for are completed. The WhenAll method returns a task which in turn allows you to use the async keyword to wait for the result, and it does not block the waiting task. Task
Although the WhenAll and WaitAll methods are finished when all the tasks you are waiting for are completed, you can wait for just one task of a list to be completed with WhenAny and WaitAny. Like the WhenAll and WaitAll methods, the WaitAny method blocks the calling task, whereas WhenAny returns a task that can be awaited. A method that already has been used several times with several samples is the Task.Delay method. You can specify a number of milliseconds to wait before the task that is returned from this method is completed. In case all that should be done is to give up the CPU and thus allow other tasks to run, you can invoke the Task.Yield method. This method gives up the CPU and lets other tasks run. In case no other task is waiting to run, the task calling Task.Yield continues immediately. Otherwise it needs to wait until the CPU is scheduled again for the calling task.
Value Tasks In case a method sometimes runs asynchronously, but not always, the Task class might be some overhead that’s not needed. .NET now offers ValueTask that is a struct compared to the Task that is a class, thus the ValueTask doesn’t have the overhead of an object in the heap. Usually invoking asynchronous methods, such as making calls to an API server or a database, the overhead of the Task type can be ignored compared to the time needed for the work to be done. However, there are some cases where the overhead cannot be ignored, such as when a method is called thousands of times, and it rarely really needs a call across the network. This is a scenario where the ValueTask becomes handy. Let’s get into an example. The method GetTheRealData simulates a method that usually takes a long time, accessing data from the 1030
Download from finelybook www.finelybook.com
network or a database. Here, sample data is generated with the Enumerable class. Together with the time, the data is retrieved, a result in the form of a tuple is returned. This method returns a Task as we are used to (code file ValueTaskSample/Program.cs): public static Task GetTheRealData() => Task.FromResult( (Enumerable.Range(0, 10) .Select(x => $"item {x}").AsEnumerable(), DateTime.Now));
The interesting part now follows in the method GetSomeData. This method is declared to return a ValueTask. With the implementation, first a check is done if cached data is not older than 5 seconds. If the cached data is not older, the cached data is directly returned and passed to the ValueTask constructor. This doesn’t really need a background thread; the data can be directly returned. In case the cache is older, the GetTheRealData method is invoked. This method needs a real task and could occur with some delay (code file ValueTaskSample/Program.cs): private static DateTime _retrieved; private static IEnumerable _cachedData; public static async ValueTask GetSomeDataAsync() { if (_retrieved >= DateTime.Now.AddSeconds(-5)) { Console.WriteLine("data from the cache"); return await new ValueTask (_cachedData); } Console.WriteLine("data from the service"); (_cachedData, _retrieved) = await GetTheRealData(); return _cachedData; }
NOTE 1031
Download from finelybook www.finelybook.com
The constructor of the ValueTask accepts type TResult for the data to be returned, or Task to supply a Task returned from methods that do run asynchronously. The Main method includes a loop to invoke the GetSomeDataAsync method several times with a delay after every iteration (code file ValueTaskSample/Program.cs): static async Task Main(string[] args) { for (int i = 0; i < 20; i++) { IEnumerable data = await GetSomeDataAsync(); await Task.Delay(1000); } Console.ReadLine(); }
When you run the application, you can see that the data is returned from the cache, and after the cache is invalidated, the service is accessed first before the cache is used again. data data data data data data data data data data data data …
from from from from from from from from from from from from
the the the the the the the the the the the the
service cache cache cache cache service cache cache cache cache service cache
NOTE Probably you don’t have scenarios yet where you can’t ignore the overhead from tasks compared to value tasks. However, having this core feature in the framework allows for upcoming features 1032
Download from finelybook www.finelybook.com
such as async streams or async operators in a future C# version.
CANCELLATION FRAMEWORK .NET includes a cancellation framework to enable the canceling of long-running tasks in a standard manner. Every blocking call should support this mechanism. Of course, not every blocking call currently implements this new technology, but more and more are doing so. Among the technologies that offer this mechanism already are tasks, concurrent collection classes, and Parallel LINQ, as well as several synchronization mechanisms. The cancellation framework is based on cooperative behavior; it is not forceful. A long-running task checks whether it is canceled and returns control accordingly. A method that supports cancellation accepts a CancellationToken parameter. This class defines the property IsCancellationRequested, whereby a long operation can check to see whether it should abort. Other ways for a long operation to check for cancellation include using a WaitHandle property that is signaled when the token is canceled or using the Register method. The Register method accepts parameters of type Action and ICancelableOperation. The method that is referenced by the Action delegate is invoked when the token is canceled. This is like the ICancelableOperation, whereby the Cancel method of an object implementing this interface is invoked when the cancellation is done. The sample code for cancellation samples makes use of the following namespaces: Namespaces System System.Threading System.Threading.Tasks
Cancellation of Parallel.For 1033
Download from finelybook www.finelybook.com
This section starts with a simple example using the Parallel.For method. The Parallel class provides overloads for the For method, whereby you can pass a parameter of type ParallelOptions. With ParallelOptions, you can pass a CancellationToken. The CancellationToken is generated by creating a CancellationTokenSource. CancellationTokenSource implements the interface ICancelableOperation and can therefore be registered with the CancellationToken and allows cancellation with the Cancel method. The example doesn’t call the Cancel method directly but uses the CancelAfter method to cancel the token after 500 milliseconds. Within the implementation of the For loop, the Parallel class verifies the outcome of the CancellationToken and cancels the operation. Upon cancellation, the For method throws an exception of type OperationCanceledException, which is caught in the example. With the CancellationToken, it is possible to register for information when the cancellation is done. This is accomplished by calling the Register method and passing a delegate that is invoked on cancellation (code file CancellationSamples/Program.cs): public static void CancelParallelFor() { var cts = new CancellationTokenSource(); cts.Token.Register(() => Console.WriteLine("*** token cancelled")); // send a cancel after 500 ms cts.CancelAfter(500); try { ParallelLoopResult result = Parallel.For(0, 100, new ParallelOptions { CancellationToken = cts.Token, }, x => { Console.WriteLine($"loop {x} started"); int sum = 0; for (int i = 0; i < 100; i++) { Task.Delay(2).Wait(); sum += i; }
1034
Download from finelybook www.finelybook.com
Console.WriteLine($"loop {x} finished"); }); } catch (OperationCanceledException ex) { Console.WriteLine(ex.Message); } }
When you run the application, you get output like the following. Iteration 0, 50, 25, 75, and 1 were all started. This is on a system with a quad-core CPU. With the cancellation, all other iterations were canceled before starting. The iterations that were started are allowed to finish because cancellation is always done in a cooperative way to avoid the risk of resource leaks when iterations are canceled somewhere in between: loop 0 started loop 50 started loop 25 started loop 75 started loop 1 started *** token cancelled loop 75 finished loop 50 finished loop 1 finished loop 0 finished loop 25 finished The operation was canceled.
Cancellation of Tasks The same cancellation pattern is used with tasks. First, a new CancellationTokenSource is created. If you need just one cancellation token, you can use a default token by accessing Task.Factory.CancellationToken. Then, like the previous code, the task is canceled after 500 milliseconds. The task doing the major work within a loop receives the cancellation token via the TaskFactory object. The cancellation token is assigned to the TaskFactory by setting it in the constructor. This cancellation token is used by the task to check whether cancellation is requested by checking the IsCancellationRequested property of the CancellationToken (code file 1035
Download from finelybook www.finelybook.com
CancellationSamples/Program.cs): public void CancelTask() { var cts = new CancellationTokenSource(); cts.Token.Register(() => Console.WriteLine("*** task cancelled")); // send a cancel after 500 ms cts.CancelAfter(500); Task t1 = Task.Run(() => { Console.WriteLine("in task"); for (int i = 0; i < 20; i++) { Task.Delay(100).Wait(); CancellationToken token = cts.Token; if (token.IsCancellationRequested) { Console.WriteLine("cancelling was requested, " + "cancelling from within the task"); token.ThrowIfCancellationRequested(); break; } Console.WriteLine("in loop"); } Console.WriteLine("task finished without cancellation"); }, cts.Token); try { t1.Wait(); } catch (AggregateException ex) { Console.WriteLine($"exception: {ex.GetType().Name}, {ex.Message}"); foreach (var innerException in ex.InnerExceptions) { Console.WriteLine($"inner exception: {ex.InnerException.GetType()}," + $"{ex.InnerException.Message}"); } } }
When you run the application, you can see that the task starts, runs for a few loops, and gets the cancellation request. The task is canceled and 1036
Download from finelybook www.finelybook.com
throws a TaskCanceledException, which is initiated from the method call ThrowIfCancellationRequested. With the caller waiting for the task, you can see that the exception AggregateException is caught and contains the inner exception TaskCanceledException. This is used for a hierarchy of cancellations—for example, if you run a Parallel.For within a task that is canceled as well. The final status of the task is Canceled: in task in loop in loop in loop in loop *** task cancelled cancelling was requested, cancelling from within the task exception: AggregateException, One or more errors occurred. inner exception: TaskCanceledException, A task was canceled.
DATA FLOW The Parallel and Task classes, and Parallel LINQ, help a lot with data parallelism. However, these classes do not directly support dealing with data flow or transforming data in parallel. For this, you can use Task Parallel Library Data Flow, or TPL Data Flow. The sample code for the data flow samples makes use of the following namespaces: Namespaces System System.IO System.Threading System.Threading.Tasks System.Threading.Tasks.DataFlow
Using an Action Block The heart of TPL Data Flow is data blocks. These blocks can act as a 1037
Download from finelybook www.finelybook.com
source to offer some data or a target to receive data, or both. Let’s start with a simple example, a data block that receives some data and writes it to the console. The following code snippet defines an ActionBlock that receives a string and writes information to the console. The Main method reads user input within a while loop, and posts every string read to the ActionBlock by calling the Post method. The Post method posts an item to the ActionBlock, which deals with the message asynchronously, writing the information to the console (code file SimpleDataFlowSample/Program.cs): static void Main() { var processInput = new ActionBlock(s => { Console.WriteLine($"user input: {s}"); }); bool exit = false; while (!exit) { string input = ReadLine(); if (string.Compare(input, "exit", ignoreCase: true) == 0) { exit = true; } else { processInput.Post(input); } } }
Source and Target Blocks When the method assigned to the ActionBlock from the previous example executes, the ActionBlock uses a task to do the execution in parallel. You could verify this by checking the task and thread identifiers and writing these to the console. Every block implements the interface IDataflowBlock, which contains the property Completion, which returns a Task, and the methods Complete and Fault. Invoking the Complete method, the block no longer accepts any input or produces any more output. Invoking the Fault method puts the block into a faulting state. 1038
Download from finelybook www.finelybook.com
As mentioned earlier, a block can be either a source or a target, or both. In this case, the ActionBlock is a target block and thus implements the interface ITargetBlock. ITargetBlock derives from IDataflowBlock and defines the OfferMessage method, in addition to the members of the IDataBlock interface. OfferMessage sends a message that can be consumed by the block. An API that is easier to use than OfferMessage is the Post method, which is implemented as an extension method for the ITargetBlock interface. The Post method was also used by the sample application. The ISourceBlock interface is implemented by blocks that can act as a data source. ISourceBlock offers methods in addition to the members of the IDataBlock interface to link to a target block and to consume messages. The BufferBlock acts as both a source and a target, implementing both ISourceBlock and ITargetBlock. In the next example, this BufferBlock is used to both post messages and receive messages (code file SimpleDataFlowSample/Program.cs): The Producer method reads strings from the console and writes them to the BufferBlock by invoking the Post method: public static void Producer() { bool exit = false; while (!exit) { string input = ReadLine(); if (string.Compare(input, "exit", ignoreCase: true) == 0) { exit = true; } else { s_buffer.Post(input); } }
The Consumer method contains a loop to receive data from the BufferBlock by invoking the ReceiveAsync method. ReceiveAsync is an extension method for the ISourceBlock interface: 1039
Download from finelybook www.finelybook.com
public static async Task ConsumerAsync() { while (true) { string data = await s_buffer.ReceiveAsync(); Console.WriteLine($"user input: {data}"); } }
Now, you just need to start the producer and consumer. You do this with two independent tasks in the Main method: static void Main() { Task t1 = Task.Run(() => Producer()); Task t2 = Task.Run(async () => await ConsumerAsync()); Task.WaitAll(t1, t2); }
When you run the application, the producer task reads data from the console, and the consumer receives the data to write it to the console.
Connecting Blocks This section creates a pipeline by connecting multiple blocks. First, three methods are created that will be used by the blocks. The GetFileNames method receives a directory path and yields the filenames that end with the .cs extension (code file DataFlowSample/Program.cs): public static IEnumerable GetFileNames(string path) { foreach (var fileName in Directory.EnumerateFiles(path, "*.cs")) { yield return fileName; } }
The LoadLines method receives a list of filenames and yields every line of the files: public static IEnumerable LoadLines(IEnumerable fileNames) {
1040
Download from finelybook www.finelybook.com
foreach (var fileName in fileNames) { using (FileStream stream = File.OpenRead(fileName)) { var reader = new StreamReader(stream); string line = null; while ((line = reader.ReadLine()) != null) { //WriteLine($"LoadLines {line}"); yield return line; } } } }
The third method, GetWords, receives the lines collection and splits it up line by line to yield return a list of words: public static IEnumerable GetWords(IEnumerable lines) { foreach (var line in lines) { string[] words = line.Split(' ', ';', '(', ')', '{', '}', '.', ','); foreach (var word in words) { if (!string.IsNullOrEmpty(word)) yield return word; } } }
To create the pipeline, the SetupPipeline method creates three TransformBlock objects. The TransformBlock is a source and target block that transforms the source by using a delegate. The first TransformBlock is declared to transform a string to IEnumerable. The transformation is done by the GetFileNames method that is invoked within the lambda expression passed to the constructor of the first block. Similarly, the next two TransformBlock objects are used to invoke the LoadLines and GetWords methods: public static ITargetBlock SetupPipeline() { var fileNamesForPath = new TransformBlock( path => GetFileNames(path)); var lines = new TransformBlock( fileNames => LoadLines(fileNames)); var words = new TransformBlock( lines2 => GetWords(lines2));
The last block defined is an ActionBlock. This block has been used before and is just a target block to receive data: var display = new ActionBlock( coll => { foreach (var s in coll) { Console.WriteLine(s); } });
Finally, the blocks are connected to each other. fileNamesForPath is linked to the lines block. The result from fileNamesForPath is passed to the lines block. The lines block links to the words block, and the words block links to the display block. Last, the block to start the pipeline is returned: fileNamesForPath.LinkTo(lines); lines.LinkTo(words); words.LinkTo(display); return fileNamesForPath; }
The Main method now needs to kick off the pipeline. Invoking the Post method to pass a directory, the pipeline starts and finally writes words from the C# source code to the console. Here, it would be possible to start multiple requests for the pipeline, passing more than one directory, and doing these tasks in parallel: static void Main() { var target = SetupPipeline(); target.Post(".");
1042
Download from finelybook www.finelybook.com
Console.ReadLine(); }
With this brief introduction to the TPL Data Flow library, you’ve seen the principal way to work with this technology. This library offers a lot more functionality, such as different blocks that deal with data differently. The BroadcastBlock allows passing the input source to multiple targets (for example, writing data to a file and displaying it), the JoinBlock joins multiple sources to one target, and the BatchBlock batches input into arrays. Using DataflowBlockOptions options allows configuration of a block, such as the maximum number of items that are processed within a single task and passing a cancellation token that allows canceling a pipeline. With links, you can also filter messages and only pass messages that fulfill a specified predicate.
TIMERS With a timer, you can do a repeat invocation of a method. Two timers will be covered in this section: the Timer class from the System.Threading namespace and the DispatcherTimer for XAMLbased apps. Using the System.Threading.Timer class, you can pass the method to be invoked as the first parameter in the constructor. This method must fulfill the requirements of the TimerCallback delegate, which defines a void return type and an object parameter. With the second parameter of the constructor, you can pass any object, which is then received with the object argument in the callback method. For example, you can pass an Event object to signal the caller. The third parameter specifies the time span during which the callback should be invoked the first time. With the last parameter, you specify the repeating interval for the callback. If the timer should fire only once, set the fourth parameter to the value –1. If the time interval should be changed after creating the Timer object, you can pass new values with the Change method (code file TimerSample/Program.cs): private static void ThreadingTimer() {
1043
Download from finelybook www.finelybook.com
void TimeAction(object o) => Console.WriteLine($"System.Threading.Timer {DateTime.Now:T}"); using (var t1 = new Timer(TimeAction, null, TimeSpan.FromSeconds(2), TimeSpan.FromSeconds(3))) { Task.Delay(15000).Wait(); } }
The DispatcherTimer from the namespace Windows.UI.Xaml (for UWP apps) is a timer for XAML-based apps where the event handler is called within the UI thread, thus it is possible to directly access user interface elements. The sample application to demonstrate the DispatcherTimer is a Windows app that shows the hand of a clock that switches every second. The following XAML code defines the commands that enable you to start and stop the clock (code file WinAppTimer/MainPage.xaml):
The hand of the clock is defined using the shape Line. To rotate the line, you use a RotateTransform element:
1044
Download from finelybook www.finelybook.com
NOTE XAML shapes are explained in Chapter 35, “Styling XAML Apps.” The DispatcherTimer object is created in the MainPage class. In the constructor, the handler method is assigned to the Tick event, and the Interval is specified to be one second. The timer is started in the OnTimer method—the method that gets called when the user clicks the Play button in the CommandBar (code file WinAppTimer/MainPage.xaml.cs): private DispatcherTimer _timer = new DispatcherTimer(); public MainPage() { this.InitializeComponent(); _timer.Tick += OnTick; _timer.Interval = TimeSpan.FromSeconds(1); } private void OnTimer() { _timer.Start(); } private void OnTick(object sender, object e) { double newAngle = rotate.Angle + 6; if (newAngle >= 360) newAngle = 0; rotate.Angle = newAngle; } private void OnStopTimer() { _timer.Stop(); }
When you run the application, the clock hand is shown (see Figure 211).
1045
Download from finelybook www.finelybook.com
FIGURE 21-1
THREADING ISSUES Programming with multiple threads is challenging. When starting multiple threads that access the same data, you can get intermittent problems that are hard to find. The problems are the same whether you use tasks, Parallel LINQ, or the Parallel class. To avoid getting into trouble, you must pay attention to synchronization issues and the problems that can occur with multiple threads. This section covers two in particular: race conditions and deadlocks.
NOTE 1046
Download from finelybook www.finelybook.com
Before synchronizing custom collection classes with the synchronization types shown here, you should also read Chapter 11, “Special Collections,” to learn about collections that are already thread-safe: concurrent collections. The sample code for the ThreadingIssues sample makes use of these namespaces: System.Diagnostics System.Threading System.Threading.Tasks static System.Console
You can start the sample application ThreadingIssues with commandline arguments to simulate either race conditions or deadlocks.
Race Conditions A race condition can occur if two or more threads access the same objects and access to the shared state is not synchronized. To demonstrate a race condition, the following example defines the class StateObject, with an int field and the method ChangeState. In the implementation of ChangeState, the state variable is verified to determine whether it contains 5; if it does, the value is incremented. Trace.Assert is the next statement, which immediately verifies that state now contains the value 6. After incrementing by 1 a variable that contains the value 5, you might assume that the variable now has the value 6; but this is not necessarily the case. For example, if one thread has just completed the if (_state == 5) statement, it might be preempted, with the scheduler running another thread. The second thread now goes into the if body and, because the state still has the value 5, the state is incremented by 1 to 6. The first thread is then scheduled again, and in the next statement the state is incremented to 7. This is when the race condition occurs, and the assert message is shown (code file ThreadingIssues/SampleTask.cs): 1047
Download from finelybook www.finelybook.com
public class StateObject { private int _state = 5; public void ChangeState(int loop) { if (_state == 5) { _state++; if (_state != 6) { Console.WriteLine($"Race condition occurred after {loop} loops"); Trace.Fail("race condition"); } } _state = 5; } }
You can verify this by defining a method for a task. The method RaceCondition of the class SampleTask gets a StateObject as a parameter. Inside an endless while loop, the ChangeState method is invoked. The variable i is used just to show the loop number in the assert message: public class SampleTask { public void RaceCondition(object o) { Trace.Assert(o is StateObject, "o must be of type StateObject"); StateObject state = o as StateObject; int i = 0; while (true) { state.ChangeState(i++); } } }
In the Main method of the program, a new StateObject is created that is shared among all the tasks. Task objects are created by invoking the RaceCondition method with the lambda expression that is passed to the Run method of the Task. The main thread then waits for user input. However, there’s a good chance that the program will halt before 1048
Download from finelybook www.finelybook.com
reading user input because a race condition will happen: public void RaceConditions() { var state = new StateObject(); for (int i = 0; i < 2; i++) { Task.Run(() => new SampleTask().RaceCondition(state)); } }
When you start the program, you get race conditions. How long it takes until the first race condition happens depends on your system and whether you build the program as a release build or a debug build. With a release build, the problem happens more often because the code is optimized. If you have multiple CPUs in your system or dual/quad-core CPUs, where multiple threads can run concurrently, the problem also occurs more often than with a single-core CPU. The problem occurs with a single-core CPU because thread scheduling is preemptive, but the problem doesn’t occur that often. In one run of the program on my system, I saw an error after 85,232 loops; in another run, the error manifested after 70,037 loops. If you start the application multiple times, you always get different results. You can avoid the problem by locking the shared object. You do this inside the thread by locking the variable state, which is shared among the threads, with the lock statement, as shown in the following example. Only one thread can exist inside the lock block for the state object. Because this object is shared among all threads, a thread must wait at the lock if another thread has the lock for state. As soon as the lock is accepted, the thread owns the lock and gives it up at the end of the lock block. If every thread changing the object referenced with the state variable is using a lock, the race condition no longer occurs: public class SampleTask { public void RaceCondition(object o) { Trace.Assert(o is StateObject, "o must be of type StateObject"); StateObject state = o as StateObject; int i = 0;
1049
Download from finelybook www.finelybook.com
while (true) { lock (state) // no race condition with this lock { state.ChangeState(i++); } } } }
NOTE With the downloaded sample code, you need to uncomment the lock statements for solving the issues with race conditions. Instead of performing the lock when using the shared object, you can make the shared object thread-safe. In the following code, the ChangeState method contains a lock statement. Because you cannot lock the state variable itself (only reference types can be used for a lock), the variable sync of type object is defined and used with the lock statement. If a lock is done using the same synchronization object every time the value state is changed, race conditions no longer happen: public class StateObject { private int _state = 5; private _object sync = new object(); public void ChangeState(int loop) { lock (_sync) { if (_state == 5) { _state++; if (_state != 6) { Console.WriteLine($"Race condition occured after {loop} loops"); Trace.Fail($"race condition at {loop}"); }
1050
Download from finelybook www.finelybook.com
} _state = 5; } } }
Deadlocks Too much locking can get you in trouble as well. In a deadlock, at least two threads halt and wait for each other to release a lock. As both threads wait for each other, a deadlock occurs, and the threads wait endlessly. To demonstrate deadlocks, the following code instantiates two objects of type StateObject and passes them with the constructor of the SampleTask class. Two tasks are created: one task running the method Deadlock1 and the other task running the method Deadlock2 (code file ThreadingIssues/Program.cs): var var new new
state1 = state2 = Task(new Task(new
new StateObject(); new StateObject(); SampleTask(state1, state2).Deadlock1).Start(); SampleTask(state1, state2).Deadlock2).Start();
The methods Deadlock1 and Deadlock2 now change the state of two objects: s1 and s2. That’s why two locks are generated. Deadlock1 first does a lock for s1 and next for s2. Deadlock2 first does a lock for s2 and then for s1. Now, occasionally the lock for s1 in Deadlock1 is resolved. Next, a thread switch occurs, and Deadlock2 starts to run and gets the lock for s2. The second thread now waits for the lock of s1. Because it needs to wait, the thread scheduler schedules the first thread again, which now waits for s2. Both threads now wait and don’t release the lock as long as the lock block is not ended. This is a typical deadlock (code file ThreadingIssues/SampleTask.cs): public class SampleTask { public SampleTask(StateObject s1, StateObject s2) { _s1 = s1; _s2 = s2; } private StateObject _s1;
1051
Download from finelybook www.finelybook.com
private StateObject _s2; public void Deadlock1() { int i = 0; while (true) { lock (_s1) { lock (_s2) { _s1.ChangeState(i); _s2.ChangeState(i++); Console.WriteLine($"still running, {i}"); } } } } public void Deadlock2() { int i = 0; while (true) { lock (_s2) { lock (_s1) { _s1.ChangeState(i); _s2.ChangeState(i++); Console.WriteLine($"still running, {i}"); } } } } }
As a result, the program runs some loops and soon becomes unresponsive. The message “still running” is written a few times to the console. Again, how soon the problem occurs depends on your system configuration, and the result will vary. A deadlock problem is not always as obvious as it is here. One thread locks _s1 and then _s2; the other thread locks _s2 and then _s1. In this case, you just need to change the order so that both threads perform the locks in the same order. In a bigger application, the locks 1052
Download from finelybook www.finelybook.com
might be hidden deeply inside a method. You can prevent this problem by designing a good lock order in the initial architecture of the application, and by defining timeouts for the locks, as demonstrated in the next section.
THE LOCK STATEMENT AND THREAD SAFETY C# has its own keyword for the synchronization of multiple threads: the lock statement. The lock statement provides an easy way to hold and release a lock. Before adding lock statements, however, let’s look at another race condition. The class SharedState demonstrates using shared state between threads and shares an integer value (code file SynchronizationSamples/SharedState.cs): public class SharedState { public int State { get; set; } }
The sample code for all the following synchronization samples uses the following namespaces: System System.Collections.Generic System.Linq System.Text System.Threading System.Threading.Tasks
The class Job contains the method DoTheJob, which is the entry point for a new task. With the implementation, the State of the SharedState object is incremented 50,000 times. The variable sharedState is initialized in the constructor of this class (code file SynchronizationSamples/Job.cs): public class Job { private SharedState _sharedState;
1053
Download from finelybook www.finelybook.com
public Job(SharedState sharedState) { _sharedState = sharedState; } public void DoTheJob() { for (int i = 0; i < 50000; i++) { _sharedState.State += 1; } } }
In the Main method, a SharedState object is created and passed to the constructor of 20 Task objects. All tasks are started. After starting the tasks, the Main method waits until every one of the 20 tasks is completed. After the tasks are completed, the summarized value of the shared state is written to the console. With 50,000 loops and 20 tasks, a value of 1,000,000 could be expected. Often, however, this is not the case (code file SynchronizationSamples/Program.cs): class Program { static void Main() { int numTasks = 20; var state = new SharedState(); var tasks = new Task[numTasks]; for (int i = 0; i < numTasks; i++) { tasks[i] = Task.Run(() => new Job(state).DoTheJob()); } Task.WaitAll(tasks); Console.WriteLine($"summarized {state.State}"); } }
The results of multiple runs of the application are as follows: summarized summarized summarized summarized summarized
424687 465708 581754 395571 633601
1054
Download from finelybook www.finelybook.com
The behavior is different every time, but none of the results are correct. As noted earlier, you will see big differences between debug and release builds, and the type of CPU that you are using also affects results. If you change the loop count to smaller values, you often will get correct values—but not every time. In this case the application is small enough to see the problem easily; in a large application, the reason for such a problem can be hard to find. You must add synchronization to this program. To do so, use the lock keyword. Defining the object with the lock statement means that you wait to get the lock for the specified object. You can pass only a reference type. Locking a value type would just lock a copy, which wouldn’t make any sense. In any case, the C# compiler issues an error if value types are used with the lock statement. As soon as the lock is granted—only one thread gets the lock—the block of the lock statement can run. At the end of the lock statement block, the lock for the object is released, and another thread waiting for the lock can be granted access to it: lock (obj) { // synchronized region }
To lock static members, you can place the lock on the type object or a static member: lock (typeof(StaticClass)) { }
You can make the instance members of a class thread-safe by using the lock keyword. This way, only one thread at a time can access the methods DoThis and DoThat for the same instance: public class Demo { public void DoThis() { lock (this) { // only one thread at a time can access the DoThis and
1055
Download from finelybook www.finelybook.com
DoThat methods } } public void DoThat() { lock (this) { } } }
However, because the object of the instance can also be used for synchronized access from the outside, and you can’t control this from the class itself, you can apply the SyncRoot pattern. With the SyncRoot pattern, a private object named _syncRoot is created, and this object is used with the lock statements: public class Demo { private object _syncRoot = new object(); public void DoThis() { lock (_syncRoot) { // only one thread at a time can access the DoThis and DoThat methods } } public void DoThat() { lock (_syncRoot) { } } }
Using locks costs time and is not always necessary. You can create two versions of a class: synchronized and unsynchronized. This is demonstrated in the next example code by changing the class Demo. The class Demo is not synchronized, as shown in the implementation of the DoThis and DoThat methods. The class also defines the IsSynchronized property, whereby the client can get information about the synchronization option of the class. To make a synchronized 1056
Download from finelybook www.finelybook.com
variant of the Demo class, you use the static method Synchronized to pass an unsynchronized object, and this method returns an object of type SynchronizedDemo. SynchronizedDemo is implemented as an inner class that is derived from the base class Demo and overrides the virtual members of the base class. The overridden members make use of the SyncRoot pattern: public class Demo { private class SynchronizedDemo: Demo { private object _syncRoot = new object(); private Demo _d; public SynchronizedDemo(Demo d) { _d = d; } public override bool IsSynchronized => true; public override void DoThis() { lock (_syncRoot) { _d.DoThis(); } } public override void DoThat() { lock (_syncRoot) { _d.DoThat(); } } } public virtual bool IsSynchronized => false; public static Demo Synchronized(Demo d) { if (!d.IsSynchronized) { return new SynchronizedDemo(d); } return d;
1057
Download from finelybook www.finelybook.com
} public virtual void DoThis() { } public virtual void DoThat() { } }
Bear in mind that when you use the SynchronizedDemo class, only methods are synchronized. There is no synchronization for invoking other members of this class. Now, change the SharedState class that was not synchronized at first to use the SyncRoot pattern. If you try to make the SharedState class thread-safe by locking access to the properties with the SyncRoot pattern, you still get the race condition shown earlier in the “Race Conditions” section: public class SharedState { private int _state = 0; private object _syncRoot = new object(); public int State // there's still a race condition, // don't do this! { get { lock (_syncRoot) { return _state; }} set { lock (_syncRoot) { _state = value; }} } }
The thread that invokes the DoTheJob method is accessing the get accessor of the SharedState class to get the current value of the state, and then the set accessor sets the new value for the state. In between calling the get and set accessors, the object is not locked, and another thread can read the interim value (code file SynchronizationSamples/Job.cs): public void DoTheJob() { for (int i = 0; i < 50000; i++) { _sharedState.State += 1;
1058
Download from finelybook www.finelybook.com
} }
Therefore, it is better to leave the SharedState class as it was earlier, without thread safety (code file SynchronizationSamples/SharedState.cs): public class SharedState { public int State { get; set; } }
In addition, add the lock statement where it belongs, inside the method DoTheJob (code file SynchronizationSamples/Job.cs): public void DoTheJob() { for (int i = 0; i < 50000; i++) { lock (_sharedState) { _sharedState.State += 1; } } }
This way, the results of the application are always as expected.
NOTE Using the lock statement in one place does not mean that all other threads accessing the object are waiting. You have to explicitly use synchronization with every thread accessing the shared state. Of course, you can also change the design of the SharedState class and offer incrementing as an atomic operation. This is a design question— what should be an atomic functionality of the class? The next code snippet just keeps the increment locked: public class SharedState {
1059
Download from finelybook www.finelybook.com
private int _state = 0; private object _syncRoot = new object(); public int State => _state; public int IncrementState() { lock (_syncRoot) { return ++_state; } } }
There is, however, a faster way to lock the increment of the state, as shown in the next section.
INTERLOCKED The Interlocked class is used to make simple statements for variables atomic. i++ is not thread-safe. It consists of getting a value from the memory, incrementing the value by 1, and storing the value back in memory. These operations can be interrupted by the thread scheduler. The Interlocked class provides methods for incrementing, decrementing, exchanging, and reading values in a thread-safe manner. Using the Interlocked class is much faster than other synchronization techniques. However, you can use it only for simple synchronization issues. For example, instead of using the lock statement to lock access to the variable someState when setting it to a new value, in case it is null, you can use the Interlocked class, which is faster: lock (this) { if (_someState == null) { _someState = newState; } }
The faster version with the same functionality uses the Interlocked.CompareExchange method. 1060
Download from finelybook www.finelybook.com
Instead of performing incrementing inside a lock statement as shown here: public int State { get { lock (this) { return ++_state; } } }
you can use Interlocked.Increment, which is faster: public int State { get => Interlocked.Increment(ref _state); }
MONITOR The C# compiler resolves the lock statement to use the Monitor class. The following lock statement lock (obj) { // synchronized region for obj }
is resolved to invoke the Enter method, which waits until the thread gets the lock of the object. Only one thread at a time may be the owner of the object lock. As soon as the lock is resolved, the thread can enter the synchronized section. The Exit method of the Monitor class releases the lock. The compiler puts the Exit method into a finally handler of a try block so that the lock is also released if an exception is thrown: Monitor.Enter(obj); try { // synchronized region for obj }
1061
Download from finelybook www.finelybook.com
finally { Monitor.Exit(obj); }
NOTE Chapter 14, “Errors and Exceptions,” covers the try/finally block. The Monitor class has a big advantage over the lock statement of C#: You can add a timeout value for waiting to get the lock. Therefore, instead of endlessly waiting to get the lock, you can use the TryEnter method shown in the following example, passing a timeout value that defines the maximum amount of time to wait for the lock. If the lock for obj is acquired, TryEnter sets the Boolean ref parameter to true and performs synchronized access to the state guarded by the object obj. If obj is locked for more than 500 milliseconds by another thread, TryEnter sets the variable lockTaken to false, and the thread does not wait any longer but is used to do something else. Maybe later, the thread can try to acquire the lock again. bool _lockTaken = false; Monitor.TryEnter(_obj, 500, ref _lockTaken); if (_lockTaken) { try { // acquired the lock // synchronized region for obj } finally { Monitor.Exit(obj); } } else { // didn't get the lock, do something else }
1062
Download from finelybook www.finelybook.com
SPINLOCK If the overhead on object-based lock objects (Monitor) would be too high because of garbage collection, you can use the SpinLock struct. SpinLock is useful if you have many locks (for example, for every node in a list) and hold times are always extremely short. You should avoid holding more than one SpinLock, and don’t call anything that might block. Other than the architectural differences, SpinLock is very similar in usage to the Monitor class. You acquire the lock with Enter or TryEnter and release the lock with Exit. SpinLock also offers two properties to provide information about whether it is currently locked: IsHeld and IsHeldByCurrentThread.
NOTE Be careful when passing SpinLock instances around. Because SpinLock is defined as a struct, assigning one variable to another creates a copy. Always pass SpinLock instances by reference.
WAITHANDLE is an abstract base class that you can use to wait for a signal to be set. You can wait for different things, because WaitHandle is a base class and some classes are derived from it. WaitHandle
With WaitHandle, you can wait for one signal to occur (WaitOne), multiple objects that all must be signaled (WaitAll), or one of multiple objects (WaitAny). WaitAll and WaitAny are static members of the WaitHandle class and accept an array of WaitHandle parameters. has a SafeWaitHandle property with which you can assign a native handle to an operating system resource and wait for that handle. For example, you can assign a SafeFileHandle to wait for a file I/O operation to complete. WaitHandle
1063
Download from finelybook www.finelybook.com
The classes Mutex, EventWaitHandle, and Semaphore are derived from the base class WaitHandle, so you can use any of these with waits.
MUTEX (mutual exclusion) is one of the classes of the .NET Framework that offers synchronization across multiple processes. It is very similar to the Monitor class in that there is just one owner. That is, only one thread can get a lock on the mutex and access the synchronized code regions that are secured by the mutex. Mutex
With the constructor of the Mutex class, you can define whether the mutex should initially be owned by the calling thread, define a name for the mutex, and determine whether the mutex already exists. In the following example, the third parameter is defined as an out parameter to receive a Boolean value if the mutex was newly created. If the value returned is false, the mutex was already defined. The mutex might be defined in a different process, because a mutex with a name is known to the operating system and is shared among different processes. If no name is assigned to the mutex, the mutex is unnamed and not shared among different processes. bool createdNew; var mutex = new Mutex(false, "ProCSharpMutex", out createdNew);
To open an existing mutex, you can also use the method Mutex.OpenExisting, which doesn’t require the same .NET privileges as creating the mutex with the constructor. Because the Mutex class derives from the base class WaitHandle, you can do a WaitOne to acquire the mutex lock and be the owner of the mutex during that time. The mutex is released by invoking the ReleaseMutex method: if (mutex.WaitOne()) { try { // synchronized region }
1064
Download from finelybook www.finelybook.com
finally { mutex.ReleaseMutex(); } } else { // some problem happened while waiting }
Because a named mutex is known system-wide, you can use it to keep an application from being started twice. In the following console application, the constructor of the Mutex object is invoked. Then it is verified whether the mutex with the name SingletonAppMutex exists already. If it does, the application exits (code file SingletonUsingMutex/Program.cs): static void Main() { bool mutexCreated; var mutex = new Mutex(false, "SingletonAppMutex", out mutexCreated); if (!mutexCreated) { Console.WriteLine("You can only start one instance of the application."); Console.WriteLine("Exiting."); return; } Console.WriteLine("Application running"); Console.WriteLine("Press return to exit"); Console.ReadLine(); }
SEMAPHORE A semaphore is very similar to a mutex, but unlike the mutex, the semaphore can be used by multiple threads at once. A semaphore is a counting mutex, meaning that with a semaphore you can define the number of threads that are allowed to access the resource guarded by the semaphore simultaneously. This is useful if you need to limit the number of threads that can access the available resources. For example, if a system has three physical I/O ports available, three 1065
Download from finelybook www.finelybook.com
threads can access them simultaneously, but a fourth thread needs to wait until the resource is released by one of the other threads. .NET Core provides two classes with semaphore functionality: Semaphore and SemaphoreSlim. Semaphore can be named, can use system-wide resources, and allows synchronization between different processes. SemaphoreSlim is a lightweight version that is optimized for shorter wait times. In the following example application, in the Main method six tasks are created along with one semaphore with a count of 3. In the constructor of the Semaphore class, you can define the count for the number of locks that can be acquired with the semaphore (the second parameter) and the number of locks that are free initially (the first parameter). If the first parameter has a lower value than the second parameter, the difference between the values defines the already allocated semaphore count. As with the mutex, you can also assign a name to the semaphore to share it among different processes. Here a SemaphoreSlim object is created that can only be used within the process. After the SemaphoreSlim object is created, six tasks are started, and they all wait for the same semaphore (code file SemaphoreSample/Program.cs): class Program { static void Main() { int taskCount = 6; int semaphoreCount = 3; var semaphore = new SemaphoreSlim(semaphoreCount, semaphoreCount); var tasks = new Task[taskCount]; for (int i = 0; i < taskCount; i++) { tasks[i] = Task.Run(() => TaskMain(semaphore)); } Task.WaitAll(tasks); Console.WriteLine("All tasks finished"); } //...
In the task’s main method, TaskMain, the task does a Wait to lock the semaphore. Remember that the semaphore has a count of 3, so three 1066
Download from finelybook www.finelybook.com
tasks can acquire the lock. Task 4 must wait, and here the timeout of 600 milliseconds is defined as the maximum wait time. If the lock cannot be acquired after the wait time has elapsed, the task writes a message to the console and repeats the wait in a loop. As soon as the lock is acquired, the thread writes a message to the console, sleeps for some time, and releases the lock. Again, with the release of the lock it is important that the resource be released in all cases. That’s why the Release method of the SemaphoreSlim class is invoked in a finally handler (code file SemaphoreSample/Program.cs): // ... public static void TaskMain(SemaphoreSlim semaphore) { bool isCompleted = false; while (!isCompleted) { if (semaphore.Wait(600)) { try { Console.WriteLine($"Task {Task.CurrentId} locks the semaphore"); Task.Delay(2000).Wait(); } finally { Console.WriteLine($"Task {Task.CurrentId} releases the semaphore"); semaphore.Release(); isCompleted = true; } } else { Console.WriteLine($"Timeout for task {Task.CurrentId}; wait again"); } } }
When you run the application, you can indeed see that with four threads, the lock is made immediately. The tasks with IDs 7, 8, and 9 must wait. The wait continues in the loop until one of the other threads releases the semaphore: 1067
Download from finelybook www.finelybook.com
Task 4 locks the semaphore Task 5 locks the semaphore Task 6 locks the semaphore Timeout for task 7; wait again Timeout for task 7; wait again Timeout for task 8; wait again Timeout for task 7; wait again Timeout for task 8; wait again Timeout for task 7; wait again Timeout for task 9; wait again Timeout for task 8; wait again Task 5 releases the semaphore Task 7 locks the semaphore Task 6 releases the semaphore Task 4 releases the semaphore Task 8 locks the semaphore Task 9 locks the semaphore Task 8 releases the semaphore Task 7 releases the semaphore Task 9 releases the semaphore All tasks finished
EVENTS Like mutex and semaphore objects, events are also system-wide synchronization resources. For using system events from managed code, the .NET Framework offers the classes ManualResetEvent, AutoResetEvent, ManualResetEventSlim, and CountdownEvent in the namespace System.Threading.
NOTE The event keyword from C# that is covered in Chapter 8, “Delegates, Lambdas, and Events,” has nothing to do with the event classes from the namespace System.Threading; the event keyword is based on delegates. However, both event classes are .NET wrappers to the system-wide native event resource for synchronization. You can use events to inform other tasks that some data is present, 1068
Download from finelybook www.finelybook.com
that something is completed, and so on. An event can be signaled or not signaled. A task can wait for the event to be in a signaled state with the help of the WaitHandle class, discussed earlier. A ManualResetEventSlim is signaled by invoking the Set method, and it’s returned to a nonsignaled state with the Reset method. If multiple threads are waiting for an event to be signaled and the Set method is invoked, then all threads waiting are released. In addition, if a thread invokes the WaitOne method but the event is already signaled, the waiting thread can continue immediately. An AutoResetEvent is also signaled by invoking the Set method, and you can set it back to a nonsignaled state with the Reset method. However, if a thread is waiting for an auto-reset event to be signaled, the event is automatically changed into a nonsignaled state when the wait state of the first thread is finished. This way, if multiple threads are waiting for the event to be set, only one thread is released from its wait state. It is not the thread that has been waiting the longest for the event to be signaled, but the thread waiting with the highest priority. To demonstrate events with the ManualResetEventSlim class, the following class Calculator defines the method Calculation, which is the entry point for a task. With this method, the task receives input data for calculation and writes the result to the variable result that can be accessed from the Result property. As soon as the result is completed (after a random amount of time), the event is signaled by invoking the Set method of the ManualResetEventSlim (code file EventSample/Calculator.cs): public class Calculator { private ManualResetEventSlim _mEvent; public int Result { get; private set; } public Calculator(ManualResetEventSlim ev) { _mEvent = ev; } public void Calculation(int x, int y) { Console.WriteLine($"Task {Task.CurrentId} starts
1069
Download from finelybook www.finelybook.com
calculation"); Task.Delay(new Random().Next(3000)).Wait(); Result = x + y; // signal the event-completed! Console.WriteLine($"Task {Task.CurrentId} is ready"); _mEvent.Set(); } }
The Main method of the program defines arrays of four ManualResetEventSlim objects and four Calculator objects. Every Calculator is initialized in the constructor with a ManualResetEventSlim object, so every task gets its own event object to signal when it is completed. Now, the Task class is used to enable different tasks to run the calculation (code file EventSample/Program.cs): class Program { static void Main() { const int taskCount = 4; var mEvents = new ManualResetEventSlim[taskCount]; var waitHandles = new WaitHandle[taskCount]; var calcs = new Calculator[taskCount]; for (int i = 0; i < taskCount; i++) { int i1 = i; mEvents[i] = new ManualResetEventSlim(false); waitHandles[i] = mEvents[i].WaitHandle; calcs[i] = new Calculator(mEvents[i]); Task.Run(() => calcs[i1].Calculation(i1 + 1, i1 + 3)); } //...
The WaitHandle class is now used to wait for any one of the events in the array. WaitAny waits until any one of the events is signaled. In contrast to ManualResetEvent, ManualResetEventSlim does not derive from WaitHandle. That’s why a separate collection of WaitHandle objects is kept, which is filled from the WaitHandle property of the ManualResetEventSlim class. WaitAny returns an index value that provides information about the event that was signaled. The returned value matches the index of the WaitHandle array that is passed to 1070
Download from finelybook www.finelybook.com
WaitAny.
Using this index, information from the signaled event can be
read: for (int i = 0; i < taskCount; i++) { int index = WaitHandle.WaitAny(waitHandles); if (index == WaitHandle.WaitTimeout) { Console.WriteLine("Timeout!!"); } else { mEvents[index].Reset(); Console.WriteLine($"finished task for {index}, result: {calcs[index].Result}"); } }
When starting the application, you can see the tasks doing the calculation and setting the event to inform the main thread that it can read the result. At random times, depending on whether the build is a debug or release build and on your hardware, you might see different orders and a different number of tasks performing calls: Task 4 starts calculation Task 5 starts calculation Task 6 starts calculation Task 7 starts calculation Task 7 is ready finished task for 3, result: Task 4 is ready finished task for 0, result: Task 6 is ready finished task for 1, result: Task 5 is ready finished task for 2, result:
10 4 6 8
In a scenario like this, to fork some work into multiple tasks and later join the result, the new CountdownEvent class can be very useful. Instead of creating a separate event object for every task, you need to create only one. CountdownEvent defines an initial number for all the tasks that set the event, and after the count is reached, the CountdownEvent is signaled. The Calculator class is modified to use the CountdownEvent instead of 1071
Download from finelybook www.finelybook.com
the ManualResetEvent. Rather than set the signal with the Set method, CountdownEvent defines the Signal method (code file EventSampleWithCountdownEvent/Calculator.cs): public class Calculator { private CountdownEvent _cEvent; public int Result { get; private set; } public Calculator(CountdownEvent ev) { _cEvent = ev; } public void Calculation(int x, int y) { Console.WriteLine($"Task {Task.CurrentId} starts calculation"); Task.Delay(new Random().Next(3000)).Wait(); Result = x + y; // signal the event-completed! Console.WriteLine($"Task {Task.CurrentId} is ready"); _cEvent.Signal(); } }
You can now simplify the Main method so that it’s only necessary to wait for the single event. If you don’t deal with the results separately as it was done before, this new edition might be all that’s needed: const int taskCount = 4; var cEvent = new CountdownEvent(taskCount); var calcs = new Calculator[taskCount]; for (int i = 0; i < taskCount; i++) { calcs[i] = new Calculator(cEvent); int i1 = i; Task.Run(() => calcs[i1].Calculation, Tuple.Create(i1 + 1, i1 + 3)); } cEvent.Wait(); Console.WriteLine("all finished"); for (int i = 0; i < taskCount; i++) { Console.WriteLine($"task for {i}, result:
1072
Download from finelybook www.finelybook.com
{calcs[i].Result}"); }
BARRIER For synchronization, the Barrier class is great for scenarios in which work is forked into multiple tasks and the work must be joined afterward. Barrier is used for participants that need to be synchronized. While the job is active, you can dynamically add participants—for example, child tasks that are created from a parent task. Participants can wait until the work is done by all the other participants before continuing. The BarrierSample is somewhat complex, but it’s worthwhile to demonstrate the features of the Barrier type. The sample creates multiple collections of two million random strings. Multiple tasks are used to iterate through the collection and count the number of strings, starting with a, b, c, and so on. The work is not only distributed between different tasks, but also within a task. After all tasks are iterated through the first collection of strings, the result is summarized, and the tasks continue later with the next collection. The method FillData creates a collection and fills it with random strings (code file BarrierSample/Program.cs): public static IEnumerable FillData(int size) { var r = new Random(); return Enumerable.Range(0, size).Select(x => GetString(r)); } private static string GetString(Random r) { var sb = new StringBuilder(6); for (int i = 0; i < 6; i++) { sb.Append((char)(r.Next(26) + 97)); } return sb.ToString(); }
A helper method to show information about a Barrier is defined with the method LogBarrierInformation: 1073
Download from finelybook www.finelybook.com
private static void LogBarrierInformation(string info, Barrier barrier) { Console.WriteLine($"Task {Task.CurrentId}: {info}. " + $"{barrier.ParticipantCount} current and " + $"{barrier.ParticipantsRemaining} remaining participants, " + $"phase {barrier.CurrentPhaseNumber}"); }
The CalculationInTask method defines the job performed by a task. With the parameters, the third parameter references the Barrier instance. The data that is used for the calculation is an array of IList. The last parameter, a jagged int array, will be used to write the results as the task progresses. The task makes the processing in a loop. With every loop, an array element of IList[] is processed. After every loop is completed, the Task signals that it’s ready by invoking the SignalAndWait method, and it waits until all the other tasks are ready with this processing as well. This loop continues until the task is fully finished. Then the task removes itself from the barrier by invoking the method RemoveParticipant (code file BarrierSample/Program.cs): private static void CalculationInTask(int jobNumber, int partitionSize, Barrier barrier, IList[] coll, int loops, int[][] results) { LogBarrierInformation("CalculationInTask started", barrier); for (int i = 0; i < loops; i++) { var data = new List(coll[i]); int start = jobNumber * partitionSize; int end = start + partitionSize; Console.WriteLine($"Task {Task.CurrentId} in loop {i}: partition " + $"from {start} to {end}"); for (int j = start; j < end; j++) { char c = data[j][0]; results[i][c - 97]++; } Console.WriteLine($"Calculation completed from task
1074
Download from finelybook www.finelybook.com
{Task.CurrentId} " + $"in loop {i}. {results[i][0]} times a, {results[i] [25]} times z"); LogBarrierInformation("sending signal and wait for all", barrier); barrier.SignalAndWait(); LogBarrierInformation("waiting completed", barrier); } barrier.RemoveParticipant(); LogBarrierInformation("finished task, removed participant", barrier); }
With the Main method, a Barrier instance is created. In the constructor, you can specify the number of participants. In the example, this number is 3 (numberTasks + 1) because there are two created tasks, and the Main method is a participant as well. Using Task.Run, two tasks are created to fork the iteration through the collection into two parts. After starting the tasks, using SignalAndWait, the main method signals its completion and waits until all remaining participants either signal their completion or remove themselves as participants from the barrier. As soon as all participants are ready with one iteration, the results from the tasks are zipped together with the Zip extension method. Then the next iteration is done to wait for the next results from the tasks (code file BarrierSample/Program.cs): static void Main() { const int numberTasks = 2; const int partitionSize = 1000000; const int loops = 5; var taskResults = new Dictionary(); var data = new List[loops]; for (int i = 0; i < loops; i++) { data[i] = new List(FillData(partitionSize * numberTasks); } var barrier = new Barrier(numberTasks + 1); LogBarrierInformation("initial participants in barrier", barrier); for (int i = 0; i < numberTasks; i++) {
1075
Download from finelybook www.finelybook.com
barrier.AddParticipant(); int jobNumber = i; taskResults.Add(i, new int[loops][]); for (int loop = 0; loop < loops; loop++) { taskResult[i, loop] = new int[26]; } Console.WriteLine("Main - starting task job {jobNumber}"); Task.Run(() => CalculationInTask(jobNumber, partitionSize, barrier, data, loops, taskResults[jobNumber])); } for (int loop = 0; loop < 5; loop++) { LogBarrierInformation("main task, start signaling and wait", barrier); barrier.SignalAndWait(); LogBarrierInformation("main task waiting completed", barrier); int[][] resultCollection1 = taskResults[0]; int[][] resultCollection2 = taskResults[1]; var resultCollection = resultCollection1[loop].Zip( resultCollection2[loop], (c1, c2) => c1 + c2); char ch = 'a'; int sum = 0; foreach (var x in resultCollection) { Console.WriteLine($"{ch++}, count: {x}"); sum += x; } LogBarrierInformation($"main task finished loop {loop}, sum: {sum}", barrier); } Console.WriteLine("finished all iterations"); Console.ReadLine(); }
NOTE Jagged arrays are explained in Chapter 7, “Arrays.” The Zip 1076
Download from finelybook www.finelybook.com
extension method is explained in Chapter 12, “Language Integrated Query.” When you run the application, you can see output like the following. In the output you can see that every call to AddParticipant increases the participant count as well as the remaining participant count. As soon as one participant invokes SignalAndWait, the remaining participant count is decremented. When the remaining participant count reaches 0, the wait of all participants ends, and the next phase begins: Task : initial participants in barrier. 1 current and 1 remaining participants, phase 0. Main - starting task job 0 Main - starting task job 1 Task : main task, starting signaling and wait. 3 current and 3 remaining participants, phase 0. Task 4: CalculationInTask started. 3 current and 2 remaining participants, phase 0. Task 5: CalculationInTask started. 3 current and 2 remaining participants, phase 0. Task 4 in loop 0: partition from 0 to 1000000 Task 5 in loop 0: partition from 1000000 to 2000000 Calculation completed from task 4 in loop 0. 38272 times a, 38637 times z Task 4: sending signal and wait for all. 3 current and 2 remaining participants, phase 0. Calculation completed from task 5 in loop 0. 38486 times a, 38781 times z Task 5: sending signal and wait for all. 3 current and 1 remaining participants, phase 0. Task 5: waiting completed. 3 current and 3 remaining participants, phase 1 Task 4: waiting completed. 3 current and 3 remaining participants, phase 1 Task : main waiting completed. 3 current and 3 remaining participants, phase 1
READERWRITERLOCKSLIM For a locking mechanism to allow multiple readers but only one writer for a resource, you can use the class ReaderWriterLockSlim. This class offers a locking functionality in which multiple readers can access the 1077
Download from finelybook www.finelybook.com
resource if no writer locked it, and only a single writer can lock the resource. The ReaderWriterLockSlim class has blocking and nonblocking methods to acquire a read lock, such as EnterReadLock (blocking) and TryEnterReadLock (nonblocking), and to acquire a write lock with EnterWriteLock (blocking) and TryEnterWriteLock (nonblocking). If a task reads first and writes afterward, it can acquire an upgradable read lock with EnterUpgradableReadLock or TryEnterUpgradableReadLock. With this lock, the write lock can be acquired without releasing the read lock. Several properties of this class offer information about the held locks, such as CurrentReadCount, WaitingReadCount, WaitingUpgradableReadCount, and WaitingWriteCount. The following example creates a collection containing six items and a ReaderWriterLockSlim object. The method ReaderMethod acquires a read lock to read all items of the list and write them to the console. The method WriterMethod tries to acquire a write lock to change all values of the collection. In the Main method, six tasks are started that invoke either the method ReaderMethod or the method WriterMethod (code file ReaderWriterLockSample/Program.cs): class Program { private static List _items = new List() { 0, 1, 2, 3, 4, 5}; private static ReaderWriterLockSlim _rwl = new ReaderWriterLockSlim(LockRecursionPolicy.SupportsRecursion); public static void ReaderMethod(object reader) { try { _rwl.EnterReadLock(); for (int i = 0; i < _items.Count; i++) { Console.WriteLine($"reader {reader}, loop: {i}, item: {_items[i]}"); Task.Delay(40).Wait(); }
1078
Download from finelybook www.finelybook.com
} finally { _rwl.ExitReadLock(); } } public static void WriterMethod(object writer) { try { while (!_rwl.TryEnterWriteLock(50)) { Console.WriteLine($"Writer {writer} waiting for the write lock"); Console.WriteLine($"current reader count: {_rwl.CurrentReadCount}"); } Console.WriteLine($"Writer {writer} acquired the lock"); for (int i = 0; i < _items.Count; i++) { _items[i]++; Task.Delay(50).Wait(); } Console.WriteLine($"Writer {writer} finished"); } finally { _rwl.ExitWriteLock(); } } static void Main() { var taskFactory = new TaskFactory(TaskCreationOptions.LongRunning, TaskContinuationOptions.None); var tasks = new Task[6]; tasks[0] = taskFactory.StartNew(WriterMethod, tasks[1] = taskFactory.StartNew(ReaderMethod, tasks[2] = taskFactory.StartNew(ReaderMethod, tasks[3] = taskFactory.StartNew(WriterMethod, tasks[4] = taskFactory.StartNew(ReaderMethod, tasks[5] = taskFactory.StartNew(ReaderMethod, Task.WaitAll(tasks); } }
1079
1); 1); 2); 2); 3); 4);
Download from finelybook www.finelybook.com
When you run the application, the following shows that the first writer gets the lock first. The second writer and all readers need to wait. Next, the readers can work concurrently, while the second writer still waits for the resource: Writer 1 acquired the lock Writer 2 waiting for the write current reader count: 0 Writer 2 waiting for the write current reader count: 0 Writer 2 waiting for the write current reader count: 0 Writer 2 waiting for the write current reader count: 0 Writer 1 finished reader 4, loop: 0, item: 1 reader 1, loop: 0, item: 1 Writer 2 waiting for the write current reader count: 4 reader 2, loop: 0, item: 1 reader 3, loop: 0, item: 1 reader 4, loop: 1, item: 2 reader 1, loop: 1, item: 2 reader 3, loop: 1, item: 2 reader 2, loop: 1, item: 2 Writer 2 waiting for the write current reader count: 4 reader 4, loop: 2, item: 3 reader 1, loop: 2, item: 3 reader 2, loop: 2, item: 3 reader 3, loop: 2, item: 3 Writer 2 waiting for the write current reader count: 4 reader 4, loop: 3, item: 4 reader 1, loop: 3, item: 4 reader 2, loop: 3, item: 4 reader 3, loop: 3, item: 4 reader 4, loop: 4, item: 5 reader 1, loop: 4, item: 5 Writer 2 waiting for the write current reader count: 4 reader 2, loop: 4, item: 5 reader 3, loop: 4, item: 5 reader 4, loop: 5, item: 6 reader 1, loop: 5, item: 6 reader 2, loop: 5, item: 6
lock lock lock lock
lock
lock
lock
lock
1080
Download from finelybook www.finelybook.com
reader 3, loop: 5, item: 6 Writer 2 waiting for the write lock current reader count: 4 Writer 2 acquired the lock Writer 2 finished
LOCKS WITH AWAIT In case you try to use the lock keyword while having the async keyword in the lock block, you get this compilation error: cannot await in the body of a lock statement. The reason is that after the async completes, the method might run in a different thread than before the async keyword. The lock keyword needs to release the lock in the same thread as the lock is acquired. Such a code block results in compilation errors: static async Task IncorrectLockAsync() { lock (s_syncLock) { Console.WriteLine($"{nameof(IncorrectLockAsync)} started"); await Task.Delay(500); // compiler error: cannot await in the body // of a lock statement Console.WriteLine($"{nameof(IncorrectLockAsync)} ending"); } }
How can this be solved? You cannot use a Monitor for this, as the Monitor needs to release the lock from the same thread where it entered the lock. The lock keyword is based on Monitor. While the Mutex object can be used for synchronization across different processes, it has the same issues: it grants a lock for a thread. Releasing the lock from a different thread is not possible. Instead, you can use the Semaphore—or the SemaphoreSlim class. Semaphores can release the semaphore from a different thread. The following code snippet waits to acquire a semaphore using WaitAsync on a SemaphoreSlim object. The SemaphoreSlim object is 1081
Download from finelybook www.finelybook.com
initialized with a count of 1, thus the wait on the semaphore is only granted once. In the finally code block, the semaphore is released by invoking the Release method (code file LockAcrossAwait/Program.cs): private static SemaphoreSlim s_asyncLock = new SemaphoreSlim(1); static async Task LockWithSemaphore(string title) { Console.WriteLine($"{title} waiting for lock"); await s_asyncLock.WaitAsync(); try { Console.WriteLine($"{title} {nameof(LockWithSemaphore)} started"); await Task.Delay(500); Console.WriteLine($"{title} {nameof(LockWithSemaphore)} ending"); } finally { s_asyncLock.Release(); } }
Let’s try to invoke this method from multiple tasks concurrently. The method RunUseSemaphoreAsync starts six tasks to invoke the LockWithSemaphore method concurrently: static async Task RunUseSemaphoreAsync() { Console.WriteLine(nameof(RunUseSemaphoreAsync)); string[] messages = { "one", "two", "three", "four", "five", "six" }; Task[] tasks = new Task[messages.Length]; for (int i = 0; i < messages.Length; i++) { string message = messages[i]; tasks[i] = Task.Run(async () => { await LockWithSemaphore(message); }); } await Task.WhenAll(tasks);
1082
Download from finelybook www.finelybook.com
Console.WriteLine(); }
Running the program, you can see that multiple tasks are started concurrently, but after the semaphore is locked, all other tasks need to wait until the semaphore is released again: RunLockWithAwaitAsync two waiting for lock two LockWithSemaphore started three waiting for lock five waiting for lock four waiting for lock six waiting for lock one waiting for lock two LockWithSemaphore ending three LockWithSemaphore started three LockWithSemaphore ending five LockWithSemaphore started five LockWithSemaphore ending four LockWithSemaphore started four LockWithSemaphore ending six LockWithSemaphore started six LockWithSemaphore ending one LockWithSemaphore started one LockWithSemaphore ending
To make the use of the lock easier, you can create a class that implements the IDisposable interface to manage the resource. With this class, you can use the using statement in the same way as the lock statement is used to lock and release the semaphore. The following code snippet implements the AsyncSemaphore class that allocates a SemaphoreSlim in the constructor, and on invoking the WaitAsync method on the AsyncSemaphore, the inner class SemaphoreReleaser is returned that implements the interface IDisposable. On calling the Dispose method, the semaphore is released (code file LockAcrossAwait/AsyncSemaphore.cs): public sealed class AsyncSemaphore { private class SemaphoreReleaser : IDisposable { private SemaphoreSlim _semaphore;
1083
Download from finelybook www.finelybook.com
public SemaphoreReleaser(SemaphoreSlim semaphore) => _semaphore = semaphore; public void Dispose() => _semaphore.Release(); } private SemaphoreSlim _semaphore; public AsyncSemaphore() => _semaphore = new SemaphoreSlim(1); public async Task WaitAsync() { await _semaphore.WaitAsync(); return new SemaphoreReleaser(_semaphore) as IDisposable; } }
Changing the implementation from the LockWithSemaphore method shown previously, now a using statement can be used where the semaphore is locked. Remember, the using statement creates a catch/finally block, and in the finally block the Dispose method gets invoked (code file LockAcrossAwait/Program.cs): private static AsyncSemaphore s_asyncSemaphore = new AsyncSemaphore(); static async Task UseAsyncSemaphore(string title) { using (await s_asyncSemaphore.WaitAsync()) { Console.WriteLine($"{title} {nameof(LockWithSemaphore)} started"); await Task.Delay(500); Console.WriteLine($"{title} {nameof(LockWithSemaphore)} ending"); } }
Using the UseAsyncSemaphore method similar to the LockWithSemaphore method results in the same behavior. However, with a class written once, locking across await becomes simpler.
SUMMARY This chapter explored how to code applications that use multiple tasks 1084
Download from finelybook www.finelybook.com
by using the System.Threading.Tasks namespace. Using multithreading in your applications takes careful planning. Too many threads can cause resource issues, and not enough threads can cause your application to be sluggish and perform poorly. With tasks, you get an abstraction to threads. This abstraction helps you avoid creating too many threads because threads are reused from a pool. You’ve seen various ways to create multiple tasks, such as the Parallel class, which offers both task and data parallelism with Parallel.Invoke, Parallel.ForEach, and Parallel.For. With the Task class, you’ve seen how to gain more control over parallel programming. Tasks can run synchronously in the calling thread, using a thread from a thread pool, and a separate new thread can be created. Tasks also offer a hierarchical model that enables the creation of child tasks, also providing a way to cancel a complete hierarchy. The cancellation framework offers a standard mechanism that can be used in the same manner with different classes to cancel a task early. You’ve seen several synchronization objects that are available with .NET, and with which scenario what synchronization object has its advantage. An easy synchronization can be done using the lock keyword. Behind the scenes, it’s the Monitor type that allows setting timeouts, which is not possible with the lock keyword. For synchronization between processes, the Mutex object offers similar functionality. With the Semaphore object you’ve seen a synchronization object with a count—some tasks are allowed to run concurrently. To inform others of information that is ready, various kinds of event objects have been discussed, such as the AutoResetEvent, ManualResetEvent, and CountdownEvent. A straightforward way to have multiple readers and one writer is offered by the ReaderWriterLock. The Barrier type allows for more complex scenarios where multiple tasks can run concurrently until a synchronization point is reached. As soon as all tasks reach this point, all can continue concurrently to meet at the next synchronization point. Here are some final guidelines regarding threading: Try to keep synchronization requirements to a minimum. Synchronization is complex and blocks threads. You can avoid it if 1085
Download from finelybook www.finelybook.com
you try to avoid sharing state. Of course, this is not always possible. Static members of a class should be thread-safe. Usually, this is the case with classes in the .NET Framework. Instance state does not need to be thread-safe. For best performance, synchronization is best used outside the class where it is needed, and not with every member of the class. Instance members of .NET Framework classes usually are not thread-safe. In the Microsoft API documentation, you can find this information documented for every class of the .NET Framework in the “Thread Safety” section. The next chapter gives information on another core .NET topic: files and streams.
1086
Download from finelybook www.finelybook.com
22 Files and Streams WHAT’S IN THIS CHAPTER? Exploring the directory structure Moving, copying, and deleting files and folders Reading and writing text in files Using streams to read and write files Using readers and writers to read and write files Compressing files Monitoring file changes Communicating using pipes Using Windows Runtime streams
WROX.COM CODE DOWNLOADS FOR THIS CHAPTER The Wrox.com code downloads for this chapter are found at www.wrox.com on the Download Code tab. The source code is also available at https://github.com/ProfessionalCSharp/ProfessionalCSharp7 in the directory FilesAndStreams. The code for this chapter is divided into the following major examples: 1087
Download from finelybook www.finelybook.com
DriveInformation WorkingWithFilesAndFolders StreamSamples ReaderWriterSamples CompressFileSample FileMonitor MemoryMappedFiles NamedPipes AnonymousPipes WindowsAppEditor
INTRODUCTION When you’re reading and writing to files and directories you can use simple APIs, or you can use advanced ones that offer more features. You also have to differentiate between .NET classes and functionality offered from the Windows Runtime. From Universal Windows Platform (UWP) Windows apps, you don’t have access to the file system in any directory; you have access only to specific directories. Alternatively, you can let the user pick files. This chapter covers all these options. You’ll read and write files by using a simple API and get into more features by using streams. You’ll use both .NET types and types from the Windows Runtime, and you’ll mix both of these technologies to take advantage of .NET features with the Windows Runtime. As you use streams, you also learn about compressing data and sharing data between different tasks using memory mapped files and pipes.
MANAGING THE FILE SYSTEM The classes used to browse around the file system and perform 1088
Download from finelybook www.finelybook.com
operations such as moving, copying, and deleting files are shown in Figure 22-1.
FIGURE 22-1 The following list explains the function of these classes: FileSystemInfo—The FileInfo
base class represents any file system object.
and File—These classes represent a file on the file system.
and Directory—These classes represent a folder on the file system. DirectoryInfo Path—This
class contains static members that you can use to manipulate pathnames. DriveInfo—This
class provides properties and methods that provide information about a selected drive.
NOTE Directories or folders? These terms are often used interchangeably. Directory is a classical term for a file system object. A directory contains files and other directories. A folder has its origin with Apple’s Lisa and is a GUI object. Often it is associated with an icon to map to a directory.
1089
Download from finelybook www.finelybook.com
Notice in the previous list that two classes are used to work with folders and two classes are for working with files. Which one of these classes you use depends largely on how many operations you need to access that folder or file: and File contain only static methods and are never instantiated. You use these classes by supplying the path to the appropriate file system object whenever you call a member method. If you want to do only one operation on a folder or file, using these classes is more efficient because it saves the overhead of creating a .NET object. Directory
DirectoryInfo and FileInfo implement roughly the same public methods as Directory and File, as well as some public properties
and constructors, but they are stateful and the members of these classes are not static. You need to instantiate these classes before each instance is associated with a particular folder or file. This means that these classes are more efficient if you are performing multiple operations using the same object. That’s because they read in the authentication and other information for the appropriate file system object on construction, and then they do not need to read that information again, no matter how many methods and so on you call against each object (class instance). In comparison, the corresponding stateless classes need to check the details of the file or folder again with every method you call.
Checking Drive Information Before working with files and folders, let’s check the drives of the system. You use the DriveInfo class, which can perform a scan of a system to provide a list of available drives and then dig in deeper to provide a large amount of detail about any of the drives. To demonstrate using the DriveInfo class, the following example creates a simple Console application that lists information of all the available drives on a computer. The sample code for DriveInformation makes use of the following namespaces: 1090
Download from finelybook www.finelybook.com
System System.IO
The following code snippet invokes the static method DriveInfo.GetDrives. This method returns an array of DriveInfo objects. With this array, every drive that is ready is accessed to write information about the drive name, type, and format, and it also shows size information (code file DriveInformation/Program.cs): DriveInfo[] drives = DriveInfo.GetDrives(); foreach (DriveInfo drive in drives) { if (drive.IsReady) { Console.WriteLine($"Drive name: {drive.Name}"); Console.WriteLine($"Format: {drive.DriveFormat}"); Console.WriteLine($"Type: {drive.DriveType}"); Console.WriteLine($"Root directory: {drive.RootDirectory}"); Console.WriteLine($"Volume label: {drive.VolumeLabel}"); Console.WriteLine($"Free space: {drive.TotalFreeSpace}"); Console.WriteLine($"Available space: {drive.AvailableFreeSpace}"); Console.WriteLine($"Total size: {drive.TotalSize}"); Console.WriteLine(); } }
When I run this program on my Windows system, which doesn’t have a DVD drive but has a solid-state disk (SSD) and a memory card, I see this information: Drive name: C:\ Format: NTFS Type: Fixed Root directory: C:\ Volume label: Windows Free space: 289063882752 Available space: 289063882752 Total size: 509571969024 Drive name: D:\ Format: exFAT Type: Removable Root directory: D:\
1091
Download from finelybook www.finelybook.com
Volume label: Free space: 196831477760 Available space: 196831477760 Total size: 196832395264
On my Mac, drive letters are not available, but you can also see Ram and Network types as they are accessible using File APIs on Unixbased systems: Drive name: / Format: hfs Type: Fixed Root directory: / Volume label: / Free space: 170332930048 Available space: 170070786048 Total size: 249769230336 Drive name: /dev Format: devs Type: Ram Root directory: /dev Volume label: /dev Free space: 0 Available space: 0 Total size: 184832 Drive name: /net Format: autofs Type: Network Root directory: /net Volume label: /net Free space: 0 Available space: 0 Total size: 0
Working with the Path Class For accessing files and directories, the names of the files and directories need to be defined—including parent folders. When you combine multiple folders and files using string concatenation operators, you can easily miss a separator character or use one too many characters. The Path class can help with this because this class adds missing separator characters, and it also deals with different platform requirements on Windows- and Unix-based systems. 1092
Download from finelybook www.finelybook.com
The Path class exposes some static methods that make operations on pathnames easier. For example, suppose that you want to display the full pathname for a file, ReadMe.txt, in the folder D:\Projects. You could find the path to the file using the following code: Console.WriteLine(Path.Combine(@"D:\Projects", "ReadMe.txt")); Path.Combine is the method of this class that you are likely to often, but Path also implements other methods that supply
use most
information about the path or the required format for it. With the public fields VolumeSeparatorChar, DirectorySeparatorChar, AltDirectorySeparatorChar, and PathSeparator you can get the platform-specific character that is used to separate drives, folders, and files, and the separator of multiple paths. With Windows, these characters are :, \, /, and ;. The Path class also helps with accessing the user-specific temp folder (GetTempPath) and creating temporary (GetTempFileName) and random filenames (GetRandomFileName). Pay attention that the method GetTempFileName includes the folder, whereas GetRandomFileName just returns the filename without any folder. The sample code for WorkingWithFilesAndDirectories makes use of the following namespaces: System System.Collections.Generic System.IO
This sample application offers several command line arguments to start the different functionality of the program. Just start the program without command lines or check the source code to see all the different options. The Environment class defines a list of special folders. The following code snippet returns the documents folder by passing the enumeration value SpecialFolder.MyDocuments to the GetFolderPath method (code file WorkingWithFilesAndDirectories/Program.cs): 1093
Download from finelybook www.finelybook.com
private static string GetDocumentsFolder() => Environment.GetFolderPath(Environment.SpecialFolder.MyDocuments);
is a huge enumeration that gives values for music, pictures, program files, app data, and many other folders. Environment.SpecialFolder
Creating Files and Folders Now let’s get into using the File, FileInfo, Directory, and DirectoryInfo classes. First, the method CreateAFile creates the file Sample1.txt and adds the string Hello, World! to the file. An easy way to create a text file is to invoke the method WriteAllText of the File class. This method takes a filename and the string that should be written to the file. Everything is done with a single call (code file WorkingWithFilesAndDirectories/Program.cs): const string Sample1FileName = "Sample1.md"; // ... public static void CreateAFile() { string fileName = Path.Combine(GetDocumentsFolder(), Sample1FileName); File.WriteAllText(fileName, "Hello, World!"); }
To copy a file, you can use either the Copy method of the File class or the CopyTo method of the FileInfo class: var file = new FileInfo(fileName1); file.CopyTo(fileName2); File.Copy(fileName1", fileName2);
The first code snippet using FileInfo takes slightly longer to execute because of the need to instantiate an object named file, but it leaves file ready for you to perform further actions on the same file. When you use the second example, there is no need to instantiate an object to copy the file. You can instantiate a FileInfo or DirectoryInfo class by passing to the constructor a string containing the path to the corresponding file system object. You have just seen the process for a file. For a folder, 1094
Download from finelybook www.finelybook.com
the code looks similar: var myFolder = new DirectoryInfo(directory1);
If the path represents an object that does not exist, an exception is not thrown at construction; instead it’s thrown the first time you call a method that actually requires the corresponding file system object to be there. You can find out whether the object exists and is of the appropriate type by checking the Exists property, which is implemented by both of these classes: var test = new FileInfo(@"C:\Windows"); Console.WriteLine(test.Exists);
Note that for this property to return true, the corresponding file system object must be of the appropriate type. In other words, if you instantiate a FileInfo object by supplying the path of a folder, or you instantiate a DirectoryInfo object by giving it the path of a file, Exists has the value false. Most of the properties and methods of these objects return a value if possible—they won’t necessarily throw an exception just because the wrong type of object has been called, unless they are asked to do something that is impossible. For example, the preceding code snippet might first display false (because C:\Windows is a directory), but it still displays the time the folder was created because a directory has that information. However, if you tried to open the directory as if it were a file, using the FileInfo.Open method, you’d get an exception. You move and delete files or directories using the MoveTo and Delete methods of the FileInfo and DirectoryInfo classes. The equivalent methods on the File and Directory classes are Move and Delete. The FileInfo and File classes also implement the methods CopyTo and Copy, respectively. However, no methods exist to copy complete folders —you need to do that by copying each file in the folder. Using all of these methods is quite intuitive. You can find detailed descriptions in the Microsoft documentation.
Accessing and Modifying File Properties 1095
Download from finelybook www.finelybook.com
Let’s get some information about files. You can use both the File and FileInfo classes to access file information. The File class defines static method, whereas the FileInfo class offers instance methods. The following code snippet shows how to use FileInfo to retrieve multiple information. If you instead used the File class, the access would be slower because every access would mean a check to determine whether the user is allowed to get this information. With the FileInfo class, the check happens only when calling the constructor. The sample code creates a new FileInfo object and writes the result of the properties Name, DirectoryName, IsReadOnly, Extension, Length, CreationTime, LastAccessTime, and Attributes to the console (code file WorkingWithFilesAndDirectories/Program.cs): private static void FileInformation(string fileName) { var file = new FileInfo(fileName); Console.WriteLine($"Name: {file.Name}"); Console.WriteLine($"Directory: {file.DirectoryName}"); Console.WriteLine($"Read only: {file.IsReadOnly}"); Console.WriteLine($"Extension: {file.Extension}"); Console.WriteLine($"Length: {file.Length}"); Console.WriteLine($"Creation time: {file.CreationTime:F}"); Console.WriteLine($"Access time: {file.LastAccessTime:F}"); Console.WriteLine($"File attributes: {file.Attributes}"); }
Passing the Program.cs filename of the current directory to this method, FileInformation("./Program.cs");
results in this output (on my machine): Name: Program.cs Directory: C:\ProCSharpSources\files\ProfessionalCSharp7\FilesAndStreams\F ilesAndStreamsSamples\WorkingWithFilesAndDirectories Read only: False Extension: .cs Length: 7637 Creation time: Friday, September 1, 2017 12:48:51 PM Access time: Friday, September 1, 2017 4:07:12 PM
1096
Download from finelybook www.finelybook.com
File attributes: Archive
A few of the properties of the FileInfo class cannot be set; they only define get accessors. It’s not possible to retrieve the filename, the file extension, and the length of the file. The creation time and last access time can be set. The method ChangeFileProperties writes the creation time of a file to the console and later changes the creation time to a date in the year 2025. private static void ChangeFileProperties() { string fileName = Path.Combine(GetDocumentsFolder(), Sample1FileName); var file = new FileInfo(fileName); if (!file.Exists) { Console.WriteLine($"Create the file {Sample1FileName} before calling this method"); Console.WriteLine("You can do this by invoking this program with the -c argument"); return; } Console.WriteLine($"creation time: {file.CreationTime:F}"); file.CreationTime = new DateTime(2025, 12, 24, 15, 0, 0); Console.WriteLine($"creation time: {file.CreationTime:F}"); }
Running the program shows the initial creation time of the file as well as the creation time after it has been changed. Creating files in the future (at least specifying the creation time) is possible with this technique. creation time: Sunday, December 20, 2015 9:41:49 AM creation time: Wednesday, December 24, 2025 3:00:00 PM
NOTE Being able to manually modify these properties might seem strange at first, but it can be quite useful. For example, if you have a program that effectively modifies a file by simply reading it in, deleting it, and creating a new file with the new contents, you 1097
Download from finelybook www.finelybook.com
would probably want to modify the creation date to match the original creation date of the old file.
Using File to Read and Write With File.ReadAllText and File.WriteAllText you can read and write a file using a single string. Instead of using one string, you can also use file operations that use a string for every line in a file as shown here. Instead of reading all lines to a single string, a string array is returned from the method File.ReadAllLines. With this method you can do a different handling based on every line, but still the complete file needs to be read into memory (code file WorkingWithFilesAndFolders/Program.cs): public static void ReadingAFileLineByLine(string fileName) { string[] lines = File.ReadAllLines(fileName); int i = 1; foreach (var line in lines) { Console.WriteLine($"{i++}. {line}"); } //... }
To read line by line without needing to wait until all lines have been read, you can use the method File.ReadLines. This method returns IEnumerable, where you can already start looping through the file before the complete file has been read: public static void ReadingAFileLineByLine(string fileName) { //... IEnumerable lines = File.ReadLines(fileName); i = 1; foreach (var line in lines) { Console.WriteLine($"{i++}. {line}"); } }
For writing a string collection, you can use the method 1098
Download from finelybook www.finelybook.com
File.WriteAllLines. This method accepts IEnumerable type as parameter:
a filename and an
public static void WriteAFile() { string fileName = Path.Combine(GetDocumentsFolder(), "movies.txt"); string[] movies = { "Snow White And The Seven Dwarfs", "Gone With The Wind", "Casablanca", "The Bridge On The River Kwai", "Some Like It Hot" }; File.WriteAllLines(fileName, movies); }
To append strings to an existing file, you use File.AppendAllLines: string[] moreMovies = { "Psycho", "Easy Rider", "Star Wars", "The Matrix" }; File.AppendAllLines(fileName, moreMovies);
ENUMERATING FILES For working with multiple files, you can use the Directory class. Directory defines the method GetFiles that returns a string array of all files in the directory. The method GetDirectories returns a string array of all directories. All of these methods define overloads that allow passing a search pattern and a value of the SearchOption enumeration. SearchOption enables you to walk through all subdirectories or to stay in the toplevel directory by using the value AllDirectories or TopDirectoriesOnly. The search pattern doesn’t allow passing regular expressions as are discussed in Chapter 9, “Strings and Regular Expressions”; it passes only simple expressions using * for any 1099
Download from finelybook www.finelybook.com
characters and ? for single characters. When you walk through a huge directory (or subdirectories), the methods GetFiles and GetDirectories need to have the complete result before the result is returned. An alternative is to use the methods EnumerateDirectories and EnumerateFiles. These methods offer the same parameters for the search pattern and options, but they immediately start returning a result with IEnumerable. Let’s get into an example: Within a directory and all its subdirectories, all files that end with Copy are deleted in case another file exists with the same name and size. You can simulate this easily by selecting all files in a folder by pressing Ctrl+A on the keyboard, entering Ctrl+C on the keyboard for copy, and entering Ctrl+V on the keyboard while the mouse is still in the same folder to paste. The new files have the Copy postfix applied. The method DeleteDuplicateFiles iterates all files in the directory that is passed with the first argument, walking through all subdirectories using the option SearchOption.AllDirectories. Within the foreach statement, the current file in the iteration is compared to the file in the previous iteration. In cases where the filename is the same and only the Copy postfix is different, and if the size of the files is the same as well, the copied file is deleted by invoking FileInfo.Delete (code file WorkingWithFilesAndFolders/Program.cs): private void DeleteDuplicateFiles(string directory, bool checkOnly) { IEnumerable fileNames = Directory.EnumerateFiles(directory, "*", SearchOption.AllDirectories); string previousFileName = string.Empty; foreach (string fileName in fileNames) { string previousName = Path.GetFileNameWithoutExtension(previousFileName); if (!string.IsNullOrEmpty(previousFileName) && previousName.EndsWith("Copy") && fileName.StartsWith(previousFileName.Substring( 0, previousFileName.LastIndexOf(" - Copy")))) { var copiedFile = new FileInfo(previousFileName);
1100
Download from finelybook www.finelybook.com
var originalFile = new FileInfo(fileName); if (copiedFile.Length == originalFile.Length) { Console.WriteLine($"delete {copiedFile.FullName}"); if (!checkOnly) { copiedFile.Delete(); } } } previousFileName = fileName; } }
WORKING WITH STREAMS Now let’s get into more powerful options that are available when you work with files: streams. The idea of a stream has been around for a very long time. A stream is an object used to transfer data. The data can be transferred in one of two directions: If the data is being transferred from some outside source into your program, it is called reading from the stream. If the data is being transferred from your program to some outside source, it is called writing to the stream. Very often, the outside source will be a file, but that is not always the case. Other possibilities include the following: Reading or writing data on the network using some network protocol, where the intention is for this data to be picked up by or sent from another computer Reading from or writing to a named pipe Reading from or writing to an area of memory Some streams allow only writing, some streams allow only reading, and some streams allow random access. Random access enables you to position a cursor randomly within a stream—for example, to start reading from the start of the stream to later move to the end of the stream, and continue with a position in the middle of the stream.
1101
Download from finelybook www.finelybook.com
Of these examples, Microsoft has supplied a .NET class for writing to or reading from memory: the System.IO.MemoryStream object. The System.Net.Sockets.NetworkStream object handles network data. The Stream class does not make any assumptions of the nature of the data source. It can be file streams, memory streams, network streams, or any data source you can think of. Some streams can also be chained. For example, the DeflateStream can be used to compress data. This stream in turn can write to the FileStream, MemoryStream, or NetworkStream. The CryptoStream enables you to encrypt data. It’s also possible to chain the DeflateStream to the CryptoStream to write in turn to the FileStream.
NOTE Chapter 24, “Security,” explains how you can use the CryptoStream. Using streams, the outside source might even be a variable within your own code. This might sound paradoxical, but the technique of using streams to transmit data between variables can be a useful trick for converting data between data types. The C language used something similar—the sprintf function—to convert between integer data types and strings or to format strings. The advantage of having a separate object for the transfer of data, rather than using the FileInfo or DirectoryInfo classes to do this, is that separating the concept of transferring data from the particular data source makes it easier to swap data sources. Stream objects themselves contain a lot of generic code that concerns the movement of data between outside sources and variables in your code. By keeping this code separate from any concept of a particular data source, you make it easier for this code to be reused in different circumstances. Although it’s not that easy to directly read and write to streams, you can use readers and writers. This is another separation of concerns. Readers and writers can read and write to streams. For example, the 1102
Download from finelybook www.finelybook.com
and StringWriter classes are part of the same inheritance tree as two classes that you use later to read and write text files. The classes will almost certainly share a substantial amount of code behind the scenes. Figure 22-2 illustrates the hierarchy of stream-related classes in the System.IO namespace. StringReader
FIGURE 22-2 As far as reading and writing files goes, the classes that concern us most are the following: FileStream—This
class is intended for reading and writing binary
data in a file. and StreamWriter—These classes are designed specifically for reading from and writing to streams offering APIs for text formats. StreamReader
and BinaryWriter—These classes are designed for reading and writing to streams offering APIs for binary data. BinaryReader
The difference between using these classes and directly using the underlying stream objects is that a basic stream works in bytes. For example, suppose that as part of the process of saving some document you want to write the contents of a variable of type long to a binary file. Each long occupies 8 bytes, and if you use an ordinary binary stream you would have to explicitly write each of those 8 bytes of memory. 1103
Download from finelybook www.finelybook.com
In C# code, you would have to perform some bitwise operations to extract each of those 8 bytes from the long value. Using a BinaryWriter instance, you can encapsulate the entire operation in an overload of the BinaryWriter.Write method, which takes a long as a parameter, and which places those 8 bytes into the stream (and if the stream is directed to a file, into the file). A corresponding BinaryReader.Read method extracts 8 bytes from the stream and recovers the value of the long.
Working with File Streams Let’s get into programming streams reading and writing files. A FileStream instance is used to read or write data to or from a file. To construct a FileStream, you need four pieces of information: The file you want to access. The mode, which indicates how you want to open the file. For example, are you intending to create a new file or open an existing file? If you are opening an existing file, should any write operations be interpreted as overwriting the contents of the file or appending to the file? The access, which indicates how you want to access the file. For example, do you want to read from or write to the file or do both? The share access, which specifies whether you want exclusive access to the file. Alternatively, are you willing to have other streams access the file simultaneously? If so, should other streams have access to read the file, to write to it, or to do both? The first piece of information is usually represented by a string that contains the full pathname of the file, and this chapter considers only those constructors that require a string here. Besides those, however, some additional constructors take a native Windows handle to a file instead. The remaining three pieces of information are represented by three .NET enumerations called FileMode, FileAccess, and FileShare. The values of these enumerations are listed in the following table and are self-explanatory: ENUMERATION VALUES 1104
Download from finelybook www.finelybook.com
FileMode
Append, Create, CreateNew, Open, OpenOrCreate, Truncate
FileAccess
Read, ReadWrite,
FileShare
or
or Write Delete, Inheritable, None, Read, ReadWrite, or Write
Note that in the case of FileMode, exceptions can be thrown if you request a mode that is inconsistent with the existing status of the file. Append, Open, and Truncate throw an exception if the file does not already exist, and CreateNew throws an exception if it does. Create and OpenOrCreate cope with either scenario, but Create deletes any existing file to replace it with a new, initially empty, one. The FileAccess and FileShare enumerations are bitwise flags, so values can be combined with the C# bitwise OR operator, |. Creating a FileStream The sample code for StreamSamples makes use of the following namespaces: System System.Collections.Generic System.Globalization System.IO System.Linq System.Text System.Threading.Tasks
There are a large number of constructors for the FileStream. The following sample uses one with four parameters (code file StreamSamples/Program.cs): The filename The FileMode enumeration with the Open value to open an existing file 1105
Download from finelybook www.finelybook.com
The FileAccess enumeration with the Read value to read the file The FileShare enumeration with a Read value to allow other programs to read but not change the file at the same time private void ReadFileUsingFileStream(string fileName) { const int bufferSize = 4096; using (var stream = new FileStream(fileName, FileMode.Open, FileAccess.Read, FileShare.Read)) { ShowStreamInformation(stream); Encoding encoding = GetEncoding(stream); //...
Instead of using the constructor of the FileStream class to create a FileStream object, you can create a FileStream directly using the File class with the OpenRead method. The OpenRead method opens a file (similar to FileMode.Open), returns a stream that can be read (FileAccess.Read), and also allows other processes read access (FileShare.Read): using (FileStream stream = File.OpenRead(filename)) { //...
Getting Stream Information The Stream class defines the properties CanRead, CanWrite, CanSeek, and CanTimeout that you can read to get information about what can be done with a stream. For reading and writing streams, the timeout values ReadTimeout and WriteTimeout specify timeouts in milliseconds. Setting these values can be important in networking scenarios to make sure the user does not have to wait too long when reading or writing the stream fails. The Position property returns the current position of the cursor in the stream. Every time some data is read from the stream, the position moves to the next byte that will be read. The sample code writes information about the stream to the console (code file StreamSamples/Program.cs): private void ShowStreamInformation(Stream stream) { Console.WriteLine($"stream can read: {stream.CanRead}, " +
1106
Download from finelybook www.finelybook.com
$"can write: {stream.CanWrite}, can seek: {stream.CanSeek}, " + $"can timeout: {stream.CanTimeout}"); Console.WriteLine($"length: {stream.Length}, position: {stream.Position}"); if (stream.CanTimeout) { Console.WriteLine($"read timeout: {stream.ReadTimeout} " + $"write timeout: {stream.WriteTimeout} "); } }
When you run the program with the file stream that has been opened, you get the following output. The position is currently 0 as read has not yet happened: stream can read: True, can write: False, can seek: True, can timeout: False length: 1113, position: 0
Analyzing Text File Encodings With text files, the next step is to read the first bytes of the stream—the preamble. The preamble gives information about how the file is encoded (the text format used). This is also known as byte order mark (BOM). You can read a stream by using ReadByte that reads just a byte from the stream, or the Read method that fills a byte array. With the GetEncoding sample method, an array of 5 bytes is created, and the byte array is filled from the Read method. The second and third parameters specify the offset within the byte array and the count of the number of bytes that are available to fill. The Read method returns the number of bytes read; the stream might be smaller than the buffer. In case no more characters are available to read, the Read method returns 0. The sample code analyzes the first characters of the stream to return the detected encoding and positions the stream after the encoding characters (code file StreamSamples/Program.cs): private Encoding GetEncoding(Stream stream) {
1107
Download from finelybook www.finelybook.com
if (!stream.CanSeek) throw new ArgumentException( "require a stream that can seek"); Encoding encoding = Encoding.ASCII; byte[] bom = new byte[5]; int nRead = stream.Read(bom, offset: 0, count: 5); if (bom[0] == 0xff && bom[1] == 0xfe && bom[2] == 0 && bom[3] == 0) { Console.WriteLine("UTF-32"); stream.Seek(4, SeekOrigin.Begin); return Encoding.UTF32; } else if (bom[0] == 0xff && bom[1] == 0xfe) { Console.WriteLine("UTF-16, little endian"); stream.Seek(2, SeekOrigin.Begin); return Encoding.Unicode; } else if (bom[0] == 0xfe && bom[1] == 0xff) { Console.WriteLine("UTF-16, big endian"); stream.Seek(2, SeekOrigin.Begin); return Encoding.BigEndianUnicode; } else if (bom[0] == 0xef && bom[1] == 0xbb && bom[2] == 0xbf) { Console.WriteLine("UTF-8"); stream.Seek(3, SeekOrigin.Begin); return Encoding.UTF8; } stream.Seek(0, SeekOrigin.Begin); return encoding; }
The start of a file can begin with the characters FF and FE. The order of these bytes gives information about how the document is stored. Two-byte Unicode can be stored in little or big endian. With FF followed by FE, it’s little endian, and when FE is followed by FF, it’s big endian. This endianness goes back to mainframes by IBM that used big endian for byte ordering, and PDP11 systems from Digital Equipment that used little endian. Communicating across the network with computers that have different endianness requires changing the order of bytes on one side. Nowadays, the Intel CPU architecture uses 1108
Download from finelybook www.finelybook.com
little endian, and the ARM architecture allows switching between little and big endian. What’s the other difference between these encodings? With ASCII, 7 bits are enough for every character. Originally based on the English alphabet, ASCII offers lowercase, uppercase, and control characters. Extended ASCII makes use of the 8th bit to allow switching to language-specific characters. Switching is not easy as it requires paying attention to the code map and also does not provide enough characters for some Asian languages. UTF-16 (Unicode Text Format) solves this by having 16 bits for every character. Because UTF-16 is still not enough for historical glyphs, UTF-32 uses 32 bits for every character. Although Windows NT 3.1 switched to UTF-16 for the default text encoding (from a Microsoft extension of ASCII before), nowadays the most-used text format is UTF-8. With the web, UTF-8 turned out to be the most-used text format since 2007 (this superseded ASCII, which had been the most common character encoding before). UTF-8 uses a variable length for character definitions. One character is defined by using between 1 and 6 bytes. UTF-8 is detected by this character sequence at the beginning of a file: 0xEF, 0xBB, 0xBF.
Reading Streams After opening the file and creating the stream, the file is read using the Read method. This is repeated until the method returns 0. A string is created using the Encoder created from the GetEncoding method defined earlier. Do not forget to close the stream using the Dispose method. If possible, use the using statement—as is done with this code sample—to dispose the stream automatically (code file StreamSamples/Program.cs): public static void ReadFileUsingFileStream(string fileName) { const int BUFFERSIZE = 256; using (var stream = new FileStream(fileName, FileMode.Open, FileAccess.Read, FileShare.Read)) { ShowStreamInformation(stream); Encoding encoding = GetEncoding(stream);
1109
Download from finelybook www.finelybook.com
byte[] buffer = new byte[bufferSize]; bool completed = false; do { int nread = stream.Read(buffer, 0, BUFFERSIZE); if (nread == 0) completed = true; if (nread < BUFFERSIZE) { Array.Clear(buffer, nread, BUFFERSIZE - nread); } string s = encoding.GetString(buffer, 0, nread); Console.WriteLine($"read {nread} bytes"); Console.WriteLine(s); } while (!completed); } }
Writing Streams How streams can be written is demonstrated by writing a simple string to a text file. To create a stream that can be written to, the File.OpenWrite method can be used. This time a temporary filename is created with the help of Path.GetTempFileName. The default file extension defined by the GetTempFileName is changed to txt with Path.ChangeExtension (code file StreamSamples/Program.cs): public static void WriteTextFile() { string tempTextFileName = Path.ChangeExtension(Path.GetTempFileName(), "txt"); using (FileStream stream = File.OpenWrite(tempTextFileName)) { //...
When you’re writing a UTF-8 file, the preamble needs to be written to the file. This can be done by sending the 3 bytes of the UTF-8 preamble to the stream with the WriteByte method: stream.WriteByte(0xef); stream.WriteByte(0xbb); stream.WriteByte(0xbf);
There’s an alternative for doing this. You don’t need to remember the 1110
Download from finelybook www.finelybook.com
bytes to specify the encoding. The Encoding class already has this information. The GetPreamble method returns a byte array with the preamble for the file. This byte array is written using the Write method of the Stream class: byte[] preamble = Encoding.UTF8.GetPreamble(); stream.Write(preamble, 0, preamble.Length);
Now the content of the file can be written. As the Write method requires byte arrays to write, strings need to be converted. For converting a string to a byte array with UTF-8, Encoding.UTF8.GetBytes does the job before the byte array is written: string hello = "Hello, World!"; byte[] buffer = Encoding.UTF8.GetBytes(hello); stream.Write(buffer, 0, buffer.Length); Console.WriteLine($"file {stream.Name} written");
You can open the temporary file using an editor such as Notepad, and it will use the correct encoding.
Copying Streams Now let’s combine reading and writing from streams by copying the file content. With the next code snippet, the readable stream is opened with File.OpenRead, and the writeable stream is opened with File .OpenWrite. A buffer is read using the Stream.Read method and written with Stream.Write (code file StreamSamples/Program.cs): public static void CopyUsingStreams(string inputFile, string outputFile) { const int BUFFERSIZE = 4096; using (var inputStream = File.OpenRead(inputFile)) using (var outputStream = File.OpenWrite(outputFile)) { byte[] buffer = new byte[BUFFERSIZE]; bool completed = false; do { int nRead = inputStream.Read(buffer, 0, BUFFERSIZE); if (nRead == 0) completed = true; outputStream.Write(buffer, 0, nRead);
1111
Download from finelybook www.finelybook.com
} while (!completed); } }
To copy a stream, it’s not necessary to write the code to read and write a stream. Instead, you can use the CopyTo method of the Stream class, as shown here (code file StreamSamples/Program.cs): public static void CopyUsingStreams2(string inputFile, string outputFile) { using (var inputStream = File.OpenRead(inputFile)) using (var outputStream = File.OpenWrite(outputFile)) { inputStream.CopyTo(outputStream); } }
Using Random Access to Streams Random access to streams provides an advantage in that—even with large files—you can access a specific position within the file in a fast way. To see random access in action, the following code snippet creates a large file. This code snippet creates the file sampledata.data with records that are all the same length and contain a number, a text, and a random date. The number of records that is passed to the method is created with the help of the Enumerable.Range method. The Select method creates an anonymous type that contains Number, Text, and Date properties. Out of these records, a string with # pre- and postfix is created, with a fixed length for every value and a ; separator between each value. The WriteAsync method writes the record to the stream (code file StreamSamples/Program.cs): const string SampleFilePath = "./samplefile.data"; public static async Task CreateSampleFile(int nRecords) { FileStream stream = File.Create(SampleFilePath); using (var writer = new StreamWriter(stream)) { var r = new Random(); var records = Enumerable.Range(0, nRecords).Select(x =>
1112
Download from finelybook www.finelybook.com
new { Number = x, Text = $"Sample text {r.Next(200)}", Date = new DateTime(Math.Abs((long)((r.NextDouble() * 2 - 1) * DateTime.MaxValue.Ticks))) }); foreach (var rec in records) { string date = rec.Date.ToString("d", CultureInfo.InvariantCulture); string s = $"#{rec.Number,8};{rec.Text,-20};{date}# {Environment.NewLine}"; await writer.WriteAsync(s); } } }
NOTE Chapter 17, “Managed and Unmanaged Memory,” explains that every object implementing IDisposable should be disposed. In the previous code snippet, it looks like FileStream is not disposed. However, that’s not the case. The StreamWriter takes control over the used resource and disposes the stream when the StreamWriter is disposed. To keep the stream opened for a longer period than the StreamWriter, you can configure this with the constructor of the StreamWriter. In that case, you need to dispose the stream explicitly. Now let’s position a cursor randomly within the stream to read different records. The user is asked to enter a record number that should be accessed. The byte in the stream that should be accessed is based on the record number and the record size. The Seek method of the Stream class now enables you to position the cursor within the stream. The second argument specifies whether the position is based on the beginning of the stream, the end of the stream, or the current 1113
Download from finelybook www.finelybook.com
position (code file StreamSamples/Program.cs): public static void RandomAccessSample() { try { using (FileStream stream = File.OpenRead(SampleFilePath)) { byte[] buffer = new byte[RECORDSIZE]; do { try { Console.Write("record number (or 'bye' to end): "); string line = Console.ReadLine(); if (line.ToUpper().CompareTo("BYE") == 0) break; if (int.TryParse(line, out int record)) { stream.Seek((record - 1) * RECORDSIZE, SeekOrigin.Begin); stream.Read(buffer, 0, RECORDSIZE); string s = Encoding.UTF8.GetString(buffer); Console.WriteLine($"record: {s}"); } } catch (Exception ex) { Console.WriteLine(ex.Message); } } while (true); Console.WriteLine("finished"); } } catch (FileNotFoundException) { Console.WriteLine("Create the sample file using the option -sample first"); } }
With this you can experiment with creating a file with 1.5 million records or more. A file this size is slow when you open it using Notepad, but it is extremely fast when you use random access. Depending on your system and the CPU and disk type, you might use higher or lower values for the tests.
1114
Download from finelybook www.finelybook.com
NOTE In case the records that should be accessed are not fixed size, it still can be useful to use random access for large files. One way to deal with this is to write the position of the records to the beginning of the file. Another option is to read a larger block where the record could be and find the record identifier and the record limiters within the memory block.
Using Buffered Streams For performance reasons, when you read or write to or from a file, the output is buffered. This means that if your program asks for the next 2 bytes of a file stream, and the stream passes the request on to Windows, then Windows will not connect to the file system and then locate and read the file off the disk just to get 2 bytes. Instead, Windows retrieves a large block of the file at one time and stores this block in an area of memory known as a buffer. Subsequent requests for data from the stream are satisfied from the buffer until the buffer runs out, at which point Windows grabs another block of data from the file. Writing to files works in the same way. For files, this is done automatically by the operating system, but you might have to write a stream class to read from some other device that is not buffered. If so, you can create a BufferedStream, which implements a buffer itself, and pass the stream that should be buffered to the constructor. Note, however, that BufferedStream is not designed for the situation in which an application frequently alternates between reading and writing data.
USING READERS AND WRITERS Reading and writing text files using the FileStream class requires working with byte arrays and dealing with the encoding as described in the previous section. There’s an easier way to do this: using readers and writers. You can use the StreamReader and StreamWriter classes to 1115
Download from finelybook www.finelybook.com
read and write to the FileStream, and you have an easier job not dealing with byte arrays and encodings. That’s because these classes work at a slightly higher level and are specifically geared to reading and writing text. The methods that they implement can automatically detect convenient points to stop reading text, based on the contents of the stream. In particular: These classes implement methods to read or write one line of text at a time: StreamReader.ReadLine and StreamWriter.WriteLine. In the case of reading, this means that the stream automatically determines where the next carriage return is and stops reading at that point. In the case of writing, it means that the stream automatically appends the carriage return–line feed combination to the text that it writes out. By using the StreamReader and StreamWriter classes, you don’t need to worry about the encoding used in the file. The sample code for ReaderWriterSamples makes use of the following namespaces: System System.Collections.Generic System.Globalization System.IO System.Linq System.Text System.Threading.Tasks
The StreamReader Class Let’s start with the StreamReader by converting the previous example to read a file to use the StreamReader. It looks a lot easier now. The constructor of the StreamReader receives the FileStream. You can check for the end of the file by using the EndOfStream property, and you read lines using the ReadLine method (code file 1116
Download from finelybook www.finelybook.com
ReaderWriterSamples/Program.cs): public static void ReadFileUsingReader(string fileName) { var stream = new FileStream(fileName, FileMode.Open, FileAccess.Read, FileShare.Read); using (var reader = new StreamReader(stream)) { while (!reader.EndOfStream) { string line = reader.ReadLine(); Console.WriteLine(line); } } }
It’s no longer necessary to deal with byte arrays and the encoding. However, pay attention; the StreamReader by default uses the UTF-8 encoding. You can let the StreamReader use the encoding as it is defined by the preamble in the file by specifying a different constructor: var reader = new StreamReader(stream, detectEncodingFromByteOrderMarks: true);
You can also explicitly specify the encoding: var reader = new StreamReader(stream, Encoding.Unicode);
Other constructors enable you to set the buffer to be used; the default is 1024 bytes. Also, you can specify that the underlying stream should not be closed on closing the reader. By default, when the reader is closed (using the Dispose method), the underlying stream is closed as well. Instead of explicitly instantiating a new StreamReader, you can create a StreamReader by using the OpenText method of the File class: var reader = File.OpenText(fileName);
With the code snippet to read the file, the file was read line by line using the ReadLine method. The StreamReader also allows reading the complete file from the position of the cursor in the stream using 1117
Download from finelybook www.finelybook.com
ReadToEnd: string content = reader.ReadToEnd();
The StreamReader also allows the content to read to a char array. This is similar to the Read method of the Stream class; it doesn’t read to a byte array but instead to a char array. Remember, the char type uses two bytes. This is perfect for 16-bit Unicode, but is not as useful with UTF-8 where a single character can be between one and six bytes long: int nChars = 100; char[] charArray = new char[nChars]; int nCharsRead = reader.Read(charArray, 0, nChars);
The StreamWriter Class The StreamWriter works in the same way as the StreamReader, except that you use StreamWriter only to write to a file (or to another stream). The following code snippet shows creating a StreamWriter passing a FileStream. Then a passed string array is written to the stream (code file ReaderWriterSamples/Program.cs): public static void WriteFileUsingWriter(string fileName, string[] lines) { var outputStream = File.OpenWrite(fileName); using (var writer = new StreamWriter(outputStream)) { byte[] preamble = Encoding.UTF8.GetPreamble(); outputStream.Write(preamble, 0, preamble.Length); writer.Write(lines); } }
Remember that the StreamWriter is using the UTF-8 format by default to write the text content. You can define alternative contents by setting an Encoding object in the constructor. Also, similarly to the constructor of the StreamReader, the StreamWriter allows specifying the buffer size and whether the underlying stream should not be closed on closing of the writer. The Write method of the StreamWriter defines 17 overloads that allow passing strings and several .NET data types. Using the methods 1118
Download from finelybook www.finelybook.com
passing the .NET data types, remember that all these are changed to strings with the specified encoding. To write the data types in binary format, you can use the BinaryWriter that’s shown next.
Reading and Writing Binary Files To read and write binary files, one option is to directly use the stream types; in this case, it’s good to use byte arrays for reading and writing. Another option is to use readers and writers defined for this scenario: BinaryReader and BinaryWriter. You use them similarly to the way you use StreamReader and StreamWriter except BinaryReader and BinaryWriter don’t use any encoding. Files are written in binary format rather than text format. Unlike the Stream type, BinaryWriter defines 18 overloads for the Write method. The overloads accept different types, as shown in the following code snippet that writes a double, an int, a long, and a string (code file ReaderWriterSamples/Program.cs): public static void WriteFileUsingBinaryWriter(string binFile) { var outputStream = File.Create(binFile); using (var writer = new BinaryWriter(outputStream)) { double d = 47.47; int i = 42; long l = 987654321; string s = "sample"; writer.Write(d); writer.Write(i); writer.Write(l); writer.Write(s); } }
To read the file again, you can use a BinaryReader. This class defines methods to read all the different types, such as ReadDouble, ReadInt32, ReadInt64, and ReadString, which are shown here: public static void ReadFileUsingBinaryReader(string binFile) { var inputStream = File.Open(binFile, FileMode.Open); using (var reader = new BinaryReader(inputStream))
1119
Download from finelybook www.finelybook.com
{ double d = reader.ReadDouble(); int i = reader.ReadInt32(); long l = reader.ReadInt64(); string s = reader.ReadString(); Console.WriteLine($"d: {d}, i: {i}, l: {l}, s: {s}"); } }
The order for reading the file must match exactly the order in which it has been written. Creating your own binary format, you need to know what and how it is stored and read accordingly. The older Microsoft Word document was using a binary file format, whereas the newer docx file extension is a zip file. How zip files can be read and written is explained in the next section.
COMPRESSING FILES .NET includes types to compress and decompress streams using different algorithms. You can use DeflateStream, GZipStream, and BrotliStream to compress and decompress streams; the ZipArchive class enables you to create and read ZIP files. Both DeflateStream and GZipStream use the same algorithm for compression (in fact, GZipStream uses DeflateStream behind the scenes), but GZipStream adds a cyclic redundancy check to detect data corruption. Brotli is a relatively new open-source compression algorithm from Google. The speed of Brotli is similar to deflate, but it offers a better compression. Contrary to most other compression algorithms, it uses a dictionary for often-used words for better compression. Nowadays this algorithm is supported by most modern browsers. Using a zip file has the advantage that you can compress files to an archive (with ZipArchive), and you can open this archive directly with Windows Explorer; it’s been built in to Windows since 1998. You can’t open a gzip archive with Windows Explorer; you need third-party tools for gzip.
1120
Download from finelybook www.finelybook.com
NOTE The algorithm used by DeflateStream and GZipStream is the deflate algorithm. This algorithm is defined by RFC 1951 (https://tools.ietf.org/html/rfc1951). This algorithm is widely thought to be not covered by patents, which is why it is in widespread use. Brotli is available on GitHub at https://github.com/google/brotli and defined by RFC 7932 (https://tools.ietf.org/html/rfc7932). The sample code for CompressFileSample makes use of the following dependency and namespaces: Dependency System.IO.Compression.Brotli Namespaces System System.Collections.Generic System.IO System.IO.Compression System.Text
Using the Deflate Stream As explained earlier, a feature from streams is that you can chain them. To compress a stream, all that’s needed is to create DeflateStream and pass another stream (in this example, the outputStream to write a file) to the constructor, with the argument CompressionMode.Compress for compression. Writing to this stream either using the Write method or by using other features, such as the CopyTo method as shown in this code snippet, is all that’s needed for 1121
Download from finelybook www.finelybook.com
file compression (code file CompressFileSample/Program.cs): public static void CompressFile(string fileName, string compressedFileName) { using (FileStream inputStream = File.OpenRead(fileName)) { FileStream outputStream = File.OpenWrite(compressedFileName); using (var compressStream = new DeflateStream(outputStream, CompressionMode.Compress)) { inputStream.CopyTo(compressStream); } } }
To decompress the deflate-compressed file again, the following code snippet opens the file using a FileStream and creates the DeflateStream object with CompressionMode.Decompress passing the file stream for decompression. The Stream.CopyTo method copies the decompressed stream to a MemoryStream. This code snippet then makes use of a StreamReader to read the data from the MemoryStream and write the output to the console. The StreamReader is configured to leave the assigned MemoryStream open (using the leaveOpen argument), so the MemoryStream could also be used after closing the reader: public static void DecompressFile(string fileName) { FileStream inputStream = File.OpenRead(fileName); using (MemoryStream outputStream = new MemoryStream()) using (var compressStream = new DeflateStream(inputStream, CompressionMode.Decompress)) { compressStream.CopyTo(outputStream); outputStream.Seek(0, SeekOrigin.Begin); using (var reader = new StreamReader(outputStream, Encoding.UTF8, detectEncodingFromByteOrderMarks: true, bufferSize: 4096, leaveOpen: true)) { string result = reader.ReadToEnd(); Console.WriteLine(result);
1122
Download from finelybook www.finelybook.com
} // you could use the outputStream after the StreamReader is closed } }
Using Brotli Using BrotliStream, compression with Brotli is like using deflate. You just need to add the NuGet package System.IO.Compression.Brotli and instantiate the BrotliStream class (code file CompressFileSample/Program.cs): public static void CompressFileWithBrotli(string fileName, string compressedFileName) { using (FileStream inputStream = File.OpenRead(fileName)) { FileStream outputStream = File.OpenWrite(compressedFileName); using (var compressStream = new BrotliStream(outputStream, CompressionMode.Compress)) { inputStream.CopyTo(compressStream); } } }
Decompression works accordingly using BrotliStream: public static void DecompressFileWithBrotli(string fileName) { FileStream inputStream = File.OpenRead(fileName); using (MemoryStream outputStream = new MemoryStream()) using (var compressStream = new BrotliStream(inputStream, CompressionMode.Decompress)) { compressStream.CopyTo(outputStream); outputStream.Seek(0, SeekOrigin.Begin); using (var reader = new StreamReader(outputStream, Encoding.UTF8, detectEncodingFromByteOrderMarks: true, bufferSize: 4096, leaveOpen: true)) {
1123
Download from finelybook www.finelybook.com
string result = reader.ReadToEnd(); Console.WriteLine(result); } } }
Zipping Files Today, the ZIP file format is the standard for many different file types. Word documents (docx) as well as NuGet packages are all stored as a ZIP file. With .NET, it’s easy to create a ZIP archive. For creating a ZIP archive, you can create an object of ZipArchive. A ZipArchive contains multiple ZipArchiveEntry objects. The ZipArchive class is not a stream, but it uses a stream to read or write to (this is similar to the reader and writer classes discussed earlier). The following code snippet creates a ZipArchive that writes the compressed content to the file stream opened with File.OpenWrite. What’s added to the ZIP archive is defined by the directory passed. Directory.EnumerateFiles enumerates all the files in the directory and creates a ZipArchiveEntry object for every file. Invoking the Open method creates a Stream object. With the CopyTo method of the Stream that is read, the file is compressed and written to the ZipArchiveEntry (code file CompressFileSample/Program.cs): public static void CreateZipFile(string directory, string zipFile) { FileStream zipStream = File.OpenWrite(zipFile); using (var archive = new ZipArchive(zipStream, ZipArchiveMode.Create)) { IEnumerable files = Directory.EnumerateFiles( directory, "*", SearchOption.TopDirectoryOnly); foreach (var file in files) { ZipArchiveEntry entry = archive.CreateEntry(Path.GetFileName(file)); using (FileStream inputStream = File.OpenRead(file)) using (Stream outputStream = entry.Open()) { inputStream.CopyTo(outputStream); }
1124
Download from finelybook www.finelybook.com
} } }
WATCHING FILE CHANGES With FileSystemWatcher, you can monitor file changes. Events are fired on creating, renaming, deleting, and changing files. This can be used in scenarios where you need to react on file changes—for example, with a server when a file is uploaded, or in a case where a file is cached in memory and the cache needs to be invalidated when the file changes. As FileSystemWatcher is easy to use, let’s directly get into a sample. The sample code for FileMonitor makes use of the following namespaces: System System.IO
The sample code starts watching files in the method WatchFiles. Using the constructor of the FileSystemWatcher, you can supply the directory that should be watched. You can also provide a filter to filter only specific files that match with the filter expression. When you set the property IncludeSubdirectories, you can define whether only the files in the specified directory should be watched or whether files in subdirectories should also be watched. With the Created, Changed, Deleted, and Renamed events, event handlers are supplied. All of these events are of type FileSystemEventHandler with the exception of the Renamed event that is of type RenamedEventHandler. RenamedEventHandler derives from FileSystemEventHandler and offers additional information about the event (code file FileMonitor/Program.cs): private static FileSystemWatcher s_watcher; public static void WatchFiles(string path, string filter) { s_watcher = new FileSystemWatcher(path, filter) { IncludeSubdirectories = true };
1125
Download from finelybook www.finelybook.com
s_watcher.Created += OnFileChanged; s_watcher.Changed += OnFileChanged; s_watcher.Deleted += OnFileChanged; s_watcher.Renamed += OnFileRenamed; s_watcher.EnableRaisingEvents = true; Console.WriteLine("watching file changes..."); }
The information that is received with a file change is of type FileSystemEventArgs. It contains the name of the file that changed as well as the kind of change that is an enumeration of type WatcherChangeTypes: private static void OnFileChanged(object sender, FileSystemEventArgs e) { Console.WriteLine($"file {e.Name} {e.ChangeType}"); }
On renaming the file, additional information is received with the RenamedEventArgs parameter. This type derives from FileSystemEventArgs and defines additional information about the original name of the file: private static void OnFileRenamed(object sender, RenamedEventArgs e) { Console.WriteLine($"file {e.OldName} {e.ChangeType} to {e.Name}"); }
When you start the application by specifying a folder to watch and *.txt as the filter, the following is the output after creating the file sample1.txt, adding content, renaming it to sample2.txt, and finally deleting it: watching file changes... file New Text Document.txt Created file New Text Document.txt Renamed to sample1.txt file sample1.txt Changed file sample1.txt Changed file sample1.txt Renamed to sample2.txt file sample2.txt Deleted
1126
Download from finelybook www.finelybook.com
WORKING WITH MEMORY MAPPED FILES Memory mapped files enable you to access files or shared memory from different processes. There are several scenarios and features with this technology: Fast random access to huge files using maps of the file Sharing of files between different processes or tasks Sharing of memory between different processes or tasks Using accessors to directly read and write from memory positions Using streams to read and write The memory mapped files API allows you to use either a physical file or shared memory—where the system’s page file is used as a backing store. The shared memory can be bigger than the available physical memory, so a backing store is needed. You can create a memory mapped file to a specific file or shared memory. With either of these options, you can assign a name for the memory map. Using a name allows different processes to have access to the same shared memory. After you’ve created the memory map, you can create a view. A view is used to map a part of the complete memory mapped file to access it for reading or writing. The MemoryMappedFilesSample makes use of the following namespaces: System System.IO System.IO.MemoryMappedFiles System.Threading System.Threading.Tasks
The sample application demonstrates working with a memory mapped file using both view accessors and streams using multiple tasks. One task creates the memory mapped file and writes data to it; the other task reads data.
NOTE 1127
Download from finelybook www.finelybook.com
The sample code makes use of tasks and events. Read Chapter 21, “Tasks and Parallel Programming,” for more information about tasks, and synchronization between tasks. Some infrastructure is needed for creating the tasks and signaling when the map is ready, and the data is written. The name of the map and ManualResetEventSlim objects are defined as a member of the Program class (code file MemoryMappedFilesSample/Program.cs): private ManualResetEventSlim _mapCreated = new ManualResetEventSlim(initialState: false); private ManualResetEventSlim _dataWrittenEvent = new ManualResetEventSlim(initialState: false); private const string MAPNAME = "SampleMap";
Tasks are started within the Main method with the Task.Run method: public void Run() { Task.Run(() => WriterAsync()); Task.Run(() => Reader()); Console.WriteLine("tasks started"); Console.ReadLine(); }
Now let’s create readers and writers using accessors.
Using Accessors to Create Memory Mapped Files To create a memory-based memory mapped file, the writer invokes the MemoryMappedFile.CreateOrOpen method. This method either opens the object with the name specified with the first parameter, or it creates a new one if it doesn’t exist. To open existing files, you can use the method OpenExisting. For accessing physical files, you can use the method CreateFromFile. Other parameters used in the sample code are the size of the memory mapped file and the access needed. After the memory mapped file is created, the event _mapCreated is signaled to give other tasks the 1128
Download from finelybook www.finelybook.com
information that the memory mapped file is created and can be opened. Invoking the method CreateViewAccessor returns a MemoryMappedViewAccessor to access the shared memory. With the view accessor, you can define an offset and size that is used by this task. Of course, the maximum size that you can use is the size of the memory mapped file itself. This view is used for writing; thus, the file access is set to MemoryMappedFileAccess.Write. Next, you can write primitive data types to the shared memory using overloaded Write methods of the MemoryMappedViewAccessor. The Write method always needs position information designating where the data should be written to. After all the data is written, an event is signaled to inform the reader that it is now possible to start reading (code file MemoryMappedFilesSample/Program.cs): private async Task WriterAsync() { try { using (MemoryMappedFile mappedFile = MemoryMappedFile.CreateOrOpen( MAPNAME, 10000, MemoryMappedFileAccess.ReadWrite)) { _mapCreated.Set(); // signal shared memory segment created Console.WriteLine("shared memory segment created"); using (MemoryMappedViewAccessor accessor = mappedFile.CreateViewAccessor( 0, 10000, MemoryMappedFileAccess.Write)) { for (int i = 0, pos = 0; i < 100; i++, pos += 4) { accessor.Write(pos, i); Console.WriteLine($"written {i} at position {pos}"); await Task.Delay(10); } _dataWrittenEvent.Set(); // signal all data written Console.WriteLine("data written"); } } } catch (Exception ex) {
1129
Download from finelybook www.finelybook.com
Console.WriteLine($"writer {ex.Message}"); } }
The reader first waits for the map to be created before opening the memory mapped file using MemoryMappedFile.OpenExisting. The reader just needs read access to the map. After that, similar to the writer before, a view accessor is created. Before reading data, you wait for the _dataWrittenEvent to be set. Reading is similar to writing in that you supply a position where the data should be accessed, but different Read methods, such as ReadInt32, are defined for reading the different data types: private void Reader() { try { Console.WriteLine("reader"); _mapCreated.Wait(); Console.WriteLine("reader starting"); using (MemoryMappedFile mappedFile = MemoryMappedFile.OpenExisting( MAPNAME, MemoryMappedFileRights.Read)) { using (MemoryMappedViewAccessor accessor = mappedFile.CreateViewAccessor( 0, 10000, MemoryMappedFileAccess.Read)) { _dataWrittenEvent.Wait(); Console.WriteLine("reading can start now"); for (int i = 0; i < 400; i += 4) { int result = accessor.ReadInt32(i); Console.WriteLine($"reading {result} from position {i}"); } } } } catch (Exception ex) { Console.WriteLine($"reader {ex.Message}"); } }
1130
Download from finelybook www.finelybook.com
When you run the application, you might see output such as this: reader reader starting tasks started shared memory segment created written 0 at position 0 written 1 at position 4 written 2 at position 8 ... written 99 at 396 data written reading can start now reading 0 from position 0 reading 1 from position 4 ...
Using Streams to Create Memory Mapped Files Instead of writing primitive data types with memory mapped files, you can instead use streams. Streams enable you to use readers and writers, as described earlier in this chapter. Now create a writer to use a StreamWriter. The method CreateViewStream from the MemoryMappedFile returns a MemoryMappedViewStream. This method is very similar to the CreateViewAccessor method used earlier in defining a view inside the map; with the offset and size, it is convenient to use all the features of streams. The WriteLineAsync method is then used to write a string to the stream. As the StreamWriter caches writes, the stream position is not updated with every write; it’s updated only when the writer writes blocks. For flushing the cache with every write, you set the AutoFlush property of the StreamWriter to true (code file MemoryMappedFilesSample/Program.cs): private async Task WriterUsingStreams() { try { using (MemoryMappedFile mappedFile = MemoryMappedFile.CreateOrOpen( MAPNAME, 10000, MemoryMappedFileAccess.ReadWrite)) { _mapCreated.Set(); // signal shared memory segment created
1131
Download from finelybook www.finelybook.com
Console.WriteLine("shared memory segment created"); MemoryMappedViewStream stream = mappedFile.CreateViewStream( 0, 10000, MemoryMappedFileAccess.Write); using (var writer = new StreamWriter(stream)) { writer.AutoFlush = true; for (int i = 0; i < 100; i++) { string s = $"some data {i}"; Console.WriteLine($"writing {s} at {stream.Position}"); await writer.WriteLineAsync(s); } } _dataWrittenEvent.Set(); // signal all data written Console.WriteLine("data written"); } } catch (Exception ex) { Console.WriteLine($"writer {ex.Message}"); } }
The reader similarly creates a mapped view stream with CreateViewStream, but this time for read access. Now it’s possible to use StreamReader methods to read content from the shared memory: private async Task ReaderUsingStreams() { try { Console.WriteLine("reader"); _mapCreated.Wait(); Console.WriteLine("reader starting"); using (MemoryMappedFile mappedFile = MemoryMappedFile.OpenExisting( MAPNAME, MemoryMappedFileRights.Read)) { MemoryMappedViewStream stream = mappedFile.CreateViewStream( 0, 10000, MemoryMappedFileAccess.Read); using (var reader = new StreamReader(stream)) { _dataWrittenEvent.Wait(); Console.WriteLine("reading can start now");
1132
Download from finelybook www.finelybook.com
for (int i = 0; i < 100; i++) { long pos = stream.Position; string s = await reader.ReadLineAsync(); Console.WriteLine($"read {s} from {pos}"); } } } } catch (Exception ex) { Console.WriteLine($"reader {ex.Message}"); } }
When you run the application, you can see the data written and read. When the data is being written, the position within the stream is always updated because the AutoFlush property is set. When data is being read, always 1024 byte blocks are read. tasks started reader reader starting shared memory segment created writing some data 0 at 0 writing some data 1 at 13 writing some data 2 at 26 writing some data 3 at 39 writing some data 4 at 52 ... data written reading can start now read some data 0 from 0 read some data 1 from 1024 read some data 2 from 1024 read some data 3 from 1024 ...
When communicating via memory mapped files, you have to synchronize the reader and the writer, so the reader knows when data is available. Pipes, which are discussed in the next section, give other options in such a scenario.
COMMUNICATING WITH PIPES 1133
Download from finelybook www.finelybook.com
For communication between threads and processes, and also fast communication between different systems, you can use pipes. With .NET, pipes are implemented as streams and thus you have an option to not only send bytes into a pipe, but you can use all the stream features, such as readers and writers. Pipes are implemented as different kinds—as named pipes, where the name can be used to connect to each end, and anonymous pipes. Anonymous pipes cannot be used to communicate between different systems; they can be used only for communication between a child and parent process or for communication between different tasks. The code for all the pipe samples makes use of the following namespaces: System System.IO System.IO.Pipes System.Threading System.Threading.Tasks
Let’s start with named pipes for communication between different processes. With the first sample application, two console applications are used. One acts as server and reads data from a pipe; the other one writes messages to the pipe.
Creating a Named Pipe Server You create the server by creating a new instance of NamedPipeServerStream. NamedPipeServerStream derives from the base class PipeStream that in turn derives from the Stream base class and thus can use all the features of streams—for example, you can create a CryptoStream or a GZipStream to write encrypted or compressed data into the named pipe. The constructor requires a name for the pipe that can be used by multiple processes communicating via the pipe. The second argument that is used in the following code snippet defines the direction of the pipe. The server stream is used for reading, and 1134
Download from finelybook www.finelybook.com
thus the direction is set to PipeDirection.In. Named pipes can also be bidirectional for reading and writing; you use PipeDirection.InOut. Anonymous pipes can be only unidirectional. Next, the named pipe waits until the writing party connects by calling the WaitForConnection method. Next, within a loop (until the message “bye” is received), the pipe server reads messages to a buffer array and writes the message to the console (code file PipesReader/Program.cs): private static void PipesReader(string pipeName) { try { using (var pipeReader = new NamedPipeServerStream(pipeName, PipeDirection.In)) { pipeReader.WaitForConnection(); Console.WriteLine("reader connected"); const int BUFFERSIZE = 256; bool completed = false; while (!completed) { byte[] buffer = new byte[BUFFERSIZE]; int nRead = pipeReader.Read(buffer, 0, BUFFERSIZE); string line = Encoding.UTF8.GetString(buffer, 0, nRead); Console.WriteLine(line); if (line == "bye") completed = true; } } Console.WriteLine("completed reading"); Console.ReadLine(); } catch (Exception ex) { Console.WriteLine(ex.Message); } }
The following are some other options that you can configure with named pipes: You can set the enumeration PipeTransmissionMode to Byte or Message. With bytes, a continuous stream is sent; with messages every message can be retrieved. 1135
Download from finelybook www.finelybook.com
With the pipe options, you can specify WriteThrough to immediately write to the pipe and not to the cache. You can configure buffer sizes for input and output. You configure pipe security to designate who is allowed to read and write to the pipe. Security is discussed in Chapter 24. You can configure inheritability of the pipe handle, which is important for communicating with child processes. Because the NamedPipeServerStream is a Stream, you can use StreamReader instead of reading from the byte array; this method simplifies the code: var pipeReader = new NamedPipeServerStream(pipeName, PipeDirection.In); using (var reader = new StreamReader(pipeReader)) { pipeReader.WaitForConnection(); Console.WriteLine("reader connected"); bool completed = false; while (!completed) { string line = reader.ReadLine(); Console.WriteLine(line); if (line == "bye") completed = true; } }
Creating a Named Pipe Client Now you need a client. As the server reads messages, the client writes them. You create the client by instantiating a NamedPipeClientStream object. Because named pipes can communicate across the network, you need a server name in addition to the pipe name and the direction of the pipe. The client connects by invoking the Connect method. After the connection succeeds, messages are sent to the server by invoking WriteLine on the StreamWriter. By default, messages are not sent immediately; they are cached. The message is pushed to the server by invoking the Flush method. You can also immediately pass all the messages without invoking the Flush method. For this, you have to 1136
Download from finelybook www.finelybook.com
configure the option to write through the cache on creating the pipe (code file PipesWriter/Program.cs): public static void PipesWriter(string serverName, string pipeName) { var pipeWriter = new NamedPipeClientStream(serverName, pipeName, PipeDirection.Out); using (var writer = new StreamWriter(pipeWriter)) { pipeWriter.Connect(); Console.WriteLine("writer connected"); bool completed = false; while (!completed) { string input = ReadLine(); if (input == "bye") completed = true; writer.WriteLine(input); writer.Flush(); } } Console.WriteLine("completed writing"); }
For starting two projects from within Visual Studio, you can configure multiple startup projects with Project ⇨ Set Startup Projects. When you run the application, input from one console is echoed in the other one.
Creating Anonymous Pipes Let’s do something similar with anonymous pipes. With anonymous pipes two tasks are created that communicate with each other. For signaling the pipe creation, you use a ManualResetEventSlim object as you did with the memory mapped files. In the Run method of the Program class, two tasks are created that invoke the Reader and Writer methods (code file AnonymousPipes/Program.cs): private string _pipeHandle; private ManualResetEventSlim _pipeHandleSet; static void Main() { var p = new Program();
1137
Download from finelybook www.finelybook.com
p.Run(); Console.ReadLine(); } public void Run() { _pipeHandleSet = new ManualResetEventSlim(initialState: false); Task.Run(() => Reader()); Task.Run(() => Writer()); Console.ReadLine(); }
The server side acts as a reader by creating an AnonymousPipeServerStream and defining the PipeDirection.In. The other side of the communication needs to know about the client handle of the pipe. This handle is converted to a string from the method GetClientHandleAsString and assigned to the _pipeHandle variable. This variable will be used later by the client that acts as a writer. After the initial process, the pipe server can be acted on as a stream because it is a stream: private void Reader() { try { var pipeReader = new AnonymousPipeServerStream(PipeDirection.In, HandleInheritability.None); using (var reader = new StreamReader(pipeReader)) { _pipeHandle = pipeReader.GetClientHandleAsString(); Console.WriteLine($"pipe handle: {_pipeHandle}"); _pipeHandleSet.Set(); bool end = false; while (!end) { string line = reader.ReadLine(); Console.WriteLine(line); if (line == "end") end = true; } Console.WriteLine("finished reading"); } } catch (Exception ex) {
1138
Download from finelybook www.finelybook.com
Console.WriteLine(ex.Message); } }
The client code waits until the variable _pipeHandleSet is signaled, and thus can open the pipe handle referenced by the _pipeHandle variable. Later processing continues with a StreamWriter: private void Writer() { Console.WriteLine("anonymous pipe writer"); _pipeHandleSet.Wait(); var pipeWriter = new AnonymousPipeClientStream( PipeDirection.Out, _pipeHandle); using (var writer = new StreamWriter(pipeWriter)) { writer.AutoFlush = true; Console.WriteLine("starting writer"); for (int i = 0; i < 5; i++) { writer.WriteLine($"Message {i}"); Task.Delay(500).Wait(); } writer.WriteLine("end"); } }
When you run the application, the two tasks communicate and send data between the tasks.
USING FILES AND STREAMS WITH THE WINDOWS RUNTIME With the Windows Runtime, you implement streams with native types. Although they are implemented with native code, they look like .NET types. However, there’s a difference you need to be aware of: For streams, the Windows Runtime implements its own types in the namespace Windows.Storage.Streams. Here you can find classes such as FileInputStream, FileOutputStream, and RandomAccessStreams. All these classes are based on interfaces, for example, IInputStream, IOutputStream, and IRandomAccessStream. You’ll also find the concept of readers and writers. Windows Runtime readers and writers are the 1139
Download from finelybook www.finelybook.com
types DataReader and DataWriter. Let’s look at what’s different from the .NET streams you’ve seen so far and how .NET streams and types can map to these native types.
Windows App Editor Let’s create an editor starting with the Blank App (Universal Windows) Visual Studio template. To add commands for opening and saving a file, a CommandBar with AppBarButton elements is added to the main page (code file WindowsAppEditor/MainPage.xaml):
The TextBox added to the Grid fill receive the contents of the file:
The OnOpen handle first starts the dialog where the user can select a file. Remember, you used the OpenFileDialog earlier. With Windows apps, you can use pickers. To open files, the FileOpenPicker is the preferred type. You can configure this picker to define the proposed start location for the user. You set the SuggestedStartLocation to PickerLocationId.DocumentsLibrary to open the user’s documents folder. The PickerLocationId is an enumeration that defines various special folders. Next, the FileTypeFilter collection specifies the file types that should be listed for the user. Finally, the method PickSingleFileAsync returns the file selected from the user. To allow users to select multiple files, 1140
Download from finelybook www.finelybook.com
you can use the method PickMultipleFilesAsync instead. This method returns a StorageFile. StorageFile is defined in the namespace Windows.Storage. This class is the equivalent of the FileInfo class for opening, creating, copying, moving, and deleting files (code file WindowsAppEditor/MainPage .xaml.cs): public async void OnOpen() { try { var picker = new FileOpenPicker() { ViewMode = PickerViewMode.Thumbnail, SuggestedStartLocation = PickerLocationId.DocumentsLibrary }; picker.FileTypeFilter.Add(".txt"); picker.FileTypeFilter.Add(".md"); StorageFile file = await picker.PickSingleFileAsync(); //...
Now, open the file using OpenReadAsync. This method returns a stream that implements the interface IRandomAccessStreamWithContentType, which derives from the interfaces IRandomAccessStream, IInputStream, IOuputStream, IContentProvider, and IDisposable. IRandomAccessStream allows random access to a stream with the Seek method, and it gives information about the size of a stream. IInputStream defines the method ReadAsync to read from a stream. IOutputStream is the opposite; it defines the methods WriteAsync and FlushAsync. IContentTypeProvider defines the property ContentType that gives information about the content of the file. Remember the encodings of the text files? Now it would be possible to read the content of the stream invoking the method ReadAsync. However, the Windows Runtime also knows the reader’s and writer’s concepts that have already been discussed. A DataReader accepts an IInputStream with the constructor. The DataReader type defines methods to read primitive data types such as ReadInt16, ReadInt32, and ReadDateTime. You can read a byte array with ReadBytes, and a string with ReadString. The ReadString method requires the number of characters to read. The string is assigned to the Text property of the TextBox control to display 1141
Download from finelybook www.finelybook.com
the content: //... if (file != null) { IRandomAccessStreamWithContentType stream = await file.OpenReadAsync(); using (var reader = new DataReader(stream)) { await reader.LoadAsync((uint)stream.Size); text1.Text = reader.ReadString((uint)stream.Size); } } } catch (Exception ex) { var dlg = new MessageDialog(ex.Message, "Error"); await dlg.ShowAsync(); }
NOTE Like the readers and the writers of the .NET Framework, the DataReader and DataWriter manages the stream that is passed with the constructor. On disposing the reader or writer, the stream gets disposed as well. With .NET classes, to keep the underlying stream open for a longer time you can set the leaveOpen argument in the constructor. With the Windows Runtime types, you can detach the stream from the readers and writers by invoking the method DetachStream. On saving the document, the OnSave method is invoked. First, the FileSavePicker is used to allow the user to select the document— similar to the FileOpenPicker. Next, the file is opened using OpenTransactedWriteAsync. The NTFS file system supports transactions; these are not covered from the .NET Framework but are available with the Windows Runtime. OpenTransactedWriteAsync returns a StorageStreamTransaction object that implements the interface IStorageStreamTransaction. This object itself is not a stream 1142
Download from finelybook www.finelybook.com
(although the name might lead you to believe this), but it contains a stream that you can reference with the Stream property. This property returns an IRandomAccessStream stream. As you can create a DataReader, you can create a DataWriter to write primitive data types, including strings as in this example. The StoreAsync method finally writes the content from the buffer to the stream. The transaction needs to be committed by invoking the CommitAsync method before disposing the writer: public async void OnSave() { try { var picker = new FileSavePicker() { SuggestedStartLocation = PickerLocationId.DocumentsLibrary, SuggestedFileName = "New Document" }; picker.FileTypeChoices.Add("Plain Text", new List () { ".txt" }); StorageFile file = await picker.PickSaveFileAsync(); if (file != null) { using (StorageStreamTransaction tx = await file.OpenTransactedWriteAsync()) { IRandomAccessStream stream = tx.Stream; stream.Seek(0); using (var writer = new DataWriter(stream)) { writer.WriteString(text1.Text); tx.Stream.Size = await writer.StoreAsync(); await tx.CommitAsync(); } } } } catch (Exception ex) { var dlg = new MessageDialog(ex.Message, "Error"); await dlg.ShowAsync(); } }
1143
Download from finelybook www.finelybook.com
The DataWriter doesn’t add the preamble defining the kind of Unicode file to the stream. You need to do that explicitly, as explained earlier in this chapter. The DataWriter just deals with the encoding of the file by setting the UnicodeEncoding and ByteOrder properties. The default setting is UnicodeEncoding.Utf8 and ByteOrder.BigEndian. Instead of working with the DataWriter, you can also take advantage of the features of the StreamReader and StreamWriter as well as the .NET Stream class, as shown in the next section.
Mapping Windows Runtime Types to .NET Types Let’s start with reading the file. To convert a Windows Runtime stream to a .NET stream for reading, you can use the extension method AsStreamForRead. This method is defined in the namespace System.IO (that must be opened) in the assembly System.Runtime.WindowsRuntime. This method creates a new Stream object that manages the IInputStream. Now, you can use it as a normal .NET stream, as shown previously—for example, passing it to a StreamReader and using this reader to access the file: public async void OnOpenDotnet() { try { var picker = new FileOpenPicker() { ViewMode = PickerViewMode.Thumbnail, SuggestedStartLocation = PickerLocationId.DocumentsLibrary }; picker.FileTypeFilter.Add(".txt"); picker.FileTypeFilter.Add(".md"); StorageFile file = await picker.PickSingleFileAsync(); if (file != null) { IRandomAccessStreamWithContentType wrtStream = await file.OpenReadAsync(); Stream stream = wrtStream.AsStreamForRead(); using (var reader = new StreamReader(stream)) { text1.Text = await reader.ReadToEndAsync(); }
1144
Download from finelybook www.finelybook.com
} } catch (Exception ex) { var dlg = new MessageDialog(ex.Message, "Error"); await dlg.ShowAsync(); } }
All the Windows Runtime stream types can easily be converted to .NET streams and the other way around. The following table lists the methods needed: CONVERT FROM CONVERT TO
METHOD
IRandomAccessStream Stream
AsStream
IInputStream
Stream
AsStreamForRead
IOutputStream
Stream
AsStreamForWrite
Stream
IInputStream
AsInputStream
Stream
IOutputStream
AsOutputStream
Stream
IRandomAccessStream AsRandomAccessStream
Now save the change to the file as well. The stream for writing is converted with the extension method AsStreamForWrite. Now, this stream can be written using the StreamWriter class. The code snippet also writes the preamble for the UTF-8 encoding to the file: public async void OnSaveDotnet() { try { var picker = new FileSavePicker() { SuggestedStartLocation = PickerLocationId.DocumentsLibrary, SuggestedFileName = "New Document" }; picker.FileTypeChoices.Add("Plain Text", new List () { ".txt" }); StorageFile file = await picker.PickSaveFileAsync(); if (file != null) { StorageStreamTransaction tx = await file.OpenTransactedWriteAsync(); using (var writer = new
1145
Download from finelybook www.finelybook.com
StreamWriter(tx.Stream.AsStreamForWrite())) { byte[] preamble = Encoding.UTF8.GetPreamble(); await stream.WriteAsync(preamble, 0, preamble.Length); await writer.WriteAsync(text1.Text); await writer.FlushAsync(); tx.Stream.Size = (ulong)stream.Length; await tx.CommitAsync(); } } } catch (Exception ex) { var dlg = new MessageDialog(ex.Message, "Error"); await dlg.ShowAsync(); } }
SUMMARY In this chapter, you examined how to use the .NET classes to access the file system from your C# code. You have seen that in both cases the base classes expose simple but powerful object models that make it very easy to perform almost any kind of action in these areas. For the file system, these actions are copying files; moving, creating, and deleting files and folders; and reading and writing both binary and text files. You’ve seen how to compress files using both the deflate algorithm and ZIP files. The FileSystemWatcher was used to get information when files change. You’ve also seen how to communicate with the help of shared memory as well as named and anonymous pipes. Finally, you’ve seen how to map .NET streams to Windows Runtime streams to take advantage of .NET features within Windows apps. In some other chapters of the book you can see streams in action. For example, Chapter 23, “Networking,” uses streams to send data across the network. Reading and writing XML files and streaming large XML files are shown in Bonus Chapter 2/JSON,” which you can find online. The next chapter covers the foundation of networking and sending streams across the network. 1146
Download from finelybook www.finelybook.com
23 Networking WHAT’S IN THIS CHAPTER? Using HttpClient Manipulating IP addresses and performing DNS lookups Creating a server with WebListener Socket programming with TCP, UDP, and socket classes
WROX.COM CODE DOWNLOADS FOR THIS CHAPTER The Wrox.com code downloads for this chapter are found at http://www.wrox.com on the Download Code tab. The source code is also available at https://github.com/ProfessionalCSharp/ProfessionalCSharp7 in the directory Networking. The code for this chapter is divided into the following major examples: HttpClientSample WinAppHttpClient HttpServer Utilities DnsLookup 1147
Download from finelybook www.finelybook.com
HttpClientUsingTcp TcpServer WinAppTcpClient UdpReceiver UdpSender SocketServer SocketClient
NETWORKING This chapter takes a practical approach to networking, mixing examples with a discussion of relevant theory and networking concepts as appropriate. This chapter is not a guide to computer networking but an introduction to using the .NET for network communication. This chapter shows you how to create both clients and servers using network protocols. It starts with the simplest case: sending an HTTP request to a server and storing the information that’s sent back in the response. Then you see how to create an HTTP server, using utility classes to split up and create URIs and resolve hostnames to IP addresses. You are also introduced to sending and receiving data via TCP and UDP and find out how to make use of the Socket class. The two namespaces of most interest for networking are System.Net and System.Net.Sockets. The System.Net namespace is generally concerned with higher-level operations, such as downloading and uploading files, and making web requests using HTTP and other protocols, whereas System.Net.Sockets contains classes to perform lower-level operations. You will find these classes useful when you want to work directly with sockets or protocols, such as TCP/IP. The methods in these classes closely mimic the Windows socket (Winsock) API functions derived from the Berkeley sockets interface. You will also find that some of the objects that this chapter works with are 1148
Download from finelybook www.finelybook.com
found in the System.IO namespace.
THE HTTPCLIENT CLASS The HttpClient class is used to send an HTTP request and receive the response from the request. It is in the System.Net.Http namespace. The classes in the System.Net.Http namespace help make it easy to consume web services for both clients and server. The HttpClient class derives from the HttpMessageInvoker class. This base class implements the SendAsync method. The SendAsync method is the workhorse of the HttpClient class. As you see later in this section, there are several derivatives of this method to use. As the name implies, the SendAsync method call is asynchronous. This enables you to write a fully asynchronous system for calling web services.
WARNING The HttpClient class implements the IDisposable interface. As a general guideline, objects implementing IDisposable should be disposed after its use. This is also true for the HttpClient class. However, the Dispose method of the HttpClient does not immediately release the associated socket; it is released after a timeout. This timeout can take 20 seconds. With this timeout, using many HttpClient object instances can lead to the program running out of sockets. The solution: The HttpClient class is built for reuse. You can use this class with many requests and not create a new instance every time.
Making an Asynchronous Get Request In the download code examples for this chapter is HttpClientSample. It calls a web service asynchronously in different ways. To call using the different ways demonstrated by the sample, you use command-line arguments. 1149
Download from finelybook www.finelybook.com
The sample code makes use of the following namespaces: System System.Linq System.Net System.Net.Http System.Net.Http.Headers System.Threading System.Threading.Tasks
The first code snippet instantiates an HttpClient object and assigns it to the private field _httpClient for reuse. The HttpClient object is thread-safe, so a single HttpClient object can be used to handle multiple requests. Each instance of HttpClient maintains its own thread pool, so requests between HttpClient instances are isolated. Invoking the GetAsync makes an HTTP GET request to the server. You pass in the address of the method you’re going to call. The GetAsync call is overloaded to take either a string or a URI object. The example calls into Microsoft’s OData sample site http://services.odata.org, but you could alter that address to call any number of REST web services. The call to GetAsync returns an HttpResponseMessage object. The HttpResponseMessage class represents a response including headers, status, and content. Checking the IsSuccessfulStatusCode property of the response tell you whether the request was successful. With a successful call, the content returned is retrieved as a string using the ReadAsStringAsync method (code file HttpClientSample/HttpClientSamples.cs): private const string NorthwindUrl = "http://services.data.org/Northwind/Northwind.svc/Regions"; private const string IncorrectUrl = "http://services.data.org/Northwind1/Northwind.svc/Regions";
1150
Download from finelybook www.finelybook.com
private HttpClient _httpClient; public HttpClient HttpClient => _httpClient ?? (_httpClient = new HttpClient()); private async Task GetDataSimpleAsync() { HttpResponseMessage response = await HttpClient.GetAsync(NorthwindUrl); if(response.IsSuccessStatusCode) { Console.WriteLine($"Response Status Code: {(int)response.StatusCode} " + $"{response.ReasonPhrase}"); string responseBodyAsText = await response.Content.ReadAsStringAsync(); Console.WriteLine($"Received payload of {responseBodyAsText.Length} characters"); Console.WriteLine(); Console.WriteLine(responseBodyAsText); } } }
Executing this code with the command-line argument -s should produce the following output: Response Status Code: 200 OK Received payload of 3379 characters
NOTE Because the HttpClient class used the GetAsync method call with the await keyword, the calling thread returned and could do some other work. When the result is available from the GetAsync method a thread continues with the method, and the response is written to the response variable. The await keyword is explained in Chapter 15, “Asynchronous Programming.” Creating and using tasks is explained in Chapter 21, “Tasks and Parallel Programming.”
1151
Download from finelybook www.finelybook.com
Throwing Exceptions Invoking the GetAsync method of the HttpClient class by default doesn’t generate an exception if the method fails. This could be easily changed by invoking the EnsureSuccessStatusCode method with the HttpResponseMessage. This method checks whether IsSuccessStatusCode is false and throws an exception otherwise (code file HttpClientSample/HttpClientSamples.cs): private async Task GetDataWithExceptionsAsync() { try { HttpResponseMessage response = await HttpClient.GetAsync(IncorrectUrl); response.EnsureSuccessStatusCode(); ConsoleWriteLine($"Response Status Code: {(int)response.StatusCode} " + $"{response.ReasonPhrase}"); string responseBodyAsText = await response.Content.ReadAsStringAsync(); Console.WriteLine($"Received payload of {responseBodyAsText.Length} characters"); Console.WriteLine(); Console.WriteLine(responseBodyAsText); } catch (Exception ex) { Console.WriteLine($"{ex.Message}"); } }
Passing Headers You didn’t set or change any of the headers when you made the request, but the DefaultRequestHeaders property on HttpClient enables you to do just that. You can add headers to the collection using the Add method. After you set a header value, the header and header value are sent with every request that this instance of HttpClient sends. By default, the response content will be in XML format. You can change this by adding an Accept header to the request to use JSON. 1152
Download from finelybook www.finelybook.com
Add the following line just before the call to GetAsync and the content is returned in JSON format: client.DefaultRequestHeaders.Add("Accept", "application/json;odata=verbose");
Adding and removing the header and running the example will result in the content in both XML and JSON formats. The HttpRequestHeaders object returned from the DefaultHeaders property has several helper properties to many of the standard headers. You can read the values of the headers from these properties, but they are read only. To set a value, you need to use the Add method. In the code snippet, the HTTP Accept header is added. Depending on the Accept header received by the server, the server can return different data formats based on the client’s needs. When you send the Accept header application/json, the client informs the server that it accepts data in JSON format. Header information is shown with the ShowHeaders method that is also invoked when receiving the response from the server (code file HttpClientSample/HttpClientSamples.cs): public Task GetDataWithHeadersAsync() { try { HttpClient.DefaultRequestHeaders.Add("Accept", "application/json;odata=verbose"); ShowHeaders("Request Headers:", HttpClient.DefaultRequestHeaders); HttpResponseMessage response = await client.GetAsync(NorthwindUrl); HttpClient.EnsureSuccessStatusCode(); ShowHeaders("Response Headers:", response.Headers); //... } }
Contrary to the previous sample, the ShowHeaders method was added, taking an HttpHeaders object as a parameter. HttpHeaders is the base class for HttpRequestHeaders and HttpResponseHeaders. The specialized classes both add helper properties to access headers directly. The HttpHeader object is defined as a KeyValuePair.
The ShowHeaders function is pretty simple. It iterates all headers in HttpHeaders. The enumerator returns KeyValuePair elements and shows a stringified version of the values for every key: public void ShowHeaders(string title, HttpHeaders headers) { Console.WriteLine(title); foreach (var header in headers) { string value = string.Join(" ", header.Value); Console.WriteLine($"Header: {header.Key} Value: {value}"); } Console.WriteLine(); }
Running this code will now display any headers for the request: Request Headers: Header: Accept Value: application/json; odata=verbose Response Headers: Header: Cache-Control Value: private Header: Date Value: Thu, 31 Aug 2017 09:58:09 GMT Header: Server Value: Microsoft-IIS/8.0 Header: Set-Cookie Value: ARRAffinity=a5ee7717b148daedb0164e6e19088a5a78c47693a6 0e57422887d7e011fb1e5e;Path=/;Domain=services.odata.org Header: Vary Value: * Header: X-Content-Type-Options Value: nosniff Header: DataServiceVersion Value: 2.0; Header: X-AspNet-Version Value: 4.0.30319 Header: X-Powered-By Value: ASP.NET Header: Access-Control-Allow-Origin Value: * Header: Access-Control-Allow-Methods Value: GET Header: Access-Control-Allow-Headers Value: Accept, Origin, Content-Type, MaxDataServiceVersion Header: Access-Control-Expose-Headers Value: DataServiceVersion
1154
Download from finelybook www.finelybook.com
Because the client now requests JSON data, the server returns JSON, and you can also see this information: Response Status Code: 200 OK Received payload of 1551 characters {"d":{"results":[{"__metadata": {"id":"http://services.odata.org/Northwind/ Northwind.svc/Regions(1) ", "uri":
Accessing the Content The previous code snippets have shown you how to access the Content property to retrieve a string. The Content property in the response returns an HttpContent object. In order to get the data from the HttpContent object you need to use one of the methods supplied. In the example, the ReadAsStringAsync method was used. It returns a string representation of the content. As the name implies, this is an async call. Instead of using the async keyword, the Result property could be used as well. Calling the Result property blocks the call until it’s finished and then continues with execution. Other methods to get the data from the HttpContent object are ReadAsByteArrayAsync, which returns a byte array of the data, and ReadAsStreamAsync, which returns a stream. You can also load the content into a memory buffer using LoadIntoBufferAsync. The Headers property returns the HttpContentHeaders object. This works exactly the same way the request and response headers do in the previous example.
NOTE Instead of using the GetAsync and ReadAsStringAsync methods of the HttpClient and HttpContent classes, the HttpClient class also offers the method GetStringAsync that returns a string without the need to invoke two methods. However, when using this method, you don’t have that much control over the error status and other information. 1155
Download from finelybook www.finelybook.com
NOTE Note Streams are explained in Chapter 22, “Files and Streams.”
Customizing Requests with HttpMessageHandler The HttpClient class can take an HttpMessageHandler as a parameter to its constructor. This makes it possible for you to customize the request. You can pass an instance of the HttpClientHandler. There are numerous properties that can be set for things such as ClientCertificates, Pipelining, CachePolicy, ImpersonationLevel, and so on. With the next code snippet, a SampleMessageHandler is instantiated and passed to the HttpClient constructor: (code file HttpClientSample/HttpClientSamples.cs): private HttpClient _httpClientWithMessageHandler; public HttpClient HttpClientWithMessageHandler => _httpClientWithMessageHandler ?? (_httpClientWithMessageHandler = new HttpClient(new SampleMessageHandler("error")));
The purpose of this handler type, SampleMessageHandler, is to take a string as a parameter and either display it in the console, or, if the message is “error,” set the response’s status code to Bad Request. If you create a class that derives from HttpClientHandler, you can override a few properties and the method SendAsync. SendAsync is typically overridden because the request to the server can be influenced. If the _displayMessage is set to “error”, an HttpResponseMessage with a bad request is returned. The method needs a Task returned. For the error case, asynchronous methods do not need to be called; that’s why the error is simply returned with Task.FromResult (code file HttpClientSample/SampleMessageHandler.cs): public class SampleMessageHandler : HttpClientHandler {
1156
Download from finelybook www.finelybook.com
private string _message; public SampleMessageHandler(string message) => _message = message; protected override Task SendAsync( HttpRequestMessage request, CancellationToken cancellationToken) { Console.WriteLine($"In SampleMessageHandler {_message}"); if(_message == "error") { var response = new HttpResponseMessage(HttpStatusCode.BadRequest); return Task.FromResult(response); } return base.SendAsync(request, cancellationToken); } }
There are many reasons to add a custom handler. The handler pipeline is set so that multiple handlers can be added. Besides the default, there is the DelegatingHandler, which executes some code and then “delegates” the call back to the inner or next handler. The HttpClientHandler is the last handler in line and sends the request to the addressee. Figure 23-1 shows the pipeline. Each DelegatingHandler added would call the next or inner handler finally ending at the HttpClientHandler-based handler.
Creating an HttpRequestMessage Using SendAsync Behind the scenes, the GetAsync method of the HttpClient class invokes the SendAsync method. Instead of using the GetAsync method, you can also use the SendAsync method to send an HTTP request. With SendAsync you have even more control over defining the request. The constructor of the HttpRequestMessage class is overloaded to pass a value of the HttpMethod. The GetAsync method creates an HTTP request with HttpMethod.Get. Using HttpMethod, you can not only send GET, POST, PUT, and DELETE requests but you can also send also HEAD, OPTIONS, and TRACE. With the HttpRequestMessage object in place, you can invoke the SendAsync method with the HttpClient (code file 1157
Download from finelybook www.finelybook.com
HttpClientSample/HttpClientSamples.cs): private async Task GetDataAdvancedAsync() { var request = new HttpRequestMessage(HttpMethod.Get, NorthwindUrl); HttpResponseMessage response = await client.SendAsync(request); //... }
Figure 23-1
1158
Download from finelybook www.finelybook.com
NOTE This chapter only makes HTTP GET requests with the HttpClient class. The HttpClient class also allows sending HTTP POST, PUT, and DELETE requests using the PostAsync, PutAsync, and DeleteAsync methods. These methods are used in Chapter 32, “ASP.NET Web API,” where these requests are done to invoke corresponding action methods in the web service. After the HttpRequestMessage object is created, the header and content can be supplied by using the Headers and Content properties. With the Version property, the HTTP version can be specified.
NOTE HTTP/1.0 was specified in the year 1996 followed by 1.1 just a few years later. With 1.0, the connection was always closed after the server returned the data; with 1.1, a keep-alive header was added where the client was able to put his or her wish to keep the connection alive as the client might make more requests to receive not only the HTML code, but also CSS and JavaScript files and images. After HTTP/1.1 was defined in 1999, it took 16 years until HTTP/2 was done in the year 2015. What are the advantages of version 2? HTTP/2 allows multiple concurrent requests on the same connection, header information is compressed, the client can define which of the resources is more important, and the server can send resources to the client via server push. HTTP/2 supporting server push means WebSockets will practically be obsolete as soon as HTTP/2 is supported everywhere. All the newer versions of browsers, as well as IIS running on Windows 10 and Windows Server 2016, support HTTP/2. With .NET Core, HTTP/2 is planned (at the time of this writing) with a future milestone; see https://github.com/dotnet/corefx/issues/23134.
1159
Download from finelybook www.finelybook.com
Using HttpClient with Windows Runtime At the time of writing this book, the HttpClient class used with console applications doesn’t support HTTP/2. However, the HttpClient class used with the Universal Windows Platform has a different implementation that is based on features of the Windows 10 API. With this, HttpClient supports HTTP/2, and even uses this version by default. The next code sample shows a Universal Windows app that makes an HTTP request to a link that is entered in a TextBox and shows the result, as well as giving information about the HTTP version. The following code snippet shows the major elements of the XAML code, and Figure 23-2 shows the user interface of the running app (code file WinAppHttpClient/MainPage.xaml):
1160
Download from finelybook www.finelybook.com
Figure 23-2
NOTE XAML code and dependency properties are explained in Chapter 33, “Windows Apps,” and compiled binding is covered in Chapter 34, “Patterns with XAML Apps.” The properties Url, Version, and Result are implemented as dependency properties for making automatic updates to the UI. The following code snippet shows the Url property (code file WinAppHttpClient/MainPage.xaml.cs): public string Url { get => (string)GetValue(UrlProperty); set => SetValue(UrlProperty, value);
1161
Download from finelybook www.finelybook.com
} public static readonly DependencyProperty UrlProperty = DependencyProperty.Register("Url", typeof(string), typeof(MainPage), new PropertyMetadata(string.Empty));
The HttpClient class is used in the OnSendRequest method. This method is invoked when clicking the Send button in the UI. As in the previous sample, the SendAsync method is used to make the HTTP request. To see that the request is indeed making a request using the HTTP/2 version, you can check the request.Version property from the debugger. The version answered from the server coming from response.Version is written to the Version property that is bound in the UI. Nowadays, most servers just support the HTTP 1.1 version. As mentioned previously, HTTP/2 is supported by Windows Server 2016: private async void OnSendRequest() { try { using (var client = new HttpClient()) { var request = new HttpRequestMessage(HttpMethod.Get, Url); HttpResponseMessage response = await client.SendAsync(request); Version = response.Version.ToString(); response.EnsureSuccessStatusCode(); Result = await response.Content.ReadAsStringAsync(); } } catch (Exception ex) { await new MessageDialog(ex.Message).ShowAsync(); } }
Running the application, you make a request to https://http2.akamai.com/demo to see HTTP/2 returned.
WORKING WITH THE WEBLISTENER CLASS Using Internet Information Server (IIS) as an HTTP server is usually a 1162
Download from finelybook www.finelybook.com
great approach because you have access to a lot of features, such as scalability, health monitoring, a graphical user interface for administration, and a lot more. However, you can also easily create your own simple HTTP server. Since the .NET Framework 2.0, you have been able to use the HttpListener, but now since .NET Core 1.0 there’s a new one: the WebListener class. The sample code of the HttpServer makes use of the following dependency and namespaces: Dependency Microsoft.Net.Http.Server Namespaces Microsoft.Net.Http.Server System System.Collections.Generic System.Linq System.Net System.Reflection System.Text System.Threading.Tasks
The sample code for the HTTP server is a Console Application (Package) that allows passing a list of URL prefixes that defines where the server listens. An example of such a prefix is http://localhost:8082/samples where the server listens only to requests on port 8082 on the localhost if the path starts with samples. No matter what path follows, the server handles the request. To not only support requests from localhost, you can use the + character, such as http://+:8082/samples. This way the server is also accessible from all its hostnames. In case you are not starting Visual Studio from elevated mode, the user running the listener needs allowance. You can do this by running a command prompt in elevated mode and adding 1163
Download from finelybook www.finelybook.com
the URL using this netsh command: >netsh http add urlacl url=http://+:8082/samples user=Everyone
The sample code checks the arguments if at least one prefix is passed and invokes the StartServer method afterward (code file HttpServer/Program.cs): static async Task Main(string[] args) { if (args.Length < 1) { ShowUsage(); return; } await StartServerAsync(args); Console.ReadLine(); } private static void ShowUsage() { Console.WriteLine("Usage: HttpServer Prefix [Prefix2] [Prefix3] [Prefix4]"); }
The heart of the program is the StartServer method. Here, the WebListener class is instantiated, and the prefixes as defined from the command argument list are added. Calling the Start method of the WebListener class registers the port on the system. Next, after calling the GetContextAsync method, the listener waits for a client to connect and send data. As soon as a client sends an HTTP request, the request can be read from the HttpContext object that is returned from GetContextAsync. For both the request that is coming from the client and the answer that is sent, the HttpContext object is used. The Request property returns a Request object. The Request object contains the HTTP header information. With an HTTP POST request, the Request also contains the body. The Response property returns a Response object, which allows you to return header information (using the Headers property), status code (StatusCode property), and the response body (the Body property): public static async Task StartServerAsync(params string[]
1164
Download from finelybook www.finelybook.com
prefixes) { try { Console.WriteLine($"server starting at"); var listener = new WebListener(); foreach (var prefix in prefixes) { listener.UrlPrefixes.Add(prefix); Console.WriteLine($"\t{prefix}"); } listener.Start(); do { using (RequestContext context = await listener.GetContextAsync()) { context.Response.Headers.Add("content-type", new string[] { "text/html" }); context.Response.StatusCode = (int)HttpStatusCode.OK; byte[] buffer = GetHtmlContent(context.Request); await context.Response.Body.WriteAsync(buffer, 0, buffer.Length); } } while (true); } catch (Exception ex) { Console.WriteLine(ex.Message); } }
The sample code returns an HTML file that is retrieved using the GetHtmlContent method. This method makes use of the htmlFormat format string with two placeholders in the heading and the body. The GetHtmlContent method fills in the placeholders using the string.Format method. To fill the HTML body, two helper methods are used that retrieve the header information from the request and all the property values of the Request object—GetHeaderInfo and GetRequestInfo: private static string htmlFormat = "{0}" + "{1}"; private static byte[] GetHtmlContent(Request request)
1165
Download from finelybook www.finelybook.com
{ string title = "Sample WebListener"; var sb = new StringBuilder("Hello from the server"); sb.Append("Header Info"); sb.Append(string.Join(" ", GetHeaderInfo(request.Headers))); sb.Append("Request Object Information"); sb.Append(string.Join(" ", GetRequestInfo(request))); string html = string.Format(htmlFormat, title, sb.ToString()); return Encoding.UTF8.GetBytes(html); }
The GetHeaderInfo method retrieves the keys and values from the HeaderCollection to return a div element that contains every key and value: private static IEnumerable GetHeaderInfo(HeaderCollection headers) => headers.Keys.Select(key => $"{key}: {string.Join(",", headers.GetValues(key))}");
The GetRequestInfo method makes use of reflection to get all the properties of the Request type, and returns the property names as well as its values: private static IEnumerable GetRequestInfo(Request request) => request.GetType().GetProperties().Select( p => $"{p.Name}: {p.GetValue(request)}");
NOTE The GetHeaderInfo and GetRequestInfo methods make use of expression-bodied member functions, LINQ, and reflection. Expression-bodied member functions are explained in Chapter 3, “Objects and Types.” Chapter 12, “Language Integrated Query,” explains LINQ. Chapter 16, “Reflection, Metadata, and Dynamic Programming,” includes reflection as an important topic. 1166
Download from finelybook www.finelybook.com
Running the server and using a browser such as Google Chrome to access the server using a URL such as http://[hostname]:8082/samples/Hello?sample=text results in output as shown in Figure 23-3.
NOTE To access localhost from the Edge browser, you need to enable localhost loopback, which you can do via about :flags. On some Windows 10 builds there are issues accessing localhost from the Edge browser event if localhost loopback is enabled. In such cases use other browsers, such as Internet Explorer.
1167
Download from finelybook www.finelybook.com
Figure 23-3
WORKING WITH UTILITY CLASSES After dealing with HTTP requests and responses using classes that abstract the HTTP protocol like HttpClient and WebListener, let’s have a look at some utility classes that make web programming easier when dealing with URIs and IP addresses. On the Internet, you identify servers as well as clients by IP address or host name (also referred to as a Domain Name System (DNS) name). Generally speaking, the host name is the human-friendly name that you type in a web browser window, such as www.wrox.com or www.cninnovation.com. An IP address is the identifier that computers use to recognize each other. IP addresses are the identifiers used to ensure that web requests and responses reach the appropriate machines. It is even possible for a computer to have more than one IP address. An IP address can be a 32-bit or 128-bit value, depending on whether Internet Protocol version 4 (IPv4) or Internet Protocol version 6 (IPv6) is used. An example of a 32-bit IP address is 192.168.1.100. Because there are now so many computers and other devices vying for a spot on the Internet, IPv6 was developed. IPv6 can potentially provide a maximum number of about 3 × 1038 unique addresses. .NET enables your applications to work with both IPv4 and IPv6. For host names to work, you must first send a network request to translate the host name into an IP address—a task that’s carried out by one or more DNS servers. A DNS server stores a table that maps host names to IP addresses for all the computers it knows about, as well as the IP addresses of other DNS servers to look up host names it does not know about. Your local computer should always know about at least one DNS server. Network administrators configure this information when a computer is set up. Before sending out a request, your computer first asks the DNS server to give it the IP address corresponding to the host name you have typed in. When it is armed with the correct IP address, the computer 1168
Download from finelybook www.finelybook.com
can address the request and send it over the network. All this work normally happens behind the scenes while the user is browsing the web. .NET supplies a number of classes that are able to assist with the process of looking up IP addresses and finding information about host computers. The sample code makes use of the following namespaces: System System.Net
URIs and UriBuilder are two classes in the System namespace, and both are intended to represent a URI. Uri enables you to parse, combine, and compare URIs, and UriBuilder enables you to build a URI given the strings for the component parts. Uri
The following code snippet demonstrates features of the Uri class. The constructor allows passing relative and absolute URLs. This class defines several read-only properties to access parts of a URL such as the scheme, hostname, port number, query strings, and the segments of an URL (code file Utilities/Program.cs): public static void UriSample(string url) { var page = new Uri(url); Console.WriteLine($"scheme: {page.Scheme}"); Console.WriteLine($"host: {page.Host}, type: {page.HostNameType}, " + $"idn host: {page.IdnHost}"); Console.WriteLine($"port: {page.Port}"); Console.WriteLine($"path: {page.AbsolutePath}"); Console.WriteLine($"query: {page.Query}"); foreach (var segment in page.Segments) { Console.WriteLine($"segment: {segment}"); } //... }
1169
Download from finelybook www.finelybook.com
When you run the application and pass this URL and this string that contains a path and a query string http://www.amazon.com/Professional-C-6-0-ChristianNagel/dp/111909660X/ref=sr_1_4?ie=UTF8&amqid=1438459506&sr=84&keywords=professional+c%23+6, you get the following output: scheme: http host: www.amazon.com, type: Dns, idn host: www.amazon.com port: 80 path: /Professional-C-6-0-ChristianNagel/dp/111909660X/ref=sr_1_4 query: ?ie=UTF8&qid=1438459506&sr=84&keywords=professional+c%23+6 segment: / segment: Professional-C-6-0-Christian-Nagel/ segment: dp/ segment: 111909660X/ segment: ref=sr_1_4
Unlike the Uri class, the UriBuilder defines read-write properties, as shown in the following code snippet. You can create an UriBuilder instance, assign these properties, and get a URL returned from the Uri property: public static void UriSample(string url) { // ... var builder = new UriBuilder(); builder.Host = "www.cninnovation.com"; builder.Port = 80; builder.Path = "training/MVC"; Uri uri = builder.Uri; Console.WriteLine(uri); }
Instead of using properties with the UriBuilder, this class also offers several overloads of the constructor where the parts of an URL can be passed as well.
IPAddress represents an IP address. The address itself is available as a byte array using the GetAddressBytes property and may be converted to a dotted decimal format with the ToString method. IPAddress also IPAddress
1170
Download from finelybook www.finelybook.com
implements static Parse and TryParse methods that effectively perform the reverse conversion of ToString—converting from a dotted decimal string to an IPAddress. The code sample also accesses the AddressFamily property and converts an IPv4 address to IPv6, and vice versa (code file Utilities/Program.cs): public static void IPAddressSample(string ipAddressString) { IPAddress address; if (!IPAddress.TryParse(ipAddressString, out address)) { Console.WriteLine($"cannot parse {ipAddressString}"); return; } byte[] bytes = address.GetAddressBytes(); for (int i = 0; i < bytes.Length; i++) { Console.WriteLine($"byte {i}: {bytes[i]:X}"); } Console.WriteLine($"family: {address.AddressFamily}, " + $"map to ipv6: {address.MapToIPv6()}, map to ipv4: {address.MapToIPv4()}"); // ...
Passing the address 65.52.128.33 to the method results in this output: byte 0: 41 byte 1: 34 byte 2: 80 byte 3: 21 family: InterNetwork, map to ipv6: ::ffff:65.52.128.33, map to ipv4: 65.52.128.3 3
The IPAddress class also defines static properties to create special addresses such as loopback, broadcast, and anycast: public static void IPAddressSample(string ipAddressString) { //... Console.WriteLine($"IPv4 loopback address: {IPAddress.Loopback}"); Console.WriteLine($"IPv6 loopback address: {IPAddress.IPv6Loopback}"); Console.WriteLine($"IPv4 broadcast address: {IPAddress.Broadcast}");
1171
Download from finelybook www.finelybook.com
Console.WriteLine($"IPv4 any address: {IPAddress.Any}"); Console.WriteLine($"IPv6 any address: {IPAddress.IPv6Any}"); }
With a loopback address, the network hardware is bypassed. This is the IP address that represents the hostname localhost. The broadcast address is an address that addresses every node in a local network. Such an address is not available with IPv6, as this concept is not used with the newer version of the Internet Protocol. After the initial definition of IPv4, multicasting was added for IPv6. With multicasting, a group of nodes is addressed instead of all nodes. With IPv6, multicasting completely replaces broadcasting. Both broadcast and multicast are shown in code samples later in this chapter when using UDP. With an anycast one-to-many routing is used as well, but the data stream is only transmitted to the node closest in the network. This is useful for load balancing. With IPv4, the Border Gateway Protocol (BGP) routing protocol is used to find the shortest path in the network; with IPv6 this feature is inherent. When you run the application, you can see the following addresses for IPv4 and IPv6: IPv4 IPv6 IPv4 IPv4 IPv6
loopback address: 127.0.0.1 loopback address: ::1 broadcast address: 255.255.255.255 any address: 0.0.0.0 any address: ::
IPHostEntry The IPHostEntry class encapsulates information related to a particular host computer. This class makes the host name available via the HostName property (which returns a string), and the AddressList property returns an array of IPAddress objects. You are going to use the IPHostEntry class in the next example.
Dns 1172
Download from finelybook www.finelybook.com
The Dns class can communicate with your default DNS server to retrieve IP addresses. The DnsLookup sample code makes use of the following namespaces: System System.Net System.Threading.Tasks
The sample application is implemented as a Console Application (package) that loops to ask the user for hostnames (you can also add an IP address instead) to get an IPHostEntry via Dns.GetHostEntryAsync. From the IPHostEntry, the address list is accessed using the AddressList property. All the addresses of the host, as well as the AddressFamily, are written to the console (code file DnsLookup/Program.cs): static void Main() { do { Console.Write("Hostname:\t"); string hostname = ReadLine(); if (hostname.CompareTo("exit") == 0) { Console.WriteLine("bye!"); return; } OnLookupAsync(hostname).Wait(); Console.WriteLine(); } while (true); } public static async Task OnLookupAsync(string hostname) { try { IPHostEntry ipHost = await Dns.GetHostEntryAsync(hostname); Console.WriteLine($"Hostname: {ipHost.HostName}"); foreach (IPAddress address in ipHost.AddressList) { Console.WriteLine($"Address Family:
1173
Download from finelybook www.finelybook.com
{address.AddressFamily}"); Console.WriteLine($"Address: {address}"); } } catch (Exception ex) { Console.WriteLine(ex.Message); } }
Run the application and enter a few hostnames to see output such as the following. With the hostname www.orf.at, you can see that this hostname defines multiple IP addresses. Hostname: www.cninnovation.com Hostname: www.cninnovation.com Address Family: InterNetwork Address: 65.52.128.33 Hostname: www.orf.at Hostname: www.orf.at Address Family: InterNetwork Address: 194.232.104.150 Address Family: InterNetwork Address: 194.232.104.139 Address Family: InterNetwork Address: 194.232.104.140 Address Family: InterNetwork Address: 194.232.104.142 Address Family: InterNetwork Address: 194.232.104.141 Address Family: InterNetwork Address: 194.232.104.149 Hostname: exit bye!
NOTE The Dns class is somewhat limited—for example, you can’t define to use a server that’s different than the default DNS server. Also, the Aliases property of the IPHostEntry is not populated from the method GetHostEntryAsync. It’s only populated from obsolete methods of the Dns class, and these don’t populate this property 1174
Download from finelybook www.finelybook.com
fully. For a full use of DNS lookups, it’s better to use a third-party library. Now it’s time to move to some lower-level protocols such as TCP and UDP.
USING TCP The HTTP protocol is based on the Transmission Control Protocol (TCP). With TCP, the client first needs to open a connection to the server before sending commands. With HTTP, textual commands are sent. The HttpClient and WebListener classes hide the details of the HTTP protocol. When you are using TCP classes and you send HTTP requests, you need to know more about the HTTP protocol. The TCP classes don’t offer functionality for the HTTP protocol; you have to do this on your own. On the other side, the TCP classes give more flexibility because you can use these classes also with other protocols based on TCP. The TCP classes offer simple methods for connecting and sending data between two endpoints. An endpoint is the combination of an IP address and a port number. Existing protocols have well-defined port numbers—for example, HTTP uses port 80, whereas SMTP uses port 25. The Internet Assigned Numbers Authority, IANA (www.iana.org), assigns port numbers to these well-known services. Unless you are implementing a well-known service, you should select a port number higher than 1,024. TCP traffic makes up the majority of traffic on the Internet today. It is often the protocol of choice because it offers guaranteed delivery, error correction, and buffering. The TcpClient class encapsulates a TCP connection and provides a number of properties to regulate the connection, including buffering, buffer size, and timeouts. Reading and writing is accomplished by requesting a NetworkStream object via the GetStream method. The TcpListener class listens for incoming TCP connections with the Start method. When a connection request arrives, you can use the AcceptSocket method to return a socket for communication with the 1175
Download from finelybook www.finelybook.com
remote machine, or you can use the AcceptTcpClient method to use a higher-level TcpClient object for communication. The easiest way to see how the TcpListener and TcpClient classes work together is to go through some examples.
Creating an HTTP Client Using TCP First, create a Console Application (Package) that will send an HTTP request to a web server. You’ve previously done this with the HttpClient class, but with the TcpClient class you need to take a deeper look into the HTTP protocol. The HttpClientUsingTcp sample code makes use of the following namespaces: System System.IO System.Net.Sockets System.Text System.Threading.Tasks
The application accepts one command-line argument to pass the name of the server. With this, the method RequestHtmlAsync is invoked to make an HTTP request to the server. It returns a string with the Result property of the Task (code file HttpClientUsingTcp/Program.cs): static void Main(string[] args) { if (args.Length != 1) { ShowUsage(); } Task t1 = RequestHtmlAsync(args[0]); Console.WriteLine(t1.Result); Console.ReadLine(); } private static void ShowUsage() { Console.WriteLine("Usage: HttpClientUsingTcp hostname");
1176
Download from finelybook www.finelybook.com
}
Now let’s look at the most important parts of the RequestHtmlAsync method. First, a TcpClient object is instantiated. Second, with the method ConnectAsync, a TCP connection to the host is made at port 80, the default port for HTTP. Third, a stream to read and write using this connection is retrieved via the GetStream method: private const int ReadBufferSize = 1024; public static async Task RequestHtmlAsync(string hostname) { try { using (var client = new TcpClient()) { await client.ConnectAsync(hostname, 80); NetworkStream stream = client.GetStream(); //... } } }
The stream can now be used to write a request to the server and read the response. HTTP is a text-based protocol; that’s why it’s easy to define the request in a string. To make a simple request to the server, the header defines the HTTP method GET followed by the path of the URL / and the HTTP version HTTP/1.1. The second line defines the Host header with the hostname and port number, and the third line defines the Connection header. Typically, with the Connection header the client requests keep-alive to ask the server to keep the connection open as the client expects to make more requests. Here we’re just making a single request to the server, so the server should close the connection, thus close is set to the Connection header. To end the header information, you need to add an empty line to the request by using \r\n. The header information is sent with UTF-8 encoding by calling the WriteAsync method of the NetworkStream. To immediately send the buffer to the server, the FlushAsync method is invoked. Otherwise the data might be kept in the local cache: //... string header = "GET / HTTP/1.1\r\n" +
1177
Download from finelybook www.finelybook.com
$"Host: {hostname}:80\r\n" + "Connection: close\r\n" + "\r\n"; byte[] buffer = Encoding.UTF8.GetBytes(header); await stream.WriteAsync(buffer, 0, buffer.Length); await stream.FlushAsync();
Now you can continue the process by reading the answer from the server. As you don’t know how big the answer will be, you create a MemoryStream that grows dynamically. The answer from the server is temporarily written to a byte array using the ReadAsync method, and the content of this byte array is added to the MemoryStream. After all the data is read from the server, a StreamReader takes control to read the data from the stream into a string and return it to the caller: var ms = new MemoryStream(); buffer = new byte[ReadBufferSize]; int read = 0; do { read = await stream.ReadAsync(buffer, 0, ReadBufferSize); ms.Write(buffer, 0, read); Array.Clear(buffer, 0, buffer.Length); } while (read > 0); ms.Seek(0, SeekOrigin.Begin); var reader = new StreamReader(ms); return reader.ReadToEnd(); } //...
When you pass a website to the program, you see a successful request with HTML content shown in the console. Now it’s time to create a TCP listener with a custom protocol.
Creating a TCP Listener Creating your own protocol based on TCP needs requires some advance thought about the architecture. You can define your own binary protocol where every bit is saved on the data transfer, but it’s more complex to read; alternatively, you can use a text-based format such as HTTP or FTP. Should a session stay open or be closed with every request? Does the server need to keep state for a client, or is all 1178
Download from finelybook www.finelybook.com
the data sent with every request? The custom server will support some simple functionality, such as echo and reverse a message that is sent. Another feature of the custom server is that the client can send state information and retrieve it again using another call. The state is stored temporarily in a session state. Although it’s a simple scenario, you get the idea of what’s needed to set this up. The TcpServer sample code is implemented as a Console App (.NET Core) and makes use of the following namespaces: System System.Collections System.Collections.Concurrent System.Linq System.Net.Sockets System.Text System.Threading System.Threading.Tasks static TcpServer.CustomProtocol
The custom TCP listener supports a few requests, as shown in the following table. REQUEST
DESCRIPTION HELO::v1.0 This command needs to be sent after initiating the connection. Other commands will not be accepted. ECHO::message The ECHO command returns the message to the caller. REV::message The REV command reserves the message and returns it to the caller. BYE The BYE command closes the connection. SET::key=value
The SET command sets the server-side state that can 1179
Download from finelybook www.finelybook.com
be retrieved with the GET command. GET::key
The first line of the request is a session-identifier prefixed by ID. This needs to be sent with every request except the HELO request. This is used as a state identifier. All the constants of the protocol are defined in the static class CustomProtocol (code file TcpServer/CustomProtocol.cs): public static class CustomProtocol { public const string SESSIONID = "ID"; public const string COMMANDHELO = "HELO"; public const string COMMANDECHO = "ECO"; public const string COMMANDREV = "REV"; public const string COMMANDBYE = "BYE"; public const string COMMANDSET = "SET"; public const string COMMANDGET = "GET"; public const string STATUSOK = "OK"; public const string STATUSCLOSED = "CLOSED"; public const string STATUSINVALID = "INV"; public const string STATUSUNKNOWN = "UNK"; public const string STATUSNOTFOUND = "NOTFOUND"; public const string STATUSTIMEOUT = "TIMOUT"; public const string SEPARATOR = "::"; public static readonly TimeSpan SessionTimeout = TimeSpan.FromMinutes(2); }
The Run method (which is invoked from the Main method) starts a timer that cleans up all the session state every minute. The major functionality of the Run method is the start of the server by invoking the method RunServerAsync (code file TcpServer/Program.cs): static void Main() { var p = new Program(); p.Run(); } public void Run() { using (var timer = new Timer(TimerSessionCleanup, null, TimeSpan.FromMinutes(1), TimeSpan.FromMinutes(1)))
1180
Download from finelybook www.finelybook.com
{ RunServerAsync().Wait(); } }
The most important part of the server regarding the TcpListener class is in the method RunServerAsync. The TcpListener is instantiated using the constructor the IP address and port number where the listener can be accessed. Calling the Start method, the listener starts listening for client connections. The AcceptTcpClientAsync waits until a client connects. As soon as a client is connected, a TcpClient instance is returned that allows communication with the client. This instance is passed to the RunClientRequest method, where the request is dealt with. private async Task RunServerAsync() { try { var listener = new TcpListener(IPAddress.Any, portNumber); Console.WriteLine($"listener started at port {portNumber}"); listener.Start(); while (true) { Console.WriteLine("waiting for client..."); TcpClient client = await listener.AcceptTcpClientAsync(); Task t = RunClientRequest(client); } } catch (Exception ex) { Console.WriteLine($"Exception of type {ex.GetType().Name}, Message: {ex.Message}"); } }
To read and write from and to the client, the GetStream method of the TcpClient returns a NetworkStream. First you need to read the request from the client. You do this by using the ReadAsync method. The ReadAsync method fills a byte array. This byte array is converted to a string using the Encoding class. The information received is written to 1181
Download from finelybook www.finelybook.com
the console and passed to the ParseRequest helper method. Depending on the result of the ParseRequest method, an answer for the client is created and returned to the client using the WriteAsync method. private Task RunClientRequestAsync(TcpClient client) { return Task.Run(async () => { try { using (client) { Console.WriteLine("client connected"); using (NetworkStream stream = client.GetStream()) { bool completed = false; do { byte[] readBuffer = new byte[1024]; int read = await stream.ReadAsync(readBuffer, 0, readBuffer.Length); string request = Encoding.ASCII.GetString(readBuffer, 0, read); Console.WriteLine($"received {request}"); byte[] writeBuffer = null; string response = string.Empty; ParseResponse resp = ParseRequest(request, out string sessionId, out string result); switch (resp) { case ParseResponse.OK: string content = $"{STATUSOK}::{SESSIONID}:: {sessionId}"; if (!string.IsNullOrEmpty(result)) { content += $"{SEPARATOR}{result}"; } response = $"{STATUSOK}{SEPARATOR}{SESSIONID} {SEPARATOR}" + $"{sessionId}{SEPARATOR}{content}"; break; case ParseResponse.CLOSE: response = $"{STATUSCLOSED}"; completed = true; break;
1182
Download from finelybook www.finelybook.com
case ParseResponse.TIMEOUT: response = $"{STATUSTIMEOUT}"; break; case ParseResponse.ERROR: response = $"{STATUSINVALID}"; break; default: break; } writeBuffer = Encoding.ASCII.GetBytes(response); await stream.WriteAsync(writeBuffer, 0, writeBuffer.Length); await stream.FlushAsync(); Console.WriteLine($"returned {Encoding.ASCII.GetString( writeBuffer, 0, writeBuffer.Length)}"); } while (!completed); } } } catch (Exception ex) { Console.WriteLine($"Exception in client request handling " + "of type {ex.GetType().Name}, Message: {ex.Message}"); } Console.WriteLine("client disconnected"); }); }
The ParseRequest method parses the request and filters out the session identifier. The first call to the server (HELO) is the only call where a session identifier is not passed from the client; here it is created using the SessionManager. With the second and later requests, requestColl[0] must contain ID, and requestColl[1] must contain the session identifier. Using this identifier, the TouchSession method updates the current time of the session identifier if the session is still valid. If it is not valid, a timeout is returned. For the functionality of the service, the ProcessRequest method is invoked: private ParseResponse ParseRequest(string request, out string sessionId, out string response) {
1183
Download from finelybook www.finelybook.com
sessionId = string.Empty; response = string.Empty; string[] requestColl = request.Split( new string[] { SEPARATOR }, StringSplitOptions.RemoveEmptyEntries); if (requestColl[0] == COMMANDHELO) // first request { sessionId = _sessionManager.CreateSession(); } else if (requestColl[0] == SESSIONID) // any other valid request { sessionId = requestColl[1]; if (!_sessionManager.TouchSession(sessionId)) { return ParseResponse.TIMEOUT; } if (requestColl[2] == COMMANDBYE) { return ParseResponse.CLOSE; } if (requestColl.Length >= 4) { response = ProcessRequest(requestColl); } } else { return ParseResponse.ERROR; } return ParseResponse.OK; }
The ProcessRequest method contains a switch statement to handle the different requests. This method in turn makes use of the CommandActions class to echo or reverse the message received. To store and retrieve the session state, the SessionManager is used: private string ProcessRequest(string[] requestColl) { if (requestColl.Length < 4) throw new ArgumentException("invalid length requestColl"); string sessionId = requestColl[1]; string response = string.Empty; string requestCommand = requestColl[2];
1184
Download from finelybook www.finelybook.com
string requestAction = requestColl[3]; switch (requestCommand) { case COMMANDECHO: response = _commandActions.Echo(requestAction); break; case COMMANDREV: response = _commandActions.Reverse(requestAction); break; case COMMANDSET: response = _sessionManager.ParseSessionData(sessionId, requestAction); break; case COMMANDGET: response = $"{_sessionManager.GetSessionData(sessionId, requestAction)}"; break; default: response = STATUSUNKNOWN; break; } return response; }
The CommandActions class defines simple methods Echo and Reverse that return the action string or return the string reversed (code file TcpServer/CommandActions.cs): public class CommandActions { public string Reverse(string action) => string.Join("", action.Reverse()); public string Echo(string action) => action; }
After checking the main functionality of the server with the Echo and Reverse methods, it’s time to get into the session management. What’s needed on the server is an identifier and the time the session was last accessed for the purpose of removing the oldest sessions (code file TcpServer/SessionManager.cs): public struct Session { public string SessionId { get; set; } public DateTime LastAccessTime { get; set; } }
1185
Download from finelybook www.finelybook.com
The SessionManager contains thread-safe dictionaries that store all sessions and session data. When you’re using multiple clients, the dictionaries can be accessed from multiple threads simultaneously. That’s why thread-safe dictionaries from the namespace System.Collections.Concurrent are used. The CreateSession method creates a new session and adds it to the _sessions dictionary: public class SessionManager { private readonly ConcurrentDictionary _sessions = new ConcurrentDictionary(); private readonly ConcurrentDictionary _sessionData = new ConcurrentDictionary(); public string CreateSession() { string sessionId = Guid.NewGuid().ToString(); if (_sessions.TryAdd(sessionId, new Session { SessionId = sessionId, LastAccessTime = DateTime.UtcNow })) { return sessionId; } else { return string.Empty; } } //... }
The CleanupAllSessions method is called every minute from a timer thread to remove all sessions that haven’t been used recently. This method in turn invokes CleanupSession, which removes a single session. CleanupSession is also invoked when the client sends the BYE message: public void CleanupAllSessions()
1186
Download from finelybook www.finelybook.com
{ foreach (var session in _sessions) { if (session.Value.LastAccessTime + SessionTimeout >= DateTime.UtcNow) { CleanupSession(session.Key); } } } public void CleanupSession(string sessionId) { if (_sessionData.TryRemove(sessionId, out Dictionary removed)) { Console.WriteLine($"removed {sessionId} from session data"); } if (_sessions.TryRemove(sessionId, out Session header)) { Console.WriteLine($"removed {sessionId} from sessions"); } }
The TouchSession method updates the LastAccessTime of the session, and returns false if the session is no longer valid: public bool TouchSession(string sessionId) { if (!_sessions.TryGetValue(sessionId, out Session oldHeader)) { return false; } Session updatedHeader = oldHeader; updatedHeader.LastAccessTime = DateTime.UtcNow; _sessions.TryUpdate(sessionId, updatedHeader, oldHeader); return true; }
For setting session data, the request needs to be parsed. The action that is received for session data contains key and value separated by the equal sign, such as x=42. This is parsed from the ParseSessionData method, which in turn calls the SetSessionData method:
1187
Download from finelybook www.finelybook.com
public string ParseSessionData(string sessionId, string requestAction) { string[] sessionData = requestAction.Split('='); if (sessionData.Length != 2) return STATUSUNKNOWN; string key = sessionData[0]; string value = sessionData[1]; SetSessionData(sessionId, key, value); return $"{key}={value}"; }
either adds or updates the session state in the dictionary. The GetSessionData retrieves the value, or returns NOTFOUND: SetSessionData
public string GetSessionData(string sessionId, string key) { if (!_sessionData.TryGetValue(sessionId, out Dictionary data)) { data = new Dictionary(); data.Add(key, value); _sessionData.TryAdd(sessionId, data); } else { if (data.TryGetValue(key, out string val)) { data.Remove(key); } data.Add(key, value); } } public string GetSessionData(string sessionId, string key) { if (_sessionData.TryGetValue(sessionId, out Dictionary data)) { if (data.TryGetValue(key, out string value)) { return value; } } return STATUSNOTFOUND; }
1188
Download from finelybook www.finelybook.com
After compiling the listener, you can start the program. Now you need a client to connect to the server.
Creating a TCP Client The client for the example is a UWP app with the name WinAppTCPClient. This application allows connecting to the TCP server as well as sending all the different commands that are supported by the custom protocol.
NOTE For using UWP with the TcpClient class, you need a version that supports .NET Standard 2.0, which starts with the Fall Creators Update of Windows 10. The downloadable code samples also include a WPF sample project. The user interface of the application is shown in Figure 23-4. The leftupper part allows connecting to the server. In the top-left part, a ComboBox lists all commands, and the Send button sends the command to the server. In the middle section, the session identifier and the status of the request sent will be shown. The controls in the lower part show the information received from the server and allow you to clear this information.
1189
Download from finelybook www.finelybook.com
Figure 23-4 The classes CustomProtocolCommand and CustomProtocolCommands are used for data binding in the user interface. With CustomProtocolCommand, the Name property shows the name of the command while the Action property is the data that is entered by the user to send with the command. The class CustomProtocolCommands contains a list of the commands that are bound to the ComboBox (code file WinAppTcpClient/CustomProtocolCommands.cs): public class CustomProtocolCommand { public CustomProtocolCommand(string name) : this(name, null) { } public CustomProtocolCommand(string name, string action) { Name = name;
1190
Download from finelybook www.finelybook.com
Action = action; } public string Name { get; } public string Action { get; set; } public override string ToString() => Name; } public class CustomProtocolCommands : IEnumerable { private readonly List _commands = new List(); public CustomProtocolCommands() { string[] commands = { "HELO", "BYE", "SET", "GET", "ECO", "REV" }; foreach (var command in commands) { _commands.Add(new CustomProtocolCommand(command)); } _commands.Single(c => c.Name == "HELO").Action = "v1.0"; } public IEnumerator GetEnumerator() => _commands.GetEnumerator(); IEnumerator IEnumerable.GetEnumerator() => _commands.GetEnumerator(); }
The class MainPage contains properties that are bound to the XAML code and methods that are invoked based on user interactions. This class creates an instance of the TcpClient class and several properties that are bound to the user interface (code file WinAppTcpClient/MainPage.xaml.cs): public partial class MainPage : Page, INotifyPropertyChanged, IDisposable { private TcpClient _client = new TcpClient(); private readonly CustomProtocolCommands _commands = new CustomProtocolCommands();
1191
Download from finelybook www.finelybook.com
public MainWindow() => InitializeComponent(); private string _remoteHost = "localhost"; public string RemoteHost { get => _remoteHost; set => SetProperty(ref _remoteHost, value); } private int _serverPort = 8800; public int ServerPort { get => _serverPort; set => SetProperty(ref _serverPort, value); } private string _sessionId; public string SessionId { get => return _sessionId; set => SetProperty(ref _sessionId, value); } private CustomProtocolCommand _activeCommand; public CustomProtocolCommand ActiveCommand { get => _activeCommand; set => SetProperty(ref _activeCommand, value); } private string _log; public string Log { get => _log; set => SetProperty(ref _log, value); } private string _status; public string Status { get => return _status; set => SetProperty(ref _status, value); } //... }
1192
Download from finelybook www.finelybook.com
The method OnConnect is called when the user clicks the Connect button. The connection to the TCP server is made, invoking the ConnectAsync method of the TcpClient class. In case the connection is in a stale mode, and the OnConnect method is invoked once more, a SocketException is thrown where the ErrorCode is set to 0x2748. A C# exception filter is used here to handle this case of the SocketException and create a new TcpClient, so invoking OnConnect once more likely succeeds (code file WinAppTcpClient/MainPage.xaml.cs): private async void OnConnect(object sender, RoutedEventArgs e) { try { await _client.ConnectAsync(RemoteHost, ServerPort); } catch (SocketException ex) when (ex.ErrorCode == 0x2748) { _client.Dispose(); _client = new TcpClient(); await new MessageDialog("please retry connect").ShowAsync(); } catch (Exception ex) { await new MessageDialog(ex.Message).ShowAsync(); } }
Sending requests to the TCP server is handled by the method OnSendCommand. The code here is very similar to the sending and receiving code on the server. The GetStream method returns a NetworkStream, and this is used to write (WriteAsync) data to the server and read (ReadAsync) data from the server (code file WinAppTcpClient/MainPage.xaml.cs): private async void OnSendCommand(object sender, RoutedEventArgs e) { try { if (!VerifyIsConnected()) return; NetworkStream stream = _client.GetStream(); byte[] writeBuffer =
1193
Download from finelybook www.finelybook.com
Encoding.ASCII.GetBytes(GetCommand()); await stream.WriteAsync(writeBuffer, 0, writeBuffer.Length); await stream.FlushAsync(); byte[] readBuffer = new byte[1024]; int read = await stream.ReadAsync(readBuffer, 0, readBuffer.Length); string messageRead = Encoding.ASCII.GetString(readBuffer, 0, read); Log += messageRead + Environment.NewLine; ParseMessage(messageRead); } catch (Exception ex) { await new MessageDialog(ex.Message).ShowAsync(); } }
To build up the data that can be sent to the server, the GetCommand method is invoked from within OnSendCommand. GetCommand in turn invokes the method GetSessionHeader to build up the session identifier, and then takes the ActiveCommand property (of type CustomProtocolCommand) that contains the selected command name and the entered data: private string GetCommand() => $"{GetSessionHeader()}{ActiveCommand?.Name}:: {ActiveCommand?.Action}"; private string GetSessionHeader() { if (string.IsNullOrEmpty(SessionId)) return string.Empty; return $"ID::{SessionId}::"; }
The ParseMessage method is used after the data is received from the server. This method splits up the message to set the Status and SessionId properties: private void ParseMessage(string message) { if (string.IsNullOrEmpty(message)) return; string[] messageColl = message.Split( new string[] { "::" }, StringSplitOptions.RemoveEmptyEntries);
1194
Download from finelybook www.finelybook.com
Status = messageColl[0]; SessionId = GetSessionId(messageColl); }
When you run the application, you can connect to the server, select commands, set values for echo and reverse returns, and see all the messages coming from the server, as shown in Figure 23-5.
TCP Versus UDP The next protocol covered is UDP (User Datagram Protocol). UDP is a simple protocol with little overhead. Before sending and receiving data with TCP, a connection needs to be made. This is not necessary with UDP. With UDP, just start sending or receiving. Of course, that means that UDP has less overhead than TCP, but it is also more unreliable. When you send data with UDP, you don’t get information when this data is received. UDP is often used for situations in which the speed and performance requirements outweigh the reliability requirements —for example, video streaming. UDP also offers broadcasting messages to a group of nodes. On the other hand, TCP offers a number of features to confirm the delivery of data. TCP provides error correction and retransmission in the case of lost or corrupted packets. Last, but hardly least, TCP buffers incoming and outgoing data and guarantees that a sequence of packets scrambled in transmission is reassembled before delivery to the application. Even with the extra overhead, TCP is the most widely used protocol across the Internet because of its high reliability.
1195
Download from finelybook www.finelybook.com
Figure 23-5
USING UDP To demonstrate UDP, you create two Console Application (Package) projects that show various features of UDP: directly sending data to a host, broadcasting data to all hosts on the local network, and multicasting data to a group of nodes that belong to the same group. The UdpSender and UdpReceiver projects use the following namespaces: System System.Linq System.Net System.Net.Sockets System.Text System.Threading.Tasks
Building a UDP Receiver Start with the receiving application. This application makes use of 1196
Download from finelybook www.finelybook.com
command-line arguments where you can control the different features of the application. A command-line argument that is required is -p, which specifies the port number where the receiver is available to receive data. An optional argument is -g with a group address for multicasting. The ParseCommandLine method parses the command-line arguments and puts the results into the variables port and groupAddress (code file UdpReceiver/Program.cs): static async Task Main(string[] args) { if (!ParseCommandLine(args, out int port, out string groupAddress)) { ShowUsage(); return; } await ReaderAsync(port, groupAddress); Console.ReadLine(); } private static void ShowUsage() { Console.WriteLine("Usage: UdpReceiver -p port [-g groupaddress]"); }
The Reader method creates a UdpClient object with the port number that’s passed in the program arguments. The ReceiveAsync method waits until some data arrives. This data can be found with the UdpReceiveResult with the Buffer property. After the data is encoded to a string, it’s written to the console to continue the loop and wait for the next data to receive: private static async Task ReaderAsync(int port, string groupAddress) { using (var client = new UdpClient(port)) { if (groupAddress != null) { client.JoinMulticastGroup(IPAddress.Parse(groupAddress)); Console.WriteLine( $"joining the multicast group
1197
Download from finelybook www.finelybook.com
{IPAddress.Parse(groupAddress)}"); } bool completed = false; do { Console.WriteLine("starting the receiver"); UdpReceiveResult result = await client.ReceiveAsync(); byte[] datagram = result.Buffer; string received = Encoding.UTF8.GetString(datagram); Console.WriteLine($"received {received}"); if (received == "bye") { completed = true; } } while (!completed); Console.WriteLine("receiver closing"); if (groupAddress != null) { client.DropMulticastGroup(IPAddress.Parse(groupAddress)); } } }
When you start the application, it waits for a sender to send data. For the time being, ignore the multicast group and just use the argument with the port number because multicasting is discussed after you create the sender.
Creating a UDP Sender The UDP sender application also enables you to configure it by passing command-line options. It has more options than the receiving application. Besides the command-line argument -p to specify the port number, the sender allows -b for a broadcast to all nodes in the local network, -h to identify a specific host, -g to specify a group, and -ipv6 to indicate that IPv6 should be used instead of IPv4 (code file UdpSender/Program.cs): static async Task Main(string[] args) { if (!ParseCommandLine(args, out int port, out string hostname, out bool broadcast,
1198
Download from finelybook www.finelybook.com
out string groupAddress, out bool ipv6)) { ShowUsage(); Console.ReadLine(); return; } IPEndpoint endpoint = await GetIPEndPointAsync(port, hostname, broadcast, groupAddress, ipv6); await SenderAsync(endpoint, broadcast, groupAddress); Console.WriteLine("Press return to exit..."); Console.ReadLine(); } private static void ShowUsage() { Console.WriteLine("Usage: UdpSender -p port [-g groupaddress | -b | -h hostname] " + "[-ipv6]"); Console.WriteLine("\t-p port number\tEnter a port number for the sender"); Console.WriteLine("\t-g group address\tGroup address in the range 224.0.0.0 " + "to 239.255.255.255"); Console.WriteLine("\t-b\tFor a broadcast"); Console.WriteLine("\t-h hostname\tUse the hostname option if the message should " + "be sent to a single host"); }
To send data, you need an IPEndPoint. Depending on the program arguments, you create this in different ways. With a broadcast, IPv4 defines the address 255.255.255.255 that is returned from IPAddress.Broadcast. There’s no IPv6 address for broadcast because IPv6 doesn’t support broadcasts. IPv6’s replacement for broadcasts are multicasts. Multicasts have been added to IPv4 as well. When you’re passing a hostname, the hostname is resolved using DNS lookup using the Dns class. The method GetHostEntryAsync returns an IPHostEntry where the IPAddress can be retrieved from the AddressList property. Depending on whether IPv4 or IPv6 is used, a different IPAddress is taken from this list. Depending on your network environment, only one of these address types might work. If a group address is passed to the method, the address is parsed using 1199
Download from finelybook www.finelybook.com
IPAddress.Parse: public static async Task GetIPEndPoint(int port, string hostName, bool broadcast, string groupAddress, bool ipv6) { IPEndPoint endpoint = null; try { if (broadcast) { endpoint = new IPEndPoint(IPAddress.Broadcast, port); } else if (hostName != null) { IPHostEntry hostEntry = await Dns.GetHostEntryAsync(hostName); IPAddress address = null; if (ipv6) { address = hostEntry.AddressList.Where( a => a.AddressFamily == AddressFamily.InterNetworkV6) .FirstOrDefault(); } else { address = hostEntry.AddressList.Where( a => a.AddressFamily == AddressFamily.InterNetwork) .FirstOrDefault(); } if (address == null) { Func ipversion = () => ipv6 ? "IPv6" : "IPv4"; Console.WriteLine($"no {ipversion()} address for {hostName}"); return null; } endpoint = new IPEndPoint(address, port); } else if (groupAddress != null) { endpoint = new IPEndPoint(IPAddress.Parse(groupAddress), port); }
1200
Download from finelybook www.finelybook.com
else { throw new InvalidOperationException($" {nameof(hostName)}, " + "{nameof(broadcast)}, or {nameof(groupAddress)} must be set"); } } catch (SocketException ex) { Console.WriteLine(ex.Message); } return endpoint; }
Now, regarding the UDP protocol, the most important part of the sender follows. After creating a UdpClient instance and converting a string to a byte array, data is sent using the SendAsync method. Note that neither the receiver needs to listen, nor the sender needs to connect. UDP is really simple. However, in a case in which the sender sends the data to nowhere—nobody receives the data—you also don’t get any error messages: private async Task Sender(IPEndpoint endpoint, bool broadcast, string groupAddress) { try { string localhost = Dns.GetHostName(); using (var client = new UdpClient()) { client.EnableBroadcast = broadcast; if (groupAddress != null) { client.JoinMulticastGroup(IPAddress.Parse(groupAddress)); } bool completed = false; do { Console.WriteLine("Enter a message or bye to exit"); string input = Console.ReadLine(); Console.WriteLine(); completed = input == "bye"; byte[] datagram = Encoding.UTF8.GetBytes($"{input}
1201
Download from finelybook www.finelybook.com
from {localhost}"); int sent = await client.SendAsync(datagram, datagram.Length, endpoint); } while (!completed); if (groupAddress != null) { client.DropMulticastGroup(IPAddress.Parse(groupAddress)); } } } catch (SocketException ex) { Console.WriteLine(ex.Message); } }
Now you can start the receiver with this option: -p 9400
and the sender with this option: -p 9400 -h localhost
You can enter data in the sender that will arrive in the receiver. If you stop the receiver, you can go on sending without detecting any error. You can also try to use a hostname instead of localhost and run the receiver on a different system. With the sender, you can add the -b option and remove the hostname to send a broadcast to all nodes listening to port 9400 on the same network: -p 9400 -b
Be aware that broadcasts don’t cross most routers, and of course you can’t use broadcasts on the Internet. This situation is different with multicasts, discussed next.
Using Multicasts Broadcasts don’t cross routers, but multicasts can. Multicasts have 1202
Download from finelybook www.finelybook.com
been invented to send messages to a group of systems—all nodes that belong to the same group. With IPv4, specific IP addresses are reserved for multicast use. The addresses start with 224.0.0.0 to 239.255.255.253. Many of these addresses are reserved for specific protocols—for example, for routers—but 239.0.0.0/8 can be used privately within an organization. This is very similar to IPv6, which has well-known IPv6 multicast addresses for different routing protocols. Addresses f::/16 are local within an organization; addresses ffxe::/16 have global scope and can be routed over public Internet. For a sender or receiver to use multicasts, it must join a multicast group by invoking the JoinMulticastGroup method of the UdpClient: client.JoinMulticastGroup(IPAddress.Parse(groupAddress));
To leave the group again, you can invoke the method DropMulticastGroup: client.DropMulticastGroup(IPAddress.Parse(groupAddress));
When you start both the receiver and sender with these options, -p 9400 -g 230.0.0.1
they both belong to the same group, and multicasting is in action. As with broadcasting, you can start multiple receivers and multiple senders. The receivers will receive nearly all messages from each receiver.
USING SOCKETS The HTTP protocol is based on TCP, and thus the HttpXX classes offered an abstraction layer over the TcpXX classes. The TcpXX classes, however, give you more control. You can even get more control than offered by the TcpXX or UdpXX classes with sockets. With sockets, you can use different protocols, not only protocols based on TCP or UDP, and also create your own protocol. What might be even more important is that you can have more control over TCP- or UDP-based protocols. The SocketServerSender and SocketClient projects are implemented as 1203
Download from finelybook www.finelybook.com
Console Application (Package) and use these namespaces: System System.Linq System.IO System.Net System.Net.Sockets System.Text System.Threading System.Threading.Tasks
Creating a Listener Using Sockets Let’s start with a server that listens to incoming requests. The server requires a port number that is expected with the program arguments. With this, it invokes the Listener method (code file SocketServer/Program.cs): static void Main(string[] args) { if (args.Length != 1) { ShowUsage(); return; } if (!int.TryParse(args[0], out int port)) { ShowUsage(); return; } Listener(port); Console.ReadLine(); } private void ShowUsage() { Console.WriteLine("SocketServer port");
1204
Download from finelybook www.finelybook.com
}
The most important code with regard to sockets is in the following code snippet. The listener creates a new Socket object. With the constructor, the AddressFamily, SocketType, and ProtocolType are supplied. The AddressFamily is a large enumeration that offers many different networks. Examples are DECnet, which was released 1975 by Digital Equipment and used as main network communication between PDP-11 systems; Banyan VINES, which was used to connect client machines; and, of course, InetnetWork for IPv4 and InternetWorkV6 for IPv6. As mentioned previously, you can use sockets for a large number of networking protocols. The second parameter SocketType specifies the kind of socket. Examples are Stream for TCP, Dgram for UDP, or Raw for raw sockets. The third parameter is an enumeration for the ProtocolType. Examples are IP, Ucmp, Udp, IPv6, and Raw. The settings you choose need to match. For example, using TCP with IPv4, the address family must be InterNetwork, the socket type Stream, and the protocol type Tcp. To create a UDP communication with IPv4, the address family needs to be set to InterNetwork, the socket type Dgram, and the protocol type Udp. public static void Listener(int port) { var listener = new Socket(AddressFamily.InterNetwork, SocketType.Stream, ProtocolType.Tcp); listener.ReceiveTimeout = 5000; // receive timout 5 seconds listener.SendTimeout = 5000; // send timeout 5 seconds //...
The listener socket returned from the constructor is bound to an IP address and port numbers. With the sample code, the listener is bound to all local IPv4 addresses and the port number is specified with the argument. Calling the Listen method starts the listening mode of the socket. The socket can now accept incoming connection requests. Specifying the parameter with the Listen method defines the size of the backlog queue—how many clients can connect concurrently before their connection is dealt with: public static void Listener(int port) {
1205
Download from finelybook www.finelybook.com
//... listener.Bind(new IPEndPoint(IPAddress.Any, port)); listener.Listen(backlog: 15); Console.WriteLine($"listener started on port {port}"); //...
Waiting for the client to connect happens in the Accept method of the Socket class. This method blocks the thread until a client connects. After a client connects, this method needs to be invoked again to fulfill requests of other clients; this is why this method is called within a while loop. For the listening, a separate task, which can be canceled from the calling thread, is started. The task to read and write using the socket happens within the method CommunicateWithClientUsingSocketAsync. This method receives the Socket instance that is bound to the client to read and write: public static void Listener(int port) { //... var cts = new CancellationTokenSource(); var tf = new TaskFactory(TaskCreationOptions.LongRunning, TaskContinuationOptions.None); tf.StartNew(() => // listener task { Console.WriteLine("listener task started"); while (true) { if (cts.Token.IsCancellationRequested) { cts.Token.ThrowIfCancellationRequested(); break; } Console.WriteLine("waiting for accept"); Socket client = listener.Accept(); if (!client.Connected) { Console.WriteLine("not connected"); continue; } Console.WriteLine($"client connected local address " + $"{((IPEndPoint)client.LocalEndPoint).Address} and port " + $"{((IPEndPoint)client.LocalEndPoint).Port}, remote address " +
1206
Download from finelybook www.finelybook.com
$"{((IPEndPoint)client.RemoteEndPoint).Address} and port " + $"{((IPEndPoint)client.RemoteEndPoint).Port}"); Task t = CommunicateWithClientUsingSocketAsync(client); } listener.Dispose(); Console.WriteLine("Listener task closing"); }, cts.Token); Console.WriteLine("Press return to exit"); Console.ReadLine(); cts.Cancel(); }
For the communication with the client, a new task is created. This frees the listener task to immediately make the next iteration to wait for the next client connection. The Receive method of the Socket class accepts a buffer where data can be read to as well as flags for the socket. This byte array is converted to a string and sent back to the client with a small change using the Send method: private static Task CommunicateWithClientUsingSocketAsync(Socket socket) { return Task.Run(() => { try { using (socket) { bool completed = false; do { byte[] readBuffer = new byte[1024]; int read = socket.Receive(readBuffer, 0, 1024, SocketFlags.None); string fromClient = Encoding.UTF8.GetString(readBuffer, 0, read); Console.WriteLine($"read {read} bytes: {fromClient}"); if (string.Compare(fromClient, "shutdown", ignoreCase: true) == 0) { completed = true; } byte[] writeBuffer = Encoding.UTF8.GetBytes($"echo {fromClient}");
1207
Download from finelybook www.finelybook.com
int send = socket.Send(writeBuffer); Console.WriteLine($"sent {send} bytes"); } while (!completed); } Console.WriteLine("closed stream and client socket"); } catch (Exception ex) { Console.WriteLine(ex.Message); } }); }
The server is ready as it is. However, let’s look at different ways to make the read and write communication by extending the abstraction level.
Using NetworkStream with Sockets You’ve already used the NetworkStream class with the TcpClient and TcpListener classes. The NetworkStream constructor allows passing a Socket, so you can use the Stream methods Read and Write instead of socket’s Send and Receive methods. With the constructor of the NetworkStream you can define whether the stream should own the socket. If—as in this code snippet—the stream owns the socket, the socket will be closed when the stream is closed (code file SocketServer/Program.cs): private static async Task CommunicateWithClientUsingNetworkStreamAsync( Socket socket) { try { using (var stream = new NetworkStream(socket, ownsSocket: true)) { bool completed = false; do { byte[] readBuffer = new byte[1024]; int read = await stream.ReadAsync(readBuffer, 0, 1024); string fromClient =
1208
Download from finelybook www.finelybook.com
Encoding.UTF8.GetString(readBuffer, 0, read); Console.WriteLine($"read {read} bytes: {fromClient}"); if (string.Compare(fromClient, "shutdown", ignoreCase: true) == 0) { completed = true; } byte[] writeBuffer = Encoding.UTF8.GetBytes($"echo {fromClient}"); await stream.WriteAsync(writeBuffer, 0, writeBuffer.Length); } while (!completed); } Console.WriteLine("closed stream and client socket"); } catch (Exception ex) { Console.WriteLine(ex.Message); } }
To use this method in the code sample, you need to change the Listener method to invoke the method CommunicateWithClientUsingNetworkStreamAsync instead of the method CommunicateWithClientUsingSocketAsync.
Using Readers and Writers with Sockets Let’s add one more abstraction layer. Because the NetworkStream derives from the Stream class, you can also use readers and writers to access the socket. What you need to pay attention to is the lifetime of the readers and writers. Calling the Dispose method of a reader or writer also disposes the underlying stream. That’s why a constructor of the StreamReader and StreamWriter was selected where the leaveOption argument can be set to true. With this in place, the underlying stream is not disposed on disposing the readers and writers. The NetworkStream is disposed on the end of the outer using statement, and this in turn closes the socket because here the socket is owned. There’s another aspect that you need to be aware of when using writers with sockets: By default, the writer doesn’t flush the data, so they are kept in the cache until the cache is full. Using network streams, you might 1209
Download from finelybook www.finelybook.com
need to get an answer faster. Here you can set the AutoFlush property to true (an alternative would be to invoke the FlushAsync method): public static async Task CommunicateWithClientUsingReadersAndWritersAsync( Socket socket) { try { using (var stream = new NetworkStream(socket, ownsSocket: true)) using (var reader = new StreamReader(stream, Encoding.UTF8, false, 8192, leaveOpen: true)) using (var writer = new StreamWriter(stream, Encoding.UTF8, 8192, leaveOpen: true)) { writer.AutoFlush = true; bool completed = false; do { string fromClient = await reader.ReadLineAsync(); Console.WriteLine($"read {fromClient}"); if (string.Compare(fromClient, "shutdown", ignoreCase: true) == 0) { completed = true; } await writer.WriteLineAsync($"echo {fromClient}"); } while (!completed); } Console.WriteLine("closed stream and client socket"); } catch (Exception ex) { Console.WriteLine(ex.Message); } }
To use this method in the code sample, you need to change the Listener method to invoke the method CommunicateWithClientUsingReadersAndWritersAsync instead of the method CommunicateWithClientUsingSocketAsync.
1210
Download from finelybook www.finelybook.com
NOTE Streams, readers, and writers are explained in detail in Chapter 22.
Implementing a Receiver Using Sockets The receiver application SocketClient is implemented as a Console Application (Package) as well. With the command-line arguments, the hostname and the port number of the server need to be passed. With a successful command-line parsing, the method SendAndReceive is invoked to communicate with the server (code file SocketClient/Program.cs): static async Task Main(string[] args) { if (args.Length != 2) { ShowUsage(); return; } string hostName = args[0]; if (!int.TryParse(args[1], out int port)) { ShowUsage(); return; } Console.WriteLine("press return when the server is started"); Console.ReadLine(); await SendAndReceiveAsync(hostName, port); Console.ReadLine(); } private static void ShowUsage() { Console.WriteLine("Usage: SocketClient server port"); }
The SendAndReceive method uses DNS name resolution to get the 1211
Download from finelybook www.finelybook.com
from the hostname. This IPHostEntry is used to get an IPv4 address of the host. After the Socket instance is created (in the same way it was created for the server code), the address is used with the Connect method to make a connection to the server. After the connection was done, the methods Sender and Receiver are invoked that create different tasks, which enables you to run these methods concurrently. The receiver client can simultaneously read and write from and to the server: IPHostEntry
public static async Task SendAndReceiveAsync(string hostName, int port) { try { IPHostEntry ipHost = await Dns.GetHostEntryAsync(hostName); IPAddress ipAddress = ipHost.AddressList.Where( address => address.AddressFamily == AddressFamily.InterNetwork).First(); if (ipAddress == null) { Console.WriteLine("no IPv4 address"); return; } using (var client = new Socket(AddressFamily.InterNetwork, SocketType.Stream, ProtocolType.Tcp)) { client.Connect(ipAddress, port); Console.WriteLine("client successfully connected"); var stream = new NetworkStream(client); var cts = new CancellationTokenSource(); Task tSender = SenderAsync(stream, cts); Task tReceiver = ReceiverAsync(stream, cts.Token); await Task.WhenAll(tSender, tReceiver); } } catch (SocketException ex) { Console.WriteLine(ex.Message); } }
1212
Download from finelybook www.finelybook.com
NOTE If you change the filtering of the address list to get an IPv6 address instead of an IPv4 address, you also need to change the Socket invocation to create a socket for the IPv6 address family. The Sender method asks the user for input and sends this data to the network stream with the WriteAsync method. The Receiver method receives data from the stream with the ReadAsync method. After the user enters the termination string, cancellation is sent from the Sender task via a CancellationToken: public static async Task SenderAsync(NetworkStream stream, CancellationTokenSource cts) { Console.WriteLine("Sender task"); while (true) { Console.WriteLine("enter a string to send, shutdown to exit"); string line = Console.ReadLine(); byte[] buffer = Encoding.UTF8.GetBytes($"{line}\r\n"); await stream.WriteAsync(buffer, 0, buffer.Length); await stream.FlushAsync(); if (string.Compare(line, "shutdown", ignoreCase: true) == 0) { cts.Cancel(); Console.WriteLine("sender task closes"); break; } } } private const int ReadBufferSize = 1024; public static async Task ReceiverAsync(NetworkStream stream, CancellationToken token) { try { stream.ReadTimeout = 5000;
1213
Download from finelybook www.finelybook.com
Console.WriteLine("Receiver task"); byte[] readBuffer = new byte[ReadBufferSize]; while (true) { Array.Clear(readBuffer, 0, ReadBufferSize); int read = await stream.ReadAsync(readBuffer, 0, ReadBufferSize, token); string receivedLine = Encoding.UTF8.GetString(readBuffer, 0, read); Console.WriteLine($"received {receivedLine}"); } } catch (OperationCanceledException ex) { Console.WriteLine(ex.Message); } }
When you run both the client and server, you can see communication across TCP.
NOTE The sample code implements a TCP client and server. TCP requires a connection before sending and receiving data; this is done by calling the Connect method. For UDP, the Connect method could be invoked as well, but it doesn’t do a connection. With UDP, instead of calling the Connect method, you can use the SendTo and ReceiveFrom methods instead. These methods require an EndPoint parameter where the endpoint is defined just when sending and receiving.
NOTE Cancellation tokens are explained in Chapter 21.
1214
Download from finelybook www.finelybook.com
SUMMARY This chapter described the .NET classes available in the System.Net namespace for communication across networks. You have seen some of the .NET base classes that deal with opening client connections on the network and Internet, and how to send requests to and receive responses from servers. As a rule of thumb, when programming with classes in the System.Net namespace, you should always try to use the most generic class possible. For instance, using the TcpClient class instead of the Socket class isolates your code from many of the lower-level socket details. Moving one step higher, the HttpClient class is an easy way to make use of the HTTP protocol. This book covers much more networking than the core networking features you’ve seen in this chapter. Chapter 32 covers ASP.NET Web API to offer services using the HTTP protocol. In Bonus Chapter 3, which you can find online, you read about WebHooks and SignalR— two technologies that offers event-driven communication. In the next chapter, you read about security. You can see the CryptoStream in action for encrypting streams, no matter whether they are used with files or networking.
1215
Download from finelybook www.finelybook.com
24 Security WHAT’S IN THIS CHAPTER? Authentication and authorization Creating and verifying signatures Secure data exchange Signing and hashing Data protection Access control to resources Web security
WROX.COM CODE DOWNLOADS FOR THIS CHAPTER The Wrox.com code downloads for this chapter are found at www.wrox.com on the Download Code tab. The source code is also available in the GitHub repository https://github.com/ProfessionalCSharp/ProfessionalCSharp7 in the folder Security. The code for this chapter is divided into the following major examples: WindowsPrincipal SigningDemo SecureTransfer 1216
Download from finelybook www.finelybook.com
RSASample DataProtection UserSecretsSample FileAccessControl WebApplicationSecurity
INTRODUCTION Security has several key elements that you need to consider to make your applications secure. The primary one, of course, is the user of the application. Is the user the person authorized to access the application, or someone posing as the user? How can this user be trusted? As you see in this chapter, ensuring the security of an application in regard of the user is a two-part process: First, users need to be authenticated, and then they need to be authorized to verify that they are allowed to use the requested resources. What about data that is stored or sent across the network? Is it possible for someone to access this data, for example, by using a network sniffer? Encryption of data is important in this regard. Some technologies, such as Windows Communication Foundation (WCF), provide encryption capabilities by simple configuration, so you can see what’s done behind the scenes. Yet another aspect is the application itself. If the application is hosted by a web provider, how is the application restricted from doing harm to the server? This chapter explores the features available in .NET to help you manage security, demonstrating how .NET protects you from malicious code, how to administer security policies, and how to access the security subsystem programmatically. You can also read about the issues you need to be aware of when making web applications secure.
VERIFYING USER INFORMATION 1217
Download from finelybook www.finelybook.com
Two fundamental pillars of security are authentication and authorization. Authentication is the process of identifying the user, and authorization occurs afterward to verify that the identified user is allowed to access a specific resource. This section shows how to get information about users with identities and principals.
Working with Windows Identities You can identify the user running the application by using an identity. The WindowsIdentity class represents a Windows user. If you don’t identify the user with a Windows account, you can use other classes that implement the interface IIdentity. With this interface you have access to the name of the user, information about whether the user is authenticated, and the authentication type. A principal is an object that contains the identity of the user and the roles to which the user belongs. The interface IPrincipal defines the property Identity, which returns an IIdentity object, and the method IsInRole with which you can verify that the user is a member of a specific role. A role is a collection of users who have the same security permissions, and it is the unit of administration for users. Roles can be Windows groups or just a collection of strings that you define. The principal classes available with .NET are WindowsPrincipal, GenericPrincipal, and RolePrincipal. Since .NET 4.5, these principal types derive from the base class ClaimsPrincipal. You can also create a custom principal class that implements the interface IPrincipal or derives from ClaimsPrincipal. The sample code runs only on Windows and makes use of the following dependency and namespaces: Dependency System.Security.Principal.Windows Namespaces System System.Collections.Generic
1218
Download from finelybook www.finelybook.com
System.Security.Claims System.Security.Principal
The following example creates a Console App (.NET Core) that provides access to the principal in an application that, in turn, enables you to access the underlying Windows account. You need to import the System.Security.Principal and System.Security.Claims namespaces. The Main method invokes the method ShowIdentityInformation to write information about the WindowsIdentity to the console, ShowPrincipal to write additional information that is available with principals, and ShowClaims to write information about claims (code file WindowsPrincipal/Program.cs): static void Main() { WindowsIdentity identity = ShowIdentityInformation(); WindowsPrincipal principal = ShowPrincipal(identity); ShowClaims(principal.Claims); }
The method ShowIdentityInformation creates a WindowsIdentity object by invoking the static GetCurrent method of the WindowsIdentity and accesses its properties to show the identity type, name of the identity, authentication type, and other values (code file WindowsPrincipal/Program.cs): public static WindowsIdentity ShowIdentityInformation() { WindowsIdentity identity = WindowsIdentity.GetCurrent(); if (identity == null) { Console.WriteLine("not a Windows Identity"); return null; } Console.WriteLine($"IdentityType: {identity}"); Console.WriteLine($"Name: {identity.Name}"); Console.WriteLine($"Authenticated: {identity.IsAuthenticated}"); Console.WriteLine($"Authentication Type: {identity.AuthenticationType}"); Console.WriteLine($"Anonymous? {identity.IsAnonymous}"); Console.WriteLine($"Access Token: " + $"{identity.AccessToken.DangerousGetHandle()}");
1219
Download from finelybook www.finelybook.com
Console.WriteLine(); return identity; }
All identity classes, such as WindowsIdentity, implement the IIdentity interface, which contains three properties—AuthenticationType, IsAuthenticated, and Name—for all derived identity classes to implement. The other properties you’ve seen with the WindowsIdentity are specific to this kind of identity. When you run the application, you see information like what’s shown in the following snippet. The authentication type shows CloudAP because I’m logged into the system using a Microsoft Live account. Active Directory shows up in the authentication type if you’re using Active Directory: IdentityType: System.Security.Principal.WindowsIdentity Name: THEROCKS\Christian Authenticated: True Authentication Type: CloudAP Anonymous? False Access Token: 564
Windows Principals A principal contains an identity and offers additional information, such as roles the user belongs to. Principals implement the interface IPrincipal, which offers the method IsInRole in addition to an Identity property. With Windows, all the Windows groups the user is member of are mapped to roles. The method IsInRole is overloaded to accept a security identifier, a role string, or an enumeration value of the WindowsBuiltInRole enumeration. The sample code verifies whether the user belongs to the built-in roles User and Administrator (code file WindowsPrincipal/Program.cs): public static WindowsPrincipal ShowPrincipal(WindowsIdentity identity) { Console.WriteLine("Show principal information"); WindowsPrincipal principal = new WindowsPrincipal(identity); if (principal == null) {
1220
Download from finelybook www.finelybook.com
Console.WriteLine("not a Windows Principal"); return null; } Console.WriteLine($"Users? {principal.IsInRole(WindowsBuiltInRole.User)}"); Console.WriteLine( $"Administrators? {principal.IsInRole(WindowsBuiltInRole.Administrator)}"); Console.WriteLine(); return principal; }
When I run the application, my account belongs to the role Users but not Administrator, and I get the following result: Show principal information Users? True Administrators? False
It is enormously beneficial to be able to easily access details about the current users and their roles. With this information, you can make decisions about what actions should be permitted or denied. The ability to make use of roles and Windows user groups provides the added benefit that administration can be handled using standard user administration tools, and you can usually avoid altering the code when user roles change. All the principal classes derive from the base class ClaimsPrincipal. This way, it’s possible to access claims from users with the Claims property of a principal object. The following section looks at claims.
Using Claims Claims offer a lot more flexibility compared to roles. A claim is a statement made about an identity from an authority. An authority such as the Active Directory or the Microsoft Live account authentication service makes claims about users—for example, the claim of the name of the user, claims about groups the user belongs to, or a claim about the age. Is the user already of age 21 or older and eligible for accessing specific resources? The method ShowClaims accesses a collection of claims to write subject, 1221
Download from finelybook www.finelybook.com
issuer, claim type, and more options to the console (code file WindowsPrincipal/Program.cs): public static void ShowClaims(IEnumerable claims) { Console.WriteLine("Claims"); foreach (var claim in claims) { Console.WriteLine($"Subject: {claim.Subject}"); Console.WriteLine($"Issuer: {claim.Issuer}"); Console.WriteLine($"Type: {claim.Type}"); Console.WriteLine($"Value type: {claim.ValueType}"); Console.WriteLine($"Value: {claim.Value}"); foreach (var prop in claim.Properties) { Console.WriteLine($"\tProperty: {prop.Key} {prop.Value}"); } Console.WriteLine(); } }
Here is an extract of the claims from the Microsoft Live account, which provides information about the name, the primary ID, and the group identifiers: Claims Subject: System.Security.Principal.WindowsIdentity Issuer: AD AUTHORITY Type: http://schemas.xmlsoap.org/ws/2005/05/identity/claims/name Value type: http://www.w3.org/2001/XMLSchema#string Value: THEROCKS\Christian Subject: System.Security.Principal.WindowsIdentity Issuer: AD AUTHORITY Type: http://schemas.microsoft.com/ws/2008/06/identity/claims/primarysid Value type: http://www.w3.org/2001/XMLSchema#string Value: S-1-5-21-1413171511-313453878-1364686672-1001 Property: http://schemas.microsoft.com/ws/2008/06/identity/claims/ windowssubauthority NTAuthority Subject: System.Security.Principal.WindowsIdentity
1222
Download from finelybook www.finelybook.com
Issuer: AD AUTHORITY Type: http://schemas.microsoft.com/ws/2008/06/identity/claims/groupsid Value type: http://www.w3.org/2001/XMLSchema#string Value: S-1-1-0 Property: http://schemas.microsoft.com/ws/2008/06/identity/claims/ windowssubauthority WorldAuthority Subject: System.Security.Principal.WindowsIdentity Issuer: AD AUTHORITY Type: http://schemas.microsoft.com/ws/2005/05/identity/claims/denyonlysid Value type: http://www.w3.org/2001/XMLSchema#string Value: S-1-5-114 Property: http://schemas.microsoft.com/ws/2008/06/identity/claims/ windowssubauthority NTAuthority ...
You can add claims to a Windows identity from a claim provider. You can also add a claim from a simple client program, such as the age claim here: identity.AddClaim(new Claim("Age", "25"));
Using claims from a program, it’s just a matter to trust this claim. Is this claim true—the age 25? Claims can also be lies. Adding this claim from the client application, you can see that the issuer of this claim is the LOCAL AUTHORITY. Information from the AD AUTHORITY (the Active Directory) is more trustworthy, but here you need to trust the Active Directory system administrators. The WindowsIdentity deriving from the base class ClaimsIdentity offers several methods checking for claims or retrieving specific claims. To test whether a claim is available, you can use the HasClaim method: bool hasName = identity.HasClaim(c => c.Type == ClaimTypes.Name);
To retrieve specific claims, the method FindAll needs a predicate to 1223
Download from finelybook www.finelybook.com
define a match: var groupClaims = identity.FindAll(c => c.Type == ClaimTypes.GroupSid);
NOTE A claim type can be a simple string like the "Age" type used earlier. The ClaimType defines a list of known types such as Country, Email, Name, MobilePhone, UserData, Surname, PostalCode, and several more.
ENCRYPTING DATA Confidential data should be secured so that it cannot be read by unprivileged users. This is valid for both data that is sent across the network and stored data. You can encrypt such data with symmetric or asymmetric encryption keys. With a symmetric key, you can use the same key for encryption and decryption. With asymmetric encryption, different keys are used for encryption and decryption: a public key and a private key. Something encrypted using a public key can be decrypted with the corresponding private key. This also works the other way around: Something encrypted using a private key can be decrypted by using the corresponding public key, but not the private key. It’s practically impossible to calculate the private or public key from the other one. Public and private keys are always created as a pair. The public key can be made available to everybody, and even put on a website, but the private key must be safely locked away. Following are some examples that demonstrate how public and private keys are used for encryption. If Alice sends a message to Bob (see Figure 24-1), and she wants to ensure that no one other than Bob can read the message, she uses Bob’s public key. The message is encrypted using Bob’s public key. Bob opens the message and can decrypt it using his secretly stored private 1224
Download from finelybook www.finelybook.com
key. This key exchange guarantees that only Bob can read Alice’s message.
FIGURE 24-1 There is one problem, however: Bob can’t be sure that the mail comes from Alice. Eve can use Bob’s public key to encrypt messages sent to Bob and pretend to be Alice. We can extend this principle using public/private keys. Let’s start again with Alice sending a message to Bob. Before Alice encrypts the message using Bob’s public key, she adds her signature and encrypts the signature using her own private key. Then she encrypts the mail using Bob’s public key. Therefore, it is guaranteed that no one other than Bob can read the message. When Bob decrypts it, he detects an encrypted signature. The signature can be decrypted using Alice’s public key. For Bob, it is not a problem to access Alice’s public key because the key is public. After decrypting the signature, Bob can be sure that it was Alice who sent the message. The encryption and decryption algorithms using symmetric keys are a lot faster than those using asymmetric keys. The problem with symmetric keys is that the keys must be exchanged in a safe manner. With network communication, one way to do this is by using asymmetric keys first for the key exchange and then symmetric keys 1225
Download from finelybook www.finelybook.com
for encryption of the data that is sent across the wire. .NET contains classes for encryption in the namespace System.Security.Cryptography. Several symmetric and asymmetric algorithms are implemented. You can find algorithm classes for many different purposes. Some of the classes have a Cng prefix or suffix. CNG is short for Cryptography Next Generation, which is a newer version of the native Windows Crypto API. This API makes it possible to write a program independently of the algorithm by using a provider-based model. The following table lists encryption classes and their purposes from the namespace System.Security.Cryptography. The classes without a Cng, Managed, or CryptoServiceProvider suffix are abstract base classes, such as MD5. The Managed suffix means that this algorithm is implemented with managed code; other classes might wrap native Windows API calls. The suffix CryptoServiceProvider is used with classes that implement the abstract base class. The Cng suffix is used with classes that make use of the new Cryptography CNG API. CATEGORY CLASSES Hash MD5 SHA1 SHA1Managed SHA256 SHA256Managed SHA256Cng SHA384 SHA384Managed SHA512 SHA512Managed
1226
DESCRIPTION The purpose of hash algorithms is to create a fixed-length hash value from binary strings of arbitrary length. These algorithms are used with digital signatures and for data integrity. If the same binary string is hashed again, the same hash result is returned. MD5
Download from finelybook www.finelybook.com
Symmetric
(Message Digest Algorithm 5), developed at RSA Laboratories, is faster than SHA1. SHA1 is stronger against brute force attacks. The SHA algorithms were designed by the National Security Agency (NSA). MD5 uses a 128-bit hash size; SHA1 uses 160 bits. The other SHA algorithms contain the hash size in the name. SHA512 is the strongest of these algorithms, with a hash size of 512 bits; it is also the slowest. DES DESCryptoServiceProvider Symmetric key TripleDESTripleDESCryptoServiceProvider algorithms use Aes AesCryptoServiceProvider AesManaged the same key for RC2 RC2CryptoServiceProvider Rijndael encryption and RijndaelManaged decryption of data. Data Encryption Standard (DES) is now 1227
Download from finelybook www.finelybook.com
Asymmetric
DSA DSACryptoServiceProvider ECDsa ECDsaCng ECDiffieHellman ECDiffieHellmanCng RSA RSACryptoServiceProvider RSACng
1228
considered insecure because it uses only 56 bits for the key size and can be broken in less than 24 hours. Triple-DES is the successor to DES and has a key length of 168 bits, but the effective security it provides is only 112-bit. Advanced Encryption Standard (AES) has a key size of 128, 192, or 256 bits. Rijndael is very similar to AES but offers more key size options. AES is an encryption standard adopted by the U.S. government. Asymmetric algorithms use different keys for encryption and decryption. The Rivest, Shamir, Adleman (RSA)
Download from finelybook www.finelybook.com
algorithm was the first one used for signing as well as encryption. This algorithm is widely used in ecommerce protocols. RSACng is a class new with .NET 4.6 and .NET Core that is based on a Cryptography Next Generation (CNG) implementation. Digital Signature Algorithm (DSA) is a United States Federal Government standard for digital signatures. Elliptic Curve DSA (ECDSA) and EC DiffieHellman use algorithms based on elliptic curve groups. These algorithms are more secure, with shorter key sizes. For example, having 1229
Download from finelybook www.finelybook.com
a key size of 1024 bits for DSA is similar in security to 160 bits for ECDSA. As a result, ECDSA is much faster. EC DiffieHellman is an algorithm used to exchange private keys in a secure way over a public channel. The following section includes some examples demonstrating how these algorithms can be used programmatically.
WARNING Be aware that all classes with the Cng pre- or postfix (belonging to Windows Cryptography Next Generation, CNG), are supported only on Windows. They do not run on Linux or Mac. These APIs throw a PlatformNotSupportedException on Linux.
Creating and Verifying a Signature The first example demonstrates a signature using the ECDSA algorithm, described in the preceding table, for signing. Alice creates a signature that is encrypted with her private key and can be accessed using her public key. This way, it is guaranteed that the signature is from Alice. The sample application SigningDemo makes use of the following dependency and namespaces: Dependency
1230
Download from finelybook www.finelybook.com
System.Security.Cryptography.Cng Namespaces System System.Security.Cryptography System.Text
First, look at the major steps in the Main method: Alice’s keys are created, and the string "Alice" is signed and then verified to be the signature from Alice by using the public key. The message that is signed is converted to a byte array by using the Encoding class. To write the encrypted signature to the console, the byte array that contains the signature is converted to a string with the method Convert .ToBase64String (code file SigningDemo/Program.cs): private CngKey _aliceKeySignature; private byte[] _alicePubKeyBlob; static void Main() { var p = new Program(); p.Run(); } public void Run() { InitAliceKeys(); byte[] aliceData = Encoding.UTF8.GetBytes("Alice"); byte[] aliceSignature = CreateSignature(aliceData, aliceKeySignature); Console.WriteLine($"Alice created signature: " + $"{Convert.ToBase64String(aliceSignature)}"); if (VerifySignature(aliceData, aliceSignature, alicePubKeyBlob)) { Console.WriteLine("Alice signature verified successfully"); } }
1231
Download from finelybook www.finelybook.com
WARNING Never convert encrypted data to a string using the Encoding class. The Encoding class verifies and converts invalid values that are not allowed with Unicode; therefore, converting the string back to a byte array can yield a different result. is the method that creates a new key pair for Alice. This key pair is stored in a static field, so it can be accessed from the other methods. The Create method of CngKey gets the algorithm as an argument to define a key pair for the algorithm. With the Export method, the public key of the key pair is exported. This public key can be given to Bob for verification of the signature. Alice keeps the private key. Instead of creating a key pair with the CngKey class, you can open existing keys that are stored in the key store. Usually Alice would have a certificate containing a key pair in her private store, and the store could be accessed with CngKey.Open: InitAliceKeys
private void InitAliceKeys() { _aliceKeySignature = CngKey.Create(CngAlgorithm.ECDsaP521); _alicePubKeyBlob = aliceKeySignature.Export(CngKeyBlobFormat.GenericPublicBlob); }
With the key pair, Alice can create the signature using the ECDsaCng class. The constructor of this class receives the CngKey—which contains both the public and private keys—from Alice. The private key is used to sign the data with the SignData method: public byte[] CreateSignature(byte[] data, CngKey key) { byte[] signature; using (var signingAlg = new ECDsaCng(key)) { signature = signingAlg.SignData(data, HashAlgorithmName.SHA512); signingAlg.Clear();
1232
Download from finelybook www.finelybook.com
} return signature; }
To verify that the signature was really from Alice, Bob checks the signature by using the public key from Alice. The byte array containing the public key blob can be imported to a CngKey object with the static Import method. The ECDsaCng class is then used to verify the signature by invoking VerifyData: public bool VerifySignature(byte[] data, byte[] signature, byte[] pubKey) { bool retValue = false; using (CngKey key = CngKey.Import(pubKey, CngKeyBlobFormat.GenericPublicBlob)) using (var signingAlg = new ECDsaCng(key)) { retValue = signingAlg.VerifyData(data, signature, HashAlgorithmName.SHA512); signingAlg.Clear(); } return retValue; }
Implementing Secure Data Exchange The next example helps explain public/private key principles, exchanging a secret between two parties, and communication with symmetric keys. A secret can be exchanged between two parties using the EC Diffie-Hellman algorithm. This algorithm allows exchanging a secret just by using public and private keys and exchanging the public key between two parties. At the time of this writing, an implementation of this algorithm is not available with .NET Core; it’s available only with the .NET Framework running on Windows. In your applications you typically don’t need to implement this functionality because it’s already offered by infrastructure services.
NOTE 1233
Download from finelybook www.finelybook.com
At the time of this writing, .NET Core just includes the ECDiffieHellman abstract base class that can be used by implementers to create concrete classes. A concrete class is not yet here, that’s why this sample uses only .NET 4.7.1. The sample application SecureTransfer has the target framework set to net471 and makes use of the following dependencies and namespaces: Dependencies System.Security.Cryptography.Algorithms System.Security.Cryptography.Cng System.Security.Cryptography.Csp System.Security.Cryptography.Primitives Namespaces System System.IO System.Security.Cryptography System.Text System.Threading.Tasks
The Main method contains the primary functionality. Alice creates an encrypted message and sends it to Bob. Before the message is created and sent, key pairs are created for Alice and Bob. Bob has access only to Alice’s public key, and Alice has access only to Bob’s public key (code file SecureTransfer/Program.cs): private private private private
CngKey CngKey byte[] byte[]
_aliceKey; _bobKey; _alicePubKeyBlob; _bobPubKeyBlob;
static async Task Main() { var p = new Program();
1234
Download from finelybook www.finelybook.com
await p.RunAsync(); Console.ReadLine(); } public async Task RunAsync() { try { CreateKeys(); byte[] encrytpedData = await AliceSendsDataAsync("This is a secret message for Bob"); await BobReceivesDataAsync(encrytpedData); } catch (Exception ex) { Console.WriteLine(ex.Message); } }
In the implementation of the CreateKeys method, keys are created to be used with the EC Diffie-Hellman 521 algorithm: public void CreateKeys() { aliceKey = CngKey.Create(CngAlgorithm.ECDiffieHellmanP521); bobKey = CngKey.Create(CngAlgorithm.ECDiffieHellmanP521); alicePubKeyBlob = aliceKey.Export(CngKeyBlobFormat.EccPublicBlob); bobPubKeyBlob = bobKey.Export(CngKeyBlobFormat.EccPublicBlob); }
In the method AliceSendsDataAsync, the string that contains text characters is converted to a byte array by using the Encoding class. An ECDiffieHellmanCng object is created and initialized with the key pair from Alice. Alice creates a symmetric key by using her key pair and the public key from Bob, calling the method DeriveKeyMaterial. The returned symmetric key is used with the symmetric algorithm AES to encrypt the data. AesCryptoServiceProvider requires the key and an initialization vector (IV). The IV is generated dynamically from the method GenerateIV. The symmetric key is exchanged with the help of the EC Diffie-Hellman algorithm, but the IV must also be exchanged. From a security standpoint, it is OK to transfer the IV unencrypted 1235
Download from finelybook www.finelybook.com
across the network—only the key exchange must be secured. The IV is stored first as content in the memory stream, followed by the encrypted data where the CryptoStream class uses the encryptor created by the AesCryptoServiceProvider class. Before the encrypted data is accessed from the memory stream, the crypto stream must be closed. Otherwise, end bits would be missing from the encrypted data: public async Task AliceSendsDataAsync(string message) { Console.WriteLine($"Alice sends message: {message}"); byte[] rawData = Encoding.UTF8.GetBytes(message); byte[] encryptedData = null; using (var aliceAlgorithm = new ECDiffieHellmanCng(aliceKey)) using (CngKey bobPubKey = CngKey.Import(bobPubKeyBlob, CngKeyBlobFormat.EccPublicBlob)) { byte[] symmKey = aliceAlgorithm.DeriveKeyMaterial(bobPubKey); Console.WriteLine("Alice creates this symmetric key with " + $"Bobs public key information: {Convert.ToBase64String(symmKey)}"); using (var aes = new AesCryptoServiceProvider()) { aes.Key = symmKey; aes.GenerateIV(); using (ICryptoTransform encryptor = aes.CreateEncryptor()) using (var ms = new MemoryStream()) { // create CryptoStream and encrypt data to send using (var cs = new CryptoStream(ms, encryptor, CryptoStreamMode.Write)) { // write initialization vector not encrypted await ms.WriteAsync(aes.IV, 0, aes.IV.Length); cs.Write(rawData, 0, rawData.Length); } encryptedData = ms.ToArray(); } aes.Clear(); } } Console.WriteLine("Alice: message is encrypted: "+ $"{Convert.ToBase64String(encryptedData)}");
1236
Download from finelybook www.finelybook.com
Console.WriteLine(); return encryptedData; }
Bob receives the encrypted data in the argument of the method BobReceivesDataAsync. First, the unencrypted initialization vector must be read. The BlockSize property of the class AesCryptoServiceProvider returns the number of bits for a block. The number of bytes can be calculated by dividing by 8, and the fastest way to do this is by doing a bit shift of 3 bits (shifting by 1 bit is a division by 2, 2 bits by 4, and 3 bits by 8). With the for loop, the first bytes of the raw bytes that contain the IV unencrypted are written to the array iv. Next, an ECDiffieHellmanCng object is instantiated with the key pair from Bob. Using the public key from Alice, the symmetric key is returned from the method DeriveKeyMaterial. Comparing the symmetric keys created from Alice and Bob shows that the same key value is created. Using this symmetric key and the initialization vector, the message from Alice can be decrypted with the AesCryptoServiceProvider class: public async Task BobReceivesDataAsync(byte[] encryptedData) { Console.WriteLine("Bob receives encrypted data"); byte[] rawData = null; var aes = new AesCryptoServiceProvider(); int nBytes = aes.BlockSize 3; byte[] iv = new byte[nBytes]; for (int i = 0; i < iv.Length; i++) { iv[i] = encryptedData[i]; } using (var bobAlgorithm = new ECDiffieHellmanCng(bobKey)) using (CngKey alicePubKey = CngKey.Import(alicePubKeyBlob, CngKeyBlobFormat.EccPublicBlob)) { byte[] symmKey = bobAlgorithm.DeriveKeyMaterial(alicePubKey); Console.WriteLine("Bob creates this symmetric key with " + $"Alices public key information: {Convert.ToBase64String(symmKey)}"); aes.Key = symmKey; aes.IV = iv;
1237
Download from finelybook www.finelybook.com
using (ICryptoTransform decryptor = aes.CreateDecryptor()) using (MemoryStream ms = new MemoryStream()) { using (var cs = new CryptoStream(ms, decryptor, CryptoStreamMode.Write)) { await cs.WriteAsync(encryptedData, nBytes, encryptedData.Length - nBytes); } rawData = ms.ToArray(); Console.WriteLine("Bob decrypts message to: " + $"{Encoding.UTF8.GetString(rawData)}"); } aes.Clear(); } }
Running the application returns output like the following. The message from Alice is encrypted, and then decrypted by Bob with the securely exchanged symmetric key. Alice sends message: this is a secret message for Bob Alice creates this symmetric key with Bobs public key information: q4D182m7lyev9Nlp6f0av2Jvc0+LmHF5zEjXw1O1I3Y= Alice: message is encrypted: WpOxvUoWH5XY31wC8aXcDWeDUWa6zaSObfGcQCpKixzlTJ9exb tkF5Hp2WPSZWL9V9n13toBg7hgjPbrVzN2A== Bob receives encrypted data Bob creates this symmetric key with Alices public key information: q4D182m7lyev9Nlp6f0av2Jvc0+LmHF5zEjXw1O1I3Y= Bob decrypts message to: this is a secret message for Bob
Signing and Hashing Using RSA A new cryptography algorithm class is RSACng. RSA (the name comes from the algorithm designers Ron Rivest, Adi Shamir, and Leonard Adlerman) is an asymmetric algorithm that is widely used. Although the RSA algorithm was already available with .NET with the RSA and RSACryptoServiceProvider classes, RSACng is a class based on the CNG API and is similar in use to the ECDSACng class shown earlier. With the sample application shown in this section, Alice creates a 1238
Download from finelybook www.finelybook.com
document, hashes it to make sure it doesn’t get changed, and signs it with a signature to guarantee that the document is generated by Alice. Bob receives the document and checks the guarantees from Alice to make sure the document hasn’t been tampered with. The RSA sample code makes use of the following dependency and namespaces: Dependency System.Security.Cryptography.Cng Namespaces System System.IO System.Linq
The Main method of the application is structured to start with Alice’s tasks to invoke the method AliceTasks to create a document, a hash code, and a signature. This information is then passed to Bob’s tasks to invoke the method BobTasks (code file RSASample/Program.cs): class Program { private CngKey _aliceKey; private byte[] _alicePubKeyBlob; static void Main() { var p = new Program(); p.Run(); } public void Run() { AliceTasks(out byte[] document, out byte[] hash, out byte[] signature); BobTasks(document, hash, signature); } //... }
The method AliceTasks first creates the keys needed by Alice, converts the message to a byte array, hashes the byte array, and adds a signature: public void AliceTasks(out byte[] data, out byte[] hash, out
1239
Download from finelybook www.finelybook.com
byte[] signature) { InitAliceKeys(); data = Encoding.UTF8.GetBytes("Best greetings from Alice"); hash = HashDocument(data); signature = AddSignatureToHash(hash, _aliceKey); }
Like before, the keys needed by Alice are created using the CngKey class. As the RSA algorithm is being used now, the enumeration value CngAlgorithm.Rsa is passed to the Create method to create public and private keys. Only the public key is given to Bob, so the public key is extracted with the Export method: private void InitAliceKeys() { _aliceKey = CngKey.Create(CngAlgorithm.Rsa); _alicePubKeyBlob = _aliceKey.Export(CngKeyBlobFormat.GenericPublicBlob); }
The HashDocument method is invoked from Alice’s tasks to create a hash code for the document. The hash code is created using one of the hash algorithm classes: SHA384. No matter how long the document is, the hash code always has the same length. Creating the hash code for the same document again results in the same hash code. Bob needs to use the same algorithm on the document. If the same hash code is returned, the document hasn’t been changed. private byte[] HashDocument(byte[] data) { using (var hashAlg = SHA384.Create()) { return hashAlg.ComputeHash(data); } }
Adding a signature guarantees that the document is from Alice. Here, the hash is signed using the RSACng class. Alice’s CngKey, including the public and private keys, is passed to the constructor of the RSACng class; the signature is created by invoking the SignHash method. When the hash is signed, the SignHash method needs to know about the algorithm of the hash; HashAlgorithmName.SHA384 is the algorithm that 1240
Download from finelybook www.finelybook.com
was used to create the hash. Also, the RSA padding is needed. Possible options with the RSASignaturePadding enumeration are Pss and Pkcs1: private byte[] AddSignatureToHash(byte[] hash, CngKey key) { using (var signingAlg = new RSACng(key)) { byte[] signed = signingAlg.SignHash(hash, HashAlgorithmName.SHA384, RSASignaturePadding.Pss); return signed; } }
After hashing and signing from Alice, Bob’s tasks can start in the method BobTasks. Bob receives the document data, the hash code, and the signature, and he uses Alice’s public key. First, Alice’s public key is imported using CngKey.Import and assigned to the aliceKey variable. Next, Bob uses the helper methods IsSignatureValid and IsDocumentUnchanged to verify whether the signature is valid and the document unchanged. Only if both conditions are true, the document is written to the console: public void BobTasks(byte[] data, byte[] hash, byte[] signature) { CngKey aliceKey = CngKey.Import(_alicePubKeyBlob, CngKeyBlobFormat.GenericPublicBlob); if (!IsSignatureValid(hash, signature, aliceKey)) { Console.WriteLine("signature not valid"); return; } if (!IsDocumentUnchanged(hash, data)) { Console.WriteLine("document was changed"); return; } Console.WriteLine("signature valid, document unchanged"); Console.WriteLine($"document from Alice: {Encoding.UTF8.GetString(data)}"); }
To verify if the signature is valid, the public key from Alice is used to create an instance of the RSACng class. With this class, the VerifyHash 1241
Download from finelybook www.finelybook.com
method is used to pass the hash, signature, and algorithm information that was used earlier. Now Bob knows the information is from Alice: private bool IsSignatureValid(byte[] hash, byte[] signature, CngKey key) { using (var signingAlg = new RSACng(key)) { return signingAlg.VerifyHash(hash, signature, HashAlgorithmName.SHA384, RSASignaturePadding.Pss); } }
To verify that the document data is unchanged, Bob hashes the document again and uses the LINQ extension method SequenceEqual to verify whether the hash code is the same as was sent earlier. If the hashes are the same, it can be assumed that the document was not changed: private bool IsDocumentUnchanged(byte[] hash, byte[] data) { byte[] newHash = HashDocument(data); return newHash.SequenceEqual(hash); }
When you run the application, you see output like what’s shown here. When you debug the application, you can change the document data after it’s hashed by Alice and see that Bob doesn’t accept the changed document. To change the document data, you can easily change the value in the Watch window of the debugger. signature valid, document unchanged document from Alice: Best greetings from Alice
PROTECTING DATA After encrypting, signing, and hashing data, let’s move the abstraction layer higher. This section gets into protecting data—storing securitysensitive data. When data is used with web applications, the client used cannot be trusted. This is where the data protection API takes place. 1242
Download from finelybook www.finelybook.com
Another kind of data that needs to be protected is configuration data. Configuration data—such as SQL connection strings (including username and password) or some access tokens to AWS or Microsoft Azure—shouldn’t be put into a public source code repository. This information can easily be misused. Indeed, bots are used to crawl over public GitHub repositories to find secret keys and use them, for example to spin up virtual machines to farm Bitcoins. App Secrets offer a way for storing secrets in a user profile. Both these technologies, data protection and user secrets, are covered in this section.
Implementing Data Protection With the .NET Framework, the namespace System.Security.DataProtection contains a DpApiDataProtector class that wraps the native Windows Data Protection API (DPAPI). Because these classes are based on Windows, they do not offer the flexibility and features needed with .NET Core, that’s why the ASP.NET team created classes with the Microsoft.AspNetCore.DataProtection namespace. With this library, trusted information can be stored for later retrieval, and the storage media (such as using hosting environments from a third party) cannot be trusted itself, so the information needs to be stored encrypted on the host. The sample application is a simple Console App (.NET Core) that enables you to read and write information using data protection. With this sample, you see the flexibility and features of the ASP.NET data protection. The data protection sample code makes use of the following dependencies and namespaces: Dependencies Microsoft.AspNetCore.DataProtection Microsoft.Extensions.DependencyInjection
1243
Download from finelybook www.finelybook.com
Namespaces Microsoft.AspNetCore.DataProtection Microsoft.Extensions.DependencyInjection System System.IO System.Linq
You can start the console application by using the -r and -w commandline arguments to either read or write from the storage. Also, you need to use the command line to set a filename to read and write. After checking the command-line arguments, the data protection is initialized calling the SetupDataProtection helper method. This method returns an object of type MySafe that embeds an IDataProtector. After that, depending on the command-line arguments, either the Write or Read method is invoked (code file DataProtectionSample/Program.cs): class Program { private const string readOption = "-r"; private const string writeOption = "-w"; private readonly string[] options = { readOption, writeOption }; static void Main(string[] args) { if (args.Length != 2 || args.Intersect(options).Count() != 1) { ShowUsage(); return; } string fileName = args[1]; MySafe safe = SetupDataProtection(); switch (args[0]) { case writeOption: Write(safe, fileName); break; case readOption:
1244
Download from finelybook www.finelybook.com
Read(safe, fileName); break; default: ShowUsage(); break; } } //... }
The class MySafe holds a member of IDataProtector. This interface defines the members Protect and Unprotect to encrypt and decrypt data. This interface defines Protect and Unprotect methods with byte array arguments and returning byte arrays. However, the sample code directly sends and returns strings from the Encrypt and Decrypt methods using extension methods that are defined within the Microsoft.AspNetCore.DataProtection.Abstractions NuGet package. The MySafe class receives an IDataProtectionProvider interface via dependency injection. With this interface, a IDataProtector is returned passing a purpose string. The same string needs to be used when reading and writing from this safe (code file DataProtectionSample/MySafe.cs): public class MySafe { private IDataProtector _protector; public MySafe(IDataProtectionProvider provider) => _protector = provider.CreateProtector("MySafe.MyProtection.v2"); public string Encrypt(string input) => _protector.Protect(input); public string Decrypt(string encrypted) => _protector.Unprotect(encrypted); }
With the SetupDataProtection method, the AddDataProtection extension method is invoked to add data protection via dependency injection, and to configure it. The AddDataProtection method registers default services and returns an IDataProtectionBuilder that can be used to configure data protection further using a fluent API. The sample code persists the key to the actual directory passing a DirectoryInfo instance to the method PersistKeysToFileSystem. 1245
Download from finelybook www.finelybook.com
Another option is to persist the key to the registry (PersistKeysToRegistry), and you can create your own method to persist the key to a custom store. The lifetime of the created keys is defined by the method SetDefaultKeyLifetime. Next, the keys are protected by calling ProtectKeysWithDpapi. This method protects the keys using the DPAPI, which encrypts the stored keys with the current user. ProtectKeysWithCertificate allows using a certificate for key protection. The API also defines the method UseEphemeralDataProtectionProvider in which keys are stored just in memory. When the application is started again, new keys need to be generated. This is a great feature for unit testing (code file DataProtectionSample/Program.cs): public static MySafe SetupDataProtection() { var serviceCollection = new ServiceCollection(); serviceCollection.AddDataProtection() .PersistKeysToFileSystem(new DirectoryInfo(".")) .SetDefaultKeyLifetime(TimeSpan.FromDays(20)) .ProtectKeysWithDpapi(); IServiceProvider services = serviceCollection.BuildServiceProvider(); return ActivatorUtilities.CreateInstance(services); }
NOTE Dependency injection is explained in detail in Chapter 20, “Dependency Injection.” Now the heart of the data protection application is implemented, and the Write and Read methods can take advantage of MySafe to encrypt and decrypt the user’s content: public static void Write(MySafe safe, string fileName) { Console.WriteLine("enter content to write:");
1246
Download from finelybook www.finelybook.com
string content = Console.ReadLine(); string encrypted = safe.Encrypt(content); File.WriteAllText(fileName, encrypted); Console.WriteLine($"content written to {fileName}"); } public static void Read(MySafe safe, string fileName) { string encrypted = File.ReadAllText(fileName); string decrypted = safe.Decrypt(encrypted); Console.WriteLine(decrypted); }
User Secrets Having the connection string in the configuration file is not a big problem as long as Windows authentication is used. When you store username and password with the connection string, it can be a big issue to add the connection string to a configuration file and store the configuration file along with the source code repository. Having a public repository and storing Amazon or Azure keys with the configuration can lead to losing thousands of dollars very quickly. Hackers’ background jobs comb through public GitHub repositories to find Amazon keys to hijack accounts and create virtual machines for making Bitcoins. Visit https://www.humankode.com/security/how-abug-in-visual-studio-2015-exposed-my-source-code-on-github-andcost-me-6500-in-a-few-hours to find out more about the situation.
.NET Core has some mitigations around this: user secrets. With user secrets, configuration is not stored in a configuration file of the project; it is stored in a configuration file associated with your account. The user secrets sample code makes use of the following dependencies and namespaces: Dependencies Microsoft.Extensions.Configuration Microsoft.Extensions.Configuration.CommandLine Microsoft.Extensions.Configuration.EnvironmentVariables Microsoft.Extensions.Configuration.Json
1247
Download from finelybook www.finelybook.com
Microsoft.Extensions.Configuration.UserSecrets Namespaces Microsoft.Extensions.Configuration System System.IO
To have the user secrets command-line extension for the dotnet CLI tools, a reference to Microsoft.Extensions.SecretManager.Tools needs to be added to the csproj file (project file UserSecretsSample/UserSecretsSample.csproj):
In addition, you need to define an initial ID by adding a value to the UserSecretsId element in the project file (project file UserSecretsSample/UserSecretsSample.csproj): Exe netcoreapp2.0 UserSecretsSample-Id
This secret ID just needs to be unique on your local system to not mix up configuration values from different projects. Thus, it’s a good idea to have the project name contained in the identifier. The sample application defines using configuration from a JSON file, environmental variables, the command line, and user secrets. User secrets are configured to invoke the extension method AddUserSecrets with the ConfigurationBuilder. This provider is added only if the application is built with debug mode enabled. Remember, this provider is available only when you’re running the application with the user profile that has user secrets enabled. The overloaded method of AddUserSecrets requires the user secrets ID as a parameter—the same 1248
Download from finelybook www.finelybook.com
identifier that has been used with the configuration (code file UserSecretsSample/Program.cs): static void Main(string[] args) { var configBuilder = new ConfigurationBuilder(); configBuilder.SetBasePath(Directory.GetCurrentDirectory()) .AddJsonFile("appsettings.json") .AddEnvironmentVariables() .AddCommandLine(args); #if DEBUG configBuilder.AddUserSecrets("UserSecretsSample-Id"); #endif IConfigurationRoot configuration = configBuilder.Build(); //... }
NOTE Read more about application configuration with Microsoft.Extensions.Configuration in Chapter 30, “ASP.NET Core.” With the JSON configuration file appsettings.json, a value to the key NotASecret is written. This configuration file should not contain sensitive configuration information when the project is added to a public source code repository (configuration file UserSecretsSample/appsettings.json): { "NotASecret": "this is not a secret" }
Because the SecretManager tool has been configured with the project file, you can use the dotnet command-line tool to set, list, remove, and clear secrets. The following command sets the secret with the key Secret1: > dotnet user-secrets set Secret1 "this is a secret"
1249
Download from finelybook www.finelybook.com
Use dotnet user-secrets list to show all user secrets, and dotnet user-secrets clear to remove all user secrets. On a Windows system, user secrets are stored in the folder %APPDATA%\microsoft\UserSecrets\\secrets.json.
On
a Linux system, the secrets are stored in ~/.microsoft/usersecrets//secrets.json.
To read the configuration values, no matter where the configuration is stored, the variable of type IConfigurationRoot can be used. Using the indexer, the values stored with the corresponding keys can be read, no matter whether the configuration was stored in the JSON file or with user secrets (code file UserSecretsSample/Program.cs): string notASecret1 = configuration["NotASecret"]; Console.WriteLine($"not a secret: {notASecret1}"); string secretValue1 = configuration["Secret1"]; Console.WriteLine($"secret: {secretValue1}");
On the production system, the private profile where the user secrets are stored are not available. Depending on the technology used, different providers can be used. For example, with Azure App Services, configuration can be configured with the Azure portal, and retrieved using environmental variables. You also can use the Azure Key Vault configuration provider to read configuration from Azure Key Vault secrets.
ACCESS CONTROL TO RESOURCES Operating system resources such as files and registry keys, as well as handles of a named pipe, are secured by using an access control list (ACL). Figure 24-2 shows the structure mapping this. Associated with the resource is a security descriptor that contains information about the owner of the resource. It references two access control lists: a discretionary access control list (DACL) and a system access control list (SACL). The DACL defines who has access; the SACL defines audit rules for security event logging. An ACL contains a list of access control entries (ACEs), which contain a type, a security identifier, and rights. With the DACL, the ACE can be of type access allowed or access 1250
Download from finelybook www.finelybook.com
denied. Some of the rights that you can set and get with a file are create, read, write, delete, modify, change permissions, and take ownership.
FIGURE 24-2 The classes to read and modify access control are in the namespace System.Security.AccessControl. The following program demonstrates reading the access control list from a file. The sample application FileAccessControl makes use of the following dependencies and namespaces: Dependencies System.IO.FileSystem System.IO.FileSystem.AccessControl Namespaces System System.IO System.Security.AccessControl System.Security.Principal
1251
Download from finelybook www.finelybook.com
WARNING Access control APIs are available only on Windows, not on Linux or Mac. System.IO.FileSystem.AccessControl APIs are part of the resource management on Windows. The FileStream class defines the GetAccessControl method, which returns a FileSecurity object. FileSecurity is the .NET class that represents a security descriptor for files. FileSecurity derives from the base classes ObjectSecurity, CommonObjectSecurity, NativeObjectSecurity, and FileSystemSecurity. Other classes that represent a security descriptor are CryptoKeySecurity, EventWaitHandleSecurity, MutexSecurity, RegistrySecurity, SemaphoreSecurity, PipeSecurity, and ActiveDirectorySecurity. All these objects can be secured using an ACL. In general, the corresponding .NET class defines the method GetAccessControl to return the corresponding security class; for example, the Mutex.GetAccessControl method returns a MutexSecurity, and the PipeStream.GetAccessControl method returns a PipeSecurity. The FileSecurity class defines methods to read and change the DACL and SACL. The method GetAccessRules returns the DACL in the form of the class AuthorizationRuleCollection. To access the SACL, you can use the method GetAuditRules. With the method GetAccessRules, you can specify whether inherited access rules, and not only access rules directly defined with the object, should be used. The last parameter defines the type of the security identifier that should be returned. This type must derive from the base class IdentityReference. Possible types are NTAccount and SecurityIdentifier. Both these classes represent users or groups; the NTAccount class finds the security object by its name and the SecurityIdentifier class finds the security object by a unique security identifier. The returned AuthorizationRuleCollection contains AuthorizationRule objects. The AuthorizationRule is the .NET 1252
Download from finelybook www.finelybook.com
representation of an ACE. In the following example, a file is accessed, so the AuthorizationRule can be cast to a FileSystemAccessRule. With ACEs of other resources, different .NET representations exist, such as MutexAccessRule and PipeAccessRule. With the FileSystemAccessRule class, the properties AccessControlType, FileSystemRights, and IdentityReference return information about the ACE (code file FileAccessControl/Program.cs). class Program { static void Main(string[] args) { string filename = null; if (args.Length == 0) return; filename = args[0]; using (FileStream stream = File.Open(filename, FileMode.Open)) { FileSecurity securityDescriptor = stream.GetAccessControl(); AuthorizationRuleCollection rules = securityDescriptor.GetAccessRules(true, true, typeof(NTAccount)); foreach (AuthorizationRule rule in rules) { var fileRule = rule as FileSystemAccessRule; Console.WriteLine($"Access type: {fileRule.AccessControlType}"); Console.WriteLine($"Rights: {fileRule.FileSystemRights}"); Console.WriteLine($"Identity: {fileRule.IdentityReference.Value}"); Console.WriteLine(); } } } }
By running the application and passing a filename, you can see the ACL for the file. The following output lists full control to Administrators and System, modification rights to authenticated users, and read and execute rights to all users belonging to the group Users: Access type: Allow
1253
Download from finelybook www.finelybook.com
Rights: FullControl Identity: BUILTIN\Administrators Access type: Allow Rights: FullControl Identity: NT AUTHORITY\SYSTEM Access type: Allow Rights: FullControl Identity: BUILTIN\Administrators Access type: Allow Rights: FullControl Identity: TheOtherSide\Christian
Setting access rights is very similar to reading access rights. To set access rights, several resource classes that can be secured offer the SetAccessControl and ModifyAccessControl methods. The following code modifies the ACL of a file by invoking the SetAccessControl method from the File class. To this method a FileSecurity object is passed. The FileSecurity object is filled with FileSystemAccessRule objects. The access rules listed here deny write access to the Sales group, give read access to the Everyone group, and give full control to the Developers group:
NOTE This program runs on your system only if the Windows groups Sales and Developers are defined. You can change the program to use groups that are available in your environment. private void WriteAcl(string filename) { var salesIdentity = new NTAccount("Sales"); var developersIdentity = new NTAccount("Developers"); var everyOneIdentity = new NTAccount("Everyone"); var salesAce = new FileSystemAccessRule(salesIdentity, FileSystemRights.Write, AccessControlType.Deny); var everyoneAce = new FileSystemAccessRule(everyOneIdentity, FileSystemRights.Read, AccessControlType.Allow); var developersAce = new FileSystemAccessRule(developersIdentity, FileSystemRights.FullControl, AccessControlType.Allow);
1254
Download from finelybook www.finelybook.com
var securityDescriptor = new FileSecurity(); securityDescriptor.SetAccessRule(everyoneAce); securityDescriptor.SetAccessRule(developersAce); securityDescriptor.SetAccessRule(salesAce); File.SetAccessControl(filename, securityDescriptor); }
NOTE You can verify the access rules by opening the Properties window and selecting a file in Windows Explorer. Select the Security tab to see the ACL.
WEB SECURITY Web applications have some specific security issues you need to be aware of with applications that allow user input. User input cannot be trusted. Verifying input data on the client using JavaScript or built-in HTML5 features is only for the convenience of the user. Errors can be shown without making an extra network request to the server. However, the client cannot be trusted. HTTP requests can be intercepted, and the user (a hacker) can make different requests that bypass the HTML5 and JavaScript validation. This section looks at common issues with web applications, and what you need to be aware of avoiding the issues.
NOTE This section makes use of ASP.NET Core and ASP.NET MVC. Read Chapter 30 and Chapter 31, “ASP.NET Core MVC” for more information on these technologies.
Encoding 1255
Download from finelybook www.finelybook.com
Never trust user input. Writing user information to a database and using this information to display on a website can be the cause of a typical hack. For example, a community website was showing the latest five new users on the home page. One of the new users managed to add a script to the username, and the script did a redirect to a malicious website. Because the user information was shown for every user coming to this site, every user was redirected. Let’s have a look at how easy it is to simulate and to avoid such a behavior with the next example. In the following code snippet, the /echo URL is mapped to an answer that returns the input from the user assigned to the x parameter that sends the response using context.Response.WriteAsync (code file ASPNETCoreMVCSecurity/Startup.cs): app.Map("/echo", app1 => { app1.Run(async context => { string data = context.Request.Query["x"]; await context.Response.WriteAsync(data); }); });
Now passing the request http://localhost:24897/echo?x=I'm a nice user
The string I'm a nice user is returned to the browser. This is not that bad, but users can’t play differently. For example, users can input HTML code such as this: http://localhost:24897/echo?x=Is this wanted?
The result shows the input string is formatted with the HTML H1 tag. Users can do more bad things by entering JavaScript code: localhost:24897/echo?x=alert("this is bad");
In most browsers, a pop-up window where the user entered text shows up. In case you try this with Google Chrome, there’s a separate measure to avoid this issue. This browser shows an error page, This 1256
Download from finelybook www.finelybook.com
page isn't working with additional ERR_BLOCKED_BY_XSS_AUDITOR.
information
If you try to avoid this issue by checking for elements with the input and not return a thing in that case, you’ll likely fail. Instead of using the element, users can also use Unicode numbers for the angle brackets with the same result. Instead, let’s encode the user input to not let it be interpreted by the browser. You can use the HTMLEncoder class from the namespace System.Text.Encodings.Web to encode user input: app.Map("/echoenc", app1 => { app1.Run(async context => { string data = context.Request.Query["x"]; await context.Response.WriteAsync(HtmlEncoder.Default.Encode(data)); }); });
When you use HtmlEncoder class, the user can enter elements with the input http://localhost:24897/echoenc?x=this gets converted. As result, this gets converted is shown in the browser. The < character is encoded to <, and thus displayed as text. The complete encoded string is: <h1>this gets converted</h1>
Similarly, the script element is converted and doesn’t run as script in the browser.
NOTE You can use the HtmlEncoder class to allow specific inputs to go through—for example, you might allow the user to add elements. You can create an encoder with accepted inputs using the HtmlEncoder.Create method. Nowadays a preferred method is 1257
Download from finelybook www.finelybook.com
to allow the user to make some formatting by using Markdown and converting Markdown to HTML. You can read my blog article about Markdown at https://csharp.christiannagel.com/2016/07/03/markdown/. The sample code has so far made use of ASP.NET Core functionality. When you directly return a string from an ASP.NET Core MVC controller or inside a view, encoding happens by default. You need to make extra investment to not encode the result here. Just returning a string with an ASP.NET Core controller results in an encoded string (code file ASPNETCoreMVCSecurity/Controllers/HomeController.cs): public string Echo(string x) => x;
To send an unencoded string, the Content method of the Controller base class can be used, and you specify that the content is returned as text/html: public IActionResult EchoUnencoded(string x) => Content(x, "text/html");
Let’s go a step further on using Razor code in a view. Here, the EchoWithView method passes the input data from the user using ViewBag.SampleData to a view (code file ASPNETCoreMVCSecurity/Controllers/HomeController.cs): public IActionResult EchoWithView(string x) { ViewBag.SampleData = x; return View(); }
In the view, encoding happens by default. Passing the input data using the Razor expression @data. data is a local variable where the passed ViewBag information is assigned. For not making use of encoding, the Html helper class with the method Raw can be used (code file ASPNETCoreMVCSecurity/Views/Home/EchoWithView.cshtml): @{ string data = ViewBag.SampleData;
1258
Download from finelybook www.finelybook.com
} this is encoded @data This is not encoded @Html.Raw(@data)
NOTE When explicitly sending unencoded data to the client, you need to make sure the input can be trusted—for example, HTML converted from Markdown instead of directly returning user input.
NOTE You can use the UrlEncoder class when using user input for URL strings similarly to how you use the HtmlEncoder class when using user input as HTML content.
SQL Injection Another common problem with web applications is SQL injection. As with HTML encoding, the issue can easily be avoided by using built-in functionality. The following code snippet creates a SQL string that directly assigns the input parameter in the SqlSample controller method. With this, the user can enter ;SELECT * FROM Table Users, and all this information is 1259
Download from finelybook www.finelybook.com
shown to the user: public IActionResult SqlSample(string id) { string connectionString = GetConnectionString(); var sqlConnection = new SqlConnection(connectionString); SqlCommand command = sqlConnection.CreateCommand(); // don't do this - string concatenation for SQL commands! command.CommandText = "SELECT * FROM Customers WHERE City = " + id; sqlConnection.Open(); using (SqlDataReader reader = command.ExecuteReader(System.Data.CommandBehavior.CloseConnection)) { var sb = new StringBuilder(); while (reader.Read()) { for (int i = 0; i < reader.FieldCount; i++) { sb.Append(reader[i]); } sb.AppendLine(); } ViewBag.Data = sb.ToString(); } return View(); }
You should never use string concatenation with SQL statements. Instead, you can easily avoid this problem by using parameters or implicitly using Entity Framework Core parameters.
NOTE Using SQL commands is covered in Chapter 25, “ADO.NET and Transactions.” Entity Framework Core is covered in Chapter 26, “Entity Framework Core.”
Cross-Site Request Forgery 1260
Download from finelybook www.finelybook.com
Cross-site request forgery (XSRF) is an attack in which a malicious website tries to replay a user and enter data without the user knowing. Let’s get into an example where the user enters book information in a form. Book is a simple model class containing Title and Publisher properties. Within the HomeController, the EditBook method returns a view (code file ASPNETCoreMVCSecurity/Controllers/HomeController.cs): public IActionResult EditBook() => View();
The view defines simple input data where the user can enter title and publisher information, and pass this information to the server with a HTTP POST request (code file ASPNETCoreMVCSecurity/Views/EditBook.cshtml): @{ ViewData["Title"] = "EditBook"; } Edit Book Title: Publisher:
With the HTTP POST request, the following EditBook method is invoked to display a view with the entered user data (code file ASPNETCoreMVCSecurity/Controllers/HomeController.cs): [HttpPost] public IActionResult EditBook(Book book) => View("EditBookResult", book);
When you run the application while opening the URL http://localhost:24897/Home/EditBook, book information can be entered, the submit button clicked, the information is received from the controller, and the book information is shown in the view result. 1261
Download from finelybook www.finelybook.com
Meanwhile, a malicious website just needs to use the same link to post the data in its own form. Check the following code snippet with the form element referencing the same URL as before. This form is hosted from a different website, http//localhost:9817/dothis.html. Here it’s only a different port, but it could be a different domain name as well. The user doesn’t need to enter anything with the form (the input elements are hidden, thus not shown to the user). The user just needs to click the submit button without knowing something different happens behind the scenes (code file HackingSite/wwwroot/dothis.html): Click this for a win!
When you click this link, the malicious data is transmitted to the website on behalf of the user. If the user is authenticated with the Book website and didn’t sign out, the data is submitted on behalf of the user, and probably some ordering happened with a different delivery address. To avoid this behavior, ASP.NET Core offers anti forgery tokens. Such a token needs to be created from the form that should be used from the user to enter valid data and is validated on receiving the data. The edit book form is now changed to include this token with the HTML helper method AntiForgeryToken (code file ASPNETCoreMVCSecurity/Views/EditBook.cshtml): @Html.AntiForgeryToken() Title:
1262
Download from finelybook www.finelybook.com
Publisher:
When you run the application, you can see a hidden form field with the automatically generated token. When the data is retrieved, the token is validated using the ValidateAntiForgeryToken attribute (code file ASPNETCoreMVCSecurity/Controllers/HomeController.cs): [HttpPost] [ValidateAntiForgeryToken] public IActionResult EditBook(Book book) => View("EditBookResult", book);
When you run the malicious website now, a response is returned without accepting invalid data.
SUMMARY This chapter covered several aspects of security with .NET applications. Users are represented by identities and principals, classes that implement the interface IIdentity and IPrincipal. You’ve also seen how to access claims from identities. A brief overview of cryptography demonstrated how the signing and encrypting of data enable the exchange of keys in a secure way. .NET offers both symmetric and asymmetric cryptography algorithms as well as hashing and signing. With access control lists you can read and modify access to operating system resources such as files. You program ACLs similarly to the way you program secure pipes, registry keys, Active Directory entries, and many other operating system resources. In many cases you can work with security from higher abstraction levels. For example, using HTTPS to access a web server, keys for encryption are exchanged behind the scenes. The File class offers an Encrypt method (using the NTFS file system) to easily encrypt files. Still it’s important to know what happens behind this functionality. 1263
Download from finelybook www.finelybook.com
Regarding web applications, you’ve seen common issues on trusting user input that results in various attacks, including cross-site request forgery. You’ve seen how various issues can be avoided using encoding and anti-forgery request tokens to avoid XSRF. The next two chapters make use of data in the database, starting with ADO.NET.
1264
Download from finelybook www.finelybook.com
25 ADO.NET and Transactions WHAT’S IN THIS CHAPTER? Connecting to the database Executing commands Calling stored procedures The ADO.NET object model Committing transactions with ADO.NET Managing transactions with System.Transactions
WROX.COM CODE DOWNLOADS FOR THIS CHAPTER The Wrox.com code downloads for this chapter are found at www.wrox.com on the Download Code tab. The source code is also available in the GitHub repository https://github.com/ProfessionalCSharp/ProfessionalCSharp7 in the folder ADONET. The code for this chapter is divided into the following major examples: ConnectionSamples CommandSamples AsyncSamples TransactionSamples 1265
Download from finelybook www.finelybook.com
SystemTransactionSamples
ADO.NET OVERVIEW This chapter discusses how to access a relational database like SQL Server from your C# programs using ADO.NET. It shows you how to connect to and disconnect from a database, how to use queries, and how to add and update records. You learn the various command object options and see how commands can be used for each of the options presented by the SQL Server provider classes; how to call stored procedures with command objects; and how to use transactions. ADO.NET previously shipped different database providers: a provider for SQL Server and one for Oracle, using OLEDB and ODBC. The OLEDB technology is discontinued, so this provider shouldn’t be used with new applications. Accessing the Oracle database, Microsoft’s provider is discontinued as well because a provider from Oracle (http://www.oracle.com/technetwork/topics/dotnet/products) better fits the needs. For other data sources (also for Oracle), many thirdparty providers are available. Before using the ODBC provider, you should use a provider specific for the data source you access. The code samples in this chapter are based on SQL Server, but you can easily change it to use different connection and command objects, such as OracleConnection and OracleCommand when accessing the Oracle database instead of SqlConnection and SqlCommand.
NOTE This chapter does not cover the DataSet to have tables in memory, although they are supported by .NET Core 2.0. Datasets enable you to retrieve records from a database and store the content within in-memory data tables with relations. Datasets have been used a lot with earlier versions of .NET. Now, you can use Entity Framework Core (EF Core) instead. EF Core is covered in Chapter 26, “Entity Framework Core.” This newer technology enables you to have object relations instead of table-based relations. 1266
Download from finelybook www.finelybook.com
Sample Database The examples in this chapter use the Books database for SQL Server. A backup file of this database is part of the source code download in the directory CreateDatabase. Using the backup file, you can restore the database backup using SQL Server Management Studio as shown in Figure 25-1. As an alternative, you can also use the SQL script CreateBooks.sql to create the database. In case you don’t have SQL Server Management Studio on your system, you can download a free version from https://docs.microsoft.com/sql/ssms/download-sqlserver-management-studio-ssms. The SQL server used with this chapter is SQL Server LocalDb. This is a database server that is installed as part of Visual Studio. You can use any other SQL Server edition as well; you just need to change the connection string accordingly.
NuGet Packages and Namespaces The sample code for all the ADO.NET samples makes use of the following dependencies and namespaces: Dependencies Microsoft.Extensions.Configuration Microsoft.Extensions.Configuration.Json System.Data.SqlClient Namespaces Microsoft.Extensions.Configuration System System.Collections System.Data System.Data.SqlClient
1267
Download from finelybook www.finelybook.com
System.IO System.Threading.Tasks
FIGURE 25-1
USING DATABASE CONNECTIONS To access the database, you need to provide connection parameters, such as the machine on which the database is running and possibly your login credentials. You make a connection to SQL Server using the SqlConnection class. The following code snippet illustrates how to create, open, and close a 1268
Download from finelybook www.finelybook.com
connection to the Books database (code file ConnectionSamples/Program.cs): public static void OpenConnection() { string connectionString = @"server=(localdb)\MSSQLLocalDB;" + "integrated security=SSPI;database=Books"; var connection = new SqlConnection(connectionString); connection.Open(); // Do something useful Console.WriteLine("Connection opened"); connection.Close(); }
NOTE The SqlConnection class implements the IDisposable interface with the Dispose method in addition to the Close method. Both do the same, to release the connection. With this, you can use the using statement to close the connection. In the example connection string, the parameters used are as follows (the parameters are delimited by a semicolon in the connection string): server=(localdb)\MSSQLLocalDB—This
denotes the database server to connect to. SQL Server permits several separate database server instances to be running on the same machine. Here, you are connecting to the localdb Server and the MSSQLLocalDB SQL Server instance that is created with the installation of SQL Server. If you are using the local installation of SQL Server, change this part to server=(local). Instead of using the keyword server, you can use Data Source instead. Connecting to SQL Azure, you can set Data Source=servername.database.windows.net. database=Books—This
describes the database instance to connect to; each SQL Server process can expose several database instances. 1269
Download from finelybook www.finelybook.com
Instead of the keyword database, you can instead use Initial Catalog. integrated security=SSPI—This
uses Windows Authentication to connect to the database. In case you are using SQL Azure, you need to set User Id and Password instead, or use the Azure Active Directory.
NOTE You can find great information about connection strings with many different databases at http://www.connectionstrings.com. The ConnectionSamples example opens a database connection using the defined connection string and then closes that connection. After you have opened the connection, you can issue commands against the data source; when you are finished, you can close the connection.
Managing Connection Strings Instead of hard-coding the connection string with the C# code, it is better to read it from a configuration file. With .NET Core, configuration files can be JSON or XML formats, or read from environmental variables. With the following sample, the connection string is read from a JSON configuration file (code file ConnectionSamples/config.json): { "Data": { "DefaultConnection": { "ConnectionString": "Server=(localdb)\\MSSQLLocalDB;Database=Books; Trusted_Connection=True;" } } }
The JSON file can be read using the Configuration API defined in the NuGet package Microsoft.Extensions.Configuration. To use JSON 1270
Download from finelybook www.finelybook.com
configuration files, the NuGet package Microsoft.Extensions.Configuration.Json is added as well. For reading a configuration file, the ConfigurationBuilder is created. The AddJsonFile extension method adds the JSON file config.json to read
configuration information from this file—if it is in the same path as the program. To configure a different path, you can invoke the method SetBasePath. Invoking the Build method of the ConfigurationBuilder builds up the configuration from all the added configuration files and returns an object implementing the IConfiguration interface. With this, the configuration values can be retrieved, such as the configuration value for Data:DefaultConnection:ConnectionString (code file ConnectionSamples/Program.cs): public static void ConnectionUsingConfig() { var configurationBuilder = new ConfigurationBuilder() .SetBasePath(Directory.GetCurrentDirectory()) .AddJsonFile("config.json"); IConfiguration config = configurationBuilder.Build(); string connectionString = config["Data:DefaultConnection:ConnectionString"]; Console.WriteLine(connectionString); }
Connection Pools When two-tier applications were done several years ago it was a good idea to open the connection on application start and close it only when the application was closed. Nowadays, this is not a good idea. The reason for this program architecture was that it takes some time to open a connection. Now, closing a connection doesn’t close the connection with the server. Instead, the connection is added to a connection pool. When you open the connection again, it can be taken from the pool, thus it is very fast to open a connection; it only takes time to open the first connection. Pooling can be configured with several options in the connection string. Setting the option Pooling to false disables the connection pool; by default, it’s enabled—Pooling = true. Min Pool Size and Max Pool Size enable you to configure the number of connections in the 1271
Download from finelybook www.finelybook.com
pool. By default, Min Pool Size has a value of 0 and Max Pool Size has a value of 100. Connection Lifetime defines how long a connection should stay inactive in the pool before it is really released.
Connection Information After creating a connection, you can register event handlers to get some information about the connection. The SqlConnection class defines the InfoMessage and StateChange events. The InfoMessage event is fired every time an information or warning message is returned from SQL Server. The StateChange event is fired when the state of the connection changes—for example, the connection is opened or closed (code file ConnectionSamples/Program.cs): public static void ConnectionInformation() { using (var connection = new SqlConnection(GetConnectionString())) { connection.InfoMessage += (sender, e) => { Console.WriteLine($"warning or info {e.Message}"); }; connection.StateChange += (sender, e) => { Console.WriteLine($"current state: {e.CurrentState}, before: " + $"{e.OriginalState}"); }; try { connection.StatisticsEnabled = true; connection.FireInfoMessageEventOnUserErrors = true; connection.Open(); Console.WriteLine("connection opened"); //... Read some records } catch (Exception ex) { Console.WriteLine(ex.Message); } }
1272
Download from finelybook www.finelybook.com
}
When you run the application, you can see the StateChange event fired and the Open and Closed state: current state: Open, before: Closed connection opened ... output reading records current state: Closed, before: Open
In case an exception happens, by default the InfoMessage event is not fired. You can change this behavior by setting the property FireInfoMessageEventOnUserErrors. Then with an error, e.g. using the Titl property instead of Title, you can see this information with the application: current state: Open, before: Closed connection opened warning or info: Invalid column name 'Titl'. ... output reading records current state: Closed, before: Open
The SqlConnection class also offers statistic information. You just need to set the StatisticsEnabled property, then you can retrieve the statistics from the RetrieveStatistics method. This method returns the statistic with an object implementing the IDictionary interface: IDictionary statistics = connection.RetrieveStatistics(); ShowStatistics(statistics); connection.ResetStatistics();
The method ShowStatistics iterates all keys of the received IDictionary interface and displays all values: private static void ShowStatistics(IDictionary statistics) { Console.WriteLine("Statistics"); foreach (var key in statistics.Keys) { Console.WriteLine($"{key}, value: {statistics[key]}"); } Console.WriteLine(); }
Retrieving all records from the Books table shows this statistical 1273
Download from finelybook www.finelybook.com
information from the connection: BuffersReceived, value: 1 BuffersSent, value: 1 BytesReceived, value: 142 BytesSent, value: 124 CursorOpens, value: 0 IduCount, value: 0 IduRows, value: 0 PreparedExecs, value: 0 Prepares, value: 0 SelectCount, value: 0 SelectRows, value: 0 ServerRoundtrips, value: 1 SumResultSets, value: 0 Transactions, value: 0 UnpreparedExecs, value: 1 ConnectionTime, value: 140 ExecutionTime, value: 456 NetworkServerTime, value: 8
COMMANDS The “Using Database Connections” section briefly touched on the idea of issuing commands against a database. A command is, in its simplest form, a string of text containing SQL statements to be issued to the database. A command could also be a stored procedure, shown later in this section. A command can be constructed by passing the SQL statement as a parameter to the constructor of the Command class, as shown in this example (code file CommandSamples/Program.cs): public static void CreateCommand() { using (var connection = new SqlConnection(GetConnectionString())) { string sql = "SELECT [Title], [Publisher], [ReleaseDate] " + "FROM [ProCSharp].[Books]"; var command = new SqlCommand(sql, connection); connection.Open(); //... }
1274
Download from finelybook www.finelybook.com
}
A command can also be created by invoking the CreateCommand method of the SqlConnection and assigning the SQL statement to the CommandText property: SqlCommand command = connection.CreateCommand(); command.CommandText = sql;
Commands often need parameters. For example, the following SQL statement requires a Title parameter. Don’t be incited to use string concatenation to build up parameters. Instead, always use the parameter features of ADO.NET: string sql = "SELECT [Title], [Publisher], [ReleaseDate] " + "FROM [ProCSharp].[Books] WHERE lower([Title]) LIKE @Title"; var command = new SqlCommand(sql, connection);
When you add the parameter to the SqlCommand object, there’s a simple way to use the Parameters property that returns a SqlParameterCollection and the AddWithValue method: command.Parameters.AddWithValue("Title", "Professional C#%");
A more efficient method that’s more programming work is to use overloads of the Add method by passing the name and the SQL data type: command.Parameters.Add("TitleStart", SqlDbType.NVarChar, 50); command.Parameters["Title"].Value = "Professional C#%";
It’s also possible to create a SqlParameter object and add this to the SqlParameterCollection.
NOTE Don’t be inclined to use string concatenation with SQL parameters. This is often misused for SQL injection attacks. Using SqlParameter objects inhibits such attacks.
1275
Download from finelybook www.finelybook.com
After you have defined the command, you need to execute it. There are several ways to issue the statement, depending on what, if anything, you expect to be returned from that command. The SqlCommand class provides the following ExecuteXX methods: ExecuteNonQuery—Executes
the command but does not return any
output ExecuteReader—Executes IDataReader
the command and returns a typed
ExecuteScalar—Executes
the command and returns the value from the first column of the first row of any result set
ExecuteNonQuery The ExecuteNonQuery method is commonly used for UPDATE, INSERT, or DELETE statements, for which the only returned value is the number of records affected. This method can, however, return results if you call a stored procedure that has output parameters. The sample code creates a new record within the ProCSharp.Books table. Figure 25-2 shows the design view of this table with Visual Studio 2017.
1276
Download from finelybook www.finelybook.com
FIGURE 25-2 This table has an Id as primary key that is an identity column and thus does not need to be supplied creating the record. The Title and Isbn columns do not allow null (see Figure 25-2), but other columns do. In the sample code, all the columns are filled with values. The method ExecuteNonQuery defines the SQL INSERT statement, adds values for the parameters, and invokes the ExecuteNonQuery method of the SqlCommand class (code file CommandSamples/Program.cs): public static void ExecuteNonQuery { try { using (var connection = new SqlConnection(GetConnectionString())) { string sql = "INSERT INTO [ProCSharp].[Books] " + "([Title], [Publisher], [Isbn], [ReleaseDate]) " + "VALUES (@Title, @Publisher, @Isbn, @ReleaseDate)"; var command = new SqlCommand(sql, connection);
1277
Download from finelybook www.finelybook.com
command.Parameters.AddWithValue("Title", "Professional C# 7 and .NET Core 2.0"); command.Parameters.AddWithValue("Publisher", "Wrox Press"); command.Parameters.AddWithValue("Isbn", "9781119449270"); command.Parameters.AddWithValue("ReleaseDate", new DateTime(2018, 4, 2)); connection.Open(); int records = command.ExecuteNonQuery(); Console.WriteLine($"{records} record(s) inserted"); } } catch (SqlException ex) { Console.WriteLine(ex.Message); } } ExecuteNonQuery returns the number of rows affected by the command as an int. When you run the method the first time, one record is
inserted. When you run the same method a second time, you get an exception because of a unique index conflict. The Isbn has a unique index defined and thus is allowed only once. To run the method a second time, you need to delete the created record first.
ExecuteScalar On many occasions it is necessary to return a single result from a SQL statement, such as the count of records in a given table or the current date/time on the server. You can use the ExecuteScalar method in such situations: public static void ExecuteScalar() { using (var connection = new SqlConnection(GetConnectionString())) { string sql = "SELECT COUNT(*) FROM [ProCSharp].[Books]"; SqlCommand command = connection.CreateCommand(); command.CommandText = sql; connection.Open(); object count = command.ExecuteScalar();
1278
Download from finelybook www.finelybook.com
Console.WriteLine($"counted {count} book records"); } }
The method returns an object, which you can cast to the appropriate type if required. If the SQL you are calling returns only one column, it is preferable to use ExecuteScalar over any other method of retrieving that column. That also applies to stored procedures that return a single value.
ExecuteReader The ExecuteReader method executes the command and returns a data reader object. The object returned can be used to iterate through the record(s) returned. The ExecuteReader sample makes use of an SQL query that is defined with the local function GetBookQuery in the method ExecuteReader (code file CommandSamples/Program.cs): public static void ExecuteReader(string titleParameter) { string GetBookQuery() => "SELECT [Id], [Title], [Publisher], [ReleaseDate] "+ "FROM [ProCSharp].[Books] WHERE lower([Title]) LIKE @Title " + "ORDER BY [ReleaseDate] DESC"; //... }
NOTE Local functions are explained in Chapter 13, “Functional Programming with C#.” When you invoke the method ExecuteReader of the SqlCommand object, a SqlDataReader is returned. Note that the SqlDataReader needs to be disposed after it has been used. Also note that this time the SqlConnection object is not explicitly disposed at the end of the method. Passing the parameter CommandBehavior.CloseConnection to the ExecuteReader method automatically closes the connection on 1279
Download from finelybook www.finelybook.com
closing of the reader. If you don’t supply this setting, you still need to close the connection. For reading the records from the data reader, the Read method is invoked within a while loop. The first call to the Read method moves the cursor to the first record returned. When Read is invoked again, the cursor is positioned to the next record—if there’s a record available. The Read method returns false if no record is available at the next position. When accessing the values of the columns, different GetXXX methods are invoked, such as GetInt32, GetString, and GetDateTime. These methods are strongly typed as they return the specific type needed, such as int, string, and DateTime. The index passed to these methods corresponds to the columns retrieved with the SQL SELECT statement, so the index stays the same even if the database structure changes. With the strongly typed GetXXX methods you need to pay attention to values where null is returned from the database; here the GetXXX method throws an exception with a value type returned. With the data retrieved, the ReleaseDate can be null. To avoid an exception in this case, the C# conditional statement ?: is used to check whether the value is null with the SqlDataReader.IsDbNull method. In that case, null is assigned to a nullable DateTime. Only if the value is not null, the DateTime is accessed with the GetDateTime method (code file CommandSamples/Program.cs): public static void ExecuteReader(string title) { //... var connection = new SqlConnection(GetConnectionString()); var command = new SqlCommand(GetBookQuery(), connection); var parameter = new SqlParameter("Title", SqlDbType.NVarChar, 50) { Value = $"{title}%" }; command.Parameters.Add(parameter); connection.Open(); using (SqlDataReader reader = command.ExecuteReader(CommandBehavior.CloseConnection)) { while (reader.Read())
1280
Download from finelybook www.finelybook.com
{ int id = reader.GetInt32(0); string bookTitle = reader.GetString(1); string publisher = reader.GetString(2); DateTime? releaseDate = reader.IsDbNull(3) ? (DateTime?)null : reader.GetDateTime(3); DateTime from = reader.GetDateTime(4); Console.WriteLine($"{id,5}. {bookTitle,-40} {publisher,-15} " + $"{releaseDate:d}"); } } }
When you run the application and pass the title Professional C# to the ExecuteReader method, you see this output: 1015. Professional 4/2/2018 1. Professional 4/11/2016 2. Professional 2/9/2014 11. Professional 10/18/2012 9. Professional 3/8/2010 8. Professional 5/24/2008 18. Professional 6/12/2007 12. Professional 11/7/2005 6. Professional 6/2/2004 10. Professional 3/28/2002 1010. Professional 12/1/2001 1012. Professional 6/1/2001
C# 7 and .NET Core 2.0
Wrox Press
C# 6 and .NET Core 1.0
Wrox Press
C# 5.0 and .NET 4.5.1
Wrox Press
C# 2012 and .NET 4.5
Wrox Press
C# 4 and .NET 4
Wrox Press
C# 2008
Wrox Press
C# 2005 with .NET 3.0
Wrox Press
C# 2005
Wrox Press
C# 3rd Edition
Wrox Press
C# 2nd Edition
Wrox Press
C# Web Services
Wrox Press
C# (Beta 2 Edition)
Wrox Press
With the SqlDataReader, instead of using the typed methods GetXXX, you can use the untyped indexer that returns an object. With this, you need to cast to the corresponding type: 1281
Download from finelybook www.finelybook.com
int id = (int)reader[0]; string bookTitle = (string)reader[1]; string publisher = (string)reader[2]; DateTime? releaseDate = (DateTime?)reader[3];
The indexer of the SqlDataReader also allows a string to be used instead of the int, passing the column name. This is the slowest method of these different options, but it might fulfill your needs. Compared to the time it costs to make a service call, the additional time needed to access the indexer can be ignored: int id = (int)reader["Id"]; string bookTitle = (string)reader["Title"]; string publisher = (string)reader["Publisher"]; DateTime? releaseDate = (DateTime?)reader["ReleaseDate"];
Calling Stored Procedures Calling a stored procedure with a command object is just a matter of defining the name of the stored procedure, adding a definition for each parameter of the procedure, and then executing the command with one of the methods presented in the previous section. The following sample calls the stored procedure GetBooksByPublisher to get all the books from a publisher. This stored procedure receives one parameter to return records of the requested books: CREATE PROCEDURE [ProCSharp].[GetBooksByPublisher] @publisher nvarchar(50) AS SELECT [Id], [Title], [Publisher], [ReleaseDate] FROM [ProCSharp].[Books] WHERE [Publisher] = @publisher ORDER BY [ReleaseDate]
To invoke the stored procedure, the CommandText of the SqlCommand object is set to the name of the stored procedure, and the CommandType is set to CommandType.StoredProcedure. Other than that, the command is invoked similarly to the way you’ve seen before. The parameter is created using the CreateParameter method of the SqlCommand object, but you can use other methods to create the parameter used earlier as well. With the parameter, the SqlDbType, ParameterName, and Value properties are filled. Because the stored procedure returns records, it 1282
Download from finelybook www.finelybook.com
is invoked by calling the method ExecuteReader (code file CommandSamples/Program.cs): private static void StoredProcedure(string publisher) { using (var connection = new SqlConnection(GetConnectionString())) { SqlCommand command = connection.CreateCommand(); command.CommandText = "[ProCSharp]. [GetBooksByPublisher]"; command.CommandType = CommandType.StoredProcedure; SqlParameter p1 = command.CreateParameter(); p1.SqlDbType = SqlDbType.NvarChar; p1.ParameterName = "@Publisher"; p1.Value = publisher; command.Parameters.Add(p1); connection.Open(); using (SqlDataReader reader = command.ExecuteReader()) { while (reader.Read()) { int recursionLevel = (int)reader["Id"]; string title = (string)reader["Title"]; string pub = (string)reader["Publisher"]; DateTime releaseDate = (DateTime)reader["ReleaseDate"]; Console.WriteLine($"{title} - {pub}; {releaseDate:d}"; } } } }
When you run the application and pass the publisher Wrox Press, you get the result as shown: Professional C# (Beta 2 Edition) - Wrox Press; 6/1/2001 Beginning C# - Wrox Press; 9/15/2001 Professional C# Web Services - Wrox Press; 12/1/2001 Professional C# 2nd Edition - Wrox Press; 3/28/2002 Beginning Visual C# - Wrox Press; 8/20/2002 Professional .NET Network Programming - Wrox Press; 10/1/2002 ASP to ASP.NET Migration Handbook - Wrox Press; 2/1/2003 Professional C# 3rd Edition - Wrox Press; 6/2/2004 Professional C# 2005 - Wrox Press; 11/7/2005 Beginning Visual C# 2005 - Wrox Press; 11/7/2005
1283
Download from finelybook www.finelybook.com
Professional C# 2005 with .NET 3.0 - Wrox Press; 6/12/2007 Beginning Visual C# 2008 - Wrox Press; 5/5/2008 Professional C# 2008 - Wrox Press; 5/24/2008 Professional C# 4 and .NET 4 - Wrox Press; 3/8/2010 Beginning Visual C# 2010 - Wrox Press; 4/5/2010 Real World .NET, C#, and Silverlight - Wrox Press; 11/22/2011 Professional C# 2012 and .NET 4.5 - Wrox Press; 10/18/2012 Beginning Visual C# 2012 Programming - Wrox Press; 12/4/2012 Professional C# 5.0 and .NET 4.5.1 - Wrox Press; 2/9/2014 Professional C# 6 and .NET Core 1.0 - Wrox Press; 4/11/2016 Professional C# 7 and .NET Core 2.0 - Wrox Press; 4/2/2018
Depending on the return of the stored procedure, you need to invoke the stored procedure with ExecuteReader, ExecuteScalar, or ExecuteNonQuery. With a stored procedure that contains Output parameters, you need to specify the Direction property of the SqlParameter. By default, the direction is ParameterDirection.Input: var pOut = new SqlParameter(); pOut.Direction = ParameterDirection.Output;
ASYNCHRONOUS DATA ACCESS Accessing the database can take some time. Here you shouldn’t block the user interface. The ADO.NET classes offer task-based asynchronous programming by offering asynchronous methods in addition to the synchronous ones. The following code snippet is like the previous one using the SqlDataReader, but it makes use of Async method calls. The connection is opened with SqlConnection.OpenAsync, the reader is returned from the method SqlCommand.ExecuteReaderAsync, and the records are retrieved using SqlDataReader.ReadAsync. With all these methods, the calling thread is not blocked but can do other work before getting the result (code file AsyncSamples/Program.cs): public static async Task Main() { await ReadAsync("Wrox Press"); } public static async Task ReadAsync(int productId)
1284
Download from finelybook www.finelybook.com
{ var connection = new SqlConnection(GetConnectionString()); string sql = "SELECT [Title], [Publisher], [ReleaseDate] " + "FROM [ProCSharp].[Books] WHERE lower([Title]) " + "LIKE @Title ORDER BY [ReleaseDate]"; var command = new SqlCommand(sql, connection); var titleParameter = new SqlParameter("Title", SqlDbType.NVarChar, 50); titleParameter.Value = title; command.Parameters.Add(titleParameter); await connection.OpenAsync(); using (SqlDataReader reader = await command.ExecuteReaderAsync(CommandBehavior.CloseConnection)) { while (await reader.ReadAsync()) { int id = reader.GetInt32(0); string bookTitle = reader.GetString(1); string publisher = reader[2].ToString(); DateTime? releaseDate = reader.IsDBNull(3) ? (DateTime?)null : reader.GetDateTime(3); Console.WriteLine($"{id,5}. {bookTitle,-40} {publisher,-15} " + $"{releaseDate:d}"); } } }
NOTE The asynchronous Main method requires at least C# 7.1. Using the asynchronous method calls is not only advantageous with Windows applications but also useful on the server side for making multiple calls simultaneous. The asynchronous methods of the ADO.NET API have overloads to support the CancellationToken for an 1285
Download from finelybook www.finelybook.com
earlier stop of a long-running method.
NOTE For more information about asynchronous method calls and the CancellationToken, read Chapter 15, “Asynchronous Programming.”
TRANSACTIONS WITH ADO.NET By default, a single command is running within a transaction. If you need to issue multiple commands, and either all of these or none happen, you can start and commit transactions explicitly. Transactions are described by the term ACID. ACID is a four-letter acronym for atomicity, consistency, isolation, and durability: Atomicity—Represents one unit of work. With a transaction, either the complete unit of work succeeds, or nothing is changed. Consistency—The state before the transaction was started and after the transaction is completed must be valid. During the transaction, the state may have interim values. Isolation—Transactions that happen concurrently are isolated from the state, which is changed during a transaction. Transaction A cannot see the interim state of transaction B until the transaction is completed. Durability—After a transaction is completed, it must be stored in a durable way. This means that if the power goes down or the server crashes, the state must be recovered at reboot.
NOTE Transactions and valid state can easily be described as a wedding 1286
Download from finelybook www.finelybook.com
ceremony. A bridal couple is standing before a transaction coordinator. The transaction coordinator asks the first of the couple: “Do you want to marry this person on your side?” If the first one agrees, the second is asked: “Do you want to marry this person?” If the second one declines, the first receives a rollback. A valid state with this transaction is only that both are married, or none are. If both agree, the transaction is committed, and both are in the married state. If one denies, the transaction is aborted, and both stay in the unmarried state. An invalid state is that one is married, and the other is not. The transaction guarantees that the result is never in an invalid state. With ADO.NET, transactions can be started by invoking the BeginTransaction method of the SqlConnection. A transaction is always associated with one connection; you can’t create ADO.NET transactions over multiple connections. The method BeginTransaction returns an SqlTransaction that in turn needs to be used with the commands running under the same transaction (code file TransactionSamples/Program.cs): public static void TransactionSample() { using (var connection = new SqlConnection(GetConnectionString())) { await connection.OpenAsync(); SqlTransaction tx = connection.BeginTransaction(); //... } }
The code sample creates a record in the ProCSharp.Books table. Using the SQL clause INSERT INTO, a record is added. The Books table defines an auto-increment identifier that is returned with the second SQL statement SELECT SCOPE_IDENTITY() that returns the created identifier. After the SqlCommand object is instantiated, the connection is assigned by setting the Connection property, and the transaction is assigned by setting the Transaction property. With ADO.NET transactions, you cannot assign the transaction to a command that uses a different connection. However, you can also create commands with the same 1287
Download from finelybook www.finelybook.com
connection that are not related to a transaction: public static void TransactionSample() { //... try { string sql = "INSERT INTO [ProCSharp].[Books] " + "([Title], [Publisher], [Isbn], [ReleaseDate])" + "VALUES (@Title, @Publisher, @Isbn, @ReleaseDate); " + "SELECT SCOPE_IDENTITY()"; var command = new SqlCommand { CommandText = sql, Connection = connection, Transaction = tx } //... }
NOTE You might wonder why the OpenAsync and BeginTransaction methods are defined outside of the try block. These calls can fail, too. For example, if the OpenAsync method fails, the exception is not caught in the local catch block, but instead a matching catch is searched for outside of the TransactionSample method. It’s a good way to deal with such exceptions separately. The tx variable needs to be declared outside of the try block—otherwise it wouldn’t be possible to use it in the catch. After defining the parameters and filling the values, the command is executed by invoking the method ExecuteScalarAsync. This time the ExecuteScalarAsync method is used with the INSERT INTO clause because the complete SQL statement ends by returning a single result: The created identifier is returned from SELECT SCOPE_IDENTITY(). In case you set a breakpoint after the WriteLine method and check the result in the database, you will not see the new record in the database 1288
Download from finelybook www.finelybook.com
although the created identifier is already returned. The reason is that the transaction is not yet committed: public static void TransactionSample() { //... var p1 = new SqlParameter("Title", SqlDbType.NVarChar, 50); var p2 = new SqlParameter("Publisher", SqlDbType.NVarChar, 50); var p3 = new SqlParameter("Isbn", SqlDbType.NVarChar, 20); var p4 = new SqlParameter("ReleaseDate", SqlDbType.Date); command.Parameters.AddRange(new SqlParameter[] { p1, p2, p3, p4 }); command.Parameters["Title"].Value = "Professional C# 8 and .NET Core 3.0"; command.Parameters["Publisher"].Value = "Wrox Press"; command.Parameters["Isbn"].Value = "42-08154711"; command.Parameters["ReleaseDate"].Value = new DateTime(2020, 9, 2); object id = await command.ExecuteScalarAsync(); Console.WriteLine($"record added with id: {id}"); //... }
Now another record can be created within the same transaction. With the sample code, the same command is used that has the connection and transaction still associated, just the values are changed before invoking ExecuteScalarAsync again. You could also create a new SqlCommand object that accesses a different table in the same database. The transaction is committed invoking the Commit method of the SqlTransaction object. After the commit, you can see the new records in the database: public static void TransactionSample() { //... command.Parameters["Title"].Value = "Professional C# 9 and .NET Core 4.0"; command.Parameters["Publisher"].Value = "Wrox Press"; command.Parameters["Isbn"].Value = "42-08154711"; command.Parameters["ReleaseDate"].Value = new DateTime(2022, 11, 2);
1289
Download from finelybook www.finelybook.com
id = await command.ExecuteScalarAsync(); Console.WriteLine($"record added with id: {id}"); tx.Commit(); } catch (Exception ex) { Console.WriteLine($"error {ex.Message}, rolling back"); tx.Rollback(); } }
Did you check the Isbn number with both records? It’s the same. Because the database table is specified with a unique index on the Isbn number, writing the second records fail with an exception of type SqlException and the exception information Cannot insert duplicate key row in object 'ProCSharp.Books' with unique index 'IX_Books_Isbn'. The duplicate key value is (42-08154711). As a result, the Rollback method makes an undo of all the SQL commands
in the same transaction. The state is reset as it was before the transaction was started. This way, the first record is not written to the database as well. In case you run the program in debugging mode and have a breakpoint active for too long, the transaction will be aborted because the transaction timeout is reached. Transactions are not meant to have user input while the transaction is active. It’s also not useful to increase the transaction timeout for user input, because having a transaction active causes locks within the database. Depending on the records you read and write, either row locks, page locks, or table locks can happen. You can influence the locks and thus performance of the database by setting an isolation level for creating the transaction. However, this also influences the ACID properties of the transaction— for example, not everything is isolated. The default isolation level that is applied to the transaction is ReadCommitted. The following table shows the different options you can set. ISOLATION LEVEL
DESCRIPTION
1290
Download from finelybook www.finelybook.com
Transactions are not isolated from each other. With this level, there is no wait for locked records from other transactions. This way, uncommitted data can be read from other transactions—dirty reads. This level is usually only used for reading records for which it does not matter if you read interim changes, such as reports. ReadCommitted Waits for records with a write-lock from other transactions. This way, a dirty read cannot happen. This level sets a read-lock for the current record read and a write-lock for the records being written until the transaction is completed. During the reading of a sequence of records, with every new record that is read, the prior record is unlocked. That’s why nonrepeatable reads can happen. RepeatableRead Holds the lock for the records read until the transaction is completed. This way, the problem of nonrepeatable reads is avoided. Phantom reads can still occur. Serializable Holds a range lock. While the transaction is running, it is not possible to add a new record that belongs to the same range from which the data is being read. Snapshot With this level a snapshot is done from the actual data. This level reduces the locks as modified rows are copied. That way, other transactions can still read the old data without needing to wait for releasing of the lock. Unspecified Indicates that the provider is using an isolation level that is different from the values defined by the IsolationLevel enumeration. Chaos This level is like ReadUncommitted, but in addition to performing the actions of the ReadUncommitted value, Chaos does not lock updated records. ReadUncommitted
The following table summarizes the problems that can occur because of setting the most commonly used transaction isolation levels. 1291
Download from finelybook www.finelybook.com
ISOLATION LEVEL
DIRTY READS ReadUncommitted Y ReadCommitted N RepeatableRead N Serializable Y
NONREPEATABLE READS Y Y N Y
PHANTOM READS Y Y Y Y
TRANSACTIONS WITH SYSTEM.TRANSACTIONS Another way to deal with transactions is by using System.Transactions. These classes have been available since .NET Framework 2.0 but have not been available with .NET Core 1.1. With .NET Core 2.1, these types are back, and can be used from ADO.NET (starting with version 4.5 of System.Data.SqlClient) as well as Entity Framework Core 2.1. The System.Transactions namespace defines several classes for transactions. Probably the most important class is Transaction. This can be used to directly access ambient transactions, to give information about the transaction, and to start a rollback if something fails. The following table describes the properties and methods of the Transaction class: TRANSACTION CLASS MEMBER
DESCRIPTION
Current
The property Current is a static property. Transaction.Current returns an ambient transaction if one exists. Ambient transactions are discussed later in this chapter. The IsolationLevel property returns an object of type IsolationLevel. IsolationLevel is an enumeration that defines what access other transactions have to the interim result of the transaction. Check the section “Transactions with
IsolationLevel
1292
Download from finelybook www.finelybook.com
ADO.NET” earlier in this chapter for more information about isolation levels. TransactionInformation The TransactionInformation property returns a TransactionInformation object, which provides information about the current state of the transaction, the time when the transaction was created, and transaction identifiers. Rollback With the Rollback method, you can abort a transaction and undo everything that is part of the transaction, setting all results to the state before the transaction. DependentClone With the DependentClone method, you can create a transaction that depends on the current transaction. TransactionCompleted TransactionCompleted is an event that is fired when the transaction is completed—either successfully or unsuccessfully. With an event handler object of type TransactionCompletedEventHandler, you can access the Transaction object and read its state. The sample application (a .NET Core Console App) showing the features of System.Transactions makes use of the following dependencies and namespaces: Dependencies Microsoft.Extensions.Configuration Microsoft.Extensions.Configuration.Json System.Data.SqlClient Namespaces Microsoft.Extensions.Configuration
1293
Download from finelybook www.finelybook.com
System System.Data.SqlClient System.IO System.Linq System.Threading.Tasks System.Transactions
The code sample defines a Utilities class with some helper methods that are used throughout the different samples. (code file SystemTransactionSamples/Utilities.cs): public class Utilities { public static bool AbortTx() { Console.WriteLine("Abort the transaction (y/n)?"); return Console.ReadLine().ToLower().Equals("y"); } public static void DisplayTransactionInformation(string title, TransactionInformation info) { if (info == null) throw new ArgumentNullException(nameof(info)); Console.WriteLine(title); Console.WriteLine($"Creation time: {info.CreationTime:T}"); Console.WriteLine($"Status: {info.Status}"); Console.WriteLine($"Local Id: {info.LocalIdentifier}"); Console.WriteLine($"Distributed Id: {info.DistributedIdentifier}"); Console.WriteLine(); } }
NOTE 1294
Download from finelybook www.finelybook.com
The sample code asks the user if the transaction should be aborted. This is good for demonstration purposes, but you should never have user interactions within a transaction in a real application. Records are locked while a transaction is active. You don’t want to hinder other users to work because one user has locks opened because of these locks. You also need to pay attention to the transaction timeout. If the user input takes more time than the transaction timeout, the transaction is aborted. This sample makes use of the same database as the previous samples, but there’s an important change. This time the Book type is defined to map information from the Books table (code file SystemTransactionSamples/Book.cs): public class Book { public int Id { get; set; } public string Title { get; set; } public string Publisher { get; set; } public string Isbn { get; set; } public DateTime? ReleaseDate { get; set; } }
The BookData class maps the Book type to the database and implements the AddBookAsync method to add a new record to the Books table. The implementation looks like the implementation you’ve seen it before when invoking the ExecuteNonQuery method to insert a new record, but there is an important difference. This time, the System.Transactions.Transaction is enlisted using the SqlConnection method EnlistTransaction. This way the SqlConnection participates with the outcome of this transaction (code file SystemTransactionSamples/BookData.cs): public class BookData { public async Task AddBookAsync(Book book, Transaction tx) { using (SqlConnection connection = new SqlConnection(GetConnectionString())) {
1295
Download from finelybook www.finelybook.com
string sql = "INSERT INTO [ProCSharp].[Books] ([Title], [Publisher], " + "[Isbn], [ReleaseDate]) " + "VALUES (@Title, @Publisher, @Isbn, @ReleaseDate)"; await connection.OpenAsync(); if (tx != null) { connection.EnlistTransaction(tx); } var command = connection.CreateCommand(); command.CommandText = sql; command.Parameters.AddWithValue("Title", book.Title); command.Parameters.AddWithValue("Publisher", book.Publisher); command.Parameters.AddWithValue("Isbn", book.Isbn); command.Parameters.AddWithValue("ReleaseDate", book.ReleaseDate); await command.ExecuteNonQueryAsync(); } } //... }
Committable Transactions The Transaction class cannot be committed programmatically; it does not have a method to commit the transaction. The base class Transaction just supports aborting the transaction. The only transaction class that supports a commit is the class CommittableTransaction. In the CommittableTransactionAsync method, first a transaction of type CommittableTransaction is created, and information is shown to the console. Then a Book object is created, which is written to the database from the AddBookAsync method. If you verify the record in the database from outside the transaction, you cannot see the book added until the transaction is completed. If the transaction fails, there is a rollback, and the book is not written to the database. After the AddBookAsync method is invoked, the AbortTx method is called to ask the user whether the transaction should be aborted. If the user aborts, an exception of type ApplicationException is thrown and, in 1296
Download from finelybook www.finelybook.com
the catch block, a rollback is performed by calling the method Rollback of the Transaction class. The record is not written to the database. If the user does not abort, the Commit method commits the transaction, and the final state of the transaction is committed (code file SystemTransactionSamples/Program.cs): static async Task CommittableTransactionAsync() { var tx = new CommittableTransaction(); DisplayTransactionInformation("TX created", tx.TransactionInformation); try { var b = new Book { Title = "A Dog in The House", Publisher = "Pet Show", Isbn = RandomIsbn(), ReleaseDate = new DateTime(2018, 11, 24) }; var data = new BookData(); await data.AddBookAsync(b, tx); if (AbortTx()) { throw new ApplicationException("transaction abort by the user"); } tx.Commit(); } catch (Exception ex) { Console.WriteLine(ex.Message); Console.WriteLine(); tx.Rollback(); } DisplayTransactionInformation("TX completed", tx.TransactionInformation); }
As shown in the following output of the application, the transaction is active and has a local identifier. In addition, the user has chosen to abort the transaction. After the transaction is finished, you can see the 1297
Download from finelybook www.finelybook.com
aborted state: TX created Creation time: 7:29:36 PM Status: Active Local Id: c090c903-3f74-44b2-92a7-7607e33b787c:1 Distributed Id: 00000000-0000-0000-0000-000000000000 Abort the transaction (y/n)? y transaction abort by the user TX completed Creation time: 7:29:36 PM Status: Aborted Local Id: c090c903-3f74-44b2-92a7-7607e33b787c:1 Distributed Id: 00000000-0000-0000-0000-000000000000
With the second output of the application that follows, the transaction is not aborted by the user. The transaction has the status Committed, and the data is written to the database: TX created Creation time: 7:30:59 PM Status: Active Local Id: e60feb38-e3b2-4ede-992d-f93296a363a4:1 Distributed Id: 00000000-0000-0000-0000-000000000000 Abort the transaction (y/n)? n TX completed Creation time: 7:30:59 PM Status: Committed Local Id: e60feb38-e3b2-4ede-992d-f93296a363a4:1 Distributed Id: 00000000-0000-0000-0000-000000000000
Dependent Transactions With dependent transactions, you can influence one transaction among multiple tasks or threads. A dependent transaction depends on another transaction and influences the outcome of the transaction. The sample method DependentTransactions first creates a root transaction using CommittableTransaction. This transaction object is used to create a dependent transaction with the method 1298
Download from finelybook www.finelybook.com
DependentClone.
This DependentTransaction is passed to a separate task in the local function UsingDependentTransactionAsync. A dependent transaction can be marked as completed as is done invoking the Complete method. The DependentClone method requires and argument of type DependentCloneOption, which is an enumeration with the values BlockCompleteUntilComplete and RollbackIfNotComplete. This option is important if the root transaction completes before the dependent transaction. Setting the option to RollbackIfNotComplete, the transaction aborts if the dependent transaction didn’t invoke the Complete method before the Commit method of the root transaction. Setting the option to BlockCommitUntilComplete, the method Commit waits (blocks) until the outcome is defined by all dependent transactions. Next, the Commit method of the CommittableTransaction class is invoked if the user does not abort the transaction (code file SystemTransactions/Program.cs): static void DependentTransactions() { async Task UsingDependentTransactionAsync(DependentTransaction dtx) { dtx.TransactionCompleted += (sender, e) => DisplayTransactionInformation("Depdendent TX completed", e.Transaction.TransactionInformation); DisplayTransactionInformation("Dependent Tx", dtx.TransactionInformation); await Task.Delay(2000); dtx.Complete(); DisplayTransactionInformation("Dependent Tx send complete", dtx.TransactionInformation); } var tx = new CommittableTransaction(); DisplayTransactionInformation("Root Tx created", tx.TransactionInformation);
1299
Download from finelybook www.finelybook.com
try { DependentTransaction depTx = tx.DependentClone( DependentCloneOption.BlockCommitUntilComplete); Task t1 = Task.Run(() => UsingDependentTransactionAsync(depTx)); if (AbortTx()) { throw new ApplicationException("transaction abort by the user"); } tx.Commit(); } catch (Exception ex) { Console.WriteLine(ex.Message); tx.Rollback(); } DisplayTransactionInformation("TX completed", tx.TransactionInformation); }
The following output of the application shows the root transaction and its identifier. Because of the option DependentCloneOption.BlockCommitUntilComplete, the root transaction waits in the Commit method until the outcome of the dependent transaction is defined. As soon as the dependent transaction is finished, the transaction is committed: Root Tx created Creation time: 7:50:32 PM Status: Active Local Id: 87268b8c-076d-4823-af58-944b861bd4fe:1 Distributed Id: 00000000-0000-0000-0000-000000000000 Abort the transaction (y/n)? Dependent Tx Creation time: 7:50:32 PM Status: Active Local Id: 87268b8c-076d-4823-af58-944b861bd4fe:1 Distributed Id: 00000000-0000-0000-0000-000000000000 Dependent Tx send complete
1300
Download from finelybook www.finelybook.com
Creation time: 7:50:32 PM Status: Active Local Id: 87268b8c-076d-4823-af58-944b861bd4fe:1 Distributed Id: 00000000-0000-0000-0000-000000000000 n Depdendent TX completed Creation time: 7:50:32 PM Status: Committed Local Id: 87268b8c-076d-4823-af58-944b861bd4fe:1 Distributed Id: 00000000-0000-0000-0000-000000000000 TX completed Creation time: 7:50:32 PM Status: Committed Local Id: 87268b8c-076d-4823-af58-944b861bd4fe:1 Distributed Id: 00000000-0000-0000-0000-000000000000
Ambient Transactions The biggest advantage of the classes in the System.Transactions namespace is the ambient transaction feature. With ambient transactions, there is no need to manually enlist a connection with a transaction; this is done automatically from the resources supporting ambient transactions. An ambient transaction is associated with the current thread. You can get and set the ambient transaction with the static property Transaction.Current. APIs supporting ambient transactions check this property to get an ambient transaction and to enlist with the transaction. ADO.NET connections support ambient transactions. You can create a CommittableTransaction object and assign it to the property Transaction.Current to initialize the ambient transaction. Another way (and typically the preferred way) is with the TransactionScope class. The constructor of TransactionScope creates an ambient transaction.
NOTE If an ADO.NET connection should not enlist with an ambient 1301
Download from finelybook www.finelybook.com
transaction, you can set the value Enlist=false with the connection string. For using the TransactionScope, another AddBook method is created that just adds a record to the Books table without explicitly enlisting to a transaction (code file SystemTransactionSamples/BookData.cs): public void AddBook(Book book) { using (SqlConnection connection = new SqlConnection(GetConnectionString())) { string sql = "INSERT INTO [ProCSharp].[Books] ([Title], [Publisher], " + "[Isbn], [ReleaseDate]) " + "VALUES (@Title, @Publisher, @Isbn, @ReleaseDate)"; connection.Open(); var command = connection.CreateCommand(); command.CommandText = sql; command.Parameters.AddWithValue("Title", book.Title); command.Parameters.AddWithValue("Publisher", book.Publisher); command.Parameters.AddWithValue("Isbn", book.Isbn); command.Parameters.AddWithValue("ReleaseDate", book.ReleaseDate); command.ExecuteNonQuery(); } }
Important methods of the TransactionScope are Complete and Dispose. The Complete method sets the success bit for the scope, and the Dispose method finishes the scope and commits or rolls back the transaction if the scope is a root scope. Because the TransactionScope class implements the IDisposable interface, you can define the scope with the using statement. The default constructor creates a new transaction. In the following code snippet, immediately after creating the TransactionScope instance, a lambda expression invoking DisplayTransactionInformation is assigned to the TransactionCompleted event to get information when 1302
Download from finelybook www.finelybook.com
the transaction is completed. Before this event fires, immediately after the creation of the transaction, the property Transaction.Current is accessed to display the current state of the transaction on the console. After that, a new Book object is created, and the previously created AddBook method is invoked. In case the user does not abort the transaction, the Complete method of the TransactionScope is invoked. The end of the using block invokes the Dispose method of the TransactionScope. If the Complete method was invoked, and if every other party participating in the transaction (for example, the SQL connection) has the success bit set, the transaction is committed. In case any party was not successful with the transaction that includes the TransactionScope when Complete was not invoked, the transaction is aborted (code file SystemTransactionSamples/Program.cs): static void AmbientTransactions() { using (var scope = new TransactionScope()) { Transaction.Current.TransactionCompleted += (sender, e) => DisplayTransactionInformation("TX completed", e.Transaction.TransactionInformation); DisplayTransactionInformation("Ambient TX created", Transaction.Current.TransactionInformation); var b = new Book { Title = "Cats in The House", Publisher = "Pet Show", Isbn = RandomIsbn(), ReleaseDate = new DateTime(2019, 11, 24) }; var data = new BookData(); data.AddBook(b); if (!AbortTx()) { scope.Complete(); } else { Console.WriteLine("transaction abort by the user"); }
1303
Download from finelybook www.finelybook.com
}
// scope.Dispose();
}
When you run the application, you can see an active ambient transaction after an instance of the TransactionSope class is created. The last output of the application is the output from the TransactionCompleted event handler to display the finished transaction state: Ambient TX created Creation time: 7:53:10 AM Status: Active Local Id: 0e28b708-9dd7-4b17-bf41-c09f963928cf:1 Distributed Id: 00000000-0000-0000-0000-000000000000 Abort the transaction (y/n)? n TX completed Creation time: 7:53:10 AM Status: Committed Local Id: 0e28b708-9dd7-4b17-bf41-c09f963928cf:1 Distributed Id: 00000000-0000-0000-0000-000000000000
Nested Scopes with Ambient Transactions With the TransactionScope class you can also nest scopes. The nested scope can be directly inside an outer scope or within a method that is invoked from the scope. A nested scope can use the same transaction as the outer scope, suppress the transaction, or create a new transaction that is independent from the outer scope. The requirement for the scope is defined with a TransactionScopeOption enumeration that is passed to the constructor of the TransactionScope class. The following table describes the values and corresponding functionality available with the TransactionScope enumeration. TRANSACTIONSCOPE DESCRIPTION MEMBER Required Required defines that the scope requires a transaction. If the outer scope already contains an ambient transaction, the inner 1304
Download from finelybook www.finelybook.com
RequiresNew
Suppress
scope uses the existing transaction. If an ambient transaction does not exist, a new transaction is created. If both scopes share the same transaction, every scope influences the outcome of the transaction. Only if all scopes set the success bit, the transaction can commit. If one scope does not invoke the Complete method before the root scope is disposed, the transaction is aborted. RequiresNew always creates a new transaction. If the outer scope already defines a transaction, the transaction from the inner scope is completely independent. Both transactions can commit or abort independently. With Suppress, the scope does not contain an ambient transaction, whether the outer scope contains a transaction.
The next example defines two scopes. The inner scope is configured to require a new transaction with the option TransactionScopeOption.RequiresNew (code file SystemTransactionSamples/Program.cs): static void NestedScopes() { using (var scope = new TransactionScope()) { Transaction.Current.TransactionCompleted += (sender, e) => DisplayTransactionInformation("TX completed", e.Transaction.TransactionInformation); DisplayTransactionInformation("Ambient TX created", Transaction.Current.TransactionInformation); var b = new Book { Title = "Dogs in The House", Publisher = "Pet Show",
1305
Download from finelybook www.finelybook.com
Isbn = RandomIsbn(), ReleaseDate = new DateTime(2020, 11, 24) }; var data = new BookData(); data.AddBook(b); using (var scope2 = new TransactionScope(TransactionScopeOption.RequiresNew)) { Transaction.Current.TransactionCompleted += (sender, e) => DisplayTransactionInformation("Inner TX completed", e.Transaction.TransactionInformation); DisplayTransactionInformation("Inner TX scope", Transaction.Current.TransactionInformation); var b1 = new Book { Title = "Dogs and Cats in The House", Publisher = "Pet Show", Isbn = RandomIsbn(), ReleaseDate = new DateTime(2021, 11, 24) }; var data1 = new BookData(); data1.AddBook(b1); scope2.Complete(); } scope.Complete(); }
When you run the application, you can see different transaction identifiers of the outer scope and the inner scope where the inner scope appends :2 to the GUID, and the outer scope :1. These transactions are independent of each other: Ambient TX created Creation time: 8:20:09 AM Status: Active Local Id: d4e3a180-49d6-4c16-b4c9-89a9c6d4ace9:1 Distributed Id: 00000000-0000-0000-0000-000000000000 Inner TX scope Creation time: 8:20:11 AM Status: Active
1306
Download from finelybook www.finelybook.com
Local Id: d4e3a180-49d6-4c16-b4c9-89a9c6d4ace9:2 Distributed Id: 00000000-0000-0000-0000-000000000000 Inner TX completed Creation time: 8:20:11 AM Status: Committed Local Id: d4e3a180-49d6-4c16-b4c9-89a9c6d4ace9:2 Distributed Id: 00000000-0000-0000-0000-000000000000 TX completed Creation time: 8:20:09 AM Status: Committed Local Id: d4e3a180-49d6-4c16-b4c9-89a9c6d4ace9:1 Distributed Id: 00000000-0000-0000-0000-000000000000
If you change the creation of the inner scope to use TransactionScopeOption.Required, you can see the same transaction is used with the outer and the inner scope: Ambient TX created Creation time: 8:23:52 AM Status: Active Local Id: 95181f71-0268-40f0-8f12-471a01a83638:1 Distributed Id: 00000000-0000-0000-0000-000000000000 Inner TX scope Creation time: 8:23:52 AM Status: Active Local Id: 95181f71-0268-40f0-8f12-471a01a83638:1 Distributed Id: 00000000-0000-0000-0000-000000000000 TX completed Creation time: 8:23:52 AM Status: Committed Local Id: 95181f71-0268-40f0-8f12-471a01a83638:1 Distributed Id: 00000000-0000-0000-0000-000000000000 Inner TX completed Creation time: 8:23:52 AM Status: Committed Local Id: 95181f71-0268-40f0-8f12-471a01a83638:1 Distributed Id: 00000000-0000-0000-0000-000000000000
SUMMARY In this chapter, you’ve seen the core foundation of ADO.NET. You first 1307
Download from finelybook www.finelybook.com
looked at the SqlConnection object to open a connection to SQL Server. You’ve seen how to retrieve the connection string from a configuration file. This chapter explained how to use connections properly so that they can be closed as early as possible, which preserves valuable resources. All the connection classes implement the IDisposable interface, called when the object is placed within a using statement. If there is one thing you should take away from this chapter, it is the importance of closing database connections as early as possible. With commands you’ve seen passing parameters, getting a single return value, and retrieving records using the SqlDataReader. You’ve also seen how stored procedures can be invoked using the SqlCommand object. Like other parts of the framework where processing can take some time, ADO.NET implements the task-based async pattern that was shown as well. You’ve also seen how to create and use transactions with ADO.NET. With System.Transactions, you’ve seen a different way to deal with transactions—transactions that can be independent of the SQL connection whereas the SQL connection automatically enlists to the transaction when ambient transactions are used. The next chapter is about Entity Framework Core that offers an abstraction to data access by offering a mapping between relations in the database and object hierarchies and uses ADO.NET classes behind the scenes when you’re accessing a relational database.
1308
Download from finelybook www.finelybook.com
26 Entity Framework Core WHAT’S IN THIS CHAPTER? Introducing Entity Framework Core Using dependency injection with Entity Framework Conventions, annotations, and the fluent API Using queries, compiled queries, global query filters Defining relationships with conventions, annotations, and the fluent API Using table per hierarchy, table splitting, and owned entities Object tracking Updating objects and object trees Conflict handling with updates Using transactions Using migrations with the .NET CLI tools
WROX.COM CODE DOWNLOADS FOR THIS CHAPTER The Wrox.com code downloads for this chapter are found at www.wrox.com on the Download Code tab. The source code is also available at https://github.com/ProfessionalCSharp/ProfessionalCSharp7 in 1309
Download from finelybook www.finelybook.com
the directory EFCore. The code for this chapter is divided into the following major examples: Intro Books Sample UsingDependencyInjection Menus Sample Menus with Data Annotations Relations with Annotations/Conventions/FluentAPI Table per Hierarchy Conflict Handling Sample Transactions Sample
HISTORY OF ENTITY FRAMEWORK Entity Framework and Entity Framework Core (EF Core) are frameworks offering mapping of entities to relationships. With these, you can create types that map to database tables, create database queries using LINQ, create and update objects, and write them to the database. After many years of changes to Entity Framework, EF Core is a complete rewrite. Let’s have a look at the history of Entity Framework to see the reasons for the rewrite. Entity Framework 1—The first version of Entity Framework was not ready with .NET 3.5, but it was soon available with .NET 3.5 SP1. Another product offering somewhat similar functionality that was already available with .NET 3.5 was LINQ to SQL. Both LINQ to SQL and Entity Framework offered similar features from a wide view. However, LINQ to SQL was simpler to use but was only available for accessing SQL Server. Entity Framework was provider-based and offered access to several different relational databases. It included more features, such as many-to-many mapping without the need for mapping objects, and n-to-n 1310
Download from finelybook www.finelybook.com
mapping was possible. One disadvantage of Entity Framework was that it required model types to derive from the EntityObject base class. Mapping the objects to relations was done using an EDMX file that contains XML. The XML contained is defined by three schemas: The Conceptual Schema Definition (CSD) defines the object types with their properties and associations; the Storage Schema Definition (SSD) defines the database tables, columns, and relations; and the Mapping Schema Language (MSL) defines how the CSD and SSD map to each other. Entity Framework 4—Entity Framework 4 was available with .NET 4 and received major improvements, many coming from LINQ to SQL ideas. Because of the big changes, versions 2 and 3 have been skipped. With this edition, lazy loading was added to fetch relations on accessing a property. Creating a database was possible after designing a model using SQL Data Definition Language (DDL). The two models using Entity Framework were now Database First or Model First. Possibly the most important feature added was the support for Plain Old CLR Objects (POCO), so it was no longer necessary to derive from the base class EntityObject. With later updates (such as Entity Framework 4.1, 4.2), additional features have been added with NuGet packages. This allowed adding features faster. Entity Framework 4.1 offers the Code First model where the EDMX file to define the mappings is no longer used. Instead, all the mapping is defined using C# code—either using attributes or with a fluent API to define the mapping using code. Entity Framework 4.3 added support for Migrations. With this, it is possible to define updates to the database schemas using C# code. The database update can be automatically applied from the application using the database. Entity Framework 5—The NuGet package for Entity Framework 5 supported both .NET Framework 4.5 and .NET Framework 4.0 applications. However, many of the features of Entity Framework 5 only have been available with .NET Framework 4.5. Entity Framework was still based on types that are installed on the system 1311
Download from finelybook www.finelybook.com
with .NET Framework 4.5. New with this release were performance improvements as well as supporting new SQL Server features, such as spatial data types, and many of these features have not been available when using it with .NET Framework 4.0 applications. Entity Framework 6—Entity Framework 6 solved some issues with Entity Framework 5, which was partly a part of the framework installed on the system and partly available via NuGet extensions. Now the complete code of Entity Framework has moved to NuGet packages. For not creating conflicts, a new namespace was used. When porting apps to the new version, the namespace had to be changed. Entity Framework Core (EF Core)—This version of Entity Framework got a new name and was a complete rewrite of Entity Framework. EF Core is available not only on Windows but also on Linux and Mac. It supports both relational databases and NoSQL data stores. This book covers Entity Framework Core 2.0. This version no longer supports the XML file mapping with CSDL, SSDL, and MSL. Only Code First is supported now—the model that was added with Entity Framework 4.1. Code First doesn’t mean that the database can’t exist first. You can either create the database first or define the database purely from code; both options are possible.
NOTE The name Code First is somewhat misleading. With Code First, either the code or the database can be created first. Originally with the beta version of Code First, the name was Code Only. Because the other model options had First in their names, the name Code Only was changed as well. Entity Framework Core 1.0 did not support all the features that were offered by Entity Framework 6. Entity Framework Core 2.0 catches up but still doesn’t support all the features of Entity Framework 6. 1312
Download from finelybook www.finelybook.com
However, it also has some new features Entity Framework 6 doesn’t have. You just need to pay attention to what version of Entity Framework you are using. There are many valid reasons to stay with Entity Framework 6, but using ASP.NET Core on non-Windows platforms, using Entity Framework with the Universal Windows Platform, using Xamarin, and using nonrelational data stores all require the use of EF Core. This chapter introduces you to EF Core. It starts with a simple model reading and writing information from SQL Server. Later, relations are added, and you will be introduced to the change tracker and conflict handling when writing to the database. Creating and modifying database schemas using migrations is another important part of this chapter.
NOTE This chapter uses the Books database. This database is included with the download of the code samples at www.wrox.com. Other databases used with the samples are created from the code.
INTRODUCING EF CORE The first example uses a single Book type and maps this type to the Books table in a SQL Server database. You write records to the database and then read, update, and delete them. With the first example, you can create the database first or let the database be created from the application. To create the database first, you can use the SQL Server Object Explorer that is part of Visual Studio 2017. Select the database instance (localdb)\MSSQLLocalDB. This database is installed with the installation of Visual Studio). Click the Databases node in the tree view and select Add New Database. The sample database WroxBooks has only a single table named Books. 1313
Download from finelybook www.finelybook.com
You can create the table Books by selecting the Tables node within the WroxBooks database and then selecting Add New Table. Using the designer shown in Figure 26-1, or by entering the SQL DDL statement in the T-SQL editor, you can create the table Books. The following code snippet shows the T-SQL code for creating the table. When you click the Update button, you can submit the changes to the database. CREATE TABLE [dbo].[Books] ( [BookId] INT IDENTITY(1, 1) NOT NULL, [Title] NVARCHAR(50) NOT NULL, [Publisher] NVARCHAR(25) NULL, CONSTRAINT [PK_Books] PRIMARY KEY CLUSTERED ([BookId] ASC) )
FIGURE 26-1 The sample applications used in this chapter are all .NET Core console applications and make use of the following NuGet dependencies and namespaces: Dependencies
1314
Download from finelybook www.finelybook.com
Microsoft.EntityFrameworkCore Microsoft.EntityFrameworkCore.SqlServer Microsoft.EntityFramework.Design Microsoft.Extensions.DependencyInjection Microsoft.Extensions.Logging.Console Namespaces Microsoft.EntityFrameworkCore Microsoft.EntityFrameworkCore.ChangeTracking Microsoft.EntityFrameworkCore.Diagnostics Microsoft.EntityFrameworkCore.Infrastructure Microsoft.EntityFrameworkCore.Metadata.Builders Microsoft.Extensions.DependencyInjection Microsoft.Extensions.Logging System System.Collections.Generic System.ComponentModel.DataAnnotations System.ComponentModel.DataAnnotations.Schema System.Linq System.Threading.Tasks
Creating a Model The sample application BookSample for accessing the Books database is a .NET Core console app. With this application, the class Book is a simple entity type that defines three properties. The BookId property maps to the primary key of the table, the Title property to the Title column, and the Publisher property to the Publisher column. With the 1315
Download from finelybook www.finelybook.com
property, the Required attribute is applied because the mapping column has a NOT NULL definition in the database. Lengths for the Title and Publisher properties are applied using the StringLength attribute. This also maps with the columns in the database. To map the type to the Books table, the Table attribute is applied to the type (code file Intro/Book.cs): Title
[Table("Books")] public class Book { public int BookId { get; set; } [Required] [StringLength(50)] public string Title { get; set; } [StringLength(30)] public string Publisher { get; set; } }
Conventions, Annotations, and Fluent API EF Core is using three concepts to define the model: conventions, annotations, and the fluent API. With conventions, some things happen automatically. For example, naming a property of type int or Guid with an Id postfix maps the property to a primary key. Conventions can be overridden using annotations—specifying attributes. The previous example used the Table attribute to map the Book type to the Books table. There’s also a convention for mapping to the table; this is using a property name of a context. Creating contexts is shown in the next section. Conventions do not exist for every annotation. Required and StringLength attributes have been used as well. Annotations are more powerful than conventions; you can do more. Instead of using annotations, you can also use a fluent API, which means configuration is done via code rather than using attributes. With a fluent API, the return value of a method can be used to invoke the next method. The fluent API for EF Core is more powerful than the annotations are; you can do more. The fluent API is shown later in this chapter in the section “Creating a Model.”
1316
Download from finelybook www.finelybook.com
Creating a Context The association of the Book table with the database is done creating the BooksContext class. This class derives from the base class DbContext. The BooksContext class defines the Books property that is of type DbSet. This type allows creating queries and adding Book instances for storing it in the database. To define the connection string, the OnConfiguring method of the DbContext can be overridden. Here, the UseSqlServer extension method maps the context to a SQL Server database (code file BooksSample/BooksContext.cs): public class BooksContext: DbContext { private const string ConnectionString = @"server=(localdb)\MSSQLLocalDb;database=WroxBooks;" + @"trusted_connection=true"; public DbSet Books { get; set; } protected override void OnConfiguring(DbContextOptionsBuilder optionsBuilder) { base.OnConfiguring(optionsBuilder); optionsBuilder.UseSqlServer(ConnectionString); } }
NOTE Another way to define the connection string is by using dependency injection, which is shown later in this chapter in the section “Using Dependency Injection.”
Creating the Database The model and the context classes are defined. Now it’s also possible to create the database programmatically. First, the BooksContext object is instantiated. The using statement makes sure that the database connection is closed at the end of the using scope. 1317
Download from finelybook www.finelybook.com
When you use the Database property of the DbContext, a DatabaseFacade is returned. You can use this to create and delete databases, and to directly send SQL statements. Invoking the method EnsureCreatedAsync makes sure that the database is created. If the database already exists, this method returns false. If the database does not exist, the database is created according to the definition of the context and the model, and true is returned (code file Intro/Program.cs): private async Task CreateTheDatabaseAsync() { using (var context = new BooksContext()) { bool created = await context.Database.EnsureCreatedAsync(); string creationInfo = created ? "created" : "exists"; Console.WriteLine($"database {creationInfo}"); } }
When you run the program, if you already created the database earlier, the string database exists is written to the console. In case you didn’t create the database earlier, the database is created, followed by the string database created.
NOTE Many of the code samples make use of the asynchronous methods of EF Core, such as EnsureCreatedAsync and SaveChangesAsync. If you don’t need async functionality—for example, in your console applications or probably web applications—you can use the synchronous variant of these methods. Although async has some overhead, the synchronous versions of these APIs block the calling thread. EnsureCreated and SaveChanges are the synchronous APIs while EnsureCreatedAsync and SaveChangesAsync are the asynchronous APIs. Read more about the asynchronous methods in Chapter 15, “Asynchronous Programming,” and Chapter 21, “Tasks and Parallel Programming.” 1318
Download from finelybook www.finelybook.com
NOTE Using the Async variants of the context methods allows starting the operation in the background. However, you cannot start multiple operations on the same context parallel. You need to await for an operation to complete before starting the next operation.
Deleting the Database Deleting the database is programmatically very similar to its creation. You just need to invoke the method EnsureDeletedAsync of the DatabaseFacade: private async Task DeleteDatabaseAsync() { Console.Write("Delete the database? "); string input = Console.ReadLine(); if (input.ToLower() == "y") { using (var context = new BooksContext()) { bool deleted = await context.Database.EnsureDeletedAsync(); string deletionInfo = deleted ? "deleted" : "not deleted"; Console.WriteLine($"database {deletionInfo}"); } } }
Just make sure you don’t delete a database that should not be deleted. Pay attention to the connection string you use.
Writing to the Database After the database and the Books table are created, you can fill the table with data. The AddBookAsync method is created to add a Book object to the database. AddBookAsync just adds the Book object to the context, it 1319
Download from finelybook www.finelybook.com
doesn’t write it to the database. The object is written on invoking the method SaveChangesAsync (code file Intro/Program.cs): private async Task AddBookAsync(string title, string publisher) { using (var context = new BooksContext()) { var book = new Book { Title = title, Publisher = publisher }; await context.Books.AddAsync(book); int records = await context.SaveChangesAsync(); Console.WriteLine($"{records} record added"); } Console.WriteLine(); } For adding a list of books, you can use the AddRange method: private async Task AddBooksAsync() { using (var context = new BooksContext()) { var b1 = new Book { Title = "Professional C# 6 and .NET Core 1.0", Publisher = "Wrox Press" }; var b2 = new Book { Title = "Professional C# 5 and .NET 4.5.1", Publisher = "Wrox Press" }; var b3 = new Book { Title = "JavaScript for Kids", Publisher = "Wrox Press" }; var b4 = new Book { Title = "Web Design with HTML and CSS", Publisher = "For Dummies" }; await context.AddRangeAsync(b1, b2, b3, b4); int records = await context.SaveChangesAsync(); Console.WriteLine($"{records} records added");
1320
Download from finelybook www.finelybook.com
} Console.WriteLine(); }
When you run the application and invoke these methods, you can see the data written to the database using the SQL Server Object Explorer.
Reading from the Database To read the data from C# code, you just need to invoke the BooksContext and access the Books property. Accessing this property creates a SQL statement to retrieve all books from the database (code file Intro/Program.cs): private async Task ReadBooksAsync() { using (var context = new BooksContext()) { List books = await context.Books.ToListAsync(); foreach (var b in books) { Console.WriteLine($"{b.Title} {b.Publisher}"); } } Console.WriteLine(); }
When you open the IntelliTrace Events window during debugging, you can see the SQL statement that is sent to the database (this requires Visual Studio Enterprise edition): SELECT [b].[BookId], [b].[Publisher], [b].[Title] FROM [Books] AS [b]
Entity Framework offers a LINQ provider. With that, you can create LINQ queries to access the database. You can either use the method syntax as shown here: private async Task QueryBooksAsync() { using (var context = new BooksContext()) { List wroxBooks = context.Books .Where(b => b.Publisher == "Wrox Press")
1321
Download from finelybook www.finelybook.com
.ToListAsync(); foreach (var b in wroxBooks) { Console.WriteLine($"{b.Title} {b.Publisher}"); } } Console.WriteLine(); }
or use the declarative LINQ query syntax: var wroxBooks = await (from b in context.Books where b.Publisher == "Wrox Press" select b).ToListAsync();
With both syntax variants, this SQL statement is sent to the database: SELECT [b].[BookId], [b].[Publisher], [b].[Title] FROM [Books] AS [b] WHERE [b].[Publisher] = 'Wrox Press'
NOTE LINQ is discussed in detail in Chapter 12, “Language Integrated Query.”
Updating Records Updating records can be easily achieved just by changing objects that have been loaded with the context, and invoking SaveChangesAsync (code file Intro/Program.cs): private async Task UpdateBookAsync() { using (var context = new BooksContext()) { int records = 0; Book book = await context.Books .Where(b => b.Title == "Professional C# 7") .FirstOrDefaultAsync();
1322
Download from finelybook www.finelybook.com
if (book != null) { book.Title = "Professional C# 7 and .NET Core 2.0"; records = await context.SaveChangesAsync(); } Console.WriteLine($"{records} record updated"); } Console.WriteLine(); }
Deleting Records Finally, let’s clean up the database and delete all records. You do this by retrieving all records and invoking the Remove or RemoveRange method to set the state of the objects in the context to deleted. Invoking the SaveChangesAsync method now deletes the records from the database and invokes SQL Delete statements for every object (code file Intro/Program.cs): private async Task DeleteBooksAsync() { using (var context = new BooksContext()) { var books = context.Books; context.Books.RemoveRange(books); int records = await context.SaveChangesAsync(); Console.WriteLine($"{records} records deleted"); } Console.WriteLine(); }
NOTE An object-relational mapping tool such as EF Core is not useful with all scenarios. Deleting all objects was not done efficiently with the sample code. Instead of sending a DELETE statement to the database for every record to delete, you can delete all records using a single SQL statement. How this can be done is explained in Chapter 25, “ADO.NET.” EF Core is not that bad in such scenarios, as multiple statements can be combined into a batch 1323
Download from finelybook www.finelybook.com
statement, as shown later in the chapter in the section “Batching.” Now that you’ve seen how to add, query, update, and delete records, this chapter steps into features behind the scenes and gets into advanced scenarios using Entity Framework.
Logging To see the SQL statements sent to the database, you can open the profiler with SQL Server, open the Intellitrace Events in Visual Studio (Debug ⇨ Windows ⇨ Intellitrace Events), which requires the Enterprise edition of Visual Studio, or just enable logging. With logging, you can write trace information where you like to. EF Core internally uses a dependency injection container (using Microsoft.Extensions.DependencyInjection) that has the interface ILoggerFactory registered. You can access this interface and register your own logger provider. The following code snippet uses BooksContext to register a new logger. First, the IServiceProvider of the context is retrieved using the GetInfrastructure extension method. This extension method is defined in the namespace Microsoft.EntityFrameworkCore.Infrastructure. Using the IServiceProvider, services registered with the container can be retrieved, such as the interface ILoggerFactory. This interface is used from the EF Core infrastructure to write log information. With this interface, you can add log providers such as the Console log provider. This log provider is defined in the NuGet package Microsoft.Extensions.Logging.Console. The provider defines the AddConsole extension method to the ILoggerFactory, which makes it easy to add it as a log provider. Here, the log provider is configured to write informational logs (code file Intro/Program.cs): private void AddLogging() { using (var context = new BooksContext()) { IServiceProvider provider = context.GetInfrastructure();
1324
Download from finelybook www.finelybook.com
ILoggerFactory loggerFactory = provider.GetService(); loggerFactory.AddConsole(LogLevel.Information); } }
You need to make this configuration with only one context. The registration is done in the infrastructure of EF Core, thus as soon as this is configured for the application, logging is done with every context instantiated. For example, the QueryBooksAsync method implemented earlier now shows this logging information on the console: info: Microsoft.EntityFrameworkCore.Database.Command[200101] Executed DbCommand (131ms) [Parameters=[], CommandType='Text', CommandTimeout='30'] SELECT [b].[BookId], [b].[Publisher], [b].[Title] FROM [Books] AS [b] WHERE [b].[Publisher] = N'Wrox Press'
NOTE Dependency injection and is covered in detail in Chapter 20, “Dependency Injection.” Read more information about logging and diagnostics in Chapter 29, “Tracing, Logging, and Analytics.” Microsoft.Extensions.DependencyInjection
USING DEPENDENCY INJECTION EF Core has built-in support for dependency injection, and there’s also great support for using EF Core with a dependency injection container. Instead of defining the connection and the use of SQL Server with the DbContext derived class, the connection and SQL Server selection can be injected by using a dependency injection framework.
1325
Download from finelybook www.finelybook.com
To see this in action, the previous sample has been modified with the BooksSampleWithDI sample project. The BooksContext class now looks a lot simpler in just defining the Books property (code file UsingDependencyInjection/BooksContext.cs): public class BooksContext : DbContext { public BooksContext(DbContextOptions options) : base(options) { } public DbSet Books { get; set; } }
The BooksService is the new class that makes use of the BooksContext. Here, the BooksContext is injected via constructor injection. The methods AddBooksAsync and ReadBooks are very similar to these methods from the previous sample, but they use the context member of the BooksService class instead of creating a new one (code file UsingDependencyInjection/BooksService.cs): public class BooksService { private readonly BooksContext _booksContext; public BooksService(BooksContext context) => _booksContext = context; public async Task AddBooksAsync() { var b1 = new Book { Title = "Professional C# 6 and .NET Core 1.0", Publisher = "Wrox Press" }; var b2 = new Book { Title = "Professional C# 5.0 and .NET 4.5.1", Publisher = "Wrox Press" }; var b3 = new Book { Title = "JavaScript for Kids", Publisher = "Wrox Press" }; var b4 = new Book {
1326
Download from finelybook www.finelybook.com
Title = "Web Design with HTML and CSS", Publisher = "For Dummies" }; _booksContext.AddRange(b1, b2, b3, b4); int records = await _booksContext.SaveChangesAsync(); Console.WriteLine($"{records} records added"); } public async Task ReadBooksAsync() { List books = await _booksContext.Books.ToListAsync(); foreach (var b in books) { Console.WriteLine($"{b.Title} {b.Publisher}"); } Console.WriteLine(); } }
The container of the dependency injection framework is initialized in the InitializeServices method. Here, a ServiceCollection instance is created, and the BooksService class is added to this collection with a transient lifetime management. With this, the BooksService is instantiated every time this service is requested. For registering Entity Framework and SQL Server, the extension methods AddEntityFrameworkSqlServer, and AddDbContext are available. The AddDbContext method requires an Action delegate as parameter where a DbContextOptionsBuilder parameter is received. With this options parameter, the context can be configured using the UseSqlServer extension method. This is the similar functionality to register SQL Server with Entity Framework in the previous sample (code file UsingDependencyInjection/Program.cs): private void InitializeServices() { const string ConnectionString = @"server= (localdb)\MSSQLLocalDb;database=Books;trusted_connection=true"; var services = new ServiceCollection(); services.AddTransient() .AddEntityFrameworkSqlServer()
1327
Download from finelybook www.finelybook.com
.AddDbContext(options => options.UseSqlServer(ConnectionString)); //... Container = services.BuildServiceProvider(); } public ServiceProvider Container { get; private set; }
The initialization of the services as well as the use of the BooksService is done from the Main method. The BooksService is retrieved invoking the GetService method of the IServiceProvider (code file UsingDependencyInjection/Program.cs): static async Task Main() { var p = new Program(); p.InitializeServices(); p.ConfigureLogging(); var service = p.Container.GetService(); await service.AddBooksAsync(); service.ReadBooks(); }
When you run the application, you can see that records are added and read from the Books database. To configure logging with this application setup, you can add the ILoggerFactory interface with the help of the AddLogging extension method to the DI container: private void InitializeServices() { const string ConnectionString = @"server= (localdb)\MSSQLLocalDb;database=Books;trusted_connection=true"; var services = new ServiceCollection(); services.AddTransient() .AddEntityFrameworkSqlServer() .AddDbContext(options => options.UseSqlServer(ConnectionString)); services.AddLogging(); Container = services.BuildServiceProvider(); }
1328
Download from finelybook www.finelybook.com
Next, you configure logging. With the implementation of the ConfigureLogging method, the ILoggerFactory is retrieved from the DI container. Using this factory, the console is added to write information logs: private void ConfigureLogging() { ILoggerFactory loggerFactory = Container.GetService(); loggerFactory.AddConsole(LogLevel.Information); }
EF Core itself uses the ILoggerFactory interface by injecting the service, and thus EF Core logging is now written to the console like the previous sample.
CREATING A MODEL The first examples of this chapter mapped a single table. Now, let’s get into a more complex example with a relationship between tables. The new database will be created programmatically, but of course you also can create a database first and use the code to access the existing database.
Creating a Relation Let’s start creating a model. The sample project defines a one-to-many relation using the MenuCard and Menu types. The MenuCard contains a list of Menu objects. This relation is simply defined by the Menu property of type List (code file MenusSample/MenuCard.cs): public class MenuCard { public int MenuCardId { get; set; } public string Title { get; set; } public List Menus { get; } = new List(); public override string ToString() => Title; }
The relation can also be accessed in the other direction; a Menu can access the MenuCard using the MenuCard property. The MenuCardId 1329
Download from finelybook www.finelybook.com
property is specified to define a foreign key relationship (code file MenusSample/Menu.cs): public class Menu { public int MenuId { get; set; } public string Text { get; set; } public decimal Price { get; set; } public int MenuCardId { get; set; } public MenuCard MenuCard { get; set; } public override string ToString() => Text; }
The mapping to the database is done by the MenusContext class. This class is defined similarly to the previous context type; it just contains two properties to map the two object types: the properties Menus and MenuCards (code file MenusSamples/MenusContext.cs): public class MenusContext: DbContext { private const string ConnectionString = @"server= (localdb)\MSSQLLocalDb;" + "Database=MenuCards;Trusted_Connection=True"; public DbSet Menus { get; set; } public DbSet MenuCards { get; set; } protected override void OnConfiguring(DbContextOptionsBuilder optionsBuilder) { base.OnConfiguring(optionsBuilder); optionsBuilder.UseSqlServer(ConnectionString); } }
There are some parts in the creation code that would be useful to change. For example, the size of the Text and Title column could be reduced in size from NVARCHAR(MAX). In addition to that, SQL Server defines a Money type that could be used for the Price column, and the schema name could be changed from dbo. Entity Framework gives you two options to make these changes from code: data annotations and the Fluent API, which are both discussed next.
Data Annotations 1330
Download from finelybook www.finelybook.com
One way to influence the generated database is to add data annotations to the entity types. By default, the name of the table comes from the property of the context. Thus, to map the Menu class, the Menus table is used because the DbSet property mapping Menu has the name Menus. With data annotations, the tables can be changed by using the Table attribute. To change the schema name, the Table attribute defines the Schema property. To specify a different length for a string type, you can apply the MaxLength attribute (code file MenusWithDataAnnotations/MenuCard.cs): [Table("MenuCards", Schema = "mc")] public class MenuCard { public int MenuCardId { get; set; } [MaxLength(120)] public string Title { get; set; } public List Menus { get; } = new List(); }
NOTE Using the property name in the context to map it to the table is different from Entity Framework. Entity Framework used a dictionary to find plural and singular names. With the Menu class, the Table and MaxLength attributes are applied as well. To change the SQL type, the Column attribute can be used (code file MenusWithDataAnnotations/Menu.cs): [Table("Menus", Schema = "mc")] public class Menu { public int MenuId { get; set; } [MaxLength(50)] public string Text { get; set; } [Column(TypeName ="Money")] public decimal Price { get; set; } public int MenuCardId { get; set; } public MenuCard MenuCard { get; set; }
1331
Download from finelybook www.finelybook.com
}
After applying the migrations and creating the database, you can see the new names of the tables with the schema name, as well as the changed data types on the Title, Text, and Price columns: CREATE TABLE [mc].[MenuCards] ( [MenuCardId] INT IDENTITY (1, 1) NOT NULL, [Title] NVARCHAR (120) NULL, CONSTRAINT [PK_MenuCard] PRIMARY KEY CLUSTERED ([MenuCardId] ASC) ); CREATE TABLE [mc].[Menus] ( [MenuId] INT IDENTITY (1, 1) NOT NULL, [MenuCardId] INT NOT NULL, [Price] MONEY NOT NULL, [Text] NVARCHAR (50) NULL, CONSTRAINT [PK_Menu] PRIMARY KEY CLUSTERED ([MenuId] ASC), CONSTRAINT [FK_Menu_MenuCard_MenuCardId] FOREIGN KEY ([MenuCardId]) REFERENCES [mc].[MenuCards] ([MenuCardId]) ON DELETE CASCADE );
Fluent API Another way to influence the tables created is to use the Fluent API with the OnModelCreating method of the DbContext derived class. Using this has the advantage that you can keep the entity types simple without adding any attributes, and the fluent API also gives you more options than you have with applying attributes. The following code snippet shows the override of the OnModelCreating method of the BooksContext class. The ModelBuilder class that is received as parameter offers a few methods, and several extension methods are defined. The HasDefaultSchema is an extension method that applies a default schema to the model that is now used with all types. The Entity method returns an EntityTypeBuilder that enables you to customize the entity, such as mapping it to a specific table name and defining keys and indexes: protected override void OnModelCreating(ModelBuilder
1332
Download from finelybook www.finelybook.com
modelBuilder) { base.OnModelCreating(modelBuilder); modelBuilder.HasDefaultSchema("mc"); modelBuilder.Entity() .ToTable("MenuCards") .HasKey(c => c.MenuCardId); //... modelBuilder.Entity() .ToTable("Menus") .HasKey(m => m.MenuId); //... }
The EntityTypeBuilder defines a Property method to configure a property. The Property method returns a PropertyBuilder that in turn enables you to configure the property with max length values, required settings, and SQL types and to specify whether values should be automatically generated (such as identity columns): protected override void OnModelCreating(ModelBuilder modelBuilder) { //... modelBuilder.Entity() .Property(c => c.MenuCardId) .ValueGeneratedOnAdd(); modelBuilder.Entity() .Property(c => c.Title) .HasMaxLength(50); //... modelBuilder.Entity() .Property(m => m.MenuId) .ValueGeneratedOnAdd(); modelBuilder.Entity() .Property(m => m.Text) .HasMaxLength(120); modelBuilder.Entity() .Property(m => m.Price) .HasColumnType("Money"); //... }
1333
Download from finelybook www.finelybook.com
To define one-to-many mappings, the EntityTypeBuilder defines mapping methods. The method HasMany combined with WithOne defines a mapping of many menus with one menu card. HasMany needs to be chained with WithOne. The method HasOne needs a chain with WithMany or WithOne. Chaining HasOne with WithMany defines a one-tomany relationship; chaining HasOne with WithOne defines a one-to-one relationship: protected override void OnModelCreating(ModelBuilder modelBuilder) { //... modelBuilder.Entity() .HasMany(c => c.Menus) .WithOne(m => m.MenuCard); modelBuilder.Entity() .HasOne(m => m.MenuCard) .WithMany(c => c.Menus) .HasForeignKey(m => m.MenuCardId); }
Self-Contained Type Configuration Having a more complex DbContext, the OnModelCreating method can become quite long. EF Core 2.0 gives a new option to define configuration classes for every type. To create a configuration class, the class needs to implement the interface IEntityTypeConfiguration with the method Configure. Creating MenuCardConfiguration for the MenuCard type, the configuration can be simplified as shown in the following code snippet (code file MenusSample/MenuCardConfiguration.cs): public class MenuCardConfiguration : IEntityTypeConfiguration { public void Configure(EntityTypeBuilder builder) { builder.ToTable("MenuCards") .HasKey(c => c.MenuCardId); builder.Property(c => c.MenuCardId) .ValueGeneratedOnAdd(); builder.Property(c => c.Title)
1334
Download from finelybook www.finelybook.com
.HasMaxLength(50); builder.HasMany(c => c.Menus) .WithOne(m => m.MenuCard); } }
The configuration for the class Menu is defined in the MenuConfiguration class. The methods used by the EntityTypeBuilder are the same as used previously. The code is just simpler because the entity type does not need to be selected because with IEntityTypeConfiguration, the entity type is already specified: public class MenuConfiguration : IEntityTypeConfiguration { public void Configure(EntityTypeBuilder builder) { builder.ToTable("Menus") .HasKey(m => m.MenuId); builder.Property(m => m.MenuId) .ValueGeneratedOnAdd(); builder.Property(m => m.Text) .HasMaxLength(120); builder.Property(m => m.Price) .HasColumnType("Money"); builder.HasOne(m => m.MenuCard) .WithMany(m => m.Menus) .HasForeignKey(m => m.MenuCardId); } }
The OnModelCreating method of the MenusContext class can now be simplified. To apply the configuration from the IEntityTypeConfiguration types, the ApplyConfiguration method of the ModelBuilder needs to be invoked (code file MenusSample/MenusContext.cs): protected override void OnModelCreating(ModelBuilder modelBuilder) { base.OnModelCreating(modelBuilder);
1335
Download from finelybook www.finelybook.com
modelBuilder.HasDefaultSchema("mc"); modelBuilder.ApplyConfiguration(new MenuCardConfiguration()); modelBuilder.ApplyConfiguration(new MenuConfiguration()); }
Scaffolding a Model from the Database Instead of creating the database from the model, you can also create the model from the database. To do this, you need to add the NuGet package Microsoft.EntityFrameworkCore.Design to the packages list of the project and add Microsoft.EntityFrameworkCore.Tools.Dotntet within a DotnetCliToolReference element. As the Microsoft.EntityFrameworkCore.Design package is only needed for the project itself and not for other projects referencing this package, the attribute PrivateAssets can be specified (project file ScaffoldSample/ScaffoldSample.csproj): Exe netcoreapp2.0
After the tools are installed, you can start the dotnet ef command 1336
Download from finelybook www.finelybook.com
from the Developer Command Prompt: > dotnet ef dbcontext scaffold "server=(localdb)\MSSQLLocalDb;database=MenuCards; trusted_connection=true" "Microsoft.EntityFrameworkCore.SqlServer"
The dbcontext command enables you to list DbContext objects from the project, as well as create DBContext objects. The command scaffold creates DbContext-derived classes as well as model classes. dotnet ef dbcontext scaffold needs two required arguments: the connection string to the database and the provider that should be used. With the statement shown earlier, the database MenuCards was accessed on the SQL Server (localdb)\MSSQLLocalDb. The provider used was Microsoft.EntityFrameworkCore.SqlServer. This NuGet package needs to be added to the project. After running this command, you can see the DbContext derived classes as well as the model types generated. The configuration of the model by default is done using the fluent API. However, you can change that to using the data annotations supplying the --data-annotations option. You can also influence the generated context class name as well as the output directory. Just check the different available options using the option --help.
Mapping to Fields EF Core not only allows mapping table columns to properties, but also to private fields. This makes it possible to create read-only properties and use private fields that are not accessible outside of the class. Let’s have a look at the class Book in the following code snippet. This class contains a private field _bookId that is only accessible within the class (and it’s used from the ToString method). Title is a read/write property, and Publisher a read-only property. The publisher uses the field _publisher. What’s needed by EF Core in the class is a default constructor, but this one can be declared with the private access modifier (code file BooksSample/Book.cs): public class Book {
1337
Download from finelybook www.finelybook.com
// parameterless constructor neeeded for EF Core private Book() { } public Book(string title, string publisher) { _title = title; _publisher = publisher; } private int _bookId = 0; public string Title { get; set; } private string _publisher; public string Publisher => _publisher; public override string ToString() => $"id: {_bookId}, title: {Title}, publisher: {Publisher}"; }
To avoid typos, for the column names, the class ColumnNames with strongly typed names of the columns is defined. Also, the using static declaration accesses the const values without the class name (code file BooksSample/BooksContext.cs): using static BooksSample.ColumnNames; namespace BooksSample { internal class ColumnNames { public const string LastUpdated = nameof(LastUpdated); public const string IsDeleted = nameof(IsDeleted); public const string BookId = nameof(BookId); public const string AuthorId = nameof(AuthorId); } //... }
The property Publisher can now be configured to map to the corresponding field with the HasField method. The _bookId doesn’t have a corresponding property, thus it is configured with an overload of the Property method where the name is assigned as string. This maps the BookId column in the database table to the field _bookId (code file BooksSample/BooksContext.cs): protected override void OnModelCreating(ModelBuilder
1338
Download from finelybook www.finelybook.com
modelBuilder) { base.OnModelCreating(modelBuilder); //... modelBuilder.Entity().Property(b => b.Title) .IsRequired() .HasMaxLength(50); modelBuilder.Entity().Property(b => b.Publisher) .HasField("_publisher") .IsRequired(false) .HasMaxLength(30); modelBuilder.Entity().Property(BookId) .HasField("_bookId") .IsRequired(); modelBuilder.Entity() .HasKey(BookId); }
When you’re creating Book objects, you need to use the constructor. The properties don’t have a set accessor. After the Book objects are initialized, they are added to BooksContext with the AddRangeAsync method (code file BooksSample/Program.cs): private async Task AddBooksAsync() { using (var context = new BooksContext()) { var b1 = new Book("Professional C# 6 and .NET Core 1.0", "Wrox Press"); var b2 = new Book("Professional C# 5 and .NET 4.5.1", "Wrox Press"); var b3 = new Book("JavaScript for Kids", "Wrox Press"); var b4 = new Book("Web Design with HTML and CSS", "For Dummies"); await context.Books.AddRangeAsync(b1, b2, b3, b4); int records = await context.SaveChangesAsync(); Console.WriteLine($"{records} records added"); } Console.WriteLine(); }
1339
Download from finelybook www.finelybook.com
Shadow Properties EF Core not only allows mapping database columns to private fields, you can also define a mapping that doesn’t show up in the model at all. You can use shadow properties that can be retrieved with the entity in the context but are not available with the model. Shadow properties are defined as strings. To avoid typos when using these strings multiple times, a class defining const strings is defined (code file BooksSample/BooksContext.cs): public class ColumnNames { public const string LastUpdated = nameof(LastUpdated); public const string IsDeleted = nameof(IsDeleted); public const string BookId = nameof(BookId); }
To access the members of the class without the class name, the using static declaration is used: using static MappingToFields.ColumnNames;
The following code snippet defines the shadow properties IsDeleted and LastUpdated using the strongly typed strings defined earlier: protected override void OnModelCreating(ModelBuilder modelBuilder) { base.OnModelCreating(modelBuilder); //... // shadow properties modelBuilder.Entity().Property(IsDeleted); modelBuilder.Entity().Property (LastUpdated); }
The shadow property LastUpdated is used to write the actual time when the entity was updated last. The IsDeleted property is used to define a state that the entity is deleted instead of deleting it. Sometimes it can be useful not to delete the data on the request of the user, but mark it as deleted instead. This allows making an undo to recover the entity and offers history information. 1340
Download from finelybook www.finelybook.com
To update the shadow property LastUpdated automatically, the method SaveChangesAsync is overridden. In case you’re using the synchronous SaveChanges method to write changes to the database, you need to override this method as well. With the implementation, the actual state of the entities is checked. If the state is Added, Modified, or Deleted, the shadow property is updated with the current time. To manage the shadow property IsDeleted, deleted entities are changed to the Modified state, and the IsDeleted shadow property is set to true. Shadow properties don’t have a property in the model that allows for accessing it; instead you can use the CurrentValues indexer of the EntityEntry (code file BooksSample/BooksContext.cs): public override Task SaveChangesAsync(CancellationToken cancellationToken = default) { ChangeTracker.DetectChanges(); foreach (var item in ChangeTracker.Entries() .Where(e => e.State == EntityState.Added || e.State == EntityState.Modified || e.State == EntityState.Deleted)) { item.CurrentValues[LastUpdated] = DateTime.Now; if (item.State == EntityState.Deleted) { item.State = EntityState.Modified; item.CurrentValues[IsDeleted] = true; } } return base.SaveChangesAsync(cancellationToken); }
NOTE The change tracker that is used with the sample code is shown in detail later in the section “Object Tracking.”
1341
Download from finelybook www.finelybook.com
NOTE Having an IsDeleted property, it would be a good idea to not return entities where IsDeleted is set to true when using normal queries. You can do this with the EF Core 2.0 feature global query filters that is discussed later in the section with this name. To show deleted entities, the DeleteBookAsync method is defined to delete the entity with the ID that is passed to this method. Here, the Remove method is invoked by passing the entity object, and SaveChanges is invoked (code file BooksSample/Program.cs): private async Task DeleteBookAsync(int id) { using (var context = new BooksContext()) { Book b = await context.Books.FindAsync(id); if (b == null) return; context.Books.Remove(b); int records = await context.SaveChangesAsync(); Console.WriteLine($"{records} books deleted"); } Console.WriteLine(); }
Behind the scenes, the IsDeleted shadow property is set because of the change to the SaveChangesAsync method. To verify this, you can access the shadow property using the method EF.Property by passing the IsDeleted string. All the Book entities with this flag are shown in the QueryDeletedBooksAsync method: private async Task QueryDeletedBooksAsync() { using (var context = new BooksContext()) { IEnumerable deletedBooks = await context.Books .Where(b => EF.Property(b, IsDeleted)) .ToListAsync(); foreach (var book in deletedBooks)
1342
Download from finelybook www.finelybook.com
{ Console.WriteLine($"deleted: {book}"); } } }
NOTE EF is a static class in the namespace Microsoft.EntityFrameworkCore that
offers static methods that are useful when EF types are not available. In this section you’ve seen the Property method that can be used to access shadow state. Later in this chapter, the EF class is used with compiled queries and EF.Functions.
QUERIES Now that we’ve defined the model, let’s get into more details of queries. This section covers Basic queries Evaluation on the server and on the client Raw SQL queries Compiled queries for better performance Global query filters EF.Functions
Basic Queries You’ve already seen that accessing a context-property of DbSet returns a list of all entities of the specified table. Let’s look at this in more detail. Accessing the Books property retrieves all the Book records from the database (code file BooksSample/QuerySamples.cs): 1343
Download from finelybook www.finelybook.com
private async Task QueryAllBooksAsync() { Console.WriteLine(nameof(QueryAllBooksAsync)); using (var context = new BooksContext()) { List books = await context.Books.ToListAsync(); foreach (var b in books) { Console.WriteLine(b); } } Console.WriteLine(); }
With the asynchronous API it’s also possible to use an IAsyncEnumerable that is returned from the ToAsyncEnumerable method and use the ForEachAsync method instead of the foreach loop: await context.Books.ToAsyncEnumerable() .ForEachAsync(b => { Console.WriteLine(b); });
Accessing the Books property results in this SQL statement sent to the database: SELECT [b].[BookId], [b].[IsDeleted], [b].[LastUpdated], [b]. [Publisher], [b].[Title] FROM [Books] AS [b]
You can query for an object with a specific key with the Find and the FindAsync methods. In case the record is not found, this method returns null: Book b = await context.Books.FindAsync(id); if (b != null) { //...
This results in a SELECT SQL statement with TOP(1) and a WHERE clause: SELECT TOP(1) [e].[BookId], [e].[IsDeleted], [e]. [LastUpdated], [e].[Publisher], [e].[Title]
1344
Download from finelybook www.finelybook.com
FROM [Books] AS [e] WHERE [e].[BookId] = @__get_Item_0
Instead of using a Find method, you can also use the synchronous Single or SingleOrDefault methods, or the asynchronous variants SingleAsync or SingleOrDefaultAsync. The difference between Single and SingleOrDefault is that Single throws an exception when no records are found, whereas SingleOrDefault returns null when no records are found. These methods also throw an exception of more than one record is found. The following code snippet uses the method SingleOrDefaultAsync to ask for a book title: Book book = await context.Books.SingleOrDefaultAsync(b => b.Title == title);
The generated SQL statement asks for the TOP(2) records, which allows throwing an exception if two records are found: SELECT TOP(2) [b].[BookId], [b].[IsDeleted], [b]. [LastUpdated], [b].[Publisher], [b].[Title] FROM [Books] AS [b] WHERE [b].[Title] = @__title_0
The Where method allows for simple filtering based on a condition. You can also use the Contains method within the Where expression. An asynchronous variant of the Where method is not available, as the Where method uses lazy evaluation. You can use a foreach statement to iterate all the results from the query. However, foreach triggers the execution of the query and blocks the thread until the result is retrieved. Instead of using foreach with the result of the Where method, you can use ToListAsync to immediately trigger the execution but in a task: List wroxBooks = await context.Books .Where(b => b.Title.Contains(title)) .ToListAsync();
The resulting SQL statement makes use of a simple WHERE in the SQL clause: 1345
Download from finelybook www.finelybook.com
SELECT [b].[BookId], [b].[IsDeleted], [b].[LastUpdated], [b]. [Publisher], [b].[Title] FROM [Books] AS [b] WHERE (CHARINDEX(@__title_0, [b].[Title]) > 0) OR (@__title_0 = N'')
In Chapter 12, you can read about many more LINQ methods and LINQ clauses which you can also use with EF Core. Just bear in mind that the implementation is different between LINQ to Objects and LINQ to EF Core. With LINQ to EF Core, expression trees are used that allow creating a SQL query with the complete LINQ expression at runtime. With LINQ to objects, most of the LINQ queries are defined in the Enumerable class. LINQ with expression trees is implemented in the Queryable class, and many enhancements for EF Core such as the Async variants are implemented in the EntityFrameworkQueryableExtensions class. For more information about the expression tree, also check Chapter 12.
Client and Server Evaluation Not every part of a query can be converted to a SQL statement and thus run on the server. Some parts need to run on the client. EF Core allows for transparent client and server evaluation. If a query cannot be resolved, it automatically runs on the client. This has a big advantage for using different providers. For example, with one provider the query can be completely evaluated on the server. Using a different provider that doesn’t translate all queries, the program still runs, but some parts are now evaluated on the client. Let’s get into one example with a n-to-n relationship. The Book type is related to the Author type with a relation entity. One book can be written by multiple authors, and one author can write multiple books. The following code snippet accesses the Book objects via the Books property. The Where method is used for filtering, and the OrderBy method defines the order. With the Select method, the result is defined—including a relation to the authors using the BookAuthors property: var books = context.Books
1346
Download from finelybook www.finelybook.com
.Where(b => b.Title.StartsWith("Pro")) .OrderBy(b => b.Title) .Select(b => new { b.Title, Authors = b.BookAuthors });
All this is translated using EF Core 2.0 to a SQL statement. The evaluation happens completely on the server, translating Where, OrderBy, and Select with the relation, using SELECT, INNER JOIN, WHERE, and ORDER BY: SELECT [b.BookAuthors].[BookId], [b.BookAuthors].[AuthorId] FROM [BookAuthors] AS [b.BookAuthors] INNER JOIN ( SELECT [b0].[BookId], [b0].[Title] FROM [Books] AS [b0] WHERE [b0].[Title] LIKE N'Pro' + N'%' AND (LEFT([b0]. [Title], LEN(N'Pro')) = N'Pro') ) AS [t] ON [b.BookAuthors].[BookId] = [t].[BookId] ORDER BY [t].[Title], [t].[BookId]
If the Select statement is modified to return a comma-separated string containing the authors, the result is very different. This is done in the following code snippet: a string is assigned to the Authors property. Using the relation BookAuthors, just the FirstName and LastName properties of the authors are selected, and string.Join joins the list to a single string (code file BooksSample/QuerySamples.cs): var books = context.Books .Where(b => b.Title.StartsWith("Pro")) .OrderBy(b => b.Title) .Select(b => new { b.Title, Authors = string.Join(", ", b.BookAuthors.Select(a => $"{a.Author.FirstName} {a.Author.LastName}").ToArray()) });
EF Core 2.0 cannot translate this query to a SQL statement. Logging information from EF Core shows this warning: warn: Microsoft.EntityFrameworkCore.Query[200500]
1347
Download from finelybook www.finelybook.com
The LINQ expression 'join Author a.Author in value( Microsoft.EntityFrameworkCore.Query.Internal.EntityQueryable`1[ BooksSample.Author]) on Property([a], "AuthorId") equals Property([a.Author], "AuthorId")' could not be translated and will be evaluated locally.
Three queries are now executed. The result of these queries is joined on the client. The application still works, but the queries are not that efficient. Three statements are executed in SQL Server instead of one, and as you analyze the queries you can see that all authors are retrieved from the server before the evaluation happens on the client. This might result in a large transfer to the client: SELECT [b].[Title], [b].[BookId] FROM [Books] AS [b] WHERE [b].[Title] LIKE N'Pro' + N'%' AND (LEFT([b].[Title], LEN(N'Pro')) = N'Pro') ORDER BY [b].[Title] SELECT [b0].[BookId], [b0].[AuthorId] FROM [BookAuthors] AS [b0] WHERE @_outer_BookId = [b0].[BookId] SELECT [a.Author].[AuthorId], [a.Author].[FirstName], [a.Author].[LastName] FROM [Authors] AS [a.Author]
It’s practical to automatically have client and server evaluation. Unlike EF Core 1.0, the SQL Server provider for EF Core 2.0 can do more evaluation on the server, and future versions will even support more evaluations on the server. Using other providers can have different results. The efficiency is not the same, but at least the program works. To avoid evaluation on the server, you can configure the context to throw exceptions when evaluation should be done only on the server. You can do this by invoking the ConfigureWarnings method on the optionsBuilder when configuring the context: optionsBuilder.UseSqlServer(ConnectionString) .ConfigureWarnings(warnings =>
1348
Download from finelybook www.finelybook.com
warnings.Throw(RelationalEventId.QueryClientEvaluationWarning));
WARNING Client and server evaluation is a great feature to make your program work across different providers. However, this can lead to a performance penalty. To define queries for best performance, you can easily find out when evaluation happens on the client by configuring to throw exceptions. Then you can change your queries accordingly.
Raw SQL Queries EF Core 2.0 also enables you to define raw SQL queries, which in turn returns entity objects and tracks these objects. You just need to invoke the FromSql method of the DbSet object as shown in the following code snippet (code file BooksSample/QuerySamples.cs): private async Task RawSqlQuery(string publisher) { Console.WriteLine(nameof(RawSqlQuery)); using (var context = new BooksContext()) { IList books = await context.Books.FromSql( $"SELECT * FROM Books WHERE Publisher = {publisher}") .ToListAsync(); foreach (var b in books) { Console.WriteLine($"{b.Title} {b.Publisher}"); } } Console.WriteLine(); }
The SQL query assigned to the RawSql method needs to return entity types that are part of the model, and data for all the properties of the model needs to be returned. 1349
Download from finelybook www.finelybook.com
The SQL string assigned to the FromSql method might look like SQL injection can happen as the string is defined. However, this is not the case. FromSql requires that a FormattableString type be assigned. For this FormattableString, EF Core extracts the parameters and creates SQL parameters.
NOTE For more information about string interpolation and the FormattableString type, read Chapter 9, “Strings and Regular Expressions.”
Compiled Queries For queries that need to be done again and again, you can create a compiled query that only needs to be executed. A compiled query can be created using EF.CompileQuery. This method offers different generic overloads where you can pass a different number of arguments. In the following code snippet, one query is created that defines one string parameter. This method needs a delegate parameter where the first parameter is of type BooksContext, the second parameter is the string parameter—here the publisher is used. After defining the compiled query, you can use it passing a context and the parameter (code file BooksSample/QuerySamples.cs): private void CompiledQuery() { Console.WriteLine(nameof(CompiledQuery)); Func query = EF.CompileQuery((context, publisher) => context.Books.Where(b => b.Publisher == publisher)); using (var context = new BooksContext()) { IEnumerable books = query(context, "Wrox Press"); foreach (var b in books)
1350
Download from finelybook www.finelybook.com
{ Console.WriteLine($"{b.Title} {b.Publisher}"); } } Console.WriteLine(); }
You can create a compiled query to a member field for having it available later when it’s needed, and you can invoke the query passing different contexts as needed.
Global Query Filters Earlier in this chapter, you saw shadow state used with the IsDeleted column. You do not need to define a WHERE clause with every query not to return the records where IsDeleted is true; instead you can define a global query filter when creating the mode. This is what the next code snippet does—globally checking for IsDeleted. Because IsDeleted is not mapped to the model and just via shadow state, the value can be retrieved using EF.Property (code file BooksSample/BooksContext.cs): protected override void OnModelCreating(ModelBuilder modelBuilder) { base.OnModelCreating(modelBuilder); modelBuilder.Entity().HasQueryFilter( b => !EF.Property(b, IsDeleted)); //... }
With this query filter defined, the WHERE check for IsDeleted is added to every query used with this context.
NOTE Global query filters are also of practical use with multi-tenancy requirements. You can filter all queries for a context for a specific tenant-id. You just need to pass the tenant-id when constructing the context. Without using dependency injection, you can pass a 1351
Download from finelybook www.finelybook.com
tenant-id to the constructor. With dependency injection, you just need to specify a service that is injected with the constructor where the tenant-id can be retrieved in the query filter.
NOTE Global query filters can be ignored. For example, to get all the deleted entities, you can apply the method IgnoreQueryFilters with LINQ expressions.
EF.Functions EF Core allows custom extension methods that can be implemented by providers. For this, the EF class defines the Functions property of type DbFunctions that can be extended using extension methods. At the time of this writing, the Like method is such an extension for relational data providers. The following code snippet enhances the query of the Where method by using EF.Functions.Like and supplying an expression containing the parameter titleSegment. The parameter titleSegment is embedded within two % characters (code file BooksSample/QuerySample.cs): public static async Task UseEFCunctions(string titleSegment) { Console.WriteLine(nameof(UseEFCunctions)); using (var context = new BooksContext()) { string likeExpression = $"%{titleSegment}%"; IList books = await context.Books.Where( b => EF.Functions.Like(b.Title, likeExpression)).ToListAsync(); foreach (var b in books) { Console.WriteLine($"{b.Title} {b.Publisher}"); } } Console.WriteLine();
1352
Download from finelybook www.finelybook.com
}
When you run the application, the method Where that contains EF.Functions.Like is translated to the SQL clause WHERE with LIKE: SELECT [b].[BookId], [b].[IsDeleted], [b].[LastUpdated], [b]. [Publisher], [b].[Title] FROM [Books] AS [b] WHERE ([b].[IsDeleted] = 0) AND [b].[Title] LIKE @__likeExpression_1
RELATIONSHIPS Relationships can be defined as one-to-one or one-to-many. For many-to-many relationships, with EF Core 2.0 you need to specify an intermediate class inside the relation, thus you split this relation to one-to-many and many-to-one. Relationships can be specified by using conventions, using annotations, and with the fluent API. All the three variants are discussed in the next sections.
Relationships Using Conventions The first way to define relationships is simply by conventions. Let’s have a look using an example with Book and Chapter types. A book can have multiple chapters; thus, this is a one-to-many relationship. The Book type also defines a relationship to an author. Here, the author is represented by the User class. Later, when you define relationships using annotations, you’ll see the reasoning for this name. Book and author defines a one-to-one relation. (With multi-author books, the author specified with the book is the lead author.) The book is defined with the Book class. This class has a primary key BookId that is created because of its name. The relationship is defined by the Chapters property. The Chapters property is of type List; this is all that’s needed for the Book type to define the one-to-many relationship. The relationship of the book to the author is specified by the Author property of type User. It would also be possible to define an AuthorId property of the same type as the key in the User 1353
Download from finelybook www.finelybook.com
class to specify the foreign key. Without this definition, a shadow property gets created (code file RelationUsingConventions/Book.cs): public class Book { public int BookId { get; set; } public string Title { get; set; } public List Chapters { get; } = new List (); public User Author { get; set; } }
NOTE Another possible implementation of the Chapters property is to define a read/write property of type List without creating an instance beforehand. With such an implementation, an instance would be created automatically from the EF Core context. The chapter is defined with the Chapter class. The relationship is defined using the Book property. A one-to-many relationship defines a collection on one side (the Book defines a collection of Chapter objects), and a simple relationship on the other side (the Chapter defines a simple property Book). Using the Book property from a chapter, the related book can be directly accessed. With this type, the BookId property specifies a foreign key to the Book. As already mentioned with the Book type, in case the BookId is not specified as a member of the class, a shadow property is created by convention (code file RelationUsingConventions/Chapter.cs): public class Chapter { public int ChapterId { get; set; } public int Number { get; set; } public string Title { get; set; } public int BookId { get; set; } public Book Book { get; set; } }
1354
Download from finelybook www.finelybook.com
The User class defines the UserId property for the primary key, the Name property, and the AuthoredBooks property for the relationship (code file RelationUsingConventions/User.cs): public class User { public int UserId { get; set; } public string Name { get; set; } public List AuthoredBooks { get; set; } }
All that’s needed with the context is to specify properties for the Book, Chapter and User types using properties of type DbSet (code file RelationUsingConventions/BooksContext.cs): public class BooksContext : DbContext { private const string ConnectionString = @"server= (localdb)\MSSQLLocalDb;database=Books;trusted_connection=true";
protected override void OnConfiguring(DbContextOptionsBuilder optionsBuilder) { base.OnConfiguring(optionsBuilder); optionsBuilder.UseSqlServer(ConnectionString); } public DbSet Books { get; set; } public DbSet Chapters { get; set; } public DbSet Users { get; set; } }
NOTE The downloadable sample code contains database-generation code and code to generate sample data. Because this code is very similar to what you’ve already seen in this chapter, it’s not specifically covered with the samples going forward. Just consult the downloadable code samples for more information. 1355
Download from finelybook www.finelybook.com
Creating the database when you start the application creates the database using the mapping as defined by convention. Figure 26-2 shows the Books, Chapters, and Users table with their relationships. The Book class does not define a foreign key property to the User type, but one is created that fills a shadow property: AuthorUserId.
FIGURE 26-2 Before I get into different ways of defining relationships (using annotations and the fluent API), let’s have a look at accessing related data with queries.
Explicit Loading Related Data If you query for books and want to display related properties—for example, the related chapters and the related author—you can use explicit loading of relations. Have a look at the following code snippet. The query requests all books with a specified title and only needs a single record. If you try to access the Chapters and the Author properties of the resulting book after starting the query, the values for these properties is null. Relations are not loaded implicitly. EF Core supports explicit loading by using Entry methods of the context that return EntityEntry objects by passing an entity. The EntityEntry class defines Collection and Reference methods that allow explicit loading of relations. With a one-to-many relationship, you can use the Collection method to specify the 1356
Download from finelybook www.finelybook.com
collection, whereas a one-to-one relation needs the Reference method to specify the relation. Explicit loading then happens with the Load method (code file RelationUsingConventions/Program.cs): private static void ExplicitLoading() { Console.WriteLine(nameof(ExplicitLoading)); using (var context = new BooksContext()) { var book = context.Books .Where(b => b.Title.StartsWith("Professional C# 7")) .FirstOrDefault(); if (book != null) { Console.WriteLine(book.Title); context.Entry(book).Collection(b => b.Chapters).Load(); context.Entry(book).Reference(b => b.Author).Load(); Console.WriteLine(book.Author.Name); foreach (var chapter in book.Chapters) { Console.WriteLine($"{chapter.Number}. {chapter.Title}"); } } } Console.WriteLine(); }
The NavigationEntry class that implements the Load method also implements an IsLoaded property where you can check whether the relation is already loaded. You do not need to check for a loaded relation before invoking the Load method; in cases when the relation is already loaded when you invoke the Load method, the query to the database doesn’t happen a second time. When you run the application with the query for the books, the following SELECT statement is executed on SQL Server. This query only accesses the Books table: SELECT TOP(1) [b].[BookId], [b].[AuthorUserId], [b].[Title] FROM [Books] AS [b] WHERE [b].[Title] LIKE N'Professional C# 7' + N'%' AND (LEFT([b].[Title], LEN(N'Professional C# 7')) = N'Professional C# 7')
1357
Download from finelybook www.finelybook.com
With the following Load method to retrieve the chapters for the book, the SELECT statement retrieves the chapters based on the book ID: SELECT [e].[ChapterId], [e].[BookId], [e].[Number], [e]. [Title] FROM [Chapters] AS [e] WHERE [e].[BookId] = @__get_Item_0
With the following Load method to retrieve the chapters for the book, the SELECT statement retrieves the chapters based on the book ID: SELECT [e].[ChapterId], [e].[BookId], [e].[Number], [e]. [Title] FROM [Chapters] AS [e] WHERE [e].[BookId] = @__get_Item_0
With a third query, user information is retrieved from the Users table: SELECT [e].[UserId], [e].[Name] FROM [Users] AS [e] WHERE [e].[UserId] = @__get_Item_0
Instead of explicitly loading related data that results in multiple queries sent to SQL server, EF Core also supports eager loading as shown next.
Eager Loading Related Data Loading of related data immediately when a query is executed can be done by invoking the Include method and specifying the relation. The following code snippet includes the chapters of the books and the author for books that successfully apply the Where expression (code file RelationUsingConventions/Program.cs): private static void EagerLoading() { Console.WriteLine(nameof(EagerLoading)); using (var context = new BooksContext()) { var book = context.Books .Include(b => b.Chapters) .Include(b => b.Author) .Where(b => b.Title.StartsWith("Professional C# 7")) .FirstOrDefault();
1358
Download from finelybook www.finelybook.com
if (book != null) { Console.WriteLine(book.Title); foreach (var chapter in book.Chapters) { Console.WriteLine($"{chapter.Number}. {chapter.Title}"); } } } Console.WriteLine(); }
Using Include, just a single SQL statement is executed to access the Books table and join the Chapters and Users table: SELECT [b.Chapters].[ChapterId], [b.Chapters].[BookId], [b.Chapters].[Number], [b.Chapters].[Title] FROM [Chapters] AS [b.Chapters] INNER JOIN ( SELECT DISTINCT [t].* FROM ( SELECT TOP(1) [b0].[BookId] FROM [Books] AS [b0] LEFT JOIN [Users] AS [b.Author0] ON [b0].[AuthorUserId] = [b.Author0].[UserId] WHERE [b0].[Title] LIKE N'Professional C# 7' + N'%' AND (LEFT([b0].[Title], LEN(N'Professional C# 7')) = N'Professional C# 7') ORDER BY [b0].[BookId] ) AS [t] ) AS [t0] ON [b.Chapters].[BookId] = [t0].[BookId] ORDER BY [t0].[BookId]
In case multiple levels of relationships need to be included, the method ThenInclude can be used on the result of the Include method.
Relationships Using Annotations Instead of using conventions, entity types can be annotated by applying relation information. Let’s modify the previously created Book type by adding ForeignKey attributes to the relation properties and specify the property that represents the foreign key. Here, the Book is 1359
Download from finelybook www.finelybook.com
not only associated with the author of the book but also the reviewer and the project editor. These relations map to the User type. The foreign key properties are defined of type int? to make them optional. With mandatory relations, EF Core creates a cascading delete; when the Book is deleted, the related author, editor, and reviewer are deleted as well (code file RelationUsingAnnotations/Book.cs): public class Book { public int BookId { get; set; } public string Title { get; set; } public List Chapters { get; } = new List (); public int? AuthorId { get; set; } [ForeignKey(nameof(AuthorId))] public User Author { get; set; } public int? ReviewerId { get; set; } [ForeignKey(nameof(ReviewerId))] public User Reviewer { get; set; } public int? ProjectEditorId { get; set; } [ForeignKey(nameof(ProjectEditorId))] public User ProjectEditor { get; set; } }
The User class now has multiple associations with the Book type. The WrittenBooks property lists all books for the user where the user is added as author. Similarly, the ReviewedBooks and EditedBooks properties are related with the Book type just on the Reviewer and the ProjectEditor properties. The properties need to be annotated with the InverseProperty attribute if more than one relation between the same types exists. With this attribute, the related property on the other side of the relation is specified (code file RelationUsingAnnotations/User.cs): public class User { public int UserId { get; set; } public string Name { get; set; } [InverseProperty("Author")] public List WrittenBooks { get; set; } [InverseProperty("Reviewer")] public List ReviewedBooks { get; set; } [InverseProperty("ProjectEditor")]
1360
Download from finelybook www.finelybook.com
public List EditedBooks { get; set; } }
Figure 26-3 shows the relations of the generated tables in SQL Server. The Books table is associated with the Chapters table as in the previous sample. Now, the Users table has three associations with the Books table.
FIGURE 26-3
Relationships Using Fluent API The most powerful way to specify relations is by using the fluent API. Using the fluent API, one-to-one relationships are defined with the methods HasOne and WithOne, whereas one-to-many relationships are defined by the methods HasOne and WithMany, and many-to-one relationships are defined by HasMany and WithOne. With the following code sample, the model types do not include any 1361
Download from finelybook www.finelybook.com
annotations on the database schema. The Book class is a simple POCO type that defines properties for a book information including relation properties (code file RelationUsingFluentAPI/Book.cs): public class Book { public int BookId { get; set; } public string Title { get; set; } public List Chapters { get; } = new List (); public User Author { get; set; } public User Reviewer { get; set; } public User Editor { get; set; } }
The User type is similarly defined. Besides having a Name property, the User type defines three different relationships to the Book type (code file RelationUsingFluentAPI/User.cs): public class User { public int UserId { get; set; } public string Name { get; set; } public List WrittenBooks { get; set; } public List ReviewedBooks { get; set; } public List EditedBooks { get; set; } }
The Chapter class has a relation to the Book class. However, the Chapter class is different from the Book class because the Chapter class also defines a property to associate a foreign key: BookId (code file RelationUsingFluentAPI/Chapter.cs): public class Chapter { public int ChapterId { get; set; } public int Number { get; set; } public string Title { get; set; } public int BookId { get; set; } public Book Book { get; set; } }
The mapping between the model types is now defined in the OnModelCreating method of the BooksContext. The Book class is 1362
Download from finelybook www.finelybook.com
associated with multiple Chapter objects; this is defined using HasMany and WithOne. The Chapter class is associated with one Book object; this is defined using HasOne and WithMany. Because there’s also a foreign key property in the Chapter class, the method HasForeignKey is used to specify this key (code file RelationUsingFluentAPI/BooksContext.cs): protected override void OnModelCreating(ModelBuilder modelBuilder) { modelBuilder.Entity() .HasMany(b => b.Chapters) .WithOne(c => c.Book); modelBuilder.Entity() .HasOne(b => b.Author) .WithMany(a => a.WrittenBooks); modelBuilder.Entity() .HasOne(b => b.Reviewer) .WithMany(r => r.ReviewedBooks); modelBuilder.Entity() .HasOne(b => b.Editor) .WithMany(e => e.EditedBooks); modelBuilder.Entity() .HasOne(c => c.Book) .WithMany(b => b.Chapters) .HasForeignKey(c => c.BookId); modelBuilder.Entity() .HasMany(a => a.WrittenBooks) .WithOne(b => b.Author); modelBuilder.Entity() .HasMany(r => r.ReviewedBooks) .WithOne(b => b.Reviewer); modelBuilder.Entity() .HasMany(e => e.EditedBooks) .WithOne(b => b.Editor); }
Table per Hierarchy with Conventions EF Core also supports the relationship type of table per hierarchy (TPH). With this relationship, multiple model classes that form a hierarchy are used to map to a single table. This relationship can be specified by using conventions and by using the fluent API. 1363
Download from finelybook www.finelybook.com
Let’s start using conventions and the types Payment, CashPayment, and CreditcardPayment that form a hierarchy as shown in Figure 26-4. Payment is a base class; CashPayment and CreditcardPayment derive from it.
FIGURE 26-4 With the implementation, the Payment class defines the primary key with the PaymentId property, a required Name, and an Amount property. The Amount property maps to a database column type Money (code file TPHWithConventions/Payment.cs): public class Payment { public int PaymentId { get; set; } [Required] public string Name { get; set; } [Column(TypeName = "Money")] public decimal Amount { get; set; } }
The class CreditcardPayment derives from Payment and adds a CreditcardNumber property (code file TPHWithConventions/CreditcardPayment.cs): public class CreditcardPayment : Payment { public string CreditcardNumber { get; set; } }
Finally, the CashPayment class derives from Payment but doesn’t declare any additional members (code file TPHWithConventions/CashPayment.cs): 1364
Download from finelybook www.finelybook.com
public class CashPayment : Payment { }
The EF Core context class, the BankContext, defines DbSet properties for every class in the hierarchy (code file TPHWithConventions/BankContext.cs): public class BankContext : DbContext { private const string ConnectionString = @"server= (localdb)\MSSQLLocalDb;" + "Database=LocalBank;Trusted_Connection=True"; protected override void OnConfiguring(DbContextOptionsBuilder optionsBuilder) { base.OnConfiguring(optionsBuilder); optionsBuilder.UseSqlServer(ConnectionString); } public DbSet Payments { get; set; } public DbSet CreditcardPayments { get; set; } public DbSet CashPayments { get; set; } }
The sample data created defines two CashPayment and one CreditcardPayment payments (code file TPHWithConventions/Program.cs): private static void AddSampleData() { using (var context = new BankContext()) { context.CashPayments.Add( new CashPayment { Name = "Donald", Amount = 0.5M }); context.CashPayments.Add( new CashPayment { Name = "Scrooge", Amount = 20000M }); context.CreditcardPayments.Add( new CreditcardPayment { Name = "Gus Goose", Amount = 300M, CreditcardNumber = "987654321"
1365
Download from finelybook www.finelybook.com
}); context.SaveChanges(); } }
When you run the application to create the database, just a single table —Payments—gets created (as shown in Figure 26-5). This table defines a Discriminator column that maps a record from the table to the corresponding model type.
FIGURE 26-5 To query only specific types from the hierarchy, you can use the OfType extension method. In the following code snippet, you can see a query to return only payments of type CreditcardPayment (code file TPHWithConventions/Program.cs): private static void QuerySample() { using (var context = new BankContext()) { var creditcardPayments = context.Payments.OfType(); foreach (var payment in creditcardPayments) { Console.WriteLine($"{payment.Name}, {payment.Amount}"); } } }
Using OfType, EF Core creates a query with a WHERE clause to distinguish records only with a value of CreditcardPayment: SELECT [p].[PaymentId], [p].[Amount], [p].[Discriminator], [p].[Name], [p].[CreditcardNumber]
1366
Download from finelybook www.finelybook.com
FROM [Payments] AS [p] WHERE [p].[Discriminator] = N'CreditcardPayment'
Of course, with this scenario it also would be possible to invoke the context property CreditcardPayments, which results in the same query.
Table per Hierarchy with Fluent API Using the fluent API, you have more control to define the hierarchy. With this, the Payment class has been stripped off the annotations, and it’s now an abstract type (code file TPHWithFluentAPI/Payment.cs): public abstract class Payment { public int PaymentId { get; set; } public string Name { get; set; } public decimal Amount { get; set; } }
The CreditcardPayment and Payment classes look the same as in the previous sample, so they aren’t repeated here. The context is different. The new name of the discriminator is Type. This just should be a column in the Payments table, but it should not show up in the Payment type. The strings Cash and Creditcard should be used to differentiate the model types. For all the strings, the ColumnNames and ColumnValues classes are defined (code file TPHWithFluentAPI/BankContext.cs): public static class ColumnNames { public const string Type = nameof(Type); } public static class ColumnValues { public const string Cash = nameof(Cash); public const string Creditcard = nameof(Creditcard); }
This time the context defines just a single property Payments for all the different Payment types. Of course, it would be possible to have specialized properties as well, but in the previous sample this was a necessity. The required schema information for the Name property as well as the Money type for the Amount property is now specified in the 1367
Download from finelybook www.finelybook.com
method OnModelCreating instead of using annotations. The TPH hierarchy is specified with the HasDiscriminator method. The name of the discriminator is Type, which is also specified as a shadow property. The differentiation for the derived types is specified with the HasValue method. HasValue is a method of the DiscriminatorBuilder that is returned from the HasDiscriminator method. public class BankContext : DbContext { //... protected override void OnModelCreating(ModelBuilder modelBuilder) { modelBuilder.Entity().Property(p => p.Name).IsRequired(); modelBuilder.Entity().Property(p => p.Amount) .HasColumnType("Money"); // shadow property for the discriminator modelBuilder.Entity().Property (ColumnNames.Type); modelBuilder.Entity() .HasDiscriminator(ColumnNames.Type) .HasValue(ColumnValues.Cash) .HasValue(ColumnValues.Creditcard); } public DbSet Payments { get; set; } }
The database created looks similar like before, just instead of the Discriminator column the table Payments now defines the Type column —as specified with the creation of the model. The new query asking for credit card numbers filters the Type column: SELECT [p].[PaymentId], [p].[Amount], [p].[Name], [p].[Type], [p].[CreditcardNumber] FROM [Payments] AS [p] WHERE [p].[Type] = N'Creditcard'
Table Splitting Table splitting is another new feature of EF Core 2.0. With table splitting, a database table can be split into multiple entity types. Using 1368
Download from finelybook www.finelybook.com
table splitting, each class that belongs to the same table needs a oneto-one relationship and defines its own primary key. However, because they share the same table, also the same primary key is shared. Let’s get into an example with the Menu class that represents information about a lunch menu, and MenuDetails contains information for the kitchen. The Menu class defines some properties for the menu including the Details property. The Details property maps the relation to the MenuDetails class (code file TableSplitting/Menu.cs): public class Menu { public int MenuId { get; set; } public string Title { get; set; } public string Subtitle { get; set; } public decimal Price { get; set; } public MenuDetails Details { get; set; } }
The MenuDetails class looks like it would map to its own table—with a primary key—and map to the Menu class with the Menu property (code file TableSplitting/MenuDetails.cs): public class MenuDetails { public int MenuDetailsId { get; set; } public string KitchenInfo { get; set; } public int MenusSold { get; set; } public Menu Menu { get; set; } }
Within the context, Menus and MenuDetails are two DbSet properties. In the OnModelCreating method, the Menu class is configured to a one-toone relationship with MenuDetails using HasOne and WithOne. These APIs already have been discussed in the section “Relationships Using Fluent API.” Now you should put your attention to the invocation of the ToTable methods. Without these code lines, by default, the classes Menu and MenuDetails would map to two different tables. Here, the argument passed to the ToTable methods specify the same table name. Both Menu and MenuDetails map to the same table Menus. This makes 1369
Download from finelybook www.finelybook.com
the difference for table splitting (code file TableSplitting/MenusContext.cs): public static class SchemaNames { public const string Menus = nameof(Menus); } public class MenusContext : DbContext { //... protected override void OnModelCreating(ModelBuilder modelBuilder) { modelBuilder.Entity() .HasOne(m => m.Details) .WithOne(d => d.Menu) .HasForeignKey(d => d.MenuDetailsId); modelBuilder.Entity().ToTable(SchemaNames.Menus); modelBuilder.Entity ().ToTable(SchemaNames.Menus); } public DbSet Menus { get; set; } public DbSet MenuDetails { get; set; } }
When you verify how the table was generated in the database, you can see with the following SQL statement that the Menus table includes the columns for both the Menu and MenuDetails classes, and only the primary key from the Menu class: CREATE TABLE [dbo].[Menus]( [MenuId] [int] IDENTITY(1,1) NOT NULL, [Price] [decimal](18, 2) NOT NULL, [Subtitle] [nvarchar](max) NULL, [Title] [nvarchar](max) NULL, [KitchenInfo] [nvarchar](max) NULL, [MenusSold] [int] NOT NULL, CONSTRAINT [PK_Menus] PRIMARY KEY CLUSTERED ( [MenuId] ASC )WITH (PAD_INDEX = OFF, STATISTICS_NORECOMPUTE = OFF, IGNORE_DUP_KEY = OFF, ALLOW_ROW_LOCKS = ON, ALLOW_PAGE_LOCKS = ON) ON [PRIMARY] ) ON [PRIMARY] TEXTIMAGE_ON [PRIMARY]
1370
Download from finelybook www.finelybook.com
GO
NOTE Entity splitting is the reverse of table splitting where an entity is split into multiple tables. This feature is not yet available with EF Core 2.0, but it’s planned with a later version of EF Core.
Owned Entities A different way to split a table into multiple entity types is with the feature known as owned entities. The owned entities don’t need a primary key; they simply can be types owned within a normal entity. Entity classes from owned entities can map to a single table—using the table splitting feature—but also to different tables. When different tables are used, they share the same primary key. Let’s get into an example that shows both scenarios: using owned entities with a single table and mapping it to another table. The following code snippet shows the main entity type, Person. This is the owner of owned entities with the primary key PersonId. This type contains two addresses: a PrivateAddress and a CompanyAddress (code file OwnedEntities/Person.cs): public class Person { public int PersonId { get; set; } public string Name { get; set; } public Address PrivateAddress { get; set; } public Address CompanyAddress { get; set; } }
The Address is an owned entity—a type without its own primary key. This type has two string properties, and a relation named Location of type Location. Location is another owned entity (code file OwnedEntities/Address.cs): public class Address
1371
Download from finelybook www.finelybook.com
{ public string LineOne { get; set; } public string LineTwo { get; set; } public Location Location { get; set; } }
just contains Country and City properties, and as an owned entity, it also doesn’t define a key (code file OwnedEntities/Location.cs): Location
public class Location { public string Country { get; set; } public string City { get; set; } }
The most interesting part now comes with the context, where owned entities are defined in the OnModelCreating method. Customizing the model for the Person class, the first invocation of OwnsOne specifies that the Person entity owns the entity referenced from the CompanyAddress property, which is an Address type. The second invocation to OwnsOne now invokes OwnsOne with the return type of the first OwnsOne invocation, a ReferenceOwnershipBuilder. This way, the Address is defined to own a Location. With the second invocation a different overload of OwnsOne is used that allows some customization. With this customization shown, the column names for the City and Country properties are specified to be different from the default names. The result of the CompanyAddress customization is having columns for CompanyAddress and Location all contained within the People table with customized column names for the City and Country properties. The customization using the next OwnsOne invocation defines the ownership for the PrivateAddress property. This time, the Address type is mapped to a different table: to the table named Addr. This table also contains the columns from the Location class with default column names (code file OwnedEntities/OwnedEntitiesContext.cs): public class OwnedEntitiesContext : DbContext { //... protected override void OnModelCreating(ModelBuilder modelBuilder) {
1372
Download from finelybook www.finelybook.com
modelBuilder.Entity() .OwnsOne(p => p.CompanyAddress) .OwnsOne(a => a.Location, builder => { builder.Property(p => p.City).HasColumnName("BusinessCity"); builder.Property(p => p.Country).HasColumnName("BusinessCountry"); }); modelBuilder.Entity() .OwnsOne(p => p.PrivateAddress) .ToTable("Addr") .OwnsOne(a => a.Location); } public DbSet People { get; set; } }
When you run the sample application, it creates the database with two tables. The first table is the People table as shown here. This table has all the columns from the Person class, and the Address and Location classes as mapped from the CompanyAddress property. LineOne and LineTwo have the default naming where the property names are concatenated, and underscores are used between the hierarchical property names: CREATE TABLE [dbo].[People]( [PersonId] [int] IDENTITY(1,1) NOT NULL, [Name] [nvarchar](max) NULL, [CompanyAddress_LineOne] [nvarchar](max) NULL, [CompanyAddress_LineTwo] [nvarchar](max) NULL, [BusinessCity] [nvarchar](max) NULL, [BusinessCountry] [nvarchar](max) NULL, CONSTRAINT [PK_People] PRIMARY KEY CLUSTERED ( [PersonId] ASC )WITH (PAD_INDEX = OFF, STATISTICS_NORECOMPUTE = OFF, IGNORE_DUP_KEY = OFF, ALLOW_ROW_LOCKS = ON, ALLOW_PAGE_LOCKS = ON) ON [PRIMARY] ) ON [PRIMARY] TEXTIMAGE_ON [PRIMARY] GO
The second table created (Addr) is created because of the ToTable mapping on the PrivateAddress property. The columns have default naming because nothing else was defined. The key for this table is the 1373
Download from finelybook www.finelybook.com
same as the People table (PersonId): CREATE TABLE [dbo].[Addr]( [PersonId] [int] NOT NULL, [LineOne] [nvarchar](max) NULL, [LineTwo] [nvarchar](max) NULL, [Location_City] [nvarchar](max) NULL, [Location_Country] [nvarchar](max) NULL, CONSTRAINT [PK_Addr] PRIMARY KEY CLUSTERED ( [PersonId] ASC )WITH (PAD_INDEX = OFF, STATISTICS_NORECOMPUTE = OFF, IGNORE_DUP_KEY = OFF, ALLOW_ROW_LOCKS = ON, ALLOW_PAGE_LOCKS = ON) ON [PRIMARY] ) ON [PRIMARY] TEXTIMAGE_ON [PRIMARY] GO
SAVING DATA After creating the database with models and relations, you can write to it. The section “Introducing EF Core” showed you how to add, update, and delete records, but now let’s get into more details about how this can be influenced and can include relations.
Adding Objects with Relations The following code snippet writes a relationship, a MenuCard containing Menu objects. Here, the MenuCard and Menu objects are instantiated. The bidirectional associations are assigned. With the Menu, the MenuCard property is assigned to the MenuCard, and with the MenuCard, the Menus property is filled with Menu objects. The MenuCard instance is added to the context invoking the Add method of the MenuCards property. When you add an object to the context, by default all objects are added to the tree with the state added. Not only the MenuCard but also the Menu objects are saved. Invoking SaveChanged on the context now creates four records (code file MenusSample/Program.cs): private static void AddRecords() { //... using (var context = new MenusContext()) {
1374
Download from finelybook www.finelybook.com
var soupCard = new MenuCard(); Menu[] soups = { new Menu { Text = "Consommé Célestine (with shredded pancake)", Price = 4.8m, MenuCard = soupCard }, new Menu { Text = "Baked Potato Soup", Price = 4.8m, MenuCard = soupCard }, new Menu { Text = "Cheddar Broccoli Soup", Price = 4.8m, MenuCard = soupCard }, }; soupCard.Title = "Soups"; soupCard.Menus.AddRange(soups); context.MenuCards.Add(soupCard); ShowState(context); int records = context.SaveChanges(); Console.WriteLine($"{records} added"); //... } }
The method ShowState that is invoked after adding the four objects to the context shows the state of all objects that are associated with the context. The DbContext class has a ChangeTracker associated that can be accessed using the ChangeTracker property. The Entries method of the ChangeTracker returns all the objects the change tracker knows about. With the foreach loop, every object including its state is written to the console (code file MenusSample/Program.cs): public static void ShowState(MenusContext context) { foreach (EntityEntry entry in context.ChangeTracker.Entries()) { Console.WriteLine($"type: {entry.Entity.GetType().Name},
1375
Download from finelybook www.finelybook.com
" + $"state: {entry.State}, {entry.Entity}"); } Console.WriteLine(); }
Run the application to see the Added state with these four objects: type: MenuCard, state: Added, Soups type: Menu, state: Added, Consommé Célestine (with shredded pancake) type: Menu, state: Added, Baked Potato Soup type: Menu, state: Added, Cheddar Broccoli Soup
Because of this state, the SaveChanges method creates SQL Insert statements to write every object to the database.
Object Tracking You’ve seen the context knows about added objects. However, the context also needs to know about changes. To know about changes, every object retrieved needs its state in the context. For seeing this in action let’s create two different queries that return the same object. The following code snippet defines two different queries where each query returns the same object with the menus as they are stored in the database. Indeed, only one object gets materialized, as with the second query result it is detected that the record returned has the same primary key value as an object already referenced from the context. Verifying whether the references of the variables m1 and m2 are the same results in returning the same object (code file MenusSample/Program.cs): private static void ObjectTracking() { using (var context = new MenusContext()) { var m1 = (from m in context.Menus where m.Text.StartsWith("Con") select m).FirstOrDefault(); var m2 = (from m in context.Menus where m.Text.Contains("(") select m).FirstOrDefault(); if (object.ReferenceEquals(m1, m2))
1376
Download from finelybook www.finelybook.com
{ Console.WriteLine("the same object"); } else { Console.WriteLine("not the same"); } ShowState(context); } }
The first LINQ query results in a SQL SELECT statement with a LIKE comparison to compare for the string to start with the value Con: SELECT TOP(1) [m].[MenuId], [m].[MenuCardId], [m].[Price], [m].[Text] FROM [mc].[Menus] AS [m] WHERE [m].[Text] LIKE 'Con' + '%'
With the second LINQ query, the database needs to be consulted as well. Here, a LIKE comparison is done to compare for a (in the middle of the text: SELECT TOP(1) [m].[MenuId], [m].[MenuCardId], [m].[Price], [m].[Text] FROM [mc].[Menus] AS [m] WHERE [m].[Text] LIKE ('%' + '(') + '%'
When you run the application, the same object is written to the console, and only one object is kept with the ChangeTracker. The state is Unchanged: the same object type: Menu, state: Unchanged, Consommé Célestine (with shredded pancake)
To not track the objects running queries from the database, you can invoke the AsNoTracking method with the DbSet: var m1 = (from m in context.Menus.AsNoTracking() where m.Text.StartsWith("Con") select m).FirstOrDefault();
You can also configure the default tracking behavior of the ChangeTracker to QueryTrackingBehavior.NoTracking: 1377
Download from finelybook www.finelybook.com
using (var context = new MenusContext()) { context.ChangeTracker.QueryTrackingBehavior = QueryTrackingBehavior.NoTracking; //... }
For a more global configuration, the tracking behavior also can be configured with the SQL Server configuration: protected override void OnConfiguring(DbContextOptionsBuilder optionsBuilder) { base.OnConfiguring(optionsBuilder); optionsBuilder.UseSqlServer(ConnectionString) .UseQueryTrackingBehavior(QueryTrackingBehavior.NoTracking); }
With such a configuration, two queries are made to the database, two objects are materialized, and the state information is empty.
NOTE Using the NoTracking configuration is useful when the context is used to only read records, but changes are not made. This reduces the overhead of the context as state information is not kept.
Updating Objects As objects are tracked, they can be updated easily, as shown in the following code snippet. First, a Menu object is retrieved. With this tracked object, the price is modified before the change is written to the database. In between all changes, state information is written to the console (code file MenusSample/Program.cs): private static void UpdateRecords() { using (var context = new MenusContext()) {
1378
Download from finelybook www.finelybook.com
Menu menu = context.Menus .Skip(1) .FirstOrDefault(); ShowState(context); menu.Price += 0.2m; ShowState(context); int records = context.SaveChanges(); Console.WriteLine($"{records} updated"); ShowState(context); } }
When you run the application, you can see that the state of the object is Unchanged after loading the record, Modified after the property value is changed, and Unchanged after saving is completed: type: Menu, state: Unchanged, Baked Potato Soup type: Menu, state: Modified, Baked Potato Soup 1 updated type: Menu, state: Unchanged, Baked Potato Soup
When you access the entries from the change tracker, by default changes are automatically detected. You configure this by setting the AutoDetectChangesEnabled property of the ChangeTracker. For checking manually to see whether changes have been done, you invoke the method DetectChanges. With the invocation of SaveChangesAsync, the state is changed back to Unchanged. You can do this manually by invoking the method AcceptAllChanges.
Updating Untracked Objects DB contexts are usually very short-lived. Using EF Core with ASP.NET Core MVC, with one HTTP request one object context is created to retrieve objects. When you receive an update from the client, the object must again be created on the server. This object is not associated with the object context. To update it in the database, the object needs to be associated with the DB context, and the state changed to create an INSERT, UPDATE, or DELETE statement. Such a scenario is simulated with the next code snippet. The local function GetMenu method returns a Menu object that is disconnected from the context; the context is disposed at the end of the local 1379
Download from finelybook www.finelybook.com
function. GetMenu is invoked by the method ChangeUntracked. This method changes the Menu object that is not associated with any context. After the change, the Menu object is passed to the method UpdateUntracked to save it in the database (code file MenusSample/Program.cs): private static void ChangeUntracked() { Menu GetMenu() { using (var context = new MenusContext()) { Menu menu = context.Menus .Skip(2) .FirstOrDefault(); return menu; } } Menu m = GetMenu(); m.Price += 0.7m; UpdateUntracked(m); }
The method UpdateUntracked receives the updated object and needs to attach it with the context. One way to attach an object with the context is by invoking the Attach method of the DbSet, and set the state as needed. The Update method does both with one call: attaching the object and setting the state to Modified (code file MenusSample/Program.cs): private static void UpdateUntracked(Menu m) { using (var context = new MenusContext()) { ShowState(context); // EntityEntry entry = context.Menus.Attach(m); // entry.State = EntityState.Modified; context.Menus.Update(m); ShowState(context); context.SaveChanges(); } }
When you run the application with the ChangeUntracked method, you 1380
Download from finelybook www.finelybook.com
can see that the state is modified. The object was untracked at first, but because the state was explicitly updated, you can see the Modified state: type: Menu, state: Modified, Cheddar Broccoli Soup
Batching An object mapping tool is not geared to support all scenarios. For example, if the ZIP Code of a city changed to a new code, and you want to update all customers with the old ZIP Code to the new one, it would be best to invoke a single SQL UPDATE statement to update all these records. Using EF Core, update statements are generated for every customer. However, EF Core is not that bad for sending a bunch of separate SQL statements with a single call to SaveChanges. EF Core supports batching. SaveChanges sends one command to SQL Server where multiple inserts or updates just happen with one statement. You can control the batch size—for example, deactivate batching by invoking MaxBatchSize with a value of 1 when configuring SQL Server: protected override void OnConfiguring(DbContextOptionsBuilder optionsBuilder) { base.OnConfiguring(optionsBuilder); optionsBuilder.UseSqlServer(ConnectionString, options => options.MaxBatchSize(1)); }
The following code snippet creates hundred menu objects, and adds these as added objects to the context, to write it to the database with the SaveChanges method (code file MenusSample/Program.cs): private static void AddHundredRecords() { Console.WriteLine(nameof(AddHundredRecords)); using (var context = new MenusContext()) { var card = context.MenuCards.FirstOrDefault(); if (card != null) { var menus = Enumerable.Range(1, 100).Select(x => new
1381
Download from finelybook www.finelybook.com
Menu { MenuCard = card, Text = $"menu {x}", Price = 9.9m }); context.Menus.AddRange(menus); Stopwatch stopwatch = Stopwatch.StartNew(); int records = context.SaveChanges(); stopwatch.Stop(); Console.WriteLine($"{records} records added after " + $"{stopwatch.EllapsedMilliseconds} milliseconds"); } } Console.WriteLine(); }
Running the application with batching enabled, the EF Core provider creates a TABLE MERGE statement where 100 new menu records are written with one statement. Changing the batch size to 1, 100 INSERT statements are sent to the database. On my system the time difference is 56 milliseconds with batching compared to 105 milliseconds without batching—when the database is running on the same system. With a database on a different system, the difference will be larger.
CONFLICT HANDLING What if multiple users change the same record and then save the state? Who will win with the changes? If multiple users accessing the same database work on different records, there’s no conflict. All users can save their data without interfering with data edited by other users. If multiple users work on the same record, though, you need to give some thought to conflict resolution. You have different ways to deal with this. The easiest one is that the last one wins. The user saving the data last overwrites changes from the user that did the changes previously. EF Core also offers a way for letting the first one win. With this option, when saving a record, a verification is needed if the data originally read is still in the database. If this is the case, saving data can continue as no changes occurred between reading and writing. However, if the 1382
Download from finelybook www.finelybook.com
data changed, a conflict resolution needs to be done. Let’s get into these different options.
The Last One Wins The default scenario is that the last one saving changes wins. To see multiple accesses to the database, the BooksSample application is extended. For an easy simulation of two users, the method ConflictHandling invokes the method PrepareUpdate two times, makes different changes to two Book objects within two contexts that reference the same record, and invokes the Update method two times. Last, the book ID is passed to the CheckUpdate method, which shows the actual state of the book from the database (code file BooksSample/Program.cs): public static void ConflictHandling() { // user 1 var tuple1 = await PrepareUpdate(); tuple1.book.Title = "updated from user 1"; // user 2 var tuple2 = await PrepareUpdate(); tuple2.book.Title = "updated from user 2"; // user 1 Update(tuple1.context, tuple1.book, "user 1"); // user 2 UpdateAsync(tuple2.context, tuple2.book, "user 2"); tuple1.context.Dispose(); tuple2.context.Dispose(); CheckUpdate(tuple1.book.BookId); }
The PrepareUpdate method opens a BookContext and returns both the context and the book within a tuple. Remember, this method is invoked two times, and different Book objects associated with different context objects are returned (code file ConflictHandlingSample/Program.cs): 1383
Download from finelybook www.finelybook.com
private static (BooksContext context, Book book) PrepareUpdate() { var context = new BooksContext(); Book book = await context.Books .Where(b => b.Title == BookTitle) .FirstOrDefault(); return (context, book); }
NOTE Tuples are explained in Chapter 13, “Functional Programming with C#.” The Update method receives the opened BooksContext with the updated Book object to save the book to the database. Remember, this method is invoked two times as well (code file BooksSample/Program.cs): private static void Update(BooksContext context, Book book, string user) { int records = context.SaveChanges(); Console.WriteLine($"{user}: {records} record updated from {user}"); }
The CheckUpdate method writes the book with the specified id to the console (code file BooksSample/Program.cs): private static void CheckUpdate(int id) { using (var context = new BooksContext()) { Book book = context.Books.Find(id); Console.WriteLine($"updated: {book.Title}"); } }
What happens when you run the application? You see the first update is successful, and so is the second update. When updating a record, it is not verified whether any changes happened after reading the record, 1384
Download from finelybook www.finelybook.com
which is the case with this sample application. The second update just overwrites the data from the first update, as you can see with the application output: user 1: 1 record updated from user 1 user 2: 1 record updated from user 2 this is the updated state: updated from user 2
The First One Wins In case you need a different behavior, such as the first user’s changes being saved to the record, you need to do some changes. The sample project ConflictHandlingSample uses the Book and BookContext objects like before, but it deals with the first-one-wins scenario. For conflict resolution, you need to specify the properties that should be verified if any change happened between reading and updating with a concurrency token. Based on the property you specify, the SQL UPDATE statement is modified to verify not only for the primary key, but also all properties that are marked with the concurrency token. Adding many concurrency tokens to the entity type creates a huge WHERE clause with the UPDATE statement, which is not very efficient. Instead you can add a property that is updated from SQL Server with every UPDATE statement—and this is what’s done with the Book class. The property TimeStamp is defined as timeStamp in SQL Server (code file ConflictHandlingSample/Book.cs): public class Book { public int BookId { get; set; } public string Title { get; set; } public string Publisher { get; set; } public byte[] TimeStamp { get; set; } }
To define the TimeStamp property as a timestamp type in SQL Server, you use the Fluent API. The SQL data type is defined using the HasColumnType method. The method ValueGeneratedOnAddOrUpdate informs the context that with every SQL INSERT or UPDATE statement the TimeStamp property can change, and it needs to be set with the context after these operations. The IsConcurrencyToken method marks 1385
Download from finelybook www.finelybook.com
this property as required to check whether it didn’t change after reading it (code file ConflictHandlingSample/BooksContext.cs): protected override void OnModelCreating(ModelBuilder modelBuilder) { base.OnModelCreating(modelBuilder); var book = modelBuilder.Entity(); book.HasKey(p => p.BookId); book.Property(p => p.Title).HasMaxLength(120).IsRequired(); book.Property(p => p.Publisher).HasMaxLength(50); book.Property(p => p.TimeStamp) .HasColumnType("timestamp") .ValueGeneratedOnAddOrUpdate() .IsConcurrencyToken(); }
NOTE Instead of using the IsConcurrencyToken method with the Fluent API, you can also apply the attribute ConcurrencyCheck to the property where concurrency should be checked. The process of the conflict-handling check is like what was done before. Both user 1 and user 2 invoke the PrepareUpdateAsync method, change the book title, and call the UpdateAsync method to make the change in the database (code file ConflictHandlingSample/Program.cs): public static void ConflictHandling() { // user 1 var tuple1 = PrepareUpdate(); tuple1.book.Title = "user 1 wins"; // user 2 var tuple2 = await PrepareUpdate(); tuple2.book.Title = "user 2 wins"; // user 1 Update(tuple1.context, tuple1.book); // user 2 Update(tuple2.context, tuple2.book);
1386
Download from finelybook www.finelybook.com
tuple1.context.Dispose(); tuple2.context.Dispose(); CheckUpdate(context1.book.BookId); }
The PrepareUpdate method is not repeated here, as this method is implemented in the same way as with the previous sample. What’s quite different is the Update method. To see the different timestamps, before and after the update, a custom extension method StringOutput for the byte array is implemented that writes the byte array in a readable form to the console. Next, the changes of the Book object are shown calling the ShowChanges helper method. The SaveChanges method is invoked to write all updates to the database. In case the update fails with a DbUpdateConcurrencyException, information is written to the console about the failure (code file ConflictHandlingSample/Program.cs): private static Update(BooksContext context, Book book, string user) { try { Console.WriteLine($"{user}: updating id {book.BookId}, " + $"timestamp: {book.TimeStamp.StringOutput()}"); ShowChanges(book.BookId, context.Entry(book)); int records = await context.SaveChangesAsync(); Console.WriteLine($»{user}: updated {book.TimeStamp.StringOutput()}»); Console.WriteLine($"{user}: {records} record(s) updated while updating " + $"{book.Title}"); } catch (DbUpdateConcurrencyException ex) { Console.WriteLine($"{user}: update failed with {book.Title}"); Console.WriteLine($"error: {ex.Message}"); foreach (var entry in ex.Entries) { if (entry.Entity is Book b) { Console.WriteLine($"{b.Title} {b.TimeStamp.StringOutput()}"); ShowChanges(book.BookId, context.Entry(book));
1387
Download from finelybook www.finelybook.com
} } } }
With objects that are associated with the context, you can access the original values and the current values with a PropertyEntry object. The original values that were retrieved when reading the object from the database can be accessed with the OriginalValue property, the current values with the CurrentValue property. The PropertyEntry object can be accessed with the Property method of an EntityEntry as shown in the ShowChanges and ShowChange methods (code file ConflictHandlingSample/Program.cs): private static void ShowChanges(int id, EntityEntry entity) { void ShowChange(PropertyEntry propertyEntry) => Console.WriteLine($"id: {id}, current: {propertyEntry.CurrentValue}, " + $"original: {propertyEntry.OriginalValue}, " + $"modified: {propertyEntry.IsModified}"); ShowChange(entity.Property("Title")); ShowChange(entity.Property("Publisher")); }
To convert the byte array of the TimeStamp property that is updated from SQL Server for visual output, the extension method StringOutput is defined (code file ConflictHandlingSample/ByteArrayExtensions.cs): static class ByteArrayExtension { public static string StringOutput(this byte[] data) { var sb = new StringBuilder(); foreach (byte b in data) { sb.Append($"{b}."); } return sb.ToString(); } }
When you run the application, you can see output such as the 1388
Download from finelybook www.finelybook.com
following. The timestamp values and book IDs differ with every run. The first user updates the book with the original title sample book to the new title user 1 wins. The IsModified property returns true for the Title property but false for the Publisher property, as only the title changed. The original timestamp ends with 1.1.209; after the update to the database the timestamp is changed to 1.17.114. In the meantime, user 2 opened the same record; this book still has a timestamp of 1.1.209. User 2 updates this book, but here the update failed because the timestamp of this book does not match the timestamp from the database. Here, a DbUpdateConcurrencyException exception is thrown. In the exception handler, the reason of the exception is written to the console as you can see in the program output: user 1: updating id 1, timestamp 0.0.0.0.0.0.7.209. id: 1, current: user 1 wins, original: sample book, modified: True id: 1, current: Sample, original: Sample, modified: False user 1: updated 0.0.0.0.0.0.7.210. user 1: 1 record(s) updated while updating user 1 wins user 2: updating id 1, timestamp 0.0.0.0.0.0.7.209. id: 1, current: user 2 wins, original: sample book, modified: True id: 1, current: Sample, original: Sample, modified: False user 2 update failed with user 2 wins user 2 error: Database operation expected to affect 1 row(s) but actually affected 0 row(s). Data may have been modified or deleted since entities were loaded. See http://go.microsoft.com/fwlink/?LinkId=527962 for information on understanding and handling optimistic concurrency exceptions. user 2 wins 0.0.0.0.0.0.7.209. id: 1, current: user 2 wins, original: sample book, modified: True id: 1, current: Sample, original: Sample, modified: False this is the updated state: user 1 wins
When using concurrency tokens and handling the DbConcurrencyException, you can deal with concurrency conflicts as needed. You can, for example, automatically resolve concurrency issues. If different properties are changed, you can retrieve the changed record and merge the changes. If the property changed is a number where you do some calculations—for example, a point system 1389
Download from finelybook www.finelybook.com
—you can increment or decrement the values from both updates and just throw an exception if a limit is reached. You can also ask the user to resolve the concurrency issue by giving the user the information that’s currently in the database and ask what changes he or she would like to do. Just don’t ask too much from the user. It’s likely that the only thing the user wants is to get rid of this rarely shown dialog, which means he or she might click OK or Cancel without reading the content. For rare conflicts, you can also write logs and inform the system administrator that an issue needs to be resolved.
CONTEXT POOLING With EF Core 2.0 you can increase performance by pooling the context. Connections are already pooled for a long time. You should open connections just before they are needed and close them immediately after use. With EF Core, this behavior is already implemented in the framework. On closing a connection, the connection to the database server is not really closed. Instead, the connection returns to the pool and can be reused when the next connection is opened. Connection pools are configured with the connection string. DB contexts have similar usage guidelines to connections. They should be created just before they are needed and closed (disposed) immediately after use. The overhead of this is not as significant as you might expect. The model is not newly initialized with every new invocation of the context; instead the model is reused. With Entity Framework and the XML file mapping, the overhead on creating the context was a lot larger than it is now with EF Core. However, when you have big contexts, the overhead of creating the context might be still significant in your scenario. Here, you can increase performance by using context pooling. To use context pooling, dependency injection must be used. All you need to do to activate context pooling is to change the EF Core registration from AddDbContext to AddDbContextPool. This way, the context injected (in the sample code the BooksContext) is retrieved from the context pool. 1390
Download from finelybook www.finelybook.com
var services = new ServiceCollection(); services.AddTransient(); services.AddTransient(); services.AddEntityFrameworkSqlServer(); services.AddDbContextPool(options => options.UseSqlServer(ConnectionString)); services.AddLogging(); Container = services.BuildServiceProvider();
USING TRANSACTIONS Chapter 25 introduces programming with transactions. With every access of the database using the Entity Framework, a transaction is involved, too. You can use transactions implicitly or create them explicitly with configurations as needed. The sample project used with this section demonstrates transactions in both ways. Here, the Menu, MenuCard, and MenuContext classes are used as shown earlier with the MenusSample project.
Using Implicit Transactions An invocation of the SaveChanges method automatically resolves to one transaction. If one part of the changes that need to be done fails—for example, because of a database constraint—all the changes already done are rolled back. This is demonstrated with the following code snippet. Here, the first Menu (m1) is created with valid data. A reference to an existing MenuCard is done by supplying the MenuCardId. After the update succeeds, the MenuCard property of the Menu m1 is filled automatically. However, the second Menu created, mInvalid, references an invalid menu card by supplying a MenuCardId that is one value higher than the highest ID available in the database. Because of the defined foreign key relation between MenuCard and Menu, adding this object will fail (code file TransactionsSample/Program.cs): private static void AddTwoRecordsWithOneTx() { Console.WriteLine(nameof(AddTwoRecordsWithOneTx)); try { using (var context = new MenusContext())
1391
Download from finelybook www.finelybook.com
{ var card = context.MenuCards.First(); var m1 = new Menu { MenuCardId = card.MenuCardId, Text = "added", Price = 99.99m }; int hightestCardId = context.MenuCards.Max(c => c.MenuCardId); var mInvalid = new Menu { MenuCardId = ++hightestCardId, Text = "invalid", Price = 999.99m }; context.Menus.AddRange(m1, mInvalid); int records = context.SaveChanges(); Console.WriteLine($"{records} records added"); } } catch (DbUpdateException ex) { Console.WriteLine($"{ex.Message}"); Console.WriteLine($"{ex?.InnerException.Message}"); } Console.WriteLine(); }
After running the application invoking the method AddTwoRecordsWithOneTx, you can verify the content of the database to see that not a single record was added. The exception message as well as the message of the inner exception gives the details: AddTwoRecordsWithOneTx trying to add one invalid record to the database, this should fail... An error occurred while updating the entries. See the inner exception for details. The MERGE statement conflicted with the FOREIGN KEY constraint "FK_Menus_MenuCards_MenuCardId". The conflict occurred in database "ProCSharpMenuCards", table "mc.MenuCards", column 'MenuCardId'. The statement has been terminated.
1392
Download from finelybook www.finelybook.com
In case writing the first record to the database should be successful even if the second record write fails, you must invoke the SaveChanges method multiple times as shown in the following code snippet. In the method AddTwoRecordsWithTwoTx, the first invocation of SaveChanges inserts the m1 Menu object, whereas the second invocation tries to insert the mInvalid Menu object (code file TransactionsSample/Program.cs): private static void AddTwoRecordsWithTwoTx() { Console.WriteLine(nameof(AddTwoRecordsWithTwoTx)); try { using (var context = new MenusContext()) { var card = context.MenuCards.First(); var m1 = new Menu { MenuCardId = card.MenuCardId, Text = "added", Price = 99.99m }; context.Menus.Add(m1); int records = context.SaveChanges(); Console.WriteLine($"{records} records added"); int hightestCardId = context.MenuCards.Max(c => c.MenuCardId); var mInvalid = new Menu { MenuCardId = ++hightestCardId, Text = "invalid", Price = 999.99m }; context.Menus.Add(mInvalid); records = context.SaveChanges(); Console.WriteLine($"{records} records added"); } } catch (DbUpdateException ex) { Console.WriteLine($"{ex.Message}"); Console.WriteLine($"{ex?.InnerException.Message}"); } Console.WriteLine(); }
1393
Download from finelybook www.finelybook.com
When you run the application, adding the first INSERT statement succeeds, but of course the second one results in a DbUpdateException. You can verify the database to see that one record was added this time: AddTwoRecordsWithTwoTx adding two records with two transactions to the database. One record should be written, the other not.... 1 records added An error occurred while updating the entries. See the inner exception for details. The INSERT statement conflicted with the FOREIGN KEY constraint "FK_Menus_MenuCards_MenuCardId". The conflict occurred in database "ProCSharpMenuCards", table "mc.MenuCards", column 'MenuCardId'. The statement has been terminated.
Creating Explicit Transactions Instead of using implicitly created transactions, you can also create them explicitly. This gives you the advantage of also having the option to roll back in case some of your business logic fails, and you can combine multiple invocations of SaveChanges within one transaction. To start a transaction that is associated with the DbContext derived class, you need to invoke the BeginTransaction method of the DatabaseFacade class that is returned from the Database property. The transaction returned implements the interface IDbContextTransaction. The SQL statements done with the associated DbContext are enlisted with the transaction. To commit or roll back, you must explicitly invoke the methods Commit or Rollback. In the sample code, Commit is done when the end of the DbContext scope is reached; Rollback is done in cases where an exception occurs (code file TransactionsSample/Program.cs): private static void TwoSaveChangesWithOneTx() { Console.WriteLine(nameof(TwoSaveChangesWithOneTxAsync)); IDbContextTransaction tx = null; try { using (var context = new MenusContext()) using (tx = await context.Database.BeginTransaction()) { var card = context.MenuCards.First();
1394
Download from finelybook www.finelybook.com
var m1 = new Menu { MenuCardId = card.MenuCardId, Text = "added with explicit tx", Price = 99.99m }; context.Menus.Add(m1); int records = await context.SaveChanges(); Console.WriteLine($"{records} records added"); int hightestCardId = context.MenuCards.Max(c => c.MenuCardId); var mInvalid = new Menu { MenuCardId = ++hightestCardId, Text = "invalid", Price = 999.99m }; context.Menus.Add(mInvalid); records = await context.SaveChanges(); Console.WriteLine($"{records} records added"); tx.Commit(); } } catch (DbUpdateException ex) { Console.WriteLine($"{ex.Message}"); Console.WriteLine($"{ex?.InnerException.Message}"); Console.WriteLine("rolling back…"); tx.Rollback(); } Console.WriteLine(); }
When you run the application, you can see that no records have been added, although the SaveChanges method was invoked multiple times. The first return of SaveChanges lists one record as being added, but this record is removed based on the Rollback later. Depending on the setting of the isolation level, the updated record can only be seen before the rollback was done within the transaction, but not outside the transaction. TwoSaveChangesWithOneTx using one explicit transaction, writing should roll back... 1 records added
1395
Download from finelybook www.finelybook.com
An error occurred while updating the entries. See the inner exception for details. The INSERT statement conflicted with the FOREIGN KEY constraint "FK_Menus_MenuCards_MenuCardId". The conflict occurred in database "ProCSharpMenuCards", table "mc.MenuCards", column 'MenuCardId'. The statement has been terminated. rolling back...
NOTE With the BeginTransaction method, you can also supply a value for the isolation level to specify the isolation requirements and locks needed in the database. Isolation levels are discussed in Chapter 25.
MIGRATIONS You can use EF Core with an existing database (known as “database first”). In many scenarios where EF Core is used, the database already exists. Updates to the database happen independently of the applications, and the application is updated after database changes are done. In such a scenario, EF Core migrations do not help much. If you create the database with the application, EF Core migrations can be very helpful. As you change your code models, the database can be updated automatically. If your customers each have their own database, and you change the database schema with newer versions of the application, updating customers with older application versions can be a challenge. EF Core migrations can solve this: With migrations you can easily upgrade from version x to version y. The current version of the database is read from the database, and migration has the information that’s needed with every step to upgrade to the newest version. You also can upgrade or downgrade to a specific version. You have different options to upgrade the database. Migration can happen directly from the application with upgrade commands. You 1396
Download from finelybook www.finelybook.com
can also update the database from the command line using a dotnet command. Another option is to create an SQL server script that can be used by the database administrator to update the database. The sample application to show migrations exists from a .NET Standard library and a .NET Core Web application. Typically, data access code is implemented within a library, and there are some additional command-line options needed to deal with this, that’s why migrations are demonstrated in such a scenario.
Preparing the Project File Let’s start with a .NET Standard 2.0 Library. This library contains Menu and MenuCard classes to define the model, MenuConfiguration and MenuCardConfiguration classes to configure the mapping for the corresponding model types by implementing the interface IEntityTypeConfiguration, and the context class MenusContext. The project file needs to be prepared to not only reference the NuGet packages Microsoft.EntityFrameworkCore and Microsoft.EntityFrameworkCore.SqlServer but also for having the EF Core tools extension with the dotnet command line, a tool reference to Microsoft.EntityFrameworkCore.Tools.Dotnet (project file MigrationsLib/MigrationsLib.csproj): netstandard2.0
1397
Download from finelybook www.finelybook.com
For using the context class from a web application, the MenusContext is implemented to use dependency injection with the constructor requiring DbContextOptions (code file MigrationsLib/MenusContext.cs): public class MenusContext : DbContext { public MenusContext(DbContextOptions options): base(options) { } public DbSet Menus { get; set; } public DbSet MenuCards { get; set; } protected override void OnModelCreating(ModelBuilder modelBuilder) { base.OnModelCreating(modelBuilder); modelBuilder.HasDefaultSchema("mc"); modelBuilder.ApplyConfiguration(new MenuCardConfiguration()); modelBuilder.ApplyConfiguration(new MenuConfiguration()); } }
Hosting Applications with ASP.NET Core MVC With a new ASP.NET Core MVC web application, dependency injection using Microsoft.Extensions.DependencyInjection is already built in to the template. All you need to do to enable migrations is to add the EF Core DB context using the extension method AddDbContext and configure SQL Server with UseSqlServer. The connection string to the database needs to be configured in the configuration file. With this, you are ready for using the command line for migrations (code file MigrationsWebApp/Startup.cs): public void ConfigureServices(IServiceCollection services) { services.AddMvc(); services.AddDbContext(options =>
1398
Download from finelybook www.finelybook.com
options.UseSqlServer( Configuration.GetConnectionString("MenusConnection"))); }
NOTE ASP.NET Core MVC is covered in Chapter 31, “ASP.NET Core MVC.” Before that you should read Chapter 20, “Dependency Injection,” and Chapter 30, “ASP.NET Core.”
Hosting .NET Core Console App If your EF Core DB context is not using dependency injection, you are ready to go and use the context class with the tools configured. In that case, the connections string can be retrieved with the OnConfiguring method of the context. Using dependency injection, the connection string is injected from the outside. ASP.NET Core has special support from the tools in accessing the Main method of the web application to get the connection string via the dependency injection container. Your Main method in console applications (and with UWP, WPF, and Xamarin applications) looks different. Here, you need to implement a factory class that returns the DB context by implementing the interface IDesignTimeDbContextFactory. A class implementing this interface is automatically detected from the .NET Core tools when accessing the assembly. The method CreateDbContext defined by this interface needs to return a configured context (code file MigrationsConsoleApp/MenusContextFactory.cs): public class MenusContextFactory : IDesignTimeDbContextFactory { private const string ConnectionString = @"server= (localdb)\mssqllocaldb;database=ProCSharpMigrations;" + "trusted_connection=true"; public MenusContext CreateDbContext(string[] args) {
1399
Download from finelybook www.finelybook.com
var optionsBuilder = new DbContextOptionsBuilder(); optionsBuilder.UseSqlServer(ConnectionString); return new MenusContext(optionsBuilder.Options); } }
The project file of the console application that is used by the .NET Core tools needs to reference the NuGet package Microsoft.EntityFrameworkCore.Design. The Design-Library is only needed for the tools and does not need to be referenced from calling apps, that’s why the PrivateAssets attribute can be set (project file MigrationsConsoleApp/MigrationsConsoleApp.csproj): Exe netcoreapp2.0
Creating Migrations With all this in place, you can create an initial migration. Using the following command, the current directory needs to be the directory of the library—the directory where the tool reference is defined. The 1400
Download from finelybook www.finelybook.com
following command creates the initial migration named InitMenus. The startup project referenced with the option --startup-project contains the initial code that contains the connection string to the server—either with the Main method generated from the default project template of the ASP.NET Core web application or an object implementing IDesignTimeContextFactory as shown in the previous section: > dotnet ef migrations add InitMenus --startup-project ../MigrationsConsoleApp
In case your project contains multiple DB contexts, you need to supply the additional option --context and supply the name of the DB context class. Running this command creates a Migrations folder with a snapshot to create the complete database schema based on the model (code file MigrationsLib/Migration/MenusContextModelSnapshot.cs): [DbContext(typeof(MenusContext))] partial class MenusContextModelSnapshot : ModelSnapshot { protected override void BuildModel(ModelBuilder modelBuilder) { #pragma warning disable 612, 618 modelBuilder .HasDefaultSchema("mc") .HasAnnotation("ProductVersion", "2.0.0-rtm-26452") .HasAnnotation("SqlServer:ValueGenerationStrategy", SqlServerValueGenerationStrategy.IdentityColumn); modelBuilder.Entity("MigrationsLib.Menu", b => { b.Property("MenuId") .ValueGeneratedOnAdd(); b.Property("MenuCardId"); b.Property("Price") .HasColumnType("Money"); b.Property("Text") .HasMaxLength(120);
1401
Download from finelybook www.finelybook.com
b.HasKey("MenuId"); b.HasIndex("MenuCardId"); b.ToTable("Menus"); }); modelBuilder.Entity("MigrationsLib.MenuCard", b => { b.Property("MenuCardId") .ValueGeneratedOnAdd(); b.Property("IsDeleted"); b.Property("LastUpdated"); b.Property("Title") .HasMaxLength(50); b.HasKey("MenuCardId"); b.ToTable("MenuCards"); }); modelBuilder.Entity("MigrationsLib.Menu", b => { b.HasOne("MigrationsLib.MenuCard", "MenuCard") .WithMany("Menus") .HasForeignKey("MenuCardId") .OnDelete(DeleteBehavior.Cascade); }); #pragma warning restore 612, 618 } }
For every migration, a migration class deriving from the base class Migration is created. This base class defines the Up and Down methods that allow applying the migration to this migration version or to step a level back (code file MigrationsLib/_InitialMenus.cs): public partial class InitialMenus : Migration { protected override void Up(MigrationBuilder migrationBuilder) { migrationBuilder.EnsureSchema(name: "mc");
1402
Download from finelybook www.finelybook.com
migrationBuilder.CreateTable( name: "MenuCards", schema: "mc", columns: table => new { MenuCardId = table.Column(type: "int", nullable: false) .Annotation("SqlServer:ValueGenerationStrategy", SqlServerValueGenerationStrategy.IdentityColumn), IsDeleted = table.Column(type: "bit", nullable: false), LastUpdated = table.Column(type: "datetime2", nullable: false), Title = table.Column(type: "nvarchar(50)", maxLength: 50, nullable: true) }, constraints: table => { table.PrimaryKey("PK_MenuCards", x => x.MenuCardId); }); migrationBuilder.CreateTable( name: "Menus", schema: "mc", columns: table => new { MenuId = table.Column(type: "int", nullable: false) .Annotation("SqlServer:ValueGenerationStrategy", SqlServerValueGenerationStrategy.IdentityColumn), MenuCardId = table.Column(type: "int", nullable: false), Price = table.Column(type: "Money", nullable: false), Text = table.Column(type: "nvarchar(120)", maxLength: 120, nullable: true) }, constraints: table => { table.PrimaryKey("PK_Menus", x => x.MenuId); table.ForeignKey( name: "FK_Menus_MenuCards_MenuCardId", column: x => x.MenuCardId, principalSchema: "mc", principalTable: "MenuCards",
1403
Download from finelybook www.finelybook.com
principalColumn: "MenuCardId", onDelete: ReferentialAction.Cascade); }); migrationBuilder.CreateIndex( name: "IX_Menus_MenuCardId", schema: "mc", table: "Menus", column: "MenuCardId"); } protected override void Down(MigrationBuilder migrationBuilder) { migrationBuilder.DropTable( name: "Menus", schema: "mc"); migrationBuilder.DropTable( name: "MenuCards", schema: "mc"); } }
After making a change to a model, such as adding Allergens to the Menu class (code file MigrationsLib/Menu.cs): public class Menu { public int MenuId { get; set; } public string Text { get; set; } public decimal Price { get; set; } public string Allergens { get; set; } public int MenuCardId { get; set; } public MenuCard MenuCard { get; set; } public override string ToString() => Text; }
Requires a new migration: > dotnet ef migrations add AddAllergens --startup-project ..\MigrationsConsoleApp
With the new migration, that snapshot class is updated to show the current state, and a new Migration type is added to add and remove the allergen column with the Up and Down methods (code file 1404
Download from finelybook www.finelybook.com
MigrationsLib/_AddAllergens.cs) public partial class AddAllergens : Migration { protected override void Up(MigrationBuilder migrationBuilder) { migrationBuilder.AddColumn( name: "Allergens", schema: "mc", table: "Menus", type: "nvarchar(max)", nullable: true); } protected override void Down(MigrationBuilder migrationBuilder) { migrationBuilder.DropColumn( name: "Allergens", schema: "mc", table: "Menus"); } }
Pay attention to build the library before applying a new migration. Otherwise, the new migration can be empty.
NOTE With every change you’re doing, you can create another migration. The new migration defines only the changes needed to get from the previous version to the new version. In case a customer’s database needs to be updated from any earlier version, the necessary migrations are invoked when migrating the database. During the development process, you might end up with many migrations that are not needed in production. You just need to keep the migrations for all the versions that might be running on the customer sites. To remove the migrations from development time, 1405
Download from finelybook www.finelybook.com
you can invoke dotnet ef migrations remove to remove the latest migration code. Then add new larger migrations that contain all the changes since the previous migration.
Applying Migrations Programmatically After you’ve configured the migrations, you can start the migration process of the database directly from the application. To do this, the console application is configured to use the dependency injection container to retrieve the DB context and then to invoke the Migrate method of the Database property (code file MigrationsConsoleApp/Program.cs): class Program { private const string ConnectionString = @"server= (localdb)\mssqllocaldb;database=ProCSharpMigrations;" + @"trusted_connection=true"; static void Main(string[] args) { RegisterServices(); var context = Container.GetService(); context.Database.Migrate(); } private static void RegisterServices() { var services = new ServiceCollection(); services.AddDbContext(options => options.UseSqlServer(ConnectionString)); Container = services.BuildServiceProvider(); } public static IServiceProvider Container { get; private set; } }
In case the database does not exist yet, the Migrate method creates the database—with the schemas defined by the model—as well as a __EFMigrationsHistory table that lists all the migrations that have been applied to the database. You cannot use the EnsureCreated method to create the database as was used earlier because this method 1406
Download from finelybook www.finelybook.com
does not apply the migration information to the database. With an existing database, the database gets updated to the current version of the migration. Programmatically you can get all the migrations available in the application with the GetMigrations method. To see all applied migrations, you can use the GetAppliedMigrations method. For all migrations that are missing in the database, use the GetPendingMigrations method.
Other Ways to Apply Migrations Instead of applying migrations programmatically, you can apply migrations using the command line: > dotnet ef database update --startup-project ../MigrationsConsoleApp
This command applies the latest migration to the database. You can also supply the name of the migration to this command to put the database into a specific version of the migration. In case you have a database administrator who needs to keep full control over the database and doesn’t allow programmatic changes, and no changes from a tool such as the .NET Core CLI command line, you can create a SQL script and hand this over or use it by yourself. The following command line creates the SQL script migrationsscript.sql from the initial database creation up to the latest migration. You can also supply specific from/to values for the range of the migrations that should be applied in the script: > dotnet ef migrations script --output migrationsscript.sql --startup-project ..\MigrationsConsoleApp
SUMMARY This chapter introduced you to the features of the EF Core. You’ve learned how the object context keeps knowledge about entities retrieved and updated, and how changes can be written to the database. You’ve also seen how migrations can be used to create and change the database schema from C# code. To define the schema, 1407
Download from finelybook www.finelybook.com
you’ve seen how the database mapping can be done using data annotations, and you’ve also seen the fluent API that offers more features compared to the annotations. You’ve seen possibilities for reacting to conflicts when multiple users work on the same record, as well as using transactions implicitly or explicitly for more transactional control. New features of EF Core 2.0, such as compiled queries, global query filters, table splitting, and owned entities, have been covered with great information to get you started. The next chapter gets into globalization and localization features of .NET, using culture specific date, time, and number formats, as well as resources to define text for different languages.
1408
Download from finelybook www.finelybook.com
27 Localization WHAT’S IN THIS CHAPTER? Formatting of numbers and dates Using resources for localized content Localizing ASP.NET Core Web Applications Localizing Universal Windows apps
WROX.COM CODE DOWNLOADS FOR THIS CHAPTER The Wrox.com code downloads for this chapter are found at www.wrox.com on the Download Code tab. The source code is also available in the GitHub repository https://github.com/ProfessionalCSharp/ProfessionalCSharp7 in the folder Localization. The code for this chapter is divided into the following major examples: NumberAndDateFormatting SortingDemo CreateResource UWPCultureDemo ResourcesDemo 1409
Download from finelybook www.finelybook.com
WebApplicationSample ASPNETCoreMVCSample UWPLocalization
GLOBAL MARKETS NASA’s Mars Climate Orbiter was lost on September 23, 1999, at a cost of $125 million, because one engineering team used metric units while another one used inches for a key spacecraft operation. When writing applications for international distribution, different cultures and regions must be kept in mind. Different cultures have diverging calendars and use different number and date formats; and sorting strings may lead to various results because the order of A–Z is defined differently based on the culture. To make usable applications for global markets, you must globalize and localize them. This chapter covers the globalization and localization of .NET applications. Globalization is about internationalizing applications: preparing applications for international markets. With globalization, the application supports number and date formats that vary according to culture, calendars, and so on. Localization is about translating applications for specific cultures. For translations of strings, you can use resources such as .NET resources or WPF resource dictionaries. .NET supports the globalization and localization of Windows and web applications. To globalize an application, you can use classes from the namespace System.Globalization; to localize an application, you can use resources supported by the namespace System.Resources.
NAMESPACE SYSTEM.GLOBALIZATION The System.Globalization namespace holds all the culture and region classes necessary to support different date formats, different number formats, and even different calendars that are represented in classes such as GregorianCalendar, HebrewCalendar, JapaneseCalendar, and so on. By using these classes, you can display different representations 1410
Download from finelybook www.finelybook.com
according to the user’s locale. This section looks at the following issues and considerations when using the System.Globalization namespace: Unicode issues Cultures and regions An example showing all cultures and their characteristics Sorting
Unicode Issues A Unicode character has 16 bits, so there is room for 65,536 characters. Is this enough for all languages currently used in information technology? In the case of the Chinese language, for example, more than 80,000 characters are needed. Fortunately, Unicode has been designed to deal with this issue. With Unicode you must differentiate between base characters and combining characters. You can add multiple combining characters to a base character to build a single display character or a text element. Take, for example, the Icelandic character Ogonek. Ogonek can be combined by using the base character 0x006F (Latin small letter o), and the combining characters 0x0328 (combining Ogonek), and 0x0304 (combining Macron), as shown in Figure 27-1. Combining characters are defined within ranges from 0x0300 to 0x0345. For American and European markets, predefined characters exist to facilitate dealing with special characters. The character Ogonek is also defined by the predefined character 0x01ED.
FIGURE 27-1 For Asian markets, where more than 80,000 characters are necessary for Chinese alone, such predefined characters do not exist. In Asian languages, you always have to deal with combining characters. The 1411
Download from finelybook www.finelybook.com
problem is getting the right number of display characters or text elements and getting to the base characters instead of the combined characters. The namespace System.Globalization offers the class StringInfo, which you can use to deal with this issue. The following table lists the static methods of the class StringInfo that help in dealing with combined characters. METHOD
DESCRIPTION GetNextTextElement Returns the first text element (base character and all combining characters) of a specified string GetTextElementEnumerator Returns a TextElementEnumerator object that allows iterating all text elements of a string ParseCombiningCharacters Returns an integer array referencing all base characters of a string
NOTE A single display character can contain multiple Unicode characters. To address this issue, when you write applications that support international markets, don’t use the data type char; use string instead. A string can hold a text element that contains both base characters and combining characters, whereas a char cannot.
Cultures and Regions The world is divided into multiple cultures and regions, and applications must be aware of these cultural and regional differences. A culture is a set of preferences based on a user’s language and cultural habits. RFC 4646 (http://www.ietf.org/rfc/rfc4646.txt) defines culture names that are used worldwide, depending on a language and a country or region. Some examples are en-AU, en-CA, 1412
Download from finelybook www.finelybook.com
en-GB, and en-US for the English language in Australia, Canada, the United Kingdom, and the United States, respectively. Possibly the most important class in the System.Globalization namespace is CultureInfo. CultureInfo represents a culture and defines calendars, formatting of numbers and dates, and sorting strings used with the culture. The class RegionInfo represents regional settings (such as the currency) and indicates whether the region uses the metric system. Some regions can use multiple languages. One example is the region of Spain, which has Basque (eu-ES), Catalan (ca-ES), Spanish (es-ES), and Galician (gl-ES) cultures. Like one region can have multiple languages, one language can be spoken in different regions; for example, Spanish is spoken in Mexico, Spain, Guatemala, Argentina, and Peru, to name only a few countries. Later in this chapter is a sample application that demonstrates these characteristics of cultures and regions. Specific, Neutral, and Invariant Cultures When using cultures in the .NET Framework, you must differentiate between three types: specific, neutral, and invariant cultures. A specific culture is associated with a real, existing culture defined with RFC 4646, as described in the preceding section. A specific culture can be mapped to a neutral culture. For example, de is the neutral culture of the specific cultures de-AT, de-DE, de-CH, and others. de is shorthand for the German language (Deutsch); AT, DE, and CH are shorthand for the countries Austria, Germany, and Switzerland, respectively. When translating applications, it is typically not necessary to do translations for every region; not much difference exists between the German language in the countries Austria and Germany. Instead of using specific cultures, you can use a neutral culture to localize applications. The invariant culture is independent of a real culture. When storing formatted numbers or dates in files, or sending them across a network to a server, using a culture that is independent of any user settings is 1413
Download from finelybook www.finelybook.com
the best option. Figure 27-2 shows how the culture types relate to each other.
FIGURE 27-2 Current Culture and CurrentUICulture When you set cultures, you need to differentiate between a culture for the user interface and a culture for the number and date formats. Cultures are associated with a thread, and with these two culture types, two culture settings can be applied to a thread. The CultureInfo class has the static properties CurrentCulture and CurrentUICulture. The property CurrentCulture is for setting the culture that is used with formatting and sort options, whereas the property CurrentUICulture is used for the language of the user interface. Users can install additional languages to Windows 10 by selecting Time & Language in the Windows settings, and from there Region & Language (see Figure 27-3). The language configured as default is the current UI culture.
1414
Download from finelybook www.finelybook.com
FIGURE 27-3 To change the current culture, you use the Additional Date, Time, & Regional Settings link in the dialog shown in Figure 27-3. From there, you click the Change Date, Time, or Number Formats option to see the dialog shown in Figure 27-4. The language setting for the format influences the current culture. It is also possible to change the defaults for the number format, the time format, and the date format independent of the culture.
1415
Download from finelybook www.finelybook.com
FIGURE 27-4 These settings provide a very good default, and in many cases, you won’t need to change the default behavior. If the culture should be changed, you can easily do this programmatically by changing both cultures to, say, the Spanish culture, as shown in this code snippet (using the namespace System.Globalization): var ci = new CultureInfo("es-ES");
1416
Download from finelybook www.finelybook.com
CultureInfo.CurrentCulture = ci; CultureInfo.CurrentUICulture = ci;
Now that you know how to set the culture, the following sections discuss number and date formatting, which are influenced by the CurrentCulture setting. Number Formatting The number structures Int16, Int32, Int64, and so on in the System namespace have an overloaded ToString method. You can use this method to create a different representation of the number, depending on the locale. For the Int32 structure, ToString is overloaded with the following four versions: public public public public
string string string string
ToString(); ToString(IFormatProvider); ToString(string); ToString(string, IFormatProvider);
without arguments returns a string without format options. You can also pass a string and a class that implements IFormatProvider. ToString
The string specifies the format of the representation. The format can be a standard numeric formatting string or a picture numeric formatting string. For standard numeric formatting, strings are predefined where C specifies the currency notation, D creates a decimal output, E creates scientific output, F creates fixed-point output, G creates general output, N creates number output, and X creates hexadecimal output. With a picture numeric formatting string, it is possible to specify the number of digits, section and group separators, percent notation, and so on. The picture numeric format string ###,### means two three-digit blocks separated by a group separator. The IFormatProvider interface is implemented by the NumberFormatInfo, DateTimeFormatInfo, and CultureInfo classes. This interface defines a single method, GetFormat, that returns a format object. You can use NumberFormatInfo to define custom formats for numbers. With the default constructor of NumberFormatInfo, a culture1417
Download from finelybook www.finelybook.com
independent or invariant object is created. Using the properties of NumberFormatInfo, it is possible to change all the formatting options, such as a positive sign, a percent symbol, a number group separator, a currency symbol, and a lot more. A read-only, culture-independent NumberFormatInfo object is returned from the static property InvariantInfo. A NumberFormatInfo object in which the format values are based on the CultureInfo of the current thread is returned from the static property CurrentInfo. The sample code NumberAndDateFormatting makes use of the following namespaces: System System.Globalization
To create the next example, you can start with a Console App (.NET Core) project. In this code, the first example shows a number displayed in the format of the current culture (here: English-US, the setting of the operating system). The second example uses the ToString method with the IFormatProvider argument. CultureInfo implements IFormatProvider, so create a CultureInfo object using the French culture. The third example changes the current culture. The culture is changed to German by using the property CurrentCulture of the CultureInfo instance (code file NumberAndDateFormatting\Program.cs): public static void NumberFormatDemo() { int val = 1234567890; // culture of the current thread Console.WriteLine(val.ToString("N")); // use IFormatProvider Console.WriteLine(val.ToString("N", new CultureInfo("frFR"))); // change the current culture CultureInfo.CurrentCulture = new CultureInfo("de-DE"); Console.WriteLine(val.ToString("N")); }
You can compare the following different output for U.S. English, French, and German, respectively, shown here:
1418
Download from finelybook www.finelybook.com
1,234,567,890.00 1 234 567 890,00 1.234.567.890,00
Date Formatting The same support for numbers is available for dates. The DateTime structure has some overloads of the ToString method for date-tostring conversions. You can pass a string format and assign a different culture: public public public public
string string string string
ToString(); ToString(IFormatProvider); ToString(string); ToString(string, IFormatProvider);
With the string argument of the ToString method, you can specify a predefined format character or a custom format string for converting the date to a string. The class DateTimeFormatInfo specifies the possible values. With DateTimeFormatInfo, the case of the format strings has a different meaning. D defines a long date format; d defines a short date format. Other examples of possible formats are ddd for the abbreviated day of the week, dddd for the full day of the week, yyyy for the year, T for a long time, and t for a short time. With the IFormatProvider argument, you can specify the culture. Using an overloaded method without the IFormatProvider argument implies that the current culture is used (code file NumberAndDateFormatting/Program.cs): public static void DateFormatDemo() { var d = new DateTime(2017, 09, 17); // current culture Console.WriteLine(d.ToLongDateString()); // use IFormatProvider Console.WriteLine(d.ToString("D", new CultureInfo("frFR"))); // use current culture Console.WriteLine($"{CultureInfo.CurrentCulture}: {d:D}"); CultureInfo.CurrentCulture = new CultureInfo("es-ES"); Console.WriteLine($"{CultureInfo.CurrentCulture}: {d:D}"); }
The output of this example program shows ToLongDateString with the 1419
Download from finelybook www.finelybook.com
current culture of the thread, a French version where a CultureInfo instance is passed to the ToString method, and a Spanish version where the CurrentCulture property of the thread is changed to es-ES: Sunday, September 17, 2017 dimanche 17 septembre 2017 en-US: Sunday, September 17, 2017 es-ES: domingo, 17 de septiembre de 2017
Cultures in Action To see all cultures in action, you can use a sample UWP app that lists all cultures and demonstrates different characteristics of culture properties. On the left side of the UI, a tree view is used to display all the cultures. On the right side is a user control that displays relevant information about the selected culture and region. Figure 27-5 shows the user interface of the user control in the Visual Studio 2017 Designer.
FIGURE 27-5
NOTE 1420
Download from finelybook www.finelybook.com
The sample code makes use of a tree control. The Windows 10 Runtime does not include a tree view control with the Fall Creators Update 2017, but one is expected later. Several thirdparty tree controls are available for UWP that you could use. Microsoft’s Windows Universal Samples at https://github.com/Microsoft/Windows-universal-samples also include a tree view control. This control is used with this UWP sample. Because this control is written with C++ code, you need to install the C++ component with the Universal Windows Platform development workload. During initialization of the application, all available cultures are added to the TreeView control that is placed on the left side of the application. This initialization happens in a view-model in the method SetupCultures, which is called in the constructor of the CulturesViewModel class (code file UWPCultureDemo/CulturesViewModel.cs): public CulturesViewModel() { SetupCultures(); }
For the data that is shown in the user interface, the custom class CultureData is created. This class can be bound to a TreeView control, as it has a property SubCultures that contains a list of CultureData. Therefore, the TreeView control enables walking through this tree. Other than the subcultures, CultureData contains the CultureInfo type and sample values for a number, a date, and a time. The number returns a string in the number format for the specific culture, and the date and time return strings in the specific culture formats as well. CultureData contains a RegionInfo class to display regions. With some neutral cultures (for example, English), creating a RegionInfo throws an exception, as there are regions only with specific cultures. However, with other neutral cultures (for example, German), creating a RegionInfo succeeds and is mapped to a default region. The exception thrown here is handled (code file UWPCultureDemo/CultureData.cs): public class CultureData
1421
Download from finelybook www.finelybook.com
{ public CultureInfo CultureInfo { get; set; } public List SubCultures { get; set; } double numberSample = 9876543.21; public string NumberSample => numberSample.ToString("N", CultureInfo); public string DateSample => DateTime.Today.ToString("D", CultureInfo); public string TimeSample => DateTime.Now.ToString("T", CultureInfo); public RegionInfo RegionInfo { get { RegionInfo ri; try { ri = new RegionInfo(CultureInfo.Name); } catch (ArgumentException) { // with some neutral cultures regions are not available return null; } return ri; } } }
In the method SetupCultures, you get all cultures from the static method CultureInfo.GetCultures. Passing CultureTypes.AllCultures to this method returns an unsorted array of all available cultures. The result is sorted by the name of the culture. With the result of the sorted cultures, a collection of CultureData objects is created and the CultureInfo and SubCultures properties are assigned. With the result of this, a dictionary is created to enable fast access to the culture name. For the data that should be shown in the UI, a list of CultureData objects is created that contains all the root cultures for the tree view after the foreach statement is completed. Root cultures can be verified to determine whether they have the invariant culture as their parent. The invariant culture has the Locale Identifier (LCID) 127. Every 1422
Download from finelybook www.finelybook.com
culture has its own unique identifier that can be used for a fast verification. In the code snippet, root cultures are added to the rootCultures collection within the block of the if statement. If a culture has the invariant culture as its parent, it is a root culture. If the culture does not have a parent culture, it is added to the root nodes of the tree. To find parent cultures, all cultures are remembered inside a dictionary. (See Chapter 10, “Collections,” for more information about dictionaries, and Chapter 8, “Delegates, Lambdas, and Events,” for details about lambda expressions.) If the culture iterated is not a root culture, it is added to the SubCultures collection of the parent culture. The parent culture can be quickly found by using the dictionary. In the last step, the root cultures are made available to the UI by assigning them to the RootCultures property (code file UWPCultureDemo/CulturesViewModel.cs): private void SetupCultures() { var cultureDataDict = CultureInfo.GetCultures(CultureTypes.AllCultures) .OrderBy(c => c.Name) .Select(c => new CultureData { CultureInfo = c, SubCultures = new List() }) .ToDictionary(c => c.CultureInfo.Name); var rootCultures = new List(); foreach (var cd in cultureDataDict.Values) { if (cd.CultureInfo.Parent.LCID == 127) { rootCultures.Add(cd); } else { if (cultureDataDict.TryGetValue(cd.CultureInfo.Parent.Name, out CultureData parentCultureData)) { parentCultureData.SubCultures.Add(cd); } else
1423
Download from finelybook www.finelybook.com
{ throw new InvalidOperationException( "parent culture not found"); } } } foreach (var rootCulture in rootCultures.OrderBy( cd => cd.CultureInfo.EnglishName)) { RootCultures.Add(rootCulture); } } public IList RootCultures { get; } = new List();
Now let’s get into the XAML code for the display. A TreeView is used to display all the cultures. For the display of items inside the TreeView, an item template is used. This template uses a TextBlock that is bound to the EnglishName property of the CultureInfo class (code file UWPCultureDemo/MainPage.xaml):
1424
Download from finelybook www.finelybook.com
In the code-behind file, the TreeView is initialized by accessing the CultureData objects from the view-model. Using the CultureData objects, TreeNode objects are created for the TreeView. The TreeNode class defines a Data property where the CultureData object is assigned. The Add method of the TreeNode allows adding child objects. Child objects are added by recursively invoking the local function AddSubNodes (code file UWPCultureDemo/MainPage.xaml.cs): protected override void OnNavigatedTo(NavigationEventArgs e) { void AddSubNodes(TreeNode parent) { if (parent.Data is CultureData cd && cd.SubCultures != null) { foreach (var culture in cd.SubCultures) { var node = new TreeNode { Data = culture, ParentNode = parent }; parent.Add(node); foreach (var subCulture in culture.SubCultures) { AddSubNodes(node); } } } } base.OnNavigatedTo(e); var rootNodes = ViewModel.RootCultures.Select(cd => new TreeNode { Data = cd
1425
Download from finelybook www.finelybook.com
}); foreach (var node in rootNodes) { treeView1.RootNode.Add(node); AddSubNodes(node); } }
When the user selects a node inside the tree, the handler of the SelectedItemChanged event of the TreeView is called. In the following code snippet, the handler is implemented in the method OnSelectionChanged. With the implementation, the SelectedCulture property of the associated ViewModel is set to the selected CultureData object (code file UWPCultureDemo/MainPage.xaml.cs): private void OnSelectionChanged(object sender, SelectionChangedEventArgs e) { ViewModel.SelectedCulture = (treeView1.SelectedItems?.FirstOrDefault() as TreeNode)?.Data as CultureData; }
To display the values of the selected item, you use several TextBlock controls. These bind to the CultureInfo property of the CultureData class and in turn to properties of the CultureInfo type that is returned from CultureInfo, such as Name, IsNeutralCulture, EnglishName, NativeName, and so on. To convert a Boolean value, as returned from the IsNeutralCulture property, to a Visibility enumeration value, and to display calendar names, you use converters (XAML file UWPCultureDemo/CultureDetailUC.xaml):
1426
Download from finelybook www.finelybook.com
To display the calendar text, you use an object that implements IValueConverter. Here is the implementation of the Convert method in the class CalendarTypeToCalendarInformationConverter. The implementation uses the class name and calendar type name to return a useful value for the calendar (code file UWPCultureDemo/Converters/CalendarTypeToCalendarInformationConverter.cs public object Convert(object value, Type targetType, object parameter, string language) { if (value is Calendar cal) { var calText = new StringBuilder(50); calText.Append(cal.ToString()); calText.Remove(0, 21); // remove the namespace
1427
Download from finelybook www.finelybook.com
calText.Replace("Calendar", ""); if (cal is GregorianCalendar gregCal) { calText.Append($" {gregCal.CalendarType}"); } return calText.ToString(); } else { return null; } }
The CultureData class contains properties to display sample information for number, date, and time formats. These properties are bound with the following TextBlock elements (XAML file UWPCultureDemo/CultureDetailUC.xaml):
The information about the region is shown with the last part of the XAML code. The complete area hidden if the RegionInfo is not available. The TextBlock elements bind the DisplayName, CurrencySymbol, ISOCurrencySymbol, and IsMetric properties of the RegionInfo type:
When you start the application, you can see all available cultures in the tree view, and selecting a culture lists its characteristics, as shown in Figure 27-6.
FIGURE 27-6
1429
Download from finelybook www.finelybook.com
Sorting The sample SortingDemo makes use of the following namespaces: System System.Collections System.Collections.Generic System.Globalization
Sorting strings varies according to the culture. The algorithms that compare strings for sorting by default are culture-specific. For example, in Finnish the characters V and W are treated the same. To demonstrate this behavior with a Finnish sort, the following code creates a small sample console application in which some U.S. states are stored unsorted inside an array. The method DisplayNames shown here is used to display all elements of an array or a collection on the console (code file SortingDemo/Program.cs): public static void DisplayNames(string title, IEnumerable names) { Console.WriteLine(title); Console.WriteLine(string.Join("-", names)); Console.WriteLine(); }
In the Main method, after creating the array with some of the U.S. states, the thread property CurrentCulture is set to the Finnish culture so that the following Array.Sort uses the Finnish sort order. Calling the method DisplayNames displays all the states on the console: public static void Main() { string[] names = {"Alabama", "Texas", "Washington", "Virginia", "Wisconsin", "Wyoming", "Kentucky", "Missouri", "Utah", "Hawaii","Kansas", "Louisiana", "Alaska", "Arizona"}; CultureInfo.CurrentCulture = new CultureInfo("fi-FI"); Array.Sort(names); DisplayNames("Sorted using the Finnish culture", names); //... }
1430
Download from finelybook www.finelybook.com
After the first display of some U.S. states in the Finnish sort order, the array is sorted once again. If you want a sort that is independent of the users’ culture, which would be useful when the sorted array is sent to a server or stored somewhere, you can use the invariant culture. You can do this by passing a second argument to Array.Sort. The Sort method expects an object implementing IComparer with the second argument. The Comparer class from the System.Collections namespace implements IComparer. Comparer.DefaultInvariant returns a Comparer object that uses the invariant culture for comparing the array values for a culture-independent sort: public static void Main() { //... // sort using the invariant culture Array.Sort(names, System.Collections.Comparer.DefaultInvariant); DisplayNames("Sorted using the invariant culture", names); }
The program output shows different sort results with the Finnish and culture-independent cultures—Virginia is before Washington when using the invariant sort order, and vice versa when using Finnish: Sorted using the Finnish culture Alabama-Alaska-Arizona-Hawaii-Kansas-Kentucky-LouisianaMissouri-Texas-UtahWashington-Virginia-Wisconsin-Wyoming Sorted using the invariant culture Alabama-Alaska-Arizona-Hawaii-Kansas-Kentucky-LouisianaMissouri-Texas-UtahVirginia-Washington-Wisconsin-Wyoming
NOTE If sorting a collection should be independent of a culture, the collection must be sorted with the invariant culture. This can be particularly useful when sending the sort result to a server or storing it inside a file. To display a sorted collection to the user, 1431
Download from finelybook www.finelybook.com
it’s best to sort it with the user’s culture. In addition to a locale-dependent formatting and measurement system, text and pictures may differ depending on the culture. This is where resources come into play.
RESOURCES You can put resources such as pictures or string tables into resource files or satellite assemblies. Such resources can be very helpful when localizing applications, and .NET has built-in support to search for localized resources. Before you see how to use resources to localize applications, the following sections explain how you can create and read resources without looking at language aspects.
Resource Readers and Writers With .NET Core, the resource readers and writers are limited compared to the full .NET version (at the time of this writing). However, for many scenarios—including multiplatform support—what is needed is available. The CreateResource sample application creates a resource file dynamically and reads resources from the file. This sample makes use of the following namespaces: System System.Collections System.IO System.Resources
enables you to create binary resource files. The constructor of the writer requires a Stream that is created using the File class. You add resources by using the AddResource method (code file CreateResource/Program.cs): ResourceWriter
private const string ResourceFile = "Demo.resources"; public static void CreateResource() { FileStream stream = File.OpenWrite(ResourceFile); using (var writer = new ResourceWriter(stream))
1432
Download from finelybook www.finelybook.com
{ writer.AddResource("Title", "Professional C#"); writer.AddResource("Author", "Christian Nagel"); writer.AddResource("Publisher", "Wrox Press"); } }
To read the resources of a binary resource file, you can use ResourceReader. The GetEnumerator method of the reader returns an IDictionaryEnumerator that is used within the following foreach statement to access the key and value of the resource: public static void ReadResource() { FileStream stream = File.OpenRead(ResourceFile); using (var reader = new ResourceReader(stream)) { foreach (DictionaryEntry resource in reader) { Console.WriteLine($"{resource.Key} {resource.Value}"); } } }
Running the application returns the keys and values that have been written to the binary resource file. As shown in the next section, you can also use a command-line tool—the Resource File Generator (resgen)—to create and convert resource files.
Using the Resource File Generator Resource files can contain items such as pictures and string tables. A resource file is created by using either a normal text file or a .resX file that uses XML. This section starts with a simple text file. You can create a resource that embeds a string table by using a normal text file. The text file assigns strings to keys. The key is the name that can be used from a program to get the value. Spaces are allowed in both keys and values. This example shows a simple string table in the file Wrox.ProCSharp.Localization.MyResources.txt: Title = Professional C#
1433
Download from finelybook www.finelybook.com
Chapter = Localization Author = Christian Nagel Publisher = Wrox Press
NOTE When saving text files with Unicode characters, you must save the file with the proper encoding. To select the UTF8 encoding, use the Save As dialog. You can use the Resource File Generator (Resgen.exe) utility to create a resource file out of Wrox .ProCSharp.Localization.MyResources.txt. Typing the line resgen Wrox.ProCSharp.Localization.MyResources.txt
creates the file Wrox.ProCSharp.Localization.MyResources.resources. The resulting resource file can be either added to an assembly as an external file or embedded into the DLL or EXE. Resgen also supports the creation of XML-based .resX resource files. One easy way to build an XML file is by using Resgen itself: resgen Wrox.ProCSharp.Localization.MyResources.txt Wrox.ProCSharp.Localization.MyResources.resX
This command creates the XML resource file Wrox.ProCSharp.LocalizationMyResources.resX. Resgen
supports strongly typed resources. A strongly typed resource is represented by a class that accesses the resource. You can create the class with the /str option of the Resgen utility: resgen /str:C#,Wrox.ProCSharp.Localization,MyResources,MyResources.cs Wrox.ProCSharp.Localization.MyResources.resX
With the /str option, the language, namespace, class name, and filename for the source code are defined, in that order.
1434
Download from finelybook www.finelybook.com
Using Resource Files with ResourceManager By default, resource files are embedded in the assembly. You can customize this—for example, by removing resources from the assembly by adding an EmbeddedResource element with the Remove attribute to an ItemGroup in the project file as shown:
To see how resource files can be loaded with the ResourceManager class, create a Console App (.NET Core) and name it ResourcesDemo. This sample makes use of the following namespaces: System System.Globalization System.Reflection System.Resources
Create a Resources folder and add a Messages.resx file to this folder. The Messages.resx file is filled with a key and value for English-US content—for example, the key GoodMorning and the value Good Morning! This will be the default language. You can add other language resource files with the naming convention to add the culture to the resource file, for example, Messages.de.resx for German languages and Messages.de-AT.resx for Austrian differences. To access the embedded resource, use the ResourceManager class from the System.Resources namespace and the System.Resources.ResourceManager NuGet package. When you’re instantiating the ResourceManager, one overload of the constructor needs the name of the resource and the assembly. The namespace of the application is ResourcesDemo; the resource file is in the folder Resources, which defines the sub-namespace Resources, and it has the name Messages.resx. This defines the name ResourcesDemo.Resources.Messages. You can retrieve the assembly of the resource using the GetTypeInfo method of the Program type, which defines an Assembly property. Using the resources instance, the GetString method returns the value of the key passed from the resource file. Passing a culture such as de-AT for the second argument 1435
Download from finelybook www.finelybook.com
looks for resources in the de-AT resource file. If it’s not found there, the neutral language for de is taken, the de resource file. If it’s not found there, the default resource file without culture naming succeeds to return the value (code file ResourcesDemo/Program.cs): var resources = new ResourceManager("ResourcesDemo.Resources.Messages", typeof(Program).GetTypeInfo().Assembly); string goodMorning = resources.GetString("GoodMorning", new CultureInfo("de-AT")); Console.WriteLine(goodMorning);
Another overload of the ResourceManager constructor just requires the type of the class. This ResourceManager looks for a resource file named Program.resx: var programResources = new ResourceManager(typeof(Program)); Console.WriteLine(programResources.GetString("Resource1"));
The System.Resources Namespace Before moving on to the next example, this section provides a review of the classes contained in the System.Resources namespace that deal with resources: ResourceManager—Can
be used to get resources for the current culture from assemblies or resource files. Using the ResourceManager, you can also get a ResourceSet for a culture. ResourceSet—Represents the resources for a culture. When a ResourceSet instance is created, it enumerates over a class, implementing the interface IResourceReader, and it stores all resources in a Hashtable. IResourceReader—Used from the ResourceSet to enumerate resources. The class ResourceReader implements this interface. ResourceWriter—Used
to create a resource file. ResourceWriter implements the interface IResourceWriter.
LOCALIZATION WITH ASP.NET CORE 1436
Download from finelybook www.finelybook.com
NOTE For using localization with ASP.NET Core, you need to know about both cultures and resources that are discussed in this chapter as well as creating ASP.NET Core applications. In case you didn’t create ASP.NET Core web applications with .NET Core before, you should read Chapter 30, “ASP.NET Core,” before continuing with this part of the chapter. For localization of ASP.NET Core web applications, you can use the CultureInfo class and resources like what you’ve seen earlier in this chapter, but there are some additional issues that you need to resolve. Setting the culture for the complete application doesn’t fulfill usual needs because users are coming from different cultures. So, it’s necessary to set the culture with every request to the server. How do you know about the culture of the user? There are different options. The browser sends preferred languages within the HTTP header with every request. This information from the browser can come from browser settings or when the browser itself checks the installed languages. Another option is to define URL parameters or use different domain names for different languages. You can use different domain names in some scenarios, such as www.cninnovation.com for an English version of the site and www.cninnovation.de for a German version. But what about www.cninnovation.ch? This should be offered both in German and French and probably Italian. URL parameters such as www.cninnovation.com/culture=de could help here. Using www.cninnovation.com/de works like the URL parameter by defining a specific route. Another option is to allow the user to select the language and define a cookie to remember this option. All these scenarios are supported out of the box by ASP.NET Core.
Registering Localization Services To start seeing this in action, create a new ASP.NET Core Web 1437
Download from finelybook www.finelybook.com
Application using an Empty ASP.NET Core project template. This sample project makes use of the following dependency and namespaces: Dependency Microsoft.AspNetCore.All Namespaces Microsoft.AspNetCore Microsoft.AspNetCore.Builder Microsoft.AspNetCore.Hosting Microsoft.AspNetCore.Http Microsoft.AspNetCore.Localization Microsoft.Extensions.DependencyInjection Microsoft.Extensions.Localization System System.Globalization System.Text.Encodings.Web
Within the Startup class, you need to invoke the AddLocalization extension method to register services for localization (code file WebApplicationSample/Startup.cs): public void ConfigureServices(IServiceCollection services) { services.AddLocalization(options => options.ResourcesPath = "CustomResources"); }
The AddLocalization method registers services for the interfaces IStringLocalizerFactory and IStringLocalizer. With the registration code, the type ResourceManagerStringLocalizerFactory is registered as a singleton, and StringLocalizer is registered with transient lifetime. The class ResourceManagerStringLocalizerFactory is a factory for 1438
Download from finelybook www.finelybook.com
ResourceManagerStringLocalizer. This class in turn makes use of ResourceManager class shown earlier for retrieving strings from
the
resource files.
Injecting Localization Services After localization is added to the service collection, you can request localization in the Configure method of the Startup class. The UseRequestLocalization method defines an overload where you can pass RequestLocalizationOptions. The RequestLocalizationOptions enables you to customize what cultures should be supported and to set the default culture. Here, the DefaultRequestCulture is set to en-US. The class RequestCulture is just a small wrapper around the culture for formatting—which is accessible via the Culture property—and the culture for using the resources (UICulture property). The sample code accepts en-US, en, de-AT, and de cultures for SupportedCultures and SupportedUICultures (code file WebApplicationSample/Startup.cs): public void Configure(IApplicationBuilder app, IHostingEnvironment env, IStringLocalizer sr) { //... var supportedCultures = new[] { new CultureInfo("en-US"), new CultureInfo("en"), new CultureInfo("de-AT"), new CultureInfo("de") }; var options = new RequestLocalizationOptions { DefaultRequestCulture = new RequestCulture(new CultureInfo("en-US")), SupportedCultures = supportedCultures, SupportedUICultures = supportedCultures }; app.UseRequestLocalization(options); //... }
With the RequestLocalizationOptions settings, the property 1439
Download from finelybook www.finelybook.com
RequestCultureProviders is also set. By default, three configured: QueryStringRequestCultureProvider, CookieRequestCultureProvider, and AcceptLanguageHeaderRequestCultureProvider.
providers are
Culture Providers Let’s get into more details on these culture providers. The QueryStringRequestCultureProvider uses the query string to retrieve the culture. By default, the query parameters culture and ui-culture are used with this provider, as shown with this URL: http://localhost:5000/?culture=de&ui-culture=en-US http://localhost:5000/?culture=de&ui-culture=en-US
You can also change the query parameters by setting the QueryStringKey and UIQueryStringKey properties of the QueryStringRequestCultureProvider. The CookieRequestCultureProvider defines the cookie named ASPNET_CULTURE (which can be set using the CookieName property). The values from this cookie are retrieved to set the culture. To create a cookie and send it to the client, you can use the static method MakeCookieValue to create a cookie from a RequestCulture and send it to the client. The CookieRequestCultureProvider uses the static method ParseCookieValue to get a RequestCulture. With the third option for culture settings, you can use the HTTP header information that is sent by the browser. The HTTP header that is sent looks like this: Accept-Language: en-us, de-at;q=0.8, it;q=0.7
The AcceptLanguageHeaderRequestCultureProvider uses this information to set the culture. You use up to three language values in the order as defined by the quality value to find a first match with the supported cultures. The following code snippet now uses the request culture to generate HTML output. First, you access the requested culture using the IRequestCultureFeature contract. The RequestCultureFeature that 1440
Download from finelybook www.finelybook.com
implements the interface IRequestCultureFeature uses the first culture provider that matches the culture setting. If a URL defines a query string that matches the culture parameter, the QueryStringRequestCultureProvider is used to return the requested culture. If the URL does not match, but a cookie with the name ASPNET_CULTURE is received, the CookieRequestCultureProvider is used, and otherwise the AcceptLanguageRequestCultureProvider. The resulting culture that is used by the user is written to the response stream using properties of the returned RequestCulture. Then, today’s date is written to the stream using the current culture. The variable of type IStringLocalizer used here needs some more examination that is discussed next (code file WebApplicationSample/Startup.cs): public void Configure(IApplicationBuilder app, IHostingEnvironment env, IStringLocalizer sr) { //... app.Run(async context => { IRequestCultureFeature requestCultureFeature = context.Features.Get(); RequestCulture requestCulture = requestCultureFeature.RequestCulture; var today = DateTime.Today; await context.Response.WriteAsync("Sample Localization"); await context.Response.WriteAsync( $"{requestCulture.Culture} {requestCulture.UICulture}"); await context.Response.WriteAsync($"{today:D} "); //... }); }
Using Resources from ASP.NET Core Resource files, as you’ve seen in the Resources section in this chapter, can be used with ASP.NET Core. The sample project adds the CustomResources folder and the file Startup.resx within. Localized versions for the resources are offered with Startup.de.resx and 1441
Download from finelybook www.finelybook.com
Startup.de-AT.resx.
The folder name where the resources are found is defined with the options when injecting the localization service (code file WebApplicationSample/Startup.cs): public void ConfigureServices(IServiceCollection services) { services.AddLocalization( options => options.ResourcesPath = "CustomResources"); }
With dependency injection, IStringLocalizer is injected as a parameter of the Configure method. The generic type Startup parameter is used to find a resource file with the same name in the resources directory; this matches with Startup.resx. public void Configure(IApplicationBuilder app, IHostingEnvironment env, IStringLocalizer sr) { //... }
NOTE Read more about dependency injection in Chapter 20, “Dependency Injection.” The following code snippet makes use of the sr variable of type IStringLocalizer to access a resource named message1 using an indexer and with the GetString method. The resource message2 uses string format placeholders, which are injected with an overload of the GetString method where any number of parameters can be passed to: public void Configure(IApplicationBuilder app, IHostingEnvironment env, IStringLocalizer sr) { //... app.Run(async context =>
1442
Download from finelybook www.finelybook.com
{ //... await context.Response.WriteAsync( $"{HtmlEncoder.Default.Encode(sr["message1"])} "); await context.Response.WriteAsync( $" {HtmlEncoder.Default.Encode(sr.GetString("message1")}) "); await context.Response.WriteAsync( $" {HtmlEncoder.Default.Encode(sr.GetString("message2", requestCulture.Culture, requestCulture.UICulture))} "); }); }
NOTE With the sample code, the HtmlEncoder is used to change the output from the resources before passing it to the WriteAsync method of the HttpResponse. With this encoder, the resource values are converted to the HTML format to correctly display special characters such as the German ü and ß. With HTML encoding, these characters are translated to the HTML format ü and ß. The resource for message1 is a simple string; the resource for message2 is defined with string format placeholders: Using culture {0} and UI culture {1}
NOTE Using formatted strings in resources, the new syntax with interpolated strings cannot be used in this case. The variables or expressions used with interpolated strings in the placeholders are not available from resources. 1443
Download from finelybook www.finelybook.com
Running the web application results in the view shown in Figure 27-7.
FIGURE 27-7 Adding ?culture=de-AT to the URL request (which uses the QueryStringRequestCultureProvider), you can see output as shown in Figure 27-8. When you pass cultures that aren’t supported with the URL request, you can see an output of the default culture.
FIGURE 27-8 1444
Download from finelybook www.finelybook.com
Localizing with Controllers and Views Using ASP.NET Core MVC, there’s special support for localization. You can create specific resource files for controllers and views, you can add annotations to model data that are used to retrieve values from resources.
NOTE ASP.NET Core MVC is discussed in detail in Chapter 31, “ASP.NET Core MVC.” Annotations are discussed in Chapter 16, “Reflection, Metadata, and Dynamic Programming.” The ASP.NET Core Web Application named ASPNETCoreMVCSample used in this section is based on the Web Application (Model View Controller) template, and it uses the following dependency and namespaces: Dependency Microsoft.AspNetCore.All Namespaces Microsoft.AspNetCore Microsoft.AspNetCore.Builder Microsoft.AspNetCore.Hosting Microsoft.AspNetCore.Localization Microsoft.AspNetCore.Mvc.Localization Microsoft.AspNetCore.Mvc.Razor Microsoft.Extensions.Configuration Microsoft.Extensions.DependencyInjection Microsoft.Extensions.Localization
1445
Download from finelybook www.finelybook.com
System System.ComponentModel System.Diagnostics System.Globalization
Let’s start with creating resources. The resources are now stored in the folder Resources. The folder name is specified with the options of the AddLocalization helper method (code file ASPNETCoreMVCSample/Startup.cs): public void ConfigureServices(IServiceCollection services) { services.AddLocalization(options => options.ResourcesPath = "Resources"); //... }
You can put resources for controllers, views, and models into subfolders, or you can use a dot notation with the filename. For example, you can put resources for the HomeController into the subdirectory Resources\Controllers—for example, the resource file named HomeController.resx with the default language, as well as language specific resource files— such as HomeController.de.resx. Instead of using the directory structure, you can use the dot notation for the filename. Here you store the resource file directly within the Resources folder. With this convention, the resource file for the HomeController needs to be named Controllers.HomeController.resx. For the view named Hello that is activated from the HomeController, you can use directory notation for the resource file Hello.resx to put it into the directory structure Resources/Views/Home. Using dot notation, the resource file Views.Home.Hello.resx needs to be saved in the folder Resources. The version of resource files that is used is specified with the AddViewLocalization method, an extension method for the IMvcBuilder interface. An object implementing this interface is returned from the AddMvc method, thus AddViewLocalization can be invoked using fluent 1446
Download from finelybook www.finelybook.com
API syntax. When you pass the option LanguageViewLocationExpanderFormat.SubFolder,
it defines that the subfolder resources are used. The other option would be LanguageViewLocationExpanderFormat.Suffix. In the following code snippet, the extension method AddDataAnnotationsLocalization also is invoked to enable localization with data annotations (code file ASPNETCoreMVCSample/Startup.cs): public void ConfigureServices(IServiceCollection services) { services.AddLocalization(options => options.ResourcesPath = "Resources"); services.AddMvc() .AddViewLocalization(LanguageViewLocationExpanderFormat.SubFolder) .AddDataAnnotationsLocalization(); }
With the HomeController, the IStringLocalizer can be injected and used like what you’ve seen with the Configure method of the WebSampleApp sample where an IStringLocalizer was injected as well. In the following code snippet, the IStringLocalizer is injected in the constructor of the HomeController, and used with the Hello action method (code file ASPNETCoreMVCSample/Controllers/HomeController.cs): private readonly IStringLocalizer _localizer; public HomeController(IStringLocalizer localizer) { _localizer = localizer; } public IActionResult Hello() { ViewBag.Message1 = _localizer.GetString("Message1"); return View(); }
In the view, the Message1 passed from the controller is directly accessed (code file ASPNETCoreMVCSample/Views/Home/Hello.cshtml): @ViewBag.Message1
1447
Download from finelybook www.finelybook.com
To access a resource directly from the resource in the view, the IViewLocalizer can be injected using the @inject declaration. Here, a local variable Localizer is defined that is then used to access the resource named Message2; the resource just needs to be saved in the resource file Resources/Views/Home/Hello.resx (code file ASPNETCoreMVCSample/Views/Home/Hello.cshtml): @using Microsoft.AspNetCore.Mvc.Localization @inject IViewLocalizer Localizer @{ ViewData["Title"] = "Hello"; } Hello @ViewBag.Message1 @Localizer["Message2"]
Running the application and accessing the link /Home/Hello, resources are retrieved both from the controller and the view as shown in Figure 27-9.
1448
Download from finelybook www.finelybook.com
FIGURE 27-9 Another way to retrieve resource values with ASP.NET Core MVC is via applying annotations. To see the annotations in action, the Book type is defined in the Models directory. This type has DisplayName attributes added to the properties Booktitle and Publisher (code file ASPNETCoreMVCSample/Models/Book.cs): public class Book { [DisplayName("Booktitle")] public string Booktitle { get; set; } [DisplayName("Publisher")] public string Publisher { get; set; } }
NOTE Don’t forget to enable annotations for localization by invoking the method AddDataAnnotationsLocalization in the Startup class. The resource file Book.resx is now added to the directory Resources/Models (resource file ASPNETCoreMVCSample/Resources/Models/Book.resx): Publisher Title
A German language representation is added as well (resource file ASPNETCoreMVCSample/Resources/Models/Book.de.resx): Verlag
1449
Download from finelybook www.finelybook.com
Titel
The Book action method from the HomeController passes a Book model to the view (code file ASPNETCoreMVCSample/Controllers/HomeController.cs): public IActionResult Book() { var b = new Book { Booktitle = "Professional C# 7 and .NET Core 2", Publisher = "Wrox Press" }; return View(b); }
To display the book, the HTML Helper method EditorForModel is used to display all the properties of the model with input fields (code file ASPNETCoreMVCSample/Views/Home/Book.cshtml): @{ ViewData["Title"] = "Book"; } Book @Html.EditorForModel()
Figure 27-10 shows the running application accessing Home/Book with the German culture.
1450
Download from finelybook www.finelybook.com
FIGURE 27-10
NOTE For more information about controllers, views, and HTML Helper, read Chapter 31.
LOCALIZATION WITH THE UNIVERSAL WINDOWS PLATFORM Localization with the Universal Windows Platform (UWP) is based on the concepts you’ve learned so far, but it brings some fresh ideas, as described in this section. For the best experience, you need to install the Multilingual App Toolkit that is available via Visual Studio Extensions and Updates. The concepts of cultures, regions, and resources are the same, but because Windows apps can be written with C# and XAML, C++ and XAML, and JavaScript and HTML, these concepts need to be available with all languages. Only Windows Runtime is available with all these programming languages and UWP apps. Therefore, new namespaces 1451
Download from finelybook www.finelybook.com
for globalization and resources are available with Windows Runtime: Windows.Globalization and Windows.ApplicationModel.Resources. With the globalization namespaces you can find Calendar, GeographicRegion (this can be compared to the .NET RegionInfo), and Language classes. With sub-namespaces, there are also classes for number and date formatting that vary according to the language. With C# and Windows apps, you can still use the .NET classes for cultures and regions. Let’s get into an example so you can see localization with a Universal Windows app in action. Create a small application using the Blank App (Universal Windows) Visual Studio project template. Add two TextBlock controls and one TextBox control to the page. Within the OnNavigatedTo method of the code file you can assign a date with the current format to the Text property of the text1 control. You can use the DateTime structure in the same way you’ve done it with the console application earlier in this chapter (code file UWPLocalization/MainPage.xaml.cs): protected override void OnNavigatedTo(NavigationEventArgs e) { base.OnNavigatedTo(e); text1.Text = DateTime.Today.ToString("D"); //... }
Using Resources with UWP With UWP, you can create resource files with the file extension resw instead of resx. Behind the scenes, the same XML format is used with resw files, and you can use the same Visual Studio resource editor to create and modify these files. The following example uses the structure shown in Figure 27-11. The subfolder Messages contains a subdirectory, en-us, in which two resource files Errors.resw and Messages.resw are created. In the folder Strings\en-us, the resource file Resources.resw is created.
1452
Download from finelybook www.finelybook.com
FIGURE 27-11 The Messages.resw file contains some English text resources, Hello with a value of Hello World, and resources named GoodDay, GoodEvening, and GoodMorning. The file Resources.resw contains the resources Text3.Text and Text3.Width, with the values "This is a sample message for Text 4" and a value of "300". With the code, you can access resources with the help of the ResourceLoader class from the namespace Windows.ApplicationModel.Resources. Here you use the string "Messages" with the method GetForCurrentView. Thus, you’re using the resource file Messages.resw. Invoking the method GetString retrieves the resource with the key "Hello" (code file UWPLocalization/MainPage.xaml.cs): protected override void OnNavigatedTo(NavigationEventArgs e) { //... var resourceLoader = ResourceLoader.GetForCurrentView("Messages");
1453
Download from finelybook www.finelybook.com
text2.Text = resourceLoader.GetString("Hello"); }
With UWP Windows apps it is also easy to use the resources directly from XAML code. With the following TextBox, the x:Uid attribute is assigned the value Text3. This way, a resource named Text3 with extensions is searched for in the resource file Resources.resw. This resource file contains value for the keys Text3.Text and Text3.Width. The values are retrieved, and both the Text and Width properties are set (code file UWPLocalization/MainPage.xaml):
When you run the application at this stage, you can see the English text accessed from the resource files as shown in Figure 27-12.
1454
Download from finelybook www.finelybook.com
FIGURE 27-12
Localization with the Multilingual App Toolkit To localize UWP apps you can download the previously mentioned Multilingual App Toolkit. This toolkit integrates with Visual Studio 2017. After installing the toolkit, you can enable it within Visual Studio using the menu Tools ➪ Multilingual App Toolkit ➪ Enable Selection. This adds a build command to the project file and adds one more option to the context menu in Solution Explorer. Open the context menu in Solution Explorer and select Multilingual App Toolkit ➪ Add Translation Languages to invoke the dialog shown in Figure 27-13, where you can choose which languages should be translated. The sample uses Pseudo Language, French, German, and Spanish. For these languages, a Microsoft Translator is available. This tool now creates a MultilingualResources subdirectory that contains .xlf files for the selected languages. The .xlf files are defined with the XLIFF (XML Localisation Interchange File Format) standard. This is a standard of the Open Architecture for XML Authoring and Localization (OAXAL) reference architecture.
1455
Download from finelybook www.finelybook.com
FIGURE 27-13
NOTE The Multilingual App Toolkit can also be installed from http://aka.ms/matinstallv4 without using Visual Studio. Download the Multilingual App Toolkit. The next time you start the build process for the project, the XLIFF files are filled with content from all the resources. When you select the XLIFF files in Solution Explorer, you can send it to translation. To do so, open the context menu in Solution Explorer while selecting the .xlf files, and select Multilingual App Toolkit ➪ Export Translations, which opens the dialog shown in Figure 27-14. With this dialog you 1456
Download from finelybook www.finelybook.com
can configure the information that should be sent, and you can send an email with the XLIFF files attached.
FIGURE 27-14 For translation, you can also use Microsoft’s translation service. Select the .xlf files in Visual Studio Solution Explorer, and after opening the context menu, select Multilingual App Toolkit ➪ Generate Machine Translations. To make this work with the version used while writing this book, you need to create an Microsoft Azure account and add the Translator Speech API of Microsoft Cognitive Services. This service is used by the translation services of the Multilingual App Toolkit. A free pricing tier exists that allows up to 2,000,000 characters to be 1457
Download from finelybook www.finelybook.com
translated each month. When you open the .xlf files, the Multilingual Editor (see Figure 2715) is opened. With this tool you can verify the automatic translations and make necessary changes.
FIGURE 27-15
WARNING Don’t use the machine translation without a manual review. The tool shows a status for every resource that is translated. After the automatic translation, the status is set to Needs Review. You have probably seen applications with machine translations that are incorrect—and sometimes really funny.
SUMMARY This chapter demonstrated how to globalize and localize .NET 1458
Download from finelybook www.finelybook.com
applications. For the globalization of applications, you learned about using the namespace System.Globalization to format culturedependent numbers and dates. Furthermore, you learned that sorting strings by default varies according to the culture, and you looked at using the invariant culture for a culture-independent sort. Localizing an application is accomplished by using resources, which you can pack into files or satellite assemblies. The classes used with localization are in the namespace System.Resources. You also learned how to localize ASP.NET Core, used special features for ASP.NET Core MVC, and localized apps using the Universal Windows Platform. The next chapter provides information about testing. You learn how to create unit tests, as well as UI tests for Windows and web applications.
1459
Download from finelybook www.finelybook.com
28 Testing WHAT’S IN THIS CHAPTER? Unit tests with MSTest and xUnit Unit tests with xUnit with .NET Core Unit tests with EF Core Coded UI testing Web testing
WROX.COM CODE DOWNLOADS FOR THIS CHAPTER The Wrox.com code downloads for this chapter are found at www.wrox.com on the Download Code tab. The source code is also available at https://github.com/ProfessionalCSharp/ProfessionalCSharp7 in the directory tests. The code for this chapter is divided into the following major examples: Unit Testing Sample Mocking Sample EF Core Sample Windows App Sample 1460
Download from finelybook www.finelybook.com
ASPNETCore Integration Test Sample Web Application Load Test Sample
NOTE Unit testing is available with all editions of Visual Studio. All other testing features—such as Live Unit Testing, Web Load & Performance Testing, Coded UI Testing, Code Coverage, Microsoft Fakes, and IntelliTest—require Visual Studio Enterprise 2017.
OVERVIEW Application development is becoming agile. When using waterfall process models to analyze the requirements, it’s not unusual that you design the application architecture, do the implementation, and then find out two or three years later that you built an application that is not needed by the user. Instead, software development becomes agile with faster release cycles, and early participation of the end users. Just have a look at Windows 10: With millions of Windows insiders who give feedback to early builds, updates happen every few months or even weeks. There was one special week during the Beta program of Windows 10 when Windows insiders received three builds of Windows 10 within one week. Windows 10 is a huge program, but Microsoft managed to change development in a big way. Also, if you participate in the open-source project of .NET Core, you can get nightly builds of NuGet packages. If you’re adventurous, you might even write a book about an upcoming technology. With such fast and continuous changes—and nightly builds that you are creating—you can’t wait for insiders or end users to find all the issues. Windows 10 insiders wouldn’t have been happy with Windows 10 crashing every few minutes. How often have you done a change in the implementation of a method to find out something that doesn’t seem related is not working anymore? You might have tried to avoid 1461
Download from finelybook www.finelybook.com
such issues by not changing the method and creating a new one by copying the code and doing the necessary changes there, which in turn creates a maintenance nightmare. It happens too easily that you fix a method in one place but miss the other ones with code duplicates. You can avoid issues like these. Create tests for your methods, and let the tests run automatically on checking in the source code or during nightly builds. Creating tests from the start increases the cost for the project from the beginning, but as the project processes and during maintenance, creating tests has advantages and reduces the overall project cost. This chapter explains different kinds of tests, starting with unit tests, which are tests for small functionality. These tests should verify the functionality of the smallest testable parts of an application—for example, methods. When you pass different input values, a unit test should check all possible paths through a method. MSTest is a testing framework from Microsoft for creating unit tests. When .NET Core was built, MSTest did not support creating tests for .NET Core libraries and applications. That’s why Microsoft itself is using xUnit to create unit tests for .NET Core. Now, you can use both MSTest and XUnit to create unit tests for .NET Core. This chapter covers both Microsoft’s test framework MSTest and xUnit. With web testing you can test web applications, send HTTP requests, and simulate a load of users. Creating these kinds of tests enables you to simulate different user loads and allow stress testing. You can use test controllers to create higher loads to simulate thousands of users and thus also know what infrastructure you need and whether your application is scalable. The final testing feature covered in this chapter is UI testing. You can create automated tests of your XAML-based applications. Of course, it is a lot easier to create unit tests for your view models and the view components with ASP.NET Core, but it’s not possible to cover every aspect of testing in this chapter. You can automate UI testing. Just imagine the hundreds of different Android mobile devices that are available. Would you buy one of every model to test your app manually on every device? It’s better to use a cloud service and send the app to 1462
Download from finelybook www.finelybook.com
be tested where the app is indeed installed on hundreds of devices. Don’t assume humans will start the app in the cloud on hundreds of devices and click through the possible interactions of the app. This needs to be automated using UI tests. First, let’s start creating unit tests.
UNIT TESTING WITH MSTEST Writing unit tests helps with code maintenance. For example, when you’re performing a code update, you want to be confident that the update isn’t going to break something else. Having automatic unit tests in place helps to ensure that all functionality is retained after code changes are made. Visual Studio 2017 offers a unit testing framework, and you can also use other testing frameworks from within Visual Studio.
Creating Unit Tests with MSTest The following example tests a very simple method in a class library named UnitTestingSamples. This is a .NET Standard 2.0 class library. Of course, you can create any other MSBuild-based project. The class DeepThought contains the TheAnswerToTheUltimateQuestionOfLifeTheUniverseAndEverything method, which returns 42 as a result (code file UnitTestingSamples/DeepThought.cs): public class DeepThought { public int TheAnswerOfTheUltimateQuestionOfLifeTheUniverseAndEverything() => 42; }
To ensure that nobody changes the method to return a wrong result (maybe someone who didn’t read The Hitchhiker’s Guide to the Galaxy), a unit test is created. To create a unit test, you can use the dotnet command > dotnet new mstest
1463
Download from finelybook www.finelybook.com
or you can add the project template Unit Test Project (.NET Core) from Visual Studio. Before creating the first tests, it’s a good idea to think about naming tests and test projects. Of course, you can use names as you like, but you can find a good guideline from the .NET Core team at https://github.com/aspnet/Home/wiki/Engineeringguidelines#unit-tests-and-functional-tests
Here’s a summary of the guidelines: A test project has the name Tests appended to the name of the project—for example, for the project UnitTestingSamples, the test project has the name UnitTestingSamples.Tests. Test class names have the same class name as the class under being tested, and the word Test is appended to the name—for example, the test class for UnitTestingSamples.DeepThought is UnitTestingSamples.DeepThoughtTest. Unit test method names have a descriptive name—for example the name AddOrUpdateBookAsync_ThrowsForNull indicates a unit test to invoke the AddOrUpdateBookAsync method to check if it throws an exception passing null. The MSTest project contains references to the NuGet packages Microsoft.NET.Test.Sdk, MSTest.TestAdapter, and MSTest.TestFramework (project file UnitTestingSamples.MSTests/UnitTestingSamples.MSTests.csproj): netcoreapp2.0 false
1464
Download from finelybook www.finelybook.com
A unit test class is marked with the TestClass attribute, and a test method is marked with the TestMethod attribute. The implementation creates an instance of DeepThought and invokes the method that is to be tested: TheAnswerToTheUltimateQuestionOfLifeTheUniverseAndEverything. The return value is compared with the value 42 using Assert.AreEqual. In case Assert.AreEqual fails, the test fails (code file UnitTestingSamples.MSTests/DeepThoughtTest.cs): [TestClass] public class TestProgram { [TestMethod] public void ResultOfTheAnswerToTheUltimateQuestionOfLifeTheUniverseAndEverything() { // arrange int expected = 42; var dt = new DeepThought(); // act int actual = dt.TheAnswerToTheUltimateQuestionOfLifeTheUniverseAndEverything();
// assert Assert.AreEqual(expected, actual); } }
Unit tests are defined by three A’s: arrange, act, and assert. First, everything is arranged for the unit test to start. In the first test, with the arrange phase, a variable expected is assigned the value that is 1465
Download from finelybook www.finelybook.com
expected from calling the method to test, and an instance of the DeepThought class is invoked. Now everything is ready to test the functionality. This happens with the act phase—the method is invoked. After completing the act phase, you need to verify whether the result is as expected. This is done in the assert phase using a method of the Assert class. The Assert class is part of the MSTest framework in the Microsoft.VisualStudio.TestTools.UnitTesting namespace. This class offers several static methods that you can use with unit tests. The Assert.Fail method can be used to mark a unit test to give the information that the test is not yet implemented. Some of the other methods are AreNotEqual, which verifies whether two objects are not the same; IsFalse and IsTrue, which verify Boolean results; IsNull and IsNotNull, which verify null results; and IsInstanceOfType and IsNotInstanceOfType, which verify the passed type.
Running Unit Tests Using the Test Explorer (which you open via Test ⇨ Windows ⇨ Test Explorer), you can run the tests from the solution (see Figure 28-1).
FIGURE 28-1 Figure 28-2 shows a failed test, which includes all details about the failure.
1466
Download from finelybook www.finelybook.com
FIGURE 28-2 To run the test from the command line, you can invoke dotnet test: > dotnet test
With the sample application, this results in this successful output: Build started, please wait... Build completed.
Test run for C:\procsharp\Tests\UnitTestingSamples\UnitTestingSamples.MSTests\bin\Deb netcoreapp2.0\UnitTestingSamples.MSTests.dll(.NETCoreApp,Version=v2.0) Microsoft (R) Test Execution Command Line Tool Version 15.5.0 Copyright (c) Microsoft Corporation. All rights reserved. Starting test execution, please wait... Total tests: 1. Passed: 1. Failed: 0. Skipped: 0. Test Run Successful. Test execution time: 1.2312 Seconds
Of course, this was a very simple scenario; the tests are not usually that simple. For example, methods can throw exceptions; they can have different routes for returning other values; and they can make use of other code (for example, database access code, or services that are invoked) that shouldn’t be tested with the single unit. Now let’s look at a more involved scenario for unit testing. The following class, StringSample, defines a constructor with a string parameter, the method GetStringDemo, and a field. The method GetStringDemo uses different paths depending on the first and second parameters and returns a string that results from these parameters (code file UnitTestingSamples/StringSample.cs): public class StringSample { public StringSample(string init) { if (init is null) throw new ArgumentNullException(nameof(init));
1467
Download from finelybook www.finelybook.com
_init = init; } private string _init; public string GetStringDemo(string first, string second) { if (first is null) { throw new ArgumentNullException(nameof(first)); } if (string.IsNullOrEmpty(first)) { throw new ArgumentException("empty string is not allowed", first); } if (second is null) { throw new ArgumentNullException(nameof(second)); } if (second.Length > first.Length) { throw new ArgumentOutOfRangeException(nameof(second), "must be shorter than first"); } int startIndex = first.IndexOf(second); if (startIndex < 0) { return $"{second} not found in {first}"; } else if (startIndex < 5) { string result = first.Remove(startIndex, second.Length); return $"removed {second} from {first}: {result}"; } else { return _init.ToUpperInvariant(); } } }
NOTE 1468
Download from finelybook www.finelybook.com
When you’re writing unit tests for complex methods, the unit test also sometimes gets complex. Here it is helpful to debug into the unit test to find out what’s going on. Debugging unit tests is straightforward: Just add breakpoints to the unit test code, and from the context menu of the Test Explorer select Debug Selected Tests (see Figure 28-3).
FIGURE 28-3 Every possible execution route and check for exceptions should be covered by unit tests, as discussed next.
Expecting Exceptions with MSTest When invoking the constructor of the StringSample class and calling the method GetStringDemo with null, an ArgumentNullException is expected. You can easily check exceptions with testing code: apply the ExpectedException attribute to the test method as shown in the following example. This way, the test method succeeds with the exception (code file UnitTestingSamples.MSTests/StringSampleTest.cs): [TestMethod] [ExpectedException(typeof(ArgumentNullException))] public void ConstructorShouldThrowOnNull() { var sample = new StringSample(null); }
1469
Download from finelybook www.finelybook.com
You can deal with the exception thrown by the GetStringDemo method in a similar way.
Testing All Code Paths To test all code paths, you can create multiple tests, with each one taking a different route. The following test sample passes the strings a and b to the GetStringDemo method. Because the second string is not contained within the first string, the first path of the if statement applies. The result is checked accordingly (code file UnitTestingSamples.MSTests/StringSampleTest.cs): [TestMethod] public void GetStringDemoBNotInA() { string expected = "b not found in a"; var sample = new StringSample(String.Empty); string actual = sample.GetStringDemo("a", "b"); Assert.AreEqual(expected, actual); }
The next test method verifies another path of the GetStringDemo method. Here, the second string is found in the first one, and the index is lower than 5; therefore, it results in the second code block of the if statement: [TestMethod] public void GetStringDemoRemoveBCFromABCD() { string expected = "removed bc from abcd: ad"; var sample = new StringSample(String.Empty); string actual = sample.GetStringDemo("abcd", "bc"); Assert.AreEqual(expected, actual); }
All other code paths can be tested similarly. To see what code is covered by unit tests, and what code is still missing, you can start Code Coverage in Visual Studio and use the --collect option of the dotnet test command. In the Visual Studio 2017 Code Coverage Results window (Test ⇨ Windows ⇨ Code Coverage Results), you can see the percentage of code covered by unit tests.
1470
Download from finelybook www.finelybook.com
External Dependencies Many methods are dependent on some functionality outside the application’s control, for example, calling a web service or accessing a database. Maybe the service or database is not available during some test runs, which tests the availability of these external resources. Or worse, maybe the database or service returns different data over time, and it’s hard to compare this with expected data. Such functionality outside the scope of what should be tested must be excluded from the unit test. The following example is dependent on some outside functionality. The method ChampionsByCountry accesses an XML file from a web server that contains a list of Formula-1 world champions with Firstname, Lastname, Wins, and Country elements. This list is filtered by country, and it’s numerically ordered using the value from the Wins element. The returned data is an XElement that contains converted XML code: public XElement ChampionsByCountry(string country) { XElement champions = XElement.Load(F1Addresses.RacersUrl); var q = from r in champions.Elements("Racer") where r.Element("Country").Value == country orderby int.Parse(r.Element("Wins").Value) descending select new XElement("Racer", new XAttribute("Name", r.Element("Firstname").Value + " " + r.Element("Lastname").Value), new XAttribute("Country", r.Element("Country").Value), new XAttribute("Wins", r.Element("Wins").Value)); return new XElement("Racers", q.ToArray()); }
NOTE For more information on LINQ to XML, read Bonus Chapter 2, “XML and JSON,” which you can find online.” 1471
Download from finelybook www.finelybook.com
The link to the XML file is defined by the F1Addresses class (code file UnitTestingSamples/F1Addresses.cs): public class F1Addresses { public const string RacersUrl = "http://www.cninnovation.com/downloads/Racers.xml"; }
For the method ChampionsByCountry, you should do a unit test. The test should not be dependent on the source from the server. Server unavailability is one issue, but it can also be expected that the data on the server changes over time to return new champions, and other values. The current test should ensure that filtering is done as expected, returning a correctly filtered list, and in the correct order. One way to create a unit test that is independent of the data source is to refactor the implementation of the ChampionsByCountry method by using the dependency injection pattern. Here, a factory that returns an XElement is created to replace the XElement.Load method. The interface IChampionsLoader is the only outside requirement used from the ChampionsByCountry method. The interface IChampionsLoader defines the method LoadChampions that can replace the aforementioned method (code file UnitTestingSamples/IChampionsLoader.cs): public interface IChampionsLoader { XElement LoadChampions(); }
The class ChampionsLoader implements the interface IChampionsLoader by using the XElement.Load method—the method that was used beforehand by the ChampionsByCountry method (code file UnitTestingSamples/ChampionsLoader.cs): public class ChampionsLoader: IChampionsLoader { public XElement LoadChampions() => XElement.Load(F1Addresses.RacersUrl); }
1472
Download from finelybook www.finelybook.com
NOTE The dependency injection pattern is explained with more detail in Chapter 20, “Dependency Injection.” Now it’s possible to change the implementation of the ChampionsByCountry method by using an interface to load the champions instead of directly using XElement.Load. The IChampionsLoader is passed with the constructor of the class Formula1, and this loader is then used by ChampionsByCountry: (code file UnitTestingSamples/Formula1.cs): public class Formula1 { private IChampionsLoader _loader; public Formula1(IChampionsLoader loader) { _loader = loader; } public XElement ChampionsByCountry(string country) { var q = from r in _loader.LoadChampions().Elements("Racer") where r.Element("Country").Value == country orderby int.Parse(r.Element("Wins").Value) descending select new XElement("Racer", new XAttribute("Name", r.Element("Firstname").Value + " " + r.Element("Lastname").Value), new XAttribute("Country", r.Element("Country").Value), new XAttribute("Wins", r.Element("Wins").Value)); return new XElement("Racers", q.ToArray()); } }
With a typical implementation, a ChampionsLoader instance would be passed to the Formula1 constructor to retrieve the racers from the 1473
Download from finelybook www.finelybook.com
server. When you’re creating the unit test, you can implement a custom method that returns sample Formula-1 champions, as shown in the method Formula1SampleData (code file UnitTestingSamples.MSTests/Formula1Test.cs): internal static string Formula1SampleData() { return @" Nelson Piquet Brazil 204 23 Ayrton Senna Brazil 161 41 Nigel Mansell England 187 31 //... more sample data
The method Formula1VerificationData returns sample test data that matches the expected result (code file UnitTestingSamples.MSTests/Formula1Test.cs): internal static XElement Formula1VerificationData() { return XElement.Parse(@"
1474
Download from finelybook www.finelybook.com
"); }
The loader of the test data implements the same interface —IChampionsLoader—as the ChampionsLoader class. This loader makes use of the sample data; it doesn’t access the web server (code file UnitTestingSamples.MSTests/Formula1Test.cs): public class F1TestLoader: IChampionsLoader { public XElement LoadChampions() => XElement.Parse(Formula1SampleData()); }
Now it’s easy to create a unit test that makes use of the sample data (code file UnitTestingSamples.MSTests/Formula1Test.cs): [TestMethod] public void ChampionsByCountryFilterFinland() { Formula1 f1 = new Formula1(new F1TestLoader()); XElement actual = f1.ChampionsByCountry("Finland"); Assert.AreEqual(Formula1VerificationData().ToString(), actual.ToString()); }
Of course, a real test should do more than cover a case that passes Finland as a string and two champions are returned with the test data. You should write other tests to pass a string with no matching result, to return more than two champions, and to result in a number sort order that is different from the alphanumeric sort order.
NOTE To test methods that don’t use dependency injection, to replace the internally used dependencies with test classes, you can use the Fakes Framework. This is available only for .NET Framework projects with Visual Studio Enterprise.
1475
Download from finelybook www.finelybook.com
UNIT TESTING WITH XUNIT When .NET Core was implemented, xUnit was available to create unit tests, and the .NET Core team used this product. xUnit is an opensource implementation from the same developer who created NUnit 2.0. Nowadays, both MSTest and xUnit are supported by the .NET Core command-line interface.
TIP See https://xunit.github.io/ for documentation on xUnit. With the Visual Studio Test environment, several testing frameworks can be used. Test adapters such as NUnit, xUnit, Boost (for C++), Chutzpah (for JavaScript), and Jasmine (for JavaScript) are available via Extensions and Updates; these test adapters integrate with the Visual Studio Test Explorer. Because xUnit is a great testing framework for .NET Core, and it’s also used by Microsoft with the open-source code of .NET Core and ASP.NET Core, xUnit is the focus of this section.
Using xUnit with .NET Core You can create xUnit tests in a similar manner to MSTest tests with .NET Core applications. From the command line, you can use > dotnet new xunit
to create an xUnit test project. With Visual Studio 2017, you can select the project type xUnit Test Project (.NET Core). With this sample project, the same .NET Standard library as before —UnitTestingSamples—is tested. This library includes the same types for testing that were shown earlier: DeepThought and StringSample. The test project has the name UnitTestingSamples.xUnit.Tests. This project needs references to xunit (for the unit tests, 1476
Download from finelybook www.finelybook.com
xunit.runner.visualstudio [to run the tests within Visual Studio]) and to the UnitTestingSamples project (the code that should be tested). For
integration with the .NET Core command line, the DotNetCliToolReference for dotnet-xunit is added (project file UnitTestingSamples.xUnit.Tests/UnitTestingSamples.xUnit.Tests.csproj netcoreapp2.0 false
Creating Facts The way you create the test is very similar to what you did before. With MSTest you had to add an attribute to the testing class. This is not necessary with xUnit because all public classes are searched for test methods. The differences on testing the method TheAnswerToTheUltimateQuestionOfLifeTheUniverseAndEverything
between MSTest and xUnit are just the annotated test method with the Fact attribute and the different Assert.Equal method (code file UnitTestingSamples.xUnit.Tests/DeepThoughtTest.cs): public class DeepThoughtTest { [Fact]
1477
Download from finelybook www.finelybook.com
public void
ResultOfTheAnswerToTheUltimateQuestionOfLifeTheUniverseAndEverythingTest { int expected = 42; var dt = new DeepThought(); int actual = dt.TheAnswerToTheUltimateQuestionOfLifeTheUniverseAndEverything(); Assert.Equal(expected, actual); } }
The Assert class used now is defined in the XUnit namespace. This class defines a lot more methods for validation compared to the Assert method from MSTest. For example, instead of adding an attribute to specify an expected exception, use the Assert.Throws method, which allows multiple checks for exceptions within a single test method (code file UnitTestingSamples.xUnit.Tests/StringSampleTest.cs): [Fact] public void GetStringDemoExceptions() { var sample = new StringSample(string.Empty); Assert.Throws(() => sample.GetStringDemo(null, "a")); Assert.Throws(() => sample.GetStringDemo("a", null)); Assert.Throws(() => sample.GetStringDemo(string.Empty, "a")); }
Creating Theories xUnit defines the Fact attribute for test methods that don’t require parameters. With xUnit you can also invoke unit test methods that require parameters; you use the Theory attribute and supply data to add an attribute that derives from Data. This makes it possible to define multiple unit tests by a single method. In the following code snippet, the Theory attribute is applied to the GetStringDemoInlineData unit test method. The method 1478
Download from finelybook www.finelybook.com
defines different paths that depend on the input data. The first path is reached if the string passed with the second parameter is not contained within the first parameter. The second path is reached if the second string is contained within the first five characters of the first string. The third path is reached with the else clause. To reach all the different paths, three InlineData attributes are applied to the testing method. Every one of these attributes defines four parameters that are directly sent to the invocation of the unit testing method, in the same order. The attributes also define the values that should be returned by the method under test (code file UnitTestingSamples.xUnit.Tests/StringSampleTest.cs): StringSample.GetStringDemo
[Theory] [InlineData("", "longer string", "nger", "removed nger from longer string: lo string")] [InlineData("init", "longer string", "string", "INIT")] public void GetStringDemoInlineData(string init, string a, string b, string expected) { var sample = new StringSample(init); string actual = sample.GetStringDemo(a, b); Assert.Equal(expected, actual); }
The attribute InlineData derives from the attribute Data. Instead of directly supplying the values for the test method with the attribute, the values can also come from a property, method, or a class. The following example defines a static method that returns the same values with an IEnumerable object (code file UnitTestingSamples.xUnit.Tests/StringSampleTest.cs): public static IEnumerable GetStringSampleData() => new[] { new object[] { "", "a", "b", "b not found in a" }, new object[] { "", "longer string", "nger", "removed nger from longer string: lo string" }, new object[] { "init", "longer string", "string", "INIT" } };
1479
Download from finelybook www.finelybook.com
The unit test method is now changed with the MemberData attribute. This attribute allows using static properties or methods that return IEnumerable to fill in the parameters of the unit test method (code file UnitTestingSamples.xUnit.Tests/StringSampleTest.cs): [Theory] [MemberData("GetStringSampleData")] public void GetStringDemoMemberData(string init, string a, string b, string expected) { var sample = new StringSample(init); string actual = sample.GetStringDemo(a, b); Assert.Equal(expected, actual); }
Using a Mocking Library Let’s get into a more complex example: creating a unit test for a clientside service library from an app using the MVVM pattern. Read Chapter 34, “Patterns with XAML Apps,” for a complete picture from this app. The sample code for this chapter only includes a library used by this app. This service uses dependency injection to inject the repository defined by the interface IBooksRepository. The unit tests for testing the method AddOrUpdateBookAsync shouldn’t test the repository; they test only the functionality within the method. For the repository, another unit test should be done: The following code snippet shows the implementation of the BooksService class (code file MockingSamples/BooksLib/Services/BooksService.cs): public class BooksService: IBooksService { private ObservableCollection _books = new ObservableCollection(); private IBooksRepository _booksRepository; public BooksService(IBooksRepository repository) { _booksRepository = repository; } public async Task LoadBooksAsync() { if (_books.Count > 0) return;
1480
Download from finelybook www.finelybook.com
IEnumerable books = await _booksRepository.GetItemsAsync(); _books.Clear(); foreach (var b in books) { _books.Add(b); } } public Book GetBook(int bookId) => _books.Where(b => b.BookId == bookId).SingleOrDefault(); public async Task AddOrUpdateBookAsync(Book book) { if (book == null) throw new ArgumentNullException(nameof(book)); Book updated = null; if (book.BookId == 0) { updated = await _booksRepository.AddAsync(book); if (updated == null) throw new InvalidOperationException(); _books.Add(updated); } else { updated = await _booksRepository.UpdateAsync(book); if (updated == null) throw new InvalidOperationException(); Book old = _books.Where(b => b.BookId == updated.BookId).Single(); int ix = _books.IndexOf(old); _books.RemoveAt(ix); _books.Insert(ix, updated); } return updated; } public IEnumerable Books => _books; }
Because the unit test for AddOrUpdateBookAsync shouldn’t test the repository used for IBooksRepository, you need to implement a repository used for testing. To make this easy, you can use a mocking 1481
Download from finelybook www.finelybook.com
library that automatically fills in the blanks. A commonly used mocking library is Moq. With the unit testing project, the NuGet package Moq is added.
NOTE Instead of using the Moq framework, you also can implement an in-memory repository with sample data. You probably do this anyway to have sample data for the app during design time of the user interface. When you use xUnit, a new instance of the test class is created for every test run. In case you need common functionality for multiple tests, you can move this functionality to the constructor. In case resources need to be released after each test run, you can implement the interface IDisposable. Within the constructor of the BooksServiceTest class, a Mock object is instantiated with the generic parameter IBooksRepository. The Mock constructor creates an implementation for the interface. Because you need some results from the repository other than null to create useful tests, the Setup method defines which parameters can be passed, and the ReturnsAsync method defines the result that’s returned from the method stub. You access the mock object by using the Object property of the Mock class, and it is passed on to create an instance of the BooksService class. With these settings in place, you can implement the unit tests (code file MockingSamples/BooksLib.Tests/Services/BooksServiceTest.cs): public class BooksServiceTest : IDisposable { private const string TestTitle = "Test Title"; private const string UpdatedTestTitle = "Updated Test Title"; public const string APublisher = "A Publisher"; private BooksService _booksService; private Book _newBook = new Book {
1482
Download from finelybook www.finelybook.com
BookId = 0, Title = TestTitle, Publisher = APublisher }; private Book _expectedBook = new Book { BookId = 1, Title = TestTitle, Publisher = APublisher }; private Book _notInRepositoryBook = new Book { BookId = 42, Title = TestTitle, Publisher = APublisher }; private Book _updatedBook = new Book { BookId = 1, Title = UpdatedTestTitle, Publisher = APublisher }; public BooksServiceTest() { var mock = new Mock(); mock.Setup(repository => repository.AddAsync(_newBook)).ReturnsAsync(_expectedBook); mock.Setup(repository => repository.UpdateAsync(_notInRepositoryBook)).ReturnsAsync(null as Book); mock.Setup(repository => repository.UpdateAsync(_updatedBook)).ReturnsAsync(_updatedBook);
_booksService = new BooksService(mock.Object); } //...
NOTE 1483
Download from finelybook www.finelybook.com
The IDisposable interface is explained in detail in Chapter 17, “Managed and Unmanaged Memory.” The first unit test implemented—AddOrUpdateBookAsync_ThrowsForNull —verifies that an ArgumentNullException is thrown in case null is passed to the AddOrUpdateBookAsync method. The implementation just needs the _booksService member variable that is instantiated within the constructor, but it doesn’t need the mocking setup. This code sample also shows that unit test methods can be implemented as asynchronous methods that return a Task (code file MockingSamples/BooksLib.Tests/Services/BooksServiceTest.cs): [Fact] public async Task AddOrUpdateBookAsync_ThrowsForNull() { // arrange Book nullBook = null; // act and assert await Assert.ThrowsAsync(() => _booksService.AddOrUpdateBookAsync(nullBook)); }
The unit test method AddOrUpdateBook_AddedBookReturnsFromRepository adds a new book (variable _newBook) to the service and expects the book _expectedBook
to be returned. Within the implementation of the AddOrUpdateBookAsync method, the AddAsync method of the IBooksRepository is invoked; thus, the previously defined mock setup for this method applies. The result of this method should be that the Book returned is equal to the _expectedBook, and the _expectedBook also needs to be added to the books collection of the BooksService (code file MockingSamples/BooksLib.Tests/Services/BooksServiceTest.cs): [Fact] public async Task AddOrUpdateBook_AddedBookReturnsFromRepository() { // arrange in constructor // act Book actualAdded = await
1484
Download from finelybook www.finelybook.com
_booksService.AddOrUpdateBookAsync(_newBook); // assert Assert.Equal(_expectedBook, actualAdded); Assert.Contains(_expectedBook, _booksService.Books); }
The unit test AddOrUpdateBook_UpdateNotExistingBookThrows verifies that trying to update a book that does not exist in the service needs to result in an InvalidOperationException (code file MockingSamples/BooksLib.Tests/Services/BooksServiceTest.cs): [Fact] public async Task AddOrUpdateBook_UpdateNotExistingBookThrows() { // arrange in constructor // act and assert await Assert.ThrowsAsync(() => _booksService.AddOrUpdateBookAsync(_notInRepositoryBook)); }
The usual case to update a book is dealt with the unit test AddOrUpdateBook_UpdateBook. Here, extra preparation is needed to first add the book to the service before updating it (code file MockingSamples/BooksLib.Tests/Services/BooksServiceTest.cs): [Fact] public async Task AddOrUpdateBook_UpdateBook() { // arrange await _booksService.AddOrUpdateBookAsync(_newBook); // act Book updatedBook = await _booksService.AddOrUpdateBookAsync(_updatedBook); // assert Assert.Equal(_updatedBook, updatedBook); Assert.Contains(_updatedBook, _booksService.Books); }
When you use the MVVM pattern with XAML-based applications and the MVC pattern with web-based applications, you reduce the 1485
Download from finelybook www.finelybook.com
complexity of the user interface and reduce the need for complex UI testing. However, there are still some scenarios that should be tested with the UI—for example, navigating through pages, drag and drop of elements, and more. This is where Visual Studio’s functionality of UI testing comes into place. Testing user interfaces is covered in the section “UI Testing.” Testing web applications is covered in the section “Web Integration, Load, and Performance Testing.”
LIVE UNIT TESTING A great feature for unit testing is available with the Enterprise edition of Visual Studio 2017: Live Unit Testing. It’s best to see errors as early as possible, and the first place you can see them is in the Visual Studio editor. From the Test menu, you can start Live Unit Testing. With Live Unit Testing turned on, you can directly see in the editor what code lines are covered by tests and where the test runs successful (see Figure 28-4).
1486
Download from finelybook www.finelybook.com
FIGURE 28-4 In case you introduce some error in the code editor, you can see the issue immediately—even without saving the file. If the compiler runs successfully while you’re editing, the unit tests associated with the method you just edited runs, and you can see the results (as shown in Figure 28-5) and can react accordingly.
1487
Download from finelybook www.finelybook.com
FIGURE 28-5 All tests running while editing should run fast. You shouldn’t run integration tests with Live Unit Testing. In the Solution Explorer, you can select test projects and test classes to be excluded or included from Live Unit Testing. You also can exclude specific test methods using annotations—with xUnit using the Trait attribute: [Trait("Category", "SkipWhenLiveUnitTesting")]
and with MSTest using the TestCategory attribute: [TestCategory("SkipWhenLiveUnitTesting")]
Live Unit Tests also don’t run when the battery is less than 30 percent. You can configure this setting and other Live Unit Test settings with Visual Studio by selecting Tools ⇨ Options. 1488
Download from finelybook www.finelybook.com
UNIT TESTING WITH EF CORE When you create unit tests, you need to replace dependencies with test classes that offer test data. What about dependencies on the Entity Framework Core (EF Core) context? Usually there’s not an interface that is implemented by the context, but the context (for example, the BooksContext) is injected itself. EF Core offers a solution with a memory-based provider that can be used as a mocking class instead of using the EF Core SQL Server provider.
NOTE EF Core is discussed in detail in Chapter 26, “Entity Framework Core.” Let’s start with a simple Book type, a BooksContext, and a BooksService. The BooksService class should be tested from unit tests. The Book class is a simple class that keeps a few properties (code file EFCoreSample/EFCoreSample/Book.cs): public class Book { public int BookId { get; set; } public string Title { get; set; } public string Publisher { get; set; } }
The class BooksContext manages the connection to the database and maps the Book type to the Books table (code file EFCoreSample/EFCoreSample/BooksContext.cs): public class BooksContext : DbContext { public BooksContext(DbContextOptions options) : base(options) { } public DbSet Books { get; set; } }
1489
Download from finelybook www.finelybook.com
And finally, the class BooksService uses the BooksContext via dependency injection and defines the method GetTopBooksByPublisher. This method should be tested to only return 10 books (code file EFCoreSample/EFCoreSample/BooksService.cs): public class BooksService { private readonly BooksContext _booksContext; public BooksService(BooksContext booksContext) { _booksContext = booksContext; } public IEnumerable GetTopBooksByPublisher(string publisher) { if (publisher == null) throw new ArgumentNullException(nameof(publisher)); return _booksContext.Books .Where(b => b.Publisher == publisher) .Take(10) .ToList(); } }
For unit testing, an xUnit project is created. For using the EF Core inmemory provider, the NuGet package Microsoft.EntityFrameworkCore.InMemory is added in addition to the EFCoreSample project. Now, you can use the DbContextOptionsBuilder to create the options with the in-memory database. UseInMemoryDatabase is an extension method from the package Microsoft.EntityFrameworkCore.InMemory to add the EF Core in-memory provider. In the InitContext method, 1000 book objects are created and saved into the object list of the context to be ready to be used by the unit test (code file EFCoreSample/EFCoreSample.Tests/BooksServiceTest.cs): public class BooksServiceTest : IDisposable { private BooksContext _booksContext; private const string PublisherName = "A Publisher";
1490
Download from finelybook www.finelybook.com
public BooksServiceTest() { InitContext(); } private void InitContext() { var builder = new DbContextOptionsBuilder() .UseInMemoryDatabase("BooksDB"); _booksContext = new BooksContext(builder.Options); // init with 1000 books var books = Enumerable.Range(1, 1000) .Select(i => new Book { BookId = i, Title = $"Sample {i}", Publisher = PublisherName }) .ToList(); _booksContext.Books.AddRange(books); _booksContext.SaveChanges(); } //... public void Dispose() { _booksContext?.Dispose(); } }
NOTE The Enumerable class and the Range method are discussed in Chapter 12, “Language Integrated Query.” The unit test method GetTopBooksByPublisherCount now instantiates the BooksService in the arrange section, invokes the GetTopBooksByPublisher method in the act section, and finally checks the number of books returned in the assert section (code file EFCoreSample/EFCoreSample.Tests/BooksServiceTest.cs): 1491
Download from finelybook www.finelybook.com
[Fact] public void GetTopBooksByPublisherCount() { // arrange var booksService = new BooksService(_booksContext); // act var topbooks = booksService.GetTopBooksByPublisher(PublisherName); // assert Assert.Equal(10, topbooks.Count()); }
UI TESTING WITH WINDOWS APPS For testing the user interface, Visual Studio offers Coded UI Test Project templates for Universal Windows apps, WPF applications, and Windows Forms. When you create a new project, you can find the project template for WPF and Windows Forms in the Test group. However, this template doesn’t work for Windows apps. The project template for Universal Windows apps is in the Windows Universal group. Be aware that automatic recording is not supported for Windows apps.
NOTE Read chapters 33 to 36 for more detailed information on creating Windows Apps. In this chapter you create a UI test for a simple Windows app. This application is part of the downloadable files for this chapter, so you can use it for testing. The app just contains a TextBox control to enter some text, a Button control, and a TextBlock control where the text entered should show up when the user clicks the button as shown in Figure 28-6.
1492
Download from finelybook www.finelybook.com
FIGURE 28-6 When you create a new Coded UI Test Project (Universal Windows), you see the dialog shown in Figure 28-7. When you select the Edit UI Map or Add Assertions option, you can select controls from a running app that adds automation peers of the controls to a map, so you can easily access it programmatically.
FIGURE 28-7
1493
Download from finelybook www.finelybook.com
After you click OK to create a new project, the Coded UI Test Builder opens (see Figure 28-8). Recording of actions is not supported for Windows apps, so this option is grayed out, but you can add controls to the UI map by dragging the crosshair over controls of the running app.
FIGURE 28-8 As you select controls, the list of them shows up in the left part of the tool, and the right part shows the properties of the selected controls (see Figure 28-9). You need to click the leftmost button (Add Control to UI Control Map) to finally add the control to the map.
FIGURE 28-9 As the last step you need to click the Generate button (Figure 28-10) in the UIMap - Coded UI Test Builder window. A dialog with a method name shows up, but as with Windows apps only controls are generated, a method name is not needed, and you just need to click the Generate button.
1494
Download from finelybook www.finelybook.com
FIGURE 28-10 You can find the generated code in a partial class in the file UIMap.Designer.cs. You can extend this class in the file UIMap.cs. The designer-generated file will be overwritten if you start the Coded UI Test Builder again. The designer-generated code defines the UIMap class that contains a property for the UIWindowsAppWindow. This class represents the window with the contained controls (code file WindowsApp/WindowsApp.UITest/UIMap.Designer.cs): [GeneratedCode("Coded UITest Builder", "15.0.26621.2")] public partial class UIMap { public UIWindowsAppWindow UIWindowsAppWindow { get { if ((this.mUIWindowsAppWindow == null)) { this.mUIWindowsAppWindow = new UIWindowsAppWindow(); } return this.mUIWindowsAppWindow; } } private UIWindowsAppWindow mUIWindowsAppWindow; }
The class UIWindowsAppWindow derives from the base class XamlWindow and defines SearchProperties that are used when the app is launched. 1495
Download from finelybook www.finelybook.com
If the app is already running, you can find the app by using the name of the window. With the sample app it is set to WindowsApp and the class name Windows.UI.Core.CoreWindow (code file WindowsApp/WindowsApp.UITest/UIMap.Designer.cs): [GeneratedCode("Coded UITest Builder", "15.0.26621.2")] public class UIWindowsAppWindow : XamlWindow { public UIWindowsAppWindow() { this.SearchProperties[XamlControl.PropertyNames.Name] = "WindowsApp"; this.SearchProperties[XamlControl.PropertyNames.ClassName] = "Windows.UI.Core.CoreWindow"; this.WindowTitles.Add("WindowsApp"); } //...
For every control that is selected using the Coded UI Test Builder, a field and a property are created. In the following code snippet, you can see the generated code for the TextBox control. Every UWP control has an automation peer. For the TextBox control it is the XamlEdit class. To map the UITextInEdit property to the corresponding TextBox control, you use an AutomationId. The AutomationId can be set with the control definition using the attached property AutomationProperties.AutomationId. The sample code of the Windows app defines this attached property in the XAML code in the file MainPage.xaml. In case the AutomationId is not directly set, it is generated with the same name as the Name property of the control. The get accessor of the property implements the creation of the XamlEdit control the first time the property is accessed. After the initial creation, the value of the field is returned (code file WindowsApp/WindowsApp.UITest/UIMap.Designer.cs): public XamlEdit UITextInEdit { get { if ((this.mUITextInEdit == null)) { this.mUITextInEdit = new XamlEdit(this); this.mUITextInEdit
1496
Download from finelybook www.finelybook.com
.SearchProperties[XamlEdit.PropertyNames.AutomationId] = "textIn"; this.mUITextInEdit.WindowTitles.Add("WindowsApp"); } return this.mUITextInEdit; } } private XamlEdit mUITextInEdit;
NOTE Attached properties are covered in Chapter 33, “Windows Apps.” The test class MainPageTest is annotated with the attribute CodedUITest. This attribute derives from the base class TestClassExtensionAttribute and identifies the kind of the UI test. To start the application, you need the automation ID of the application. You can get this ID either by using the crosshair from the Coded UI Test Builder and selecting the tile of the application, or by opening the Packaging tab in the Package.appxmanifest editor. In the Packaging tab (see Figure 28-11), you can copy the package family name and add !App as postfix. To access the generated UIMap, the test class defines a property (code file WindowsApp/WindowsApp.UITest/MainPageTest.cs): [CodedUITest(CodedUITestType.WindowsStore)] public class MainPageTest { private string TileAutomationId = "0e07ecab-af0f-4129-965b-eed7a5beef75_p2wxv0ry6mv8g!App"; //... public TestContext TestContext { get => testContextInstance; set => testContextInstance = value; } private TestContext testContextInstance; public UIMap UIMap
1497
Download from finelybook www.finelybook.com
{ get { if (this.map == null) { this.map = new UIMap(); } return this.map; } } private UIMap map; }
FIGURE 28-11 The test is defined in the test method EnterTextAndButtonClick. First, you launch the application using the previously defined automation ID of the app. Next, the Text property of the TextBox control is filled by setting the Text property of the automation peer XamlEdit control. Gestures such as button clicks are done with the Gesture class. Gesture.Tap taps or clicks into a control; with the code snippet the control that is clicked into is selected by using the UIClickMeButton, which is the associated XamlButton peer control. Finally, the text is read from the TextBlock associated XamlText control (code file WindowsApp/WindowsApp.UITest/MainPageTest.cs): [TestMethod]
1498
Download from finelybook www.finelybook.com
public void EnterTextAndButtonClick() { string inText = "Hello, Windows!"; XamlWindow xamlWindow = XamlWindow.Launch(TileAutomationId); UIMap.UIWindowsAppWindow.UITextInEdit.Text = inText; Gesture.Tap(UIMap.UIWindowsAppWindow.UIClickMeButton); string outText = UIMap.UIWindowsAppWindow.UITextOutText.DisplayText; xamlWindow.Close(); Assert.AreEqual(inText, outText); }
Now you can run the UI test in the same way you run the unit tests, as shown earlier in this chapter.
WEB INTEGRATION, LOAD, AND PERFORMANCE TESTING To test web applications, you can create unit tests that invoke methods of the controllers, repository, and utility classes. Tag helpers are simple methods in which the test can be covered by unit tests. Unit tests are used to test the functionality of the algorithms of the methods —in other words, the logic inside the methods. With web applications, it is also a good practice to create integration, performance, and load tests. Does everything work together? Does the application scale? How many users can the application support with one server? How many servers are needed to support a specific number of users? Which bottleneck is not that easy to scale? To answer these questions, Web tests can help. ASP.NET Core offers a hosting class to create integration tests. Visual Studio Enterprise 2017 offers the Web Load and Performance Tests with a recorder to record HTTP requests. The recorder needs an addin within Internet Explorer.
ASP.NET Core Integration Tests With integration tests, you test everything about the web app from the HTTP request to the back end. You should have a lot more unit tests than integration tests. You probably have thousands of unit tests, but 1499
Download from finelybook www.finelybook.com
only a few integration tests. If the same functionality could be covered either by unit or integration tests, you should choose unit tests. The Visual Studio feature Live Unit Testing is useful to run with unit tests, but you shouldn’t use this with integration tests. Integration tests are needed to have the complete picture, to see how everything runs from the front end to the back end. To create an ASP.NET Core integration test, create an ASP.NET Core Web Application named ASPNETCoreSample with the Empty template. Running the application from the generated code returns the string “Hello World!”, and this will be tested from an integration test using xUnit.
NOTE ASP.NET Core is covered in detail in the Chapters 30 to 32 and Bonus Chapter 3, which you can find online. The xUnit project ASPNETCoreSample.IntegrationTest needs a package reference to Microsoft.AspNetCore.TestHost. This package contains the TestServer class to host and start the web application and to send requests. A reference to the web project ASPNETCoreSample is needed as well. A common arrangement of the integration tests is handled in the constructor. Here the TestServer is instantiated, passing an IWebHostBuilder to the constructor of the TestServer class. You need to do a similar setup as in your Program.cs file from the ASP.NET Core web application to enable the same configuration files, and the same middleware (code file ASPNETCoreSample/ASPNETCoreSample.IntegrationTest/AspNetCoreSampleTest.cs public class ASPNETCoreSampleTest : IDisposable { private TestServer _testServer; public ASPNETCoreSampleTest() {
1500
Download from finelybook www.finelybook.com
_testServer = new TestServer( WebHost.CreateDefaultBuilder().UseStartup()); } public void Dispose() => _testServer?.Dispose(); //... }
In the integration test, using the _testServer variable you can create a request to the Home page, and invoke the GetAsync method of the returned RequestBuilder. The returned HttpResponseMessage is checked for a successful status code before the content is read using ReadAsStringAsync from the Content property. In the assert section, the result is compared with the expected string (code file ASPNETCoreSample/ASPNETCoreSample.IntegrationTest/AspNetCoreSampleTest.cs [Fact] public async Task ReturnHelloWorld() { // act RequestBuilder requestBuilder = _testServer.CreateRequest("/"); HttpResponseMessage response = await requestBuilder.GetAsync(); response.EnsureSuccessStatusCode(); var responseString = await response.Content.ReadAsStringAsync(); // assert Assert.Equal("Hello World!", responseString); }
With the RequestBuilder class you can create HTTP GET, POST, PUT… requests, and add HTTP header information. The result of the GetAsync method looks like the results from the HttpClient class in Chapter 23, “Networking.” Indeed, you can directly access the HttpClient class from the TestServer by invoking the CreateClient method. The method CreateWebSocketClient returns a WebSocketClient instance, thus you can also create WebSocket requests. WebSockets are covered in Bonus Chapter 3, “WebHooks and SignalR,” which you can find online. 1501
Download from finelybook www.finelybook.com
Creating the Web Test Now that you’ve created an integration test for ASP.NET Core, let’s move into a feature of Visual Studio Enterprise 2017, Web Performance and Load Tests. For creating a web test, you can create a new ASP.NET Core Web Application by selecting Web Application (Model-View-Controller), and making sure Authentication is set to Individual User Accounts. This template has functionality built in that allows for creating tests. Before creating the web tests, start the application and register a user with the application. To create web tests, you add a Web Performance and Load Test Project named WebAndLoadTest to the solution. Click the generated file WebTest1.webtest file to open the Web Test Editor. Then start a web recording by clicking the Add Recording button. For this recording, you must have the Web Test Recorder add-in with Internet Explorer that’s installed with the installation of Visual Studio. The recorder records all HTTP requests sent to the server. Click some links on the WebApplicationSample web application such as About and Contact and register a new user. Then click the Stop button to stop the recording. After the recording is finished, you can edit the recording with the Web Test Editor. A recording is shown in Figure 28-12. With all the requests, you can see header information as well as form POST data that you can influence and change.
1502
Download from finelybook www.finelybook.com
FIGURE 28-12 Delete the recordings you don’t need, and then click the Generate Code button with the test name NavigateAndRegisterTest to generate source code to send all the requests programmatically. With web tests, the test class derives from the base class WebTest and overrides the GetRequestEnumerator method. This method returns one request after the other (code file WebApplicationSample/WebAndLoadTest/NavigateAndRegisterTest.cs): public class NavigateAndRegisterTest: WebTest { public NavigateAndRegister() { this.PreAuthenticate = true; this.Proxy = "default"; } public override IEnumerator GetRequestEnumerator() { //... } }
The method GetRequestEnumerator defines requests to the website—for 1503
Download from finelybook www.finelybook.com
example, a request to the About page. With this request, an HTTP header is added to define that the request originates from the home page: public override IEnumerator GetRequestEnumerator() { //... WebTestRequest request2 = new WebTestRequest("http://localhost:44336/Home/About"); request2.ThinkTime = 1; request2.Headers.Add(new WebTestRequestHeader("Referer", "http://localhost:44336/")); yield return request2; request2 = null; //... }
And this is the request to send an HTTP POST request to the Register page that is passing form data: WebTestRequest request6 = new WebTestRequest("http://localhost:44336/Account/Register"); request6.Method = "POST"; request6.ExpectedResponseUrl = "http://localhost:44336/"; request6.Headers.Add(new WebTestRequestHeader("Referer", "http://localhost:44336/Account/Register")); FormPostHttpBody request6Body = new FormPostHttpBody(); request6Body.FormPostParameters.Add("Email", "[email protected]"); request6Body.FormPostParameters.Add("Password", "Pa$$w0rd"); request6Body.FormPostParameters.Add("ConfirmPassword", "Pa$$w0rd"); request6Body.FormPostParameters.Add("__RequestVerificationToken",
this.Context["$HIDDEN1.__RequestVerificationToken"].ToString()); request6.Body = request6Body; yield return request6; request6 = null;
With some data you enter in forms, it can be a good idea to add 1504
Download from finelybook www.finelybook.com
flexibility by taking the data from a data source. Using the Web Test Editor, you can add a database, CSV file, or XML file as a data source (see Figure 28-13). With this dialog box, you can change form parameters to take data from a data source.
FIGURE 28-13 Adding a data source modifies the testing code. With a data source, the test class is annotated with the DeploymentItem attribute (if a CSV or XML file is used), and with DataSource and DataBinding attributes: [DeploymentItem("webandloadtestproject\\EmailTests.csv", "webandloadtestproject")] [DataSource("EmailDataSource", "Microsoft.VisualStudio.TestTools.DataSource.CSV",
1505
Download from finelybook www.finelybook.com
"|DataDirectory|\\webandloadtestproject\\EmailTests.csv", Microsoft.VisualStudio.TestTools.WebTesting.DataBindingAccessMethod .Sequential, Microsoft.VisualStudio.TestTools.WebTesting.DataBindingSelectColumns .SelectOnlyBoundColumns, "EmailTests#csv")] [DataBinding("EmailDataSource", "EmailTests#csv", "sample1@test#com", "EmailDataSource.EmailTests#csv.sample1@test#com")] public class NavigateAndRegister1: WebTest { //... }
Now, in the code the data source can be accessed using the Context property of the WebTest that returns a WebTestContext to access the required data source via an index:
request6Body.FormPostParameters.Add("Email", this.Context["EmailDataSource.EmailTests#csv.sample1@test#com"].ToString
Running the Web Test With the tests in place, the testing can start. You can run—and debug— the test directly from the Web Test Editor. Remember to start the web application before you start the test. When you run the test from the Web Test Editor, you can see the resulting web pages as well as the detail information about requests and responses, as shown in Figure 28-14.
1506
Download from finelybook www.finelybook.com
FIGURE 28-14 Using Web Load Tests, you can simulate a high load on the web application. Clicking on the solution item Local.testsettings, you can select to run the tests on Visual Studio Team Services for running the tests on multiple servers (see Figure 28-15). For the sample, we’ll stay on the local machine.
1507
Download from finelybook www.finelybook.com
FIGURE 28-15 In the Web Test dialog, you can influence the test runs by specifying a browser type, simulating think times, and running the test multiple times (see Figure 28-16).
1508
Download from finelybook www.finelybook.com
FIGURE 28-16
NOTE Load testing of web apps with Visual Studio requires the Enterprise edition of Visual Studio. If you don’t have the Enterprise edition, you can check an alternative: Selenium —http://www.seleniumhq.org/.
SUMMARY In this chapter, you’ve seen the most important aspects about testing applications: creating unit tests, coded UI tests, and Web tests. Visual Studio offers a Test Explorer to run unit tests, no matter whether they have been created using MSTest or xUnit. This chapter 1509
Download from finelybook www.finelybook.com
also showed you triple A in action: Arrange, Act, and Assert. With coded UI tests, you’ve seen how to create recordings and adapt the recordings to modify the UI testing code as needed. With ASP.NET Core Web applications, you’ve seen how the TestHost class can be used for integration tests, and this chapter gave you an introduction to the web load and performance tests from Visual Studio. Although testing helps with fixing issues with applications before they are deployed, Chapter 29, “Tracing, Logging, and Analytics,” helps you fix applications that are running.
1510
Download from finelybook www.finelybook.com
29 Tracing, Logging, and Analytics WHAT’S IN THIS CHAPTER? Simple tracing with EventSource Advanced tracing with EventSource Creating a custom trace listener Using the ILogger interface Using Visual Studio App Center with Windows apps
WROX.COM CODE DOWNLOADS FOR THIS CHAPTER The Wrox.com code downloads for this chapter are found at www.wrox.com on the Download Code tab. The source code is also available at https://github.com/ProfessionalCSharp/ProfessionalCSharp7 in the directory Diagnostics. The code for this chapter is divided into the following major examples: SimpleEventSourceSample EventSourceSampleInheritance EventSourceSampleAnnotations ClientApp/MyApplicationEvents 1511
Download from finelybook www.finelybook.com
LoggingSample WinAppAnalytics
DIAGNOSTICS OVERVIEW As release cycles for applications become faster and faster, it’s becoming more and more important to learn how the application behaves while it’s running in production. What exceptions are occurring? Knowing what features are used is also of interest. Do users find the new feature of the app? How long do they stay in the page? To answer these questions, you need real-time information on the application. When you’re getting information about the application, you need to differ logging, tracing, and analytics. With logging, error information is recorded in centralized places. This information is used by system administrators to find out issues with applications. Tracing helps to find out which method is called by which method. This information is useful for development, and you should turn it off when the application runs in production. With .NET, the same technology can be used for logging and tracing using classes from the System.Diagnostics namespace. Analytics gives information about the users, where they reside, what operating system version they use, and what features they use in the application. This helps to know if there are some issues with the application based on a location, hardware, or an operating system, and it also helps to understand what the users are doing. Users might not find a new feature of the application if it’s hard to find out about this feature. This chapter explains how to get real-time information about your running application to identify any issues that it might have during production or to monitor resource usage to ensure that higher user loads can be accommodated. This is where the namespace System.Diagnostics.Tracing comes into play. This namespace offers classes for tracing using Event Tracing for Windows (ETW). One way to deal with errors in your application, of course, is by throwing exceptions. However, an application might not fail with an 1512
Download from finelybook www.finelybook.com
exception, but it still doesn’t behave as expected. The application might be running well on most systems but have a problem on a few. On the live system, you can change the log by starting a trace collector and get detailed live information about what’s going on in the application. You can do this using ETW. If there are problems with applications, the system administrator needs to be informed. The Event Viewer is a commonly used tool that not only the system administrator should be aware of but also the software developer. With the Event Viewer, you can both interactively monitor problems with applications and can add subscriptions to be informed about specific events that happen. ETW enables you to write information about the application. Application Insights is a Microsoft Azure cloud service that enables you to monitor apps in the cloud. With just a few lines of code, you can get detailed information about how a web application or service is used. Visual Studio App Center allows monitoring of Windows and Xamarin apps. After you’ve registered the app, you just need a few lines of code to receive useful information about the app. This chapter explains these facilities and demonstrates how you can use them for your applications.
TRACING WITH EVENTSOURCE Tracing enables you to see informational messages about the running application. To get information about a running application, you can start the application in the debugger. During debugging, you can walk through the application step by step and set breakpoints at specific lines and when you reach specific conditions. The problem with debugging is that a program with release code can behave differently from a program with debug code. For example, while the program is stopping at a breakpoint, other threads of the application are suspended as well. Also, with a release build, the compiler-generated output is optimized and, thus, different effects can occur. With optimized release code, garbage collection is much more aggressive 1513
Download from finelybook www.finelybook.com
than with debug code. The order of calls within a method can be changed, and some methods can be removed completely and be called in place. There is a need to have runtime information from the release build of a program as well. Trace messages are written with both debug and release code. A scenario showing how tracing helps is described here. After an application is deployed, it runs on one system without problems, whereas on another system intermittent problems occur. When you enable verbose tracing, the system with the problems gives you detailed information about what’s happening inside the application. The system that is running without problems has tracing configured just for error messages redirected to the Windows event log system. Critical errors are seen by the system administrator. The overhead of tracing is very small because you configure a trace level only when needed. Tracing has quite a history with .NET. After a simple tracing functionality with the first version of .NET and the Trace class, .NET 2.0 made huge improvements on tracing and introduced the TraceSource class. The architecture behind TraceSource is very flexible in separating the source, the listener, and a switch to turn tracing on and off based on a list of trace levels. Starting with .NET 4.5, again a new tracing class was introduced and enhanced with .NET 4.6: the EventSource class. This class is defined in the System.Diagnostics.Tracing namespace in the NuGet package Sytem.Diagnostics. The new tracing architecture is based on Event Tracing for Windows (ETW), which was introduced with Windows Vista. It allows for fast system-wide messaging that is also used by the Windows eventlogging and performance-monitoring facilities. Let’s get into the concepts of ETW tracing and the EventSource class. An ETW provider is a library that fires ETW events. The applications created with this chapter are ETW providers. An ETW manifest describes the events that can be fired from ETW providers. Using a predefined manifest has the advantage 1514
Download from finelybook www.finelybook.com
that the system administrator already knows what events an application can fire as soon as the application is installed. This way the administrator can already configure listening for specific events. The new version of the EventSource allows both selfdescribing events and events described by a manifest. ETW keywords can be used to create categories for events. They are defined as bit-flags. ETW tasks are another way to group events. Tasks can be created to define events based on different scenarios of the program. Tasks are usually used with opcodes. ETW opcodes identify operations within a task. Both tasks and opcodes are defined with integer values. An event source is the class that fires events. You can either use the EventSource class directly or create a class that derives from the base class EventSource. An event method is a method of the event source that fires events. Deriving from the class EventSource, every void method is an event method if it is not annotated with the NonEvent attribute. Event methods can be annotated with the Event attribute. The event level defines the severity or verbosity of an event. This can be used to differ between critical, error, warning, informational, and verbose events. ETW channels are sinks for events. Events can be written to channels and log files. Admin, Operational, Analytic, and Debug are predefined channels. Using the EventSource class, you will see the ETW concepts in action.
Examining a Simple Use of EventSource The sample code using the EventSource class makes use of these namespaces: System System.Collections.Generic
1515
Download from finelybook www.finelybook.com
System.Diagnostics.Tracing System.IO System.Net.Http System.Threading.Tasks
The EventSource class offers various ways to use it. There’s a simple way when instantiating this class and invoking methods for logging, and a more advanced way when using it as a base class. There’s also a way of adding annotations. The first example for using EventSource shows a simple case that is useful in small projects. EventSource is instantiated as a static member of the Program class with a Console App (.NET Core) project. With the constructor, the name of the event source is specified (code file SimpleEventSourceSample/Program.cs): private static EventSource sampleEventSource = new EventSource("Wrox-EventSourceSample1");
With the Main method of the Program class, the unique identifier of the event source is retrieved using the Guid property. This identifier is created based on the name of the event source. After this, the first event is written to invoke the Write method of EventSource. The parameter required is the event name that needs to be passed. Other parameters are available with overloads of the object. The second parameter that is passed is an anonymous object defining the Info property. This can be used to pass any information about the event to the event log (code file SimpleEventSourceSample/Program.cs): static async Task Main() { Console.WriteLine($"Log Guid: {sampleEventSource.Guid}"); Console.WriteLine($"Name: {sampleEventSource.Name}"); sampleEventSource.Write("Startup", new { Info = "started app" }); await NetworkRequestSampleAsync(); Console.ReadLine(); sampleEventSource?.Dispose(); }
1516
Download from finelybook www.finelybook.com
NOTE Instead of passing an anonymous object with custom data to the EventSource.Write method, you can create a class that derives from the base class EventSource and mark it with the attribute EventData. This attribute is shown later in this chapter. The method NetworkRequestSampleAsync that is invoked from the Main method makes a network request and writes a trace log passing the URL that is requested to the trace information. On completion of the network call, trace information is written again. The exceptionhandling code shows another method overload on writing trace information. Different overloads allow passing specific information that is shown in the next sections. The following code snippet shows EventSourceOptions setting a trace level. The Error event level is set by writing error information. This level can be used to filter specific trace information. With filtering you can decide to read just error information—for example, information with the error level and information that is more critical than the error level. During another tracing session you can decide to read all trace information using the verbose level. The EventLevel enumeration defines the values LogAlways, Critical, Error, Warning, Informational, and Verbose (code file SimpleEventSourceSample/Program.cs): private static async Task NetworkRequestSample() { try { using (var client = new HttpClient()) { string url = "http://www.cninnovation.com"; sampleEventSource.Write("Network", new { Info = $"requesting {url}" }); string result = await client.GetStringAsync(url); sampleEventSource.Write("Network", new { Info =
1517
Download from finelybook www.finelybook.com
$"completed call to {url}, result string length: {result.Length}" }); } Console.WriteLine("Complete................."); } catch (Exception ex) { sampleEventSource.Write("Network Error", new EventSourceOptions { Level = EventLevel.Error }, new { Message = ex.Message, Result = ex.HResult }); Console.WriteLine(ex.Message); } }}
Before you run the application, you need to do some preparation: download and configure tools you use for reading the traces. The next section explains how to do this.
Understanding Tools for Tracing For analyzing trace information, several tools are available. logman is a tool that is part of Windows. With logman you can create and manage event trace sessions and write ETW traces to a binary log file. tracerpt is also available with Windows. This tool enables you to convert the binary information written from logman to a CSV, XML, or EVTX file format. PerfView is a tool that offers graphical information for ETW traces. Logman Let’s begin using logman to create a trace session from the previously created application. You need to first start the application to copy the GUID that’s created for the application. You need this GUID to start a log session with logman. The start option starts a new session to log. The -p option defines the name of the provider; here the GUID is used to identify the provider. The -o option defines the output file, and the ets option sends the command directly to the event trace system without scheduling. Be sure to start logman in a directory where you have write access; otherwise it fails to write the output file mytrace.etl: 1518
Download from finelybook www.finelybook.com
logman start mysession -p {3b0e7fa6-0346-5781-db5549d84d7103de} -o mytrace.etl -ets
After running the application, you can stop the trace session with the stop command: logman stop mysession -ets
NOTE logman has a lot more commands that are not covered here. Using logman, you can see all the installed ETW trace providers and their names and identifiers, create data collectors to start and stop at specified times, define maximum log file sizes, and more. You can see the different options of logman with logman -h. Tracerpt The log file is in a binary format. To get a readable representation, you can use the utility tracerpt. With this tool, it’s possible to extract CSV, XML, and EVTX formats, as specified with the -of option: tracerpt mytrace.etl -o mytrace.xml -of XML
Now the information is available in a readable format. With the information that is logged by the application, you can see the event name passed to the EventSource.Write method manifests within the Task element, and you can find the anonymous object within the EventData element: 2 0 5
1519
Download from finelybook www.finelybook.com
0 0 0x0 started app Startup
The error information is shown with the trace as shown here: An error occurred while sending the request. -2146233088
PerfView Another tool to read trace information is PerfView. You can download this tool from the Microsoft downloads page https://www.microsoft.com/download/details.aspx?id=28567). Version 1.9 of this tool has great enhancements for using it with Visual Studio and the self-describing ETW format from EventSource. This tool doesn’t need to be installed; just copy the tool where you need it. After you start this tool, it makes use of the subdirectories where it is located and allows directly opening the binary ETL file. Figure 29-1 shows PerfView opening the file mytrace.etl created by logman.
1520
Download from finelybook www.finelybook.com
FIGURE 29-1
Deriving from EventSource Instead of directly using an instance of EventSource, all the information that could be traced can be defined in a single place. For many applications, it’s enough to define just one event source. This event source can be defined in a separate logging assembly. The event source class needs to derive from the base class EventSource. With this custom class, all the trace information that should be written can be defined by separate methods that invoke the WriteEvent method of the base class. The class is implemented with the Singleton pattern, which offers a static Log property that returns an instance. Naming this property Log is a convention used with event sources. The private constructor calls the constructor of the base class to set the event source name (code file EventSourceSampleInheritance/SampleEventSource .cs): public class SampleEventSource : EventSource { private SampleEventSource() : base("Wrox-SampleEventSource2") { } public static SampleEventSource Log = new SampleEventSource(); public void Startup() => WriteEvent(1); public void CallService(string url) => WriteEvent(2, url); public void CalledService(string url, int length) => WriteEvent(3, url, length);
1521
Download from finelybook www.finelybook.com
public void ServiceError(string message, int error) => WriteEvent(4, message, error); }
All the void methods of an event source class are used to write event information. In case you’re defining a helper method, it needs to be annotated with the NonEvent attribute. In a simple scenario where only information messages should be written, nothing more is necessary. Besides passing an event ID to the trace log, the WriteEvent method has 18 overloads that allow passing message strings, int, and long values, and any number of objects. With this implementation, you can use the members of the SampleEventSource type to write trace messages as shown in the Program class. The Main method makes a trace log calling the Startup method, invokes the NetworkRequestSample method to create a trace log via the CallService method, and makes a trace log in case of an error (code file EventSourceSampleInheritance/Program.cs): public class Program { Static async Task Main() { SampleEventSource.Log.Startup(); Console.WriteLine($"Log Guid: {SampleEventSource.Log.Guid}"); Console.WriteLine($"Name: {SampleEventSource.Log.Name}"); await NetworkRequestSampleAsync(); Console.ReadLine(); } private static async Task NetworkRequestSampleAsync() { try { var client = new HttpClient(); string url = "http://www.cninnovation.com"; SampleEventSource.Log.CallService(url); string result = await client.GetStringAsync(url); SampleEventSource.Log.CalledService(url, result.Length); Console.WriteLine("Complete.................");
1522
Download from finelybook www.finelybook.com
} catch (Exception ex) { SampleEventSource.Log.ServiceError(ex.Message, ex.HResult); Console.WriteLine(ex.Message); } } }
When you run the app with these commands with a developer command prompt from the directory of the project, you produce an XML file that contains information about the traces: > logman start mysession -p "{1cedea2a-a420-5660-1ff0f718b8ea5138}" -o log2.etl -ets > dotnet run > logman stop mysession -ets > tracerpt log2.etl -o log2.xml -of XML
The event information about the service call is shown here: 7 0 4 0 0 0xF00000000000 http://www.cninnovation.com
1523
Download from finelybook www.finelybook.com
CallService
Using Annotations with EventSource Creating an event source class that derives from EventSource, you have more control on defining the trace information. You can add annotations to the methods by using attributes. By default, the name of the event source is the same as the name of the class, but you can change the name and the unique identifier by applying the EventSource attribute. Every event trace method can be accompanied by the Event attribute. Here you can define the ID of the event, an opcode, the trace level, custom keywords, and tasks. This information is used to create manifest information for Windows to define what information is logged. The base methods WriteEvent that are called within the methods using the EventSource need to match the event ID defined by the Event attribute, and the variable names passed to the WriteEvent methods need to match the argument names of the declared method. With the sample class SampleEventSource, custom keywords are defined by the inner class Keywords. The members of this class are cast to the enumeration type EventKeywords. EventKeywords is a flag-based enum of type long that defines only values with upper bits starting with bit 42. You can use all the lower bits to define custom keywords. The Keywords class defines values for the lowest four bits set to Network, Database, Diagnostics, and Performance. The enum EventTask is a similar flags-based enumeration. Contrary to EventKeywords, an int is enough for its backing store, and EventTask doesn’t have predefined values (only the enumeration value None = 0 is predefined). Like the Keywords class, the Task class defines custom tasks for the EventTask enumeration (code file EventSourceSampleAnnotations/SampleEventSource.cs): class SampleEventSource : EventSource { public class Keywords
1524
Download from finelybook www.finelybook.com
{ public const EventKeywords public const EventKeywords public const EventKeywords (EventKeywords)4; public const EventKeywords (EventKeywords)8; }
Network = (EventKeywords)1; Database = (EventKeywords)2; Diagnostics = Performance =
public class Tasks { public const EventTask CreateMenus = (EventTask)1; public const EventTask QueryMenus = (EventTask)2; } private SampleEventSource() { } public static SampleEventSource Log = new SampleEventSource (); [Event(1, Opcode=EventOpcode.Start, Level=EventLevel.Verbose)] public void Startup() => WriteEvent(1); [Event(2, Opcode=EventOpcode.Info, Keywords=Keywords.Network, Level=EventLevel.Verbose, Message="{0}")] public void CallService(string url) => WriteEvent(2, url); [Event(3, Opcode=EventOpcode.Info, Keywords=Keywords.Network, Level=EventLevel.Verbose, Message="{0}, length: {1}")] public void CalledService(string url, int length) => WriteEvent(3, url, length); [Event(4, Opcode=EventOpcode.Info, Keywords=Keywords.Network, Level=EventLevel.Error, Message="{0} error: {1}")] public void ServiceError(string message, int error) => WriteEvent(4, message, error); [Event(5, Opcode=EventOpcode.Info, Task=Tasks.CreateMenus, Level=EventLevel.Verbose, Keywords=Keywords.Network)] public void SomeTask() => WriteEvent(5); }
1525
Download from finelybook www.finelybook.com
The Program class to write these events is unchanged. The information from these events can now be used on using a listener and filtering only events for specific keywords, for specific log levels, or for specific tasks. You see how to create listeners later in this chapter in the “Creating Custom Listeners” section.
Creating Event Manifest Schema Creating a custom event source class has the advantage that you can create a manifest that describes all the trace information. Using the EventSource class without inheritance, the Settings property is set to the value EtwSelfDescribingEventFormat of the enumeration EventSourceSettings. The events are directly described by the methods invoked. When you use a class that inherits from EventSource, the Settings property has the value EtwManifestEventFormat. The event information is described by a manifest. You can create the manifest file by using the static method GenerateManifest of the EventSource class. The first parameter defines the class of the event source; the second parameter describes the path of the assembly that contains the event source type (code file EventSourceSampleAnnotations/Program.cs): public static void GenerateManifest() { string schema = SampleEventSource.GenerateManifest( typeof(SampleEventSource), "."); File.WriteAllText("sampleeventsource.xml", schema); }
This is the manifest information containing tasks, keywords, events, and templates for the event messages (code file EventSourceSampleAnnotations/sampleeventsource.xml):
1526
Download from finelybook www.finelybook.com
1528
Download from finelybook www.finelybook.com
Having this metadata and registering it with the system allows the system administrator to filter for specific events and get notifications when something happens. You can handle registration in two ways: static and dynamic. Static registration requires administrative privileges, and a registration via the wevtutil.exe command-line tool, which passes the DLL that contains the manifest. The EventSource class also offers the preferred dynamic registration. This happens during runtime without the need for administrative privileges returning the manifest in an event stream, or in a response to a 1529
Download from finelybook www.finelybook.com
standard ETW command.
Using Activity IDs A new feature of the new version of TraceSource makes it possible to easily write activity IDs. As soon as you have multiple tasks running, it helps to know which trace messages belong to each other and not have the trace message based only on time. For example, when you’re using tracing with a web application, multiple requests from clients are dealt concurrently when it is good to know which trace messages belong to one request. Such issues don’t occur only on the server; the problem is also in the client application as soon as you’re running multiple tasks, or when you’re using the C# async and await keywords on calling asynchronous methods. Different tasks come into play. When you create a class that derives from TraceSource, all you have to do to create activity IDs is define methods that are post-fixed with Start and Stop. For the sample showing activity IDs in action, a Class Library (.NET Standard) is created. You can use this library from both .NET Framework and .NET Core applications. Previous versions of .NET don’t support the new TraceSource features for activity IDs. The ProcessingStart and RequestStart methods are used to start activities; ProcessingStop and RequestStop stop activities (code file MyApplicationEvents/SampleEventSource): public class SampleEventSource : EventSource { private SampleEventSource() : base("Wrox-SampleEventSource") { } public static SampleEventSource Log = new SampleEventSource(); public void ProcessingStart(int x) => WriteEvent(1, x); public void Processing(int x) => WriteEvent(2, x); public void ProcessingStop(int x) => WriteEvent(3, x); public void RequestStart() => WriteEvent(4);
1530
Download from finelybook www.finelybook.com
public void RequestStop() => WriteEvent(5); }
The client application that’s writing the events makes use of the following dependency and namespaces: Dependency MyApplicatonEvents Namespaces System System.Collections.Generic System.Diagnostics.Tracing System.Net.Http System.Threading.Tasks
The ParallelRequestSample method invokes the RequestStart and RequestStop methods to start and stop the activity. Between these calls, a parallel loop is created using Parallel.For. The Parallel class uses multiple tasks to run concurrently by calling the delegate of the third parameter. This parameter is implemented as a lambda expression to invoke the ProcessTaskAsync method (code file ClientApp/Program.cs): private static void ParallelRequestSample() { SampleEventSource.Log.RequestStart(); Parallel.For(0, 20, async x => { await ProcessTaskAsync(x); }); SampleEventSource.Log.RequestStop(); Console.WriteLine("Activity complete"); }
1531
Download from finelybook www.finelybook.com
NOTE The Parallel class is explained in detail in Chapter 21, “Tasks and Parallel Programming.” The method ProcessTaskAsync writes traces using ProcessingStart and ProcessingStop. Here, an activity is started within another activity. As you can see from the output analyzing the logs, activities can be hierarchical (code file ClientApp/Program.cs): private static async Task ProcessTaskAsync(int x) { SampleEventSource.Log.ProcessingStart(x); var r = new Random(); await Task.Delay(r.Next(500)); using (var client = new HttpClient()) { var response = await client.GetAsync("http://www.bing.com"); } SampleEventSource.Log.ProcessingStop(x); }
Previously, you have used the PerfView tool to open an ETL log file. PerfView can also analyze running applications. You can run PerfView with the following option: > PerfView /onlyproviders=*Wrox-SampleEventSource collect
The option collect starts the data collection. Using the qualifier /onlyproviders turns off the Kernel and CLR providers and only logs messages from the providers listed. Use the qualifier -h to see possible options and qualifiers of PerfView. When you start PerfView this way, data collection starts immediately and continues until you click the Stop Collection button (see Figure 29-2).
1532
Download from finelybook www.finelybook.com
FIGURE 29-2 When you run the application after you’ve started the trace collection, and then have stopped the collection afterward, you can see activity IDs generated with the event type WroxSampleEventSource/ProcessingStart/Start. The IDs allow a hierarchy, such as //1/2 with one parent activity and a child activity. For every loop iteration, you see a different activity ID (see Figure 29-3). With the event type Wrox-SampleEventSource/ProcessingStop/Stop, you can see the same activity IDs as they relate to the same activity.
FIGURE 29-3 Using PerfView, you can select multiple event types on the left, and add a filter—for example, //1/1/4—so you see all the events that belong to this activity (see Figure 29-4). Here you can see that an activity ID can span multiple threads. The start and stop events from the same activity use different threads.
1533
Download from finelybook www.finelybook.com
FIGURE 29-4
CREATING CUSTOM LISTENERS As you’ve written trace messages, you’ve seen how to read them using tools such as logman, tracerpt, and PerfView. You can also create a custom in-process event listener to write the events where you want. You create custom event listeners by creating a class that derives from the base class EventListener. All you need to do is to override the OnEventWritten method. With this method, trace messages are passed to the parameter of type EventWrittenEventArgs. The sample implementation sends information about the event, including the payload, which is the additional data passed to the WriteEvent method of the EventSource (code file ClientApp/MyEventListener.cs): public class MyEventListener : EventListener { protected override void OnEventSourceCreated(EventSource eventSource) { Console.WriteLine($"created {eventSource.Name} {eventSource.Guid}"); } protected override void OnEventWritten(EventWrittenEventArgs eventData) { Console.WriteLine($"event id: {eventData.EventId} source: " + $" {eventData.EventSource.Name}"); foreach (var payload in eventData.Payload) {
1534
Download from finelybook www.finelybook.com
Console.WriteLine($"\t{payload}"); } } }
The listener is activated in the Main method of the Program class. You can access event sources by calling the static method GetSources of the EventSource class (code file ClientApp/Program.cs): The InitListener method invokes the EnableEvents method of the custom listener and passes every event source. The sample code registers the setting EventLevel.LogAlways to listen to every log message written. You can also specify to just write information messages—which also include errors—or to write errors only. private static void InitListener(IEnumerable sources) { listener = new MyEventListener(); foreach (var source in sources) { listener.EnableEvents(source, EventLevel.LogAlways); } }
When you run the application, you see events of the FrameworkEventSource and the Wrox-SampleEventSource written to the console. Using a custom event listener like this, you can easily write events to Application Insights, which is a cloud-based telemetry service that’s explained in the next section.
WRITING LOGS WITH THE ILOGGER INTERFACE Over the years several different logging and tracing facilities in .NET, and there also are many different third-party loggers. Trying to change an application from one logging technology to another one is not an easy task because the use of the logging API is spread throughout the source code. To make logging independent of any logging technology, interfaces can be used. .NET Core defines the generic ILogger interface in the NuGet package Microsoft.Extensions.Logging. This interface defines a Log method. 1535
Download from finelybook www.finelybook.com
The Log method defines parameters to specify a LogLevel (an enumeration value), an event ID (using the struct EventId), generic state information, an Exception type to log exception information, and a formatter to define how the output should look with a string: void Log(LogLevel logLevel, EventId eventide, TState state, Exception exception, Func formatter);
Other than the Log method, the ILogger interface also defines the IsEnabled method to check whether logging is currently enabled based on a LogLevel, and the method BeginScope that returns a disposable scope for logging. The members from the ILogger interface are really all that’s needed for logging. The Log method just has many parameters that need to be filled. To make logging easier, extension methods for the ILogger interface are defined in the LoggerExtensions class. You will see extension methods such as LogDebug, LogTrace, LogInformation, LogWarning, LogError, LogCritical, and BeginScope with several overloads and easier-to-use parameters. Let’s make use of dependency injection and inject the ILogger interface using the contained class SampleController as a generic parameter. The generic parameter defines the category of the logger. With the generic parameter, the category is made of the class name, including the namespace (code file LoggingSample/SampleController.cs): class SampleController { private readonly ILogger _logger; public SampleController(ILogger logger) { _logger = logger; } //... }
In the section “Filtering” you can read how the category name can be used to filter the logs.
1536
Download from finelybook www.finelybook.com
NOTE Dependency injection is discussed in detail in Chapter 20, “Dependency Injection.” The logging samples make use of the following dependencies and namespaces: Dependencies Microsoft.Extensions.DependencyInjection Microsoft.Extensions.Logging Microsoft.Extensions.Logging.Configuration Microsoft.Extensions.Logging.Console Microsoft.Extensions.Logging.Debug Microsoft.Extensions.Logging.EventSource Microsoft.Extensions.Logging.Filter Namespaces Microsoft.Extensions.DependencyInjection Microsoft.Extensions.Logging Microsoft.Extensions.Logging.Console System System.Net.Http System.Threading.Tasks
The ILogger interface can simply be used to invoke an extension method such as LogInformation: _logger.LogInformation("NetworkRequestSample started");
1537
Download from finelybook www.finelybook.com
The extension methods offer overloads to pass additional parameters, exception information, and an event ID. For using the event ID, a list of constant values is defined with the application (code file LoggingSample/LoggingEvents.cs): class LoggingEvents { public const int Injection = 2000; public const int Networking = 2002; }
Next, LogInformation and LogError extension methods are used to show the start of the NetworkRequestSampleAsync method, when it finishes, and error information when an exception is thrown (code file LoggingSample/SampleController.cs): public async Task NetworkRequestSampleAsync(string url) { try { _logger.LogInformation(LoggingEvents.Networking, "NetworkRequestSampleAsync started with url {0}", url); var client = new HttpClient(); string result = await client.GetStringAsync(url); _logger.LogInformation(LoggingEvents.Networking, "NetworkRequestSampleAsync completed, received {0} characters", result.Length); } catch (Exception ex) { _logger.LogError(LoggingEvents.Networking, ex, "Error in NetworkRequestSampleAsync, error message: {0}, HResult: {1}", ex.Message, ex.HResult); } }
NOTE One of the overloaded ILogger extension methods requires EventId 1538
Download from finelybook www.finelybook.com
with the first parameter. With the sample code, an int is passed. This is possible because the EventId struct implements an implicit operator to convert int to EventId. Operator overloading is discussed in Chapter 6, “Operators and Casts.” When you pass the message to the LogXX methods, any number of objects can be supplied that are put into the format message string. This format string uses positional arguments to pass in the following objects. Formattable strings are not used because format strings often are coming from resources that allow for localization of these messages. Localization is discussed in Chapter 27, “Localization.” Next, logging providers need to be configured to make the log information available.
Configuring Providers The location where logs are configured needs to be defined with the ILoggingBuilder. The ILoggingBuilder can be configured when you invoke the AddLogging extension method for the IServiceCollection— one overload of this method accepts an Action parameter. When you use ILoggingBuilder, you can add providers. The sample code adds providers for the console, debugs (which shows up in the Output window with Visual Studio), and adds the event source (code file LoggingSample/Program.cs): static void RegisterServices() { var services = new ServiceCollection(); services.AddLogging(builder => { builder.AddEventSourceLogger(); builder.AddConsole(); #if DEBUG builder.AddDebug(); #endif //... }); services.AddScoped(); AppServices = services.BuildServiceProvider();
1539
Download from finelybook www.finelybook.com
} public static IServiceProvider AppServices { get; private set; }
The Main method of the sample application invokes the RegisterServices method to register the services in the dependency injection container, and then it invokes the RunSampleAsync method (code file LoggingSample/Program.cs): private static string s_url = "https://csharp.christiannagel.com"; static async Task Main(string[] args) { if (args.Length == 1) { s_url = args[0]; } RegisterServices(); await RunSampleAsync(); Console.ReadLine(); } static async Task RunSampleAsync() { var controller = AppServices.GetService (); await controller.NetworkRequestSampleAsync(s_url); }
When you run the application successfully, you can see these informational logs on the console output: info: LoggingSample.SampleController[2002] NetworkRequestSampleAsync started with url https://csharp.christiannagel.com info: LoggingSample.SampleController[2002] NetworkRequestSampleAsync completed, received 76318 characters
Passing an invalid hostname results in the error information shown here: info: LoggingSample.SampleController[2002] NetworkRequestSampleAsync started with url https://csharp.christiannagel1.com
1540
Download from finelybook www.finelybook.com
fail: LoggingSample.SampleController[2002] Error in NetworkRequestSampleAsync, error message: An error occurred while sending the request., HResult: -2147012889
Using Scopes With scopes, you can combine log information that belongs with the output. A scope can be defined by invoking the BeginScope method and passing a message to the scope. The message will be shown in the output with every log message defined within the scope. BeginScope returns an IDisposable object. Invoking the Dispose method (which is done in the code sample with the using statement) ends the scope (code file LoggingScopeSample/SampleController.cs): public async Task NetworkRequestSampleAsync(string url) { using (_logger.BeginScope("NetworkRequestSampleAsync, url: {0}", url)) { try { _logger.LogInformation(LoggingEvents.Networking, "Started"); var client = new HttpClient(); string result = await client.GetStringAsync(url); _logger.LogInformation(LoggingEvents.Networking, "Completed with characters {0} received", result.Length); } catch (Exception ex) { _logger.LogError(LoggingEvents.Networking, ex, "Error, error message: {0}, HResult: {1}", ex.Message, ex.HResult); } } }
With the providers, the scope needs to be enabled to show it. You can change the configuration of the AddConsole method to set the IncludeScopes property (code file LoggingScopeSample/Program.cs): 1541
Download from finelybook www.finelybook.com
static void RegisterServices() { var services = new ServiceCollection(); services.AddLogging(builder => { builder.AddEventSourceLogger(); builder.AddConsole(options => options.IncludeScopes = true); builder.AddDebug(); }); services.AddScoped(); AppServices = services.BuildServiceProvider(); }
When you run the application now, you can see the information you passed to the scope after the =>, as shown in the following code snippet: info: LoggingScopeSample.SampleController[2002] => NetworkRequestSampleAsync, url: https://csharp.christiannagel.com Started info: LoggingScopeSample.SampleController[2002] => NetworkRequestSampleAsync, url: https://csharp.christiannagel.com Completed with characters 76395 received
Filtering You don’t need all log messages at all times. While the application is running in the production environment, error and critical information are of interest. As you’re debugging the application, you might change the configuration to show trace messages for specific trace sources to learn all the things going on in the application. You can define filters for the logging needs you have. Filtering is possible based on the logger provider and based on the log categories. The following code snippet defines a filter for the ConsoleLoggerProvider and the category name LoggingSample to filter only errors with the log level Error and higher (code file LoggingSample/Program.cs): 1542
Download from finelybook www.finelybook.com
static void RegisterServices() { var services = new ServiceCollection(); services.AddLogging(builder => { builder.AddEventSourceLogger(); builder.AddConsole(); #if DEBUG builder.AddDebug(); #endif builder.AddFilter("LoggingSample", LogLevel.Error); //...
Instead of just specifying the name of the category and the LogLevel, you can also pass a delegate with category and LogLevel parameters. The following code snippet returns a filter value true if the category name includes SampleController, and the received LogLevel is at least Information. For all other categories, the filter returns true if the LogLevel has at least the value Error: builder.AddFilter((category, logLevel) => { if (category.Contains("SampleController") && logLevel >= LogLevel.Information) return true; else if (logLevel >= LogLevel.Error) return true; else return false; });
Configure Logging Filtering can also be defined by using a configuration file. With .NET Core, you can use providers for configuration files, such as reading configuration from JSON or XML files, environment variables, or command-line arguments. You just need to create a ConfigurationBuilder from the NuGet package Microsoft.Extensions.Configuration and add providers to this builder. To add the JSON provider, you need to invoke the extension method AddJsonFile. The Build method of the builder returns an object that implements IConfiguration. You can use this interface to access configured values with any of the configured providers. With 1543
Download from finelybook www.finelybook.com
the sample code, the section Logging is retrieved from the configuration and passed to the RegisterServices method (code file LoggingConfigurationSample/Program.cs): var configurationBuilder = new ConfigurationBuilder(); configurationBuilder.AddJsonFile("appsettings.json"); IConfiguration configuration = configurationBuilder.Build(); RegisterServices(configuration);
The configuration file of the sample application configures different configuration values based on providers and categories. For the Debug provider, the LogLevel is set to Information. With this, for all categories, Information and up is logged to the Output window of Visual Studio. With the Console provider, the LogLevel differs based on categories. Below the configuration of the Console provider, the default configuration for all other providers is defined with specific log levels based on categories (configuration file LoggingConfigurationSample/appsettings.json): { "Logging": { "Debug": { "LogLevel": "Information" }, "Console": { "LogLevel": { "LoggingConfigurationSample.SampleController": "Information", "Default": "Warning" } }, "LogLevel": { "Default": "Warning", "System": "Information", "LoggingConfigurationSample.SampleController": "Warning" } } }
With the logging configuration in place, now the AddConfiguration method is invoked to pass a reference to the IConfiguration object. The AddConfiguration method expects the content of the Logging section from the configuration file (code file 1544
Download from finelybook www.finelybook.com
LoggingConfigurationSample/Program.cs): static void RegisterServices(IConfiguration configuration) { var services = new ServiceCollection(); services.AddLogging(builder => { builder.AddConfiguration(configuration.GetSection("Logging")) .AddConsole(); #if DEBUG builder.AddDebug(); #endif }); services.AddScoped(); AppServices = services.BuildServiceProvider(); }
Without changing any code, you now have flexibility in defining the logging configuration.
NOTE Read more about the architecture of and using different configuration providers in Chapter 30, “ASP.NET Core.” Microsoft.Extensions.Configuration
Using ILogger Without Dependency Injection Dependency injection has big advantages. However, you can use the logging API without DI as well. All you need to do is to create a LoggerFactory and create a logger using the CreateLogger method. Configuration providers can be added to the logger factory—similar as they provide extension methods for the ILoggingBuilder interface, extension methods for the ILoggerFactory are provided as well (code file LoggingWithoutDI/Program.cs): var loggerFactory = new LoggerFactory(); loggerFactory.AddConsole().AddDebug(); ILogger logger = loggerFactory.CreateLogger
1545
Download from finelybook www.finelybook.com
(); logger.LogInformation("Info Message");
ANALYTICS WITH VISUAL STUDIO APP CENTER Visual Studio App Center (https://appcenter.ms) is Microsoft’s entry point to build Windows and mobile apps, distribute apps to beta testers, test apps, extend apps with push notifications, and get user analytics for apps. You can get reports of users having issues with your apps—for example, you can find out about exceptions—and you can also find out the features users are using from your apps. For example, let’s say you have added a new feature to your app. Are users finding the button to activate the feature? When you use Application Insights, it’s easy to identify issues that users are having with the app. There’s a good reason Microsoft makes it easy to integrate Application Insights with all kinds of apps.
NOTE Here are some examples of features that users had trouble finding from Microsoft’s own products. The Xbox was the first device to offer a user interface with large tiles. The search feature was available directly below the tiles. Although this button was available directly in front of the user, users didn’t see it. Microsoft moved the search functionality within a tile, and now users can find it. Another example is the physical Search button on the Windows Phone. This button was meant to be used to search within apps. Users complained about not having an option to search within email because they didn’t think to press this physical button to search for emails. Microsoft changed the functionality. Now the physical Search button is used only to search content from the web, and the mail app has its own Search button.
1546
Download from finelybook www.finelybook.com
Windows 8 had a similar issue with search; users didn’t use the search functionality from the Charms bar to search within apps. Windows 8.1 changed the guideline to use search from the Charms bar, and now the app contains its own Search box; in Windows 10 there’s also an auto suggest box. Does it look like some commonalities? To enable app analytics, you first need to register with the Visual Studio App Center. Don’t be afraid of costs that are too high—crash reporting and analytics are available for free (at the time of this writing). Next, you need to create an app, and copy the App Secret from the web portal. Then you can create a new Blank App (Universal Windows) with Visual Studio. To enable analytics, add the NuGet package Microsoft.AppCenter.Analytics to the project. With just a few API calls, you’re can find out issues your users have. In the constructor of the App class, add AppCenter.Start, and add your previously copied App Secret. To enable Analytics, you need to pass the type of the Analytics object as the second argument to the Start method (code file WinAppAnalytics/App.xaml.cs): public App() { this.InitializeComponent(); this.Suspending += OnSuspending; AppCenter.Start("84df09c4-d560-4c46-a44f-a5524c3abb7f", typeof(Analytics)); }
NOTE Remember to add your App Secret from your app configuration in the Visual Studio App Center to the Application.Start method. Running the application now, you’ll see user information, when users start the application, and locations as well as devices from users. 1547
Download from finelybook www.finelybook.com
To get some more information from users, you need to create calls to Analytics.TrackEvent. All the possible events from the app are defined within the class EventNames (code file WinAppAnalytics/EventNames.cs): public class EventNames { public const string ButtonClicked = nameof(ButtonClicked); public const string PageNavigation = nameof(PageNavigation); public const string CreateMenu = nameof(CreateMenu); }
The sample application contains controls to enable/disable analytics, to enter some text, and to click a button (see Figure 29-5). Events are collected when the MainPage is activated. The TrackEvent method requires a string for the event name, which is taken from the EventNames class. The name of the event is not prefixed by the class name because a using static declaration is used to import the members of this class. The second argument of the TrackEvent method is optional. Here you can pass a dictionary of strings to track additional information. In the sample code, when the page is navigated to, the PageNavigation event contains information about the type of the page navigated to (code file WinAppAnalytics/MainPage.xaml.cs): protected override void OnNavigatedTo(NavigationEventArgs e) { base.OnNavigatedTo(e); Analytics.TrackEvent(PageNavigation, new Dictionary { ["Page"] = nameof(MainPage) }); }
1548
Download from finelybook www.finelybook.com
FIGURE 29-5 With the click of the button, TrackEvent tracks the ButtonClick event, with the information the user entered in the TextBox control: private void OnButtonClick(object sender, RoutedEventArgs e) { Analytics.TrackEvent(ButtonClicked, new Dictionary { ["State"] = textState.Text }); }
Users might not agree to allow you to collect information as they wander around your app, so you can create a setting the user can use to enable and disable this functionality. If you set Analytics.SetEnabledAsync(false), the Analytics APIs no longer report data: private async void OnAnalyticsChanged(object sender, RoutedEventArgs e) { if (sender is CheckBox checkbox) { bool isChecked = checkbox?.IsChecked ?? true; await Analytics.SetEnabledAsync(isChecked); }
1549
Download from finelybook www.finelybook.com
}
Visual Studio App Center has some limits regarding analytics, as shown in this list: You can have only 200 or fewer event names. The event name is limited to 256 characters. The dictionary can contain only 5 or fewer properties. Event property names and event property values are limited to 64 characters.
NOTE These are the limits at the time of this writing. They might change with future versions. When you run the application and monitor the Visual Studio App Center portal, you can see the events that occurred and the number of users that were affected (see Figure 29-6). When you click into the events, you can see event count by user, events per session, and the details of the dictionary properties passed. You can also see the live event log flow, as shown in Figure 29-7.
1550
Download from finelybook www.finelybook.com
FIGURE 29-6
FIGURE 29-7 Apart from this information, Visual Studio App Center Analytics also gives you information about the following: The number of active users Daily sessions per user Session duration Top devices OS versions used Languages
SUMMARY In this chapter, you have looked at tracing and logging facilities that can help you find intermittent problems in your applications. You should plan early and build these features into your applications; doing so will help you avoid many troubleshooting problems later. With tracing, you can write debugging messages to an application that you can also use for the final product delivered. If there are problems, you can turn tracing on by changing configuration values and find the issues. With Visual Studio App Center Analytics, you’ve seen that many 1551
Download from finelybook www.finelybook.com
features come out of the box when you use this cloud service. You can easily get information from your users with just a few lines of code. If you add some more lines, you can find out if users don’t use some features of the app because they are having trouble finding them. This was the last chapter of the second part of this book, “.NET Core and Windows Runtime.” The next part, “Web Applications and Services,” is based on a lot of features you were introduced to in this part. The next chapter, “ASP.NET Core,” is where you begin to dig into web applications and services.
1552
Download from finelybook www.finelybook.com
PART III Web Applications and Services Chapter 30: ASP.NET Core Chapter 31: ASP.NET Core MVC Chapter 32: ASP.NET Web API
1553
Download from finelybook www.finelybook.com
30 ASP.NET Core WHAT’S IN THIS CHAPTER? Understanding ASP.NET Core and web technologies Using static content Working with HTTP request and response Using dependency injection with ASP.NET Defining custom simple routing Creating middleware components Using sessions for state management Reading configuration settings
WROX.COM CODE DOWNLOADS FOR THIS CHAPTER The Wrox.com code downloads for this chapter are found at http://www.wrox.com on the Download Code tab. The source code is also available at https://github.com/ProfessionalCSharp/ProfessionalCSharp7 in the directory aspnetcore. The code for this chapter contains this example project: Simple Host WebSampleApp 1554
Download from finelybook www.finelybook.com
CustomConfiguration
ASP.NET CORE After more than 15 years of ASP.NET, ASP.NET Core was a complete rewrite of ASP.NET. ASP.NET Core features modular programming, makes use of modern patterns, is fully open sourced, is lightweight for best use in the cloud, and is available to non-Microsoft platforms. A full rewrite of ASP.NET gives a lot of advantages, but this also means reworking existing web applications based on older versions of ASP.NET. Is it necessary to rewrite existing web applications to ASP.NET Core? Let’s try to answer this question. ASP.NET Web Forms is no longer part of ASP.NET Core. However, having web applications that include this technology does not mean you have to rewrite them. It’s still possible to maintain legacy applications written with ASP.NET Web Forms with the full framework. ASP.NET Web Forms even received some enhancements with the latest versions of the .NET Framework, such as asynchronous model binding. The ASP.NET MVC variant of ASP.NET is still part of ASP.NET Core, but it’s different from the previous framework with the .NET Framework. When doing a high-level comparison of ASP.NET MVC and ASP.NET Core MVC, the two technologies look very much alike. However, behind the scenes everything is different. When you transfer ASP.NET MVC applications to ASP.NET Core MVC, you need to make some changes to the source code to bring it to the new application stack. For some applications this might mean making minor changes to namespaces, types, and some methods. If the application makes use of more advanced features from ASP.NET MVC, you must do more work to move the application to the new technology. Converting ASP.NET Web Forms to ASP.NET Core MVC might be a lot of work. ASP.NET Web Forms abstracts HTML and JavaScript from the developer. Using ASP.NET Web Forms, it’s not necessary to know HTML and JavaScript. Instead you use server-side controls with C# code. The server-side controls themselves return HTML and 1555
Download from finelybook www.finelybook.com
JavaScript. This programming model is like the old Windows Forms programming model. With ASP.NET MVC, developers need to know HTML and JavaScript. ASP.NET MVC is based on the Model-ViewController (MVC) pattern, which makes unit testing easy. Because ASP.NET Web Forms and ASP.NET MVC are based on very different architecture patterns, it can be a huge undertaking to migrate ASP.NET Web Forms applications to ASP.NET MVC. Before taking on this task, you should create a checklist of the advantages and the disadvantages of keeping the old technology with your solution and compare this with the advantages and disadvantages of going to the new technology. You will still be able to work with ASP.NET Web Forms for many years to come.
NOTE My website at http://www.cninnoation.com was originally created with ASP.NET Web Forms. I’ve converted this website with an early version of ASP.NET MVC to this new technology stack. Because my original site already made use of a lot of separate components to abstract the database and service code, it was not really a huge undertaking and was done very fast. I was able to use the database and service code directly from ASP.NET MVC. On the other hand, if I had used Web Forms controls to access the database instead of using my own controls, it would have been a lot more work. Nowadays, this web application is implemented with ASP.NET Core.
NOTE This book does not cover the legacy technology ASP.NET Web Forms. ASP.NET MVC also is not covered. This book has a focus on new technologies; consequently, the material about web applications is based on ASP.NET Core and ASP.NET Core MVC. You should use these technologies for new web applications. In 1556
Download from finelybook www.finelybook.com
case you need to maintain older applications, you should read older editions of this book, such as Professional C# 5.0 and .NET 4.5.1, which covers ASP.NET 4.5, ASP.NET Web Forms 4.5, and ASP.NET MVC 5. This chapter covers the foundation of ASP.NET Core 2.0. Chapter 31 covers ASP.NET Core MVC, a framework that is built on top of ASP.NET Core. Chapter 32 covers creating a web API with ASP.NET Core MVC.
WEB TECHNOLOGIES Before getting into the foundations of ASP.NET Core later in this chapter, this section describes core web technologies that are important to know when creating web applications: HTML, CSS, JavaScript, scripting libraries.
HTML HTML is the markup language that is interpreted by web browsers. It defines elements to display various headings, tables, lists, and input elements such as text and combo boxes. HTML5 has been a W3C recommendation since October 2014 (http://w3.org/TR/html5), and it is offered by all the major browsers. You can find lists of work in progress at http://w3.org/TR/html. At the time of this writing, HTML 5.2 has been a W3C recommendation since December 2017. With the features of HTML 5, several browser add-ins (such as Flash and Silverlight) are not required anymore because the things the add-ins do can now be done directly with HTML and JavaScript. Of course, you might still need Flash and Silverlight because not all websites have moved to the new technologies or your users might still be using older browser versions that don’t support HTML 5. HTML 5 adds new semantic elements that search engines are better able to use for analyzing the site. A canvas element enables the dynamic use of 2D shapes and images, and video and audio elements 1557
Download from finelybook www.finelybook.com
make the object element obsolete. With recent additions to the media source (http://w3c.github.io/media-source), adaptive streaming is also offered by HTML; previously this had been an advantage of Silverlight. HTML 5 also defines JavaScript APIs for drag-and-drop, storage, web sockets, and much more.
CSS Whereas HTML defines the content of web pages, CSS defines the look. In the earlier days of HTML, for example, the list item tag defined whether list elements should be displayed with a circle, a disc, or a square. Nowadays such information is completely removed from HTML and is instead put into a cascading style sheet (CSS). With CSS styles, you can use flexible selectors to select HTML elements, and you can define styles for these elements. You can select an element via its ID or its name, and you can define CSS classes that can be referenced from within the HTML code. With newer versions of CSS, you can define quite complex rules for selecting specific HTML elements. As of Visual Studio 2017, some web project templates make use of Twitter Bootstrap. This is a collection of CSS and HTML conventions, and you can easily adapt different looks and download ready-to-use templates. Visit www.getbootstrap.com for documentation and basic templates.
JavaScript and TypeScript Not all platforms and browsers can use .NET code, but nearly every browser understands JavaScript. One common misconception about JavaScript is that it has something to do with Java. In fact, only the name is similar because Netscape (the originator of JavaScript) made an agreement with Sun (Sun invented Java) to be allowed to use Java in the name. Nowadays, neither of these companies exist. Sun was bought by Oracle, and now Oracle holds the trademark for Java. Both Java and JavaScript (and C#) have the same roots—the C 1558
Download from finelybook www.finelybook.com
programming language. JavaScript is a functional programming language that is not object-oriented, although object-oriented capabilities have been added to it. JavaScript enables accessing the document object model (DOM) from the HTML page, which makes it possible to change elements dynamically on the client. ECMAScript is the standard that defines the current and upcoming features of the JavaScript language. Because other companies are not allowed to use the term Java with their language implementations, the standard has the name ECMAScript. Microsoft’s implementation of JavaScript had the name JScript. Check https://tc39.github.io/ecma262/ for the current state and future changes of the JavaScript language. Even though many browsers don’t support the newest ECMAScript version, you can still write ECMAScript 2018 code. Instead of writing JavaScript code, you can use TypeScript. The TypeScript syntax is based on ECMAScript, but it has some enhancements, such as strongly typed code and annotations. You’ll find many similarities between C# and TypeScript. Because the TypeScript compiler compiles to JavaScript, TypeScript can be used in every place where JavaScript is needed. For more information on TypeScript, check http://www.typescriptlang.org.
Scripting Libraries Beside the JavaScript programming language, you also need scripting libraries to make life easier. Scripting libraries can be used with the server-side functionality of ASP.NET Core. jQuery (http://www.jquery.org) is a library that abstracts browser differences when accessing DOM elements and reacting to events. A few years ago, this library was used with nearly every website. Nowadays, more options are available, and you can’t expect to have jQuery available everywhere. Angular (https://angular.io) is a library from Google based on the MVC pattern for simplifying development and testing with single1559
Download from finelybook www.finelybook.com
page web applications. (Unlike ASP.NET MVC, Angular offers the MVC pattern with client-side code.) React (https://reactjs.org) is a library from Facebook that offers functionality to easily update user interfaces as data changes in the background. ASP.NET Core 2.0 templates for Visual Studio include templates for Angular and React. Visual Studio 2017 supports IntelliSense and debugging JavaScript code.
NOTE Styling web applications and writing JavaScript code is not covered in this book. You can read more about HTML and styles in HTML and CSS: Design and Build Websites by John Duckett (John Wiley & Sons, 2011); and get up to speed with Beginning JavaScript, Fifth Edition by Jeremy McPeak (Wrox, 2015).
ASP.NET WEB PROJECT Start by creating an empty ASP.NET Core 2.0 web application. The first application is a simple host that does nothing more than answer requests. You start with a new ASP.NET Core web application and select the Empty template (see Figure 30-1). However, for the first sample, empty is not empty enough. Delete the file Startup.cs and the directory wwwroot from the template. The Main method is simplified to invoke the Start method of the WebHost class. This method has a parameter of RequestDelegate. RequestDelegate is a delegate that receives an HttpContext as parameter and returns a Task. The HttpContext can be used to read the request from the client and send a return. With the sample code, a response containing an HTML string is returned (code file SimpleHost/Program.cs): using Microsoft.AspNetCore;
1560
Download from finelybook www.finelybook.com
using Microsoft.AspNetCore.Hosting; using Microsoft.AspNetCore.Http; namespace SimpleHost { public class Program { public static void Main() { WebHost.Start(async context => { await context.Response.WriteAsync("A Simple Host! "); }).WaitForShutdown(); } } }
FIGURE 30-1 When you run the application, you can see the HTML content in the browser. Creating a web host with ASP.NET Core is extremely simple, but now 1561
Download from finelybook www.finelybook.com
we get into a more complex scenario to see the features. The next application is named WebSampleApp and is created with the same Empty template. After you’ve created the project, you see a solution and a project file named WebSampleApp, which includes a few files and folders (see Figure 30-2).
FIGURE 30-2 Within the project structure, you can see a Dependencies folder. This contains a NuGet subfolder that includes NuGet packages. With ASP.NET Core 2.0, the package list has been simplified, and you see only the reference package Microsoft.AspNetCore.All. This is a reference package that includes a whole bunch of ASP.NET Core packages. You can see the list of packages that are referenced by opening Microsoft.AspNetCore.All in Solution Explorer. In the project file you also can see the reference to this package. The project file lists the project SDK (Software Development Kit) with Microsoft.NET.Sdk.Web. This makes use of the SDK installed on the system. This entry is different from console applications where the SDK is Microsoft.NET.Sdk. With the Web SDK, additional tools for web development are available (project file WebSampleApp.cspoj):
1562
Download from finelybook www.finelybook.com
netcoreapp2.0
You can configure the web server that is used while developing with Visual Studio with the Debug option in Project settings (see Figure 303). By default, IIS Express is configured with the port number specified with the Debug settings. IIS Express derives from Internet Information Server (IIS) and offers all the core features of IIS. This makes it easy to develop the web application in practically the same environment where the application will be hosted later (if IIS is used for hosting). To run the application with the Kestrel server, you can select the profile with the name of the project with the Debug Project settings. The settings that you change with the Visual Studio project settings influence the configuration of the launchSettings.json file. With this file you can define some additional configurations such as command line arguments (code file WebSampleApp/Properties/launchsettings.json): { "iisSettings": { "windowsAuthentication": false, "anonymousAuthentication": true, "iisExpress": { "applicationUrl": "http://localhost:19879/", "sslPort": 0 } }, "profiles": { "IIS Express": { "commandName": "IISExpress",
1563
Download from finelybook www.finelybook.com
"launchBrowser": true, "environmentVariables": { "Hosting:Environment": "Development" } }, "web": { "commandName": "web", "launchBrowser": true, "launchUrl": "http://localhost:5000/", "commandLineArgs": "Environment=Development", "environmentVariables": { "Hosting:Environment": "Development" } } } }
FIGURE 30-3
1564
Download from finelybook www.finelybook.com
NOTE The Kestrel server was developed by the ASP.NET Core team to provide simple hosting with ASP.NET Core. When hosting the web application with IIS, IIS forwards requests to the Kestrel server. This is like web applications that are hosted with the Apache server on Linux—the request is forwarded to the Kestrel server. Starting with ASP.NET Core 2.0, the Kestrel server is supported for public-facing use, so you can directly host the web application in the Kestrel server and have it reachable from port 80. The Dependencies folder in the project structure in Solution Explorer shows the dependencies on the JavaScript libraries. When you create an empty project, this folder is empty. You add dependencies later in this chapter in the section “Adding Static Content.” The wwwroot folder is the folder for static files that need to be published to the server. Currently, this folder is empty, but as you work through this chapter you add HTML and CSS files and JavaScript libraries. A C# source file—Startup.cs—is included with an empty project as well. This file is discussed next. During the creation of the project, these namespaces are needed: Microsoft.AspNetCore.Builder; Microsoft.AspNetCore.Hosting; Microsoft.AspNetCore.Http; Microsoft.Extensions.Configuration Microsoft.Extensions.DependencyInjection Microsoft.Extensions.Logging Microsoft.Extensions.PlatformAbstractions Newtonsoft.Json
1565
Download from finelybook www.finelybook.com
System System.Collections.Generic System.Globalization System.Linq System.Text System.Text.Encodings.Web System.Threading.Tasks
Startup It’s time to start to get some functionality out of the web application. To get information about the client and return a response, you need to write a response to the HttpContext. The empty ASP.NET web application template creates a Main method in the Program class that contains the following code (code file WebSampleApp/Program.cs): public class Program { public static void Main(string[] args) { BuildWebHost(args).Run(); } public static IWebHost BuildWebHost(string[] args) => WebHost.CreateDefaultBuilder(args) .UseStartup() .Build(); }
The CreateDefaultBuilder returns an object that implements IWebHostBuilder, which set up the following functionality: It configures Kestrel as the web server to be used. The root path for the content is set to the current directory. Configurations are defined to load configuration from the file 1566
Download from finelybook www.finelybook.com
appsettings.json.
An additional JSON configuration file is added with different names based on the environment: appsettings. {environmentname}.json
The configuration from user secrets is read when the environment name is Development. The configuration settings providers are configured to load settings from environment variables and the command line. The logger factory is configured to log to the console and the debug output window. IIS integration is enabled.
NOTE User secrets are discussed in Chapter 24, “Security.” When you use the IWebHostBuilder returned from CreateDefaultBuilder, the UseStartup method is invoked. This method defines the Startup class that will be instantiated and the methods that will be invoked when you run the web host. The UseStartup method is implemented as a fluent API and returns IWebHostBuilder again. IWebHostBuilder can be used to configure additional services that are needed before the Startup class, and to define additional configuration providers. The Build method is the final method in the chain to set up the web host. This method builds the host to run the application and returns the IWebHost interface. You can use this interface to access the dependency injection container using the Services property, and you can access hosting server features from the ServerFeatures property. IServerAddressesFeature is one server feature that you can use to retrieve the addresses of the host. Calling the Start method starts the listening on the socket for the configured ports. 1567
Download from finelybook www.finelybook.com
NOTE Dependency injection and the .NET Core dependency injection container Microsoft.Extensions.DependencyInjection are discussed in Chapter 20, “Dependency Injection.” The empty ASP.NET web application template creates a Startup class that contains the following code: //... using using using using
Microsoft.AspNetCore.Builder; Microsoft.AspNetCore.Hosting; Microsoft.AspNetCore.Http; Microsoft.Extensions.DependencyInjection;
namespace WebSampleApp { public class Startup { public void ConfigureServices(IServiceCollection services) { } public void Configure(IApplicationBuilder app, IHostingEnvironment env) { if (env.IsDevelopment()) { app.UseDeveloperExceptionPage(); } app.Run(async (context) => { await context.Response.WriteAsync("Hello World!"); }); } } }
Because the Startup class is passed to the UseStartup method with a generic template parameter, in turn the methods ConfigureServices 1568
Download from finelybook www.finelybook.com
and Configure are invoked. You can use the ConfigureServices method to configure services in the dependency injection container. This method has a IServiceCollection property that contains all the services already registered in the Main method, and it allows you to add additional services. IServiceCollection derives from the base interface IList with a ServiceDescriptor as generic parameter and thus allows not only read services but also add services. The Configure method receives parameters via dependency injection. The parameters defined in the template are of type IApplicationBuilder and IHostingEnvironment. The interface IHostingEnvironment allows you to access the name of the environment (EnvironmentName), the root path for the content (the directory of the sources), and the root path for the web content files (the subdirectory wwwroot). The default provider that accesses these directories is the PhysicalFileProvider. With a different provider, the content can be served from other sources—for example, from a database. Within the implementation of the Configure method, the IHostingEnvironment is used to check whether the current environment is Development by invoking the extension method IsDevelopment. Only in this environment are exceptions shown. Because of security issues, in the production environment the user doesn’t see detail information on the exception. The IApplicationBuilder interface is used to add middleware to the HTTP request pipeline. When you invoke the Use method of this interface, you can build the HTTP request pipeline to define what should be done in answer to a request. The Use method is implemented using fluent API, and it again returns an IApplicationBuilder. With this, multiple middleware objects can easily be added to the pipeline. Several extension methods exist that make it easier to add middleware. Later in this chapter, in the section “Using Middleware,” you can create custom middleware and add it to the pipeline. The Run method is an extension method for the interface IApplicationBuilder and returns void. Thus, it registers the last 1569
Download from finelybook www.finelybook.com
middleware in the request pipeline. The parameter of the Run method is a delegate of type RequestDelegate. This type receives an HttpContext as a parameter, and it returns a Task. With the HttpContext (the context variable in the code snippet), you have access to the request information from the browser (HTTP headers, cookies, and form data) and can send a response. The generated code returns a simple string—Hello, World!—to the client, as shown in Figure 30-4.
FIGURE 30-4
NOTE If you’re using Microsoft Edge for testing the web application, you need to enable localhost. Type about:flags in the URL box and enable the Allow Localhost Loopback option (see Figure 30-5). Instead of using the built-in user interface of Microsoft Edge to set this option, you can also use a command line option: the utility CheckNetIsolation. The command CheckNetIsolation LoopbackExempt -a -n=Microsoft.MicrosoftEdge_8wekyb3d8bbwe
enables localhost similarly to using the friendlier user interface for Microsoft Edge. The utility CheckNetIsolation is useful if you want to configure other Windows apps to allow localhost.
1570
Download from finelybook www.finelybook.com
FIGURE 30-5
Sample Application The sample application contains an entry page where all the features shown by the application can easily be accessed using HTML links: app.Run(async (context) => {
1571
Download from finelybook www.finelybook.com
string[] lines = new[] { @"", @"Static Files requires " + @"UseStaticFiles", @"Request and Response", @"", @"Request and Response", @"Header", @"Add", //... @"", @"", @"" }; var sb = new StringBuilder(); foreach (var line in lines) { sb.Append(line); } string html = sb.ToString().HtmlDocument("Web Sample App"); await context.Response.WriteAsync(html); });
The HTMLExtensions class is defined to create some specific HTML and reduce the HTML code needed to write. This class defines extension methods to create div, span, and li elements (code file WebSampleApp/HtmlExtensions.cs): public static class HtmlExtensions { public static string Div(this string value) => $"{value}"; public static string Span(this string value) => $"{value}"; public static string Div(this string key, string value) => $"{key.Span()}: {value.Span()}".Div();
1572
Download from finelybook www.finelybook.com
public static string Li(this string value) => $@"{value}"; public static string Li(this string value, string url) => $@"{value}"; public static string Ul(this string value) => $"{value}"; public static string HtmlDocument(this string content, string title) { var sb = new StringBuilder(); sb.Append(""); sb.Append("{title} "); sb.Append(""); sb.Append(content); sb.Append(""); return sb.ToString(); } }
ADDING CLIENT-SIDE CONTENT Usually you don’t want to just send simple strings to the client. By default, simple HTML files and other static content can’t be sent. ASP.NET Core reduces the overhead as much as possible. Even static files are not returned from the server if you do not enable them. To enable static files served from the web server, you can add the extension method UseStaticFiles to add the required middleware (code file WebSampleApp/Startup.cs): public void Configure(IApplicationBuilder app, IHostingEnvironment env) { /... app.UseStaticFiles(); app.Run(async (context) => { await context.Response.WriteAsync("Hello World!"); });
1573
Download from finelybook www.finelybook.com
}
The folder where you add static files is the wwwroot folder within the project. Let’s add static content by adding a simple HTML file to the wwwroot folder (code file WebSampleApp/wwwroot/Hello.html), as shown here: ASP.NET Core Sample Hello, ASP.NET with Static Files
Now you make a request to the HTML file from the browser after starting the server—for example, http://localhost:32146/Hello.html. Depending on the configuration you are using, the port number might differ for your project. If you uncomment the extension method UseStaticFiles, the HTML file is not returned from the request.
NOTE When creating web applications with ASP.NET Core, you also need to know HTML, CSS, JavaScript, and some JavaScript libraries. As this book’s focus is C# and .NET Core, the content for these topics is kept to a minimum. I just cover the most important tasks you need to know with ASP.NET Core.
Using Tools for Client Content To create content for the client, you also need some tools. With the older version of ASP.NET, everything was integrated within Visual Studio. JavaScript libraries could be downloaded and installed in the project using NuGet packages. However, because communities around 1574
Download from finelybook www.finelybook.com
script libraries typically don’t use the NuGet server, they also don’t create NuGet packages for JavaScript libraries. Instead of NuGet, communities around JavaScript libraries use servers with functionality like NuGet. Microsoft and the community around NuGet were building NuGet packages for JavaScript libraries to have them available with Visual Studio. This always generated some delay, and often the experience of using Visual Studio was not the best in the web world. Many tools and libraries to develop web applications offer commandline interfaces. This is now also true for the .NET Core CLI. You’ve already seen the dotnet command for creating applications, and you also used some extensions, such as dotnet user-secrets (Chapter 24, “Security”) and dotnet ef (Chapter 26, “Entity Framework Core”). This experience fits now a lot better with the tools used to create web applications. On the other hand, Visual Studio offers a great integration of some web tools. What tools are needed to develop the client part of the web application? Tools to download packages Tools to process compile or transpile source files (for example, TypeScript to JavaScript) Tools to analyze source files Tools for bundling script files Tools for unit testing Depending on the templates you use, different tools are integrated to use the source code. For example, if you create an ASP.NET Core MVC web application using the template from the dotnet CLI, these tools are integrated in the project: Bower is for downloading JavaScript libraries (https://www.bower.io). Bundler and Minifier is a Visual Studio extension from Mads Kristensen to bundle and minify JavaScript and CSS files, see more 1575
Download from finelybook www.finelybook.com
at https://github.com/madskristensen/BundlerMinifier. When you create a new Angular project with Visual Studio or the dotnet CLI, you see these tools and libraries to be used: npm to download JavaScript packages (https://www.npmjs.com) tsc (the TypeScript compiler) to transpile TypeScript files to JavaScript (https://www.typescriptlang.org) Jasmine, a JavaScript testing framework (https://jasmine.github.io/) Karma, a test runner to test JavaScript code (http://karmarunner.github.io/1.0/index.html) Chai, which is an assertion library for unit tests (http://chaijs.com/) webpack, a module bundler to package, bundle, and load JavaScript libraries (https://webpack.js.org/) You are not restricted to using the tools from the templates. You can customize the code and project configuration to use the tools that best fit your way of work.
Using Client-Side Libraries with Bower .NET packages are available from the NuGet server. With .NET Core, JavaScript libraries are no longer available on this server. The JavaScript community uses other servers and is more agile on changing the server. When Visual Studio 2015 was released, nearly all client-side JavaScript libraries had been available on the Bower server. That’s why Microsoft built integration with Bower like NuGet into Visual Studio. At that time, scripting libraries for use on the server usually have been available on the npm (Node Package Manager) server (https://www.npmjs.com). Today, not only the scripting libraries used on the server but also the scripting libraries used on the client are available on the npm server. With .NET projects, NuGet packages are managed in the csproj project file. When using packages from the Bower server, the Visual 1576
Download from finelybook www.finelybook.com
Studio item template Bower Configuration File adds the file bower.json to the project. When you select the bower configuration file in Solution Explorer, you can manage bower packages and open the package manager that looks like the NuGet package manager (see Figure 30-6). You can browse and search for packages, install specific versions, and update packages in a way that’s like using the NuGet package manager.
FIGURE 30-6 Installing Bootstrap via the Bower package manager adds a reference to bootstrap to the bower configuration file (configuration file WebSampleApp/bower.json): { "name": "asp.net", "private": true, "dependencies": {
1577
Download from finelybook www.finelybook.com
"bootstrap": "v3.3.7" } }
Bower dependencies show up within the Dependencies list in the Solution Explorer as well. The package is automatically downloaded to wwwroot/lib. The location where the package is downloaded is specified by the .bowerrc file: { "directory": "wwwroot/lib" }
When you use bower from the command line, you can install the bower command-line utility with npm: > npm install -g bower
You also can install packages, which writes the packages to the bower.json file: > bower install jquery
Using a JavaScript Package Manager: npm Today, the host of the Node Package Manager (npm) not only serves server-side JavaScript libraries but most of the client-side JavaScript libraries also are available from the npm server.
NOTE With the Visual Studio Installer, you can install the Node Package Manager as optional component. You can also get it directly from https://nodejs.org/. Using Visual Studio 2017, you can add npm to the project by adding the NPM Configuration File from the item templates. When you add the item template, the following package.json file is added to the project: 1578
Download from finelybook www.finelybook.com
{ "version": "1.0.0", "name": "ASP.NET", "private": "true", "devDependencies": { } }
is the section for the libraries that are needed only during development. The section dependencies is for libraries needed during runtime; these need to be deployed on the production server. devDependencies
You can add libraries with their version to the corresponding section within package.json. Visual Studio offers IntelliSense and contacts the package server to get package names and available versions. Alternatively, you can use the npm command line to add packages—for example, as shown with the following command-line statement in which the option --save writes the dependency to the package.json file: > npm install @angular/core --save
When you select the version number in the Visual Studio editor, you can select between ^ and ~ prefixes. Without a prefix, the version of the library with the exact name you typed is retrieved from the server. With the ^ prefix, the latest library with the same major version number is retrieved; with the ~ prefix, the latest library with the same minor version number is retrieved. After the packages are added, you can easily update or uninstall the package using the npm node within the Dependencies section in Solution Explorer.
Bundling Returning JavaScript and CSS files to the browser should be different in a production environment than in the development environment. Comments and whitespaces can be removed—a process known as minifying—and multiple files can be combined to one—which is known as bundling. Both minifying and bunding increases the performance. Minifying reduces the file size. Bundling reduces the 1579
Download from finelybook www.finelybook.com
number of network transfers. One option for bunding is the Visual Studio 2017 integrated Bundler and Minifier. All you need to do is add a bundleconfig.json file (which is automatically added from the ASP.NET Core MVC project template) as shown in the following snippet. This file contains sections with outputFileName and inputFiles directives. The input files are minified and bundled to create one output file. You can add all your CSS files to bundle into one CSS file, and the JavaScript files of your project to bundle into one JavaScript file: [ { "outputFileName": "wwwroot/css/site.min.css", // An array of relative input file paths. Globbing patterns supported "inputFiles": [ "wwwroot/css/site.css" ] }, { "outputFileName": "wwwroot/js/site.min.js", "inputFiles": [ "wwwroot/js/site.js" ], // Optionally specify minification options "minify": { "enabled": true, "renameLocals": true }, // Optionally generate .map file "sourceMap": false } ]
Packaging with webpack As previously mentioned, webpack is a modern (at the time of this writing) way to package web projects. Using the ASP.NET Core template for Angular makes use of webpack and creates the file webpack.config.js to configure webpack for the web application. In this file you can find bundle configuration to bundle JavaScript and CSS files. 1580
Download from finelybook www.finelybook.com
For starting webpack also check the .NET project file csproj. With the Angular project AngularWithDotnetCore, this file contains the DebugRunWebpack task that runs before a build and executes the webpack JavaScript file:
You use the task PublishRunWebpack where npm modules are installed, and webpack is started with minifying and bundling:
1581
Download from finelybook www.finelybook.com
On top of the page, you can see the Page element with the XML attribute x:Class. This defines the name of the class where the XAML compiler generates partial code. With the code-behind file in Visual Studio you can see the part of this class that you can modify (code file XAMLIntro/MainPage.xaml):
Data templates that should be used for items in an ItemsControl can be referenced using the ItemTemplate property of an ItemsControl. Instead of fixed specifying the DataTemplate, now a DataTemplateSelector will be used to dynamically chose the DataTemplate based on the name of the publisher. The BookDataTemplateSelector derives from the base class DataTemplateSelector. A data template selector needs to override the method SelectTemplateCore and return the selected DataTemplate. With the implementation of the BookTemplateSelector, two properties are specified: the WroxTemplate and the DefaultTemplate. In the SelectTemplateCore method, Book objects are received. You can use pattern matching with the switch statement so that if the publisher is Wrox Press, the WroxTemplate is returned. In other cases, the DefaultTemplate is returned. You can extend the switch statement with more publishers (code file DataBindingSamples/Utilities/BookTemplateSelector.cs): public class BookTemplateSelector : DataTemplateSelector { public DataTemplate WroxTemplate { get; set; } public DataTemplate DefaultTemplate { get; set; } protected override DataTemplate SelectTemplateCore(object item) { DataTemplate selectedTemplate = null; switch (item) { case Book b when b.Publisher == "Wrox Press": selectedTemplate = WroxTemplate; break; default: selectedTemplate = DefaultTemplate; break; }
1880
Download from finelybook www.finelybook.com
return selectedTemplate; } }
NOTE Pattern matching is explained in Chapter 13. Next, the data template selector needs to be instantiated and initialized. You do this in the XAML code. Here, the properties WroxTemplate and DefaultTemplate are assigned to reference the previously created DataTemplate templates (code file DataBindingSamples/MainPage.xaml):
For using the BookTemplateSelector with the items in the ListView, the ItemTemplateSelector property references the template using the key 1881
Download from finelybook www.finelybook.com
and the StaticResource markup extension:
When you run the app at this stage, Figure 33-22 shows the new output with the different views based on the publisher.
FIGURE 33-22
Binding Simple Objects Instead of just binding a list, the single book should be displayed on the right side of the app. Compiled binding is used to bind to the BookId, Title, and Publisher properties of the Book property (code file DataBindingSamples/Views/BookUserControl.xaml):
1882
Download from finelybook www.finelybook.com
1904
Download from finelybook www.finelybook.com
FIGURE 33-34 The AutoSuggestBox property of the NavigationView allows adding an AutoSuggestsBox control to the navigation. This is shown on top of the menu items. The AutoSuggestBox is covered in Chapter 36 (code file NavigationViewSample/MainPage.xaml):
With the HeaderTemplate, the top of the app can be customized. The code snippet defines a header template with a Grid, a TextBlock, and a CommandBar (code file NavigationViewSample/MainPage.xaml):
1905
Download from finelybook www.finelybook.com
The PaneFooter defines the lower part in the pane. Below the footer, by default a menu item for the Settings is shown; this menu, which is used by many apps, is included by default (code file NavigationViewSample/MainPage.xaml):
Finally, the content of the NavigationPane is covered by a Frame control. This control is used to navigate to pages. The NavigationPane surrounds the page content (code file NavigationViewSample/MainPage.xaml):
LAYOUT PANELS The NavigationView control discussed in the previous section is an important control to organize the layout of the user interface. With 1906
Download from finelybook www.finelybook.com
many new Windows 10 apps you can see this control used for the main layout. There are several other controls to define a layout. This section demonstrates the VariableSizedWrapGrid for arranging multiple items in a grid that automatically wraps, the RelativePanel for arranging items relative to each other or relative to a parent, and adaptive triggers for rearranging the layout depending on the window size.
StackPanel If you need to add multiple elements to a control that supports only one control, the easiest way is to use a StackPanel. The StackPanel is a simple panel that shows one element after the other. The orientation of the StackPanel can be horizontal or vertical. In the following code snippet, the page contains a StackPanel with various controls organized vertical. In the ListBox within the first ListBoxItem contains a StackPanel organized horizontally (code file LayoutSamples/Views/StackPanelPage.xaml):
Figure 33-35 shows the child controls of the StackPanel organized vertically.
1907
Download from finelybook www.finelybook.com
FIGURE 33-35
Canvas is a panel that enables you to explicitly position controls. Canvas defines the attached properties Left, Right, Top, and Bottom that can be used by the children for positioning within the panel (code file LayoutSamples/Views/CanvasPage.xaml): Canvas
Figure 33-36 shows the output of the Canvas panel with the positioned children TextBlock, TextBox, and Button.
1908
Download from finelybook www.finelybook.com
FIGURE 33-36 Enter here:
NOTE The Canvas control is best used for the layout of graphic elements, like Shape controls shown in Chapter 35.
Grid The Grid is an important panel. Using the Grid, you can arrange your controls with rows and columns. For every column, you can specify a ColumnDefinition. For every row, you can specify a RowDefinition. The following example code lists two columns and three rows. With each 1909
Download from finelybook www.finelybook.com
column and row, you can specify the width or height. ColumnDefinition has a Width dependency property; RowDefinition has a Height dependency property. You can define the height and width in deviceindependent pixels, or you can set it to Auto to base the size on the content. The grid also allows star sizing, which means the space for the rows and columns is calculated according to the available space and relative to other rows and columns. When providing the available space for a column, you can set the Width property to *. To have the size doubled for another column, you specify 2*. The sample code, which defines two columns and three rows, uses star sizing for the columns (this is the default), the first row has a fixed size, and the second and third row use star sizing again. With the height calculation, the available height is reduced by the 200 pixels from the first row. The remaining area is divided between rows 2 and 3 in the relation 1.5:1. The grid contains several Rectangle controls with different colors to make the cell sizes visible. Because the parent of these controls is a grid, you can set the attached properties Column, ColumnSpan, Row, and RowSpan (code file LayoutSamples/Views/GridPage.xaml):
The outcome of arranging rectangles in a grid is shown in Figure 3337. 1910
Download from finelybook www.finelybook.com
FIGURE 33-37
VariableSizedWrapGrid is a wrap grid that automatically wraps to the next row or column if the size available for the grid is not large enough. The second feature of this grid is an allowance for items with multiple rows or columns; that’s why it’s called variable. VariableSizedWrapGrid
The following code snippet creates a VariableSizedWrappedGrid with orientation Horizontal, a maximum number of 20 items in the row, and rows and columns that have a size of 50 (code file LayoutSamples/Views/VariableSizedWrapGridSample.xaml):
The VariableSizedWrapGrid is filled with 30 Rectangle and TextBlock elements that have random sizes and colors. Depending on the size, 1 to 3 rows or columns can be used within the grid. The size of the items 1911
Download from finelybook www.finelybook.com
is set using the attached properties VariableSizedWrapGrid.ColumnSpan and VariableSizedWrapGrid.RowSpan (code file LayoutSamples/Views/VariableSizedWrapGridSample.xaml.cs): protected override void OnNavigatedTo(NavigationEventArgs e) { base.OnNavigatedTo(e); Random r = new Random(); Grid[] items = Enumerable.Range(0, 30).Select(i => { byte[] colorBytes = new byte[3]; r.NextBytes(colorBytes); var rect = new Rectangle { Height = r.Next(40, 150), Width = r.Next(40, 150), Fill = new SolidColorBrush(new Color { R = colorBytes[0], G = colorBytes[1], B = colorBytes[2], A = 255 }) }; var textBlock = new TextBlock { Text = (i + 1).ToString(), HorizontalAlignment = HorizontalAlignment.Center, VerticalAlignment = VerticalAlignment.Center }; var grid = new Grid(); grid.Children.Add(rect); grid.Children.Add(textBlock); return grid; }).ToArray(); foreach (var item in items) { grid1.Children.Add(item); Rectangle rect = item.Children.First() as Rectangle; if (rect.Width > 50) { int columnSpan = ((int)rect.Width / 50) + 1; VariableSizedWrapGrid.SetColumnSpan(item, columnSpan);
1912
Download from finelybook www.finelybook.com
int rowSpan = ((int)rect.Height / 50) + 1; VariableSizedWrapGrid.SetRowSpan(item, rowSpan); } }
When you run the application, you can see the rectangles and how they wrap for different window sizes in Figures 33-38 and 33-39.
FIGURE 33-38
1913
Download from finelybook www.finelybook.com
FIGURE 33-39
RelativePanel is a panel that allows one element to be positioned in relation to another element. If you’ve used the Grid control with definitions for rows and columns and you had to insert a row, you had to change all elements that were below the row that was inserted. The reason is that all rows and columns are indexed by numbers. This is not an issue with the RelativePanel, which enables you to place elements in relation to each other. RelativePanel
NOTE 1914
Download from finelybook www.finelybook.com
Compared to the RelativePanel, the Grid control still has its advantages with auto, star, and fixed sizing. The following code snippet aligns several TextBlock and TextBox controls, a Button, and a Rectangle within a RelativePanel. The TextBox elements are positioned to the right of the corresponding TextBlock elements; the Button is positioned relative to the bottom of the panel; and the Rectangle is aligned with the top with the first TextBlock and to the right of the first TextBox (code file LayoutSamples/Views/RelativePanelPage.xaml):
Figure 33-40 shows the alignment of the controls when you run the application.
1915
Download from finelybook www.finelybook.com
FIGURE 33-40
Adaptive Triggers The RelativePanel is a great control for alignment. However, to support multiple screen sizes and rearrange the controls depending on the screen size, you can use adaptive triggers with the RelativePanel control. For example, on a small screen the TextBox controls should be arranged below the TextBlock controls, but on a larger screen the TextBox controls should be right of the TextBlock controls. In the following code, the RelativePanel from before is changed to remove all RelativePanel attached properties that should not apply to all screen sizes, and an optional image is added (code file LayoutSamples/Views/AdaptiveRelativePanelPage.xaml):
1916
Download from finelybook www.finelybook.com
Using an adaptive trigger—with which the MinWindowWidth can be set to define when the trigger is fired—values for different properties are set to arrange the elements depending on the space available for the app. As the screen size gets smaller, the width needed by the app gets smaller as well. Moving elements below instead of beside reduces the width needed. Instead, the user can scroll down. With the smallest window width, the optional image is set to collapsed (code file LayoutSamples/Views/AdaptiveRelativePanelPage.xaml):
1917
Download from finelybook www.finelybook.com
You can establish the minimum window width needed by the application by setting the SetPreferredMinSize with the ApplicationView class (code file LayoutSamples/App.xaml.cs): protected override void OnLaunched(LaunchActivatedEventArgs e) { ApplicationView.GetForCurrentView().SetPreferredMinSize( new Size { Width = 320, Height = 300 }); //...
1918
Download from finelybook www.finelybook.com
}
When you run the application, you can see different layout arrangements with the smallest width (see Figure 33-41), a medium width (see Figure 33-42), and the maximum width (see Figure 33-43).
FIGURE 33-41
1919
Download from finelybook www.finelybook.com
FIGURE 33-42
1920
Download from finelybook www.finelybook.com
FIGURE 33-43
XAML Views Adaptive triggers can help support a lot of different window sizes as well as support layouts of the app for running it on the Xbox, the HoloLens, and on the desktop with different resolutions. If the user interface for your app should have more differences than can be solved by using the RelativePanel, the best option can be to use different XAML views. An XAML view contains just XAML code and uses the same code-behind as the corresponding page. You can create different XAML views for the same page for every device family. You can define XAML views for mobile devices by creating a folder DeviceFamily-Mobile. The device-specific folder always starts with the name DeviceFamily. Examples of other device families supported are Team, Desktop, and IoT. You can use this device family name as postfix to specify XAML views for the corresponding device family. You create a XAML view using the XAML View Visual Studio item template. This template creates the XAML code but no code-behind file. This view needs to have the same name as the page where the view should be replaced. Instead of creating a different folder for the mobile XAML views, you can also create the views in the same folder as the page, but the view file is named using DeviceFamily-Mobile.
Deferred Loading For a faster UI, you can delay creation of controls until they are needed. On small devices, some controls might not be needed at all, but with larger screens and faster systems they are needed. With previous versions of XAML applications, elements that have been added to the XAML code also have been instantiated. This is no longer the case with Windows 10. Here you can defer loading of controls as they are needed. You can use deferred loading with adaptive triggers to load only some controls at a later time. One sample scenario where this is useful is 1921
Download from finelybook www.finelybook.com
when you have a smaller window that the user can resize to be larger. With the smaller window, some controls should not be visible, but they should be visible with the bigger size of the window. Another scenario where deferred loading can be useful is when some parts of the layout may take more time to load. Instead of letting the user wait until he sees the complete loaded layout, you can use deferred loading. To use deferred loading, you need to add the x:Load attribute with a value False to a control, as shown in the following code snippet with a Grid control. This control also needs to have a name assigned to it (code file LayoutSamples/Views/DelayLoadingPage.xaml):
To make this deferred control visible, all you need to do is invoke the FindName method to access the identifier of the control. This not only makes the control visible but also loads the XAML tree of the control before the control is made visible (code file LayoutSamples/Views/DelayLoadingPage.xaml.cs): private void OnDeferLoad(object sender, RoutedEventArgs e) { FindName(nameof(deferGrid)); }
NOTE The x:Load attribute is new with build 15063. Previous to build 1922
Download from finelybook www.finelybook.com
15063, you could use the x:DeferLoadingStrategy attribute. x:Load has the advantage that the element can also be unloaded after it was loaded. When you run the application, you can verify with the Live Visual Tree window that the tree containing the deferGrid element is not available (see Figure 33-44), but after the FindName method is invoked to find the deferGrid element, the deferGrid element is added to the tree (see Figure 33-45).
FIGURE 33-44
1923
Download from finelybook www.finelybook.com
FIGURE 33-45
NOTE The attribute x:Load has an overhead of about 600 bytes, so you should use it only on elements that need to be hidden. If this attribute is used on a container element, you only pay the overhead once with the element where the attribute is applied to.
SUMMARY This chapter introduced many different aspects of programming Windows apps. You’ve seen the foundation on XAML and how it 1924
Download from finelybook www.finelybook.com
extends XML with attached properties and markup extensions. You’ve seen how to deal with XAML differences in different Windows 10 versions using conditional XAML. You’ve seen how different screen sizes can be dealt with, options for laying out controls with different panels, and the categories and features of different controls. The next chapter continues with XAML-based apps, the MVVM pattern, commands, and creating shareable view-models.
1925
Download from finelybook www.finelybook.com
34 Patterns with XAML Apps WHAT’S IN THIS CHAPTER? Sharing code Creating models Creating repositories Creating ViewModels Navigation between pages Adaptive user interfaces Using an event aggregator List Items with view models
WROX.COM CODE DOWNLOADS FOR THIS CHAPTER The Wrox.com code downloads for this chapter are found at www.wrox.com on the Download Code tab. The source code is also available at https://github.com/ProfessionalCSharp/ProfessionalCSharp7 in the directories Patterns and PatternsXamarinShared. The libraries are shared between Chapter 34 and Chapter 37, “Xamarin.Forms.” The code for this chapter contains the project BooksApp.
1926
Download from finelybook www.finelybook.com
WHY MVVM? Technologies and frameworks change. I created the first version of my company website (http://www.cninnovation.com) with ASP.NET Web Forms. When ASP.NET MVC came along, I tried it out to migrate a feature of my site to MVC. The progress was a lot faster than I expected. Within one day I transformed the complete site to MVC. The site uses SQL Server, integrates RSS feeds, and shows trainings and books. Information about the trainings and books is coming from the SQL Server database. The fast migration to ASP.NET MVC was only possible because I had separation of concerns from the beginning; I had created separate layers for the data access and business logic. With ASP.NET Web Forms it would have been possible to directly use data source and data controls within the ASPX page. Separating the data access and business logic took more time in the beginning, but it turned out to be a huge advantage, as it allows for unit tests and reuse. Because I had separated things this way, moving to another technology was a breeze. Nowadays this site is running with ASP.NET Core. With regard to Windows apps, technology changes fast as well. For many years, Windows Forms was the technology of choice for wrapping native Windows controls to create desktop applications. Next followed Windows Presentation Foundation (WPF), in which the user interface is defined using eXtensible Application Markup Language (XAML). Silverlight offered a lightweight framework for XAML-based applications that run within the browser. Windows Store apps followed with Windows 8, changing to Universal Windows apps with Windows 8.1 for apps running both on the PC and the Windows phone. With Windows 8.1 and Visual Studio 2013, three projects with shared code have been created to support both the PC and the phone. This changed with Visual Studio 2015, Windows 10, and the Universal Windows Platform (UWP). You can have one project that can support the PC, the phone, Xbox One, Windows IoT, large screens with the Surface Hub, and even Microsoft’s HoloLens. One project to support all Windows 10 platforms might not fit your needs. Can you write a program that supports Windows 10 only? Some 1927
Download from finelybook www.finelybook.com
of your customers might still be running Windows 7. In this case, WPF is the answer, but it doesn’t support other Windows 10 devices like HoloLens and Xbox. What about supporting Android and iOS? You can use Xamarin to create C# and .NET code here as well, but it’s different. The goal should be to reuse as much code as possible, to support the platforms needed, and to have an easy switch from one technology to another. These goals—with many organizations where administration and development joins as DevOps to bring new features and bug fixes in a fast pace to the user—require automated tests. Unit testing is a must that needs to be supported by the application architecture.
NOTE Unit testing is covered in Chapter 28, “Testing.” With XAML-based applications, the Model-View-ViewModel (MVVM) design pattern is favored for separating the view from functionality. This design pattern was invented by John Gossman of the Expression Blend team as a better fit to XAML with advancements to the ModelView-Controller (MVC) and Model-View-Presenter (MVP) patterns because it uses data binding, a number-one feature of XAML. With XAML-based applications, the XAML file and code-behind file are tightly coupled to each other. This makes it hard to reuse the codebehind and also hard to do unit testing. To solve this issue, the MVVM pattern allows for a better separation of the code from the user interface. In principle, the MVVM pattern is not that hard to understand. However, when you’re creating applications based on the MVVM pattern, you need to pay attention to a lot more needs: several patterns come into play for making applications work and making reuse possible, including dependency injection mechanisms for being independent of the implementation and communication between view models. 1928
Download from finelybook www.finelybook.com
All this is covered in this chapter, and with this information you can not only use the same code with Windows apps and Windows desktop applications, but you can also use it for iOS and Android with the help of Xamarin. This chapter gives you a sample app that covers all the different aspects and patterns needed for a good separation to support different technologies.
DEFINING THE MVVM PATTERN First, let’s have a look at the MVC design pattern that is one of the origins of the MVVM pattern. The Model-View-Controller (MVC) pattern separates the model, the view, and the controller (see Figure 34-1). The model defines the data that is shown in the view as well as business rules about how the data can be changed and manipulated. The controller is the manager between the model and the view, updates the model, and sends data for display to the view. When a user request comes in, the controller takes action, uses the model, and updates the view.
FIGURE 34-1
NOTE The MVC pattern is heavily used with ASP.NET MVC, which is covered in Chapter 31, “ASP.NET Core MVC.”
1929
Download from finelybook www.finelybook.com
With the Model-View-Presenter (MVP) pattern (see Figure 34-2), the user interacts with the view. The presenter contains all the business logic for the view. The presenter can be decoupled from the view by using an interface to the view as contract. This allows easily changing the view implementation for unit tests. With MVP, the view and model are completely shielded from each other.
FIGURE 34-2 The main pattern used with XAML-based applications is the ModelView-ViewModel pattern (MVVM) (see Figure 34-3). This pattern takes advantage of the data-binding capabilities with XAML. With MVVM, the user interacts with the view. The view uses data binding to access information from the view model and invokes commands in the view model that are bound in the view as well. The view model doesn’t have a direct dependency to the view. The view model itself uses the model to access data and gets change information from the model as well. In the following sections of this chapter you see how to use this architecture with the application to create views, view models, models, and other patterns that are needed.
1930
Download from finelybook www.finelybook.com
FIGURE 34-3
SHARING CODE Before creating the sample solution and starting to create a model, we need to take a step back and have a look at different options for how to share code between different platforms. This section covers different options to address the different platforms you need to support and the APIs you need.
Using API Contracts with the Universal Windows Platform The Universal Windows Platform defines an API that is available with all Windows 10 devices. However, this API changes from version to version. With the Application settings in the Project Properties (see Figure 34-4) you can define the target version of your application (this is the version that you build for) and the minimum version that is required on the system. The versions of all Software Developer Kits (SDKs) you select need to be installed on your system, so you can verify what APIs are available. For using features of the target version 1931
Download from finelybook www.finelybook.com
that are not available within the minimum version, you need to programmatically check whether the device supports the specific feature you need, before using that API.
FIGURE 34-4 With the UWP, you can support different device families. The UWP defines several device families: Universal, Desktop (PC), Mobile, IoT (Raspberry Pi), Surface Hub, Holographic (HoloLens), and Xbox. Over time, more device families will follow. Each of these device families offers APIs that are available only for this family of devices. The APIs of device families are specified via an API contract. Each device family can offer multiple API contracts. You can use features specific to device families, but you can still create one binary image that runs on all. Typically, your application will not support all the device families, but it might support a few of them. To support specific device families and use those families’ APIs, you can add an Extension SDK from Solution Explorer; select References ⇨ Add Reference and then select Universal Windows ⇨ Extensions (see Figure 34-5). There you can see your installed SDKs and select the ones you need.
1932
Download from finelybook www.finelybook.com
FIGURE 34-5 After selecting the Extension SDK, you can use the API from the code after verifying whether the API contract is available. The ApiInformation class (namespace Windows.Foundation.Metadata) defines the IsApiContractPresent method where you can check whether a specific API contract with a specific major and minor version is available. The following code snippet asks for the Windows.Phone.PhoneContract, major version 1. If this contract is available, the VibrationDevice can be used: if (ApiInformation.IsApiContractPresent("Windows.Phone.PhoneContract", 1)) { VibrationDevice vibration = VibrationDevice.GetDefault(); vibration.Vibrate(TimeSpan.FromSeconds(1)); }
NOTE You also can check for available API contracts with XAML code. 1933
Download from finelybook www.finelybook.com
Read about Conditional XAML in Chapter 33, “Windows Apps.” You might be afraid to get convoluted code that checks all over the place using the checks for the API contracts. In a case where you’re targeting just a single device family, it’s not necessary to check to see whether the API is present. In the previous sample, if the application is only targeted for the phone, the API check is not necessary. In a case where you’re targeting multiple device platforms, you only have to check for the device-specific APIs you’re calling. You can write useful apps spanning multiple device families just by using the Universal API. In a case where you’re supporting multiple device families with a lot of device-specific API calls, I propose you avoid using the ApiInformation and instead use dependency injection.
NOTE Read Chapter 20, “Dependency Injection,” for more information about dependency injection (DI) and using DI containers.
Working with Shared Projects Using the same binary with API contracts is possible only with the Universal Windows Platform. This is not an option if you need to share code, for example, between Windows desktop applications with WPF and UWP apps, or between Xamarin.Forms apps and UWP apps. When you create these project types where you can’t use the same binary, you can use the Shared Project template with Visual Studio 2017. The Shared Project template with Visual Studio creates a project that doesn’t create a binary—no assembly is built. Instead, code is shared between all projects that reference this shared project. You compile the code within each project that references the shared project. When you create a class as shown in the following code snippet, this class can be used in all projects that reference the shared project. You 1934
Download from finelybook www.finelybook.com
can even use platform-specific code using preprocessor directives. The Visual Studio 2017 Universal Windows App template sets the conditional compilation symbol WINDOWS_UWP, so you can use this symbol for code that should only compile for the Universal Windows Platform. For WPF, you add WPF to the conditional compilation symbols with a WPF project, and for Xamarin, XAMARIN can be added to the conditional compilation symbols. public partial class Demo { public int Id { get; set; } public string Title { get; set; } #if WPF public string WPFOnly { get; set; } #endif #if WINDOWS_UWP public string WindowsAppOnly {get; set; } #endif #if XAMARIN public string XamarinAppOnly {get; set; } #endif }
Editing shared code with the Visual Studio editor, you can select the project name in the upper-left bar, and the parts of the code that are not active for the actual project are dimmed (see Figure 34-6). When you’re editing the file, IntelliSense also offers the API for the corresponding selected project.
1935
Download from finelybook www.finelybook.com
FIGURE 34-6 Instead of using the preprocessor directives, you can also maintain differing parts of the class in the WPF, UWP, or Xamarin projects. This is a good reason to declare the class partial.
NOTE The C# partial keyword is explained in Chapter 3, “Objects and Types.” When you define the same class name with the same namespace in the WPF project, you can extend the shared class. It is also possible to use a base class (if the shared project doesn’t define a base class): public class MyBase { //... }
1936
Download from finelybook www.finelybook.com
public partial class Demo: MyBase { public string WPFTitle => $"WPF{Title}"; }
Working with .NET Standard Libraries There’s another option for sharing code: .NET Standard Libraries. All the actual technologies can use .NET Standard nowadays, so this is an easy task: Just create a .NET Standard Library, and you can share it between different platforms. You just need to pay attention to the version for the .NET Standard to use. The sample application is using a .NET Standard 2.0 library; this can be used from Windows Apps starting with build 16299, Xamarin.iOS 10.14, Xamarin.Android 8.0, Xamarin.Mac 3.8, and the .NET Framework 4.6.1.
NOTE Standard Libraries are the replacement for the Portable Class Library (PCL) and are a lot easier to use. Creating .NET Standard Libraries is discussed in detail in Chapter 19, “Libraries, Assemblies, Packages, and NuGet.” With .NET Standard Libraries, every new version gets additional APIs. APIs are never removed. After creating a .NET Standard Library, with the Project Properties you can select the version of the standard (see Figure 34-7) that should be supported. With the selection, you’re limited to the APIs that are available with this version.
1937
Download from finelybook www.finelybook.com
FIGURE 34-7 When you’re using shared projects, you can write code that is only available from one platform. To differentiate the code from other platforms, you can use preprocessor statements to compile the code only when compiling it for this one platform. You can’t do this with .NET Standard Libraries. As a practical way around this, you can use standard libraries to define code for contracts and implement the contracts with platform-specific libraries where needed. To use the code from the platform-specific libraries with libraries that are not platform specific, you can use dependency injection. How to do this is part of the bigger sample in this chapter, which is covered in the “View Models” section.
NOTE With .NET Standard Libraries, it’s possible to add references to 1938
Download from finelybook www.finelybook.com
non-standard .NET libraries. As long as you don’t use APIs that are not available on all your target platforms, you are fine. As soon as you use APIs specific to one target platform, the other ones will break. You can add runtime checks before using the specific APIs to avoid this issue. A cleaner solution on using platform-specific code is with dependency injection, as is shown in the sample application.
SAMPLE SOLUTION The sample solution consists of a Universal Windows Platform app for showing and editing a list of books. In Chapter 37, the app will be extended for use on iPhone and Android. The solution uses these projects: BooksApp—A UWP app project for the UI of a modern app. This application contains the views for the app with XAML code, and platform-specific implementation of services. BooksLib—A .NET Standard Library 2.0 with models, view models, and services to create, read, and update books; common for all platforms supporting .NET Standard 2.0. Framework—A .NET Standard Library 2.0 containing classes that are useful for all XAML-based applications. Here you can find base classes for view models, implementation of INotifyPropertyChanged, ICommand, and other useful features. The user interface of the application will have two views: one view to show as a list of books and one view to show book details. When you select a book from the list, the detail is shown. It’s also possible to add and edit books. The BooksLib and Framework library can be used by multiple applications with XAML code—for example, with UWP, WPF, and Xamarin. The Framework library is built in a way that it can be used by different apps, not only apps for working with books. Book-specific functionality is implemented in the BooksLib. The sample application demonstrates sharing view models not only between UWP and 1939
Download from finelybook www.finelybook.com
Xamarin, but also between different apps having the need for master/detail functionality. Base classes for the view models are implemented in the Framework library.
MODELS Let’s start defining the models, particularly the Book type. This is the type that will be shown and edited in the UI. To support data binding, the properties where values are updated from the user interface need a change notification implementation. The BookId property is only shown but not changed, so change notification is not needed with this property. The method SetProperty is defined by the base class BindableBase (code file BooksLib/Models/Book.cs): public class Book: BindableBase { public int BookId { get; set; } private string _title; public string Title { get => _title; set => Set(ref _title, value); } private string _publisher; public string Publisher { get => _publisher; set => Set(ref _publisher, value); } public override string ToString() => Title; }
Implementing Change Notification The object source of XAML elements needs either dependency properties or INotifyPropertyChanged to allow change notification with data binding. With model types, it makes sense to implement INotifyPropertyChanged. For having an implementation available with different projects, the implementation is done within the Framework 1940
Download from finelybook www.finelybook.com
library project in the class BindableBase. The INotifyPropertyChanged interface defines the event PropertyChanged. To fire the change notification, the method Set is implemented as a generic function for supporting any property type. Before the notification is fired, a check is done to see whether the new value is different from the current value (code file Framework/BindableBase.cs): public abstract class BindableBase: INotifyPropertyChanged { public event PropertyChangedEventHandler PropertyChanged; protected virtual void OnPropertyChanged( [CallerMemberName] string propertyName = null) => PropertyChanged?.Invoke(this, new PropertyChangedEventArgs(propertyName)); protected virtual bool SetProperty(ref T item, T value, [CallerMemberName] string propertyName = null) { if (EqualityComparer.Default.Equals(item, value)) return false; item = value; OnPropertyChanged(propertyName); return true; } }
NOTE Dependency properties are explained in Chapter 33.
Using the Repository Pattern Next you need a way to retrieve, update, and delete Book objects. You can read and write books from a database with EF Core. Although EF Core can be accessed from the Universal Windows Platform, usually this is a task from the back end and is consequently not covered in this chapter. To make the back end accessible from a client app, Web API is the technology of choice on the server side. These topics are covered 1941
Download from finelybook www.finelybook.com
in Chapter 26, “Entity Framework Core,” and Chapter 32, “Web API.” With the client application it’s best to be independent of the data store. For this, the Repository design pattern was defined. The Repository pattern is a mediator between the model and the data access layer; it can act as an in-memory collection of objects. It gives an abstraction of the data access layer and allows for easier unit tests. The generic interface IQueryRepository defines methods for retrieving one item by ID or a list of items (code file BooksLib/Services/IQueryRepository.cs): public interface IQueryRepository where T: class { Task GetItemAsync(TKey id); Task Task.FromResult(_books.Find(b => b.BookId == id)); public Task GetItemsAsync() => Task.FromResult(_books); public Task UpdateAsync(Book item) { Book bookToUpdate = _books.Find(b => b.BookId == item.BookId); int ix = _books.IndexOf(bookToUpdate); _books[ix] = item; return Task.FromResult(_books[ix]); } public Task AddAsync(Book item) { item.BookId = _books.Select(b => b.BookId).Max() + 1; _books.Add(item); return Task.FromResult(item); } }
NOTE The repository defines asynchronous methods, although they are not needed in this case because books are retrieved and updated only within memory. The methods are defined asynchronously because repositories for accessing the ASP.NET Core Web API are asynchronous in nature.
SERVICES To get the books from the repository, you use a service, and you can use it across multiple view models that access the same data. Thus, the 1944
Download from finelybook www.finelybook.com
service is a good place to share data between view models. The sample service for the books implements the generic interface IItemsService. This interface defines the Items property of a type ObservableCollection. ObservableCollection implements the interface INotifyCollectionChanged for notifications when the collection changes. The interface IItemsService also defines the SelectedItem property and change notification with the event SelectedItemChanged. Aside from that, the methods RefreshAsync, AddOrUpdateAsync, and DeleteAsync are methods that need to be implemented by the service class (code file Framework/Services/IItemsService.cs): public interface IItemsService { Task RefreshAsync(); Task AddOrUpdateAsync(T item); Task DeleteAsync(T item); ObservableCollection Items { get; } T SelectedItem { get; set; } event EventHandler SelectedItemChanged; }
The class BooksService derives from the base class BindableBase and implements the generic interface IItemsService. The BooksService uses the previously created SampleBooksRepository, but just requires the functionality of this class offered by the IBooksRepository interface. The class is injected via the constructor, and used on refreshing the books list, adding or updating books, and deleting books (code file BooksLib/Services/BooksService.cs): public class BooksService : BindableBase, IItemsService { private ObservableCollection _books = new ObservableCollection(); private readonly IBooksRepository _booksRepository; public event EventHandler SelectedItemChanged; public BooksService(IBooksRepository repository) {
1945
Download from finelybook www.finelybook.com
_booksRepository = repository; } public ObservableCollection Items => _books; private Book _selectedItem; public Book SelectedItem { get => _selectedItem; set { if (Set(ref _selectedItem, value)) { SelectedItemChanged?.Invoke(this, _selectedItem); } } } public async Task AddOrUpdateAsync(Book book) { Book updated = null; if (book.BookId == 0) { updated = await _booksRepository.AddAsync(book); } else { updated = await _booksRepository.UpdateAsync(book); } return updated; } public Task DeleteAsync(Book book) => _booksRepository.DeleteAsync(book.BookId); public async Task RefreshAsync() { IEnumerable books = await _booksRepository.GetItemsAsync(); _books.Clear(); foreach (var book in books) { _books.Add(book); } SelectedItem = Items.FirstOrDefault(); } }
1946
Download from finelybook www.finelybook.com
Now that the service-functionality is in place, let’s move on to the view models.
VIEW MODELS Every view or page has a view model. With the sample app, the BooksPage has the BooksViewModel associated. Later in the sample you’ll see that user controls can have their specific view models as well, but this is not always necessary. The BookDetailPage has the BookDetailViewModel associated. It’s a UI design decision if the list of the books and the details can be implemented in the same page. That’s a matter of the available screen size of the app: What can fit on the screen? With the sample application, a flexible approach was taken. In case the size available for the app is large enough, the BooksPage shows the list and the details; if the size is not large enough, data will be shown in separate pages with navigation between. There’s a one-to-one mapping between page view and view model. In reality, there’s a many-to-one mapping between view and view model because the same view is implemented multiple times with different technologies—UWP, WPF, and Xamarin. This makes it important that the view model doesn’t know anything about the view, but the view knows the view model. The view model is implemented in a .NET Standard Library, which allows using it from many technologies. For common functionality of view models, it makes sense to create base classes. The Framework library contains a ViewModelBase class that implements features for progress information and for errors (code file Framework/ViewModels/ViewModelBase.cs): public abstract class ViewModelBase : BindableBase { // functionality for progress information and // error information }
The sample application shows a list of books and allows the user to select a book. Here it is useful to define a generic base class for the view models with the properties Items and SelectedItem. The implementation of these properties makes use of the previously 1947
Download from finelybook www.finelybook.com
created service that implements the interface IItemsService (code file Framework/ViewModels/MasterDetailViewModel.cs): public abstract class MasterDetailViewModel : ViewModelBase where TItemViewModel : IItemViewModel where IItem: class { private readonly IItemsService _itemsService; public MasterDetailViewModel(IItemsService itemsService) { _itemsService = itemsService; //... }
public ObservableCollection Items => _itemsService.Items; protected TItem _selectedItem; public virtual TItem SelectedItem { get => _itemsService.SelectedItem; set { if (!EqualityComparer.Default.Equals( _itemsService.SelectedItem, value)) { _itemsService.SelectedItem = value; OnPropertyChanged(); } } } //... }
NOTE 1948
Download from finelybook www.finelybook.com
Generics are discussed in Chapter 5, “Generics.” To display a single item in detail, the base class ItemViewModel defines an Item property (code file Framework/ViewModels/ItemViewModel.cs): public abstract class ItemViewModel : ViewModelBase, IItemViewModel { private T _item; public virtual T Item { get => _item; set => Set(ref _item, value); } }
More complex than the simple class ItemViewModel is the view model class EditableItemViewModel. This class extends ItemViewModel by allowing editing, and thus it defines a read or edit mode. The property IsReadMode is just the inverse of IsEditMode. The EditableItemViewModel makes use of the same service as the MasterDetailViewModel class, the service that implements the interface IItemsService. This way, the EditableItemViewModel and the MasterDetailViewModel classes can share the same items and the same selection. The view model class allows the user to cancel the input. For this, the item has a copied version with the EditItem property (code file Framework/ViewModels/EditableItemViewModel.cs): public abstract class EditableItemViewModel : ItemViewModel, IEditableObject where TItem : class { private readonly IItemsService _itemsService; public EditableItemViewModel(IItemsService itemsService) { _itemsService = itemsService; Item = _itemsService.SelectedItem; PropertyChanged += (sender, e) => {
1949
Download from finelybook www.finelybook.com
if (e.PropertyName == nameof(Item)) { OnPropertyChanged(nameof(EditItem)); } }; //... } //... private bool _isEditMode; public bool IsReadMode => !IsEditMode; public bool IsEditMode { get => _isEditMode; set { if (Set(ref _isEditMode, value)) { OnPropertyChanged(nameof(IsReadMode)); //... } } } private TItem _editItem; public TItem EditItem { get => _editItem ?? Item; set => Set(ref _editItem, value); } //... }
Using IEditableObject An interface that defines methods to change an object between different edit states is the interface IEditableObject. This interface is defined in the namespace System.ComponentModel. IEditableObject defines the methods BeginEdit, CancelEdit, and EndEdit. BeginEdit is invoked to change the item from the read mode to the edit mode. CancelEdit cancels the edit and switches back to read mode. EndEdit is for a successful end of the edit mode, and thus needs to save the data. The EditableItemViewModel class implements the methods of this interface by switching the edit mode, creating a copy of the item, and 1950
Download from finelybook www.finelybook.com
saving the state. This view model class is a generic one and doesn’t know what should be done for copying and saving the item. Copying would be possible by using binary serialization. However, not all objects support binary serialization. Instead, the implementation is forwarded to the class that derives from EditableItemViewModel, similar to the save method OnSaveAsync. OnSaveAsync and CreateCopy are defined as abstract methods, and thus need to be implemented by the derived class. Another method is defined to be invoked at the end of CancelEdit and EndEdit: OnEndEditAsync. This method can be implemented by a derived class, but it’s not necessary to do. That’s why the method is declared virtual with an empty body (code file Framework/ViewModels/EditableItemViewModel.cs): public virtual void BeginEdit() { IsEditMode = true; TItem itemCopy = CreateCopy(Item); if (itemCopy != null) { EditItem = itemCopy; } } public async virtual void CancelEdit() { IsEditMode = false; EditItem = default(TItem); await _itemsService.RefreshAsync(); await OnEndEditAsync(); } public async virtual void EndEdit() { using (StartInProgress()) { await OnSaveAsync(); EditItem = default(TItem); IsEditMode = false; await _itemsService.RefreshAsync(); await OnEndEditAsync(); } } public abstract Task OnSaveAsync();
1951
Download from finelybook www.finelybook.com
public abstract TItem CreateCopy(TItem item); public virtual Task OnEndEditAsync() => Task.CompletedTask;
Concrete View Model Implementations Let’s move on to the concrete implementations of the view models. BookDetailViewModel derives from EditableItemViewModel and specifies Book as the generic parameter. With the base class already implementing the major functionality, this class can be simple. It injects the services for the interfaces IItemsService and INavigationSerivce. In the method OnSaveAsync, the request is forwarded to the IItemsService. The OnSaveAsync method also makes use of the interfaces ILogger and IMessageService. In the view model class, the CreateCopy method implements the creation of a copy of the book. This method is invoked by the base class (code file BooksLib/ViewModels/BookDetailViewModel.cs): public class BookDetailViewModel : EditableItemViewModel { private readonly IItemsService _itemsService; private readonly INavigationService _navigationService; private readonly IMessageService _messageService; private readonly ILogger _logger; public BookDetailViewModel(IItemsService itemsService, INavigationService navigationService, IMessageService messageService, ILogger logger) : base(itemsService) { _itemsService = itemsService; _navigationService = navigationService; _messageService = messageService; _logger = logger; itemsService.SelectedItemChanged += (sender, book) => { Item = book; }; } public bool UseNavigation { get; set; }
1952
Download from finelybook www.finelybook.com
public override Book CreateCopy(Book item) => new Book { BookId = item?.BookId ?? -1, Title = item?.Title ?? "enter a title", Publisher = item?.Publisher ?? "enter a publisher" }; public override async Task OnSaveAsync() { try { await _itemsService.AddOrUpdateAsync(EditItem); } catch (Exception ex) { _logger.LogError("error {0} in {1}", ex.Message, nameof(OnSaveAsync)); await _messageService.ShowMessageAsync("Error saving the data"); } } //... }
NOTE The ILogger interface is explained in Chapter 29, “Tracing, Logging, and Analytics.” The interface IMessageService is discussed later in this chapter in the section “Opening Dialogs from View Models.” The definition and use of the navigation service is discussed later in this chapter in the section “Navigation Between Pages.” The class BooksViewModel can be kept simple by inheriting the main functionality from MasterDetailViewModel. This class just injects the INavigationService interface that will be discussed later, forwards the IItemsService interface to the base class, and overrides the OnAdd method that is invoked by the base class (code file BooksLib/ViewModels/BooksViewModel.cs): 1953
Download from finelybook www.finelybook.com
public class BooksViewModel : MasterDetailViewModel { private readonly IItemsService _booksService; private readonly INavigationService _navigationService; public BooksViewModel(IItemsService booksService, INavigationService navigationService) : base(booksService) { _booksService = booksService ?? throw new ArgumentNullException(nameof(booksService)); _navigationService = navigationService ?? throw new ArgumentNullException(nameof(navigationService)); //... } public override void OnAdd() { var newBook = new Book(); Items.Add(newBook); SelectedItem = newBook; } //... }
Commands The view models offer commands that implement the interface ICommand. Commands allow a separation between the view and the command handler method via data binding. Commands also offer the functionality to enable or disable the command. The ICommand interface defines the methods Execute and CanExecute, and the event CanExecuteChanged. To map the commands to methods, the RelayCommand class is defined in the Framework library. defines two constructors, where a delegate can be passed for the method that should be invoked via the command, and another delegate defines whether the command is available (code file Framework/RelayCommand.cs): RelayCommand
1954
Download from finelybook www.finelybook.com
public class RelayCommand: ICommand { private readyonly Action _execute; private readonly Func _canExecute; public RelayCommand(Action execute, Func canExecute) { _execute = execute ?? throw new ArgumentNullException(nameof(execute)); _canExecute = canExecute; } public RelayCommand(Action execute) : this(execute, null) { } public event EventHandler CanExecuteChanged; public bool CanExecute(object parameter) => _canExecute?.Invoke() ?? true; public void Execute(object parameter) => _execute(); }
The constructor of the EditableItemViewModel creates new RelayCommand objects and assigns the previously shown methods BeginEdit, CancelEdit, and EndEdit on execution of the commands. All these commands also specify a check whether the command is available by using the IsReadMode and IsEditMode properties. When the IsEditMode property changes, the CanExecuteChanged event of the command is fired to update the command accordingly (code file Framework/ViewModels/EditableItemViewModel.cs): public abstract class EditableItemViewModel : ItemViewModel, IEditableObject where TItem : class { private readonly IItemsService _itemsService; public EditableItemViewModel(IItemsService itemsService) { _itemsService = itemsService; Item = _itemsService.SelectedItem;
1955
Download from finelybook www.finelybook.com
EditCommand = new RelayCommand(BeginEdit, () => IsReadMode); CancelCommand = new RelayCommand(CancelEdit, () => IsEditMode); SaveCommand = new RelayCommand(EndEdit, () => IsEditMode); } public RelayCommand EditCommand { get; } public RelayCommand CancelCommand { get; } public RelayCommand SaveCommand { get; } //... public bool IsEditMode { get => _isEditMode; set { if (Set(ref _isEditMode, value)) { OnPropertyChanged(nameof(IsReadMode)); CancelCommand.OnCanExecuteChanged(); SaveCommand.OnCanExecuteChanged(); EditCommand.OnCanExecuteChanged(); } } } //... }
From the XAML code, the commands are bound to the Command property of a Button. This is discussed when creating the views in more detail (code file BooksApp/Views/BookDetailUserControl.xaml):
Services, ViewModels, and Dependency Injection View models and services inject services, and view models need to be created. For this, you can use a dependency injection container. The 1956
Download from finelybook www.finelybook.com
sample application makes use of Microsoft.Extensions.DependencyInjection. The container is configured in the ApplicationServices class. This class is implemented
with the Singleton pattern. In the constructor, the DI container is configured. The property ServiceProvider returns the container where the services can be retrieved (code file BooksApp/App.xaml.cs): public class ApplicationServices { private ApplicationServices() { var services = new ServiceCollection(); services.AddSingleton(); services.AddSingleton (); services.AddTransient(); services.AddTransient(); services.AddTransient(); services.AddSingleton (); services.AddSingleton(); services.AddSingleton(); services.AddLogging(builder => { #if DEBUG builder.AddDebug(); #endif }); ServiceProvider = services.BuildServiceProvider(); } private static ApplicationServices _instance; private static object _instanceLock = new object(); private static ApplicationServices GetInstance() { lock (_instanceLock) { return _instance ?? (_instance = new ApplicationServices()); } } public static ApplicationServices Instance => _instance ?? GetInstance();
1957
Download from finelybook www.finelybook.com
public IServiceProvider ServiceProvider { get; } }
Now the view model needs to be associated with the view, which is done in the BooksPage by accessing the AppServices property of the App class and invoking the GetService method from the DI container. The container then instantiates the view model class with the required services as defined in the constructor of the view model class. The BooksPage contains a user control for the detail information of the book that needs a different view model. This view model is assigned by setting the property ViewModel of the BookDetailUC user control (code file BooksApp/Views/BooksPage.xaml.cs): public sealed partial class BooksPage : Page { public BooksPage() { this.InitializeComponent(); ViewModel.UseNavigation = false; BookDetailUC.ViewModel = ApplicationServices.Instance.ServiceProvider .GetService(); } public BooksViewModel ViewModel { get; } = (Application.Current as App).AppServices.GetService();
With the BookDetailPage, the association to the view model happens similarly (code file BooksApp/Views/BookDetailPage.xaml.cs): public sealed partial class BookDetailPage : Page { public BookDetailPage() { this.InitializeComponent(); ViewModel.UseNavigation = true; // if the Page is used, enable navigation } public BookDetailViewModel ViewModel { get; } = ApplicationServices.Instance.ServiceProvider .GetService(); }
1958
Download from finelybook www.finelybook.com
VIEWS Now that you’ve been introduced to creating the view models and to connecting the views to the view models it’s time to get into the views. The main view of the application is defined by the MainPage. This page makes use of the NavigationView control that is new with the Windows 10 update 16299 (Fall Creators Update). Usually if you only have a small list of items for navigation, you shouldn’t use this UI control. However, with the sample application uses the control because it is assumed the application will grow to more than eight items. The NavigationView control assigns the SelectionChanged event to the OnNavigationSelectionChanged method of the MainPageViewModel. This view model is very different from the other ones and will be discussed later in the section “Navigation Between Pages.” One NavigationViewItem is defined to navigate to the BooksPage (code file BooksApp/MainPage.xaml):
1959
Download from finelybook www.finelybook.com
NOTE The NavigationView control is discussed in Chapter 33. Figure 34-8 shows the NavigationView of the running app with the navigation item to the BooksPage.
FIGURE 34-8 The BooksPage contains a ListView and binds the ItemsSource to the ItemsViewModel property of the BooksViewModel. Usually you would bind it to the Items property of the BooksViewModel. However, the display of a single list item is not only used to show the value of the Book objects, but also contains buttons that are bound to commands. To implement such functionality, another view model is used for the items. How this can be done is discussed in the section “Using Actions in List Items” (code file BooksApp/Views/BooksPage.xaml):
The BookDetailPage just contains a user control: the BookDetailUserControl. The BookDetailPage has the BookDetailViewModel associated, as you’ve seen previously. This view model is forwarded to the BookDetailUserControl by assigning the ViewModel property of the BookDetailPage to the ViewModel property of the BookDetailUserControl (code file BooksApp/Views/BookDetailPage.xaml):
The dependency property of the BookDetailUserControl is shown in the following code snippet. This mapping to the view model is then used for data binding in the XAML code (code file BooksApp/Views/BookDetailUserControl.xaml.cs): public BookDetailViewModel ViewModel { get => (BookDetailViewModel)GetValue(ViewModelProperty); set => SetValue(ViewModelProperty, value); } public static readonly DependencyProperty ViewModelProperty = DependencyProperty.Register("ViewModel", typeof(BookDetailViewModel), typeof(BookDetailUserControl), new PropertyMetadata(null));
The user interface of the BookDetailUserControl makes use of two StackPanel elements. With the first StackPanel, the Command property of the AppBarButton controls is bound to the EditCommand, SaveCommand, and CancelCommand commands defined in the view model. The buttons will be automatically enabled or disabled depending on the state of the 1961
Download from finelybook www.finelybook.com
commands. With the second StackPanel, TextBox elements are used to display the Title and Publisher properties of the Book. For a read-only display, the IsReadOnly property is assigned to the IsReadMode property of the view model. When the view model is set to edit mode, the TextBox controls allow entering data (code file BooksApp/Views/BookDetailUserControl.xaml):
Figure 34-9 shows the running application with the books in the ListView. In the BookDetailUserControl, the Edit command is enabled while the Save and Cancel commands are currently disabled.
1962
Download from finelybook www.finelybook.com
FIGURE 34-9
Opening Dialogs from View Models Sometimes it’s necessary to show dialogs from actions within view models. As the view model is implemented in a .NET Standard Library, access to the MessageDialog class from UWP is not possible. You should avoid this situation, anyway, because the MessageDialog is UWP specific. With WPF you use the MessageBox class instead. With Xamarin.Forms, you use Page.DisplayAlert. What needs to be done is to define a contract that can be used by the view models and services. This contract is defined in the BooksLib library with the IMessageService interface (code file BooksLib/Services/IMessageService.cs): public interface IMessageService { Task ShowMessageAsync(string message); }
In the BookDetailViewModel, the IMessageService is injected in the constructor, and used on the OnSaveAsync method. The ShowMessageAsync method is invoked in the case of an exception (code file BooksLib/ViewModels/BookDetailViewModel.cs): public override async Task OnSaveAsync() { try
1963
Download from finelybook www.finelybook.com
{ await _itemsService.AddOrUpdateAsync(EditItem); } catch (Exception ex) { _logger.LogError("error {0} in {1}", ex.Message, nameof(OnSaveAsync)); await _messageService.ShowMessageAsync("Error saving the data"); } }
Now just a specific implementation for the Universal Windows Platform is needed. The ShowMessageAsync method is implemented using the MessageDialog class. The UWPMessageService is implemented in the Universal Windows Platform app; that’s why access to MessageDialog is now possible (code file BooksApp/Services/UWPMessageService.cs): public class UWPMessageService : IMessageService { public async Task ShowMessageAsync(string message) => await new MessageDialog(message).ShowAsync(); }
In the ApplicationServices constructor, where the services are registered with the dependency injection container, the UWPMessageService class is registered as the implementation class for the IMessageService contract. That’s why the view model will receive the UWP implementation (code file BooksApp/ApplicationServices.cs): private ApplicationServices() { var services = new ServiceCollection(); services.AddSingleton(); services.AddSingleton(); services.AddTransient(); services.AddTransient(); services.AddTransient(); services.AddSingleton (); services.AddSingleton();
1964
Download from finelybook www.finelybook.com
services.AddSingleton(); services.AddLogging(builder => { #if DEBUG builder.AddDebug(); #endif }); ServiceProvider = services.BuildServiceProvider(); }
With an error you can now see a dialog as shown in Figure 34-10.
FIGURE 34-10
Navigation Between Pages As with opening dialogs, navigation between pages is different between different technologies. With UWP, the Frame class is used to navigate pages within the app. With WPF, it’s again a Frame class, but it’s a different one. With Xamarin.Forms, the NavigationPage is used for navigation. How the navigation is implemented with these technologies also differs. With UWP, you need a Type object to navigate to. With Xamarin.Forms, you need an object instance of the page. With Xamarin.Forms, the navigation methods are asynchronous, whereas they are synchronous with UWP. For this, a common contract is needed again. With the sample application, navigation to a page is needed, and navigation back needs to be done. Also, the current page needs to be accessed to know whether navigation needs to be done. For this, the interface INavigationService is defined. This interface is based on strings for navigation, which makes it possible to create implementations for the different platforms (code file Framework/Services/INavigationService.cs): 1965
Download from finelybook www.finelybook.com
public interface INavigationService { bool UseNavigation { get; set; } Task NavigateToAsync(string page); Task GoBackAsync(); string CurrentPage { get; } }
The UWPNavigationService needs a Frame assigned, so it can navigate for UWP. When you define a property of a Frame, it’s not possible to access it because from the outside just the INavigationService interface is used. With the INavigationService interface, the Frame cannot be used because this interface is in the .NET Standard Library. When you use the INavigationService from UWP, it would be possible to cast it to an UWPNavigationService to access a specific UWP property. Requiring casts is not a good design. Instead, what you can do easily is specify a UWP specific service such as the UWPInitializeNavigationService and inject this in the constructor of the UWPNavigationService. Internally, when the Pages and Frame properties are accessed, this information is taken from the initialization service, as shown in the following code snippet (code file BooksApp/Services/UWPNavigationService.cs): public class UWPNavigationService : INavigationService { private readonly UWPInitializeNavigationService _initializeNavigation; public UWPNavigationService( UWPInitializeNavigationService initializeNavigation) { _initializeNavigation = initializeNavigation ?? throw new ArgumentNullException(nameof(initializeNavigation)); } private Dictionary _pages; private Dictionary Pages => _pages ?? (_pages = _initializeNavigation.Pages); private Frame _frame; private Frame Frame => _frame ?? (_frame = _initializeNavigation.Frame); //...
1966
Download from finelybook www.finelybook.com
}
The implementation of the CurrentPage property, the GoBackAsync method, and the NavigateToAsync method are now making use of the Frame.GoBack and Frame.Navigate methods (code file BooksApp/Services/UWPNavigationService.cs): public class UWPNavigationService : INavigationService { //... private string _currentPage; public string CurrentPage => _currentPage; public Task GoBackAsync() { PageStackEntry stackEntry = Frame.BackStack.Last(); Type backPageType = stackEntry.SourcePageType; KeyValuePair pageEntry = Pages.FirstOrDefault(pair => pair.Value == backPageType); _currentPage = pageEntry.Key; Frame.GoBack(); return Task.CompletedTask; } public Task NavigateToAsync(string pageName) { _currentPage = pageName; Frame.Navigate(Pages[pageName]); return Task.CompletedTask; } }
The only functionality the UWPInitializeNavigationService offers is to initialize it with a Frame and a dictionary of pages, and to retrieve this information (code file BooksApp/Services/UWPInitializeNavigationService.cs): public class UWPInitializeNavigationService { public void Initialize(Frame frame, Dictionary pages) { Frame = frame ?? throw new ArgumentNullException(nameof(frame));
1967
Download from finelybook www.finelybook.com
Pages = pages ?? throw new ArgumentNullException(nameof(pages)); } public Frame Frame { get; private set; } public Dictionary Pages { get; private set; } }
The UWPInitializeNavigationService can now be initialized on a place where the Frame is available. With the UWP sample application, this is in the MainPage. Within the NavigationView control specified earlier, the Frame with the name ContentFrame is specified. Now it would be possible to define the initialization within the code-behind file of the MainPage, or in a UWP-specific MainPageViewModel. For the sample application, the second option was chosen. In the following code-snippet, the MainPageViewModel keeps a list of pages for the navigation and initializes the navigation service when the SetNavigationFrame is invoked (code file BooksApp/ViewModels/MainPageViewModel.cs): public class MainPageViewModel : ViewModelBase { private Dictionary _pages = new Dictionary { [PageNames.BooksPage] = typeof(BooksPage), [PageNames.BookDetailPage] = typeof(BookDetailPage) }; private readonly INavigationService _navigationService; private readonly UWPInitializeNavigationService _initializeNavigationService; public MainPageViewModel(INavigationService navigationService, UWPInitializeNavigationService initializeNavigationService) { _navigationService = navigationService; _initializeNavigationService = initializeNavigationService; } public void SetNavigationFrame(Frame frame) => _initializeNavigationService.Initialize(frame, _pages);
1968
Download from finelybook www.finelybook.com
//... }
With this view model in place, all that needs to be in the code-behind file of the MainPage is the ViewModel property and the passing of the ContentFrame to the navigation service via invocation of the method SetNavigationFrame (code file BooksApp/MainPage.xaml.cs): public sealed partial class MainPage : Page { public MainPage() { this.InitializeComponent(); ViewModel = (Application.Current as App).AppServices.GetService(); ViewModel.SetNavigationFrame(ContentFrame); } public MainPageViewModel ViewModel { get; } }
The first navigation to the BooksPage happens in the MainPageViewModel. The method OnNavigationSelectionChanged is the handler for the NavigationSelectionChanged event of the NavigationView control. With the Tag set to books, navigation to the BooksPage is done using the INavigationService (code file BooksApp/ViewModels/MainPageViewModel.cs): public class MainPageViewModel : ViewModelBase { //... public void OnNavigationSelectionChanged(NavigationView sender, NavigationViewSelectionChangedEventArgs args) { if (args.SelectedItem is NavigationViewItem navigationItem) { switch (navigationItem.Tag) { case "books": _navigationService.NavigateToAsync(PageNames.BooksPage); break;
1969
Download from finelybook www.finelybook.com
default: break; } } } }
Following on navigation from the BooksPage is directly done from a shared view model. The navigation from the BooksPage to the BooksDetailPage happens when a list item is selected, and thus the PropertyChanged event fires. Navigation is also only done when the property UseNavigation is set to true. As previously mentioned, with UWP when the UI is large enough, navigation is not needed at this place because the detail information is then shown side by side with the list (code file BooksLib/ViewModels/BooksViewModel.cs): public class BooksViewModel : MasterDetailViewModel { private readonly IItemsService _booksService; private readonly INavigationService _navigationService; public BooksViewModel(IItemsService booksService, INavigationService navigationService) : base(booksService) { _booksService = booksService ?? throw new ArgumentNullException(nameof(booksService)); _navigationService = navigationService ?? throw new ArgumentNullException(nameof(navigationService)); PropertyChanged += async (sender, e) => { if (UseNavigation && e.PropertyName == nameof(SelectedItem) && _navigationService.CurrentPage == PageNames.BooksPage) { await _navigationService.NavigateToAsync(PageNames.BookDetailPage); } }; } public bool UseNavigation { get; set; }
1970
Download from finelybook www.finelybook.com
//... }
For making the user interface small enough to require navigation between pages, the next section explains adaptive user interfaces.
Adaptive User Interfaces Depending on the available size on the screen, either a user control should show up side by side to the list control or within a separate page. To make this possible, with the BookDetailUserControl used within the BooksPage, the Visibility property is by default set to Collapsed (code file BooksApp/Views/BooksPage.xaml):
Now an AdaptiveTrigger can be used to make the control visible with a window width larger than 1023. When the AdaptiveTrigger triggers, the Setter sets the Visibility property of the user control to Visible (code file BooksApp/Views/BooksPage.xaml):
1971
Download from finelybook www.finelybook.com
When you run the app, you can see the BooksPage with the user control visible (see Figure 34-11). Figure 34-12 shows the smaller state where the user control is hidden. Here, the NavigationView also triggers to make a smaller view. Making the app even smaller to the NarrowState (see Figure 34-13), an AdaptiveTrigger with the NavigationView triggers again to only show the hamburger button. The pane of the NavigationView is then only shown when the hamburger button is clicked.
FIGURE 34-11
1972
Download from finelybook www.finelybook.com
FIGURE 34-12
1973
Download from finelybook www.finelybook.com
FIGURE 34-13
NOTE For more information on adaptive triggers read Chapter 33.
NOTE 1974
Download from finelybook www.finelybook.com
What’s missing is to change the UseNavigation property of the view model to use or not use navigation. One way is to set the property of the view model directly or via a service. Another way is by using an event aggregator, which is demonstrated later in this chapter in the section “Messaging Using Events.”
Showing Progress Information Showing progress information is necessary in many apps, and in many view models. That’s why with the sample app, showing progress has been implemented in the ViewModelBase class. Showing progress information in the view model can be something simple like a Boolean ShowProgress property. For a more complex scenario where multiple parallel actions can be started, it can be useful to create an implementation with a counter. After invoking the SetInProgress method, to not forget to decrement the count again, the StartInProgress method returns an IDisposable that automatically decrements on Dispose (code file Framework/ViewModels/ViewModelBase.cs): public abstract class ViewModelBase : BindableBase { private class StateSetter : IDisposable { private Action _end; public StateSetter(Action start, Action end) { start?.Invoke(); _end = end; } public void Dispose() => _end?.Invoke(); } private int _inProgressCounter = 0; protected void SetInProgress(bool set = true) { if (set) { Interlocked.Increment(ref _inProgressCounter); OnPropertyChanged(nameof(InProgress)); }
1975
Download from finelybook www.finelybook.com
else { Interlocked.Decrement(ref _inProgressCounter); OnPropertyChanged(nameof(InProgress)); } } public IDisposable StartInProgress() => new StateSetter(() => SetInProgress(), () => SetInProgress(false)); public bool InProgress => _inProgressCounter != 0; //... }
With every action that might take longer, as, for example, the EndEdit method where saving occurs, the StartInProgress method is invoked where the return of this method is passed to a using statement. Thus, at the end of the using statement, the Dispose method is invoked to decrement the progress count again (code file Framework/ViewModels/EditableViewModel.cs): public async virtual void EndEdit() { using (StartInProgress()) { await OnSaveAsync(); EditItem = default(TItem); IsEditMode = false; await _itemsService.RefreshAsync(); await OnEndEditAsync(); } }
Now, you can use a ProgressBar that binds the Visibility property to the InProgress property of the view model, and the progress bar is shown automatically (code file BooksApp/Views/BooksPage.xaml):
Using Actions in List Items With modern user interfaces, when a list is shown, the list items also 1976
Download from finelybook www.finelybook.com
offer some additional information or allow some actions when hovering over the items. For example, Microsoft’s Mail program allows the user to flag/delete/archive an email without selecting it first. How is this done? Instead of binding the Book items directly to the list, you can bind BookItemViewModel objects. With BookItemViewModel items, you can define commands in addition to the information about the book. With the sample code, the BookItemViewModel is a view model that wraps a Book object. Contrary to the other view models, it will not be created via the DI container, and thus it is possible to have a Book object in the constructor. The book instance is assigned to the Item property of the ItemViewModel base class. In addition to the base class, the BookItemViewModel defines the DeleteBookCommand and the OnDeleteBook method that invokes the DeleteAsync method of the IItemsService (code file BooksLib/ViewModels/BookItemViewModel.cs): public class BookItemViewModel : ItemViewModel { private readonly IItemsService _booksService; public BookItemViewModel(Book book, IItemsService booksService) { Item = book; _booksService = booksService; DeleteBookCommand = new RelayCommand(OnDeleteBook); } public RelayCommand DeleteBookCommand { get; set; } private async void OnDeleteBook() { await _booksService.DeleteAsync(Item); } }
When the BookItemViewModel is not created via the DI container, how is it created? The MasterDetailViewModel not only defines the Items property that can be bound to a list control; it also defines the ItemsViewModels property. This property just takes the Items and converts them to a TItemViewModel by using the abstract method 1977
Download from finelybook www.finelybook.com
ToViewModel (code file Framework/ViewModels/MasterDetailViewModel.cs): public abstract class MasterDetailViewModel : ViewModelBase where TItemViewModel : IItemViewModel where TItem: class { //... public ObservableCollection Items => _itemsService.Items; protected abstract TItemViewModel ToViewModel(TItem item); public virtual IEnumerable ItemsViewModels => Items.Select(item => ToViewModel(item)); //... }
The derived class BooksViewModel just needs to override the ToViewModel method to convert the Book objects to the BookItemViewModel objects. You do this by a simple creation of BookItemViewModel objects passing the Book and the services needed (code file BooksLib/ViewModels/BooksViewModel.cs): protected override BookItemViewModel ToViewModel(Book item) => new BookItemViewModel(item, _booksService);
Now the view model types can be bound to the ListView. A user control is defined to be shown with the list items. How is it possible to display a button only when the mouse hovers over the item? A technique you’ve already used with the adaptive user interface is that one element—in this case a Grid control—has the visibility set to Collapsed. Now you define custom Visual State elements with the names HoverButtonsShown and HoverButtonsHidden. With the state HoverButtonsShown, the Visibility of the Grid is set to Visible (code file BooksApp/Views/BookItemUserControl.xaml):
1978
Download from finelybook www.finelybook.com
With the code-behind, with the overridden methods OnPointerEntered and OnPointerExited, the state is set using the VisualStateManager. The state is only set when the user uses the mouse or the pen (code file BooksApp/Views/BookItemUserControl.xaml.cs): public sealed partial class BookItemUserControl : UserControl { public BookItemUserControl() { this.InitializeComponent(); } public BookItemViewModel BookItemViewModel { get => (BookItemViewModel)GetValue(BookItemViewModelProperty);
1979
Download from finelybook www.finelybook.com
set => SetValue(BookItemViewModelProperty, value); } public static readonly DependencyProperty BookItemViewModelProperty = DependencyProperty.Register("BookViewModel", typeof(BookItemViewModel), typeof(BookItemUserControl), new PropertyMetadata(null)); protected override void OnPointerEntered(PointerRoutedEventArgs e) { base.OnPointerEntered(e); if (e.Pointer.PointerDeviceType == PointerDeviceType.Mouse || e.Pointer.PointerDeviceType == PointerDeviceType.Pen) { VisualStateManager.GoToState(this, "HoverButtonsShown", true); } } protected override void OnPointerExited(PointerRoutedEventArgs e) { base.OnPointerExited(e); VisualStateManager.GoToState(this, "HoverButtonsHidden", true); } }
When you run the application, you can see the state changes as the mouse hovers over the item, as shown in Figure 34-14.
1980
Download from finelybook www.finelybook.com
FIGURE 34-14
MESSAGING USING EVENTS With the current state of the application there’s the issue of whether the state of the view models need to be set to use navigation depending on the size of the app window. One way to deal with this is to create a singleton service with an event, use this service from the view models to subscribe to the event, and the main window fires the event. Such a service can also be defined globally—a service for events. With many MVVM frameworks, this is also known as event-aggregator. A generic EventAggregator is defined with the Framework project. This aggregator defines an event named Event where a handler of type Action can subscribe and unsubscribe, and a method Publish fires the event. This aggregator is implemented as a singleton to make it easily accessible without needing to create an instance (code file Framework/EventAggregator.cs): public class EventAggregator where TEvent: EventArgs {
1981
Download from finelybook www.finelybook.com
private static EventAggregator s_eventAggregator; public static EventAggregator Instance => s_eventAggregator ?? (s_eventAggregator = new EventAggregator()); private EventAggregator() { } public event Action Event; public void Publish(object source, TEvent ev) => Event?.Invoke(source, ev); }
NOTE With a generic Singleton class, there’s not only one instance created; there’s one instance for every generic parameter type used. That’s fine for the EventAggregator, as different event types don’t need to share some data, and it allows for better scalability. For passing the information about the navigation from the main window to the view model, the NavigationInfoEvent is needed. This event information class uses a Boolean property to define whether navigation should be used (code file BooksLib/Events/NavigationInfoEvent.cs): public class NavigationInfoEvent : EventArgs { public bool UseNavigation { get; set; } }
The BooksViewModel can now subscribe to the event. With the constructor of the BooksViewModel, the static member Instance is accessed to get the singleton object of the NavigationInfoEvent type, and the UseNavigation property method is assigned to the event information e.UseNavigation (code file BooksLib/ViewModels/BooksViewModel.cs): 1982
Download from finelybook www.finelybook.com
public BooksViewModel(IItemsService booksService, INavigationService navigationService) : base(booksService) { _booksService = booksService ?? throw new ArgumentNullException(nameof(booksService)); _navigationService = navigationService ?? throw new ArgumentNullException(nameof(navigationService)); EventAggregator.Instance.Event += (sender, e) => { UseNavigation = e.UseNavigation; }; //... }
The event is published when the size of the main page changes. With the MainPage class, the OnSizeChanged event handler is registered to the SizeChanged event of the page. In the event handler, the EventAggregator can be accessed similar to subscription using the static Instance property, by invoking the Publish method, which passes a NavigationInfoEvent object. The NavigationInfoEvent object is initialized depending on the size of the window (code file ViewModels/BooksViewModel.cs): public sealed partial class MainPage : Page { //... private void OnSizeChanged(object sender, SizeChangedEventArgs e) { EventAggregator.Instance.Publish(this, new NavigationInfoEvent { UseNavigation = e.NewSize.Width < 1024 }); } }
USING A FRAMEWORK With the sample application, you’ve seen classes defined in a Framework project such as BindableBase, DelegateCommand, and 1983
Download from finelybook www.finelybook.com
EventAggregator. These
classes are needed with all MVVM-based applications, and you don’t need to implement them on your own. They are not a big deal to do, but you can instead use an existing MVVM framework. MVVM Light (http://mvvmlight.net), from Laurent Bugnion, is a small framework that exactly fits the purpose of MVVM applications and is available for many different platforms. Another framework that originally was created by the Microsoft Patterns and Practices team and has now moved to the community is Prism.Core (https://github.com/PrismLibrary). Although the Prism framework is a full-blown framework that supports add-ins and regions in which to position the controls, Prism.Core is very light and contains only a few types such as BindableBase, DelegateCommand, and ErrorsContainer.
SUMMARY This chapter gave you an architectural guideline for creating XAMLbased applications around the MVVM pattern. You’ve seen a separation of concerns with the model, view, and view model. Besides that, you’ve seen implementing change notification with the interface INotifyPropertyChanged, the repository pattern to separate the data access code, messaging between view models (that can also be used to communicate with views) by using events, and dependency injection with an IoC container. The chapter also showed you a library of view models that can be used across applications. All this allows for code sharing while still using features of specific platforms. You can use platform-specific features with repository and service implementations, and contracts are available with all platforms. Chapter 37 makes use of the same library to create an app with Xamarin. The next chapter continues the discussion of XAML and is about styles and resources.
1984
Download from finelybook www.finelybook.com
35 Styling Windows Apps WHAT’S IN THIS CHAPTER? Styling Windows Apps Creating the base drawing with shapes and geometry Scaling, rotating, and skewing with transformations Using brushes to fill backgrounds Working with styles, templates, and resources Creating animations Visual State Manager
WROX.COM CODE DOWNLOADS FOR THIS CHAPTER The Wrox.com code downloads for this chapter are found at www.wrox.com on the Download Code tab. The source code is also available at https://github.com/ProfessionalCSharp/ProfessionalCSharp7 in the directory Styles. The code for this chapter is divided into the following major examples: Shapes Geometry 1985
Download from finelybook www.finelybook.com
Transformation Brushes Styles and Resources Templates Animation Transitions Visual State
STYLING In recent years, developers have become a lot more concerned with having good-looking apps. When Windows Forms was the technology for creating desktop applications, the user interface didn’t offer many options for styling the applications. Controls had a standard look that varied slightly based on the operating system version on which the application was running, but it was not easy to define a complete custom look. This changed with Windows Presentation Foundation (WPF). WPF is based on DirectX and thus offers vector graphics that allow easy resizing of Windows and controls. Controls are completely customizable and can have different looks. Styling of applications has become extremely important. An application can have any look. With a good design, the user can work with the application without the need to know how to use a Windows application. Instead, the user just needs to have his domain knowledge. For example, the airport in Zurich created a WPF application where buttons look like airplanes. With the button, the user can get information of the position of the plane (the complete application looks like the airport). Colors of the buttons can have different meanings based on the configuration: they can show the either the airline, or on-time/delay information of the plane. This way, the user of the app easily sees what planes that are currently at the airport have small or big delays. Having different looks of the app is even more important with modern 1986
Download from finelybook www.finelybook.com
Windows apps. With these apps, the device can be used by users who haven’t used Windows applications before. With users who are knowledgeable of Windows applications, you should think about helping these users be more productive by having the typical process for how the user works easily accessible. Microsoft has not provided a lot of guidance for styling WPF applications. How an application looks mainly depends on your (or the designer’s) imagination. With UWP apps, Microsoft has provided a lot more guidance and predefined styles, but you’re still able to change anything you like. This chapter starts with the core elements of XAML—shapes that enable you to draw lines, ellipses, and path elements. After that you’re introduced to the foundation of shapes—geometry elements. You can use geometry elements to create fast vector-based drawings. With transformations, you can scale and rotate any XAML element. With brushes you can create solid color, gradient, or more advanced backgrounds. You see how to use brushes within styles and place styles within XAML resources. Finally, with templates you can completely customize the look of controls, and you also learn how to create animations in this chapter.
SHAPES Shapes are the core elements of XAML. With shapes you can draw two-dimensional graphics using rectangles, lines, ellipses, paths, polygons, and polylines that are represented by classes derived from the abstract base class Shape. Shapes are defined in the namespace Windows.UI.Xaml.Shapes. The following XAML example draws a yellow face consisting of an ellipse for the face, two ellipses for the eyes, two ellipses for the pupils in the eyes, and a path for the mouth (code file Shapes/MainPage.xaml):
1987
Download from finelybook www.finelybook.com
Figure 35-1 shows the result of the XAML code.
FIGURE 35-1 All these XAML elements can be accessed programmatically—even if they are buttons or shapes, such as lines or rectangles. Setting the Name or x:Name property with the Path element to mouth enables you to access this element programmatically with the variable name mouth:
With the next code changes, the mouth of the face is changed dynamically from code-behind. A button with a click handler is added where the SetMouth method is invoked (code file 1988
Download from finelybook www.finelybook.com
Shapes/MainPage.xaml.cs): private void OnChangeShape(object sender, RoutedEventArgs e) { SetMouth(); }
Using code-behind, a geometrical shape can be created using figures and segments. First, you create a two-dimensional array of six points to define three points for the happy and three points for the sad state (code file Shapes/MainPage.xaml.cs): private readonly Point[,] _mouthPoints = new Point[2, 3] { { new Point(40, 74), new Point(57, 95), new Point(80, 74), }, { new Point(40, 82), new Point(57, 65), new Point(80, 82), } };
Next, you assign a new PathGeometry object to the Data property of the Path. The PathGeometry contains a PathFigure with the start point defined (setting the StartPoint property is the same as the letter M with path markup syntax). The PathFigure contains a QuadraticBezierSegment with two Point objects assigned to the properties Point1 and Point2 (the same as the letter Q with two points): private bool _laugh = false; public void SetMouth() { int index = _laugh ? 0: 1; var figure = new PathFigure() { StartPoint = _mouthPoints[index, 0] }; figure.Segments = new PathSegmentCollection(); var segment1 = new QuadraticBezierSegment { Point1 = _mouthPoints[index, 1]; Point2 = _mouthPoints[index, 2]; } figure.Segments.Add(segment1); var geometry = new PathGeometry();
1989
Download from finelybook www.finelybook.com
geometry.Figures = new PathFigureCollection(); geometry.Figures.Add(figure); mouth.Data = geometry; _laugh = !_laugh; }
Using segments and figures is explained in more detail in the next section. When you run the app, Figure 35-2 shows the sad face.
FIGURE 35-2 The following table describes the shapes available in the namespaces System.Windows.Shapes and Windows.Ui.Xaml.Shapes. SHAPE DESCRIPTION CLASS Line You can draw a line from the coordinates X1,Y1 to X2,Y2. Rectangle You draw a rectangle by specifying Width and Height for this class. Ellipse You can draw an ellipse. Path You can draw a series of lines and curves. The Data property is a Geometry type. You can do the drawing by using classes that derive from the base class Geometry, or you can use the path markup syntax to define geometry. Polygon You can draw a closed shape formed by connected lines. The polygon is defined by a series of Point objects assigned to the Points property. Polyline Like the Polygon class, you can draw connected lines with Polyline. The difference is that the polyline does not need to be a closed shape.
GEOMETRY 1990
Download from finelybook www.finelybook.com
The previous sample showed that one of the shapes, Path, uses Geometry for its drawing. You can also use Geometry elements in other places, such as with a DrawingBrush. In some ways, geometry elements are very similar to shapes. Just as there are Line, Ellipse, and Rectangle shapes, there are also geometry elements for these drawings: LineGeometry, EllipseGeometry, and RectangleGeometry. There are also big differences between shapes and geometries. A Shape is a FrameworkElement that you can use with any class that supports UIElement as its children. FrameworkElement derives from UIElement. Shapes participate with the layout system and render themselves. The Geometry class can’t render itself and has fewer features and less overhead than Shape. The Geometry class directly derives from DependencyObject. The Path class uses Geometry for its drawing. The geometry can be set with the Data property of the Path. Simple geometry elements that can be set are EllipseGeometry for drawing an ellipse, LineGeometry for drawing a line, and RectangleGeometry for drawing a rectangle.
Geometries Using Segments You can also create geometries by using segments. The geometry class PathGeometry uses segments for its drawing. The following code segment uses the BezierSegment and LineSegment elements to build one red and one green figure, as shown in Figure 35-3. The first BezierSegment draws a Bézier curve between the points 70,40, which is the starting point of the figure, and 150,63 with control points 90,37 and 130,46. The following LineSegment uses the ending point of the Bézier curve and draws a line to 120,110 (code file Geometries/MainPage.xaml):
FIGURE 35-3
Other than the BezierSegment and LineSegment elements, you can use ArcSegment to draw an elliptical arc between two points. With PolyLineSegment you can define a set of lines: PolyBezierSegment 1992
Download from finelybook www.finelybook.com
consists of multiple Bézier curves, QuadraticBezierSegment creates a quadratic Bézier curve, and PolyQuadraticBezierSegment consists of multiple quadratic Bézier curves.
Geometries Using Path Markup Earlier in this chapter you saw a use of path markup with the Path shape. Using path markup, behind the scenes a speedy drawing with StreamGeometry gets created. XAML for UWP apps creates figures and segments. Programmatically, you can define the figure by creating lines, Bézier curves, and arcs. With XAML, you can use path markup syntax. You can use path markup with the Data property of the Path class. Special characters define how the points are connected. In the following example, M marks the start point, L is a line command to the point specified, and Z is the Close command to close the figure. Figure 35-4 shows the result. The path markup syntax allows more commands such as horizontal lines (H), vertical lines (V), cubic Bézier curves (C), quadratic Bézier curves (Q), smooth cubic Bézier curves (S), smooth quadratic Bézier curves (T), and elliptical arcs (A) (code file Geometries/MainPage.xaml):
FIGURE 35-4
1993
Download from finelybook www.finelybook.com
TRANSFORMATION Because XAML is vector based, you can resize every element. In the next example, the vector-based graphics are now scaled, rotated, and skewed. Hit testing (for example, with mouse moves and mouse clicks) still works but without the need for manual position calculation. Figure 35-5 shows a rectangle in several different forms. All the rectangles are positioned within a StackPanel element with horizontal orientation to have the rectangles one beside the other. The first rectangle has its original size and layout. The second one is resized, the third moved, the forth rotated, the fifth skewed, the sixth transformed using a transformation group, and the seventh transformed using a matrix. The following sections get into the code samples of all these options.
FIGURE 35-5
Scaling Adding the ScaleTransform element to the RenderTransform property of the Rectangle element, as shown here, resizes the content of the complete rectangle by 0.5 in the x axis and 0.4 in the y axis (code file Transformations/MainPage.xaml):
You can do more than transform simple shapes like rectangles; you can transform any XAML element as XAML defines vector graphics. In 1994
Download from finelybook www.finelybook.com
the following code, the Canvas element with the face shown earlier is put into a user control named SmilingFace, and this user control is shown first without transformation and then resized. You can see the result in Figure 35-6.
FIGURE 35-6
Translating For moving an element in x or y direction, you can use TranslateTransform. In the following snippet, the element moves to the left by assigning -90 to X, and in the direction to the bottom by assigning 20 to Y (code file Transformations/MainPage.xaml):
Rotating You can rotate an element by using RotateTransform. With RotateTransform, you set the angle of the rotation and the center of the rotation with CenterX and CenterY (code file Transformations/MainPage.xaml):
1995
Download from finelybook www.finelybook.com
Skewing For skewing, you can use the SkewTransform element. With skewing you can assign angles for the x and y axes (code file Transformations/MainPage.xaml):
Transforming with Groups and Composite Transforms An easy way to do multiple transformations at once is by using the CompositeTransform and TransformationGroup elements. The TransformationGroup element can have SkewTransform, RotateTransform, TranslateTransform, and ScaleTransform as its children (code file Transformations/MainPage.xaml):
To rotate and skew together, it is possible to define a TransformGroup that contains both RotateTransform and SkewTransform. The class CompositeTransform defines properties to do multiple transformations at once—for example, ScaleX and ScaleY for scaling as well as TranslateX and TranslateY for moving an element. You can also define 1996
Download from finelybook www.finelybook.com
a MatrixTransform whereby the Matrix element specifies the properties M11 and M22 for stretching and M12 and M21 for skewing, as shown in the next section.
Transforming Using a Matrix Another option for defining multiple transformations at once is to specify a matrix. Here, you use MatrixTransform. MatrixTransform defines a Matrix property that has six values. Setting the values 1, 0, 0, 1, 0, 0 doesn’t change the element. With the values 0.5, 1.4, 0.4, 0.5, – 200, and 0, the element is resized, skewed, and translated (code file Transformations/MainPage.xaml):
The class MatrixTransform defines the public fields M11, M12, M21, M22, OffsetX, and OffsetY that are set in that order if a string is assigned to the Matrix property. MatrixTransform implements an affine transformation, so only six of the nine matrix members need to be specified. The remaining matrix members have fixed values 0, 0, and 1. The M11 and M22 fields have a default value 1 and are used to scale in x and y direction. M12 and M21 have a default value 0 and are used to skew the control. OffsetX and OffsetY have a default value 0 and are used to move the control.
BRUSHES This section demonstrates how to use XAML’s brushes for drawing backgrounds and foregrounds. In this section, you learn about using solid color and linear gradient colors with brushes, you draw images with brushes, and you use the new AcrylicBrush and RevealBrush.
SolidColorBrush The first button shown in Figure 35-7 uses the SolidColorBrush, which, 1997
Download from finelybook www.finelybook.com
as the name suggests, uses a solid color. The complete area is drawn with the same color.
FIGURE 35-7 You can define a solid color just by setting the Background attribute to a string that defines a solid color. The string is converted to a SolidColorBrush element with the help of the BrushValueSerializer (code file Brushes/MainPage.xaml): Solid Color
Of course, you will get the same effect by setting the Background child element and adding a SolidColorBrush element as its content. The first button in the application uses a hexadecimal value for the solid background color (code file Brushes/MainPage.xaml):
LinearGradientBrush For a smooth color change, you can use the LinearGradientBrush, as the button in Figure 35-8 shows. This brush defines the StartPoint and EndPoint properties. With this, you can assign two-dimensional coordinates for the linear gradient. The default gradient is diagonal linear from 0,0 to 1,1. By defining different values, the gradient can take different directions. For example, with a StartPoint of 0,0 and an EndPoint of 0,1, you get a vertical gradient. The StartPoint and EndPoint value of 1,0 creates a horizontal gradient.
1998
Download from finelybook www.finelybook.com
FIGURE 35-8 With the content of this brush, you can define the color values at the specified offsets with the GradientStop element. Between the stops, the colors are smoothed (code file Brushes/MainPage.xaml):
ImageBrush To load an image into a brush, you can use the ImageBrush element. With this element, the image defined by the ImageSource property is displayed. The image can be accessed from the file system or from a resource within the assembly. In the code example, the image is added from the file system (code file Brushes/MainPage.xaml):
When you run the application, you can see a button as shown in Figure 35-9.
1999
Download from finelybook www.finelybook.com
FIGURE 35-9
AcrylicBrush A new brush available with Windows 10 build 16299 is the AcrylicBrush. This brush is part of the new Fluent Design. The AcrylicBrush allows a transparency effect that lets other elements of the app or the host shine through. An application that ships as part of Windows 10 is the Calculator. The Calculator has some slight transparency that lets other applications or the wallpaper image shine through to the app (see Figure 35-10). This effect isn’t applied to the main number buttons in the calculator, but the other elements of the calculator let the light of the background shine through.
2000
Download from finelybook www.finelybook.com
FIGURE 35-10 You assign AcrylicBrush to the Background property of the Button. The value for the TintOpacity is taken from the value of a slider. This allows to see the different effects of this brush based on the opacity when you move the slider in the app. The TintColor property specifies the main color of the brush. With the BackgroundSource property, you can select between HostBackdrop or Backdrop. When you use Backdrop, the colors from the app itself shines through. This is known as in-app acrylic. Elements that are overlaid from the controls using the brush shine through. With HostBackdrop, the colors from below the 2001
Download from finelybook www.finelybook.com
application are taken; this is background acrylic. Because acrylic UI effects require GPU power, this feature can shorten battery life. AcrylicBrush uses the solid color defined by the FallbackColor property when the system runs low on power. You also can configure the property AlwaysUseFallback to always use the fallback color. This setting can be triggered by user configuration to enhance the battery lifetime (code file Brushes/MainPage.xaml):
Figure 35-11 shows AcrylicBrush with a current TintOpacity setting of 0.2. The button on the top is configured with HostBackdrop. Here, you can see the background underneath the application shines through. The button on the bottom is configured with Backdrop. Here, you can see an orange rectangle that is positioned underneath the button shines through.
2002
Download from finelybook www.finelybook.com
FIGURE 35-11
NOTE When should acrylic brushes be used? Acrylic adds texture and depth to the application. In-app navigation and commands look impressive with acrylic backgrounds. However, the primary app content should use solid backgrounds.
Reveal Brushes Another new brush with the Windows 10 build 16299 is the RevealBrush. This brush highlights the area where the user moves the mouse using a light effect. One simple way to style a button using this brush is to use the ButtonRevealStyle as the following code snippet demonstrates (code file Brushes/MainPage.xaml):
NOTE Styles and the StaticResource markup extension are discussed in the next section. When you use ButtonRevealStyle, you need to look carefully when the application is running to see the effect. The following button defines a thicker border that uses the BorderBrush defined in the theme resource SystemColorControlHighlightAccentRevealBorderBrush, which helps you see the effect more clearly. As you move the mouse around the button, the border of the button lights up near to the mouse. With Reveal Border
Now as you’ve used predefined styles, let’s get into defining custom styles within resources.
STYLES AND RESOURCES You can define the look and feel of the XAML elements by setting properties, such as FontSize and Background, with the Button element (code file StylesAndResources/MainPage.xaml):
Instead of defining the look and feel with every element, you can define styles that are stored with resources. To completely customize the look of controls, you can use templates and add them to resources.
Styles 2004
Download from finelybook www.finelybook.com
You can assign the Style property of a control to a Style element that has setters associated with it. A Setter element defines the Property and Value properties to set the specific properties and values for the target element. In the following example, the Background, FontSize, FontWeight, and Margin properties are set. The Style is set to the TargetType Button, so that the properties of the Button can be directly accessed (code file StylesAndResources/MainPage.xaml):
Setting the Style directly with the Button element doesn’t really help a lot with style sharing. Styles can be put into resources. Within the resources you can assign styles to specific elements, assign a style to all elements of a type, or use a key for the style. To assign a style to all elements of a type, use the TargetType property of the Style and assign it to a Button. To define a style that needs to be referenced, x:Key must be set:
In the sample application, the styles that are defined globally within the page are defined within the Resources property of the Page 2005
Download from finelybook www.finelybook.com
element. In the following XAML code the first button—which doesn’t have a style defined with the element properties—gets the style that is defined for the Button type. With the next button, the Style property is set with the StaticResource markup extension to {StaticResource ButtonStyle}, whereas ButtonStyle specifies the key value of the style resource defined earlier, so this button has a red background and a white foreground:
Rather than set the Background of a button to just a single value, you can do more. You can set the Background property to a LinearGradientBrush with a gradient color definition:
The next button in this example has a fancy style with cyan applied as the linear gradient:
Styles offer a kind of inheritance. One style can be based on another one. The style AnotherButtonStyle is based on the style FancyButtonStyle. It uses all the settings defined by the base style (referenced by the BasedOn property), except the Foreground property— 2006
Download from finelybook www.finelybook.com
which is set to LinearGradientBrush:
The last button has AnotherButtonStyle applied:
The result of all these buttons after styling is shown in Figure 35-12.
FIGURE 35-12
Resources As you have seen with the styles sample, usually styles are stored within resources. You can define any sharable element within a resource. For example, the brush created earlier for the background style of the button can be defined as a resource, so you can use it everywhere a brush is required. The following example defines a LinearGradientBrush with the key name MyGradientBrush inside the StackPanel resources. button1 assigns the Background property by using a StaticResource markup 2007
Download from finelybook www.finelybook.com
extension to the resource MyGradientBrush (code file StylesAndResources/ResourceDemoPage.xaml):
Here, the resources have been defined with the StackPanel. In the previous example, the resources were defined with the Page or Window element. The base class FrameworkElement defines the property Resources of type ResourceDictionary. That’s why resources can be defined with every class that is derived from the FrameworkElement— any XAML element. Resources are searched hierarchically. If you define the resource with the root element, it applies to every child element. If the root element contains a Grid, and the Grid contains a StackPanel, and you define the resource with the StackPanel, then the resource applies to every control within the StackPanel. If the StackPanel contains a Button, and you define the resource just with the Button, then this style is valid only for the Button.
NOTE With hierarchies, you need to pay attention if you use the TargetType without a Key for styles. If you define a resource with the Canvas element and set the TargetType for the style to apply to TextBox elements, then the style applies to all TextBox elements 2008
Download from finelybook www.finelybook.com
within the Canvas. The style even applies to TextBox elements that are contained in a ListBox when the ListBox is in the Canvas. If you need the same style for more than one window, then you can define the style with the application. Creating a Windows app using Visual Studio, the file App.xaml is created for defining global resources of the application. The application styles are valid for every page or window of the application. Every element can access resources that are defined with the application. If resources are not found with the parent window, then the search for resources continues with the Application (code file StylesAndResources/App.xaml):
Accessing Resources from Code To access resources from code-behind, the Resources property of the base class FrameworkElement returns a ResourceDictionary. This dictionary offers access to the resources using an indexer with the name of the resource. You can use the ContainsKey method to check whether the resource is available. Let’s see that in action. The Button control button1 doesn’t have a background specified, but the Click event is assigned to the method OnApplyResources to change this dynamically (code file StylesAndResources/ResourceDemoPage.xaml):
When you use WPF, you would have a TryFindResource method to iterate all the resources. When you use UWP, you can use a similar 2009
Download from finelybook www.finelybook.com
method, but you need to implement it yourself. The method OnApplyResources invokes the extension method TryFindResource to find the resource named MyGradientBrush and assigns it to the Background property of the control (code file StylesAndResources/ResourceDemo.xaml.cs): private void OnApplyResources(object sender, RoutedEventArgs e) { if (sender is Control ctrl) { ctrl.Background = ctrl.TryFindResource("MyGradientBrush") as Brush; } }
The implementation of the method TryFindResource checks whether the resource requested is available using ContainsKey, and it recursively invokes the method in case the resource is not yet found (code file StylesAndResources/FrameworkElementExtensions.cs): public static class FrameworkElementExtensions { public static object TryFindResource(this FrameworkElement e, string key) { if (e == null) throw new ArgumentNullException(nameof(e)); if (key == null) throw new ArgumentNullException(nameof(key)); if (e.Resources.ContainsKey(key)) { return e.Resources[key]; } else if (e.Parent is FrameworkElement parent) { return TryFindResource(parent, key); } else { return null; } } }
2010
Download from finelybook www.finelybook.com
Resource Dictionaries If you use the same resources with different pages or even different apps, it’s useful to put the resource in a resource dictionary. When you use resource dictionaries, you can share the files between multiple apps, or you can put the resource dictionary into an assembly that is shared. To share a resource dictionary in an assembly, create a library. You can add a resource dictionary file—here Dictionary1.xaml—to the assembly. Dictionary1.xaml defines two resources: LinearGradientBrush with the CyanGradientBrush key, and a style for a Button that can be referenced with the PinkButtonStyle key (code file download ResourcesLib/Dictionary1.xaml):
2011
Download from finelybook www.finelybook.com
With the target project, the library needs to be referenced, and the resource dictionary needs to be added to the dictionaries. You can use multiple resource dictionary files that you can add by using the MergedDictionaries property of the ResourceDictionary. You can add a list of resource dictionaries to the merged dictionaries. With UWP apps, the referenced resource dictionary must be prefixed with the msappx:/// scheme (code file StylesAndResources/App.xaml):
Now it is possible to use the resources from the referenced assembly in the same way as local resources (code file StylesAndResources/ResourceDemoPage.xaml):
Theme Resources WPF supports the DynamicResource markup extension to dynamically update the user interface when resources change while the app runs. UWP apps don’t support this markup extension, but you have a different way to change styles dynamically. The feature is based on 2012
Download from finelybook www.finelybook.com
themes, with which you can allow the user to switch between a light and a dark theme (this is like the themes you can change with Visual Studio). Defining Theme Resources Theme resources can be defined in a resource dictionary within the ThemeDictionaries collection. The ResourceDictionary objects that are defined within the ThemeDictionaries collection need to have a key assigned that has the name of a theme—either Light or Dark. The sample code defines a button for the light theme that has a light background and dark foreground, and for the dark theme a dark background and light foreground. The key for the style is the same within both dictionaries: SampleButtonStyle (code file StylesAndResources/Styles/SampleThemes.xaml):
You can assign the style using the ThemeResource markup extension. Other than using a different markup extension, everything else is the same as with the StaticResource markup extension (code file StylesAndResourcesUWP/ThemeDemoPage.xaml): 2013
Download from finelybook www.finelybook.com
Depending on the theme that is selected, the corresponding style will be used. Selecting a Theme There are different ways to select a theme. First, there’s a default for the app itself. The RequestedTheme property of the Application class defines the default theme of the app. This is defined within App.xaml, which is the place where the themes dictionary file is referenced as well (code file StylesAndResources/App.xaml):
The RequestedTheme property is defined in the XAML element hierarchy. Every element can override the theme to be used for itself and its children. The following Grid element changes the default theme for the Dark theme. This is now the theme used for the Grid and all its children elements (code file StylesAndResources/ThemeDemoPage.xaml):
2014
Download from finelybook www.finelybook.com
You can also dynamically change the theme by setting the RequestedTheme property from code (code file StylesAndResources/ThemeDemoPage.xaml.cs): private void OnChangeTheme(object sender, RoutedEventArgs e) { grid1.RequestedTheme = grid1.RequestedTheme == ElementTheme.Dark ? ElementTheme.Light: ElementTheme.Dark; }
NOTE Using the ThemeResource markup extension is useful only in cases where the resource should look different based on the theme. If the resource should look the same, with all themes, keep using the StaticResource markup extension.
TEMPLATES An XAML Button control can contain any content. The content can be simple text, but you can also add a Canvas element, which can contain shapes; a Grid; or a video. In fact, you can do even more than that with a button! With template-based XAML controls, the functionality of controls is completely separate from their look and feel. A button has a default look, but you can completely customize that look. Windows apps offer several template types that derive from the base class FrameworkTemplate. TEMPLATE TYPE
DESCRIPTION
ControlTemplate
Enables you to specify the visual structure of a 2015
Download from finelybook www.finelybook.com
control and override its look. ItemsPanelTemplate
DataTemplate
For an ItemsControl you can specify the layout of its items by assigning an ItemsPanelTemplate. Each ItemsControl has a default ItemsPanelTemplate. For the MenuItem, it is a WrapPanel. The StatusBar uses a DockPanel, and the ListBox uses a VirtualizingStackPanel. These are very useful for graphical representations of objects. When styling a ListBox, by default the items of the ListBox are shown according to the output of the ToString method. By applying a DataTemplate you can override this behavior and define a custom presentation of the items.
Control Templates Previously in this chapter you’ve seen how you can style the properties of a control. If setting simple properties of the controls doesn’t give you the look you want, you can change the Template property. With the Template property, you can customize the complete look of the control. The next example demonstrates customizing buttons, and later in the chapter list views are customized step by step so you can see the intermediate results of the changes. You customize the Button type in a separate resource dictionary file: ControlTemplates.xaml. Here, a style with the key name RoundedGelButton is defined. The style RoundedGelButton sets the properties Background, Height, Foreground, and Margin, and the Template. The Template is the most interesting aspect with this style. The Template specifies a Grid with just one row and one column. Inside this cell, you can find an ellipse with the name GelBackground. This ellipse has a linear gradient brush for the stroke. The stroke that surrounds the rectangle is very thin because the StrokeThickness is set to 0.5. The second ellipse, GelShine, is a small ellipse whose size is defined by 2016
Download from finelybook www.finelybook.com
the Margin property and so is visible within the first ellipse. The stroke is transparent, so there is no line surrounding the ellipse. This ellipse uses a linear gradient fill brush, which transitions from a light, partly transparent color to full transparency. This gives the ellipse a shimmering effect (code file Templates/Styles/ControlTemplates.xaml):
2017
Download from finelybook www.finelybook.com
From the app.xaml file, the resource dictionary is referenced as shown here (code file Templates/App.xaml):
For dynamic button changes, if the mouse moves over the button, or the button is pressed, the app template for the button makes use of the VisualStateManager. Here, key-frame animations are defined when the button changes to the states PointerOver, Pressed, and Disabled:
2022
Download from finelybook www.finelybook.com
Data Templates The content of ContentControl elements can be any content—not only XAML elements but also .NET objects. For example, an object of the Country type can be assigned to the content of a Button class. In the following example, the Country class is created to represent the name and flag with a path to an image. This class defines the Name and ImagePath properties, and it has an overridden ToString method for a default string representation (code file Models/Country.cs): public class Country { public string Name { get; set; } public string ImagePath { get; set; } public override string ToString() => Name; }
How does this content look within a Button or any other ContentControl? By default, the ToString method is invoked, and the 2023
Download from finelybook www.finelybook.com
string representation of the object is shown. For a custom look, you can create a DataTemplate for the Country type. The sample code defines the key CountryDataTemplate. You can use this key to reference the template. Within the DataTemplate the main elements are a TextBlock with the Text property bound to the Name property of the Country, and an Image with the Source property bound to the ImagePath property of the Country. The Grid and Border elements define the layout and visual appearance (code file Templates/Styles/DataTemplates.xaml):
With the XAML code in the Page, a simple Button element with the name button1 is defined:
2024
Download from finelybook www.finelybook.com
In the code-behind a new Country object is instantiated that is assigned to the Content property (code file Templates/StyledButtons.xaml.cs): this.countryButton.Content = new Country { Name = "Austria", ImagePath = "images/Austria.bmp" };
After running the application, you can see that the DataTemplate is applied to the Button because the Country data type has a default template, shown in Figure 35-16.
FIGURE 35-16 Of course, you can also create a control template and use a data template from within.
Styling a ListView Changing a style of a button or a label is a simple task, such as changing the style of an element that contains a list of elements. For example, how about changing a ListView? Again, this list control has behavior and a look. It can display a list of elements, and you can select one or more elements from the list. For the behavior, the ListView class defines methods, properties, and events. The look of the ListView is separate from its behavior. It has a default look, but you can change this look by creating a template. To fill a ListView with some items, the class CountryRepository returns a list of a few countries that will be displayed (code file Models/CountryRepository.cs): public sealed class CountryRepository
2025
Download from finelybook www.finelybook.com
{ private static IEnumerable s_countries; public IEnumerable GetCountries() => s_countries ?? (s_countries = new List { new Country { Name="Austria", ImagePath = "Images/Austria.bmp" }, new Country { Name="Germany", ImagePath = "Images/Germany.bmp" }, new Country { Name="Norway", ImagePath = "Images/Norway.bmp" }, new Country { Name="USA", ImagePath = "Images/USA.bmp" } }); }
Inside the code-behind file in the constructor of the StyledList class, a read-only property Countries is created and filled with the help of the GetCountries method of the CountryRepository (code file Templates/StyledList.xaml.cs): public ObservableCollection Countries { get; } = new ObservableCollection(); public StyledListBox() { this.InitializeComponent(); this.DataContext = this; var countries = new CountryRepository().GetCountries(); foreach (var country in countries) { Countries.Add(country); } }
Within the XAML code, the ListView named countryList1 is defined. countryList1 just uses the default style. The property ItemsSource is set to the Binding markup extension, which is used by data binding. From the code-behind, you have seen that the binding is done to an array of Country objects. Figure 35-17 shows the default look of the ListView. By default, only the names of the countries returned by the ToString method are displayed in a simple list (code file Templates/StyledList.xaml):
2026
Download from finelybook www.finelybook.com
FIGURE 35-17
DataTemplate for ListView Items Next, you use the DataTemplate created earlier for the ListView control. The DataTemplate can be directly assigned to the ItemTemplate property (code file Templates/StyledList.xaml):
With this XAML in place, the items are displayed as shown in Figure 35-18.
2027
Download from finelybook www.finelybook.com
FIGURE 35-18 Of course, it’s also possible to define a style that references the data template (code file Templates/Styles/ListTemplates.xaml):
And use this style from the ListView control (code file Templates/StyledList.xaml):
Item Container Style The data template defines the look for every item, and there’s also a 2028
Download from finelybook www.finelybook.com
container for every item. The ItemContainerStyle can define how the container for every item looks—for example, what foreground and background brushes should be used when the item is selected, pressed, and so on. For an easy view of the boundaries of the container, the Margin and Background properties are set (code file Templates/Styles/ListTemplates.xaml):
The style is associated with the ItemContainerStyle property of the ListView. The result of this style is shown in Figure 35-19. This figure gives a good view of the boundaries of the items container (code file Templates/StyledList.xaml):
2029
Download from finelybook www.finelybook.com
FIGURE 35-19
Items Panel By default, the ListView arranges the items vertically. This is not the only way to arrange the items with this view; you can arrange them in other ways as well, such as horizontally. Arranging the items in an items control is the responsibility of the items panel. The following code snippet defines a resource for an ItemsPanelTemplate and arranges the ItemsStackPanel horizontally instead of vertically (code file Templates/Styles/ListTemplates.xaml):
2030
Download from finelybook www.finelybook.com
The following ListView declaration uses the same Style and ItemContainerStyle as before but adds the resource for the ItemsPanel. Figure 35-20 shows the items now arranged horizontally (code file Templates/StyledList.xaml):
FIGURE 35-20
List View Control Template What’s still missing with the control is the scroll functionality in case the items do not fit on the screen. This behavior can be changed by defining the template for the ListView control. The style ListViewStyle2 defines horizontal and vertical scroll bar behaviors as required with a horizontal items alignment. This style also includes a resource reference to the date templates and container item templates defined earlier. By setting the Template property, you can now also change the UI of the complete ListView control (code file Templates/Styles/ListTemplates.xaml):
2031
Download from finelybook www.finelybook.com
With this resource available, the definition of the ListView becomes simple as just the ListViewStyle2 needs to be referenced in addition to the ItemsSource to retrieve the data (code file Templates/StyledList.xaml):
The new view is shown in Figure 35-21. Now a scrollbar is available.
FIGURE 35-21
ANIMATIONS Using animations, you can make a smooth transition between images by using moving elements, color changes, transforms, and so on. XAML makes it easy to create animations. You can animate the value of any dependency property. Different animation classes exist to animate the values of different properties, depending on their type. The most important element of an animation is the timeline. This element defines how a value changes over time. Different kinds of timelines are available for changing different types of values. The base 2033
Download from finelybook www.finelybook.com
class for all timelines is Timeline. To animate a property of type double, you can use the class DoubleAnimation. The Int32Animation is the animation class for int values. You use PointAnimation to animate points and ColorAnimation to animate colors. You can combine multiple timelines by using the Storyboard class. The Storyboard class itself is derived from the base class TimelineGroup, which derives from Timeline.
Timeline A Timeline defines how a value changes over time. The following example animates the size of an ellipse. In the code that follows, DoubleAnimation timelines change scaling and translation of an ellipse; ColorAnimation changes the color of the fill brush. The Triggers property of the Ellipse class is set to an EventTrigger. The event trigger is fired when the ellipse is loaded. BeginStoryboard is a trigger action that begins the storyboard. With the storyboard, a DoubleAnimation element is used to animate the ScaleX, ScaleY, TranslateX, and TranslateY properties of the CompositeTransform class. The animation changes the horizontal scale to 5 and the vertical scale to 3 within ten seconds (code file Animation/SimpleAnimation.xaml):
Using ScaleTransform and TranslateTransform results in animations accessing the collection of the TransformGroup and accessing the ScaleX, ScaleY, X, and Y properties by using an indexer:
2035
Download from finelybook www.finelybook.com
Instead of using the indexer within the transformation group it would also be possible to access the ScaleTransform element by its name. The following code simplifies the name of the property:
Figure 35-22 and 35-23 show two states from the animated ellipse.
FIGURE 35-22
FIGURE 35-23 Animations are far more than typical window-dressing animation that appears onscreen constantly and immediately. You can add animation to business applications that make the user interface feel more responsive. The look when a cursor moves over a button, or a button is clicked, is defined by animations. The following table describes what you can do with a timeline. TIMELINE DESCRIPTION PROPERTIES AutoReverse Use this property to specify whether the value that is animated should return to its original value after the animation. SpeedRatio Use this property to transform the speed at which an animation moves. You can define the relation to the parent. The default value is 1; setting the ratio to a smaller value makes the animation move slower; setting the value greater than 1 makes it move faster. BeginTime Use this to specify the time span from the start of the trigger event until the moment the animation starts. You can specify days, hours, minutes, seconds, and 2036
Download from finelybook www.finelybook.com
fractions of seconds. This might not be real time, depending on the speed ratio. For example, if the speed ratio is set to 2, and the beginning time is set to six seconds, the animation will start after three seconds. Duration Use this property to specify the length of time for one iteration of the animation. RepeatBehavior Assigning a RepeatBehavior struct to the RepeatBehavior property enables you to define how many times or for how long the animation should be repeated. FillBehavior This property is important if the parent timeline has a different duration. For example, if the parent timeline is shorter than the duration of the actual animation, setting FillBehavior to Stop means that the actual animation stops. If the parent timeline is longer than the duration of the actual animation, HoldEnd keeps the actual animation active before resetting it to its original value (if AutoReverse is set). Depending on the type of the Timeline class, more properties may be available. For example, with DoubleAnimation you can specify From and To properties for the start and end of the animation. An alternative is to specify the By property, whereby the animation starts with the current value of the Bound property and is incremented by the value specified by By.
Easing Functions With the animations you’ve seen so far, the value changes in a linear way. In real life, a move never happens in a linear way. The move could start slowly and progressively get faster until reaching the highest speed, and then it slows down before reaching the end. When you let a ball fall against the ground, the ball bounces a few times before staying on the ground. Such nonlinear behavior can be created by using easing functions.
2037
Download from finelybook www.finelybook.com
Animation classes have an EasingFunction property. This property accepts an object that derives from the base class EasingFunctionBase. With this type, an easing function object can define how the value should be animated over time. Several easing functions are available to create a nonlinear animation. Examples include ExponentialEase, which uses an exponential formula for animations; QuadraticEase, CubicEase, QuarticEase, and QuinticEase, with powers of 2, 3, 4, or 5; and PowerEase, with a power level that is configurable. Of special interest are SineEase, which uses a sinusoid curve; BounceEase, which creates a bouncing effect; and ElasticEase, which resembles animation values of a spring oscillating back and forth. The following code snippet adds the BounceEase function to the DoubleAnimation. Adding different ease functions results in very interesting animation effects:

Related documents

2,342 Pages • 443,031 Words • PDF • 25.8 MB

469 Pages • 109,702 Words • PDF • 13.8 MB

452 Pages • 272,799 Words • PDF • 45.7 MB

1 Pages • 249 Words • PDF • 418.8 KB

944 Pages • 169,224 Words • PDF • 13 MB

1 Pages • 28 Words • PDF • 111.3 KB

1,539 Pages • 471,520 Words • PDF • 52.9 MB

1,539 Pages • 471,340 Words • PDF • 33.1 MB
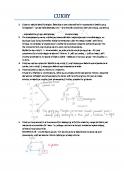
5 Pages • 643 Words • PDF • 622.1 KB

106 Pages • 32,064 Words • PDF • 35.3 MB

2 Pages • 433 Words • PDF • 409.2 KB

162 Pages • PDF • 56.8 MB